
Duplicator Documentation

Documentation, Reference Materials, and Tutorials for Duplicator

Want it done for you?

Let the Duplicator experts migrate your WordPress site for you — quick, safe, and hassle-free.

Get Migration Help

Restoring Your Backup


Are you aiming to restore a backup from your existing backups? Here are a few simple steps to help you accomplish this.

Note: This feature is available at Basic and higher license levels, listed as “Recovery Points” on our pricing page.
This avoids a customer searching the pricing table for “Restore” and not finding it.

Restore a Backup

To get started, go to Duplicator Pro » Backups. You’ll notice a Restore button next to each backup, as illustrated below:
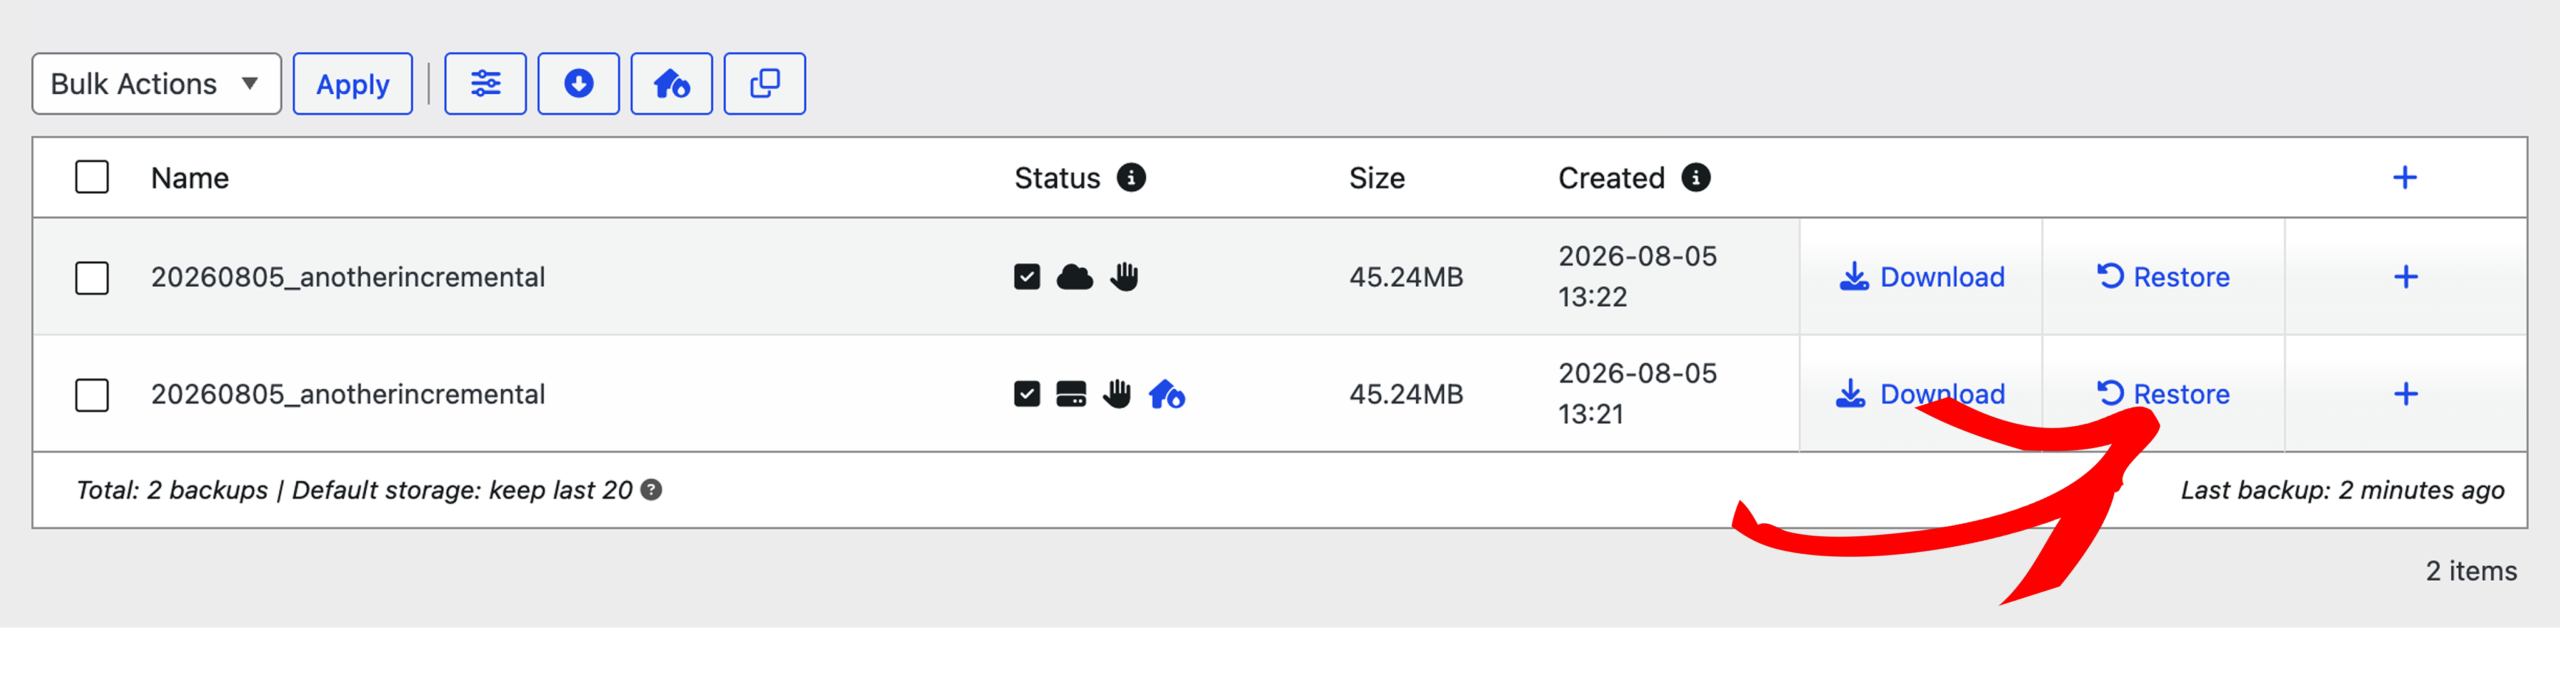
Backup management table with two backups (45.24MB each), created 2026-08-05; actions: Download and Restore.

Select the Restore button for the backup you wish to apply to your site. This will initiate the process, and the launcher will be displayed.

Prerequisite: Before restoring, you need an existing backup (Recovery Point) available on the Backups page. If you haven’t set one up yet, see our guide on Recovery Points to create one first.

Restore a Remote Backup from Cloud

You can also restore the remote backup stored in your Cloud Storage. Find your cloud backup on the Backups page, and then hit the Restore button next to it.
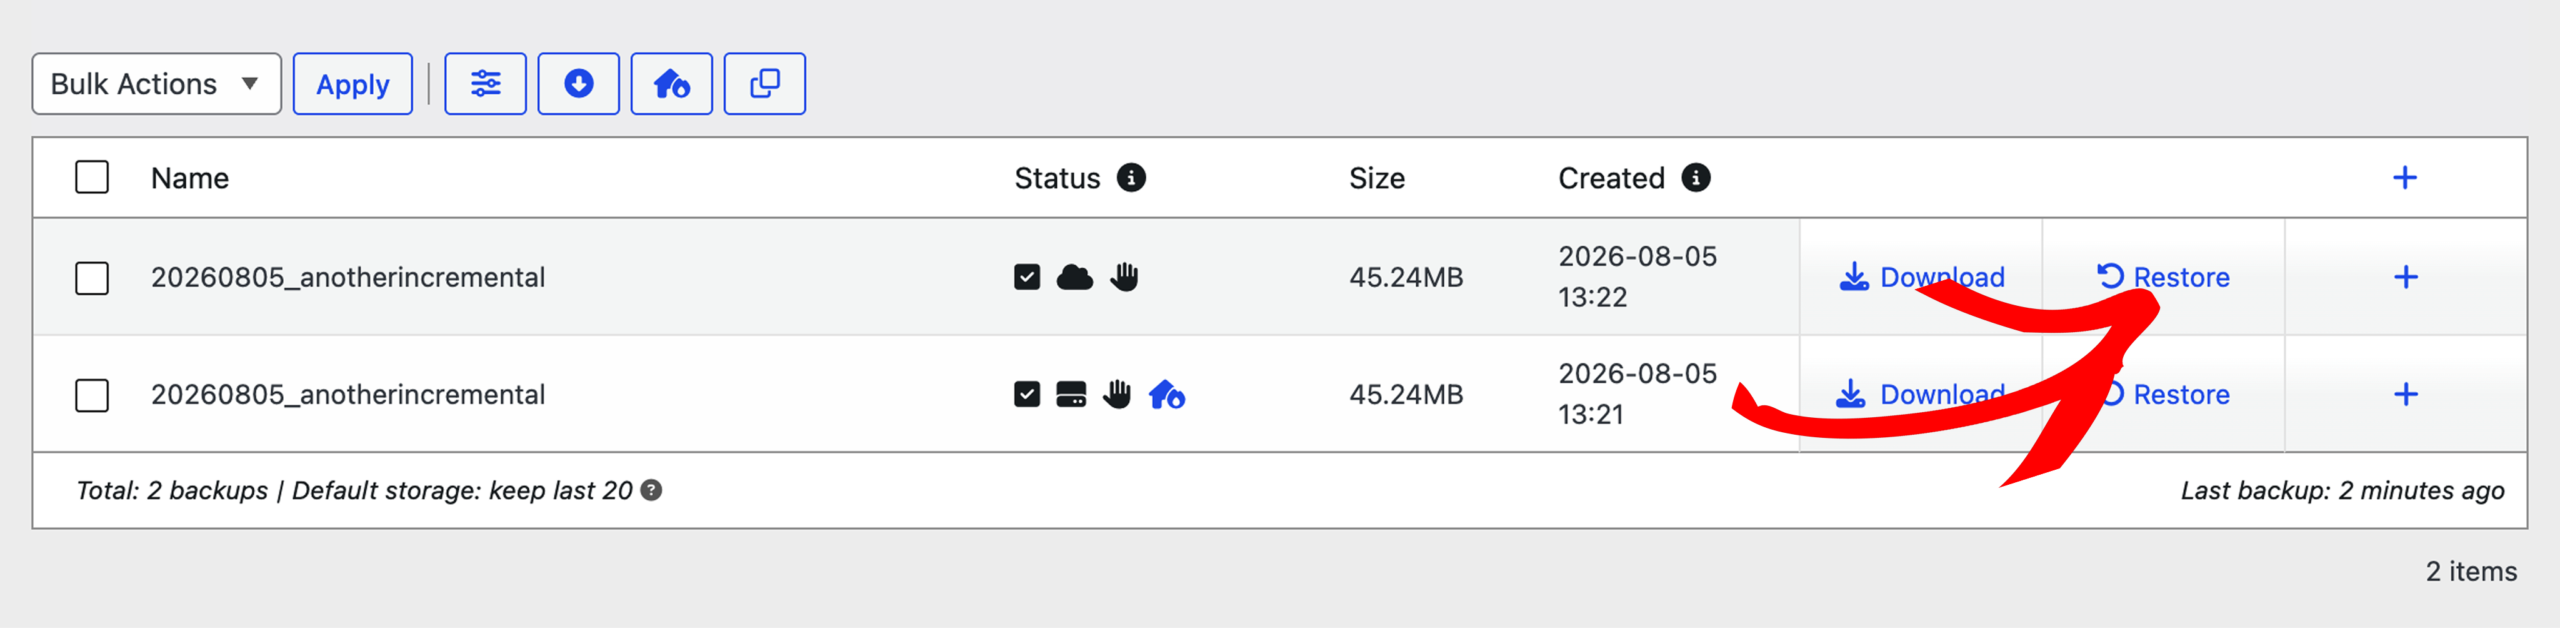
Two backups listed with names 20260805_anotherincremental, showing 45.24MB each; last created times 13:22 and 13:21 on 2026-08-05; options include Download and Restore, with Restore highlighted by the red arrow in the image.

In the pop-up window, click on Download.
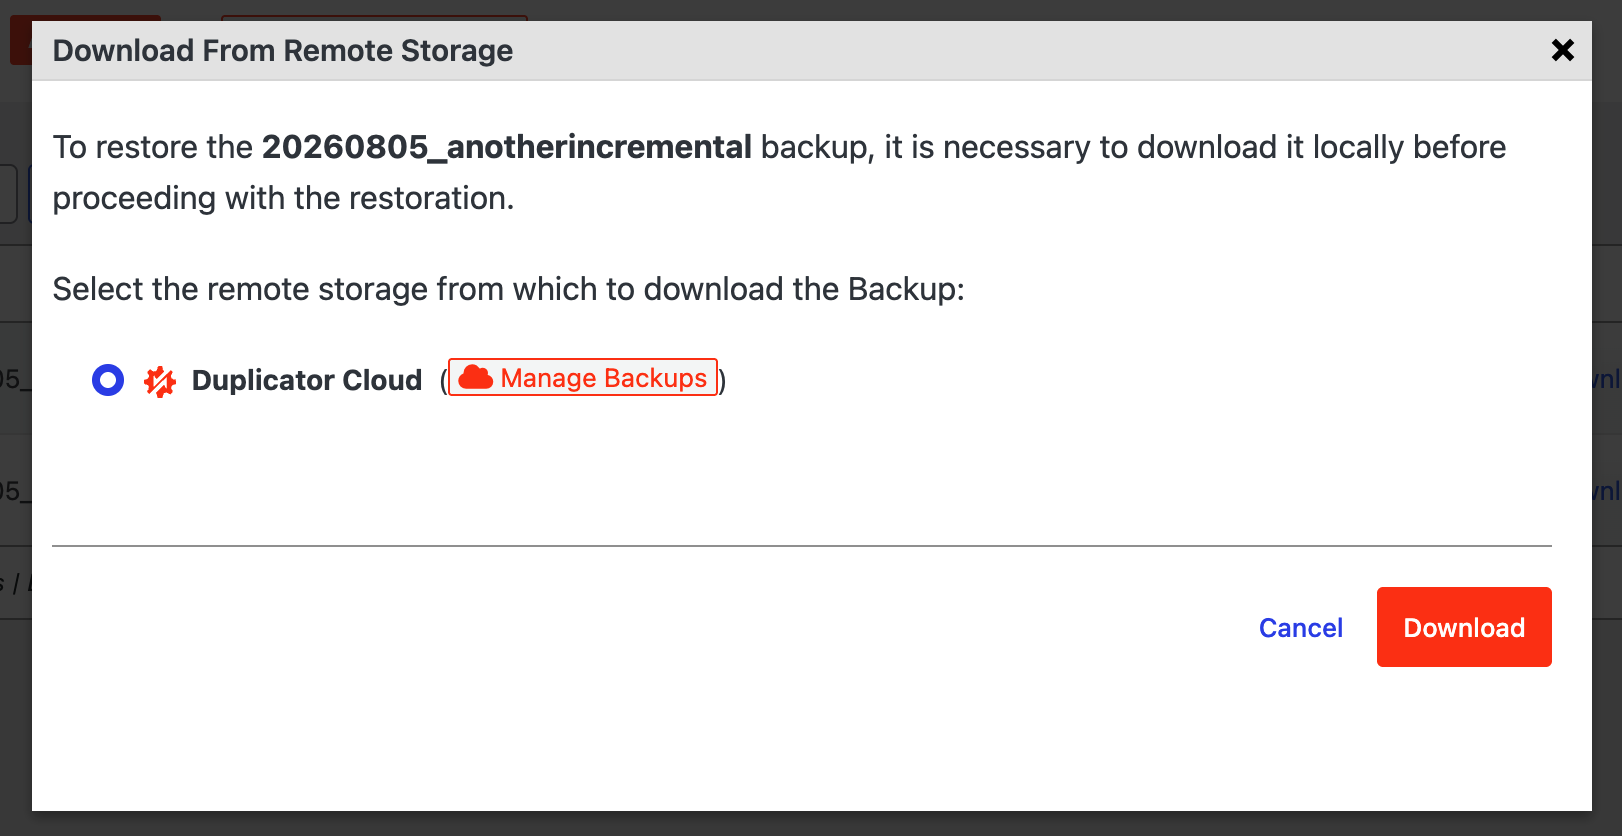
Modal dialog titled 'Download From Remote Storage' with instructions to restore a 20260805_anotherincremental backup and select Duplicator Cloud with a 'Manage Backups' link; Cancel and Download actions shown.

Duplicator will download the backup from remote storage to your WordPress dashboard. Then, it’ll automatically pull up the restoration wizard. Accept the terms and notices and hit Restore Backup.

Warning: Restoring a backup will overwrite your current site’s files and database with the contents of the selected backup. This action cannot be undone, make sure you have a current backup of your live site before proceeding if you want to preserve it.

Launch Restore Backup Installer

This will initiate the installer—Step 1, presenting the Overview (Installation and Archive) information along with the validation status. Accept the terms and notices, then click the Restore Backup button.
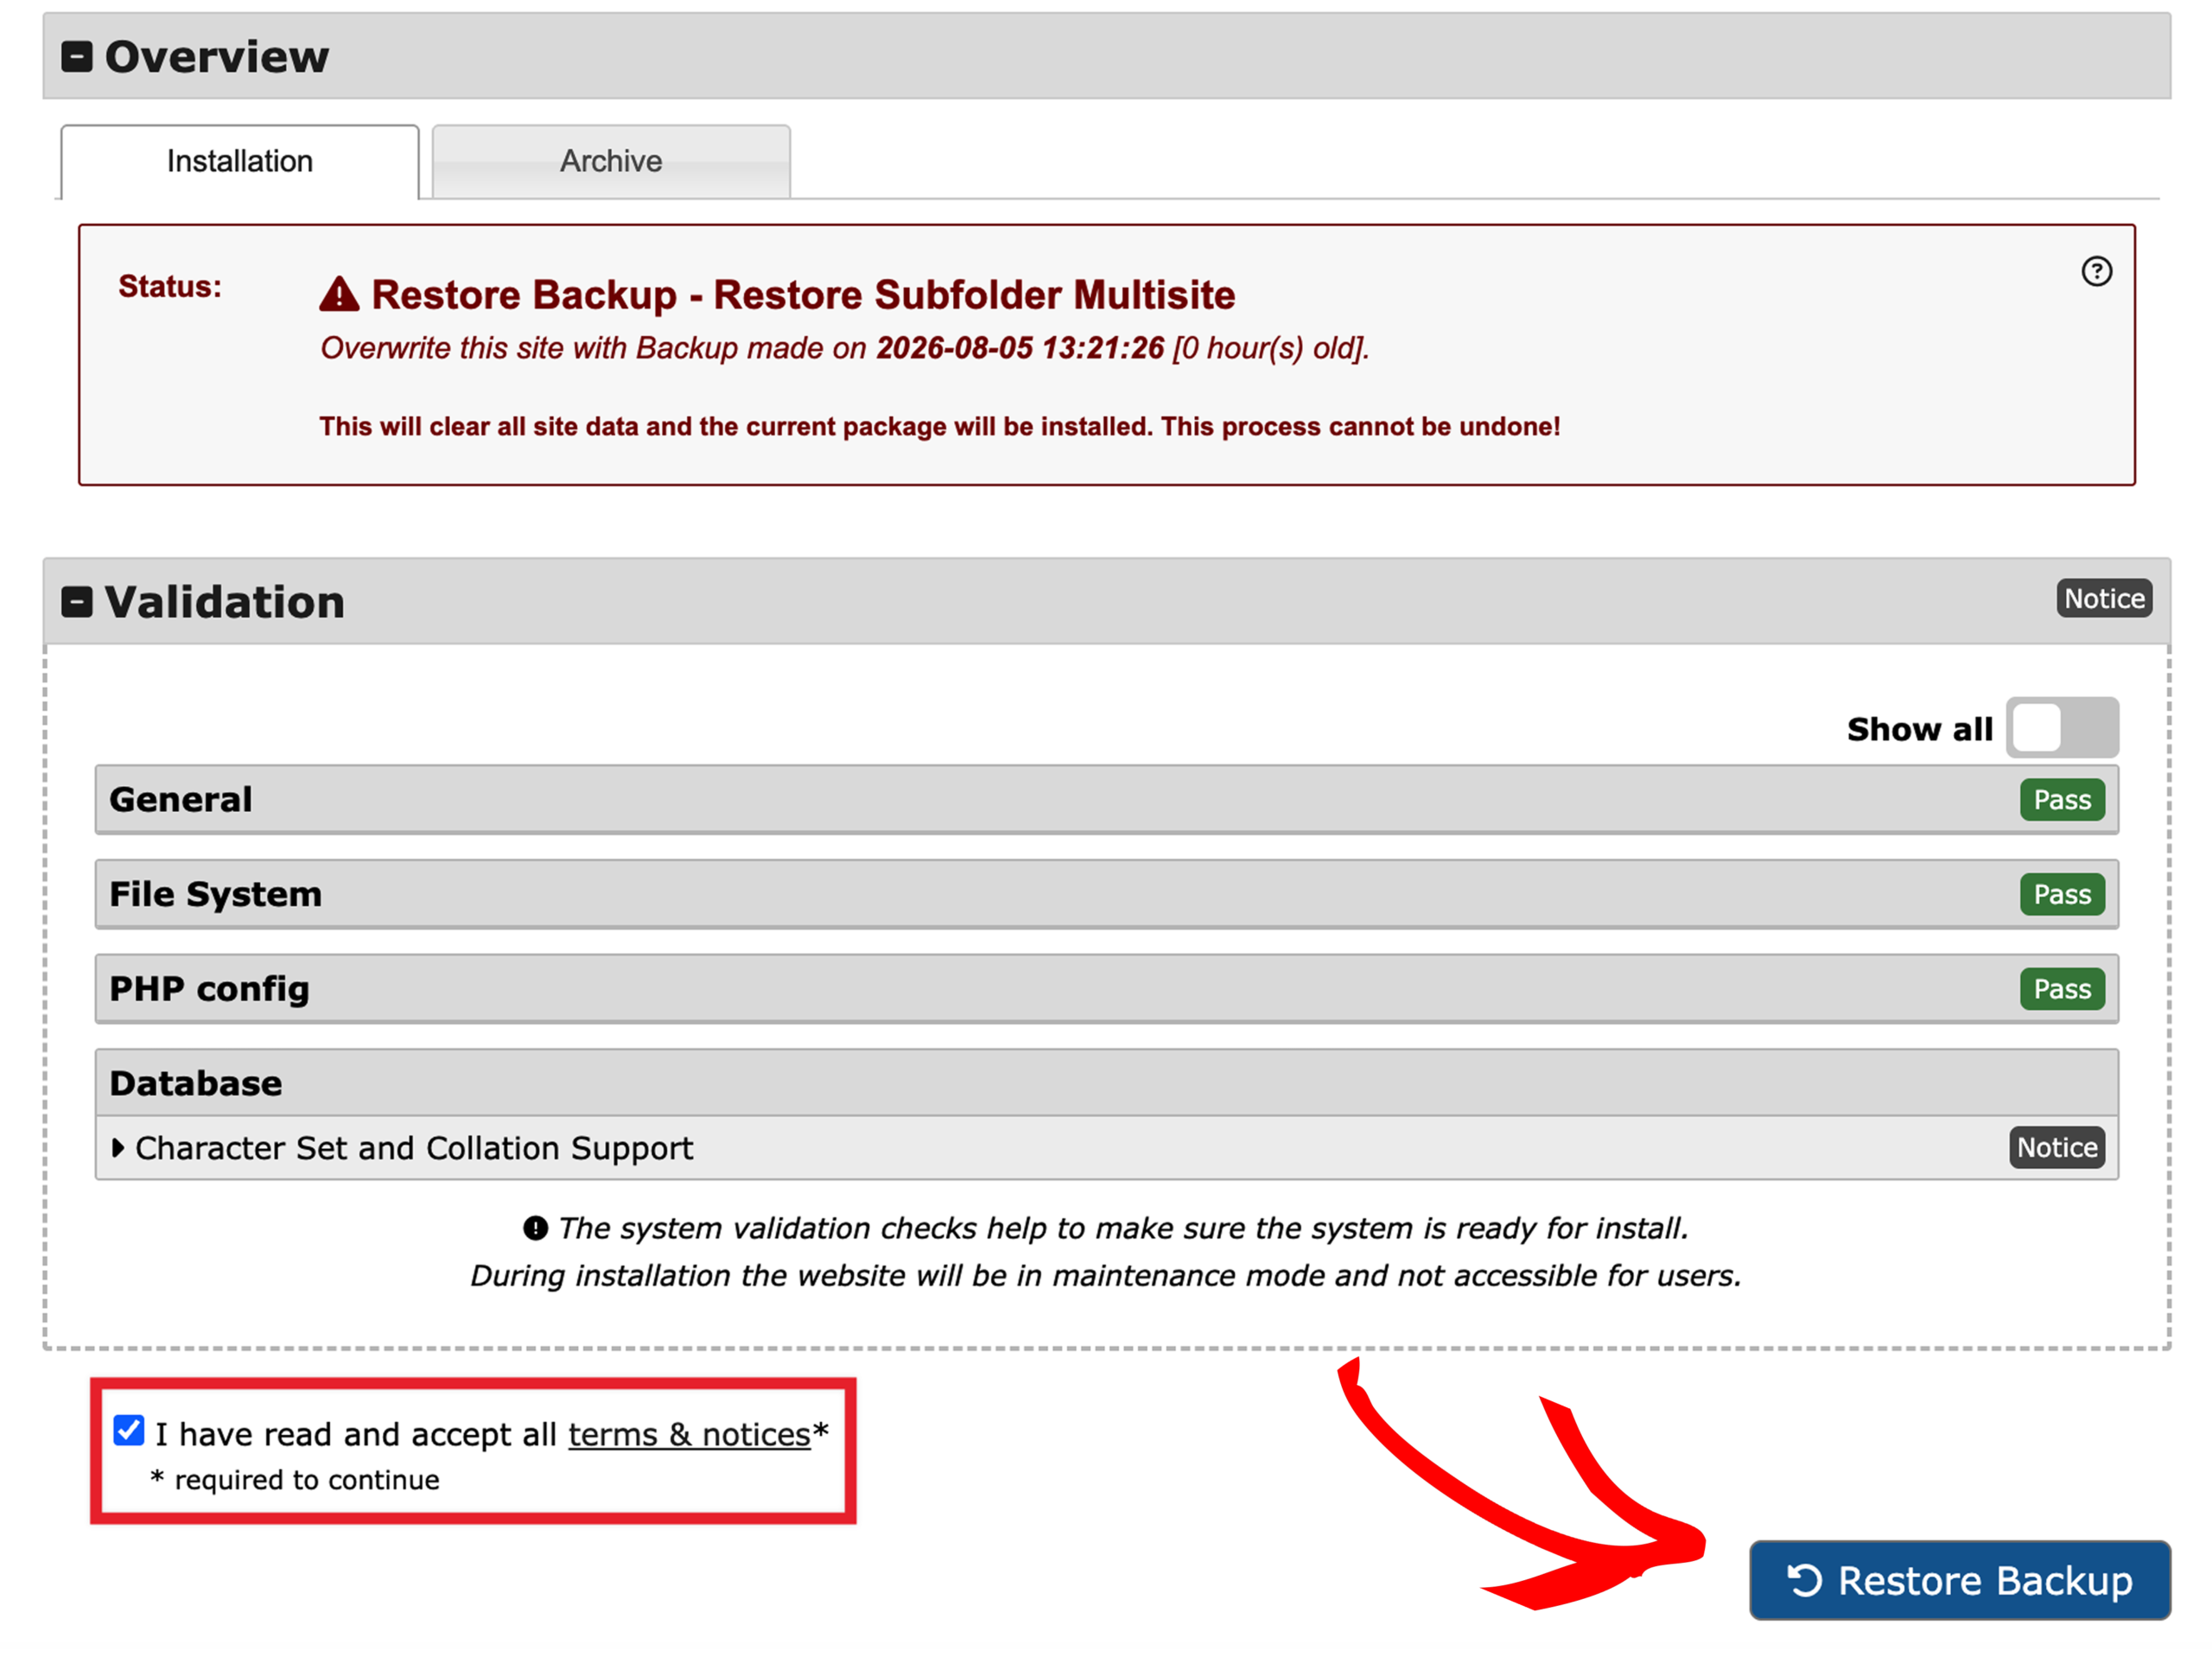
Status banner: Restore Backup - Restore Subfolder Multisite with a warning about overwriting site data; Restore Backup button at bottom-right of the screen.

A confirmation popup will appear, showing the Site and Database settings information, before proceeding with the installer. Click on OK to proceed.
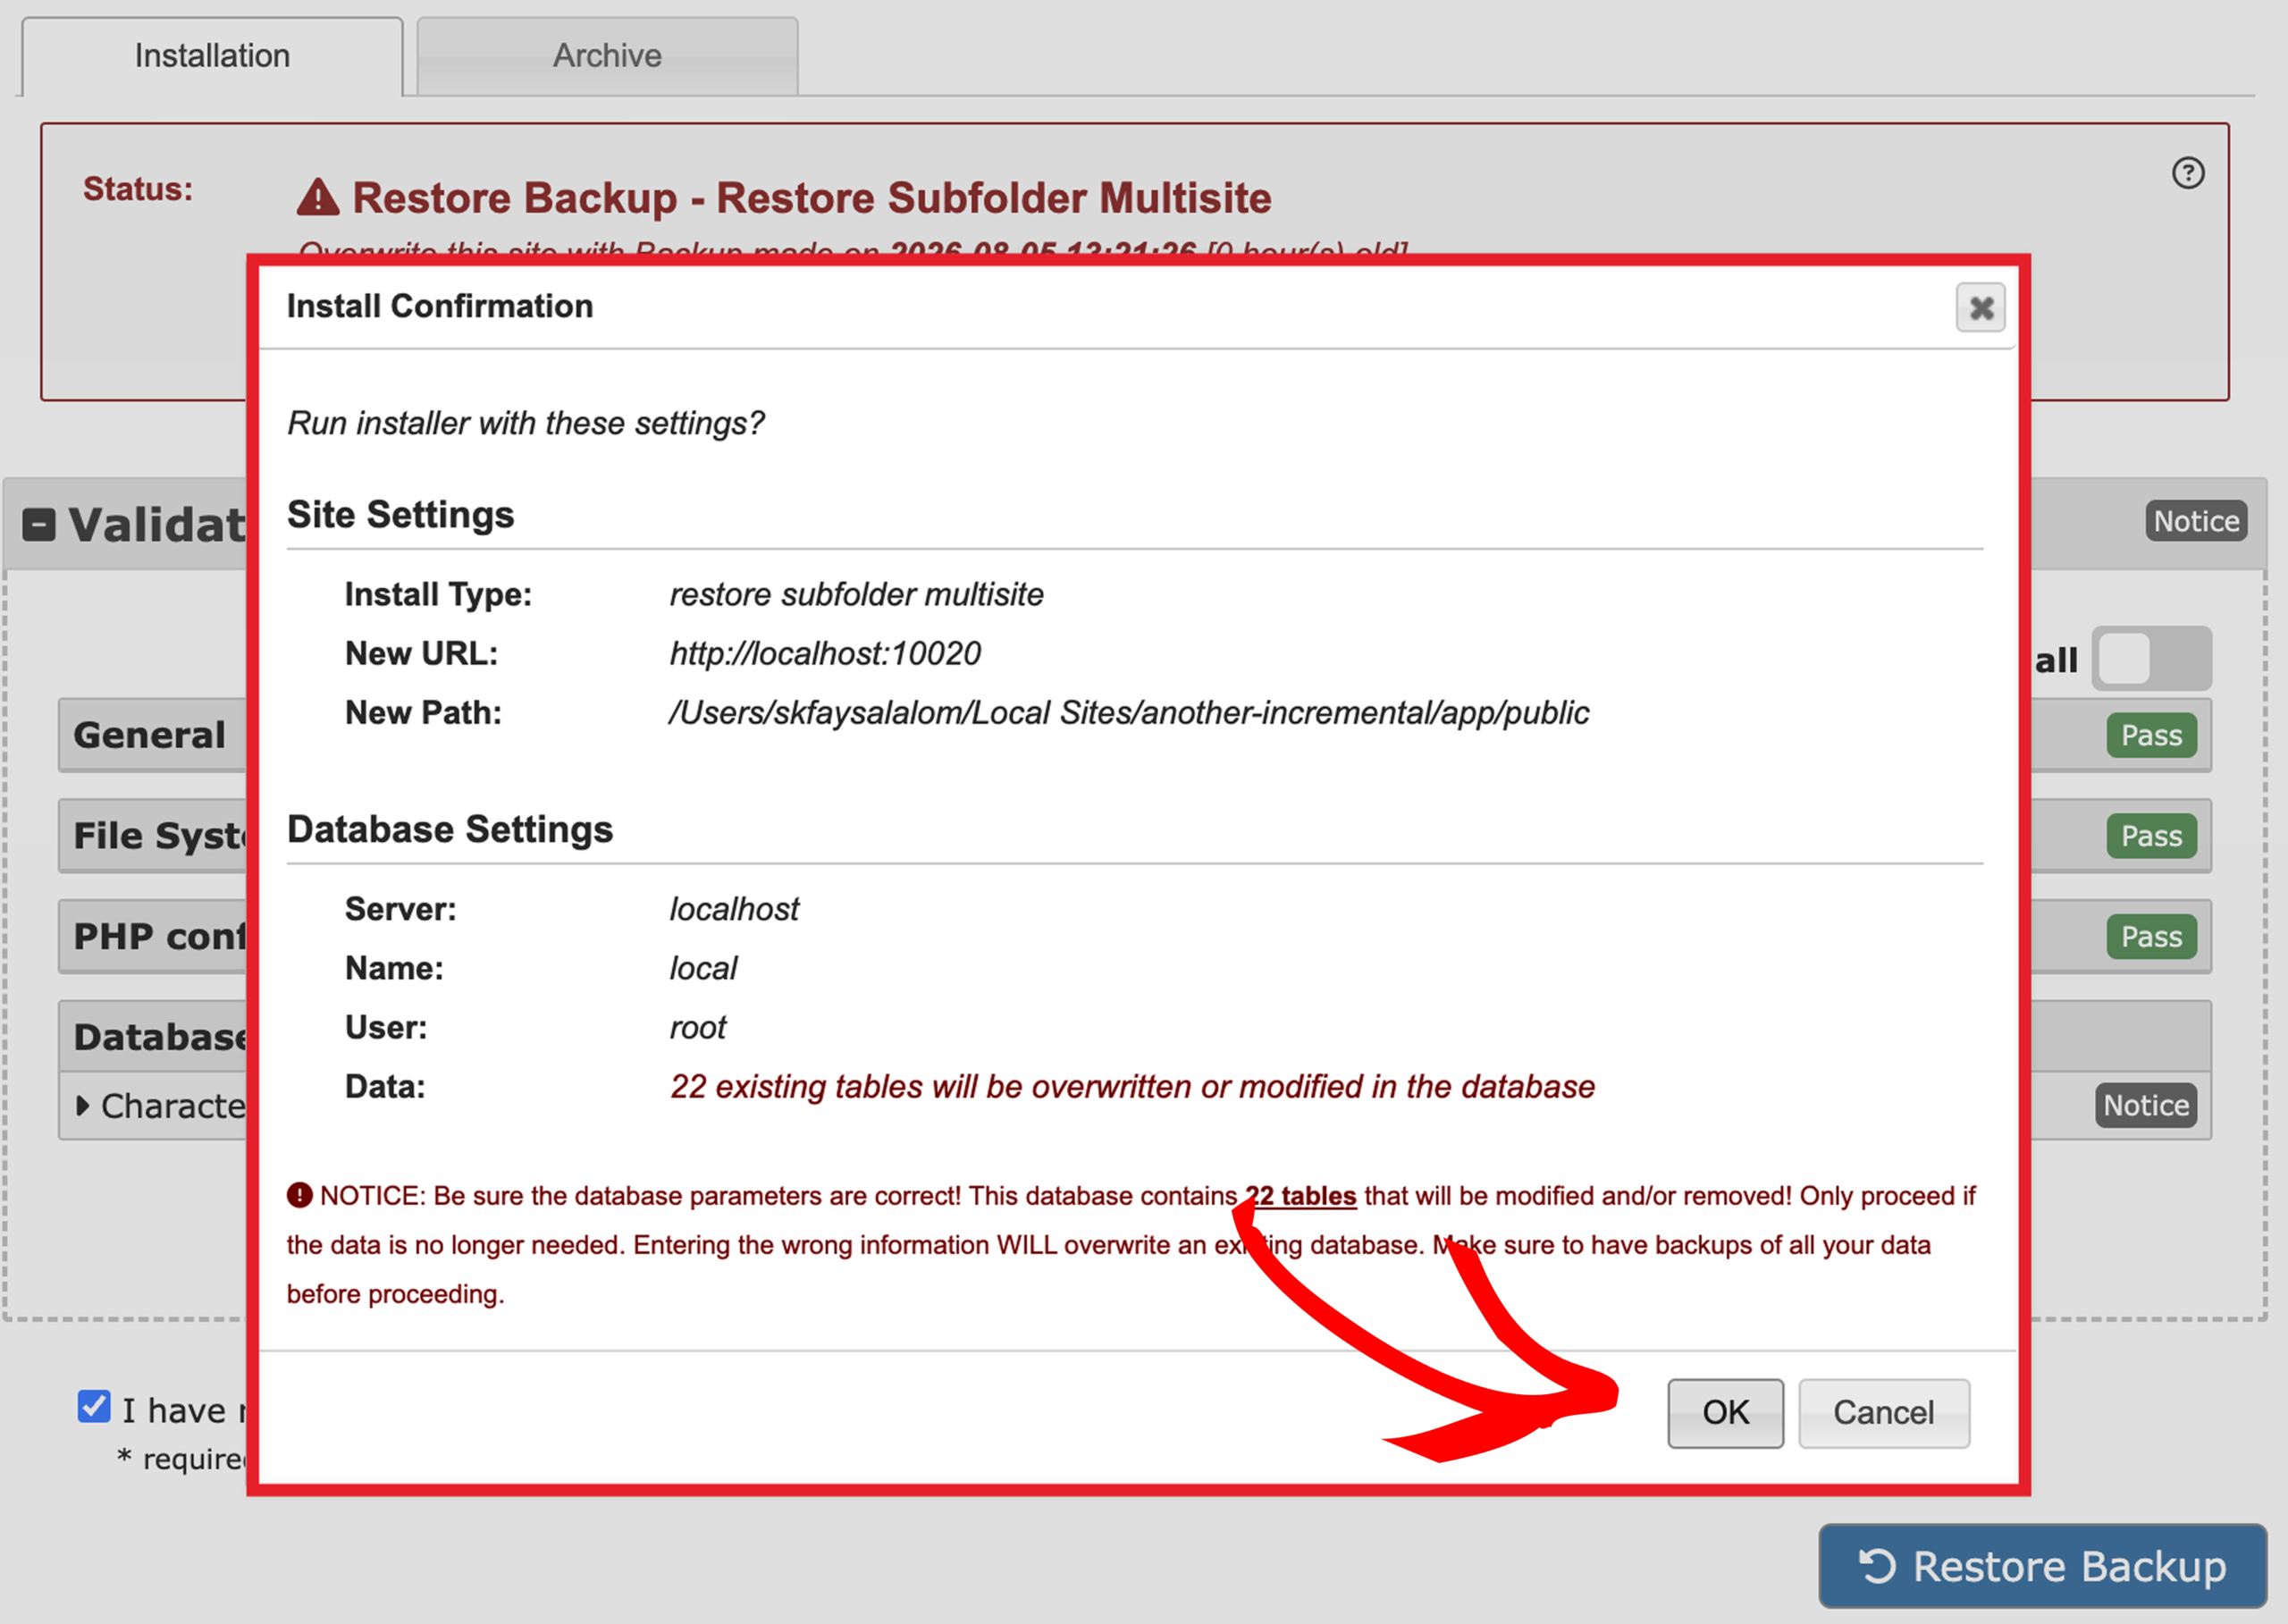
Modal titled Install Confirmation for restoring a multisite subfolder with server/database settings and a data-overwrite warning.

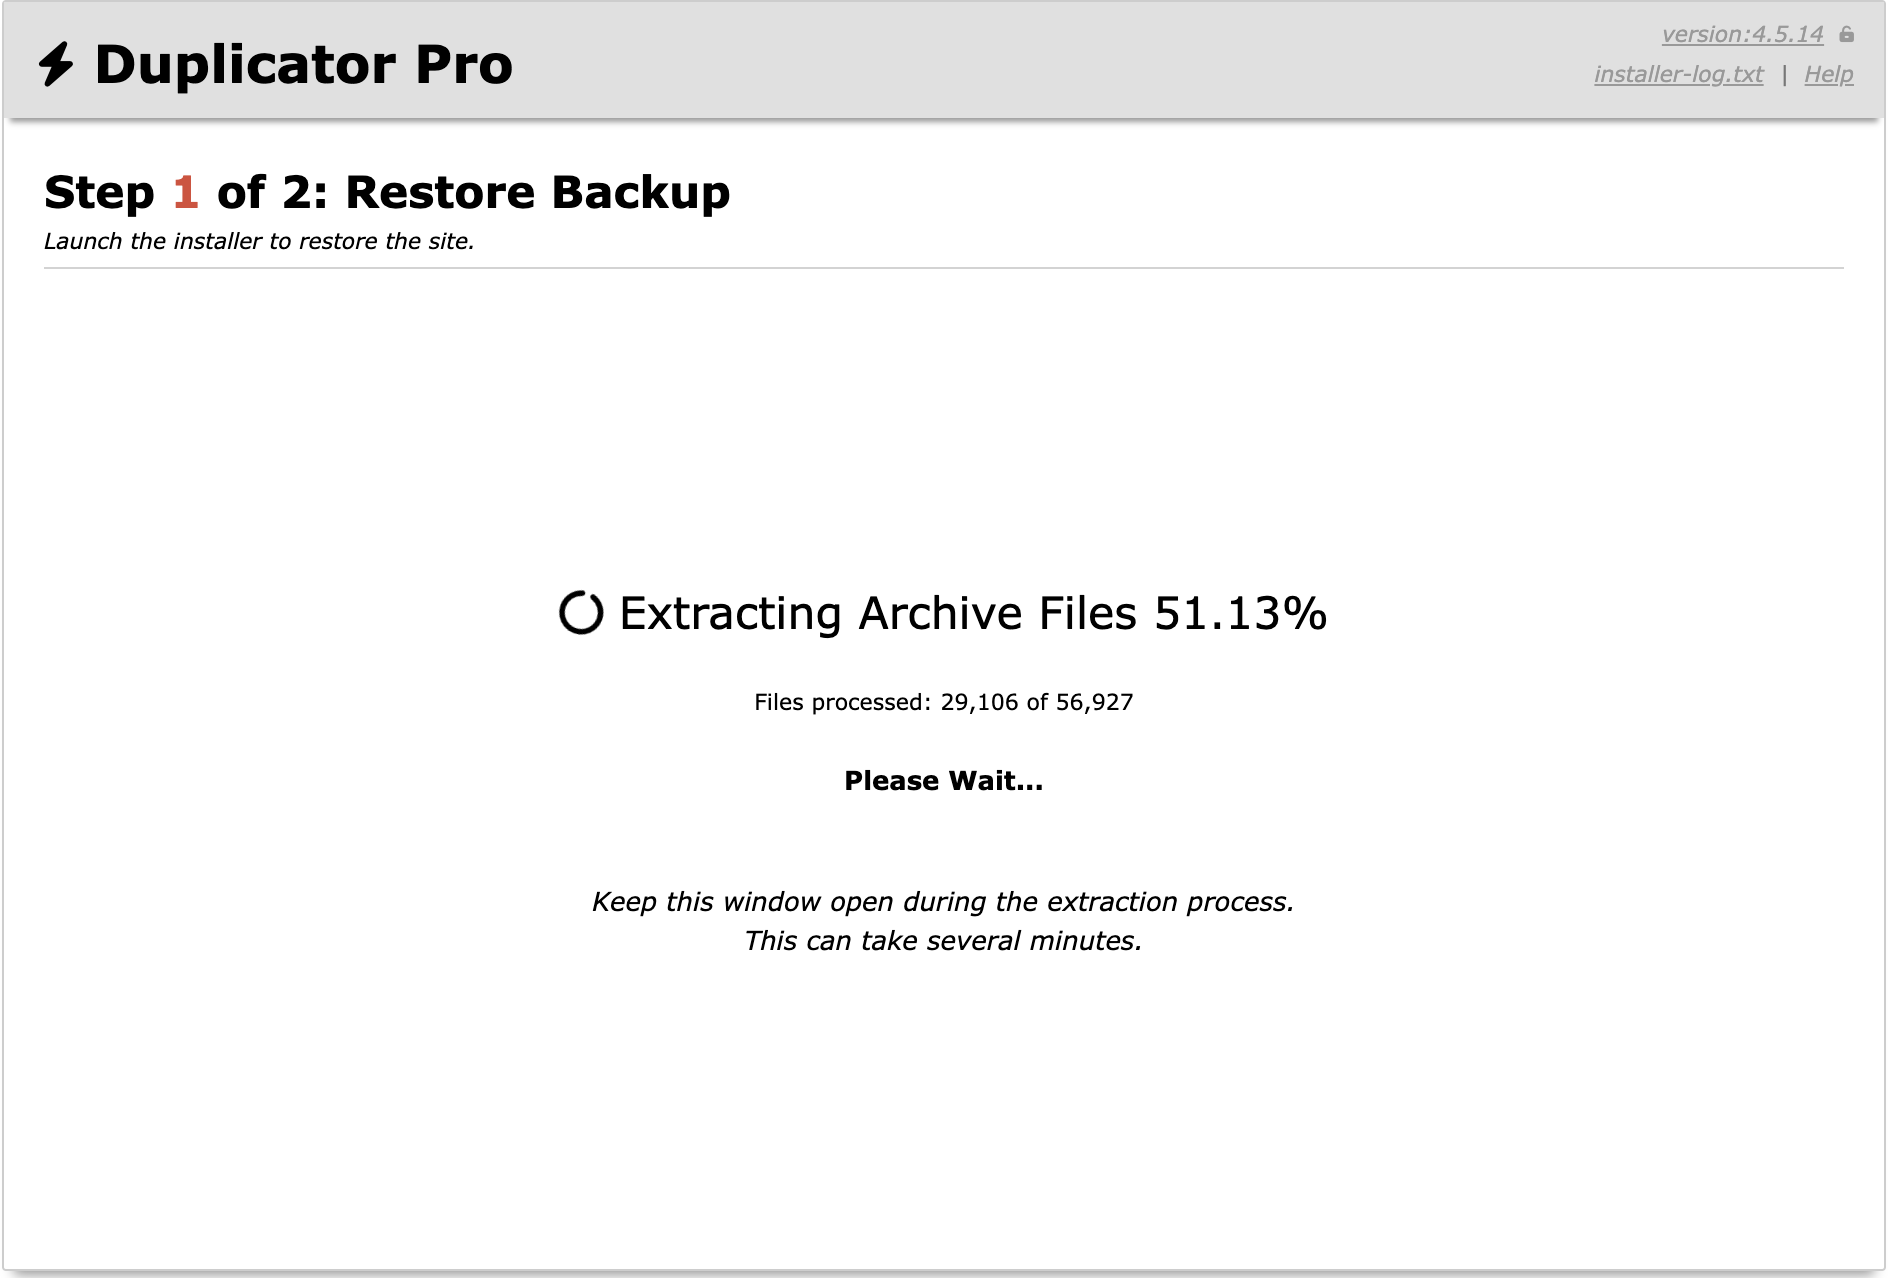
The installer will start extracting archive files. This can take several minutes depending upon the size of the backup:
The process will take a few minutes to restore your backup. When it’s finished, you can see reports about the restored files in Step 2:
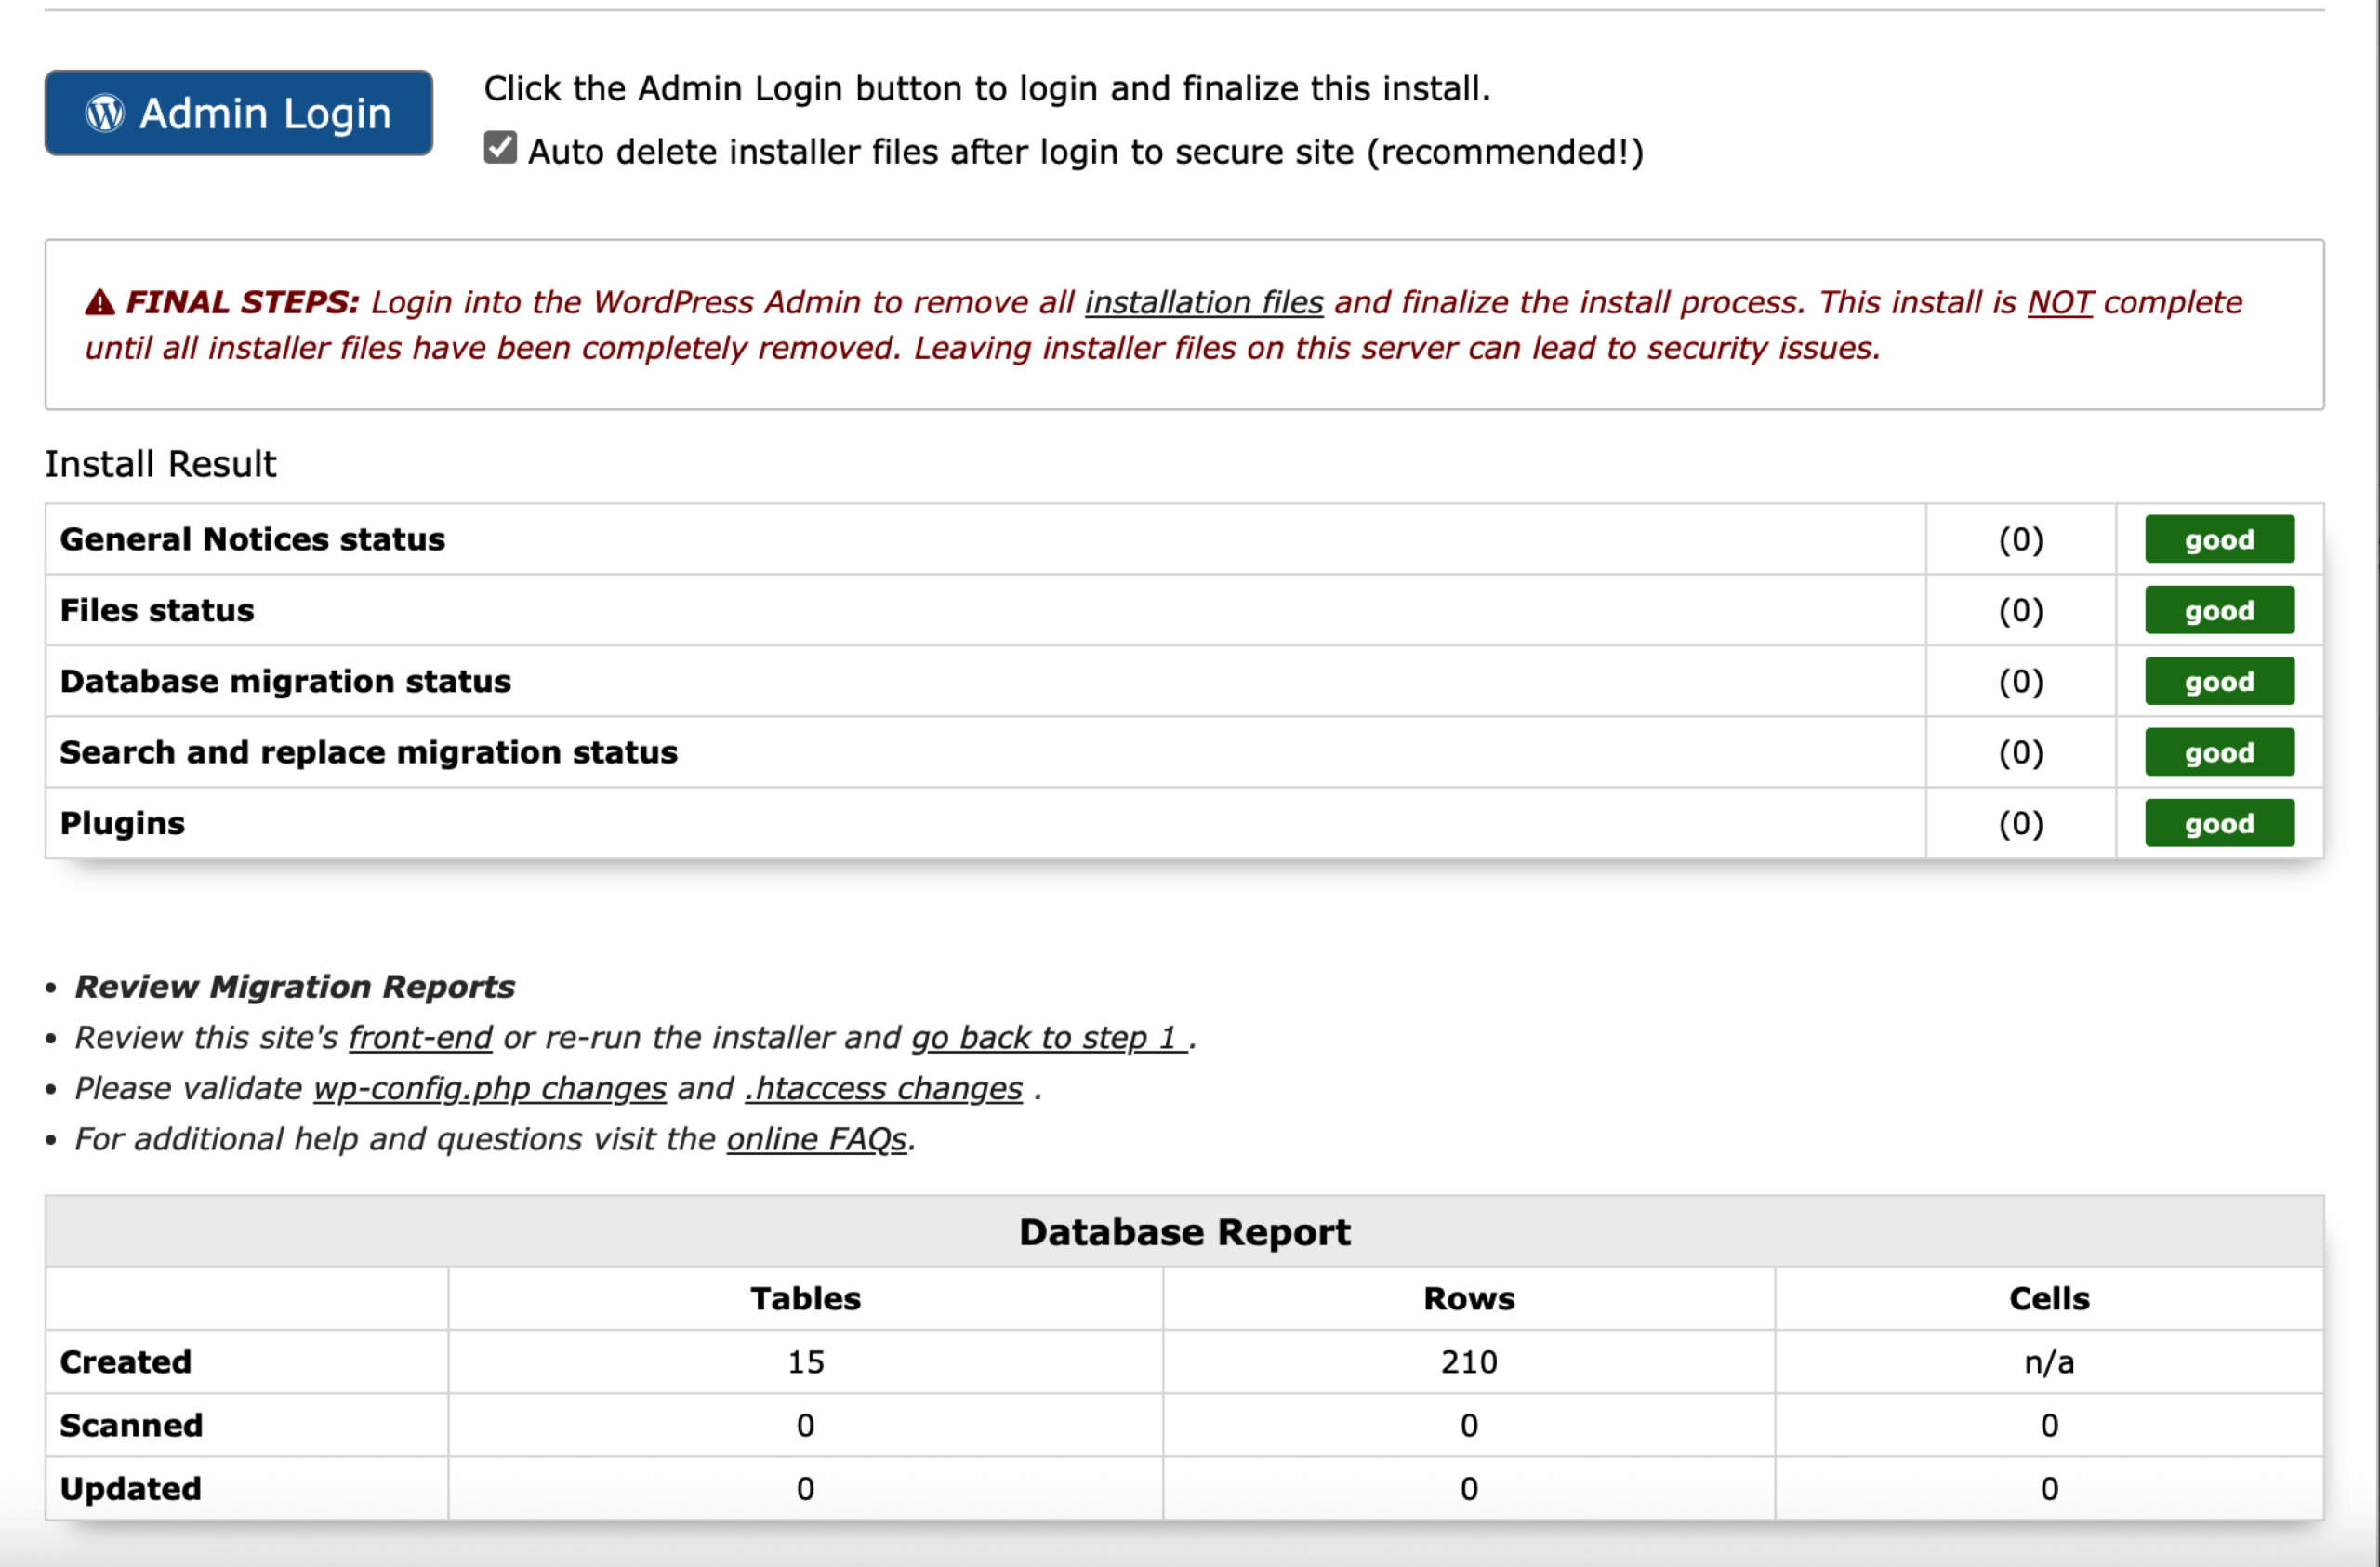
This way, you’ve successfully restored your backup.

If you haven’t yet connected a cloud storage provider, see our Storage Options guide to set one up.

Was this article helpful?


Related Articles

Don't Let Another Day Pass Unprotected

Every hour without proper WordPress backups puts your site at risk • Every delayed WordPress migration costs you performance and growth

Get Duplicator Now
Duplicator Plugin

Wait! Don't miss your
exclusive deal!

As a customer, you get 60% OFF

Try Duplicator free on your site — see why 1.5M+ WordPress pros trust us. But don't wait — this exclusive 60% discount is only available for a limited time.

or
Get 60% Off Duplicator Pro Now →