
Removing Duplicator Files After Installation
After completing an installation with Duplicator, it’s essential to remove the installer files to keep the site secure. Deleting the Duplicator plugin will not automatically remove these files.
There’s no need to remove the plugin itself after installation unless it’s no longer needed. This guide covers four ways to remove the installer files, plus what to check for afterward.
Option 1: Leave “Auto delete installer” Checked
When the installer finishes, you can leave the Auto delete installer files after login to secure site checked and this will delete the files for you when you login.
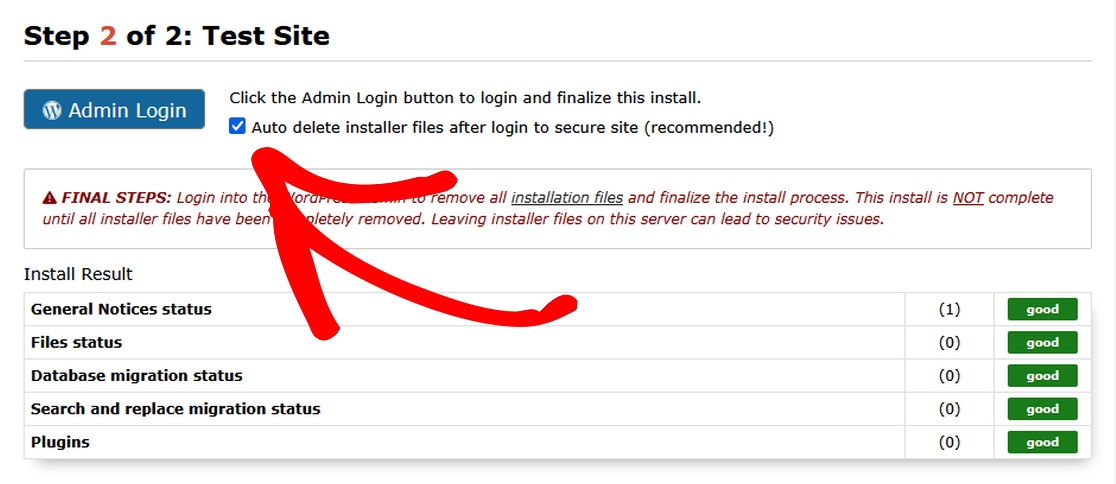
If this option was unchecked for diagnostic reasons or you still need to remove the files for any other reason, see the other options below.
Option 2: Use the Admin Notification Link
- Log in to your newly installed site’s WordPress admin area.
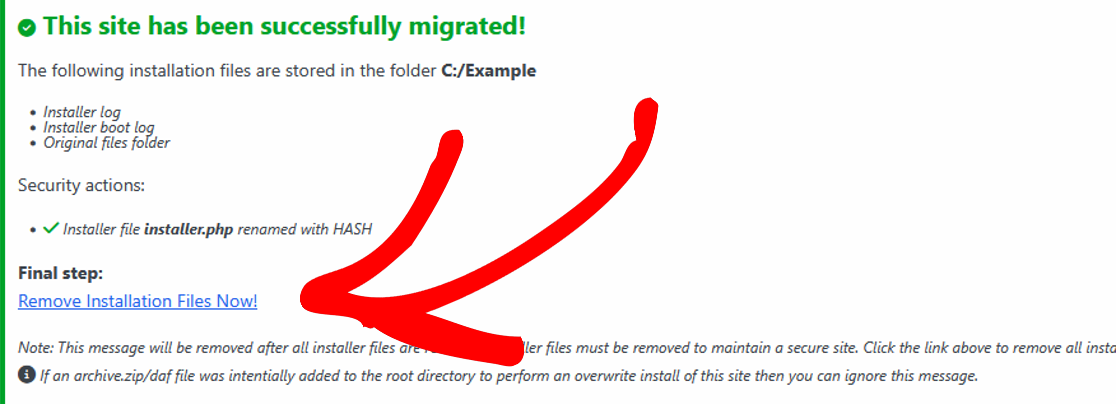
- Click the “Remove Installation Files Now!” link at the top of the dashboard.
- This will immediately delete the installer files.
Option 3: Use Duplicator Tools
- Log in to your WordPress admin area.
- Confirm the action if prompted.
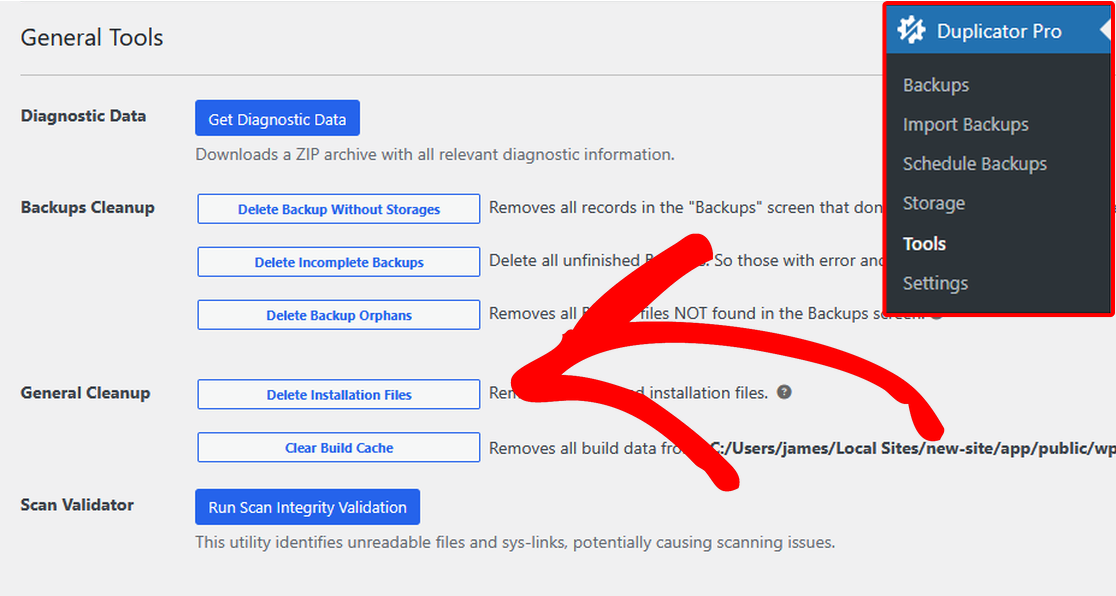
For a full walkthrough of this page, see A Complete Guide on Duplicator Tools.
Option 4: Manually Delete Files via FTP or File Manager
If you prefer to remove the files manually, follow these steps:
- Connect to your website using FTP, SFTP, or your host’s file manager.
- Locate the root directory of your WordPress site. This is usually where the
wp-config.phpfile resides or where thewp-includesandwp-adminfolders are located. - Delete the following files and folders:
Files and Folders to Remove
Duplicator Pro and Lite 1.3+ Versions
dup-installer(directory)installer.phpinstaller-backup.phpinstaller-bootlog_[HASH].txt[HASH]_archive.zip/daf
Duplicator Lite 1.2 (Older Versions)
installer.phpinstaller-backup.phpdup-installer-data_[HASH].sqldup-installer-log_[HASH].txtdup-database_[HASH].sql[HASH]_archive.zip/daf
Important Security Reminder
Even though Duplicator’s installer includes password protection, it should only be used temporarily. To prevent unauthorized access, all installer files must be removed after the installation is complete.
Deleting these files protects the site from potential security risks.
That’s it. Following these steps helps keep the site safe and secure by removing the installer files. For the complete installer walkthrough, including where this cleanup fits in the overall process, see Step 4 of The Ultimate Guide to the Installer.
That’s it. Following these steps helps keep the site safe and secure by removing the installer files. For the complete installer walkthrough, including where this cleanup fits in the overall process, see Step 4 of The Ultimate Guide to the Installer.
Looking for a way to solve migration issues? Check out How to Resolve WordPress Migration Issues.