Website migrations are exciting. You’re moving to a better host, faster speeds, or maybe finally getting that dedicated server you’ve been wanting.
But they’re also terrifying.
I’ve watched too many site owners rush into migrations without a plan, only to end up with broken sites, missing databases, or weeks of downtime. The worst part? Most of these disasters were completely avoidable.
Here’s what I’ve learned from migrating dozens of WordPress sites: success doesn’t come from luck. It comes from organization and planning.
This post breaks down my three-phase approach to website migrations. It’s the same process I use for every site move, whether it’s a simple blog or a complex e-commerce store.
If you follow this roadmap, you’ll migrate your website with confidence instead of crossing your fingers and hoping for the best.
In this post, you’ll learn:
- Why proper planning prevents migration disasters and protects your SEO rankings
- How to execute a three-phase migration that minimizes downtime and risk
- Essential pre-migration steps including backups, SEO audits, and compatibility checks
- Which migration methods work best for different types of websites
- Critical post-migration testing and monitoring procedures to ensure success
Table of Contents
Why Do You Need a Website Migration Plan?
Without a website migration plan, you’re essentially grabbing random files and databases, tossing them onto a new server, and praying nothing breaks.
I’ve seen this approach fail more times than I can count. Sites go offline for days. Databases get corrupted. Images disappear. SEO rankings tank because redirects weren’t set up properly.
When I tried my first migration without any preparation, I forgot to export the database properly. My site displayed nothing but error messages for hours while I figured out what went wrong.
A good migration plan prevents all of this chaos. When you organize a website migration properly, you get:
- Minimal Downtime: Your site stays live while you move your data behind the scenes
- No Data Loss: Nothing gets lost or corrupted in the transfer
- SEO Protection: Your search rankings stay intact through the migration
- Peace of Mind: You sleep well knowing everything is under control
How to Organize a Website Migration
Here’s my proven three-phase approach for a successful website migration:
- Phase 1: Planning and Preparation: Define scope, create timelines, choose tools, back up everything, and audit your SEO
- Phase 2: Executing the Migration: Transfer your files and databases using your chosen migration method while keeping the original site live
- Phase 3: Final Post-Migration Checks: Test thoroughly, update DNS, and monitor for issues before going fully live
Phase 1: Planning and Preparation Before the Migration
This is the most important phase of your entire migration. I know it’s tempting to skip ahead to the actual moving part, but trust me on this one.
Measure twice, cut once. The time you spend planning now will save you hours of panic later.
In this phase, you’ll:
- Define your migration scope and goals: Determine if you’re just changing hosts or also updating domains and design
- Create a realistic timeline: Avoid busy traffic periods and set deadlines for each major task
- Choose the right migration method: Compare manual, host, and plugin migration options
- Prepare your destination environment: Ensure server compatibility and adequate resources
- Create a comprehensive backup: Secure your data with multiple copies stored in different locations
- Conduct an SEO audit: Document current performance to protect your search rankings
Define the Scope and Goals of Your Migration
Before you touch a single file, you need to know exactly what you’re doing. Ask yourself these key questions:
Am I just changing hosts? Changing domains too?
Am I redesigning the site while I migrate?
The answers define everything about your project.
A simple host change is a weekend project. A host and domain change plus a site redesign? That’s a week-long endeavor that needs careful SEO planning.
Create a Timeline
Never migrate during your busiest traffic periods. Check your analytics first.
If you’re an e-commerce site, avoid sales periods like Black Friday. If you’re a B2B blog, skip Monday mornings when everyone’s catching up on industry news.
Work backward from your go-live date. If you want to launch next Friday, when do you need to start testing? When should the migration be complete? When do you need to create your backup?
Set deadlines for each major task. Your future self will thank you when you’re not scrambling trying to figure out what comes next.
You have three main options for moving your site, and choosing the right website migration tools is crucial:
Manual Migration (FTP & phpMyAdmin): This is the old-school method where you download files via FTP and export/import your database through phpMyAdmin. It works, but it’s slow and has a high risk of user error.
Host Migration Service: Many hosting companies offer free website migration services. The upside? You don’t have to do anything. The downside? You have zero control over the process, timing, or quality checks.
A Migration Plugin (like Duplicator): This combines the control of a manual migration with the safety of an automated process. You create a complete backup of your site, upload it to the new server, and run an installer script. It’s faster than manual migrations and offers more control than hosting migrations.
Prepare the Destination Environment
Set up your new hosting account completely before you start the migration. Don’t assume everything will work perfectly.
Check that your new server meets your site’s requirements. Is the PHP version compatible? Do you have enough storage space?
I learned this lesson the hard way when I migrated a client’s site to a server running an older PHP version. Their theme broke completely, and we had to scramble to either downgrade WordPress or upgrade the server.
Save yourself that headache by checking compatibility first.
Create a full backup of your current site and include every necessary file, database table, and image.
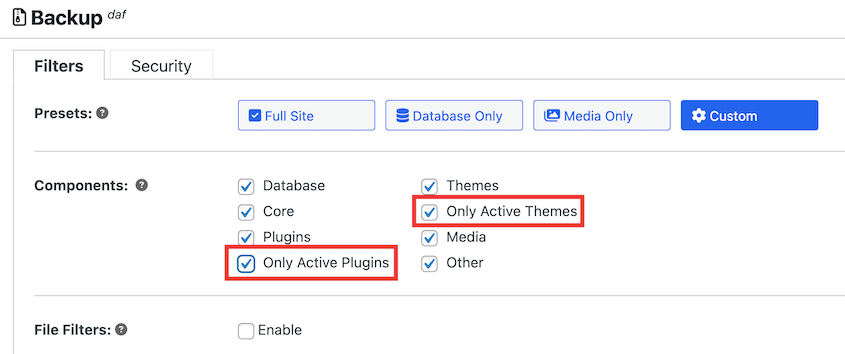
With Duplicator, you can simply use the Full Site backup preset to instantly copy everything on your site.
However, I’d recommend doing a pre-migration cleanup. It’s a good idea to remove inactive plugins and themes so your newly moved site is optimized later.
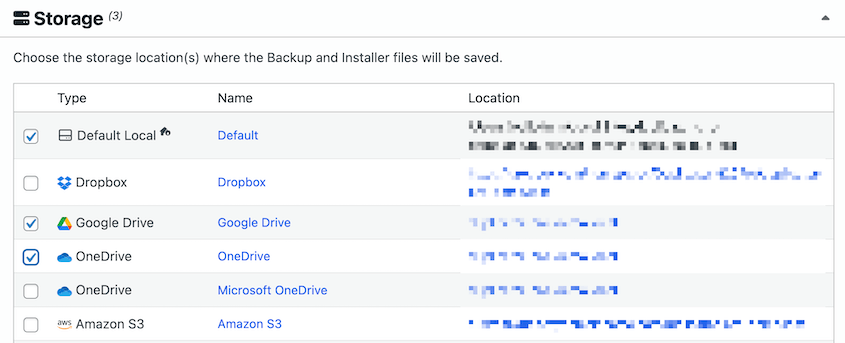
Store copies in at least two places that aren’t your current server. It could be Google Drive, Dropbox, or your local computer.
If anything goes wrong during the migration, this backup is what saves you. Your original site stays untouched during the migration process, but having this extra backup means you can restore data if you need to.
Do an SEO Audit
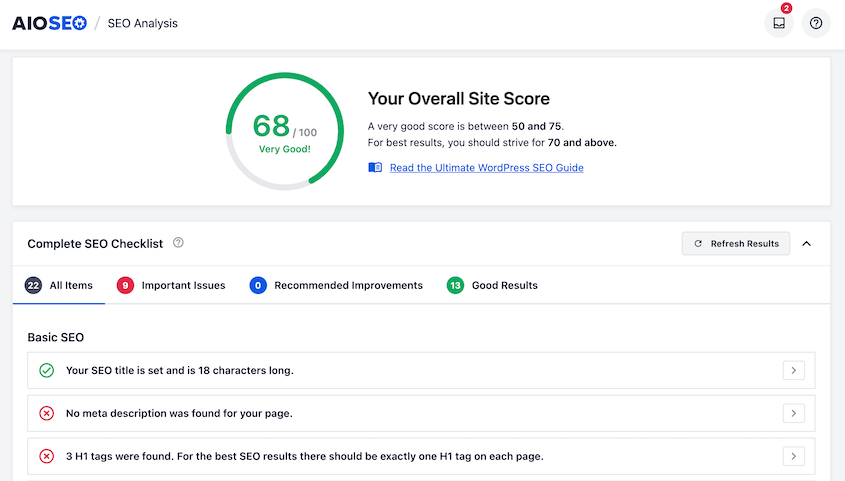
Take a snapshot of your site’s current SEO health before you change anything. You need a “before” picture to compare against later.
AIOSEO is a popular SEO plugin that gives you a comprehensive SEO audit of your site. Fix any issues now and record your current benchmarks.
Use a tool like Screaming Frog or Ahrefs to crawl your site. Document your top-performing keywords, current traffic levels, and any existing 404 errors.
This audit becomes crucial if your rankings change after the migration. Without it, you’ll never know if the migration caused new problems or if you’re just seeing existing issues for the first time.
Phase 2: Executing the Website Migration
Now comes the action phase. All that planning pays off here because you know exactly what you’re doing and when you’re doing it.
In this phase, you’ll:
- Transfer your files and database: Use your chosen method to move all site data to the new server
- Keep your original site live: Maintain visitor access while building the migrated version separately
- Handle technical details automatically: Let migration tools update URLs and file paths without manual database editing
Migrate Your Files and Database
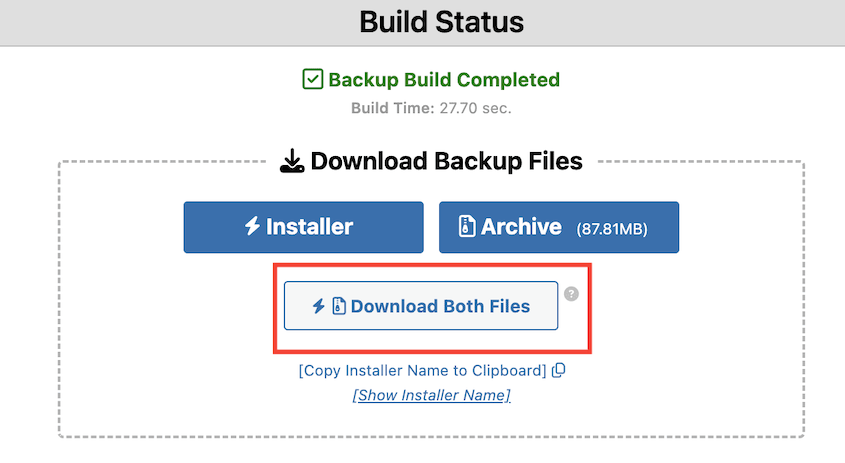
When you’re using Duplicator, this step is straightforward. Create your migration package on the old site and download the archive and installer files.
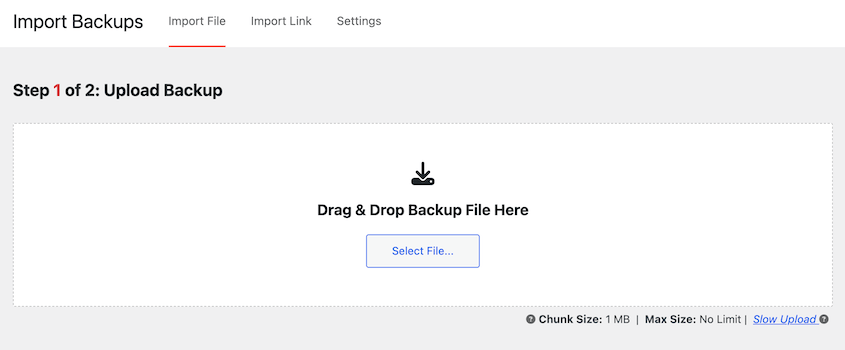
If you’ve already installed WordPress on the destination, install Duplicator and find the Import Backups page. Drag and drop the original backup file here to immediately migrate your data.
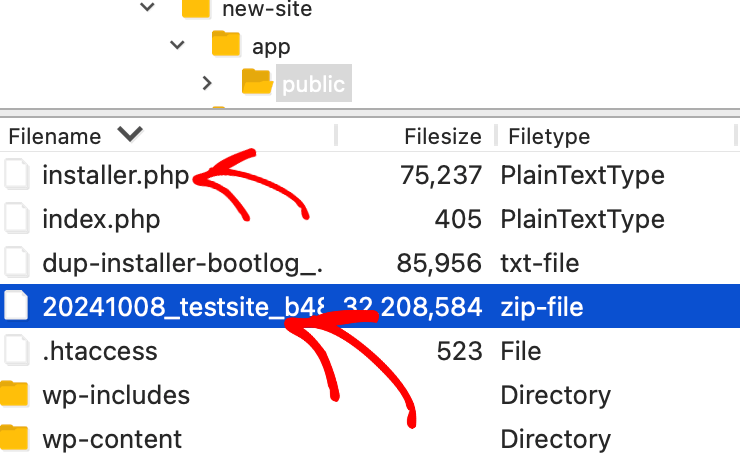
However, you don’t even have to install WordPress. You could alternatively upload both backup files to your new server’s root directory.
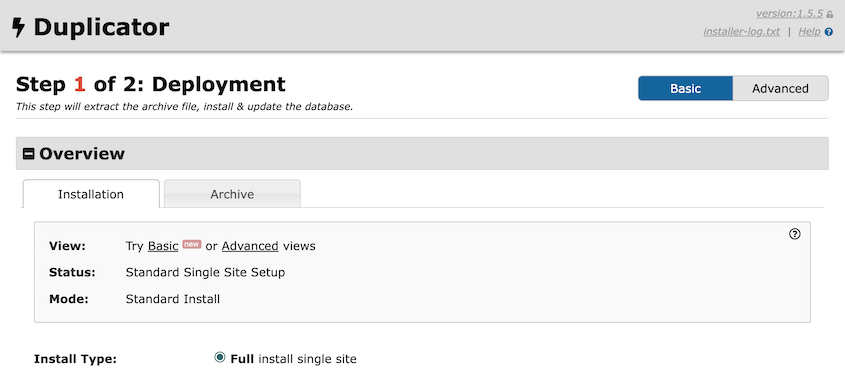
Run the installer script by visiting it in your browser. The installer walks you through connecting to your new database and handles all the technical details like updating URLs and file paths.
In a manual migration, you’d have to download thousands of files via FTP (which takes forever), export your database through phpMyAdmin, upload everything to the new server, and then manually update all the URLs and paths in the database.
I’ve done both methods more times than I care to count. Duplicator saves hours and eliminates opportunities for human error.
Phase 3: Final Post-Migration Checks
This is your quality control phase. Your site might be moved, but it’s not live yet.
In this phase, you’ll:
- Test your migrated site thoroughly: Use your hosts file to check functionality before going live
- Update DNS settings: Point your domain to the new server when testing is complete
- Perform final cleanup and monitoring: Remove temporary files and watch for any issues
Test Your Migrated Site
Before you point your domain to the new server, test everything using your local hosts file. This lets you preview the new site while keeping your original site live for visitors.
Add this line to your hosts file (the exact IP will be different for your server):
123.45.67.89 yoursite.com
Now when you visit your domain, you’ll see the migrated version while everyone else still sees the original.
Test everything systematically. Make sure your admin login still works, all your pages load without errors, images display correctly, and contact forms submit properly. If you have an e-commerce store, test the checkout process.
Update Your DNS
This is the moment of truth—making your migrated site live for everyone.
Log into your domain registrar or your hosting account and update your DNS records to point to your new server’s IP address.
DNS changes can take up to 48 hours to propagate worldwide, though most happen within a few hours. During this time, some visitors might see the old site while others see the new one.
Don’t panic if you still see the old site after making the change. Clear your browser cache and try again in an hour.
Final Cleanup and Monitoring
Once DNS has fully propagated, finish these final tasks:
- Remove that hosts file entry you added for testing.
- Delete the migration installer and archive files from your new server.
- Check Google Search Console for any new crawl errors or issues.
Keep your old hosting account active for at least a week as a final safety net. I know it costs extra money, but consider it insurance.
If something catastrophic happens, you can quickly point your DNS back to the old server while you address the problem. After a week of smooth operation, you can safely cancel the old hosting account.
Frequently Asked Questions (FAQs)
Will my website experience downtime during the migration?
Almost none, if you use the hosts file to test before updating your DNS. Your original site stays completely live while you build the new version on a separate server. The only potential downtime is the time it takes for DNS to start pointing to your new server.
How long does a website migration take?
It depends on your site’s size and complexity. A small blog might take an hour from start to finish, while a large e-commerce site could take a full day. The actual file transfer usually takes 15-30 minutes, but most of your time goes to testing and making sure everything works perfectly before going live.
What happens if the migration fails?
Your original site remains completely live and untouched throughout the process. If something goes wrong on the new server, you can troubleshoot without any pressure since your visitors never know anything happened. You can take your time to resolve issues or restore the full backup you made during planning.
Will migrating my website hurt my SEO?
Not if you do it properly by keeping your URLs the same, maintaining your site structure, and not changing content during the migration. Google treats a proper SEO migration like you’re just moving to a faster, more reliable server. Many sites actually see an SEO boost after migrating to better hosting since site speed is a ranking factor.
Why not just let my new web host handle the migration?
Host migration services put you at their mercy for scheduling and quality—they might migrate during peak traffic hours with no way for you to test first. Doing it yourself with a tool like Duplicator gives you complete control over timing, process, and quality checks. Plus, host migration quality varies wildly depending on who handles your specific transfer.
Organize Your Migration to Set Up Your New Site for Success
A website migration is straightforward when you break it into organized phases.
The three-phase approach works because it separates planning from execution and testing. You’re never trying to figure out what comes next while you’re in the middle of moving files around.
I’ve used this exact process for everything from simple WordPress blogs to complex membership sites with custom databases. The steps scale up or down depending on your site’s complexity, but the framework stays the same.
Take the fear out of migrations and try Duplicator Pro today. It handles large sites without breaking a sweat, offers cloud storage backups for extra safety, and includes a streamlined installer that walks you through every step.
You’ll wonder why you ever considered doing migrations any other way.
While you’re here, I think you’ll like these other hand-picked WordPress resources:
Joella is a writer with years of experience in WordPress. At Duplicator, she specializes in site maintenance — from basic backups to large-scale migrations. Her ultimate goal is to make sure your WordPress website is safe and ready for growth.


