Cloning your WordPress site creates an operational twin on a different server, maintaining all its features yet hidden from the public eye.
It’s like having an undercover version, ready for tests or changes without affecting the live site.
You could set up a cloned copy of your site on a server you want to migrate to. You’ll have time to get everything set up in the new location while your old site is still up.
I’d also recommend using cloning for staging and development. Design agencies use it to work on clients’ sites without affecting their live visitors.
You might think cloning is complex, but you can do it in just a few minutes!
Table of Contents
Quick Summary: How to Clone a WordPress Site
1. Back up your site.
Duplicator is a backup and migration plugin that can quickly clone your site. Simply create a new backup and select the data you want to clone. Then, download this backup.
2. Upload the backup to the new server.
Next, install Duplicator Pro on the second location. Drag and drop the backup archive file into the Import page. You could also upload both the archive and installer files to the new server with an FTP client.
3. Create a new database.
Use your web host’s control panel to create a new database. You should also create a new user and assign it to the database.
4. Finish the installation.
Finally, launch the Duplicator installer. It will fully upload your cloned website files and database to the second site.
Why You Might Need to Clone Your WordPress Site
Cloning involves saving a copy of your website in a new location. This is an exact copy that is fully operational.
Although this might seem similar to a backup, there is an important difference.
When you back up your site, you’ll save a dormant, inactive copy. If you accidentally break something on your live site, you can restore this saved backup.
A clone is an exact duplicate of the WordPress site, except it’s independent and fully functional. You can change the site clone without affecting your live website.
On a cloned staging site, you can perform a complete redesign, install updates, add new software, and edit files without breaking your live site.
If you’re moving to a new web host or domain, you can clone the original site and set up the cloned version on the new server. This prevents any downtime that could harm your User Experience (UX).
Website clones can also be helpful for web developers.
Instead of working on the live site, you can clone your client’s website to a subdomain. Using this staging environment, you’ll be able to make changes safely.
How to Clone a WordPress Site
As a beginner, cloning may seem like a difficult process. Don’t worry, I’ll walk you through every step of the way!
Step 1: Download a Cloning Plugin
To start cloning your website, I’d recommend installing Duplicator. With over 1.5 million active installations, this plugin is the most popular option for WordPress cloning.
Using Duplicator, you can copy your WordPress site to a different domain, web host, or local environment.
You won’t have to manually download or upload data. Plus, you won’t suffer from any downtime.
Rock Lobster Webdesign is a digital agency that learned how to boost design efficiency with Duplicator. See how they clone clients’ sites for safe testing!
First, choose your preferred license for Duplicator Pro. Although you can download a free version, the premium subscriptions include drag-and-drop migrations, cloud storage, automatic backups, and much more.
Once you download Duplicator, install it in your WordPress dashboard.
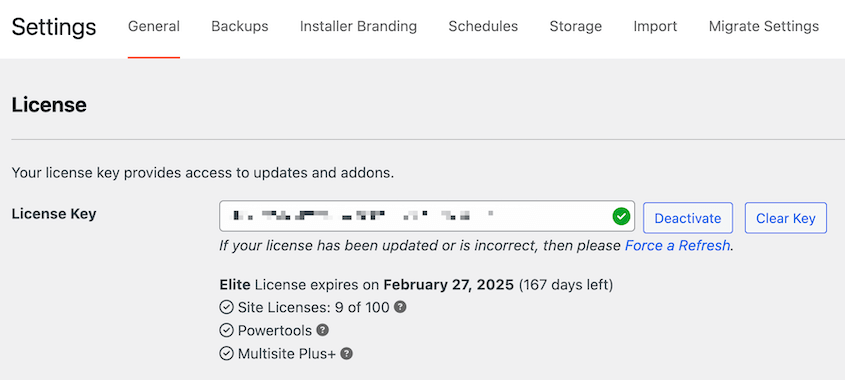
During checkout, you’ll get a license key for Duplicator Pro. Before you start using the plugin, go to Duplicator Pro » Settings » General.
Paste your key into the License Key settings.
Step 2: Create a Backup
After activating Duplicator, you’ll need to create a backup. This will bundle together your plugins, themes, database, and other WordPress files.
Once you compile all your data into a single zip file, you can easily migrate it to a different location.
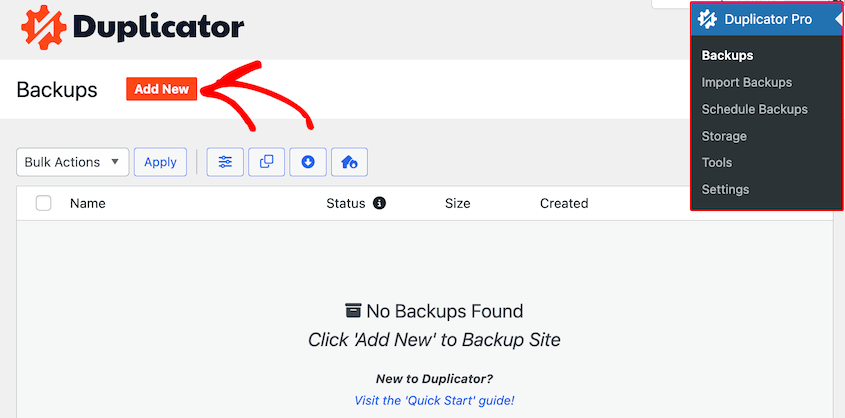
First, find Duplicator » Backups » Add New.
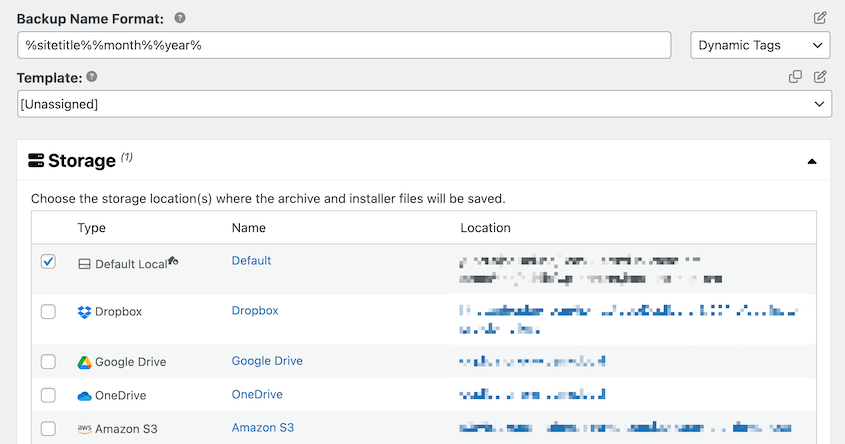
On the next page, give the backup a name. Then, choose a storage location.
With Duplicator Pro, you can connect third-party providers like:
In the Backup section, choose which site components you want to include. For a fully cloned copy, select Full Site.
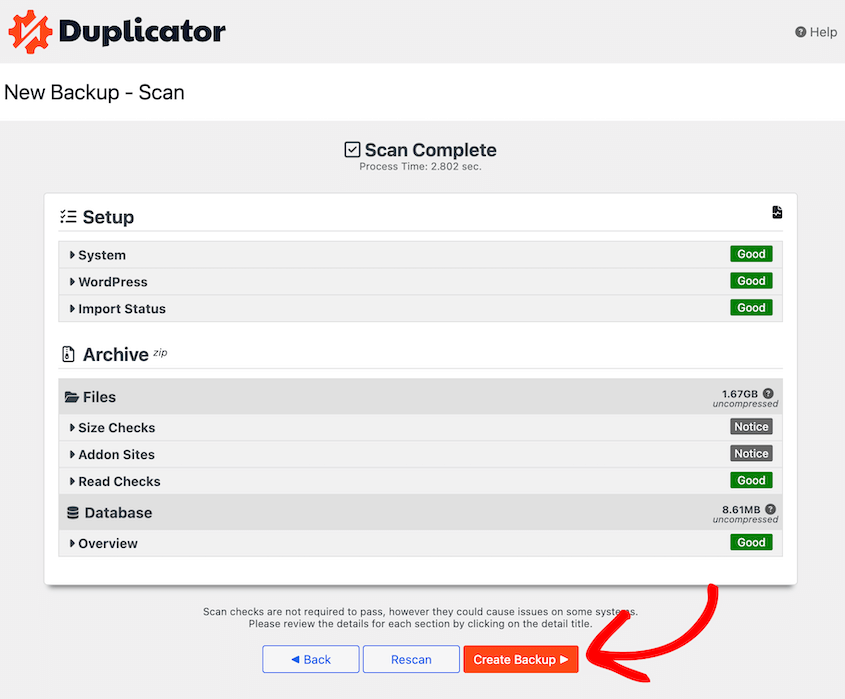
After you click Next, Duplicator will scan your website. Even if you see a notice, you can continue with the build process. Hit Create Backup.
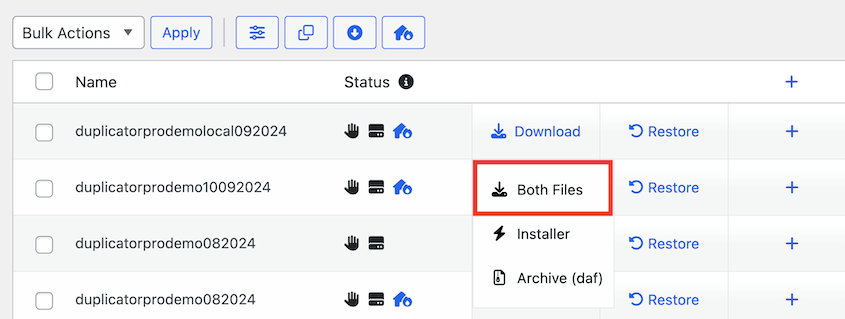
On the Backups page, you’ll see an Installer file and an Archive zip file. Before you move on to the next step, download both of these.
Duplicator is also a WordPress backup plugin. Once you download your site’s backup files, you can restore these files whenever you need to.
You could also consider setting up automatic backups so you always have a cloned copy on hand.
Step 3: Upload the Cloned Files to Your New Server
Once you have a copy of your WordPress site, it’s time to upload it to a different location.
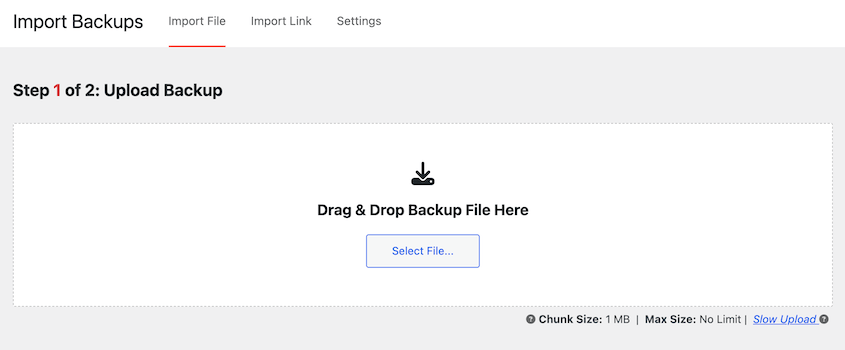
If you’ve already installed WordPress, open your dashboard and install Duplicator Pro. Then, find the Import Backups page and upload your backup’s archive file.
However, you don’t have to have WordPress installed!
Using Duplicator, you can upload your backup to a File Transfer Protocol (FTP) client or cPanel. You’ll install the site on a completely empty directory, saving time.
If you choose to use an FTP client, I’d recommend FileZilla. This free software makes it easy to connect to your site files and start editing them.
At the top of the FileZilla window, enter your host name, username, password, and port number. You can find this information in your WordPress hosting dashboard.

After you hit Quickconnect, you’ll see your site files on the right-hand side. Next, open the root directory, which is the public_html folder. Here, upload your Duplicator backup files.
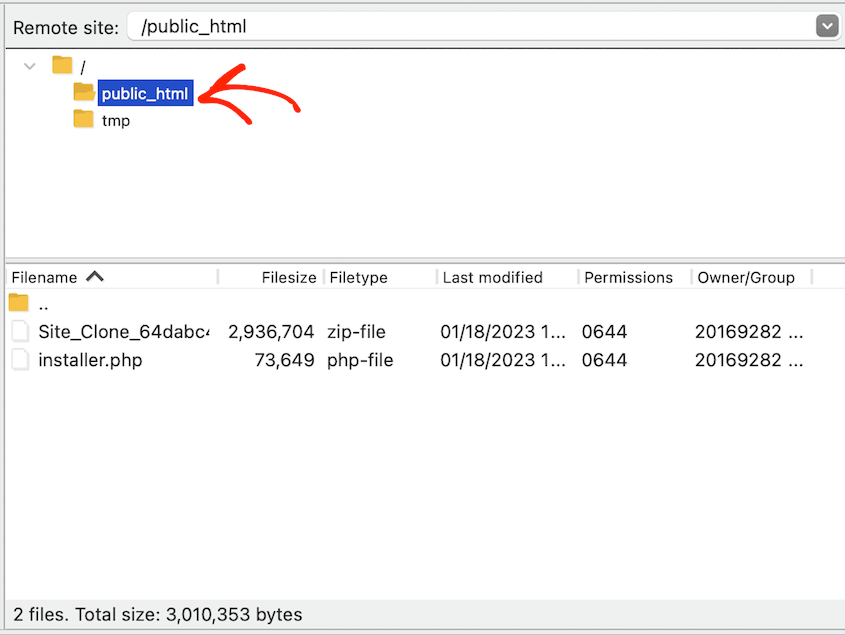
You should see both an installer.php file and a zip file containing your WordPress data. Be sure to delete any other files from your public_html folder.
Step 4: Create a Database for Your Cloned Site
After you’ve uploaded your cloned files, it’s time to create a new database to store its data. This will allow Duplicator to move information from your old database to the new one.
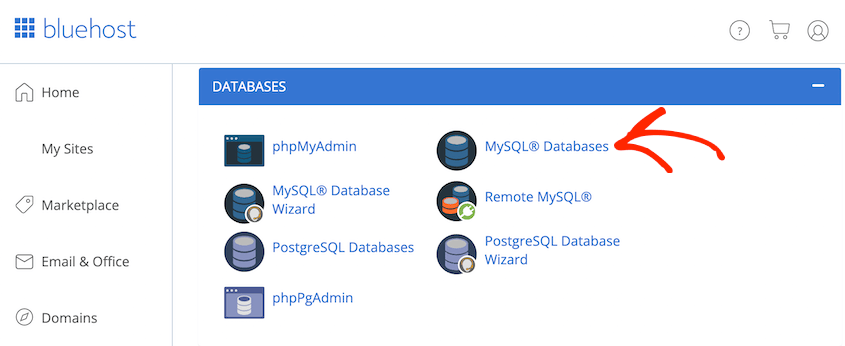
Your web host will likely allow you to edit your database from your control panel. For example, Bluehost has a setting for MySQL Databases.
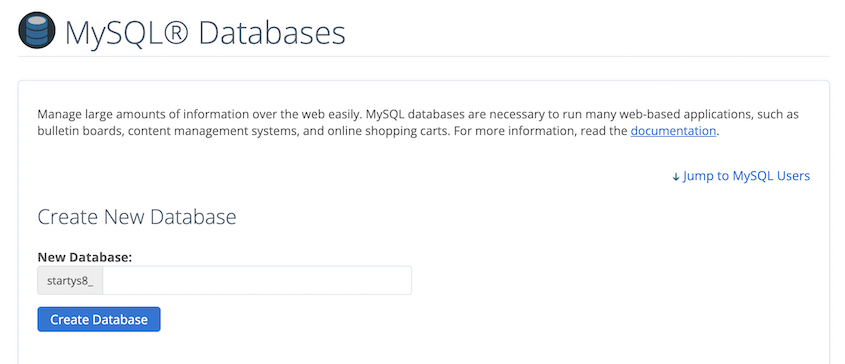
After clicking on this, look for the option to create a new database. Give it a name and click on Create Database.
Now, you’ll need to add a new user to the database. In the MySQL Users section, enter a new username and password.
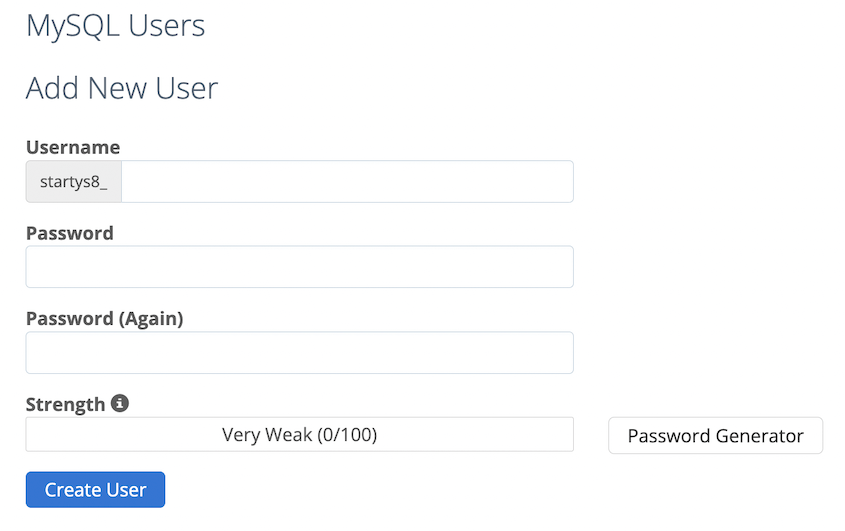
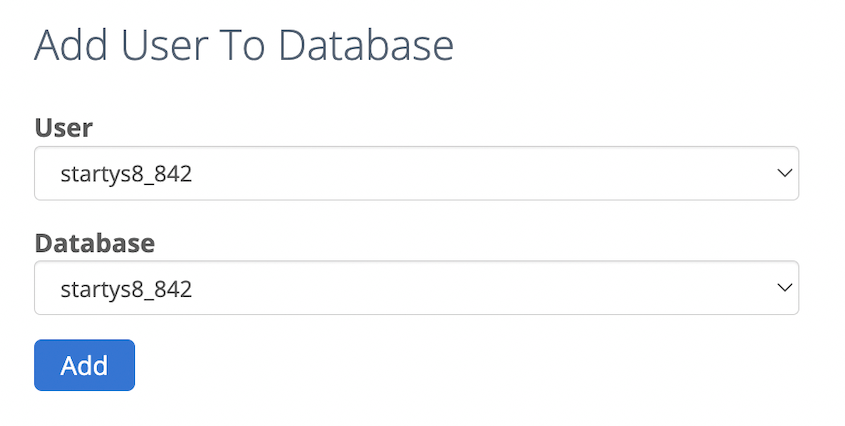
You’ll also need to assign that user to the new database.
For the next step, be sure to remember your database information!
Step 5: Run the Duplicator Installer
Finally, open a new browser window. In the search bar, enter your full web address followed by ‘installer.php’. Here’s an example:
https://yourdomain.com/installer.php
On the Duplicator installation page, find the Setup section. Here, enter your new host name, database name, username, and password.
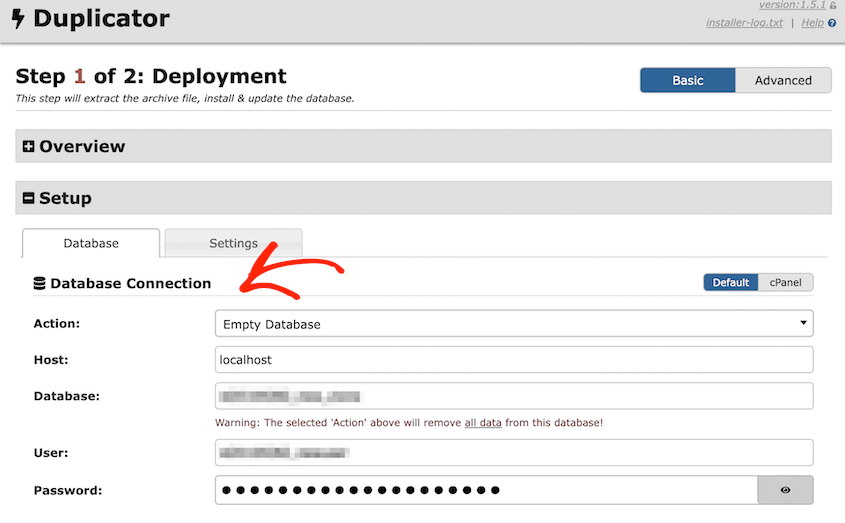
Then, scroll to the bottom and hit Validate. Duplicator will test your database connection. If everything is working correctly, select the terms and notices checkbox and click Next.
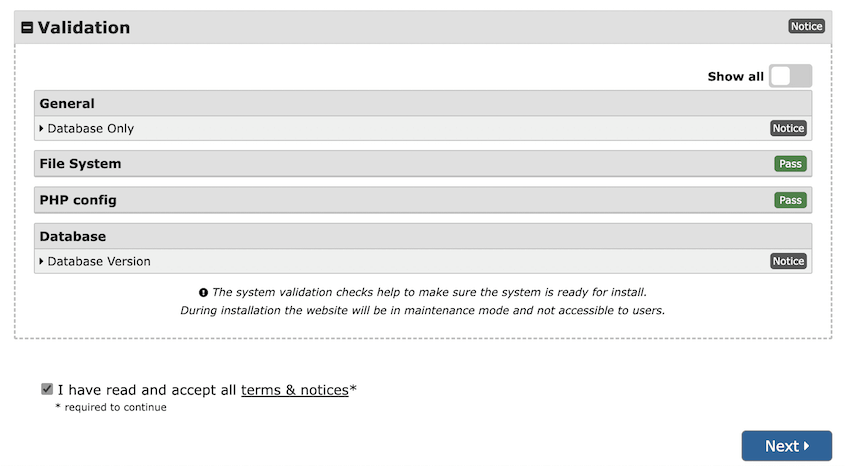
At this stage of the cloning process, Duplicator will import your database and finish the installation. If it is successful, you’ll see an Admin Login button.
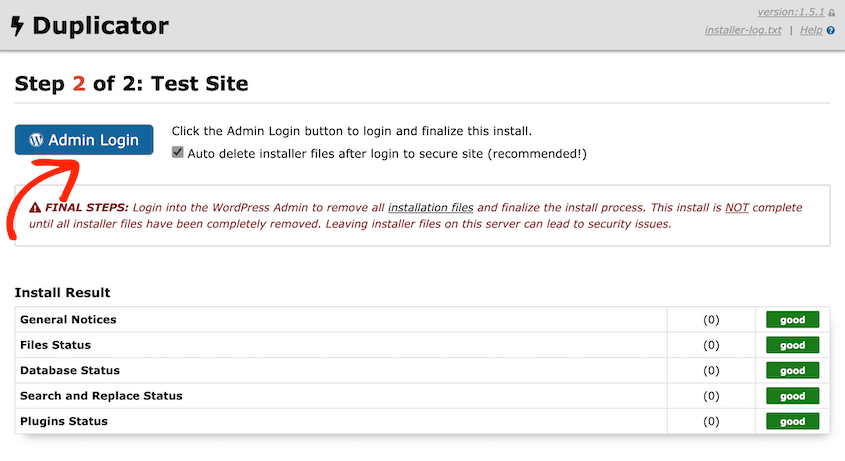
With one click, you can log into the WordPress dashboard for your new site! This new WordPress installation will look and function exactly like the original website.
If you’re migrating your site permanently, you’ll need to update the wp-config.php file to reflect the new hosting information.
Be sure to also implement 301 redirects and inform Google about the change, so that you don’t lose any SEO ranking.
For more information, see our full migration checklist!
Frequently Asked Questions (FAQs)
Can you duplicate a WordPress site?
You can duplicate a WordPress site using the Duplicator plugin. Install Duplicator, create a backup of the existing site, and use it to set up the copy on a new location. This process is efficient for cloning sites for staging, migration, or backup purposes.
How do I download a full WordPress site?
Download a full WordPress site with the Duplicator plugin. Install the plugin, create a new backup, and download the installer and archive files. These files include the site’s content and database, allowing you to move or back up the site efficiently.
How do I clone a WordPress site without plugins?
Clone a WordPress site without plugins by manually copying the files and database. Use an FTP client to download the site’s files, export the database via phpMyAdmin, and upload these to the new server. Update the wp-config.php file with the new database credentials to complete the process.
How do I duplicate a WordPress site for staging?
You can duplicate a WordPress site for staging using Duplicator. Install the plugin, create a backup of the live site, and deploy it to a staging environment. This method ensures the staging site mirrors the live site for testing changes safely.
How do I migrate my WordPress site using Duplicator?
To migrate your WordPress site using Duplicator, create a backup of your site files and database. Download the installer and archive files, upload them to the new server, and run the installer script. This process transfers your site seamlessly to a new location.
How do I clone my WordPress site to a new domain?
If you want to clone your WordPress site to a new domain, create a backup of your original site with Duplicator Pro. Then, download the backup’s archive and installer files. Upload these to the new server.
In a new browser, visit https://yournewdomain.com/installer.php
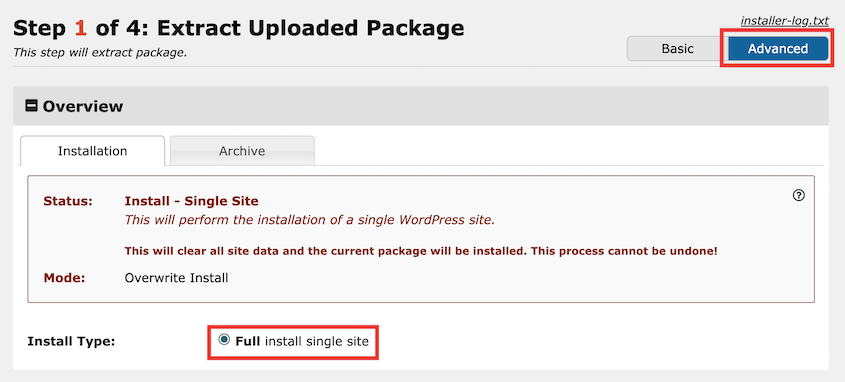
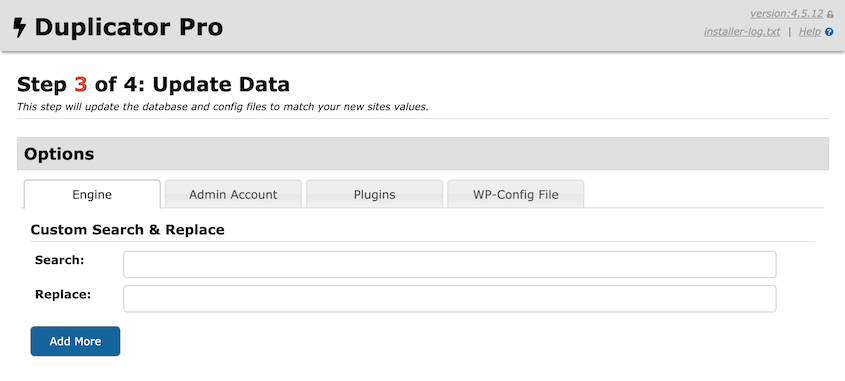
In the top-right corner of the installer wizard, select the Advanced view.
Now you’ll be able to update your domain during the migration. Simply enter your old domain in the Search field and the new one underneath it.
Duplicator will automatically import all of your old data into the new site. Plus, it’ll search your database for the old domain and update it with the new one.
Conclusion
You now hold the keys to effortlessly cloning your site, safeguarding your website’s integrity through seamless testing and migrations.
While you’re here, you may like these extra WordPress tips, tricks, and guides:
Are you ready to clone your existing website? Download Duplicator Pro to quickly create copies of your site and move them wherever you need to!
Joella is a writer with years of experience in WordPress. At Duplicator, she specializes in site maintenance — from basic backups to large-scale migrations. Her ultimate goal is to make sure your WordPress website is safe and ready for growth.


