Right now, you’re backing up your site, but are these backups safe?
Keeping backups on your web server seems easy, but it’s not the safest strategy. Think about it: if something happens to your server, your backups could be gone too.
Cloud storage offers a smart alternative, keeping your precious website data offsite and secure.
DigitalOcean Spaces is a cloud storage option specifically designed to be affordable and easy to scale, which makes it a great fit for WordPress backups.
Curious how to use it to protect your website? I’ll show you how to back up your WordPress site to DigitalOcean Spaces!
Table of Contents
Quick Summary: How to Back Up WordPress to DigitalOcean Spaces
1. Install a backup plugin that supports DigitalOcean Spaces.
Duplicator Pro is the best plugin for saving your WordPress data to the cloud. It supports cloud services like DigitalOcean Spaces, Amazon S3, and many more.
2. Set up a DigitalOcean Spaces account.
Next, sign up for DigitalOcean Spaces and create a bucket. Generate access keys and copy them.
3. Connect DigitalOcean Spaces and WordPress.
In Duplicator, create a new storage location. Add your DigitalOcean access keys, endpoint, and bucket information.
4. Create a DigitalOcean Spaces backup.
Finally, create a backup and choose DigitalOcean Spaces as the storage location. Duplicator will copy your WordPress site and send the backup to the cloud.
Why Use DigitalOcean Spaces?
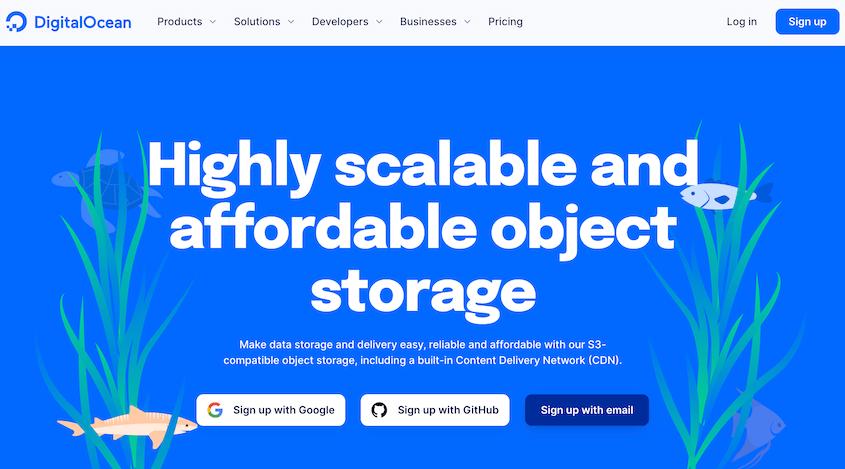
DigitalOcean Spaces is an object storage service that’s capable of storing large amounts of data. It can hold a wide range of data, including images, videos, user-generated content, site backups, databases, logs, and much more.
DigitalOcean Spaces offers an affordable and scalable storage solution.
It allows WordPress website owners to store static content, ensuring their media files are readily accessible to users without worrying about disk space constraints. This scalability is vital for growing websites with expanding content libraries.
You can also use DigitalOcean Spaces as a cloud backup storage service. Rather than storing backups on your local server, you can save them in the cloud.
This makes your backups easy to recover whenever you need them. You won’t have to worry about server errors or hacks corrupting your data.
You might be able to restore your website without a backup, but it’s not easy. As a reliable solution, create backups and store them on the cloud for safekeeping!
What Are the Features of DigitalOcean Spaces?
Here are some of the main features of DigitalOcean Spaces:
- Store multiple files of any size
- Add up to 100 buckets
- Only pay for the storage you use
- Built-in Content Delivery Network (CDN) to optimize load times
- Scalable storage
- Upload files with a drag-and-drop interface or API
- S3 compatible
- HTTPS-encrypted data transfers
- Read and write operations max out at 1500 RPS per IP address
- Integrates with FileZilla, Cyberduck, and S3-compatible WordPress plugins
To start using DigitalOcean Spaces, it costs $5 per month. This supports 250 GB of storage and 1 TB of outbound transfers. Additional storage will be $.02 per GB.
When you first sign up, DigitalOcean Spaces will give you a $200 credit. This will be valid for 60 days if you want to try out this cloud storage service before buying it.
How to Back Up WordPress to DigitalOcean Spaces
You might be used to basic file-upload cloud services like Dropbox or Google Drive. If you want to start saving WordPress backups to DigitalOcean Spaces, the setup process is a little more difficult.
However, I’ll walk you through every step along the way!
Step 1: Install Duplicator
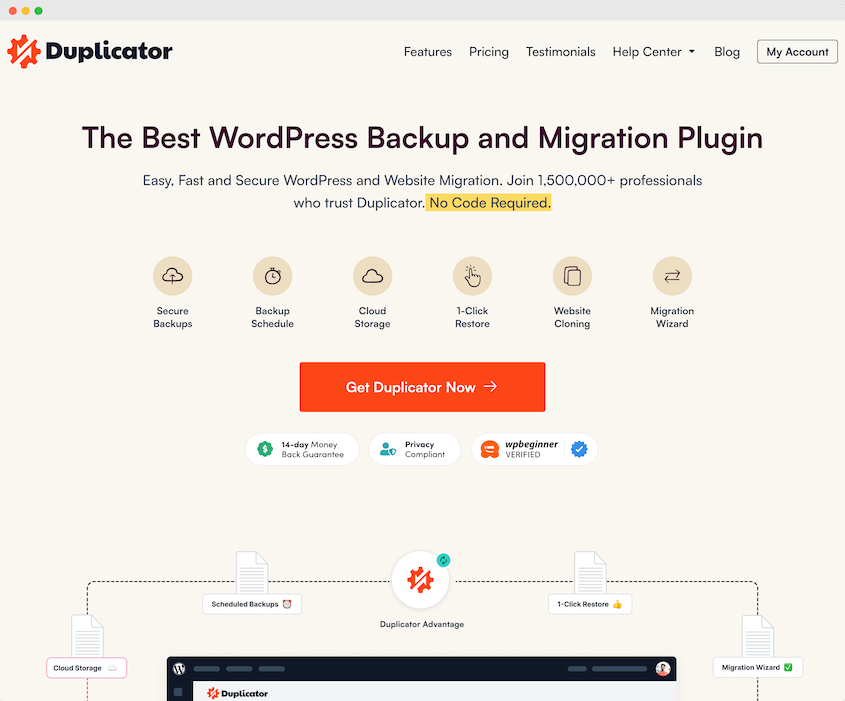
One of the easiest ways to connect your website to DigitalOcean Spaces is to find an S3-compatible WordPress backup plugin. For example, Duplicator Pro is a backup tool that supports a variety of cloud storage services.
With Duplicator, you can back up your site to any of these cloud locations:
See how Conceptstore Creative, a digital studio, keeps its clients’ data accessible and secure in the cloud with Duplicator!
If you want this flexibility, purchase a Duplicator Pro subscription. Although there is a free version, the premium plugin adds cloud storage support.
Then, download Duplicator and install it in WordPress.
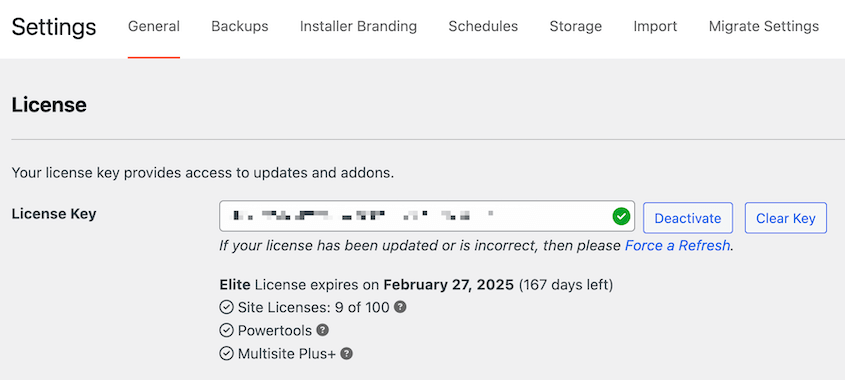
In your WordPress dashboard, go to Duplicator Pro » Settings » General.
Paste the license key you received with your purchase. Hit Activate to start using Duplicator!
Step 2: Create a DigitalOcean Spaces Bucket
Since DigitalOcean Spaces is an object storage service, it allows you to store data as objects in buckets. These buckets can hold an unlimited number of objects and you can create up to 100 different buckets.
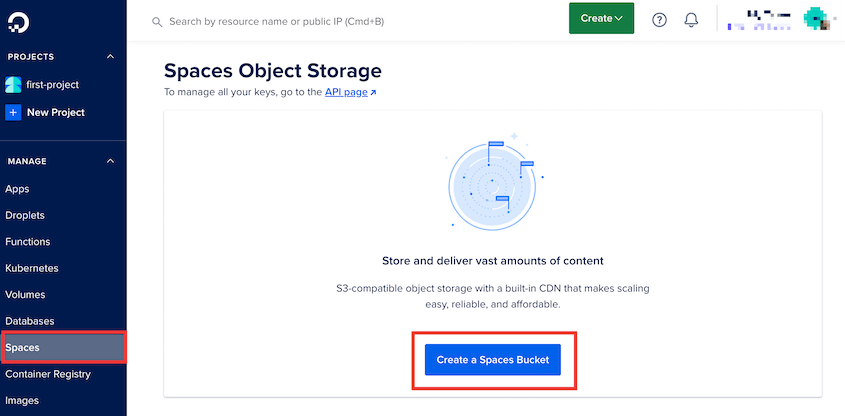
To get started, you’ll need to configure a new DigitalOcean Spaces bucket for your site backups. In your DigitalOcean control panel, click on the Spaces tab and hit Create a Spaces Bucket.
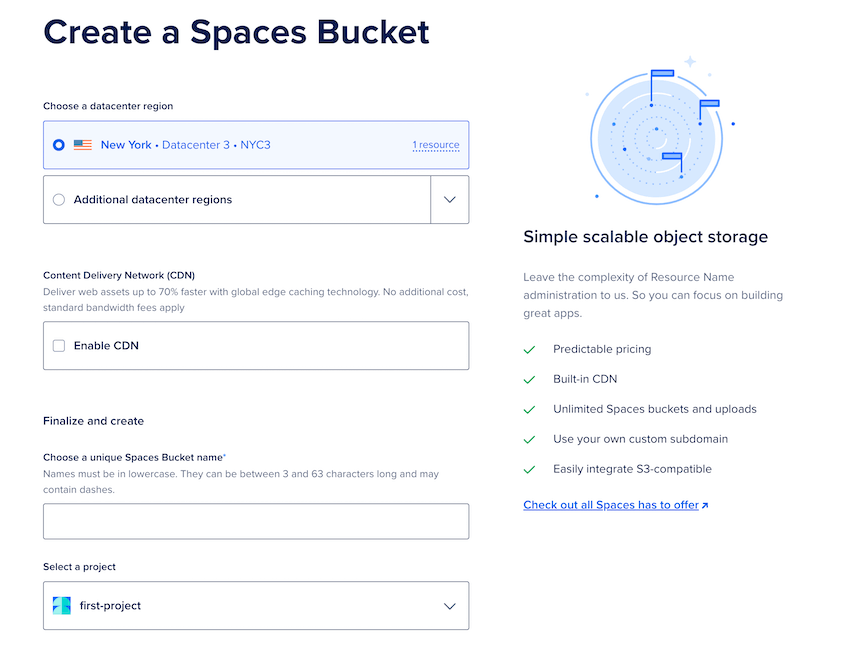
Choose the data center region closest to you. Next, name the new bucket.
Click on Create a Spaces Bucket again. Be sure to remember your bucket name and region for later on in this tutorial.
Step 3: Copy Your Access Keys
Before you back up your site remotely, Duplicator needs permission to make changes to your DigitalOcean Spaces bucket. To do this, you’ll need to generate API keys.
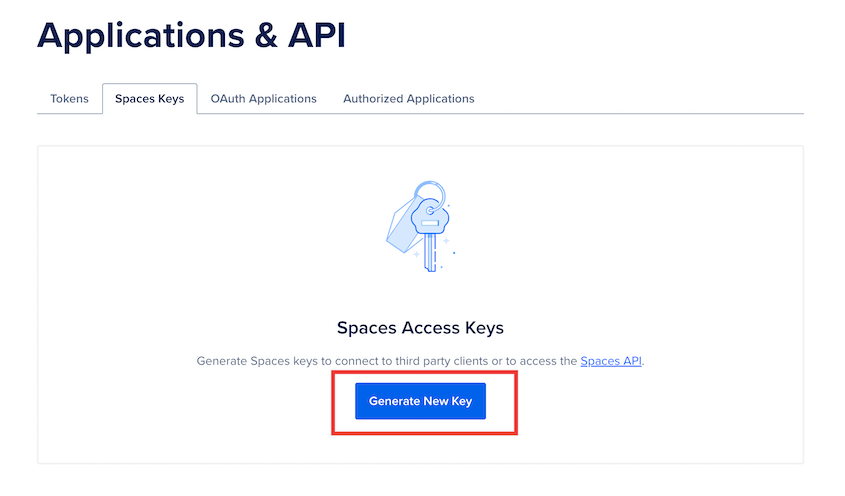
On the main Spaces page, find the API page link.
Then, click on Generate New Key.
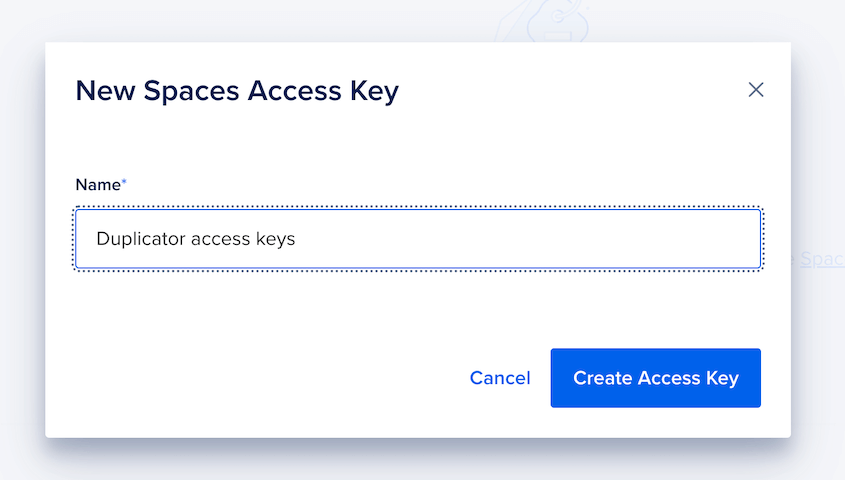
Name the access key and hit Create Access Key.
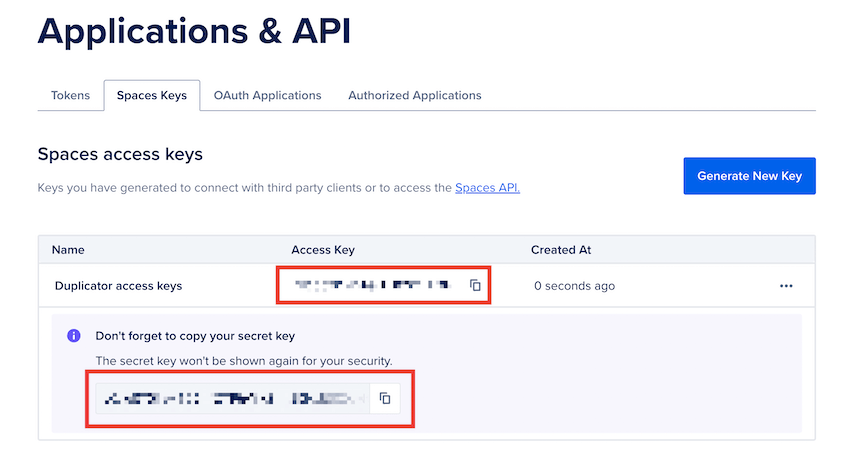
You’ll then get a new access key and secret access key. Copy and save both of these.
Now you have everything you need to connect Duplicator and DigitalOcean Spaces!
Step 4: Connect DigitalOcean Spaces to Duplicator
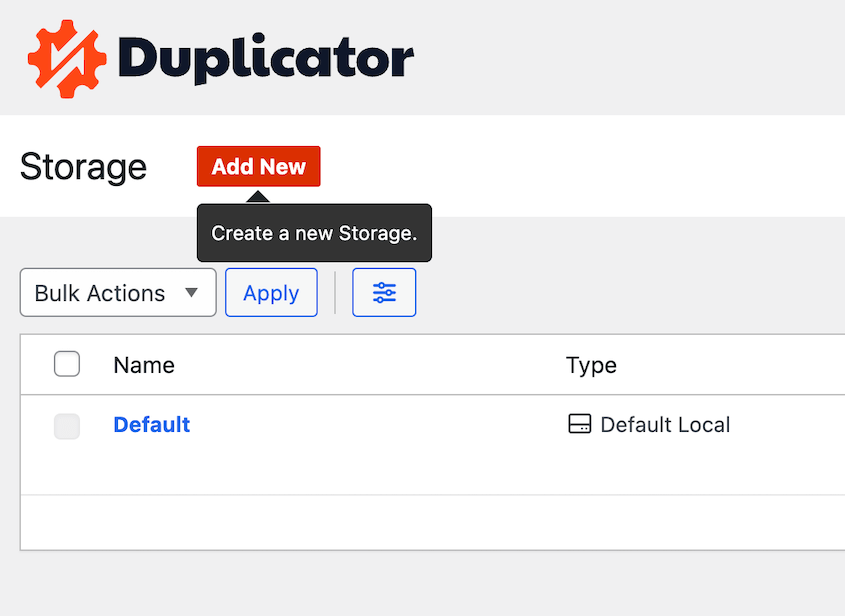
When you create a backup with Duplicator, it’ll automatically be stored on your local server. To change this, you’ll need to add a new storage location. Head over to Duplicator Pro » Storage » Add New.
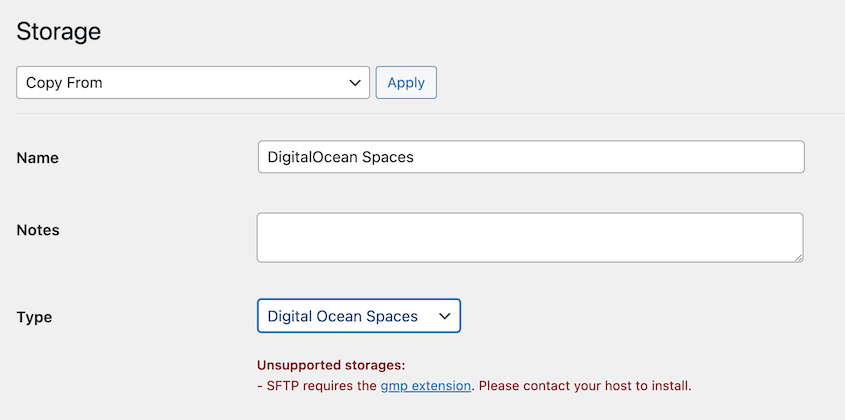
Name the storage location and choose Digital Ocean Spaces as the Type.
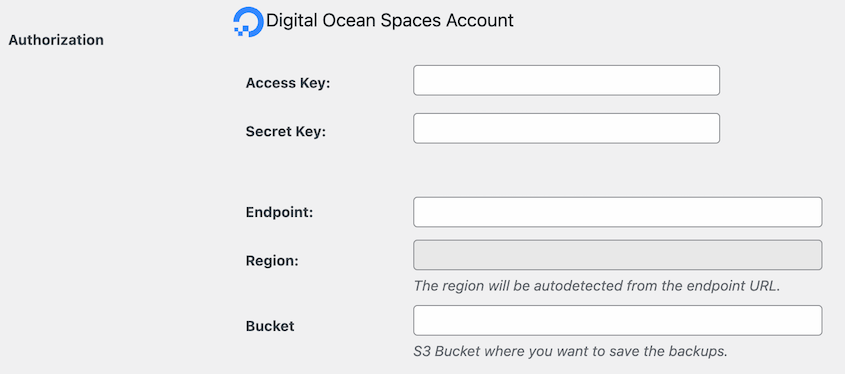
In the Authorization section, paste your access keys, endpoint, and bucket name.
Use this endpoint: https://region.digitaloceanspaces.com
Instead of “region”, enter the region you chose when you made the bucket.
The Region field will be automatically filled after you add the endpoint.
For the Max Backups value, you can decide how many backups to keep in DigitalOcean Spaces. Once you exceed this number, Duplicator will delete an old backup. This prevents you from overloading your storage space.
Save the new storage provider.
Step 5: Create a DigitalOcean Spaces Backup
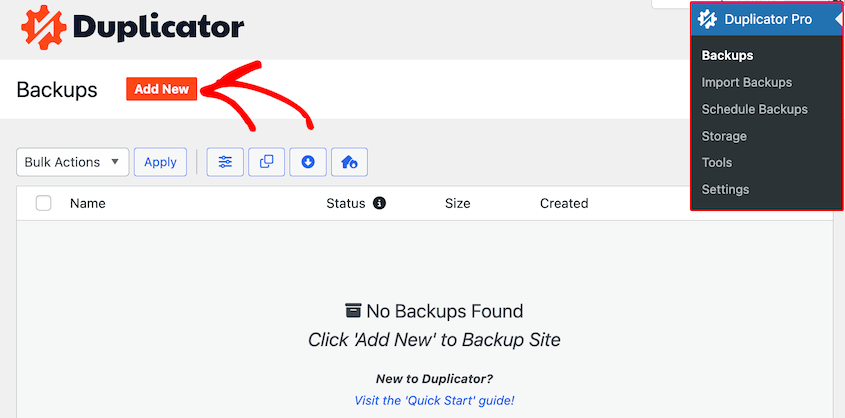
At this point, you’ll be able to save any backup to DigitalOcean Spaces. To get started, navigate to Duplicator Pro » Backups » Add New.
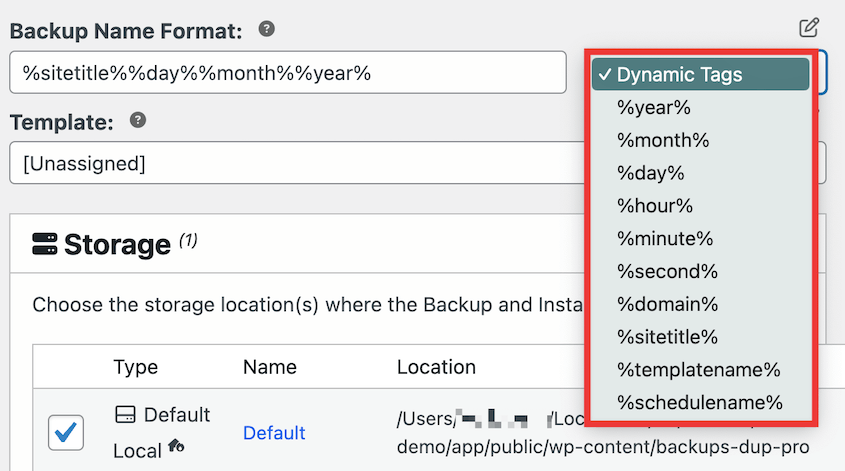
Use dynamic tags to give the backup a recognizable name.
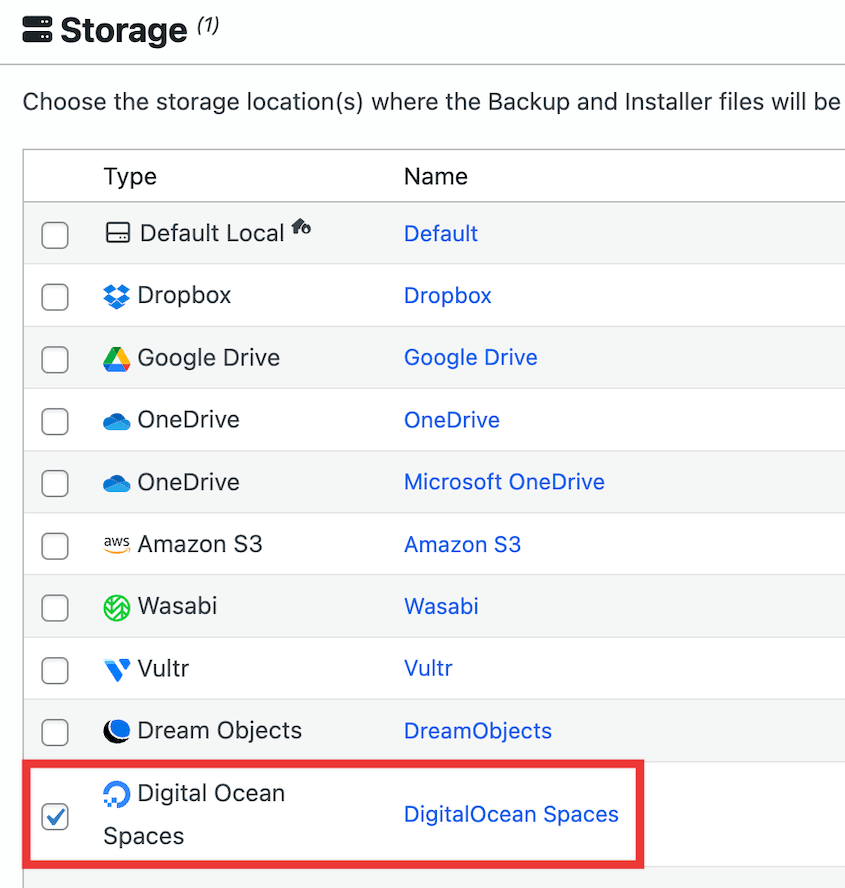
Then, choose DigitalOcean Spaces as the cloud storage location.
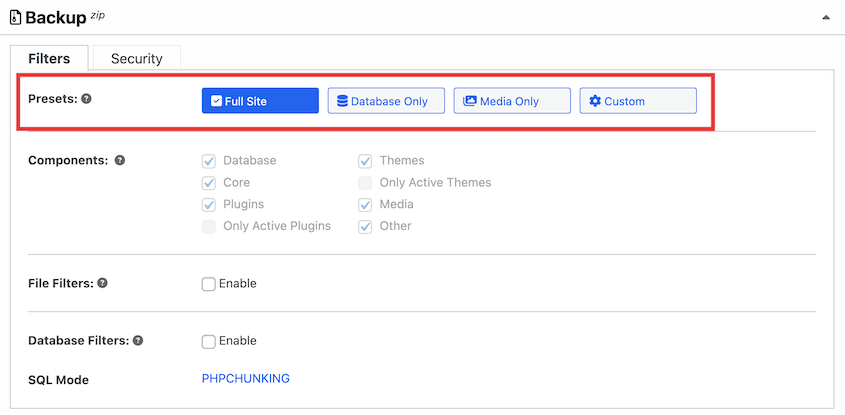
If you want to back up your entire site, choose the Full Site backup preset. However, you can easily customize the backup if you need to.
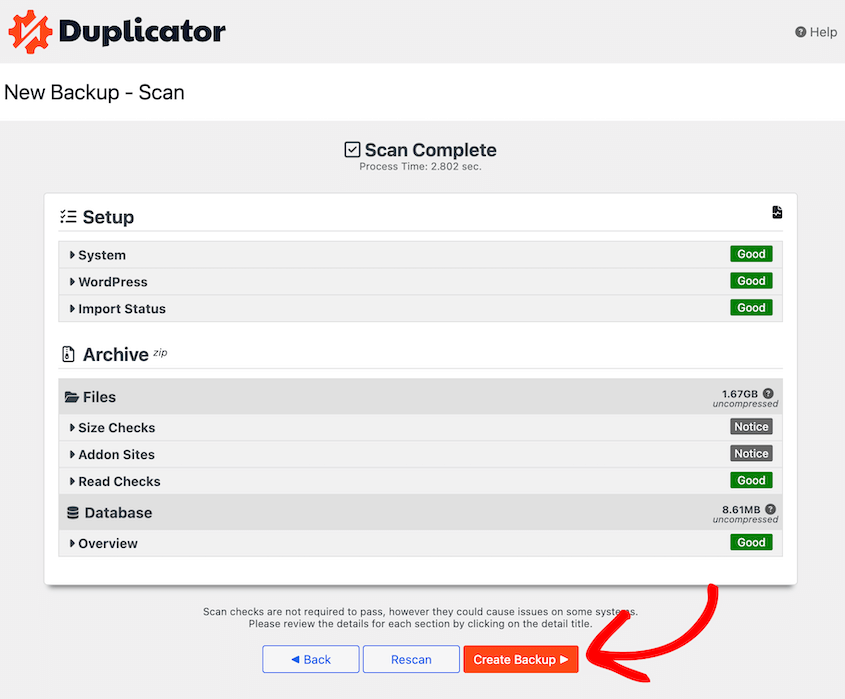
When you’re finished, hit Next. Duplicator will fully scan your website before backing it up.
If everything looks normal, click Create Backup. Once your site is backed up, Duplicator will send a copy over to DigitalOcean Spaces!
Step 6: Set Up Automatic DigitalOcean Spaces Backups
By setting up automatic backups, you won’t ever have to worry about manually backing up your site.
Duplicator will routinely create backups for you, which saves time, minimizes potential downtime, and protects your data.
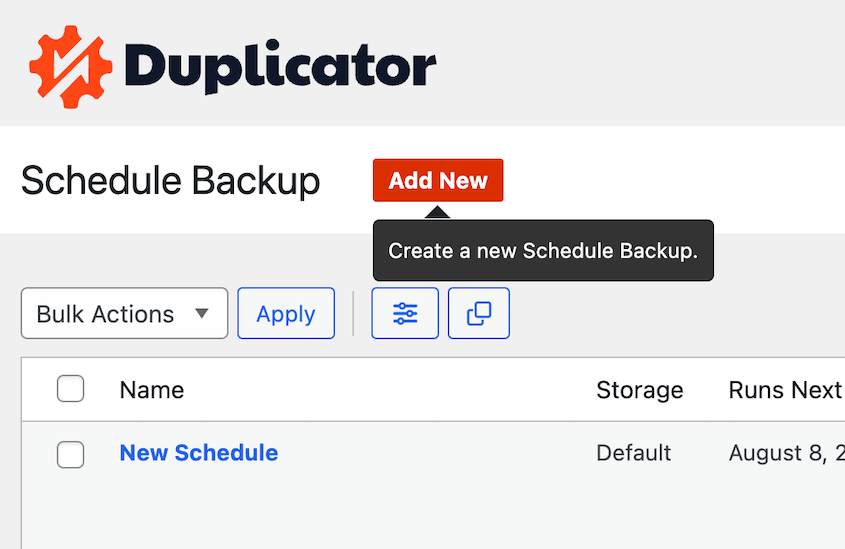
First, open the Schedule Backups page and add a new one.
Name the automatic backup schedule. Choose a backup template or create a new one.
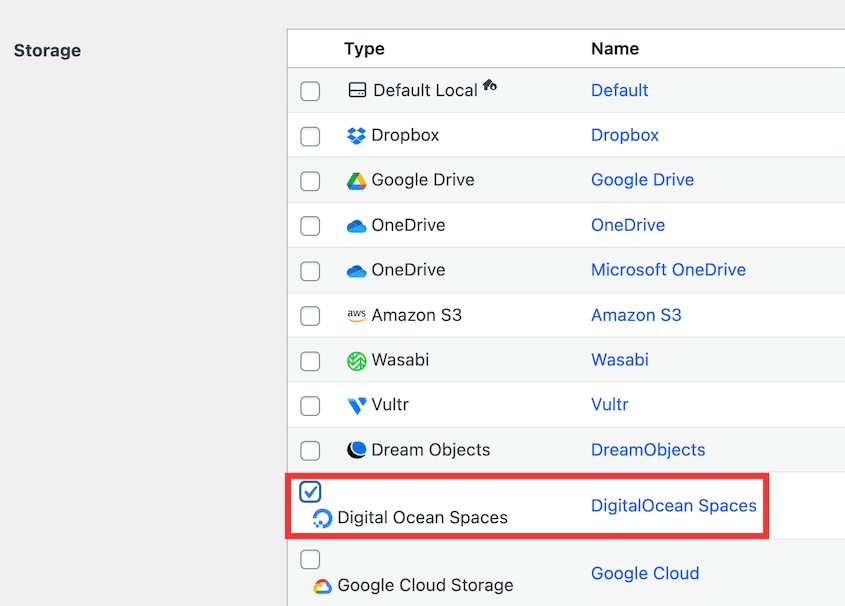
Under Storage, choose DigitalOcean Spaces.
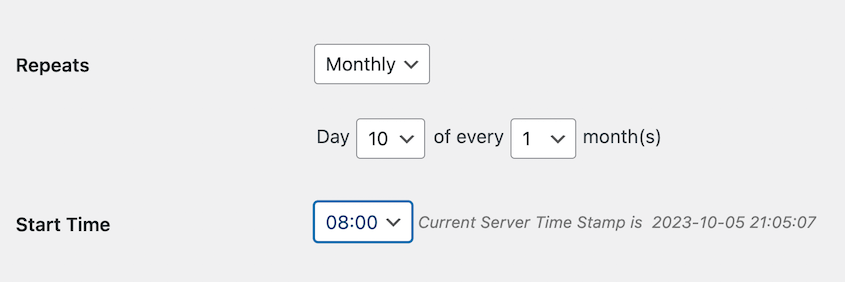
Then, you can customize when your backup will run.
As a final step, save the schedule and enable it. Without any extra help from you, Duplicator will automatically back up your site to DigitalOcean Spaces!
How to Restore Your DigitalOcean Spaces Backup
If your site ever gets hacked or displays a critical error, you can simply restore one of your DigitalOcean Spaces backups. Luckily, Duplicator makes this process easy.
Open Duplicator’s Backups page. Find a backup made before the error and hit Restore.
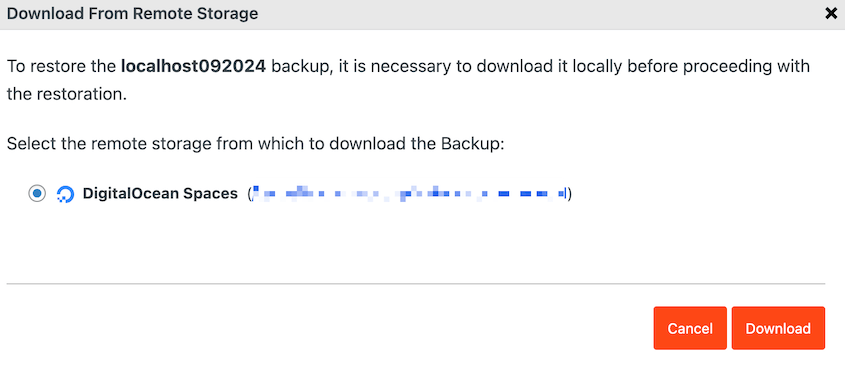
Since your backup is in DigitalOcean Spaces, you’ll need to download it to your local server.
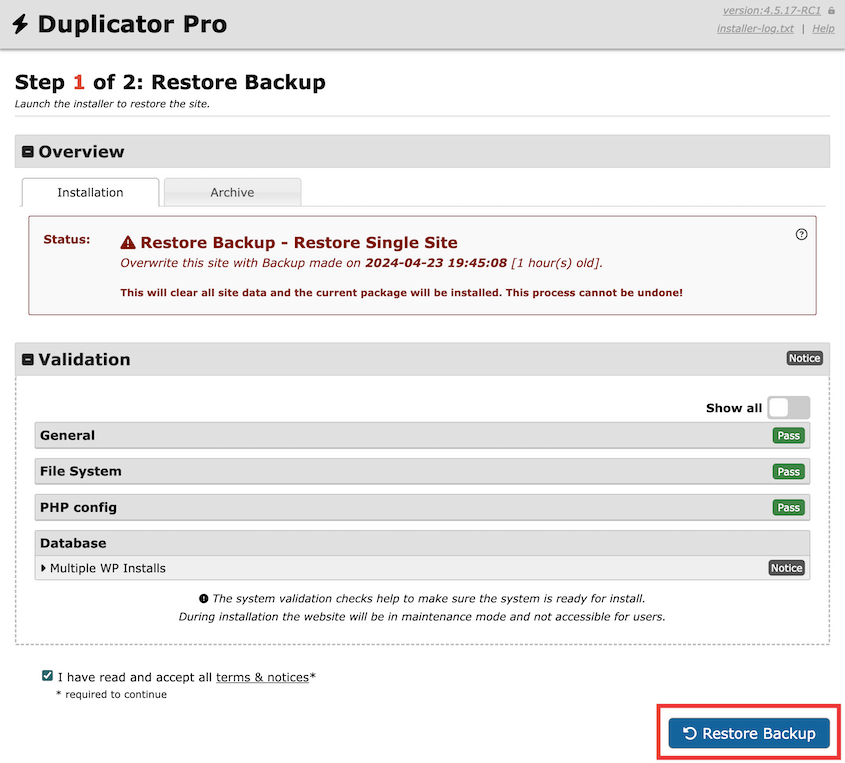
Then, the recovery wizard will automatically pop up. Accept the terms and conditions and click on Restore Backup.
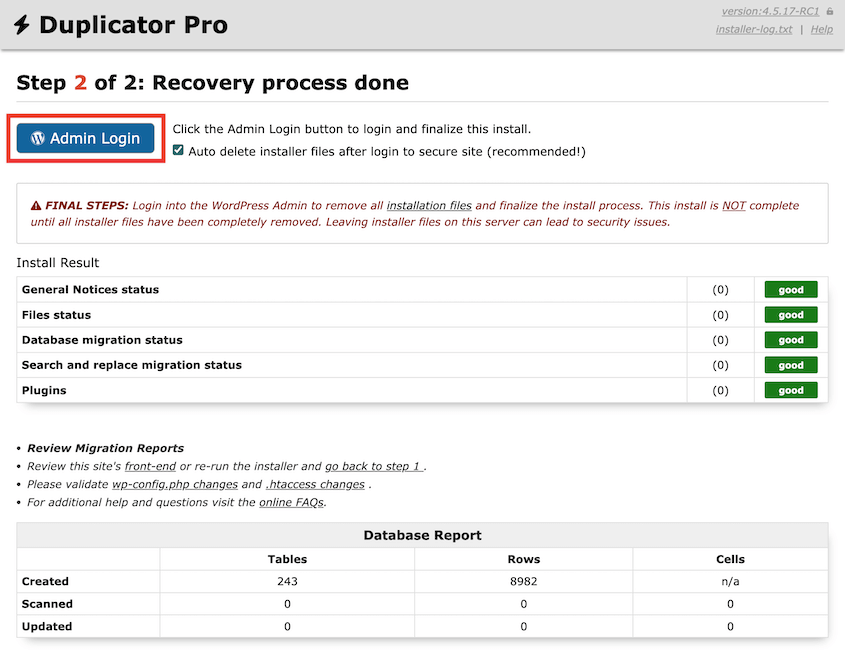
Now Duplicator will roll back your site to a clean version! Use the Admin Login button to access your dashboard again.
If an error locks you out of the WordPress dashboard, don’t worry! You can still restore a backup. You’ll need to download both the archive and installer files and upload them to your site with an FTP client. For more details, read this classic install guide.
FAQs About Connecting WordPress to DigitalOcean Spaces
What are the limitations of Spaces in DigitalOcean?
You can only create up to 100 buckets in DigitalOcean Spaces. With the lowest payment option, you’ll get 240 GB of storage. More storage costs $.02 per GB. Other options like Backblaze B2, Google Cloud, and Wasabi offer cheaper storage.
What is the DigitalOcean Spaces plugin for WordPress?
DigitalOcean Spaces Sync is a free plugin on WordPress.org that will connect your WordPress Media Library to a DigitalOcean Spaces bucket. It allows you to back up your media library to the cloud or serve images from your DigitalOcean account. If you serve them from DigitalOcean, the plugin will replace public media URLs with cloud storage links.
This plugin was last updated 4 years ago, so it hasn’t been tested with the latest WordPress updates. We would recommend installing a highly-reviewed and tested plugin like Duplicator Pro to back up your WordPress data.
How much does DigitalOcean Spaces cost?
DigitalOcean Spaces costs $5 per month for the first 240GB of storage and 1TB of outbound transfers. If you need additional storage, you’ll be charged an extra $.02 per GB.
How do I run WordPress on DigitalOcean Spaces?
You can use DigitalOcean Spaces to host static assets from your WordPress site like images. First, make sure your server is set up on the latest version of Ubuntu. Then, you’ll need to modify the wp-content/uploads folder permissions using this WP-CLI command:
sudo mkdir -p /var/www/html/wp-content/uploads
Then, set new permissions for the folder. Instead of “sammy” use your non-root sudo user:
sudo chown -R sammy:www-data /var/www/html/wp-content/uploads
After this, give the web server access to write in this folder:
sudo chmod -R g+w /var/www/html/wp-content/uploads
Next, install and activate the DigitalOcean Spaces Sync plugin. Here’s how to navigate to your WordPress plugin folder:
cd /var/www/html/wp-content/plugins
Now, install the plugin:
wp plugin install do-spaces-sync
And activate it:
wp plugin activate do-spaces-sync
In the plugin settings, enter your Spaces access key IDs and bucket name.
By default, the endpoint will be https://ams3.digitaloceanspaces.com. You can modify this to feature your specific region.
In the File & Path Settings, enter either a public storage domain or a full URL path. This depends on whether you want the files stored only on DigitalOcean Spaces or stored on your server as well.
For more information, see the DigitalOcean docs on how to store WordPress assets on DigitalOcean Spaces.
Final Thoughts
By setting up WordPress backups to DigitalOcean Spaces, you’ve made a valuable investment in the long-term health of your website!
This isn’t just about disaster recovery; it’s about building a resilient and scalable online presence. As your website grows, your backup strategy with DigitalOcean Spaces can easily grow with you, ensuring your data is always protected, no matter what.
Ready to secure your site’s data in the cloud? Duplicator Pro automatically sends your backups to cloud services like DigitalOcean Spaces, Google Cloud, Amazon S3, and more. Try it out today!
While you’re here, I think you’ll like these extra WordPress guides:
Joella is a writer with years of experience in WordPress. At Duplicator, she specializes in site maintenance — from basic backups to large-scale migrations. Her ultimate goal is to make sure your WordPress website is safe and ready for growth.


