Here’s the reality: millions of WordPress websites are hacked every year.
Yet most site owners I meet still rely solely on their hosting provider’s backup system. It’s like keeping all your savings under one mattress – risky and unnecessary.
That’s why I started using Dropbox as my backup solution. Not because it’s fancy or expensive (it’s actually free for up to 2GB), but because it gives me something invaluable: control.
When your site goes down at 3 AM, you don’t want to wait for hosting support to restore your backup. You want immediate access to a recent, working copy of your site.
Let me show you exactly how I protect WordPress sites using Dropbox, and why this approach might be the safety net your website needs!
Table of Contents
Quck Summary: How to Back Up WordPress to Dropbox
1. Install a backup plugin that supports Dropbox.
You could manually upload backups to Dropbox, but this takes extra time and effort. A backup plugin like
Duplicator Pro can create backups and automatically send them to the cloud for you.
2. Connect the backup plugin to Dropbox.
Once you install Duplicator, create a new storage location. You’ll need to authorize Duplicator to make changes to your Dropbox account. This lets it create cloud backups.
3. Create a backup.
Next, add a new backup. Select Dropbox as the storage location. Duplicator will copy all of the data on your site and send it to Dropbox.
4. Set up automatic backups to Dropbox.
I’d recommend automating backups so you never have to worry about them. To do this, set up a new schedule with Duplicator. Select a cloud storage location and customize when the backup runs.
Why You Should Back Up Your WordPress Site to Dropbox
You can save your website backups on your server, but this might not be the best option. Your server might get hacked or become corrupted. In this case, you could lose your backups.
If you want your backups to be secure, consider using cloud storage. When you save a backup to a third-party storage location, you’ll know you can always access a functional copy of your site.
Plus, storing your backups off-site can reduce strain on your server. Cloud backups won’t require resources from your web hosting provider.
There are many different cloud storage solutions, so you might not know where to start. However, Dropbox is a popular option. This tool provides a central hub for storing, organizing, and recovering your site backups.
Here are some key benefits of backing up your WordPress site to Dropbox:
- Free up to 2GB
- File synchronization across different devices
- Opportunities for team collaboration
- Edit permissions and sharing options
- File encryption
- Stores deleted files and folders for 30 days
- Various plans to scale your storage space
Dropbox might be right for you if you want free cloud storage. You can sign up for a free account and access up to 2GB of storage space.
If you need more, there are many different pricing plans available starting at $9.99 per month. The paid plans cover 2TB+ of storage, which you might need for larger backup files.
To see other options, check out our roundup of the best cloud storage services for WordPress backups!
How to Back Up a WordPress Site to Dropbox
Dropbox can be an effective backup solution for your website. Let’s discuss the step-by-step process of linking WordPress to Dropbox!
Step 1: Install a Dropbox Backup Plugin
Although you could manually create a backup and upload it to Dropbox, this can waste valuable time.
To make this process easier, consider installing a WordPress backup plugin. Duplicator Pro is my favorite option because it connects to 11 cloud storage services, including Dropbox.
With Duplicator, you can create backups and automatically push them to cloud storage. Here are all of the remote storage options you could use:
Conceptstore Creative, a digital studio, uses Duplicator to protect its clients’ backups in the cloud. If it’s a good agency tool, you know it’s safe enough for your personal website!
To get started, choose a subscription for Duplicator Pro. Although there is a free version, the premium plans include cloud storage integrations.
Once you purchase Duplicator, download the plugin. You’ll also need to copy your unique license key.
Then, open your WordPress dashboard and install and activate Duplicator.
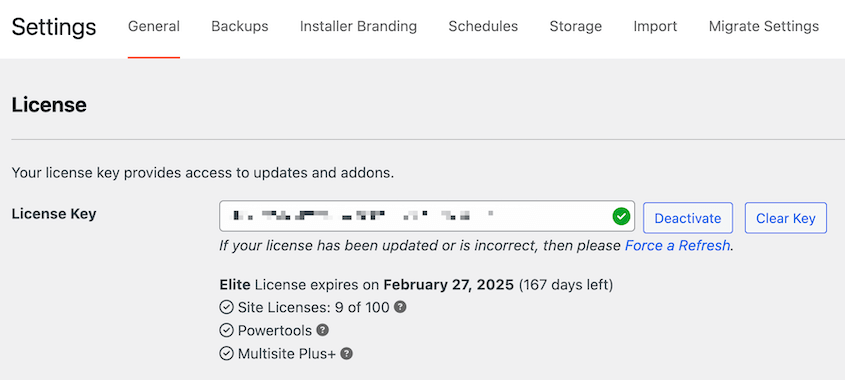
Lastly, go to the Duplicator Settings page. Then, find General. Here, paste the license key that you received with the plugin and click on Activate.
Now you’ve set up Duplicator! You can continue to the next step to link Dropbox to your website.
Step 2: Connect Your Dropbox Account
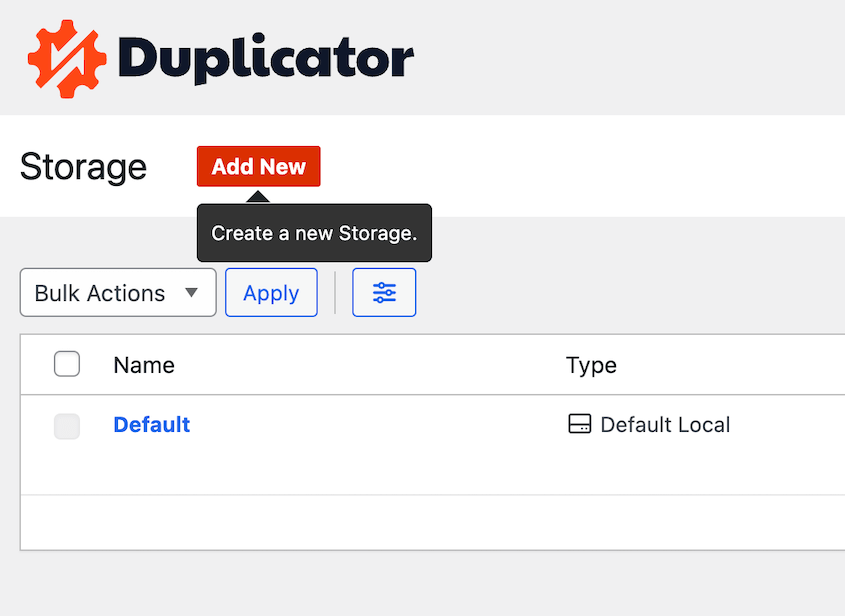
By default, Duplicator will save your backups to your local server. If you want to start using cloud storage options like Dropbox, you’ll need to connect your third-party account.
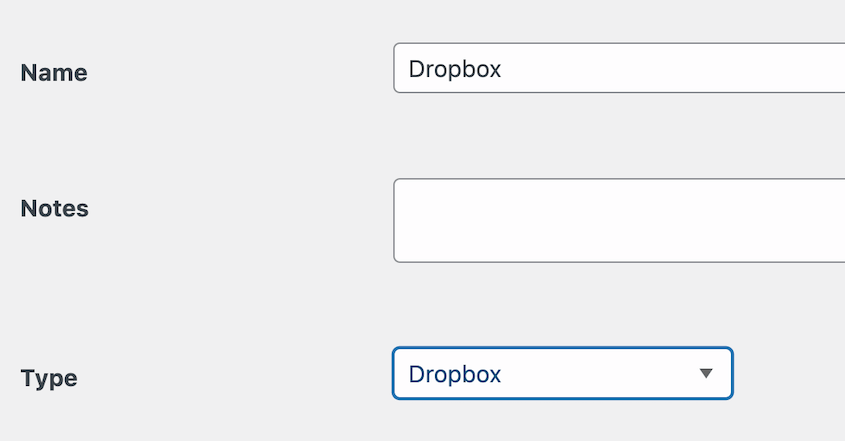
First, find Duplicator Pro » Storage. Here, you’ll see the local storage option. To add Dropbox, click on Add New.
At the top of the page, name the storage location so that it’s easy to find later. You can also add any notes if you want to. Under Type, select Dropbox.
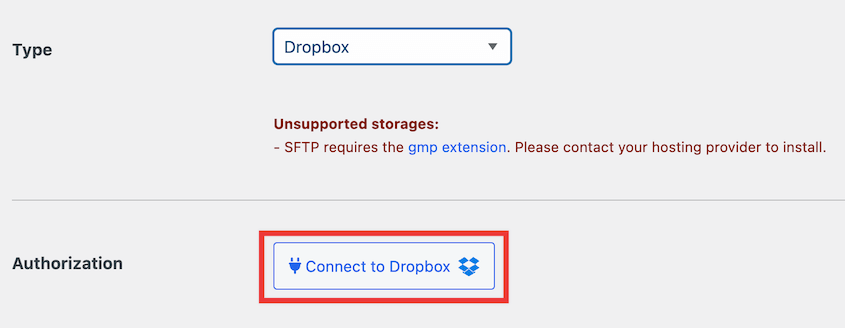
Then, hit Connect to Dropbox.
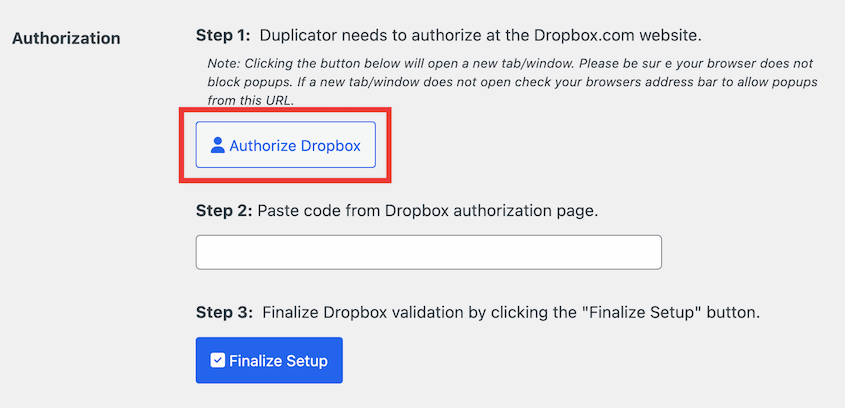
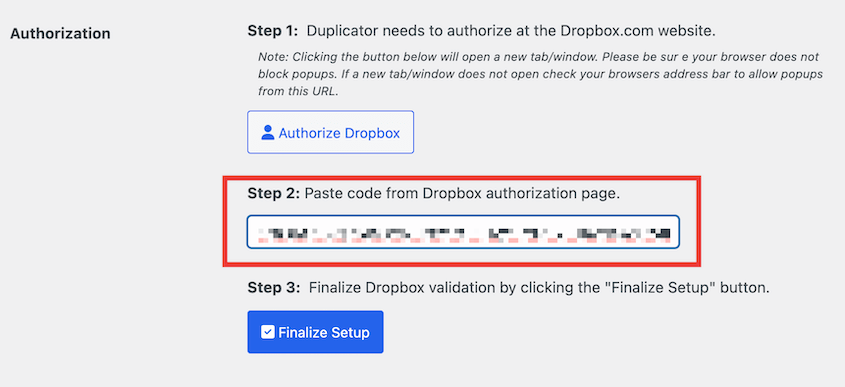
Now you’ll see new steps for connecting your Dropbox account. Click on Authorize Dropbox to open Dropbox in a new tab.
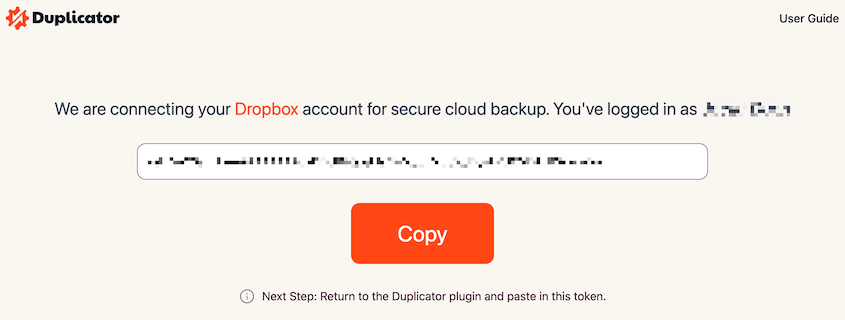
If you’re not already, sign in to your Dropbox account. You can also create a new one.
After you’re logged into your account, Dropbox will then give you an authentication code. Copy this and go back to your WordPress admin dashboard.
For Step 2 of the Authorization section, paste the authorization code. Then, click on Finalize Setup.
This will add Dropbox as a new storage location for your backups!
Step 3: Create a Dropbox Backup
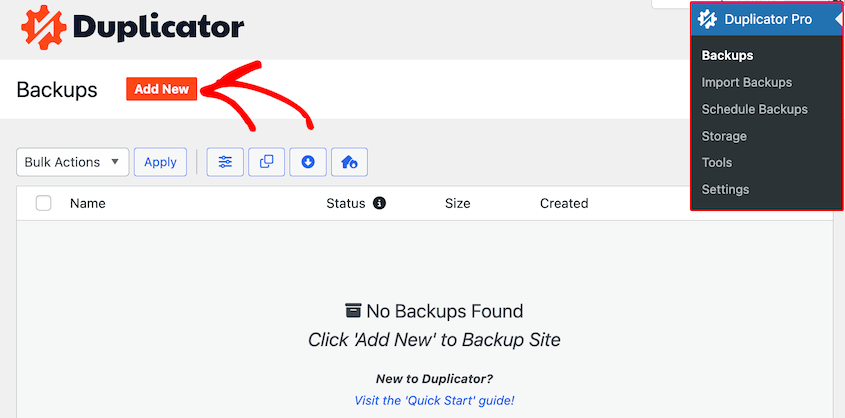
After you configure Dropbox as a storage location, you can create a cloud backup of your website. To do this, navigate to Duplicator Pro » Backups » Add New.
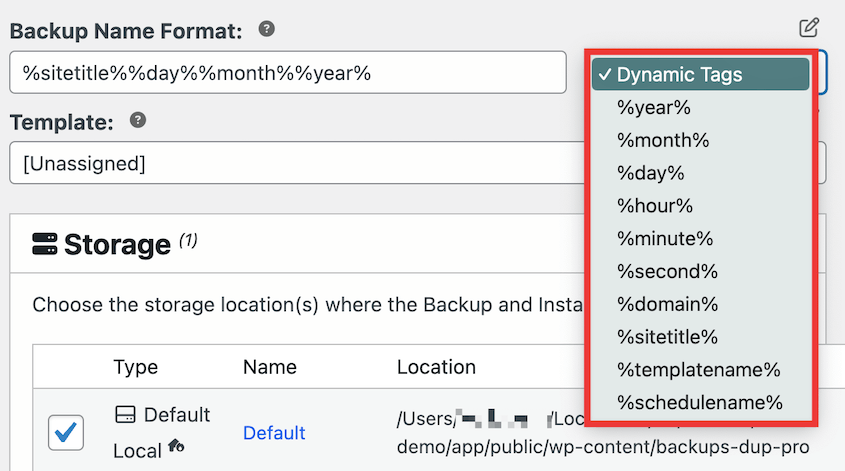
Your backups are only good if you can find them. So, feel free to add your favorite dynamic tags to name the backup.
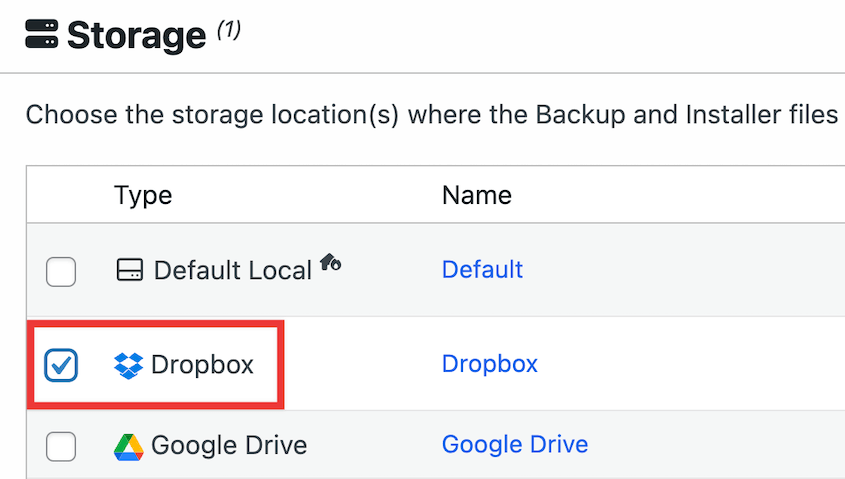
Then, open the Storage section. You’ll see all of the cloud storage options that you’ve activated for your website. To back up your backup to Dropbox, select it.
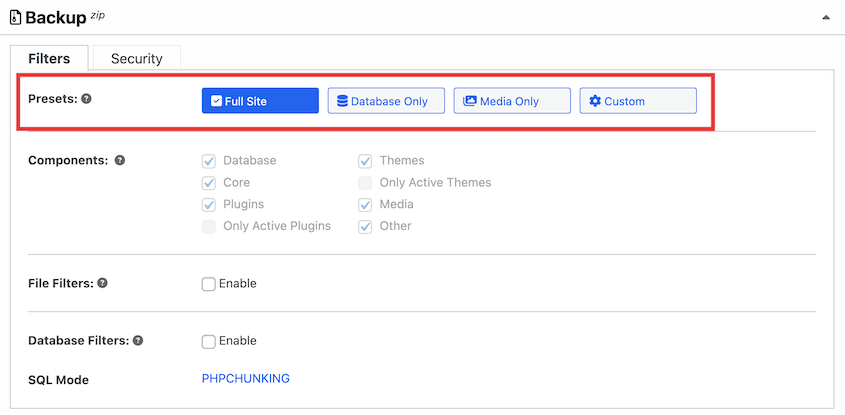
A full backup will include your WordPress files, plugins, themes, database, and media library. If you want to only save certain data, you can create a custom backup.
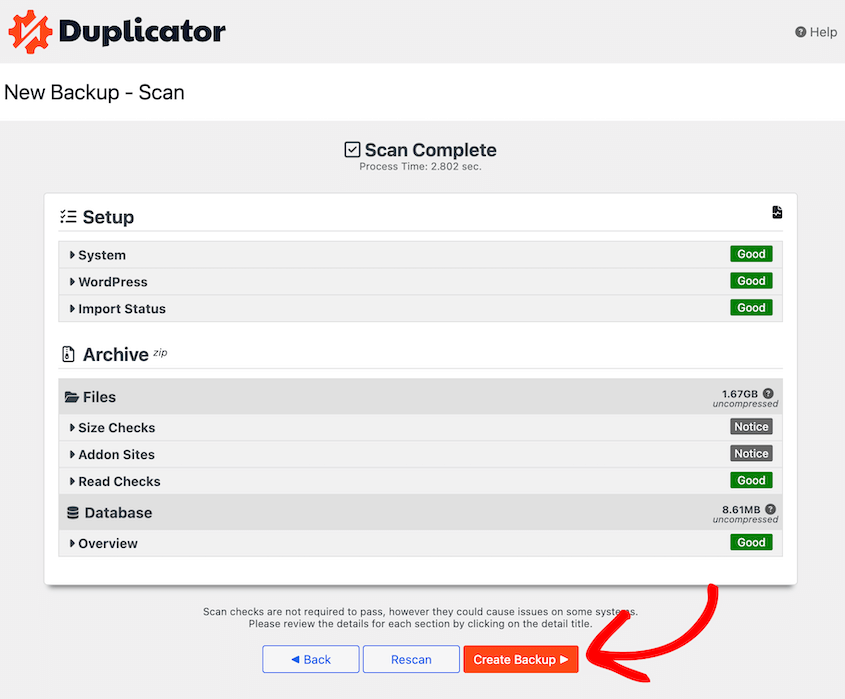
To create a complete backup of your site, however, don’t make any changes. After you click Next, Duplicator will scan your website. You’ll receive notices if there are any issues.
Hit Create Backup. Your backup will be built on the local server first and automatically transferred to Dropbox.
Step 4: Set Up Automatic Backups
To protect your website from any vulnerabilities, I’d recommend backing it up on a regular basis.
Although you could always do manual backups, you might want to dedicate more time to creating blog posts or selling products.
If you want an easier way to back up your site, consider setting up automatic backups. You can simply choose a schedule that meets your needs and your WordPress website will be backed up for you.
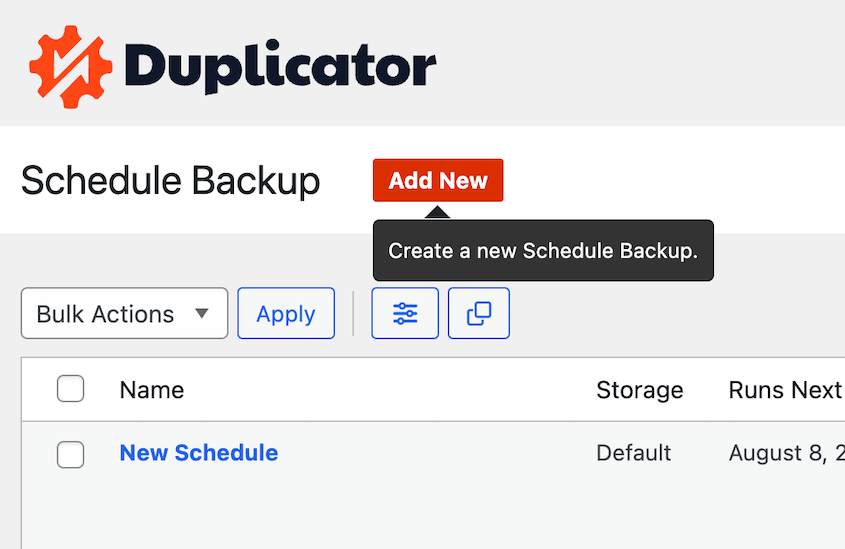
Fortunately, Duplicator Pro supports automatic backups. To set up a schedule, head over to Duplicator Pro » Schedule Backups » Add New.
Start by naming your backup schedule. If you want to perform full backups, choose the Default backup template.
Keep in mind that you can create a new template if you want to make changes to the backup files. This can allow you to schedule database backups or other custom backups.
Then, go to the Storage section. Here, select Dropbox.
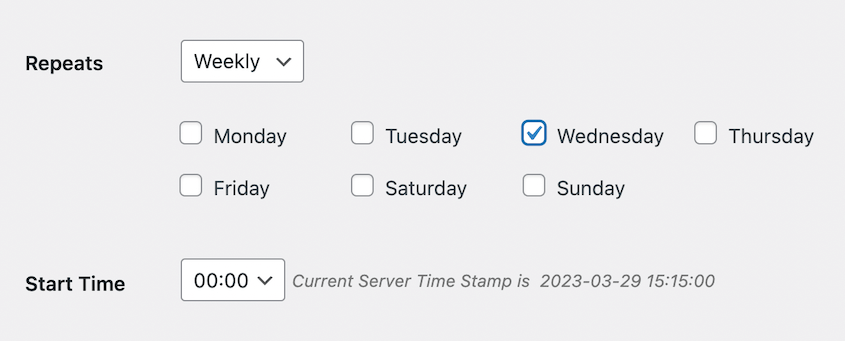
Duplicator supports monthly, weekly, hourly, and daily backups. Once you select one of these options, you can customize exactly when the backup runs.
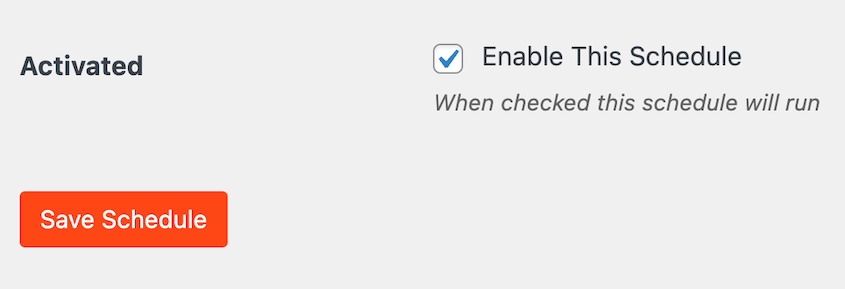
At the bottom of the page, check the box next to Enable This Schedule.
After you save this new schedule, Duplicator will automatically back up your site at the scheduled time. Plus, these backups will be saved to Dropbox.
How to Restore Your Dropbox Backup
Once you send regular backups to Dropbox, you’ll always have a functional copy of your site on hand.
If there are critical errors, data loss, server downtime, or cyber attacks, you can easily restore the most recent backup. This will immediately get your website back to normal.
To restore your backup, open Duplicator’s Backups page. Then, find the most recent Dropbox backup from before the error happened.
Next to it, hit the Restore button.
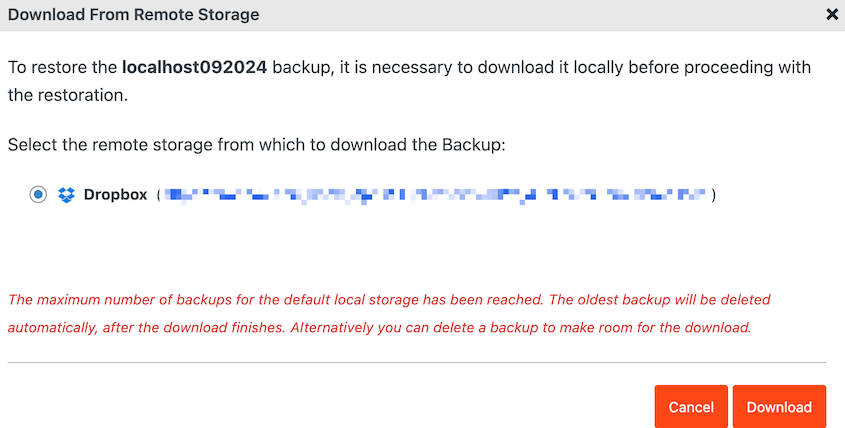
In the pop-up window, click on Download.
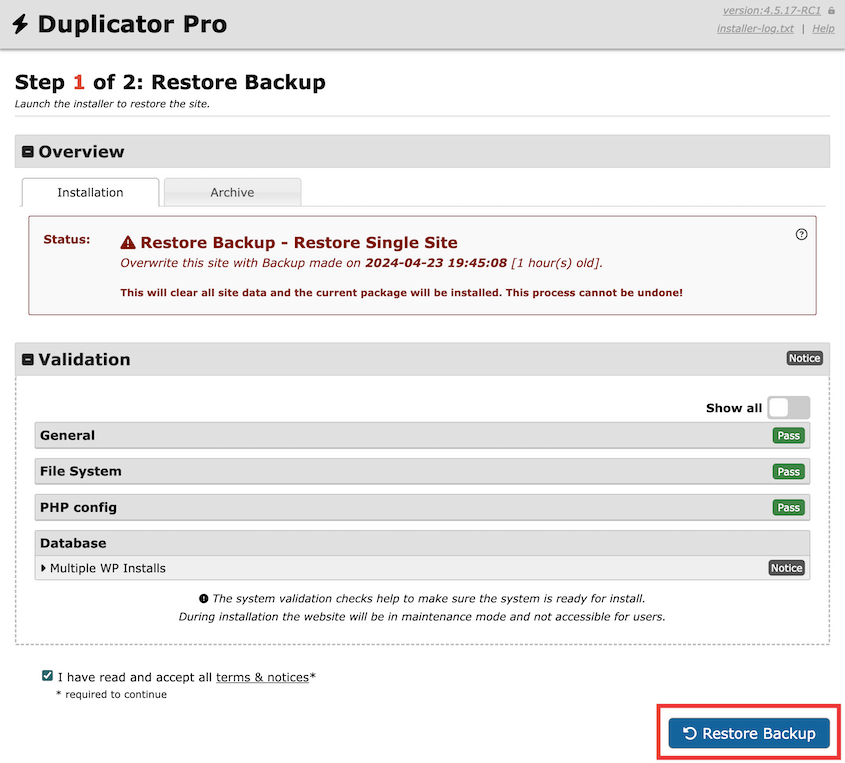
Duplicator will download the backup from remote storage. After this, it’ll automatically pull up the restoration wizard.
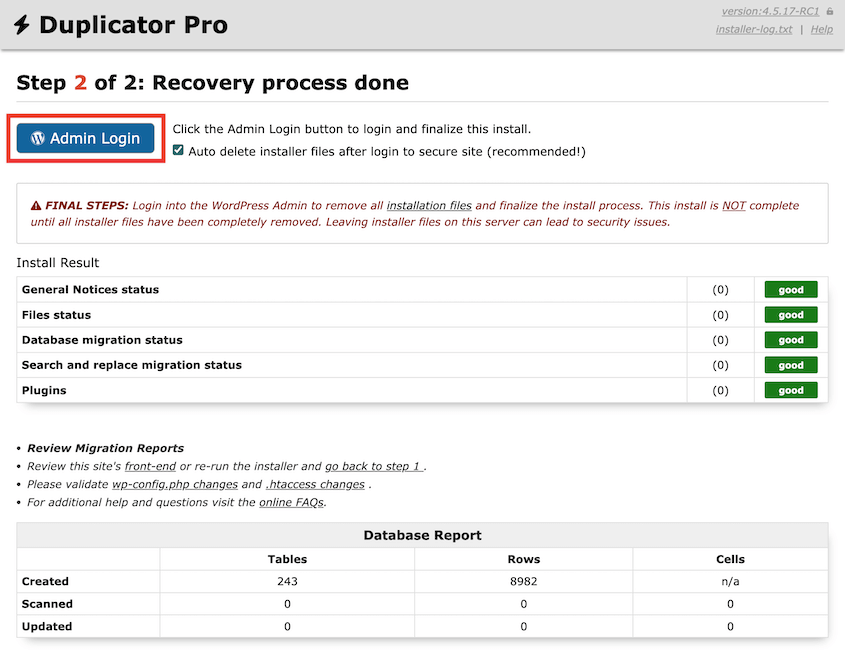
Once you select Restore Backup, your website will roll back to the old version. To access the new site, you’ll have to log back in.
Frequently Asked Questions (FAQs)
Can you use Dropbox as a backup?
Yes, you can use Dropbox to back up your website. Simply install a backup plugin like Duplicator Pro. Then, create a new backup and choose Dropbox as your preferred storage location.
What is the best WordPress plugin to upload files to Dropbox?
Duplicator Pro is the best WordPress plugin for uploading files to Dropbox. Once you back up your WordPress site, Duplicator will push your backup files to a Dropbox folder. Using this tool, you’ll backup/restore your website whenever you need to.
Alternatives: UpdraftPlus, BackWPup, BlogVault, and BackupBuddy also support Dropbox backups. To help you decide between these tools, check out our comparison of the best WordPress backup plugins.
How do I upload a website to Dropbox?
To upload a website to Dropbox, start by installing Duplicator Pro in your WordPress dashboard. Next, add your Dropbox account as a new storage location. Finally, create a backup and select Dropbox under Storage.
How do I back up my whole WordPress site?
You can back up your whole WordPress site with Duplicator Pro. Make sure the new backup includes everything in your website, including the database, core WordPress files, plugins, themes, and media library.
How do I integrate Dropbox with WordPress?
There are tons of plugins that can help you integrate Dropbox and WordPress. To send your site backups to the cloud, consider using Duplicator. With WPForms, you can create Dropbox upload forms. For WooCommerce stores, the WooCommerce PDF Invoices plugin will add new packing slips to your Dropbox account.
Conclusion
By following these steps, you’ll successfully save your WordPress backup to Dropbox!
While you’re here, you may like these extra WordPress guides:
Looking for the best WordPress Dropbox plugin? Try out Duplicator Pro to use cloud storage services like Dropbox, Google Drive, and more!
Joella is a writer with years of experience in WordPress. At Duplicator, she specializes in site maintenance — from basic backups to large-scale migrations. Her ultimate goal is to make sure your WordPress website is safe and ready for growth.


