Managing multiple sites under one WordPress installation is fantastic, but the complexity of backing it all up? That’s a whole different ball game.
I spent countless hours wrestling with multisite backup strategies, and let’s just say, there were a few close calls before I finally figured things out.
If you’re reading this, you’re likely in the same boat, or at least smart enough to be thinking ahead! You’ve got this amazing multisite network, and you know you need to protect it, but where do you even start?
Well, you’re in the right place. I’ll share what I learned (often the hard way!) about effectively backing up WordPress multisite, so you can sleep soundly knowing your network is safe and sound.
Table of Contents
Why You Should Back Up Your WordPress Multisite
If you manage multiple WordPress websites, you might want to consider setting up a Multisite network. Essentially, this will allow you to control different WordPress installations from a single dashboard.
In a Multisite, there will be one main site with many subsites in its network. These will be either subdomains or subdirectories.
Like with any website, it’s important to back up a Multisite network. Since all of your sites are connected, a cyber attack will affect every subsite. To boost your security, create frequent backups.
A backup is a saved copy of your WordPress database and files. Having a backup will ensure that you can restore your network after any devastating errors, hacks, data loss, or other problems.
Potential Challenges When Backing Up WordPress Multisite
Usually, the easiest way to back up a WordPress site is to install a backup plugin. Unfortunately, many WordPress backup plugins aren’t built to handle Multisite networks.
Rather than just backing up a single site, it’ll have to save data from multiple subsites. You can add as many subsites as you want, so this means there may be hundreds or even thousands of websites to back up.
It can be challenging to back up a Multisite, but it’s not impossible. By finding the right plugin, you can easily create backups for your entire network. This will ensure that every subsite’s data is secure.
How to Back Up WordPress Multisite
For a Multisite backup, you don’t have to manually download each subsite’s database and core files. Let’s walk you through an easier way to back up your network!
Step 1: Install a Multisite Backup Plugin
Not every plugin is compatible with Multisite network setups. Fortunately, Duplicator is a powerful backup solution that is perfect for this task.
With Duplicator, you’ll be able to migrate, clone, and back up a WordPress Multisite.
To get started, you’ll need to choose a subscription for Duplicator Pro. Although there is a free version of the plugin, Duplicator Pro adds support for Multisite.
Not sure if Duplicator is the best multisite backup tool? See how CodeVidia automatically backs up their clients’ sub-sites with Duplicator!
After your purchase, be sure to copy your license key. Then, open your network administrator dashboard. Here, go to Plugins » Add New and upload Duplicator.
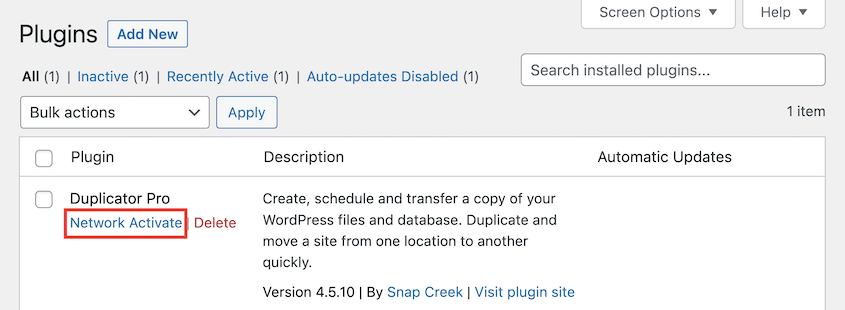
Now head over to the Installed Plugins page. Underneath Duplicator Pro, hit Network Activate.
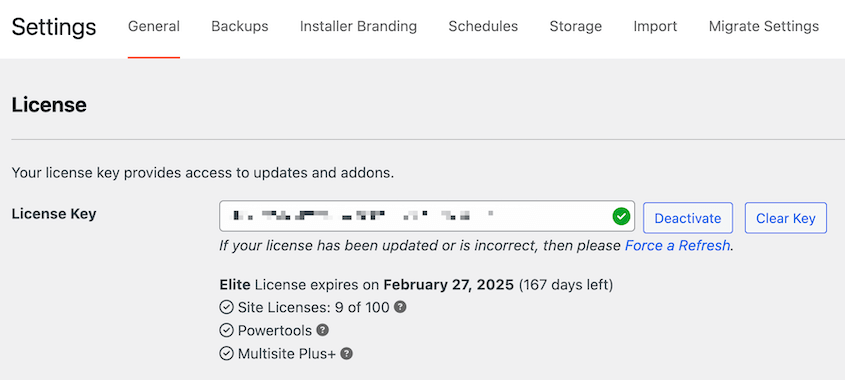
Lastly, visit Duplicator Pro » Settings » General. Be sure to paste the license key that you copied earlier.
After this, Duplicator Pro will be fully set up!
Step 2: Create a Multisite Backup
For the next step, you’ll save all of your network’s data into a single zip file. This can easily be saved as a backup or migrated to a different location.
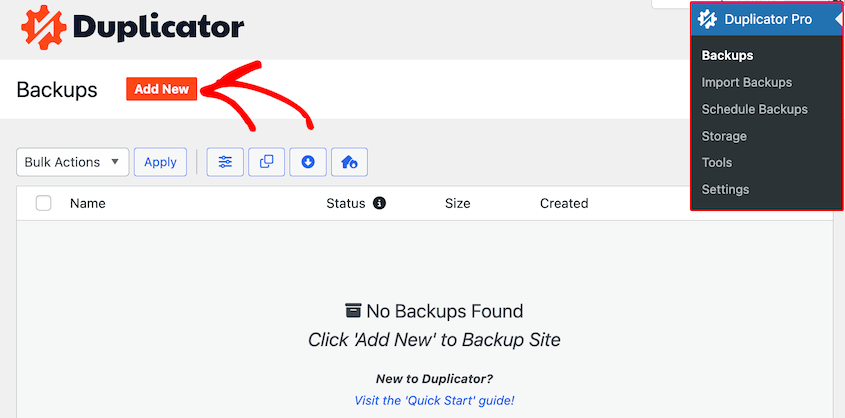
To create a backup, navigate to Duplicator Pro » Backups » Add New.
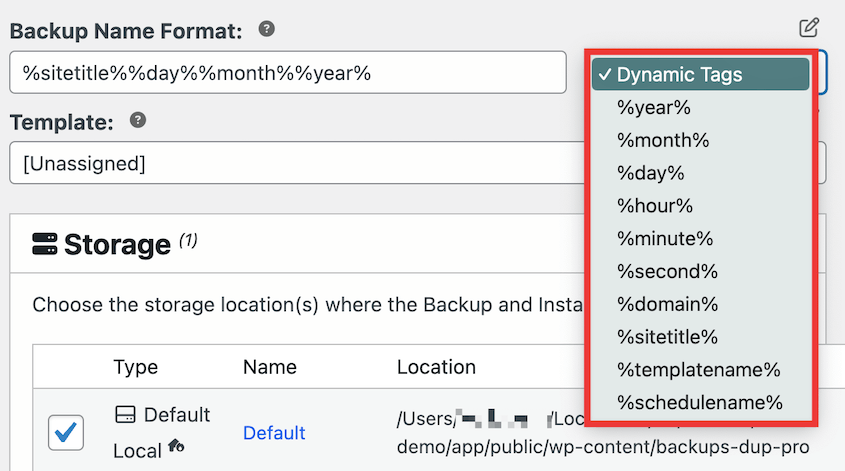
At the top of the page, name the backup. You can use dynamic tags like your domain, site title, the current month, year, and more.
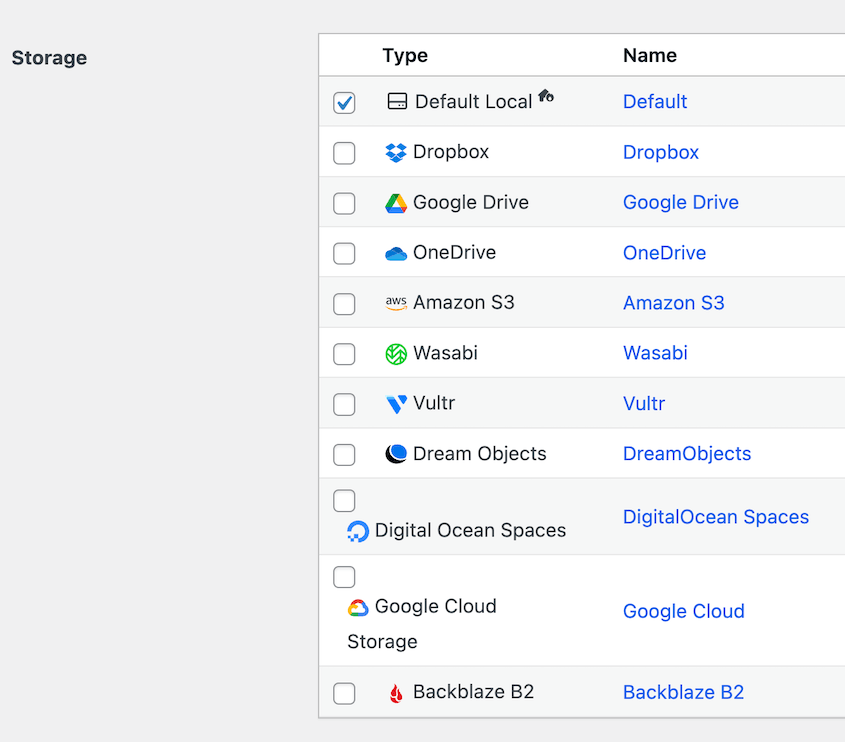
By default, Duplicator will save backups on your local server. However, you can use any of the following storage locations.
By saving your backups off-site in the cloud, you won’t put as much strain on your hosting plan. However, make sure the cloud service can handle the large amount of data from your multisite backups.
One part of the backup is the archive file. This contains all of the files and database tables for your WordPress network.
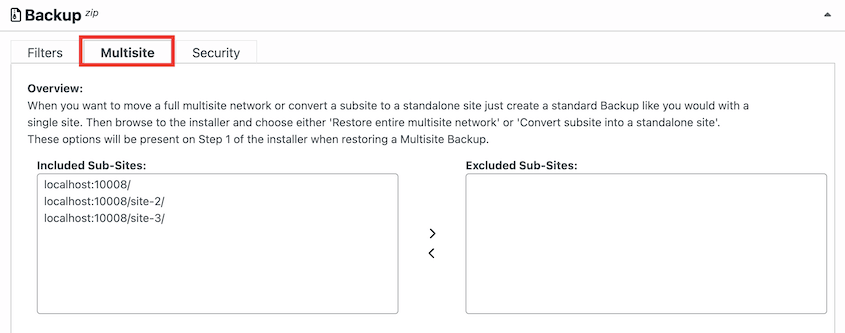
If you want to exclude an individual site from the backup, click on the Multisite tab.
To remove a subsite’s data from the build, move it into the Excluded Sub-Sites box. Don’t make any changes if you want to completely back up your entire Multisite network.
If you have a budget host or a larger Multisite installation, your server may time out before it can fully back up your network.
Duplicator avoids this problem with a custom archive format called DupArchive. To switch your ZIP archive file into a DupArchive, read our guide on backing up a large WordPress site.
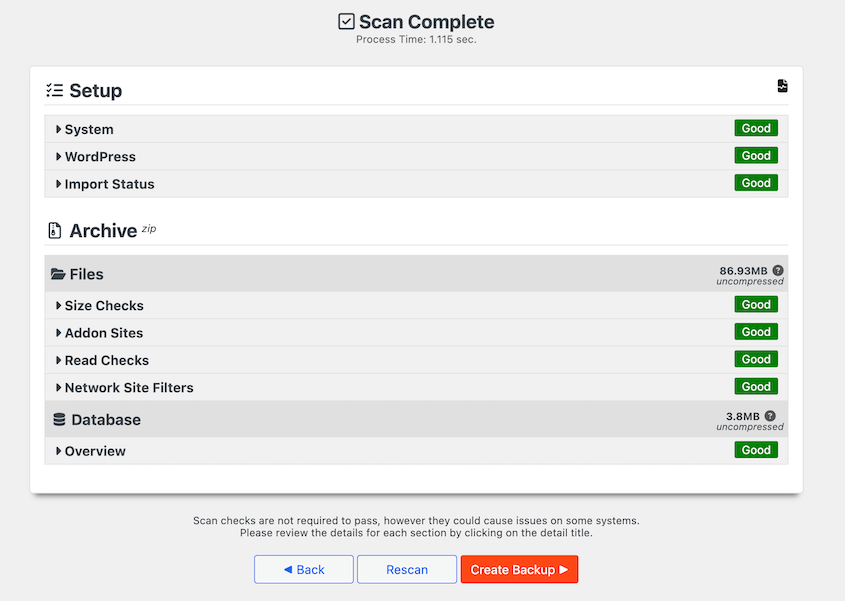
After you hit Next, Duplicator will scan your Multisite network. Review any notices before building your backup.
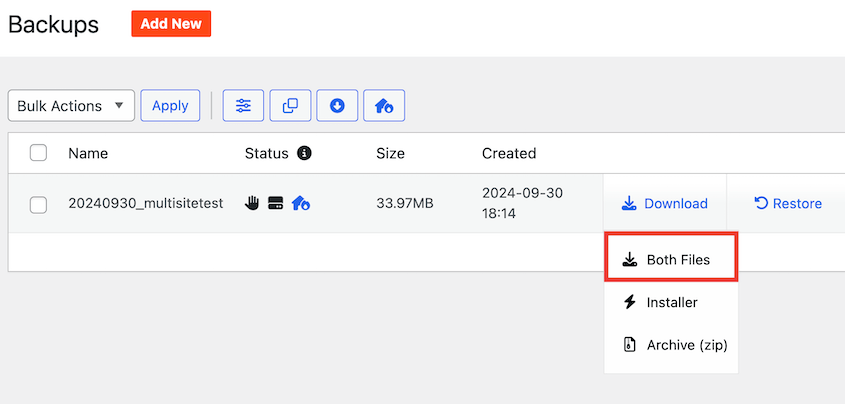
To save your backup, go to the Backups page and hit Download » Both Files.
This will save both the archive and installer files to your computer. If you can’t access your dashboard, you can upload these manually to cPanel or a File Transfer Protocol (FTP) client.
Step 3: Set a Disaster Recovery Point
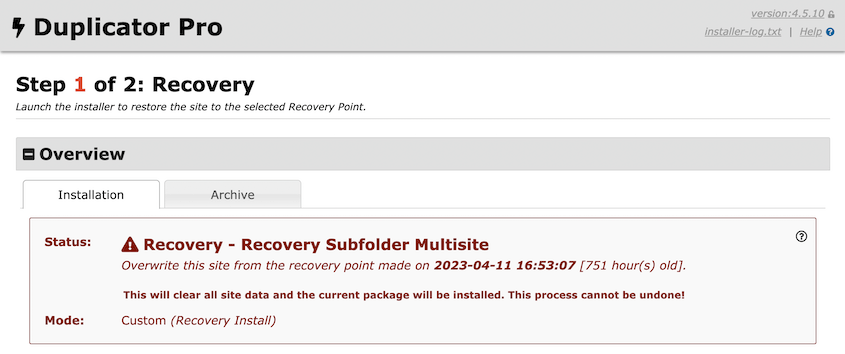
One easy way to restore a saved backup is to set up disaster recovery. This will tell Duplicator that you want to restore your website to a certain point.
Unlike other WordPress backup plugins, Duplicator Pro gives you a recovery URL. You can use this even if your website is down, ensuring you can get your site up and running after an unexpected error.
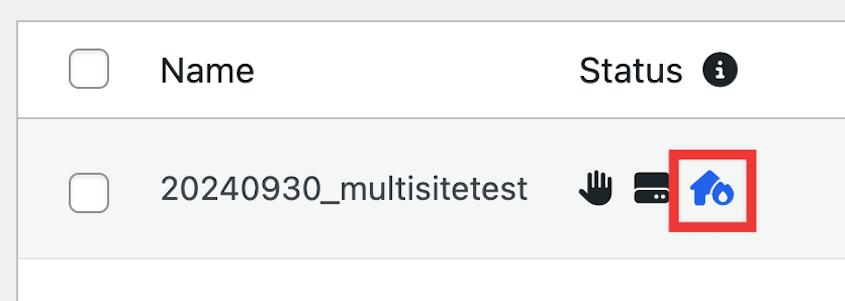
To set disaster recovery, you’ll need a complete backup that’s stored locally. If it is, you can click on the disaster recovery icon.
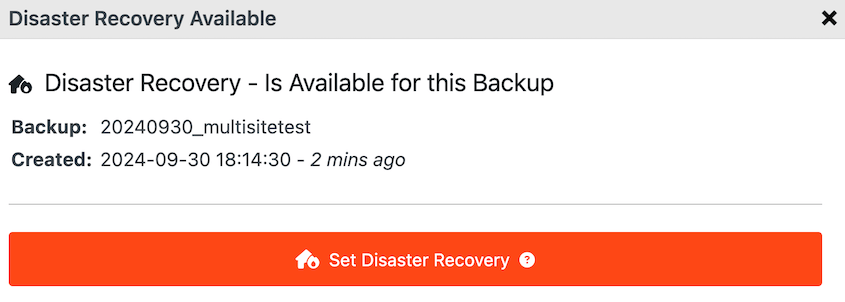
Then, continue setting disaster recovery.
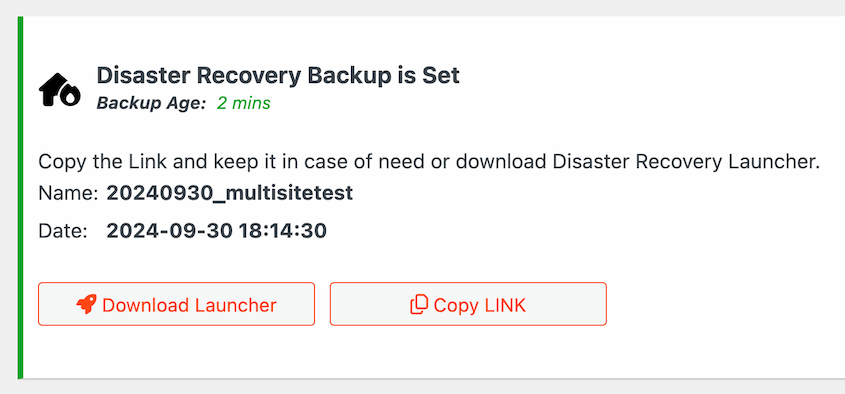
After this, either copy the recovery link or download the launcher. Whenever something goes wrong on your WordPress website, paste the link into a browser window. Alternatively, open the launcher file.
To restore your Multisite, simply follow the step-by-step recovery wizard. This allows you to access an error-free version of your network again!
Step 4: Set Up Automatic Backups
We’d recommend backing up your network regularly to prevent any unexpected errors or hacks.
Although you could create manual backups every time you need one, this can waste your time as a network admin. Often, a better solution is setting up an automatic backup schedule.
Having automated backups gives you a hands-off security solution for your network. You can sit back and allow a backup plugin like Duplicator to handle your backups on a pre-set schedule.
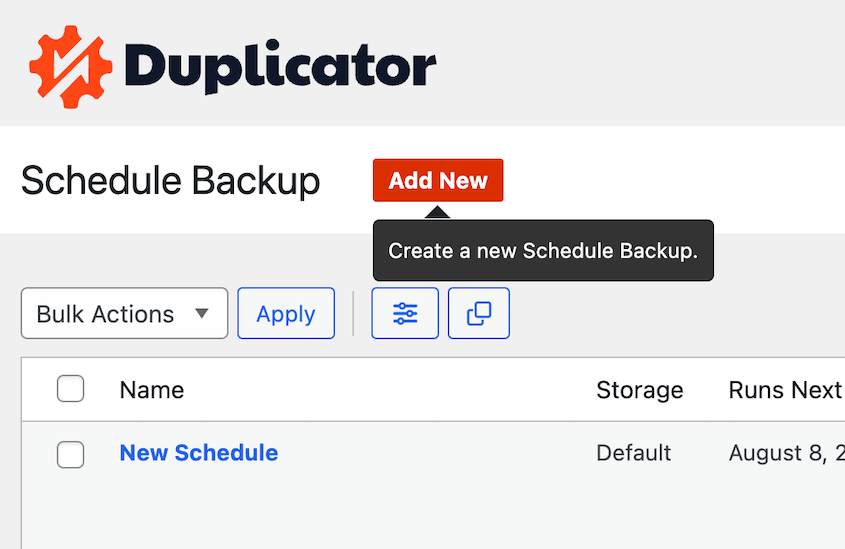
To automate your backups, find Duplicator Pro » Schedule Backups » Add New.
Name your new backup schedule. Next, feel free to select a Backup Template or create a new one. This simply customizes what data is saved in the backup.
Now you can choose where your backups will be stored. Next to Storage, you’ll see all of the storage locations you’ve already enabled.
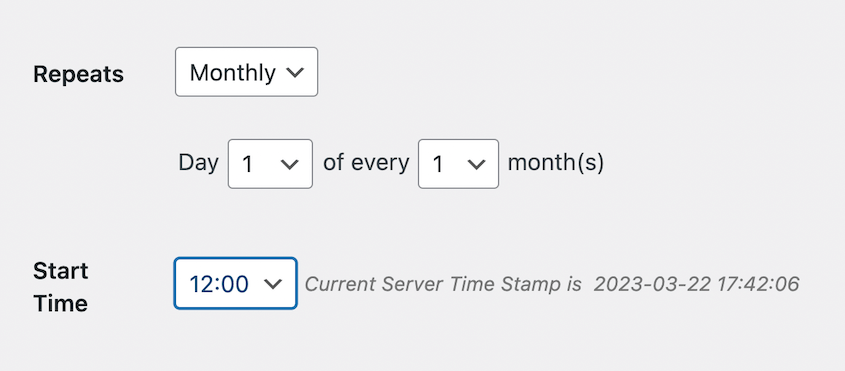
Once you select a storage location, you can set a time for your schedule. First, choose between hourly, daily, weekly, or monthly automatic backups.
Lastly, select a custom Start Time. This will start the backup process whenever you’d like.
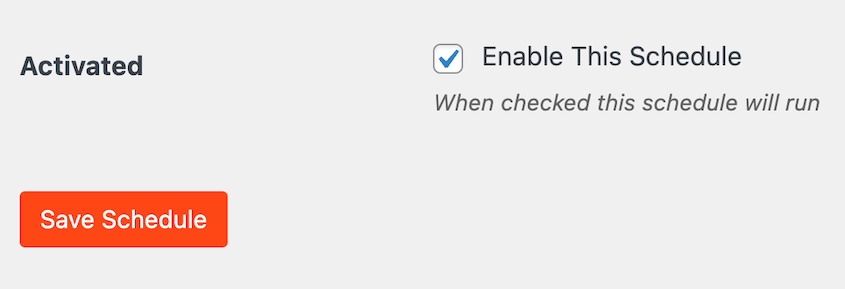
At the bottom of the page, check the box next to Enable this schedule. Then, save it.
Now Duplicator will automatically create new backups on its own! You won’t have to worry about losing any data from your network.
Other Ways to Back Up a WordPress Multisite
A backup plugin like Duplicator offers the most convenient way to back up your multisite. However, you have a few other options.
Most web hosting providers automatically back up WordPress sites. Check with your web host to see if they provide this service.
Keep in mind that web host backups are stored on your server. This can limit your storage space and even slow down your network. Plus, you might lose backups after any downtime or server errors.
For those who prefer a hands-on approach, you can manually back up your multisite. You’ll need to download your entire WordPress directory via FTP or a file manager. To back up your database, export it using phpMyAdmin.
No matter which method you choose, remember to create backups regularly. This secures your network and gives you peace of mind!
Frequently Asked Questions (FAQs)
What is the best way to back up WordPress Multisite?
The best way to back up WordPress Multisite is to install a backup plugin like Duplicator Pro. This tool allows you to create full backups of your network. You can even migrate subsites out of your network as standalone new sites.
Alternative: UpdraftPlus is another plugin that can back up or migrate WordPress Multisites. However, you’ll only be able to back up one subsite at a time. Plus, you can’t restore your network all at once.
How do I move a single site to a Multisite network?
You can move a single WordPress site into a Multisite network by creating a Duplicator backup on the original site and downloading the generated archive file. Then, open your Multisite network and go to the Import page. Drag and drop the single site’s archive file into the import box and follow the step-by-step wizard to complete the installation.
For more details, check out our guide on how to migrate WordPress multisite!
How do I back up my WordPress site manually?
You can back up your WordPress site manually by downloading your root directory with an FTP client or cPanel. Using phpMyAdmin, export your database. Save both of these files in a safe location so that they can be reuploaded to your server in the case of an emergency.
How do I export a multisite in WordPress?
To export a WordPress multisite, start by installing Duplicator Pro. Then, create a backup and include all of your sub-sites.
Finish building the backup and download it. This will fully export your multisite as a zipped archive file. If you need to migrate your multisite, simply upload this file and the installer to a new server.
How often should I back up my multisite?
Back up your multisite daily to protect against data loss, plugin conflicts, and server failures. For high-traffic networks or ecommerce multisites, consider performing backups every 12 hours. Always store backups both locally and on remote cloud storage to ensure recovery options remain available in case of server issues.
Conclusion
I hope this article helped you understand how to back up your WordPress multisite! Remember, regular backups are essential to protect your data and maintain the seamless functioning of your sites.
While you’re here, I think you’ll like these extra WordPress tips and tricks:
Are you looking for a backup plugin that can handle Multisite networks? Download Duplicator Pro to easily create manual and scheduled network backups!
Joella is a writer with years of experience in WordPress. At Duplicator, she specializes in site maintenance — from basic backups to large-scale migrations. Her ultimate goal is to make sure your WordPress website is safe and ready for growth.


