After years of managing dozens of WordPress sites, I’ve learned that local backups aren’t enough. Your hosting company’s automatic backups aren’t enough either.
Amazon S3 has become my safety net. It’s where tech giants store their data, but it’s accessible enough for small website owners too.
The best part? You can automate everything and forget about it until you need it.
In this guide, I’ll show you exactly how to set up Amazon S3 backups for your WordPress site. No technical background required – just follow along step by step.
Table of Contents
Quick Summary: How to Back Up WordPress to Amazon S3
Don’t worry, we’ll walk you through the full process of Amazon S3 backups. But for now, here’s a quick glance of how it works!
1. Install a backup plugin that supports Amazon S3.
You won’t want to waste time manually downloading a backup and importing it into the cloud. A backup plugin like
Duplicator will create backups and automatically upload them to Amazon S3.
2. Set up your Amazon S3 account.
It’s time to open a new AWS account and add a new bucket in Amazon S3. You’ll also need to create a security policy, IAM user, and access keys.
3. Connect Amazon S3 to your backup plugin.
Now, open your WordPress dashboard and add a new storage location in Duplicator. Connect your Amazon S3 account by pasting your access keys.
4. Create an Amazon S3 backup.
At this point, create a new backup. Choose Amazon S3 as the storage location. Once the backup is built, Duplicator will send it to your cloud bucket.
5. Create an automatic backup schedule.
Backups can be much easier if you never have to worry about them. With Duplicator, you can automate your cloud backups. You’ll need to build a schedule, customize when it runs, and pick Amazon S3 as the destination.
Why You Should Back Up Your WordPress Site to Amazon S3
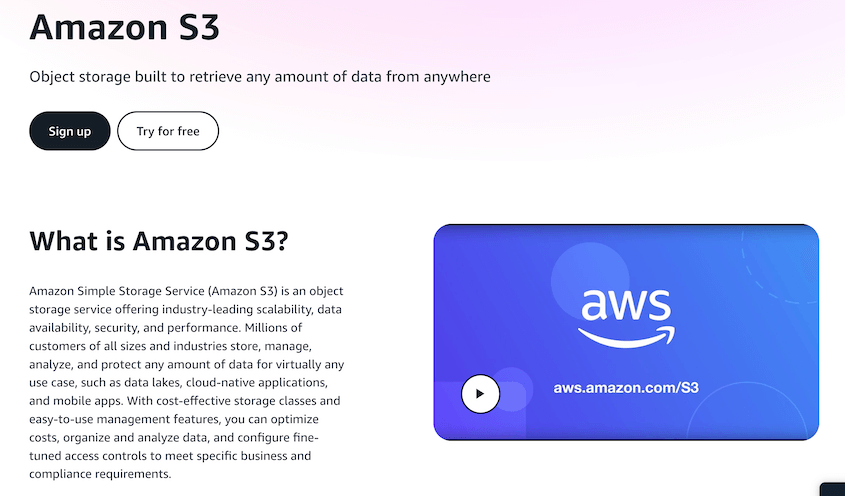
Amazon S3 is an object storage service that is hosted by Amazon. It allows you to store and organize data for mobile apps, cloud-native applications, and even website backups.
As a website owner, it’s a good idea to send your WordPress backups to the cloud. This can prevent any data loss if your server crashes. Since backups will be stored off-site, they also won’t overload your web hosting plan.
However, there are many cloud-based storage providers available. Unlike options like Google Drive or Dropbox, Amazon S3 can evolve with your business’s data operations.
Amazon S3 works by storing data in files called objects. These objects are organized into buckets.
You can have an unlimited number of objects in a bucket and up to 100 buckets, making Amazon S3 a flexible remote storage service for your site backups. It’s especially useful for large sites that need more storage space.
Here are some more features you can expect from Amazon S3:
- 99.99999999999% data durability (11 nines)
- Storage for any type of data backup
- Security measures like data encryption and access control
- Scalable resources
- Diverse tools available in the Amazon Web Services (AWS) platform
- Unlimited server capacity
To use Amazon S3, you can start with the free tier, which comes with 5GB of storage. Amazon S3 also offers pay-as-you-go pricing that allows you to only access the services that you need.
How to Save Your WordPress Backup to Amazon S3
It might seem complicated to connect your WordPress site to Amazon S3 and start creating cloud backups. However, it’s easy with the right steps.
Let’s show you how to quickly save WordPress backups to Amazon S3!
Step 1: Install Duplicator
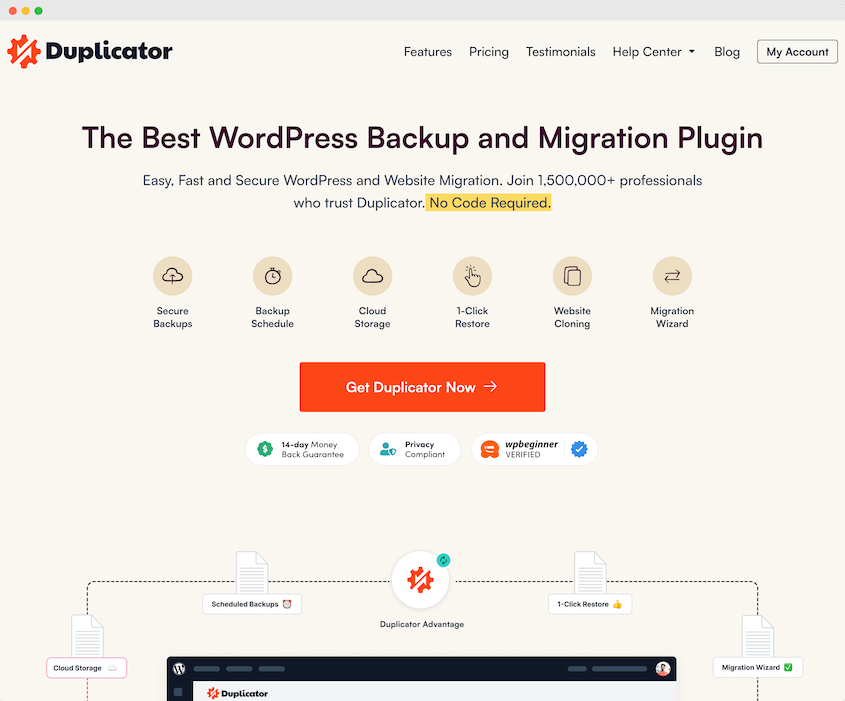
You could create a backup in WordPress and manually upload it to Amazon S3. However, to save time, consider installing Duplicator Pro. This is a powerful WordPress backup plugin that can instantly save backups to cloud services like Amazon S3.
First, be sure to select a subscription for Duplicator Pro. Although you could start using the free version, you’ll need to upgrade to connect to these external cloud storage locations:
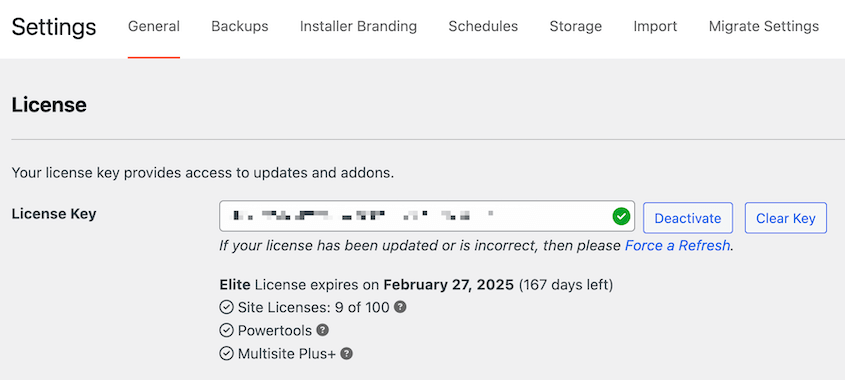
After this, download the plugin and copy your license key. Open the dashboard for your WordPress website and install Duplicator.
As a final step, you’ll need to activate your license. Navigate to Duplicator Pro » Settings » General and paste your license key.
Once you finish setting up Duplicator, go to the next step!
Step 2: Create an Amazon S3 Bucket
If you haven’t already set up an account for Amazon S3, visit the AWS website. Click on Create an AWS Account and follow the onboarding instructions.
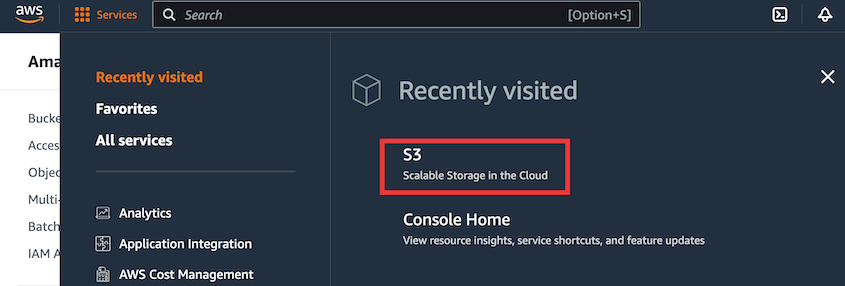
After this, you’ll be able to sign in to your AWS dashboard. Here, click on Services and find S3.
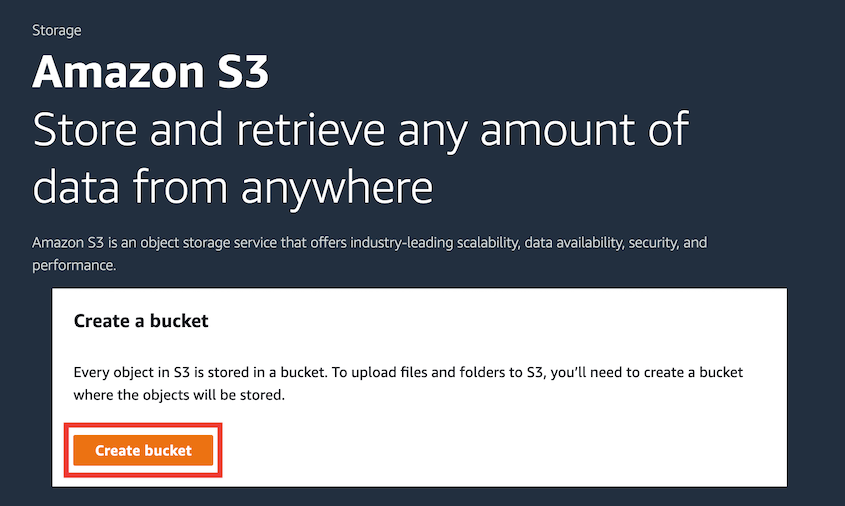
To get started with Amazon S3, you’ll need to create a bucket. Put simply, this is a storage area that can group different pieces of data together. To build one, select Create bucket.
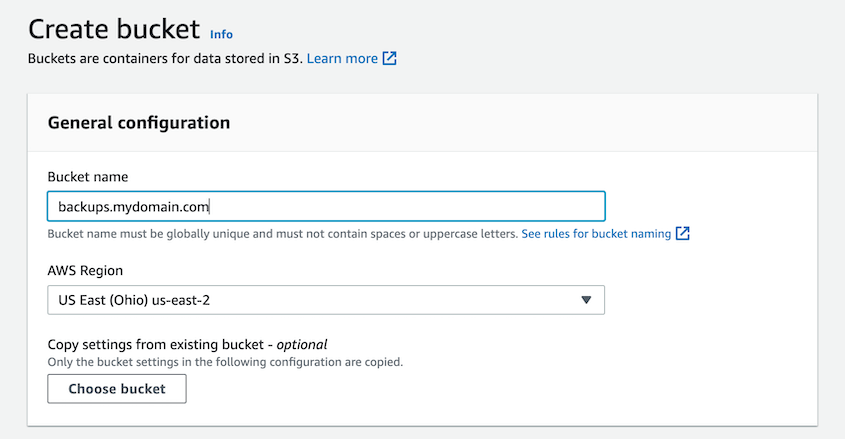
At the top of the page, name the bucket. It should be something memorable that features your domain name.
Underneath this, select the AWS region closest to your web server to finish creating the bucket.
Step 3: Add a Security Policy
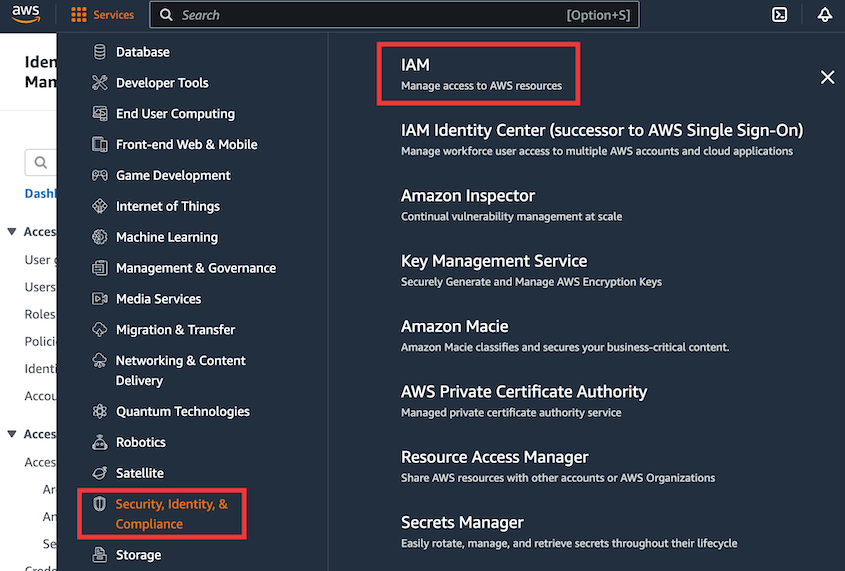
Next, you’ll want to create a security policy. This will describe what a user will be able to do with the bucket. Go back to the AWS services list and find Security, Identity, & Compliance » IAM.
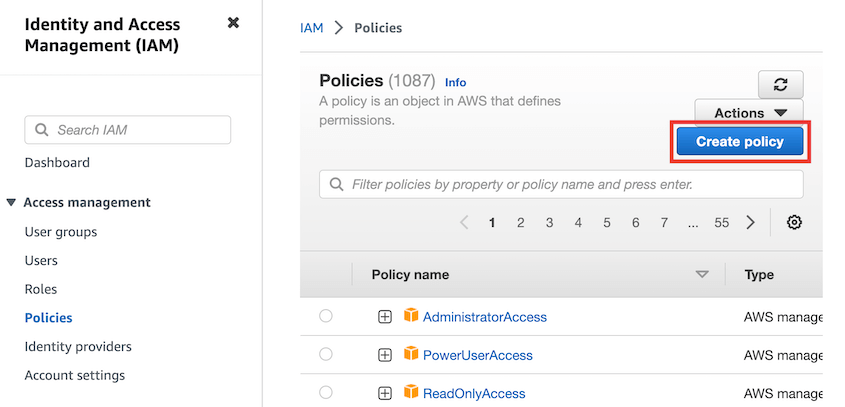
Then, head over to the Policies page. Here, select Create Policy.
Click on the JSON option. Paste this policy into the editor.
{
    "Version": "2012-10-17",
    "Statement": [
        {
            "Effect": "Allow",
            "Action": [
                "s3:ListBucket",
                "s3:GetBucketLocation",
                "s3:ListBucketMultipartUploads"
            ],
            "Resource": "arn:aws:s3:::BUCKETNAME",
            "Condition": {}
        },
        {
            "Effect": "Allow",
            "Action": [
                "s3:AbortMultipartUpload",
                "s3:DeleteObject",
                "s3:DeleteObjectVersion",
                "s3:GetObject",
                "s3:GetObjectAcl",
                "s3:GetObjectVersion",
                "s3:GetObjectVersionAcl",
                "s3:PutObject",
                "s3:PutObjectAcl"
            ],
            "Resource": "arn:aws:s3:::BUCKETNAME/*",
            "Condition": {}
        },
        {
            "Effect": "Allow",
            "Action": "s3:ListAllMyBuckets",
            "Resource": "*",
            "Condition": {}
        }
    ]
}
Remember to replace BUCKETNAME with the unique name for your bucket.
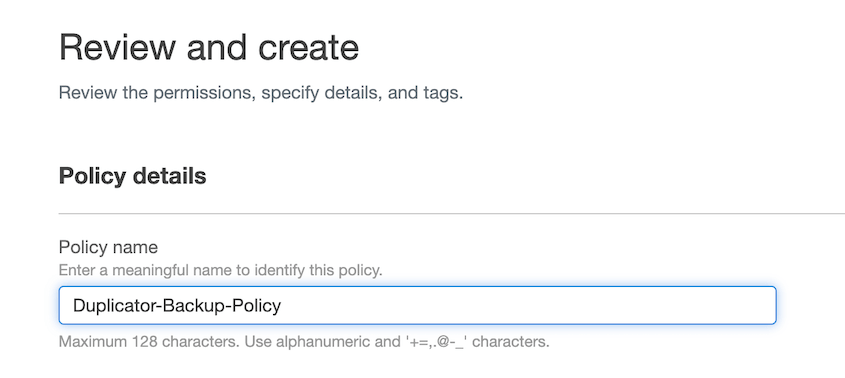
After hitting Next, name your policy. For example, you could use Duplicator-Backup-Policy.
Finish by clicking Create Policy.
Step 4: Create a User
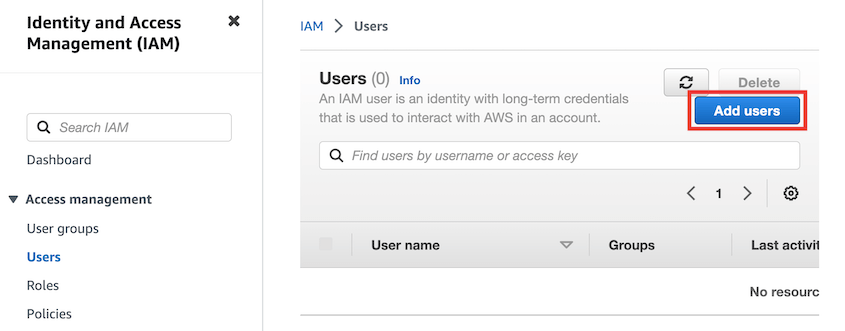
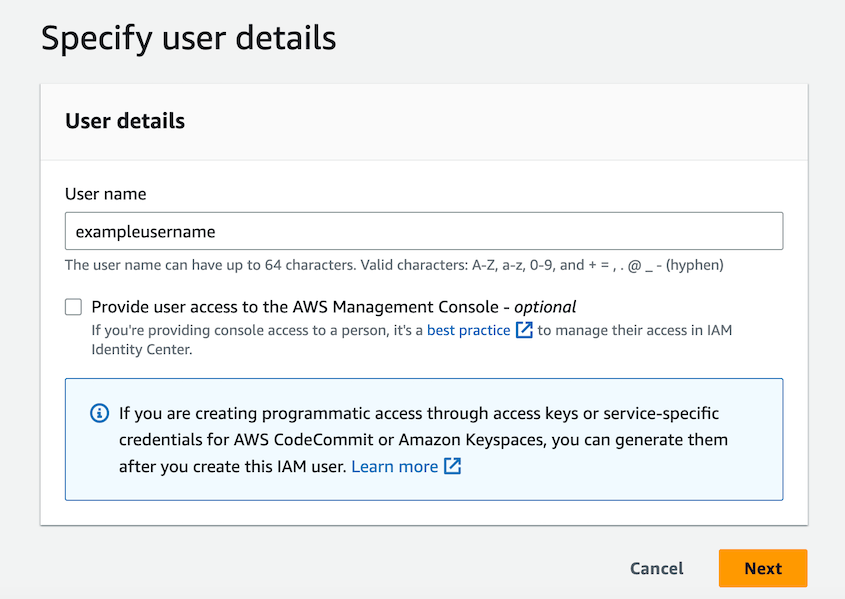
Once you create a new security policy, you’ll also need a new user. On the IAM page, find Users » Add users.
Choose a username for the IAM user before continuing to the next step.
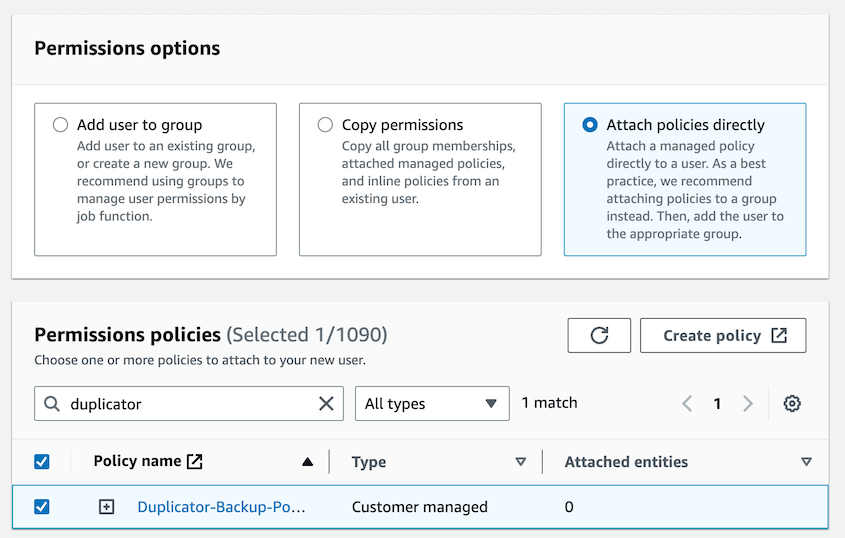
Under the Permissions options, select Attach policies directly. Then, find the policy you just created and check the box next to it.
Don’t add any tags. Finally, hit Create User.
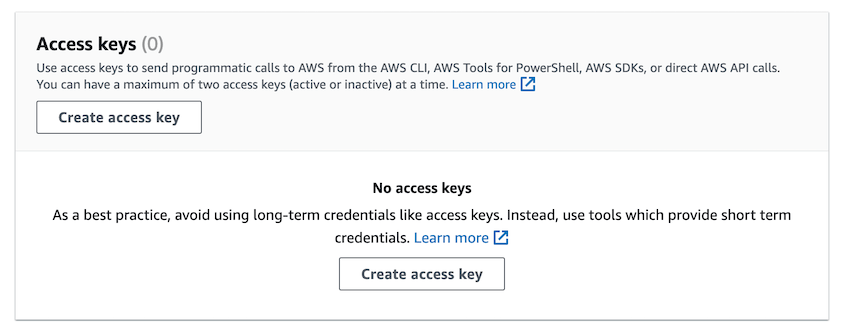
Now, click on the user and navigate to the Security Credentials tab. Here, create an access key.
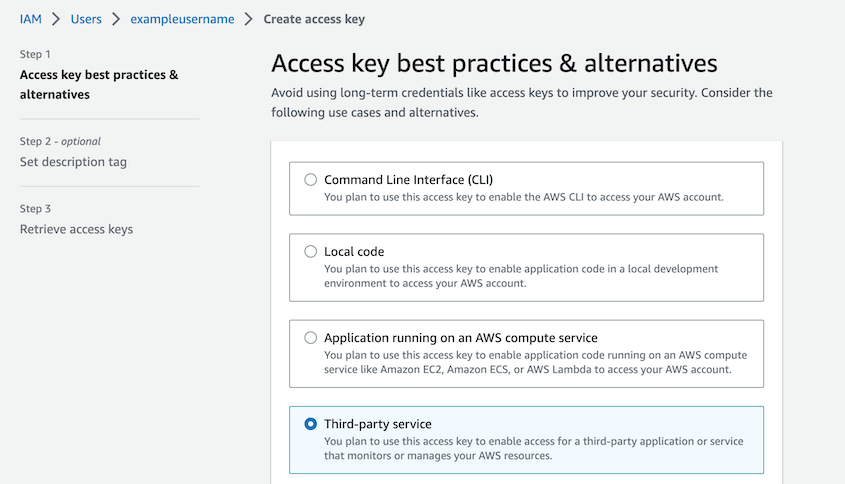
Since Duplicator will have to manage your Amazon S3 backups, select Third-party service as your use case.
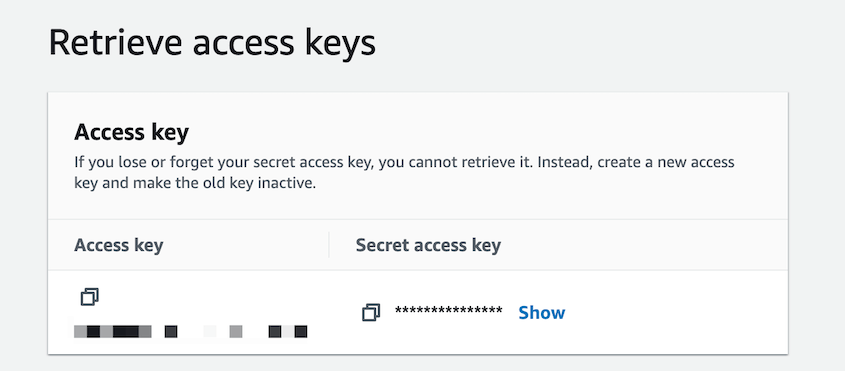
After you hit Next, you’ll see your access key IDs.
Save both the access key and the secret access key for later. You can also download this information as a CSV file.
Step 5: Connect Amazon S3 to Duplicator
After you fully configure your Amazon S3 account, you can connect it to Duplicator. This way, your backup will automatically import into the cloud.
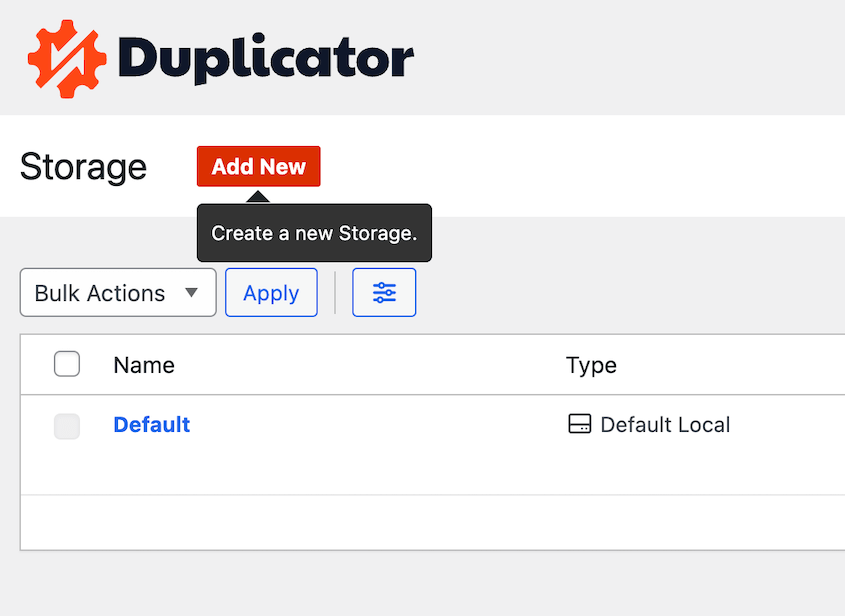
First, go to Duplicator Pro » Storage » Add New.
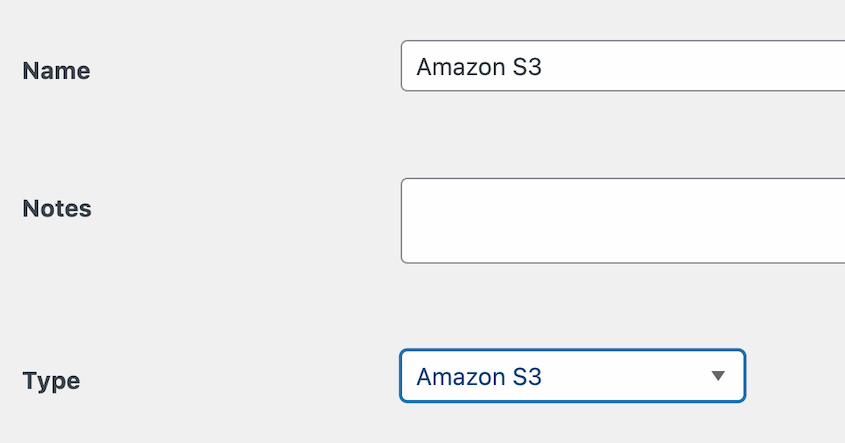
Name the new storage location. Under Type, select Amazon S3.
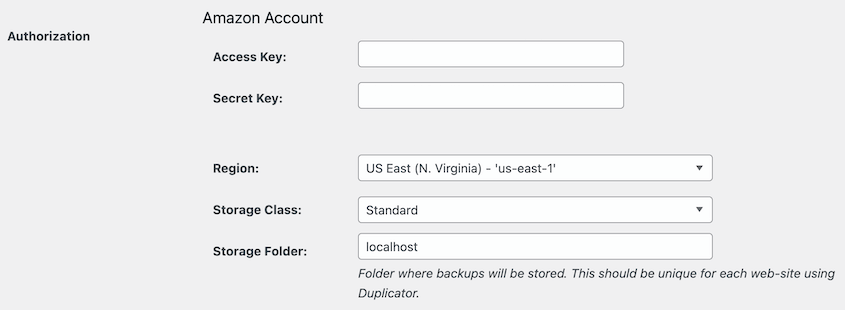
Next, scroll down to the Authorization section. Paste both the access key and the secret access key.
After this, enter the name of your bucket. You can also customize the maximum number of backups stored in the bucket. This prevents you from saving too many backups and accidentally increasing the Amazon S3 storage limit.
You can now save the new Amazon S3 storage location!
Once you connect Amazon S3 to Duplicator, hit Test S3 Connection. If the connection is successful, Duplicator will store and retrieve a test file.
Step 6: Create an Amazon S3 Backup
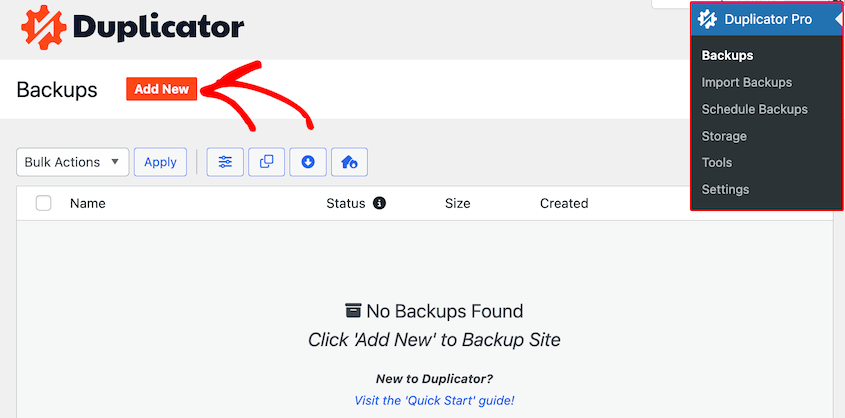
It’s time to create your first site backup and send it to Amazon S3! To do this, head over to Duplicator Pro » Backups » Add New.
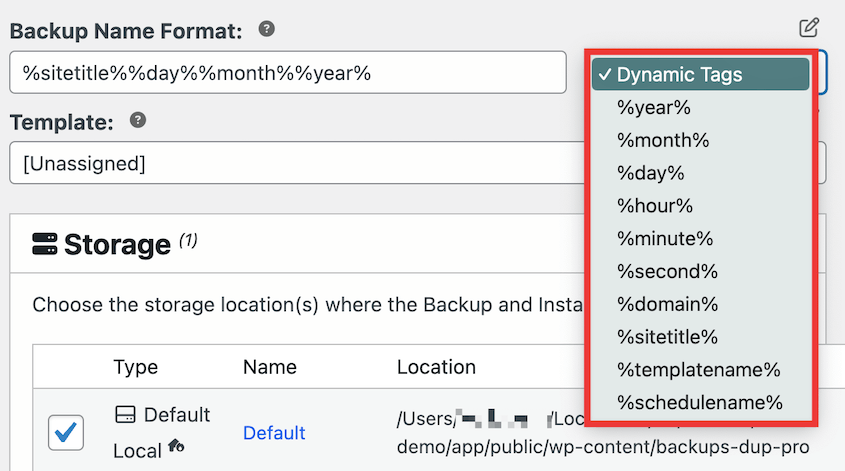
Give your backup a name so you can easily find it later. Duplicator has dynamic tags that automatically update for new backups.
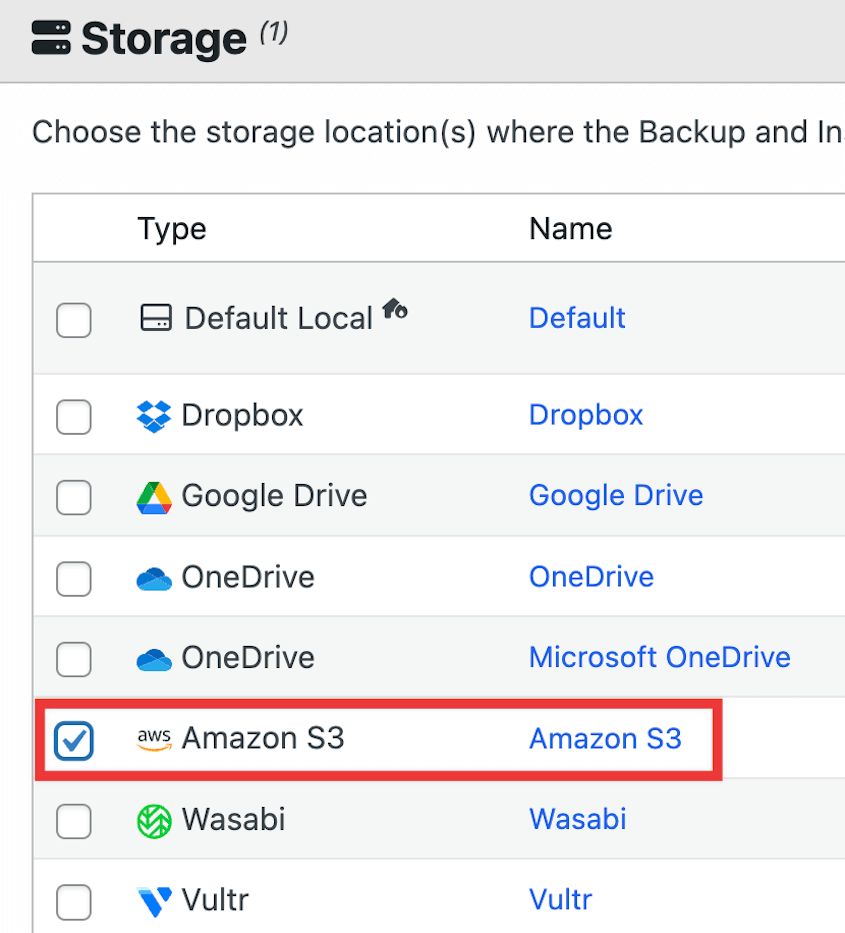
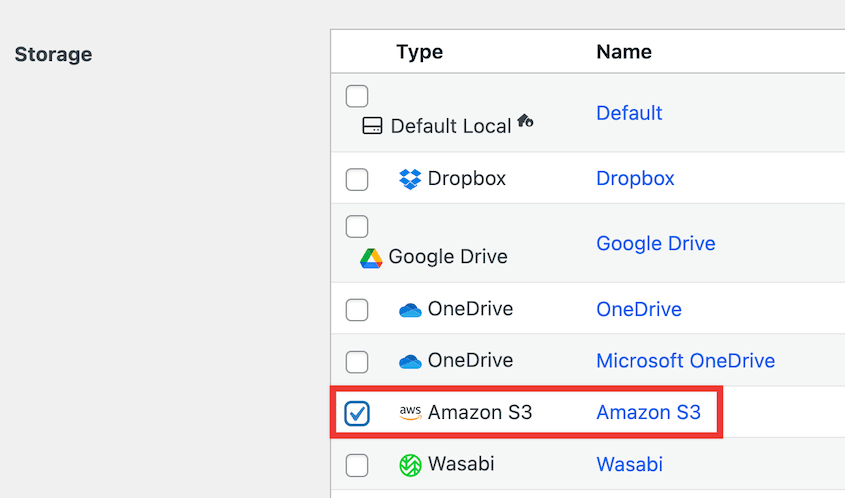
Expand the Storage section and select Amazon S3.
Duplicator now supports 14 different storage locations! Along with Amazon S3, you can send your backups to DreamObjects, Vultr, DigitalOcean Spaces, Wasabi, Cloudflare R2, and Google Cloud.
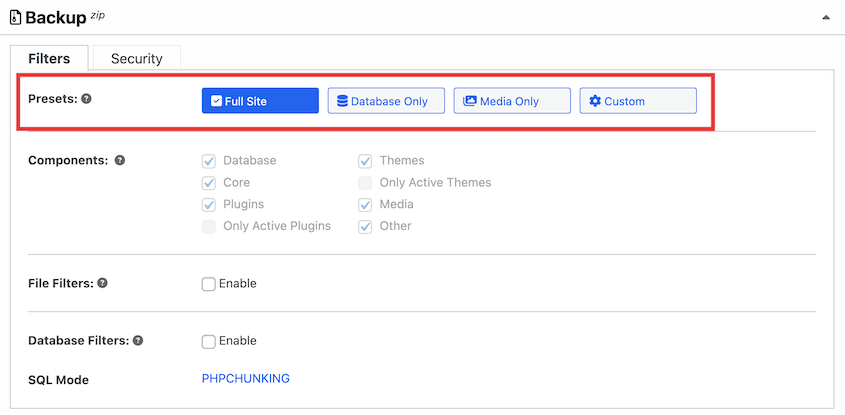
For a complete backup, don’t make any changes to the archive or installer files. However, you can create custom backups by only including the database, media library, or other files.
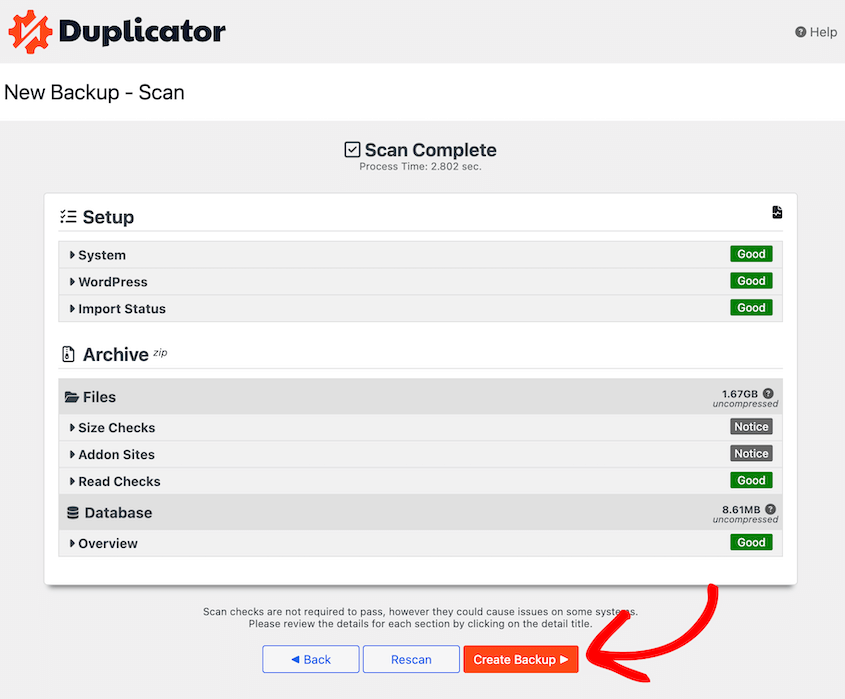
After clicking Next, Duplicator will scan your site to make sure the backup can run successfully.
Lastly, hit Create Backup. Duplicator will automatically build your backup and transfer it to Amazon S3.
Step 7: Set Up Automatic Backups
If you don’t want to waste time, you can set up an automatic backup schedule. Using Duplicator Pro, you can choose a date and time to always run backups and save them to Amazon S3.
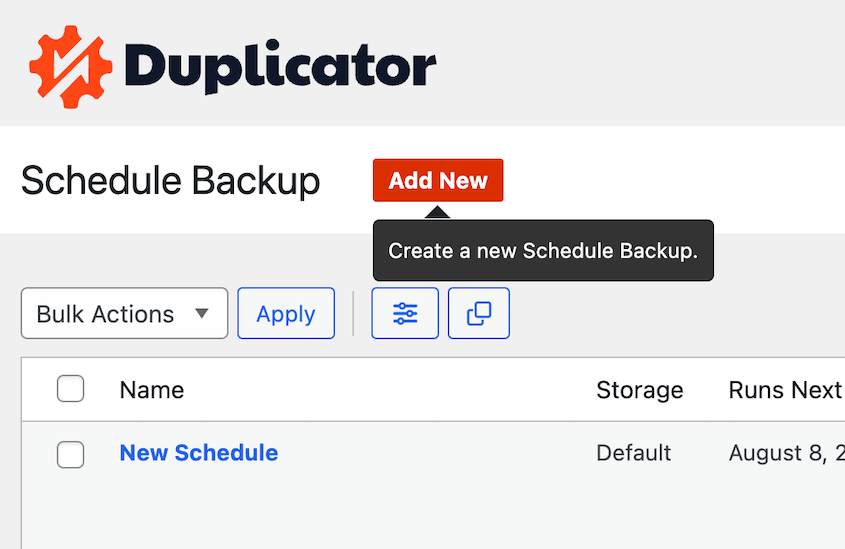
To get started with automated backups, open the Schedule Backups page and hit Add New.
Name the schedule. Then, select Amazon S3 as your storage location.
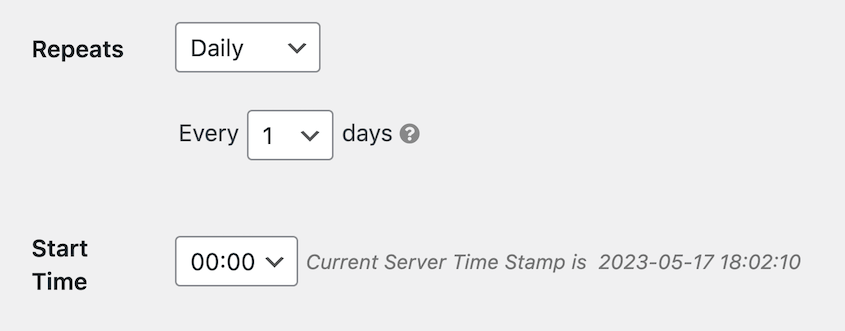
Now you can customize when your backup runs. Duplicator supports all of the following schedules.
- Hourly backups
- Daily backups
- Weekly backups
- Monthly backups
Next to Repeats, select one of these options. You’ll also need to set a Start Time.
Finally, enable the schedule and save it!
How to Restore Your Amazon S3 Backup
If your website is functioning properly, you may never need to touch your backups. However, there’s always the possibility of a hack, server crash, or other critical error. When this happens, you’ll need to restore a recent backup.
Fortunately, Duplicator has both backup and restore functionality!
To get your site back to normal, find the most recent Amazon S3 backup on the Backups page. Hit the Restore button next to it.
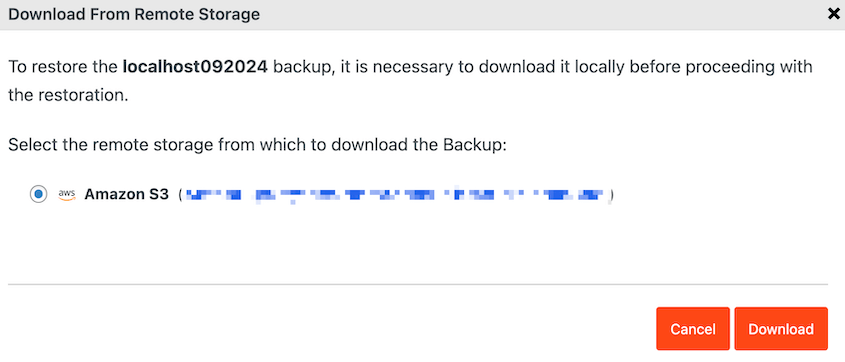
In the pop-up, download the S3 backup. This will transfer your data from the cloud to your local server.
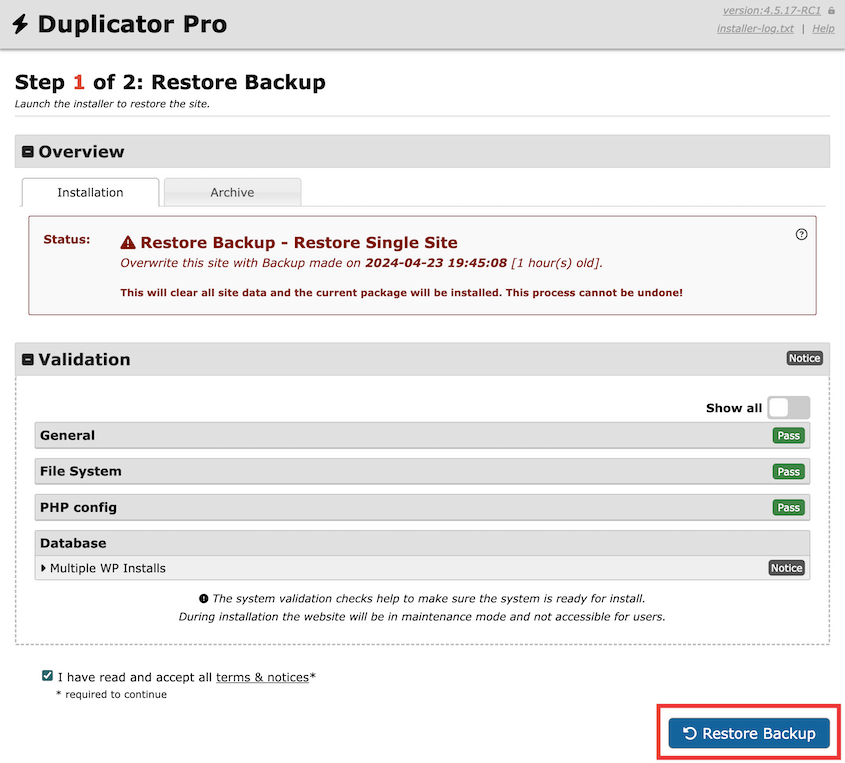
After this, you can restore your site! Simply click on Restore Backup in the restoration wizard.
Now Duplicator will install your backup! Once it’s finished, use the Admin Login button to sign back into your restored site.
FAQs About Saving WordPress Backups to Amazon S3
How do I back up my WordPress site to S3?
You can back up your WordPress site to Amazon S3 by installing Duplicator Pro, a powerful backup plugin with a variety of cloud storage locations. After creating an S3 bucket and generating your access keys, paste these keys into Duplicator Pro. This will allow you to create new backups and automatically send them to Amazon S3.
Alternatives: Other backups that support Amazon S3 include UpdraftPlus, Total Upkeep, and WPvivid.
How do I back up my entire WordPress site?
You can up your entire WordPress site with Duplicator Pro. Make sure to include all site components in the backup, like your core WordPress files, MySQL database, media library, plugins, and themes. Once Duplicator backs up your site, download your backup files.
How do I manually backup my WordPress database?
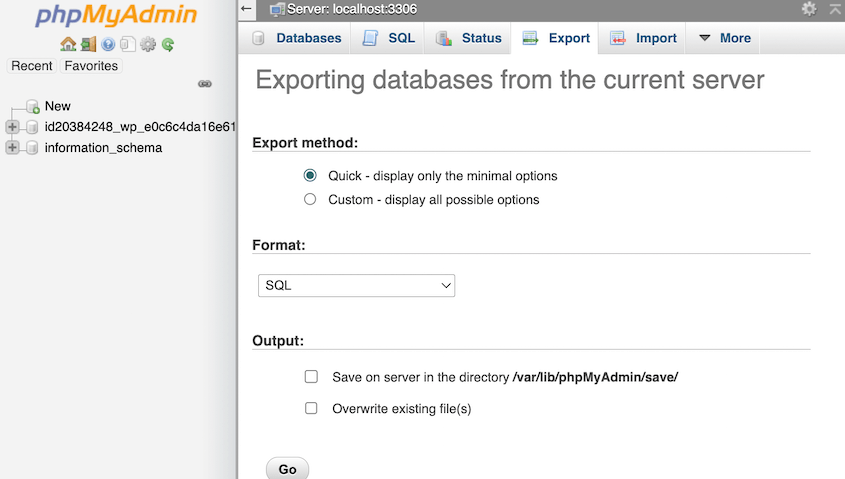
You can manually back up your WordPress database with phpMyAdmin, a database manager. After logging in, select your database name and hit Export. Be sure to choose SQL as the format and continue downloading your database.
How do I back up and import a WordPress site?
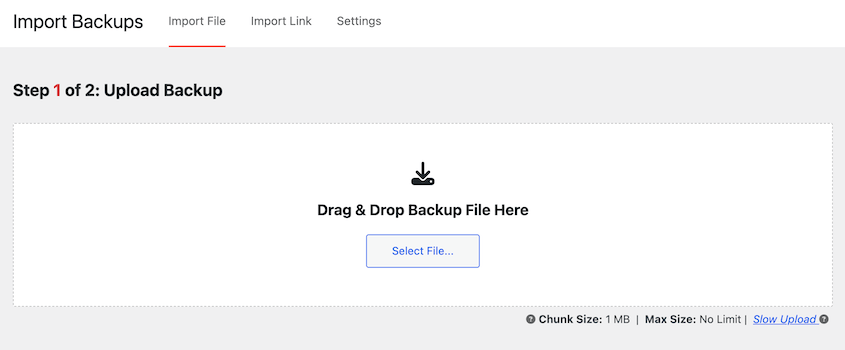
You can back up and import a WordPress site with a backup and migration plugin like Duplicator Pro. To back up your site, simply create a new backup and download its archive file. On your new website, install Duplicator and upload the backup to the Import Backups page.
How do I connect my WordPress site to an object storage bucket?
To connect your WordPress site to an object storage bucket, you’ll need to sign up for an object storage service like Amazon S3, Google Cloud, or Backblaze B2. Then, create a bucket and generate access keys.
Install the Duplicator Pro plugin in WordPress and connect your cloud account as a new storage location. Finally, create a backup and send it to cloud storage. It’ll automatically be uploaded to your object storage bucket.
Conclusion
Don’t wait for a crisis to think about backups. Set up Amazon S3 today, automate your backup schedule, and give yourself peace of mind. The entire process takes less than an hour, but it could save you countless hours of reconstruction work later.
While you’re here, I think you’ll like these other WordPress guides:
Ready to quickly connect your WordPress site to Amazon S3? Download Duplicator Pro to instantly transfer site backups to the cloud!
Joella is a writer with years of experience in WordPress. At Duplicator, she specializes in site maintenance — from basic backups to large-scale migrations. Her ultimate goal is to make sure your WordPress website is safe and ready for growth.


