I never set out to become a WordPress security expert. My relationship with my website was simple: it worked, I updated it occasionally, and I assumed nothing bad would happen.
That illusion shattered one morning when I logged in to find my site replaced with a crude hacker calling card.
No data. No posts. No backups. Just the dawning realization that years of content and customer information were gone.
The road back was painful. Expensive emergency developers. Countless hours piecing together content from Google’s cached pages. All because I had overlooked something as fundamental as proper backups.
What I learned through that crisis changed my approach entirely. I started relying on cloud backups—truly independent, automated, and stored across multiple geographic locations.
Whether you’re a business owner, blogger, or accidental website administrator, I’ll walk you through creating WordPress cloud backups that can survive anything!
Table of Contents
Quick Summary: How to Create a Cloud WordPress Backup
1. Install a WordPress backup plugin.
Duplicator Pro is a WordPress backup plugin that can send your data to the cloud. This ensures you
never lose any data.
2. Connect a cloud storage service.
Once you install Duplicator, add a new storage location. Duplicator supports 11 different cloud services including Google Drive, Amazon S3, and Microsoft OneDrive.
3. Create a cloud backup.
Finally, build a new backup. In the Storage settings, choose the cloud service you just connected. Duplicator will create a copy of your WordPress site and send it to the cloud.
The Benefits of Cloud WordPress Backups
One of the most important security precautions for your WordPress website is a backup. This is a saved copy of your site’s files and database.
If you unexpectedly face a cyber attack or critical error, you can simply restore one of your backups. Regularly backing up your WordPress site ensures you always have a healthy copy to fall back on.
There are many ways to start backing up your site. You could download a backup to your computer, a local server, or even send them to an off-site cloud storage service.
Here are some benefits of using cloud services to store WordPress backups:
Enhanced security
By storing your data in off-site servers, it’ll be safe from server crashes, malware, and hacks. Some cloud storage providers also use encryption, ensuring the security of your backups.
Scalability
As your WordPress website grows and gains more data, cloud storage can seamlessly accommodate the increasing backup size. If you have a large e-commerce site, you won’t have to worry about overloading your hosting plan with huge backup files.
Accessibility
Using the cloud, you can access your backups from anywhere, at any time. You can quickly restore your website after accidental data loss, security breaches, or bad website updates.
How to Create a Cloud WordPress Backup
Let’s walk through the step-by-step process of creating a cloud WordPress backup!
Step 1: Install Duplicator Pro
When it comes to creating cloud backups for your WordPress website, there’s one tool that truly stands out: Duplicator Pro. This user-friendly WordPress backup plugin integrates with popular cloud providers, making it a snap to store your backups in the cloud.
No matter which cloud backup service you plan on using, Duplicator can support it. You can store backups in any of the following locations:
Duplicator Pro works by creating backups of your WordPress site. You’ll be able to save valuable space in the cloud without sacrificing any data.
Plus, you can also use Duplicator as a migration plugin. With just a few clicks, you can clone or migrate your site, including all its files, database, plugins, and themes.
Not sure if Duplicator is right for you? See how Conceptstore Creative uses Duplicator’s cloud backups to protect its clients!
To get started, select a subscription for Duplicator Pro. Although there is a free version of the plugin, a premium plan will give you everything you need to connect your WordPress site to an external cloud storage location.
Then, open your WordPress dashboard and install Duplicator.
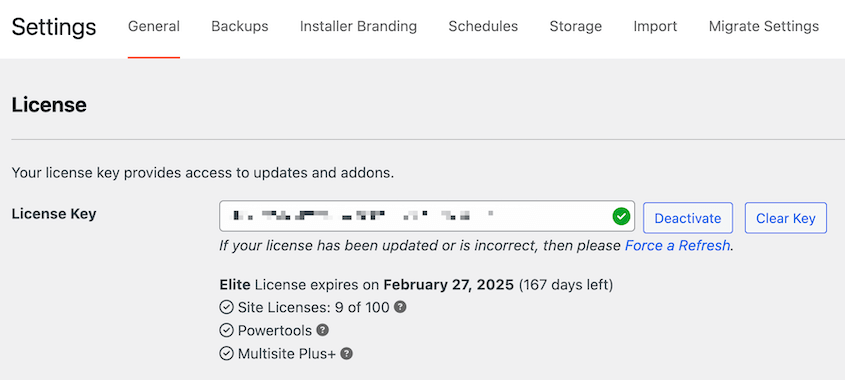
Before you start using Duplicator, you’ll need to activate your license key. To do this, go to Duplicator Pro » Settings » General.
Paste the license key you received with your purchase. Finally, hit Activate.
Step 2: Connect a Third-Party Cloud Service
As we mentioned earlier, you can start saving your backups to a variety of different cloud storage options. First, find one that meets your storage needs and budget.
I like using Google Drive for my cloud backups. It’s a free service, so you can save your site data without expensive storage fees. If you have a larger site, I’d recommend an object storage service like Backblaze B2.
Now, it’s time to connect it with Duplicator. This way, every backup will automatically be sent over to your off-site account.
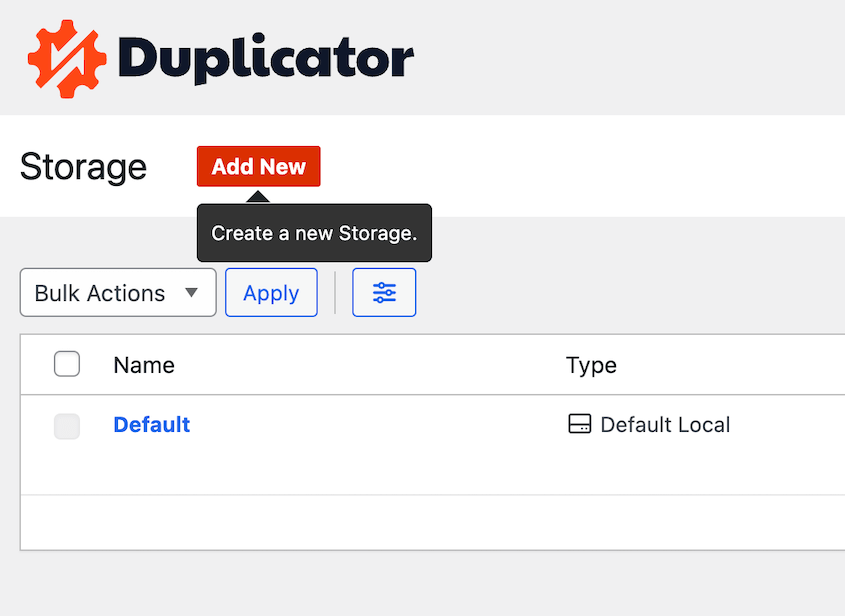
First, find Duplicator Pro » Storage. Here, you’ll see that the default backup location is your local server. To set up cloud WordPress backups, click on Add New.
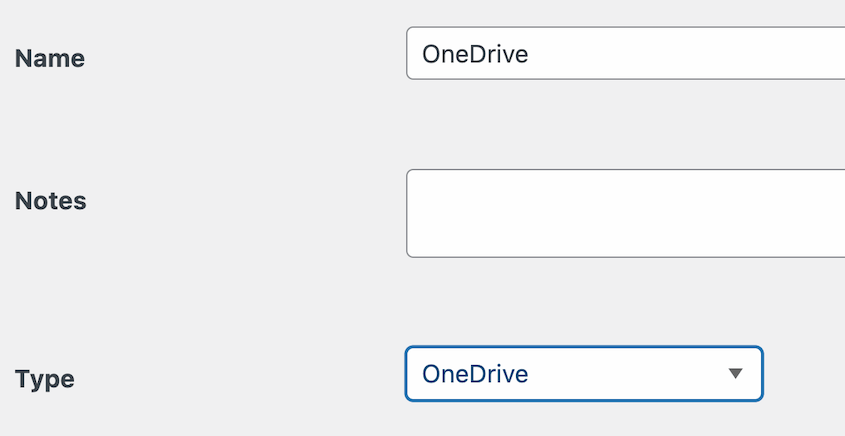
On this page, give the new storage location a name. Using the Type dropdown, choose your preferred cloud service.
For this tutorial, we’ll be using Microsoft OneDrive. These connection steps will vary slightly depending on the cloud storage provider.
After you select your provider, you’ll need to authorize Duplicator to save backups onto your cloud account. Scroll down to the Authorization section and click on Connect to OneDrive (or the different service you chose).
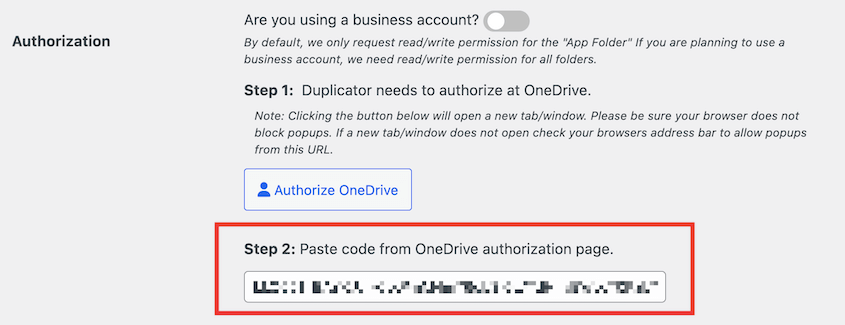
Now, new authorization steps will appear. Click on Authorize OneDrive to finish setting up the connection.
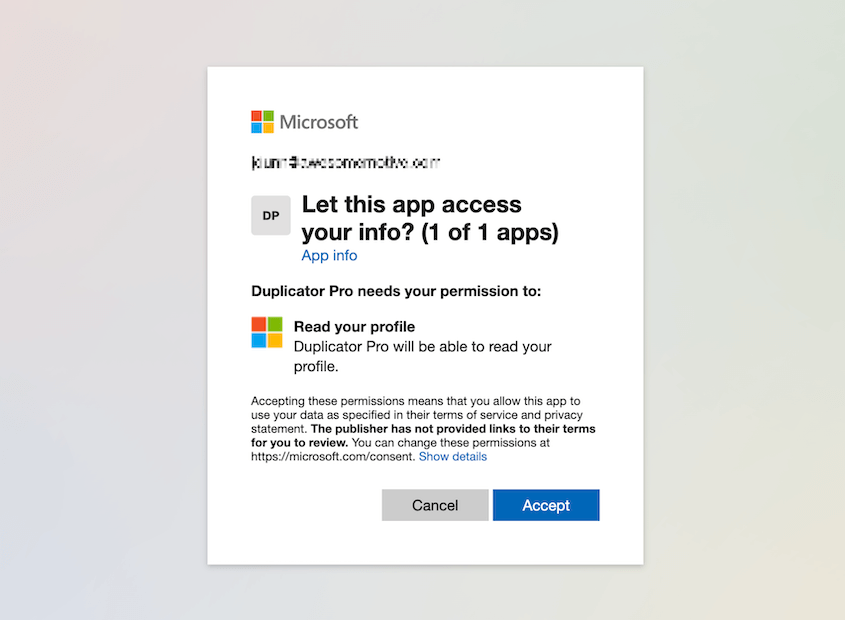
You’ll be sent to the off-site cloud service. In the pop-up window, be sure to give Duplicator full access to your account.
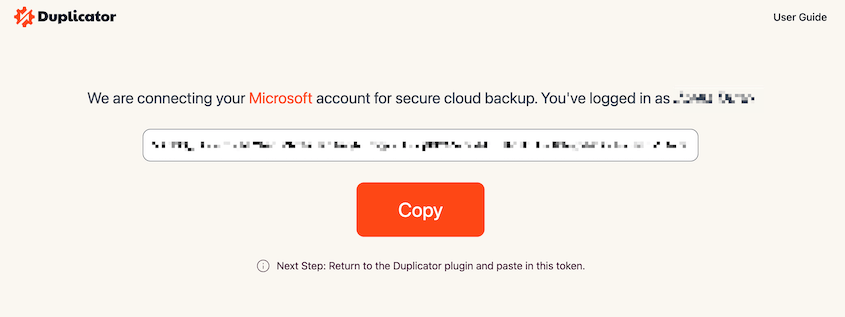
Once you do this, you’ll get an authorization code.
Copy this and go back to your WordPress dashboard. Next to Step 2, paste the code.
For the last step, hit Finalize Setup. Your cloud account is now linked to Duplicator!
Step 3: Create a Cloud Backup
Now you can create a cloud backup! This will bundle all of your plugins, themes, core WordPress files, and database tables into a single zip file. Then, Duplicator automatically sends your data to the cloud.
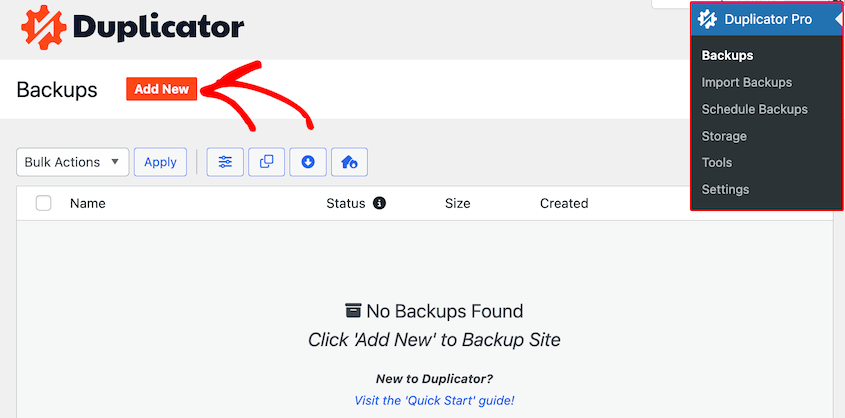
To start the backup process, head over to Duplicator Pro » Backups » Add New.
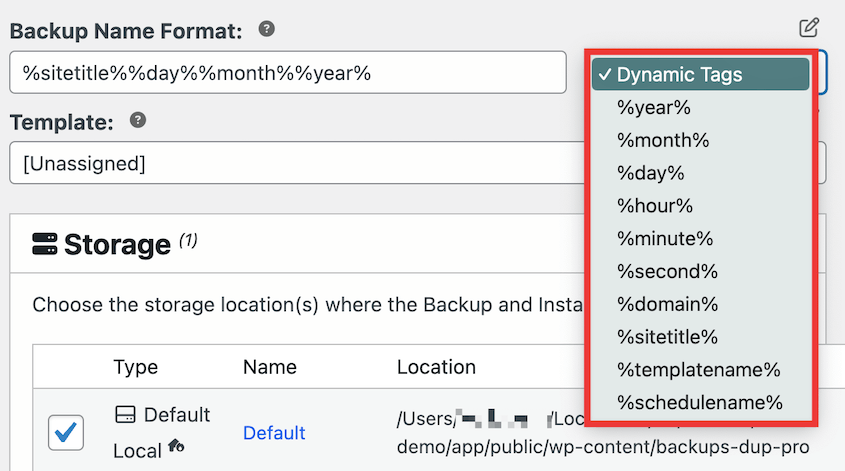
Use dynamic tags to make the backup more memorable. For example, you can add your site title, the current time, the current date, and more. This will help you find the right backup in cloud storage.
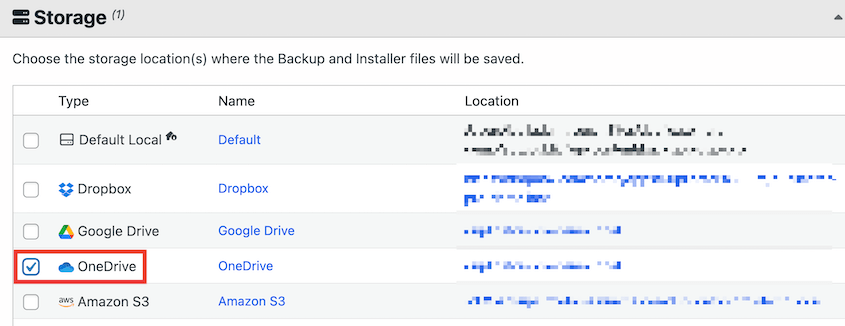
Then, open the Storage settings. Select OneDrive or whichever cloud service you prefer.
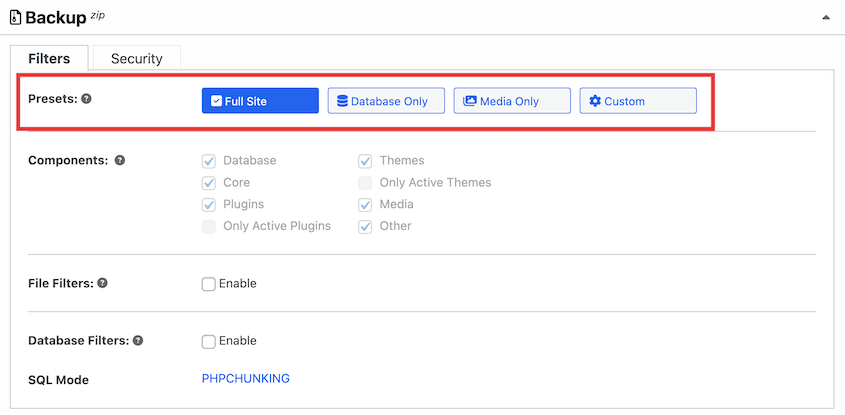
For a complete backup, you don’t need to make any changes to the archive file. However, you can easily perform a database backup instead or exclude unnecessary files from the backup.
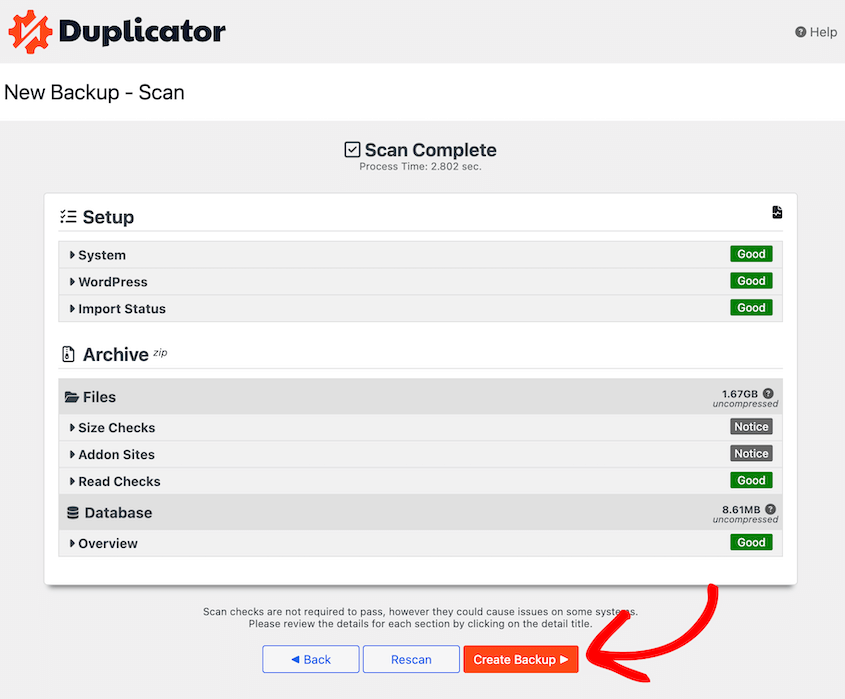
Next, Duplicator will scan your entire site. At the bottom, hit Create Backup.
Your website backup will be instantly created. Without needing any extra help from you, Duplicator will send your backup files straight to the cloud!
Step 4: Schedule Automatic Cloud Backups
By now, you know how to create manual cloud WordPress backups.
To reduce your maintenance tasks and optimize your time, consider setting up automatic backups instead. This way, you’ll have a reliable backup plan.
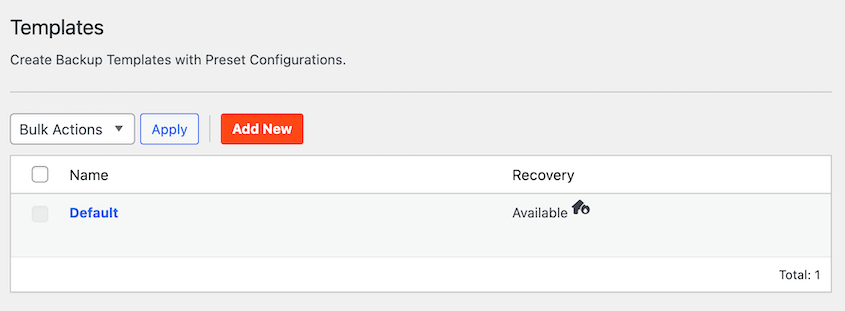
First, create a backup template by heading over to Duplicator Pro » Tools » Templates » Add New.
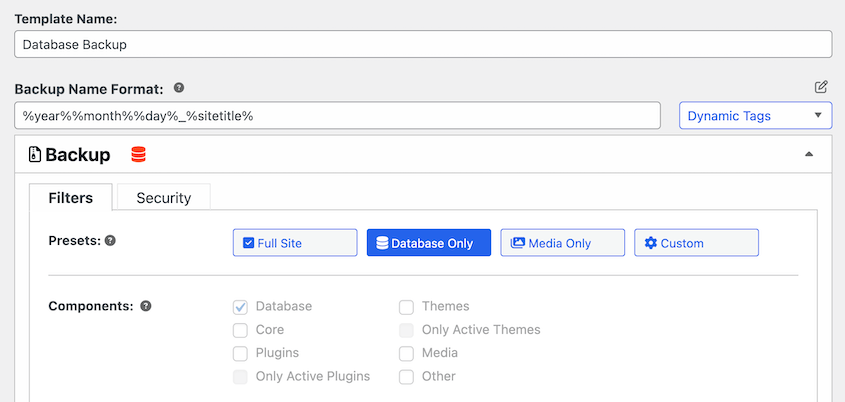
Then, you can decide what data you want Duplicator to save in the automatic backup.
If you want to back up your entire site, be sure to select Full Site. However, you can easily create custom backup templates. Then, save your changes.
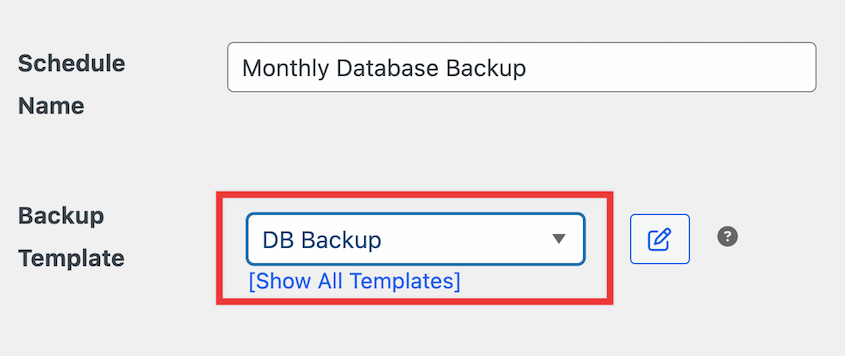
Now you can schedule backups! Go to Schedules » Add New. Name the new automatic backup schedule and select the template you made earlier.
To automatically send your WordPress backups to the cloud, you’ll need to choose a cloud storage location.
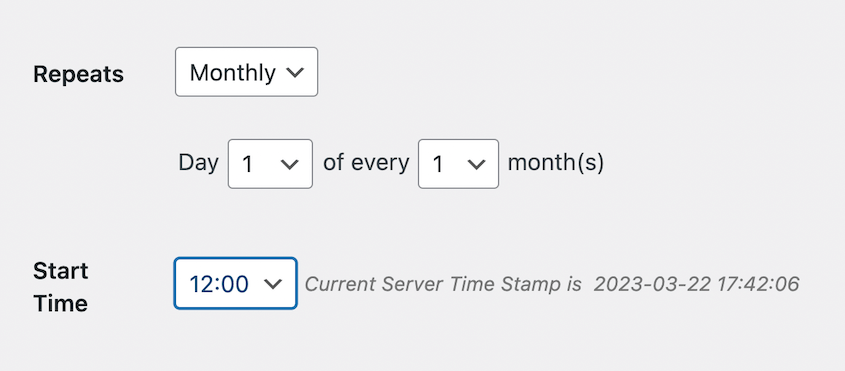
Finally, you can customize what time to schedule backups for. Duplicator can run monthly, weekly, hourly, and daily backups.
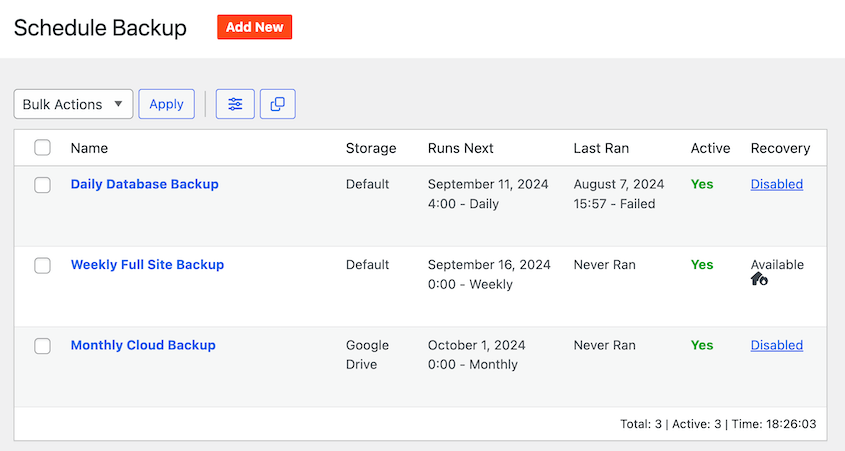
Then, enable the schedule and save it. Feel free to add as many schedules as you want. You’ll see all of them listed on the Schedule Backups page.
This will show you when your backups last ran and when they’ll run next. You’ll also see whether each automatic backup schedule allows you to restore backups of your WordPress site.
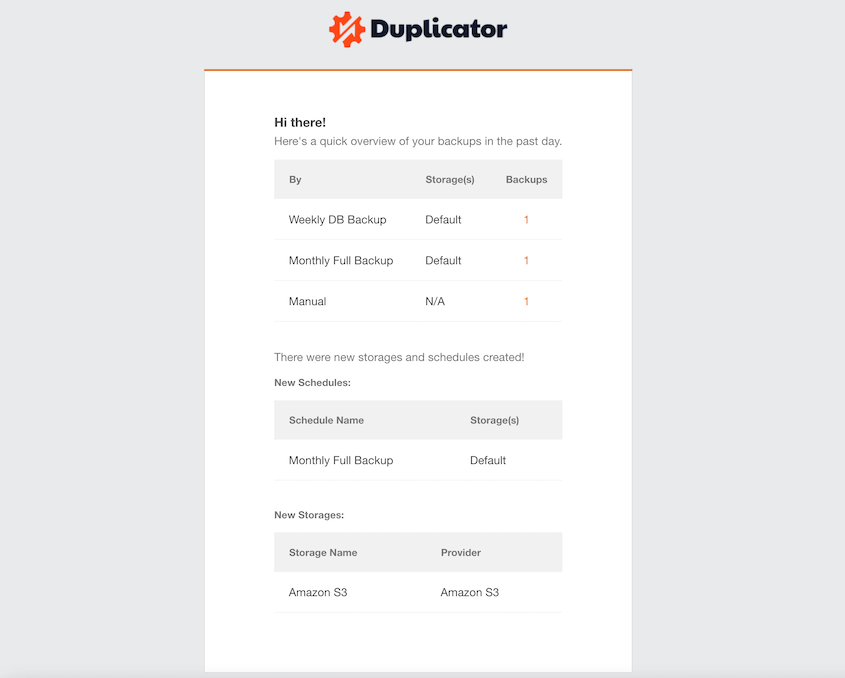
Now, Duplicator will send you email summaries. You’ll get notifications about any new manual backups, added cloud storage locations, and successful automatic backups.
By receiving daily, weekly, or monthly email summaries, you’ll know exactly when and how your site is being backed up.
How to Restore a Cloud WordPress Backup
Mistakes happen, and you might eventually need to restore a cloud backup. But how do you do it?
With Duplicator, all it takes is one click. Find one of your cloud backups on the Backups page. Click on the Restore button next to it.
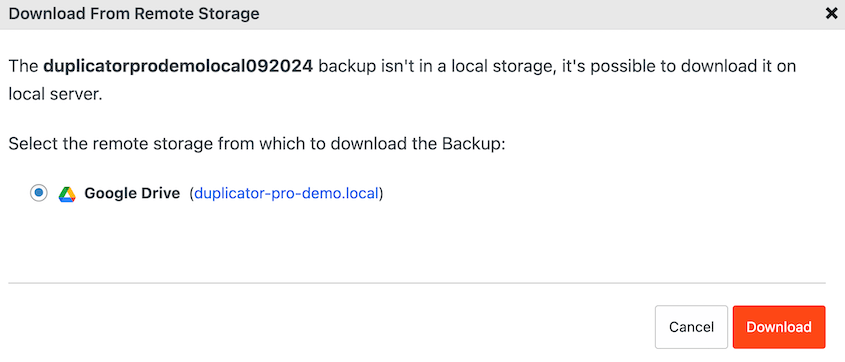
Next, download the backup from remote storage.
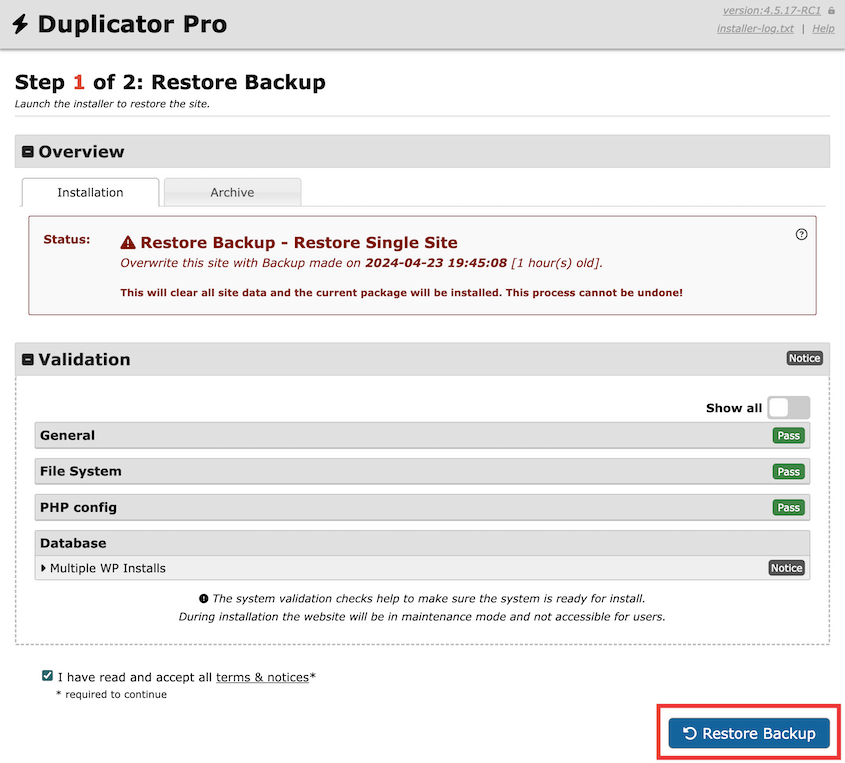
After this, Duplicator will automatically launch the recovery wizard!
Hit Restore Backup. Then, log back into your website. You’ll see that it’s been rolled back to an older, cleaner version!
See how KOROVA, a web design agency, restores its clients’ websites in under 3 minutes with Duplicator!
Frequently Asked Questions (FAQs)
What is the best way to back up WordPress?
The best way to back up WordPress is to install a backup plugin like Duplicator. Using Duplicator Pro, you can easily create new backups and instantly save them to cloud storage locations. It can also be helpful to set up scheduled backups to save time during website management.
How do I automatically back up WordPress to Google Drive?
To automatically back up WordPress to Google Drive, first install and activate Duplicator Pro. Then, add Google Drive as a new storage location. Finally, create a new backup schedule and select Google Drive under the Storage settings.
Does WordPress do automatic backups?
By itself, WordPress does not support automatic backups. However, your web hosting provider may support daily backups and one-click restore options. If not, a WordPress backup plugin can easily add this functionality to your website. This backup tool allows you to create new backup schedules and stop worrying about manual backups.
What are the best backup plugins for WordPress?
The best WordPress backup plugin is Duplicator Pro. This will allow you to create real-time backups of your website and even set up automated backups. Without needing any add-ons, you can create off-site backups that are sent to cloud storage.
Alternatives: Jetpack Backup (VaultPress), UpdraftPlus, BlogVault, BackupBuddy, and BackWPup are also popular plugins with backup and restore options. However, Duplicator Pro is more well-equipped to handle large sites like WooCommerce stores and WordPress Multisite networks.
Conclusion
You’ve just created your first cloud WordPress backup!
Here are some extra WordPress tips and tricks to get the most out of your website:
Are you ready to protect your website backups in the cloud? Upgrade to Duplicator Pro to connect cloud storage services to your site and automate cloud backups!
Joella is a writer with years of experience in WordPress. At Duplicator, she specializes in site maintenance — from basic backups to large-scale migrations. Her ultimate goal is to make sure your WordPress website is safe and ready for growth.


