Every WordPress site owner shares the same fear: losing their website data. Local backups offer some protection, but they’re vulnerable to hardware failures and natural disasters.
That’s where cloud storage comes in. But with rising costs from providers like Amazon S3, you’re probably looking for more budget-friendly alternatives.
Cloudflare R2 is a cloud storage solution that offers enterprise-level durability at a fraction of the cost of its competitors. With no egress fees and 10GB of free storage, it’s becoming the go-to choice for WordPress professionals who need reliable backup storage without the premium price tag.
In this post, I’ll show you how to back up your WordPress site to Cloudflare R2.
Whether you’re managing a small business site or a growing content platform, you’ll learn how to set up automated cloud backups that just work – no technical expertise required.
Table of Contents
Quick Summary: How to Back Up WordPress to Cloudflare R2
1. Set up a Cloudflare R2 account.
Once you sign up for Cloudflare R2, create a bucket. You should also copy your access keys.
2. Connect Cloudflare R2 to Duplicator Pro.
Duplicator Pro is a WordPress backup plugin that connects your site to cloud storage services like Cloudflare. All you’ll need to do is create a storage location and enter your Cloudflare R2 bucket details.
3. Create a Cloudflare R2 backup.
Finally, create a backup and choose Cloudflare R2 as the storage location. Duplicator will create a copy of your site and automatically save it to the cloud.
What Is Cloudflare R2 Storage?
Cloudflare R2 is an object storage service for large amounts of unstructured data like pictures, videos, data lakes, website backups, and more. Similar to other providers like Amazon S3, Cloudflare R2 organizes data as objects inside buckets.
With Cloudflare R2, you won’t have to worry about any egress bandwidth fees. This means that you can transfer data to and from cloud storage as much as you need to.
Here are some extra benefits of using Cloudflare R2 as your cloud storage service:
- Scalable cloud storage
- Globally distributed
- Integrates with Cloudflare Workers and Cloudflare CDN
- S3-compatible object storage
- 99.999999999% data durability
- Automated migration service
Plus, Cloudflare R2 is much cheaper than other popular options. Its storage is free for the first 10GB and then costs $.015 per GB. This is more affordable than AWS storage, which starts at $.023 per GB.
Cloudflare R2 isn’t the only affordable cloud storage solution! Here’s our definitive list of the best storage services for WordPress backups.
How to Back Up WordPress to Cloudflare R2
Because Cloudflare R2 is so scalable and affordable, it is a great choice for website owners who need to store backups off-site.
Let’s show you how to send your WordPress backups to this cloud storage service!
Step 1: Install Duplicator Pro
Duplicator Pro is a flexible WordPress backup plugin that supports many S3-compatible storage services. With this tool, you’ll be able to instantly connect your website with Cloudflare R2, securing backups in the cloud.
Along with Cloudflare R2, here are all of the cloud storage providers you can use with Duplicator:
To get started, choose a subscription for Duplicator Pro. There is a free version of the plugin, but you’ll need to upgrade to start creating cloud backups.
Next, install and activate Duplicator in your WordPress dashboard.
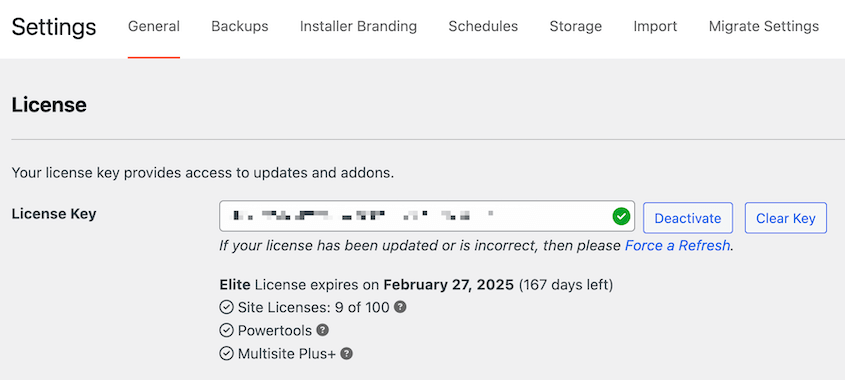
As a final step, head over to Duplicator Pro » Settings » General.
Paste your license key and hit Activate. You’ve just unlocked Duplicator’s cloud storage features!
Step 2: Create a Cloudflare R2 Bucket
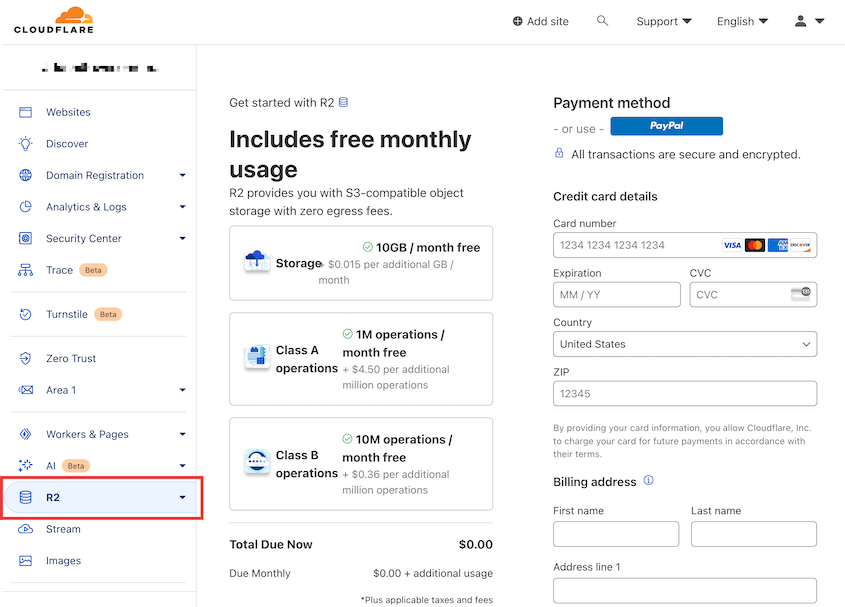
Once you set up Duplicator, it’s time to create a Cloudflare R2 account. The first 10GB of storage is free, so you can hit Get Started for Free.
Enter an email and password for the new account. Be sure to verify your email address.
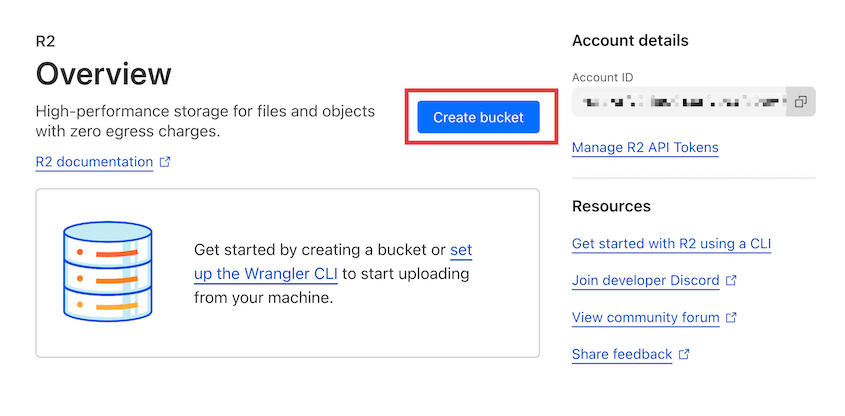
In your Cloudflare dashboard, click on the R2 tab. Here, enter your payment information. You’ll only be charged if you exceed the monthly storage limits.
After this, click on Create Bucket.
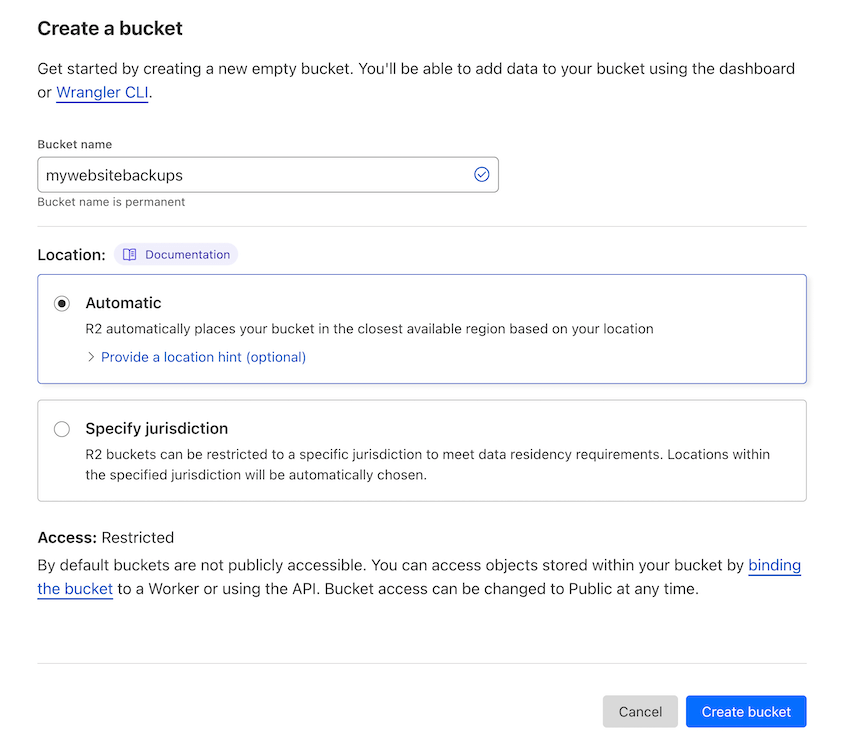
Name the new bucket. You can allow Cloudflare to automatically choose your bucket’s region or specify one yourself. Then, hit Create Bucket again.
Now you’ll have a cloud storage bucket to store your website backups!
Step 3: Copy Your Access Keys
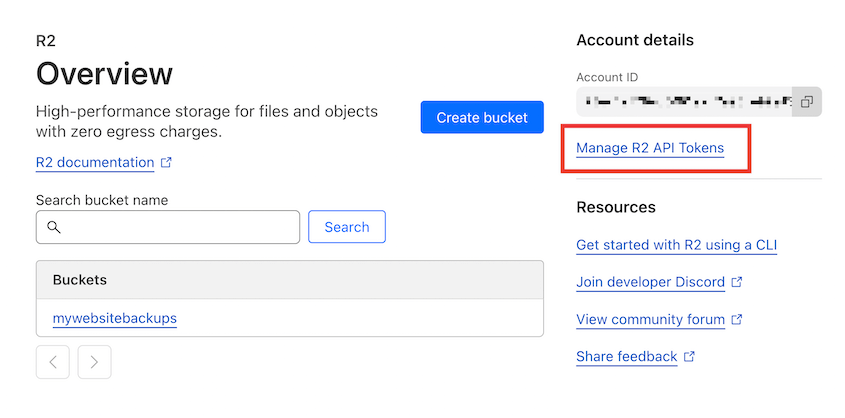
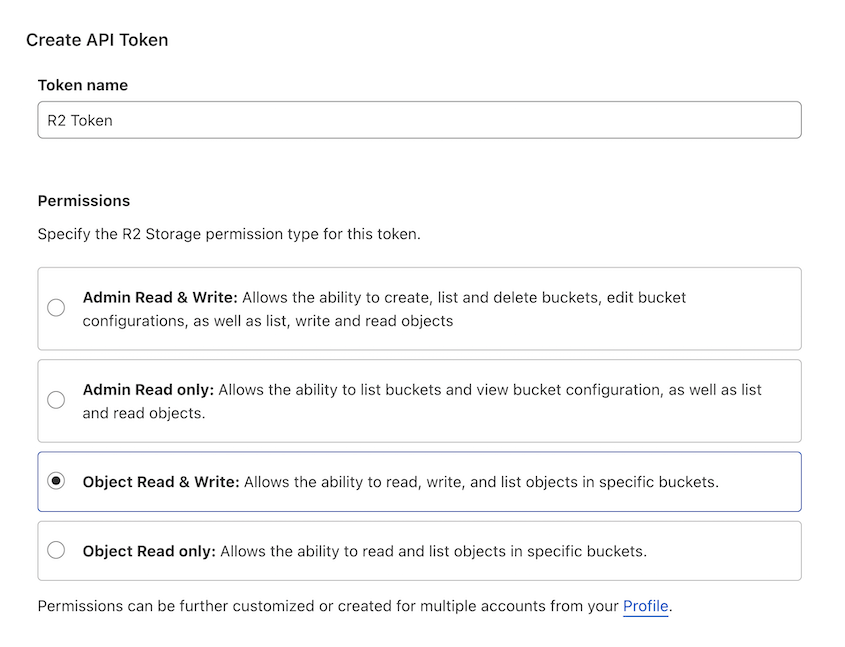
To allow Duplicator to save backups to your Cloudflare R2 storage account, you’ll need to generate access keys. On the Overview page in your dashboard, click on Manage R2 API Tokens.
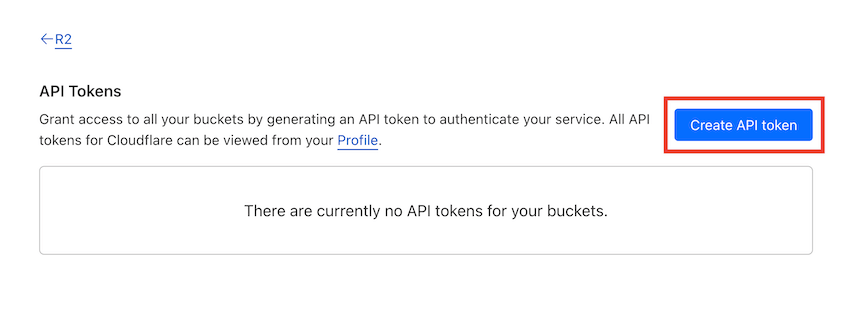
Then, hit Create API Token.
After naming the token, select the Object Read & Write permissions level.
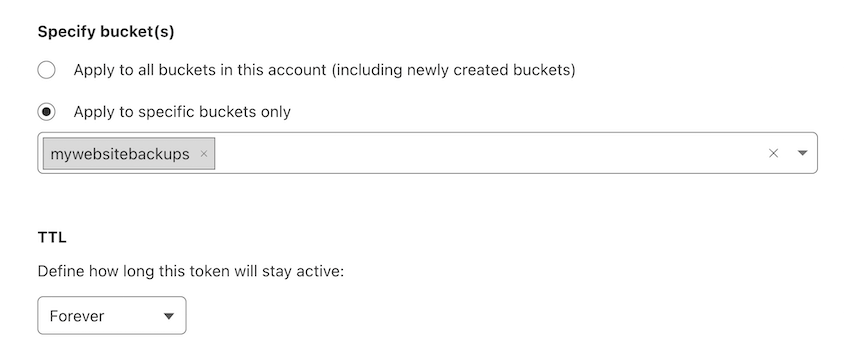
Apply these permissions to all of your buckets, or the one you just created. You can also decide how long this token will stay active.
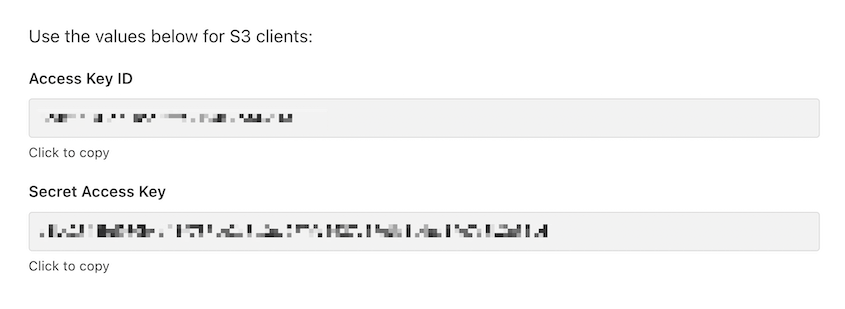
Once you create the API token, you’ll get access keys. Copy these so you can use them in the next step.
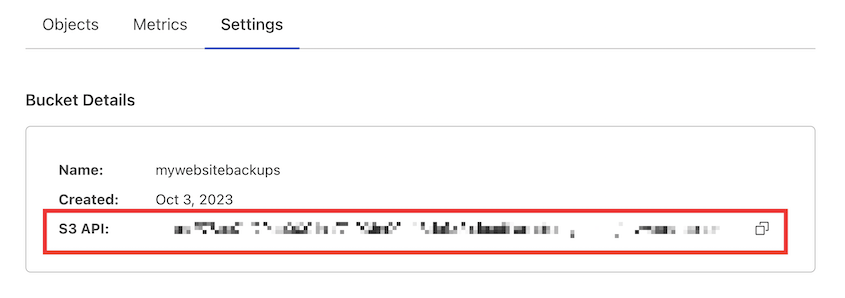
You’ll also need your S3 API endpoint. This will be in your bucket settings.
With all of this information, you can fully authorize Duplicator to send backups to Cloudflare R2 cloud storage!
Step 4: Connect Cloudflare R2 to Duplicator
At this point, open your WordPress dashboard and go to Duplicator Pro » Storage » Add New.
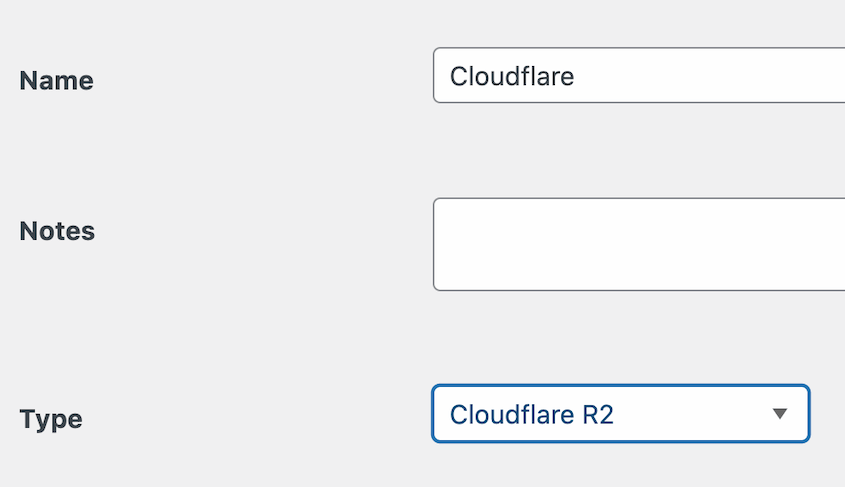
Name the new storage location. Select Cloudflare R2 as the Type.
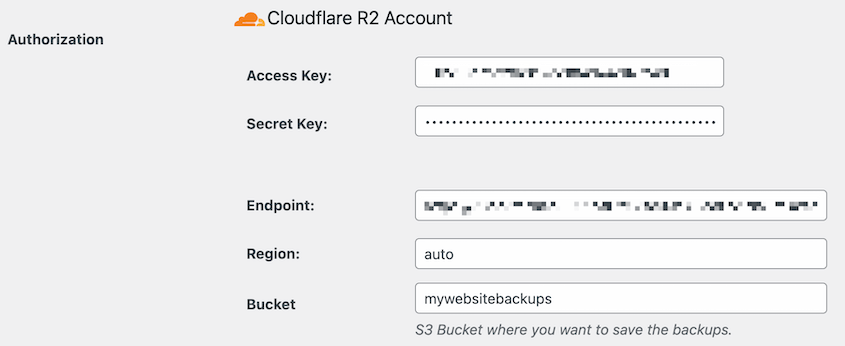
Under Authorization, paste your access key, secret key, and endpoint. If you allowed Cloudflare to choose your region, enter auto. Finally, add your bucket name.
You can adjust the Max Backups value if you want to avoid storing too many backups in your Cloudflare account. Duplicator will delete old backups, optimizing your storage space.
To make sure the setup is correct, click Test Storage. If Duplicator can create and delete a small file on Cloudflare R2, you have a new cloud backup location!
Step 5: Create a Cloudflare R2 Backup
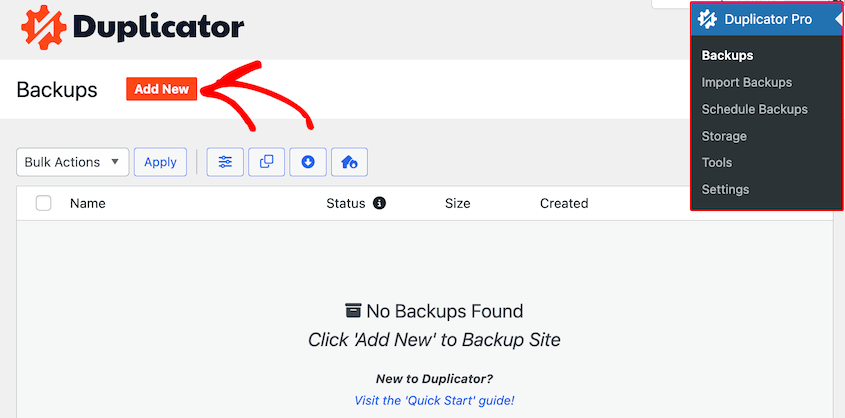
Now you can back up your website to the cloud! First, head over to Duplicator Pro » Backups » Add New.
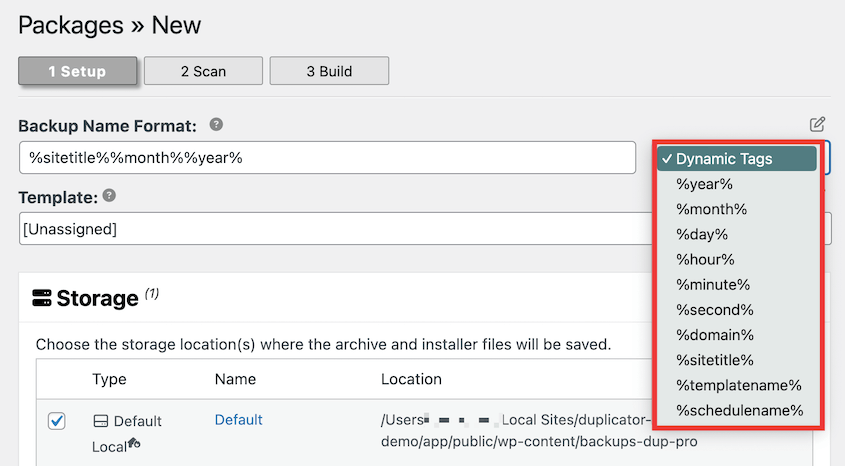
Use dynamic tags to create a custom backup name. This will automatically update for new backups.
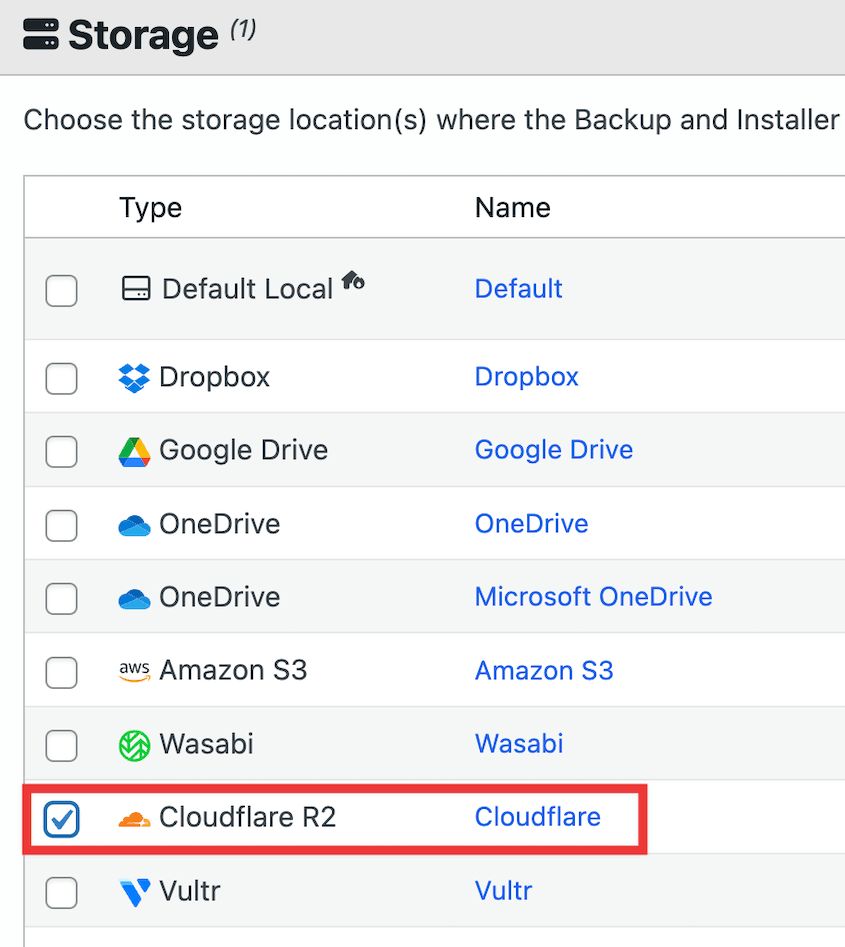
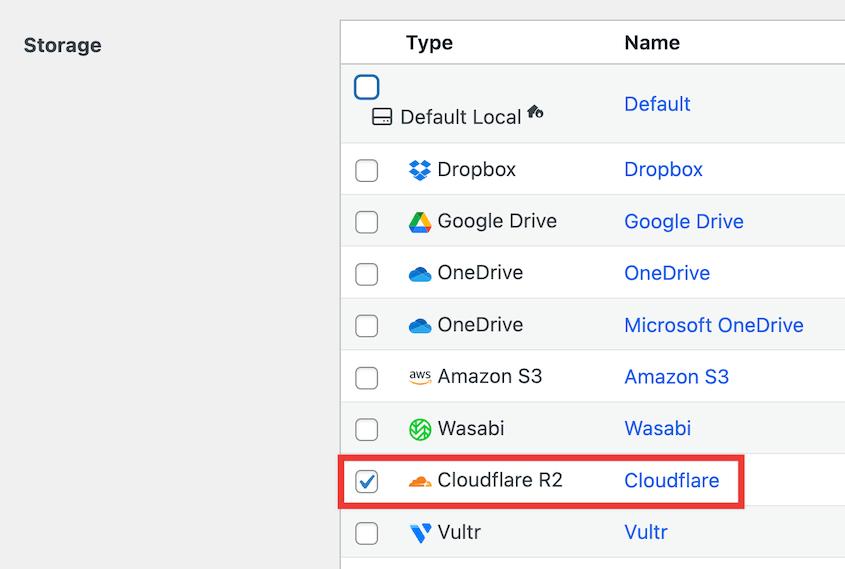
Under Storage, choose Cloudflare R2.
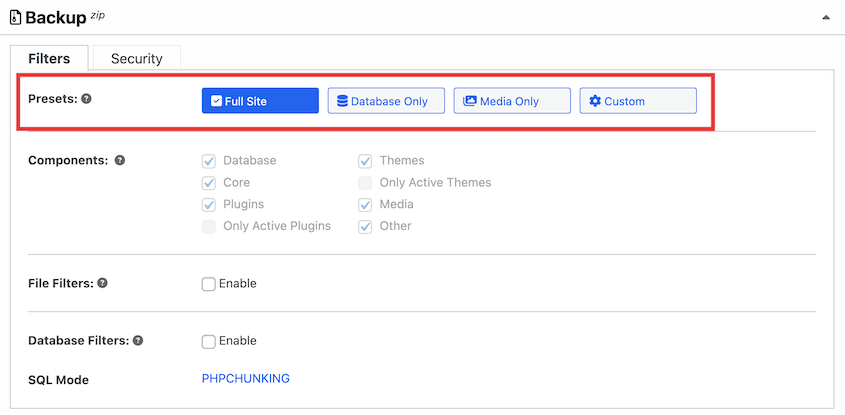
Now you can customize the backup. Select the Full Site preset if you want to save a full copy of your website. However, you can easily uncheck certain elements like inactive plugins, themes, or the media library.
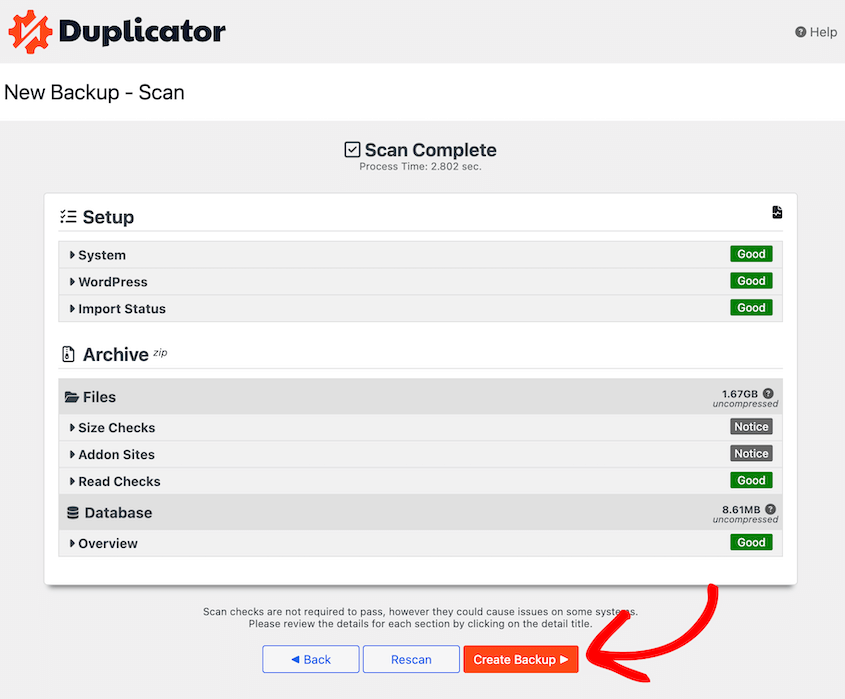
Hit Next. Then, Duplicator will fully scan your site.
If everything looks fine, click on the Create Backup button. During the backup process, Duplicator will make a copy of your WordPress site and automatically send it to the cloud.
Step 6: Set Up Automatic Cloudflare R2 Backups
To make sure your site is backed up as often as it should be, consider setting up automatic backups. This way, you’ll never forget to save your data. Plus, it takes one maintenance task off your hands.
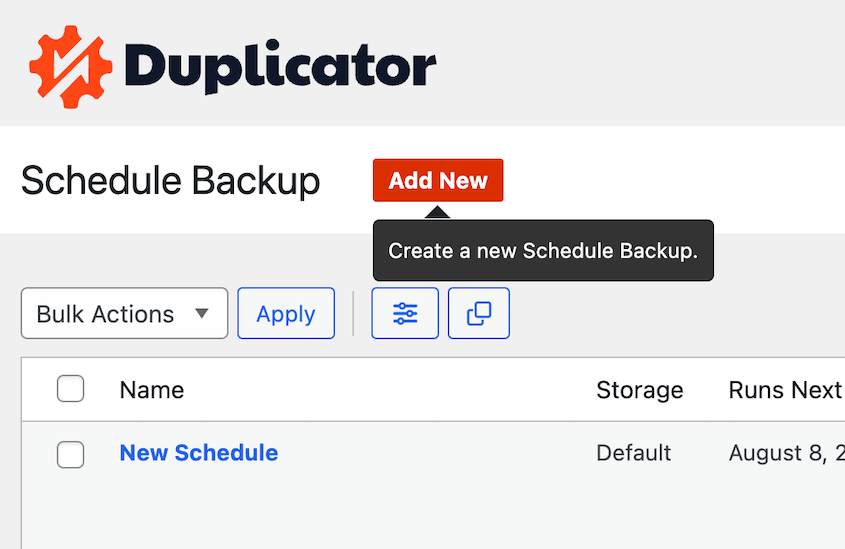
With Duplicator, you can automate backups in just a few minutes. First, find Duplicator » Schedule Backups » Add New.
Give the schedule a descriptive name. You can choose the default backup template or create a new one for custom backups.
Under Storage, select Cloudflare R2 as your cloud provider.
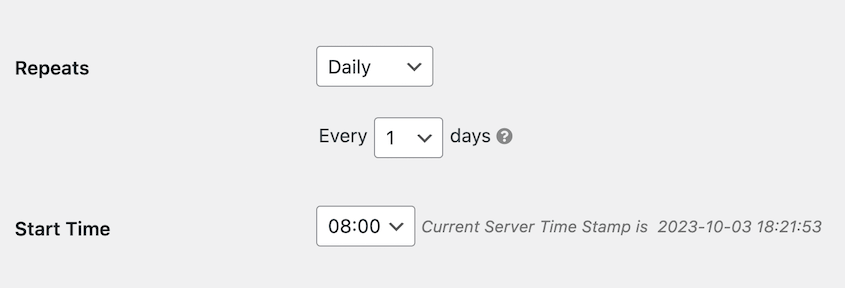
Then, you can choose how often you want your site automatically backed up. Duplicator supports hourly, daily, weekly, and monthly auto backups.
If you’d like to, select a custom start time. At the bottom of the page, enable the schedule and save it.
How to Restore Your Cloudflare R2 Backup
You might eventually experience a WordPress error, cyber attack, or server downtime. This is why it’s so important to have your backups stored in the cloud.
If you regularly send backups to Cloudflare storage, you can restore your website to its normal functionality. Since your data is off-site, it’ll be protected from any server problems.
All you’ll need to do is open Duplicator’s Backups page. Find a recent Cloudflare R2 backup and hit Restore.
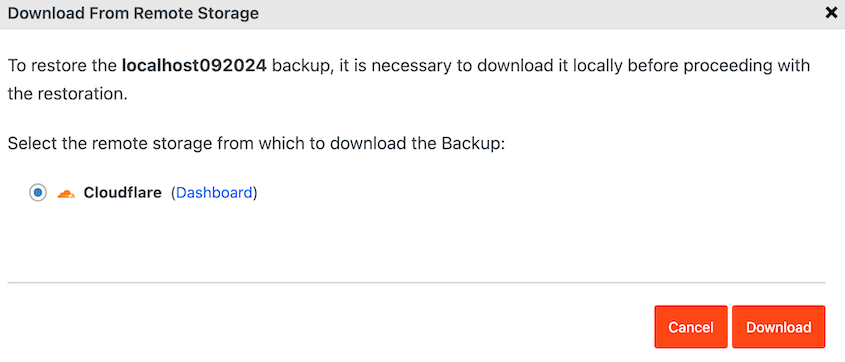
In the pop-up, click on Download.
At this point, Duplicator will pull your backup from cloud storage to your local server. When it’s done, the restoration wizard will automatically launch.
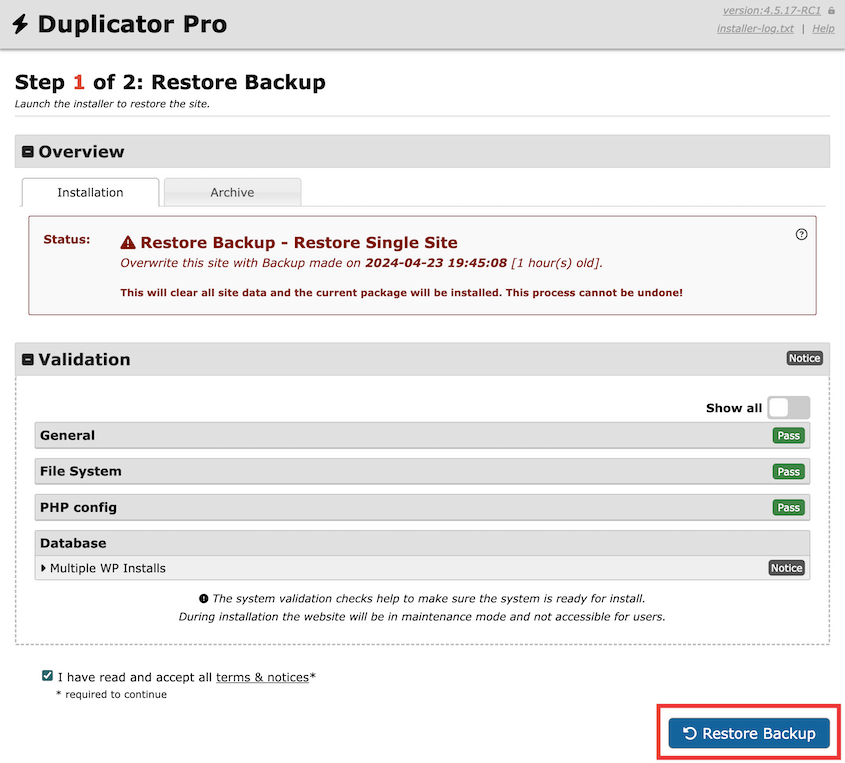
Accept the terms and notices. Then, select Restore Backup.
That’s it! You’ve just restored your Cloudflare R2 backup without ever leaving WordPress.
FAQs About Cloudflare R2 Backups
Is Cloudflare R2 worth it?
Cloudflare R2 can be a worthwhile cloud storage service if you’re looking for a more affordable solution than Amazon S3. Cloudflare R2 offers the same data durability, scalability, and security, without any egress bandwidth fees.
When it comes to pricing, Cloudflare R2 offers 10GB of storage space for free every month, while Amazon S3 only offers 5GB. Both have pay-as-you-go pricing, but Cloudflare R2 plans start at $.015 per GB per month and Amazon S3 increases this to $.023 per GB.
What is Cloudflare R2 used for?
Cloudflare R2 is a scalable storage service that offers low-cost data retrieval without egress fees. It can be used for pictures, videos, data lakes, website backups, and much more.
How do I upload files to Cloudflare R2?
You can easily upload backup files to Cloudflare R2 using Duplicator Pro, the best WordPress backup plugin. After adding your Cloudflare R2 bucket as a new storage location, create a new backup. If you choose Cloudflare R2 as the storage location, Duplicator will automatically back up your website to the cloud.
What is the maximum size for Cloudflare R2?
The maximum upload size for Cloudflare R2 is 4.995GB. This applies whenever you’re uploading a file or uploading one part of a multi-part upload. You can increase this limit by contacting Cloudflare’s account team.
Why does everyone use Cloudflare?
Many people use Cloudflare to enhance website security and performance. Its services include DDoS attack prevention and a global Content Delivery Network (CDN). It even has an object storage service, Cloudflare R2, that can secure large amounts of unstructured data.
We hope this guide helped you create a Cloudflare R2 backup for your WordPress site!
Along with sending them to the cloud, here are some other ways to optimize your backups:
Do you want to protect your data from unexpected errors? Download Duplicator Pro to save your site backups in 14 different cloud storage locations!
Joella is a writer with years of experience in WordPress. At Duplicator, she specializes in site maintenance — from basic backups to large-scale migrations. Her ultimate goal is to make sure your WordPress website is safe and ready for growth.


