Moving a WordPress site can feel like packing up your house for a big move. You want everything to arrive safely at the new location, with nothing broken or left behind.
Many website owners rely on migration plugins or their web hosts to handle the move. These tools work well, but you might want more control over your site’s migration.
In a manual migration, you’ll be your own moving company – you’ll pack every box yourself and know exactly where everything goes.
While it takes more time, you’ll have complete control of every file and database entry.
Manual migration isn’t for everyone. You’ll need some technical know-how and attention to detail.
But after moving hundreds of sites myself, I’ve found that doing it yourself can sometimes be safer than trusting third-party tools.
In this guide, I’ll walk you through the exact steps I use to manually migrate WordPress sites.
By the end, you’ll know exactly how to move your site without losing any content along the way!
Table of Contents
Quick Summary: How to Manually Migrate a WordPress Site
1. Export your database.
To start manually migrating your WordPress site, open phpMyAdmin and select your database. Export it as a SQL file.
2. Transfer your website’s files to the new location.
Next, download all of the files in your site’s root directory. Upload them to the new site’s root directory.
3. Create a new database.
Before you migrate your database, you’ll need to create a new one for the new site. You can do this with cPanel. Be sure to also add a new user and assign it to the new database.
4. Import your original database.
Open the new site’s phpMyAdmin. Select the name of the database you just created. Click on the Import tab and upload your old database.
5. Edit your wp-config.php file.
In your new site’s wp-config.php file, update the database name, user, password, and host.
6. Update your URLs and DNS settings.
After migrating your site, update your DNS Settings, along with your WordPress Address and Site Address. Use search and replace scripts to replace your old domain with the new one.
Expert Tip: To reduce these steps, I’d recommend using a WordPress migration plugin instead! With Duplicator Pro, you can back up your original site and drag and drop it into the new location.
Why You Might Want to Manually Migrate Your WordPress Site
When you first set up your website, you’ll choose a hosting plan and domain name that meets your needs. However, you may eventually need to migrate your site. This involves moving your WordPress website to another web host, server, or domain.
Here are some reasons to migrate your site.
You could start experiencing downtime, slow loading speed, or other performance problems. In this case, you’ll need to find a better web host or upgrade your hosting plan. For example, you might move from a shared server to managed WordPress hosting.
- Increased organic traffic
Once you grow your small business or blog, your current server may not be able to handle this large amount of traffic.
A complex domain name can impact your website’s credibility. If you’re considering moving to a new domain, it’s time to migrate your site.
Making changes to your live site could break it. To avoid this problem, you can migrate your content to a localhost staging site.
Before Manually Migrating Your WordPress Site
Before you start migrating your website, it’s important to take a few preventive steps.
First, delete any inactive WordPress plugins and themes so you’re not migrating useless content. Then, make sure to fully update your site, themes, and plugins.
We’d also recommend disabling any caching plugins installed on your original site. Sometimes, these interfere with the migration process.
Lastly, back up your website. This will ensure that you have a functional copy of your site if anything goes wrong during the manual migration.
How to Manually Migrate a WordPress Site
Although migration services can automate the process, you may want to do it yourself. If you have some technical knowledge, you can manually migrate WordPress without any third-party tools.
Manual migrations always come with some risks. You could lose important data or break your entire site. To make this process easier and safer, I’d recommend installing a WordPress migration plugin like Duplicator Pro.
Step 1: Export Your Database
To get started, you’ll need to export your original site’s database. This stores crucial data like posts, pages, widgets, and WordPress settings.
Once you have this database backup, you can easily upload it to your new server.
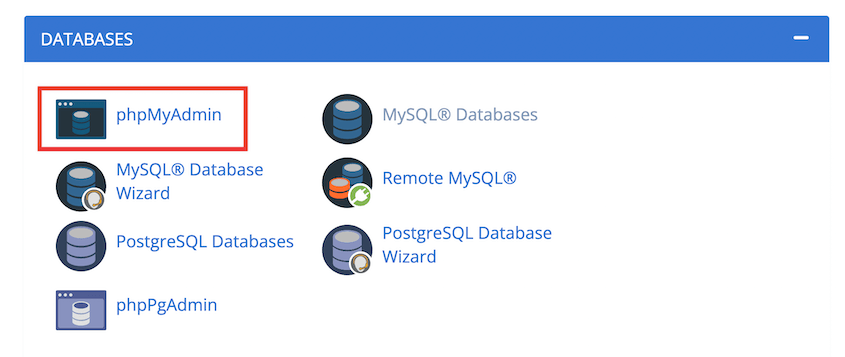
Usually, your web host will allow you to easily access phpMyAdmin, which is a database manager. With Bluehost, for example, find the phpMyAdmin button.
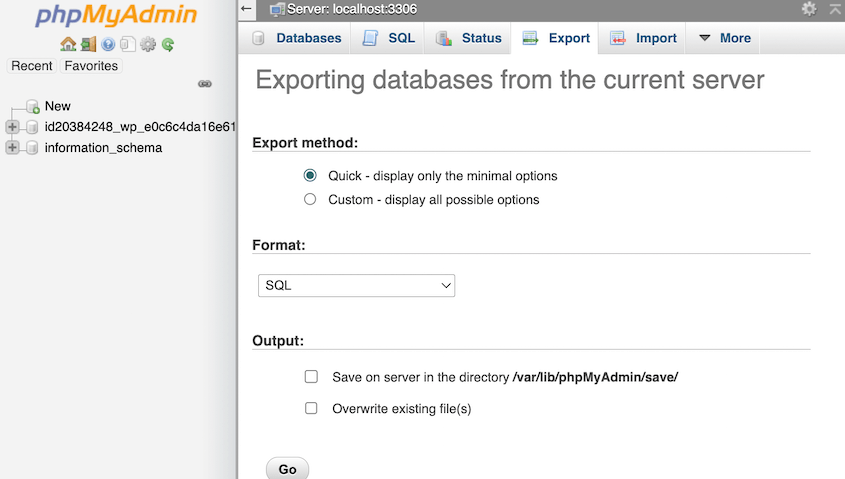
Then, select your database. After this, click on the Export tab.
This will give you options for exporting your database. You can select Quick as the Export method. Be sure to choose a SQL format.
To export the database, hit Go. Your database will automatically be downloaded as a SQL file. Lastly, compress it into a zip file.
Step 2: Transfer Your Site Files to the New Server
Now you’ll need to export your WordPress files.
To do this, log into the file manager that is recommended for your web host. This could be cPanel, FileZilla, or a custom-branded manager.
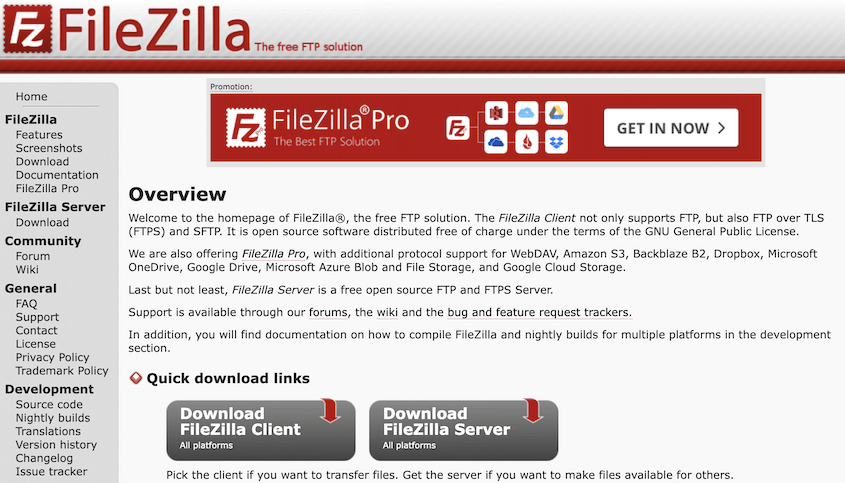
For this tutorial, we’ll be using FileZilla. This is a third-party SFTP/FTP client that is useful for editing website files.
To connect your site, enter your host name, username, password, and port number. You can find this information from your WordPress hosting provider.
After you click on Quickconnect, you’ll see your site files in the right-hand box.
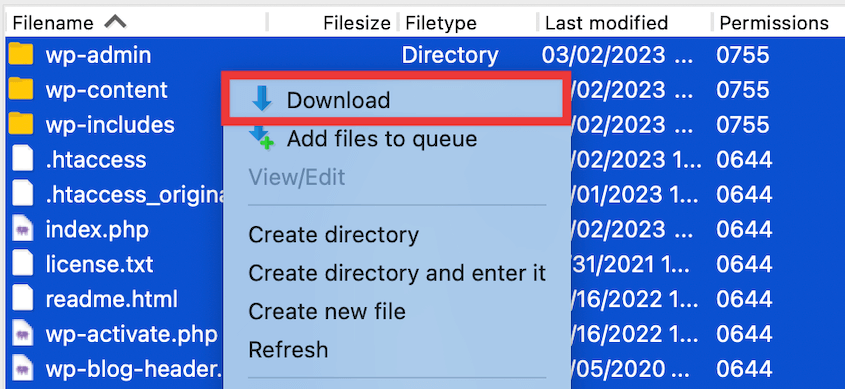
Open the public_html folder, which is your root directory. Select all of the core files in this folder and download them.
Be sure to download all of the main folders like wp-admin, wp-content, and wp-includes. You’ll also need hidden files like .htaccess.
Once FileZilla transfers these files to your computer, compress them into a single zip file. This makes it easy to upload them to the new server.
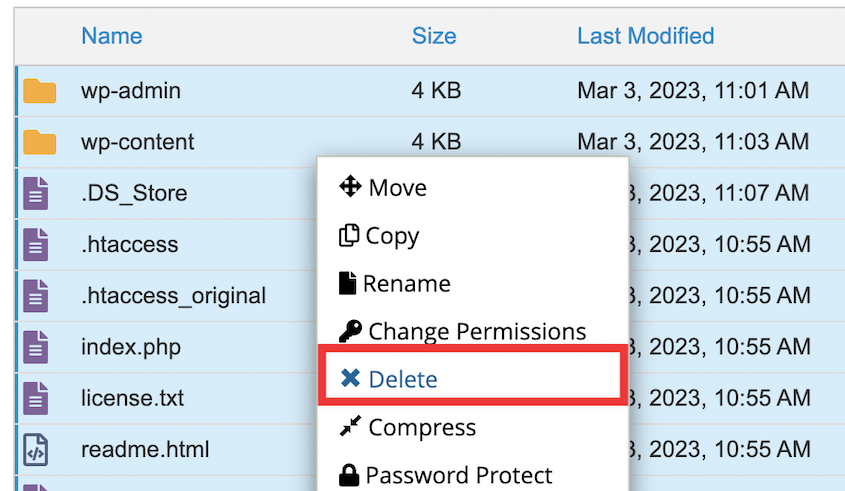
Next, open the file manager for the new website. Similar to the old site, find the public_html folder and open it. However, you’ll need to delete all of the content in this folder.
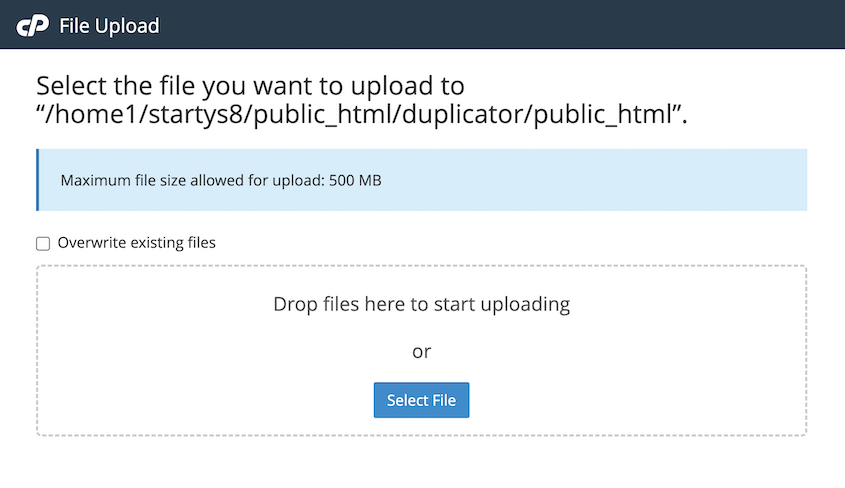
Then, upload your original files to this directory. You can simply drop your zipped file into the upload box if you’re using cPanel.
Be sure to extract the zip file after it uploads. You should now have your original files uploaded to the new website.
Step 3: Create a New Database
If you’re working with a new WordPress installation, you’ll need to create a new database. This will provide a space to import your saved SQL database.
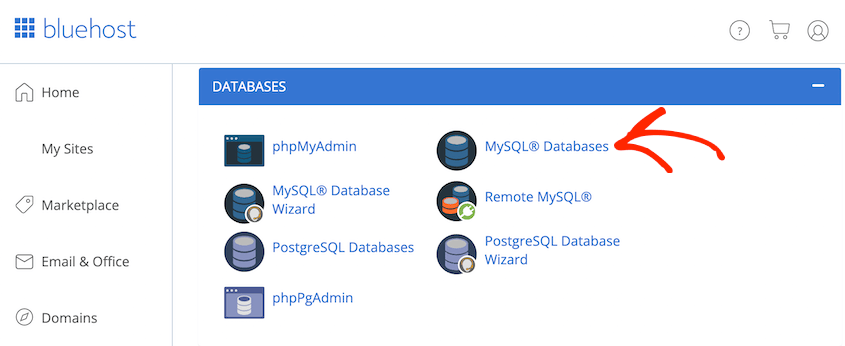
Depending on your hosting company, this process might vary. If you’re using a host that provides cPanel, find the Databases settings and click on MySQL Databases.
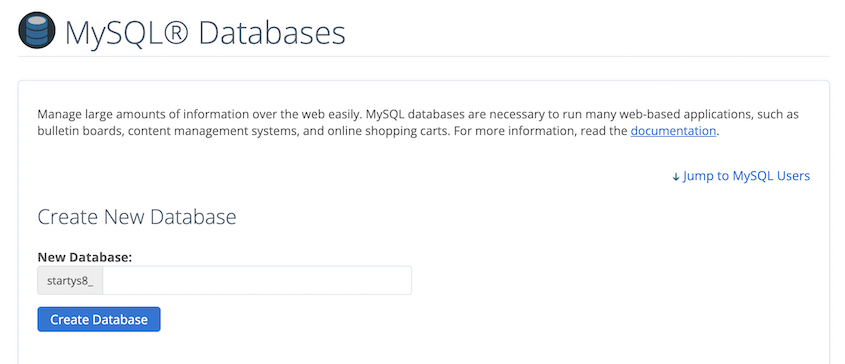
You can simply name the new database. Then, hit Create Database.
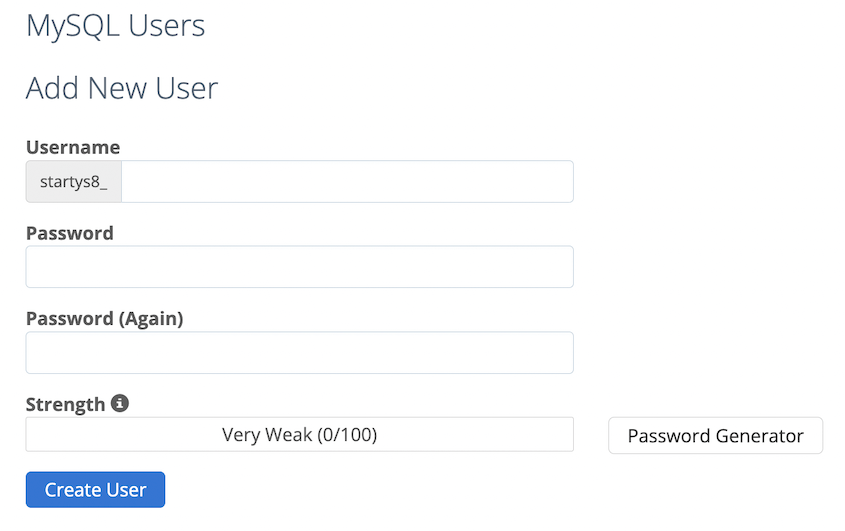
Along with a new database, you’ll need to add a new user. Provide a new username and password in the MySQL Users section.
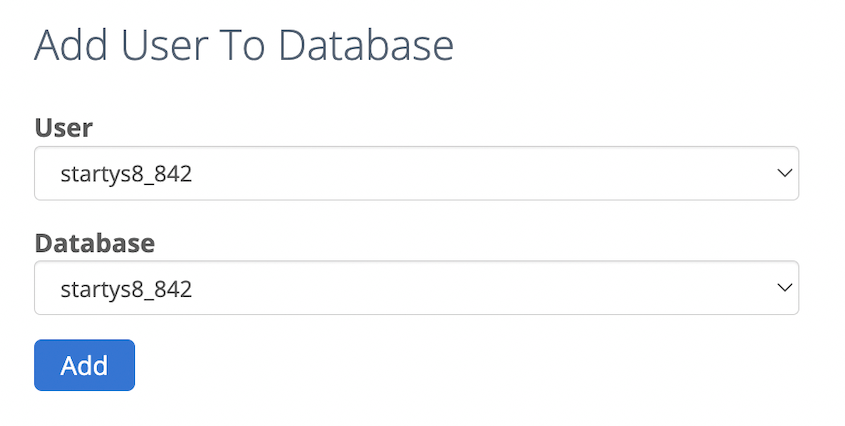
Then, link the new user to the database you just created. Underneath Add User to Database, select the new user and database.
Feel free to grant the user all privileges. This will give the user full control over the database.
Step 4: Import Your Original Database
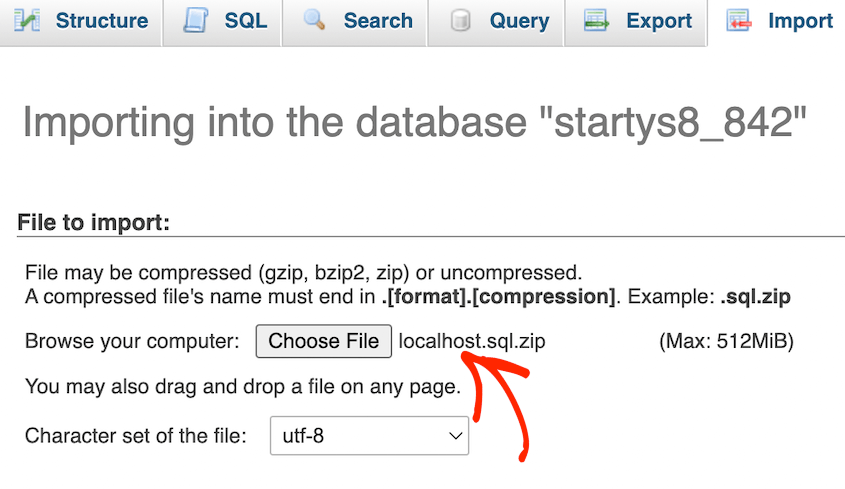
Once you’ve created a new database, you can import your original database into it. To do this, open phpMyAdmin for the new site and select the database you added. Then, go to the Import tab.
On this page, click on Choose File and upload your zipped database file. Lastly hit Go to import your original database.
Step 5: Edit the wp-config.php File
Every WordPress site has a wp-config.php file that contains information about its database. Since you uploaded your original site files to a new server, you’ll need to update this wp-config.php file.
If you have a new WordPress installation, you’ll have a wp-config-sample.php file. Make a copy of this and rename it wp-config.php.
First, open your file manager and go to public_html » wp-config.php. In this file, find the lines with DB_USER, DB_NAME, and DB_PASSWORD.
Delete the old database name, user, and password. Then, add your new database information. You may also need to update the DB_HOST value to reflect your new host.
If you moved to a new domain, you should also search for any mention of your old domain name or URL path. Be sure to update this data to point to your new website.
Step 6: Update Your DNS Settings
By now, your website will be fully migrated to the new server or domain name. Although your site is functioning, it’s important to also update how it’s displayed in the Domain Name System (DNS).
Currently, your domain’s DNS will point to its old host. Luckily, you can easily change this to reflect your new host.
This process will vary depending on where you registered your new domain. To give you an idea of how this works, we’ll walk you through the steps to change your nameservers in Bluehost.
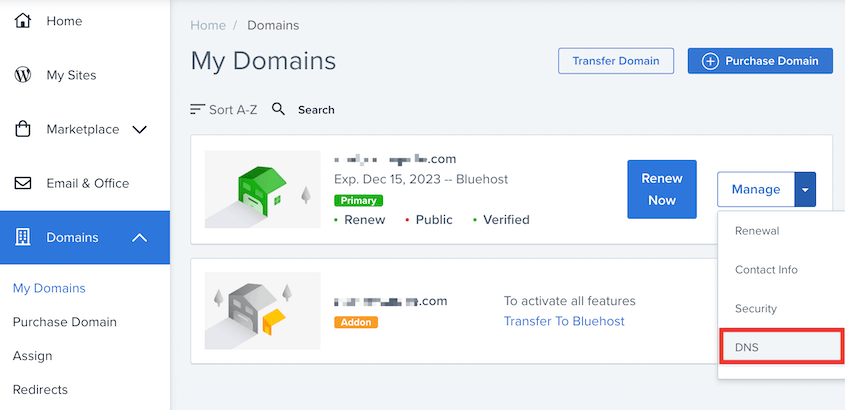
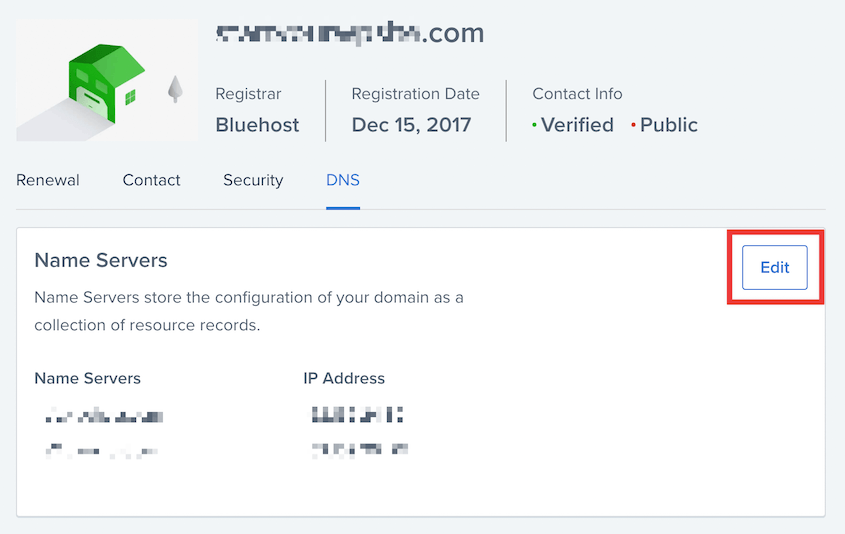
First, log into your hosting account and go to Domains » My Domains. Then, expand the dropdown menu on the right-hand side of your domain and click on DNS.
Here, you’ll see your DNS records, including your nameservers and IP addresses. Next, hit Edit.
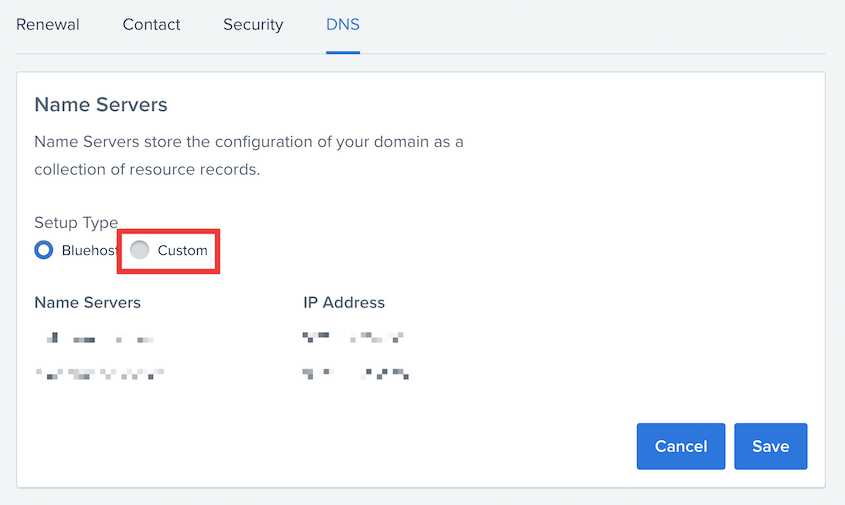
To point to a new web host, go ahead and select Custom as the Setup Type.
Now, simply enter the information for your new hosting provider. It can take up to 48 hours for the DNS to propagate and start pointing to the new site.
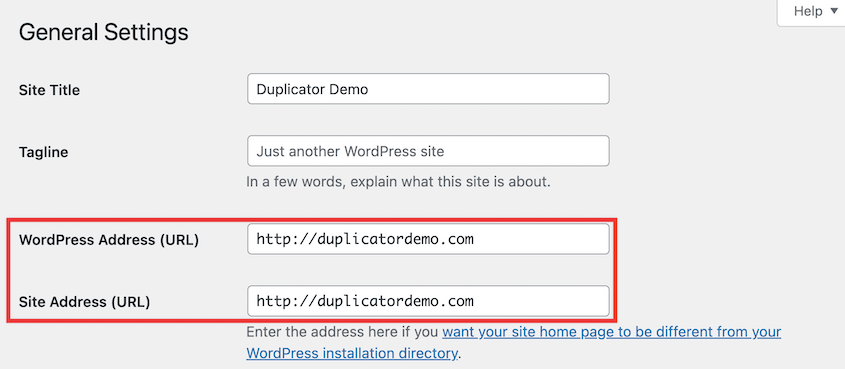
After this time period, open your WordPress dashboard and go to Settings » General. Find the WordPress Address and Site Address and update them.
Step 7: Update URLs
If you’ve moved to a new URL, you’ll also need to search and replace instances of the old domain. This way, images and other old URLs will point to the existing site.
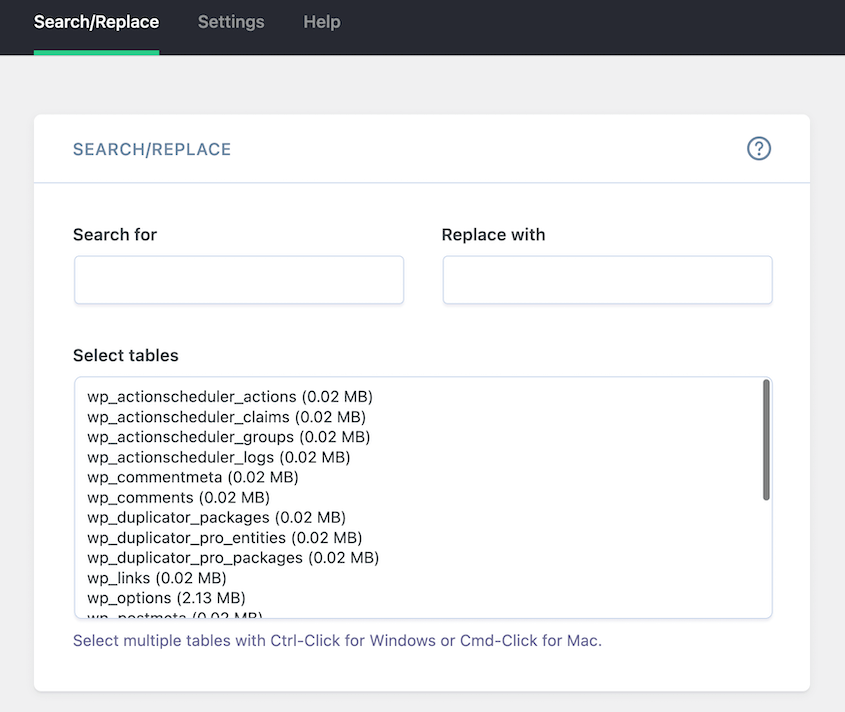
To do this, you can use the Search Replace DB script.
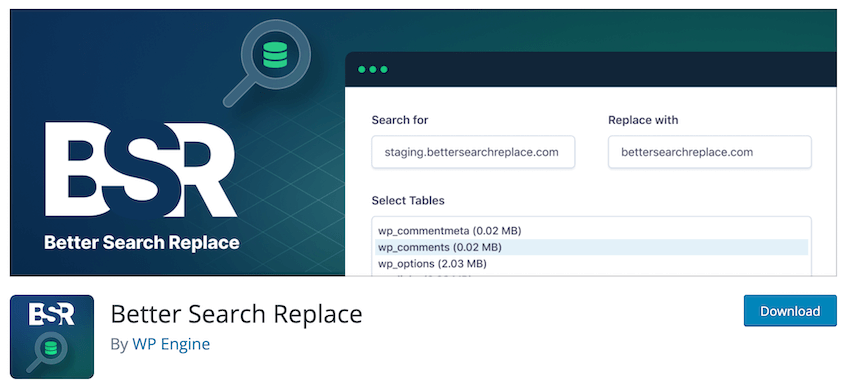
Alternatively, the Better Search Replace plugin offers a more beginner-friendly option. This tool allows you to run a search and replace on your database without leaving your dashboard.
Once you install the plugin, go to Tools » Better Search Replace. Enter your old URL in the Search for box. The new URL should go in the Replace with box.
Select all the database tables. Then, you can disable the dry run and continue to search and replace URLs on your database.
After a migration, you may also want to reach out to website owners who have given you backlinks. Make sure they update these backlinks with your new domain URL.
Duplicator: An Easier Way to Migrate WordPress
If you don’t have much experience working with the WordPress database or files, a manual site migration might not be the best option.
With all of the potential risks involved, you’ll probably want a safer way to migrate your website.
One fast and simple alternative is to install a WordPress migration plugin.
Although there are many to choose from, Duplicator is a powerful tool that allows you to export your WordPress site and move it with ease.
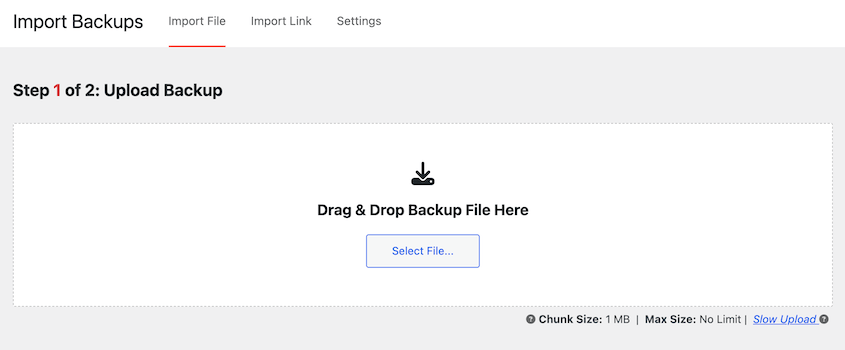
One of my favorite Duplicator Pro features its drag-and-drop functionality.
You can create a backup that bundles your site’s content, themes, plugins, database, and media files. Then, simply drop this zip file into the second site.
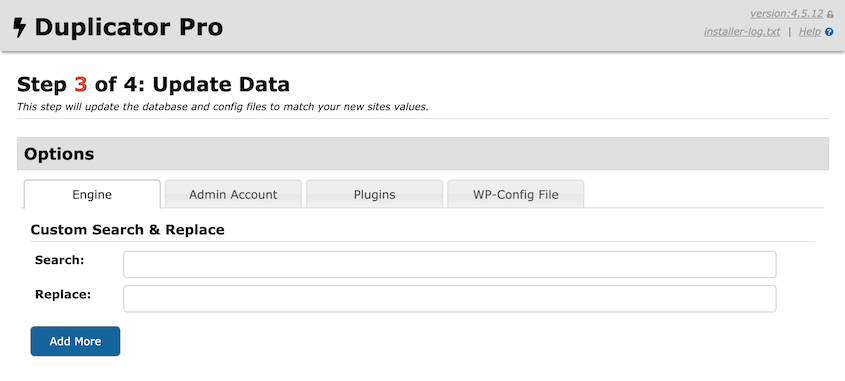
This will launch Duplicator’s migration wizard, which gives you a step-by-step guide on importing your original content. You won’t have to manually import files or run a search and replace script.
Plus, Duplicator was built to handle large sites and Multisite networks. You don’t have to worry about losing important data from your agency or business website.
This tool will save you a lot of time and effort as you’re moving your website. Rather than struggling with file managers and phpMyAdmin, you can allow Duplicator to do the work for you!
If you prefer a free migration tool, Duplicator also provides a free version. Even using Duplicator Lite, you can migrate WordPress sites without coding experience!
Frequently Asked Questions (FAQs)
What is the easiest way to migrate a WordPress site?
The easiest way to migrate a WordPress site is to install a WordPress migration plugin like Duplicator Pro. With Duplicator, you can package your entire site into a single zipped archive file. Then, you’ll be able to drag and drop it into a new WordPress installation.
This prevents you from having to manually transfer your files and database and ensures no data is lost in the migration.
If you want to explore the different migration plugins available, here are some of the most popular options:
How do I manually migrate my WordPress site?
To manually migrate your WordPress site, export the database of your current WordPress site in phpMyAdmin. Then, transfer all your website files to the new hosting environment using FTP or a file manager.
You’ll also need to create a new database on the new hosting server and import the previously exported database. Finally, update the database credentials and site URL in the new hosting’s wp-config.php file to ensure proper connectivity.
How do I upload my WordPress site to a live host after working locally?
On your local website, create a copy of the site’s files and database with Duplicator Pro. Make sure Duplicator is also installed on your production site. Then, use the Import tool to upload your local site to the live server.
Can I transfer one WordPress site to another?
Yes, you can transfer one WordPress site to another. Using the Duplicator Pro plugin, simply create a backup of the original site. Then, import the backup into the new site and follow the steps in the Duplicator migration wizard.
How do I restore my WordPress site to a new host?
To restore your WordPress site to a new host, make sure you’re using Duplicator to save regular backups. If your site crashes and you decide to upgrade your hosting, simply drag and drop the most recent backup archive file into the new site. This will recover all of the data from the original site.
Conclusion
Moving a WordPress site doesn’t have to be complicated. After completing many manual migrations, I’ve realized it’s all about following the right steps in the right order.
If manual migrations feel too technical, try Duplicator. I’ve used it on countless client sites, and it’s as simple as creating a backup and dropping it into a new location. You won’t have to touch a single database file.
Want to make your next migration even smoother? Keep regular backups of your site. You’ll always have a recent copy ready if something goes wrong during the move.
Remember to test everything after the migration. Check your pages, posts, and contact forms. I always spend at least an hour clicking through the site to make sure nothing broke during the move.
Need more WordPress migration tips? Check out our other guides below.
Joella is a writer with years of experience in WordPress. At Duplicator, she specializes in site maintenance — from basic backups to large-scale migrations. Her ultimate goal is to make sure your WordPress website is safe and ready for growth.


