Do you want to migrate your WordPress site to another location? Do it in 3 easy steps with our Classic Install option. To overwrite an existing WordPress site, use Overwrite Install OR Import Install (Pro).
For a guided walkthrough, check out the video tutorial:
These steps will show you how to install/ redeploy your WordPress site (Duplicator package) to a new location.
Step 1 – Create and Download Backup
Create a backup, then download the installer and archive files to the local computer from:
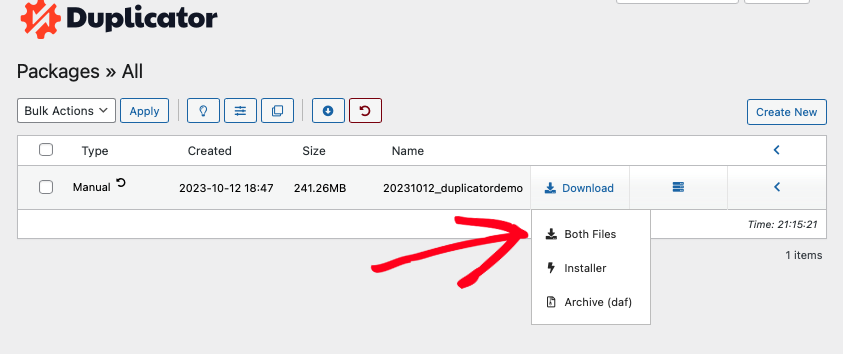
Navigate to Duplicator Lite/ Pro » Packages » and click on Download. You can select Both Files or download the Installer and Archive File individually

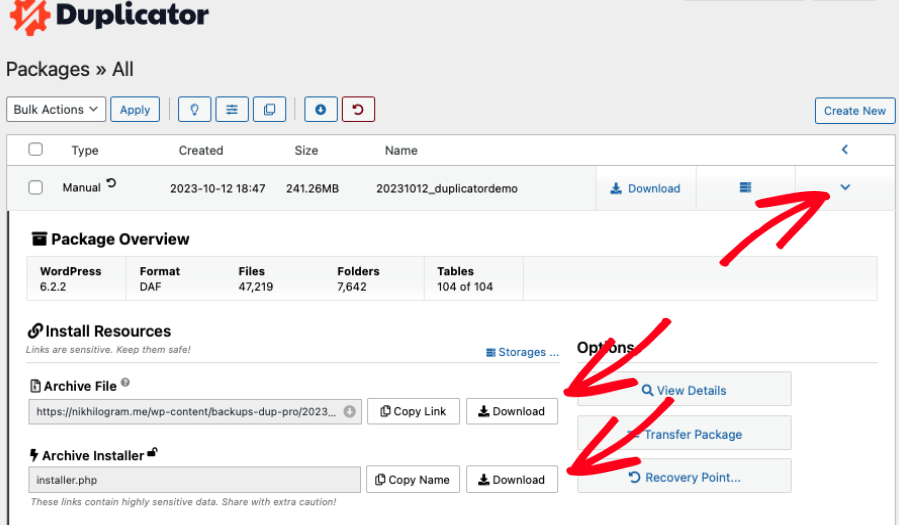
You can also view the Package Overview by dropping down the arrow.

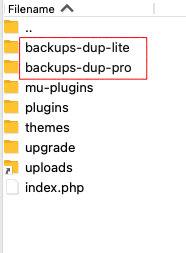
You can use File Transfer Protocol (FTP) if needed. Open an FTP Client like FileZilla » Go to the site directory » and find the wp-content folder. Locate backups-dup-pro or backups-dup-lite folder under wp-content:

Find matching installer.php with [hash-code]_archive.zip and download it.
Step 2 – Transfer the Backup
Transfer both the archive.zip and matching installer.php files from your computer to the root path of your destination site.
There are two possible locations where the archive and installer files can be placed. One is on your local computer (localhost), and the other is on a remote host commonly referred to as your hosting provider.
Remote Host
Use FTP, cPanel, or your host’s file manager to transfer the archive.zip and installer.php downloaded in Step 1 to the remote server. Place both of the files in a new empty directory on your host where the files are accessible from a valid URL such as:
https://your-domain/installer.php
https://your-domain/your-wp-directory/installer.php
The files can be placed on your web server’s root directory, but do not have to be placed there. On some hosts the root directory might be public_html -OR- www.and the host will allow files to be placed at that location. While other hosts do not allow files directly in the web server root folder. If you’re not sure where you can place the files then contact your hosting provider. Please make sure the directories they are copied to have the correct permissions.
Localhost
Be sure you have PHP, Apache, and MySQL installed on your local computer with software such as XAMPP, Instant WordPress, or MAMP for MAC. Place the archive.zip and installer.php into any directory under your webroot or where your local web server can serve them up, then continue with the Step below.
Step 3 – Installing the Backup
Open any web browser and browse to the ‘installer.php’ such as:
http(s)://your-domain/installer.php
http(s)://your-domain/[hashed-secure-data]_installer.php
In Step 1, Setup » Create Database and User,» Enter Database Connection Info,» Click on Validate,» and click Next.
Log in to your site and check if the site has been migrated.
How To Restart The Installation:
- Remove all files and directories from where you installed your site (except the installer and backup file).
- Hit your web browser’s back button or browse the installer.php file again.
- Rerun the installer.

