Is your website still looking the way it did a few years ago? A website can quickly feel outdated, and you might be noticing it’s not quite capturing visitors’ attention like it used to.
It’s not just about wanting a fresh look; you want your website to be a powerful tool that drives your business forward.
A redesign is a strategic move to refresh your online presence and ensure your WordPress site is working its hardest for you.
If done correctly, a redesign can boost engagement, conversions, and brand awareness. But how do you do it?
In this tutorial, I’ll show you how to redesign your WordPress website!
Table of Contents
Quick Summary: How to Redesign a WordPress Site
1. Back up your live website
Using
Duplicator, create a full backup of your live WordPress website. Download the backup files.
2. Build a staging site
If you don’t already have one, you’ll need to build a staging site. You can do this with your web host or use a local development environment like LocalWP.
3. Move the backup to staging
Once you install WordPress on the staging site, drag and drop the backup of your live site into Duplicator’s Import Backups page. Follow the step-by-step guide to import your original files.
4. Start redesigning
Now that you have a copy of your site, feel free to edit your web design. Add new code or use a WordPress theme builder like
SeedProd to make this process easy.
5. Move the changes from staging to production
After your site looks and functions exactly as you imagined, back up the staging site. Drag and drop the backup into your live site. Duplicator will rewrite the old design with the new one!
Why You Should Consider Redesigning Your WordPress Site
You might be putting off your site redesign because you’re afraid it’ll take too much time or put your website in maintenance mode. However, here are a few situations where a redesign would be useful.
If your website looks outdated, lacks modern features, or fails to meet current design standards, it may be time for a redesign.
An updated website design can enhance your visitors’ experience and make your site more engaging and professional.
If users find it difficult to navigate your website or experience slow page load times, it can lead to a high bounce rate and decreased conversions.
Redesigning your WordPress site with a focus on User Experience (UX) can help address these issues and keep your audience engaged.
- Non-Responsive or Mobile-Unfriendly
Many people use their mobile devices to browse the internet. This means it’s important to have a responsive website that adapts to different screen sizes.
If your current website is not mobile-friendly or lacks responsiveness, it may be time to redesign it to maximize accessibility.
- Branding or Messaging Changes
If your brand has undergone significant changes or you want to revamp your messaging, a website redesign can give you a new brand identity. Having this consistency in branding and messaging will strengthen your overall image and help you reach your target audience.
- Search Engine Optimization (SEO) Improvements
Search engines frequently update their algorithms, and SEO best practices change over time. A website redesign offers an opportunity to optimize your site structure, improve page loading speed, and implement SEO-friendly elements to increase your organic traffic.
As your business evolves, you may need to add an e-commerce store, a blog, or social media feeds to your website. With a redesign, you can integrate these new features seamlessly and ensure they align with your overall design and user experience.
Before You Redesign Your WordPress Site
Later on, we’ll show you how to completely redesign your WordPress site. However, there are a few steps you should take beforehand.
Evaluate Your Current Design
Before redesigning your website, consider its current design. You’ll want to be aware of its good features, as well as anything you’d like to improve.
Be sure to note what you like about your original website. As you go through the redesign, you’ll want to keep these features and functionality.
But, considering its weak areas is important for a good redesign. By fixing poor layouts and color palettes, you’ll have a website that performs well and is pleasing to look at.
Check Your Current Benchmarks
To see whether a redesign was effective, you’ll need to know your current site stats.
You can easily check out your current benchmarks by installing MonsterInsights. This is a plugin that connects Google Analytics to your WordPress back-end, compiling all your performance data in a single location.
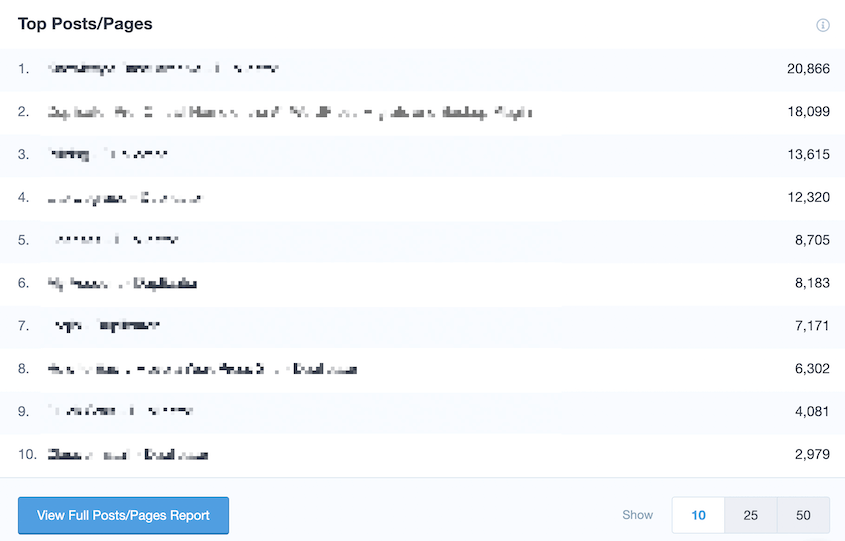
Once you add MonsterInsights to your website, find the Top Posts/Pages report. Here, you’ll see how many visitors you’re getting:
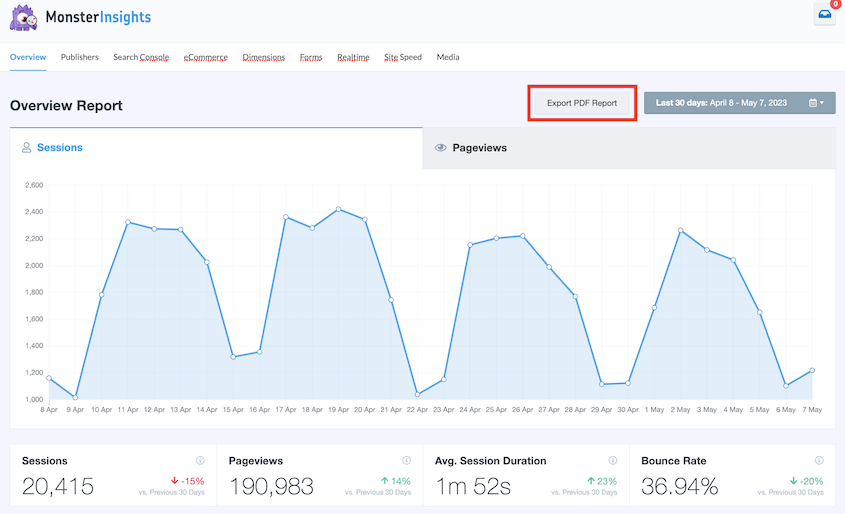
If you want to save any data from MonsterInsights, hit the Export PDF Report button. This will download a zip file with your page views, user sessions, bounce rate, and more:
By saving these statistics, you can easily see if your redesign was worth it. You’ll be able to compare analytics before and after the new design goes live.
Want to see what else MonsterInsights can do? Read our full review!
Have Goals for the Redesign
Once you know your performance benchmarks, you can set goals for the redesign.
With a good redesign, you can:
- Speed up loading time
- Increase conversion rates
- Reduce bounce rate
- Increase average time on page
- Improve user experience
- And more!
You could also try out a rebrand with new colors, logos, or layouts. Be sure to record your performance benchmarks before and after the redesign. These metrics help you decide if the redesign was successful or not.
Set a Budget
Finally, you’ll need to decide what your budget will be for the project. Some basic costs for a redesign include purchasing a new theme or hiring a professional web designer.
If you want to save money for other areas of your business, we’d recommend doing your redesign yourself. With a good theme builder, you won’t have to have any coding skills to build your new site.
How to Redesign a WordPress Site
Once you decide to improve your site’s design, you might not know how to go about it. Don’t worry, we’ll walk you through every step of the way!
Step 1: Install Duplicator Pro
If you’re considering a redesign, you won’t want to build an entirely new WordPress installation from scratch. Even if you’re redoing your entire website, it’s important to keep all your posts, pages, plugins, and other key details.
To avoid any data loss, we’d recommend creating a copy of your live website and moving it to a staging site. Here, you can build a new design without affecting your live users.
The best tool for this job is Duplicator. This WordPress plugin is a powerhouse for backups, migrations, and cloning. It downloads your entire website as a single zip file, making it easy to move.
Not sure if you need Duplicator during the redesign process? See how Rock Lobster Webdesign boosts design efficiency with Duplicator!
First, select a subscription for Duplicator Pro. There is a free version available, but Duplicator Pro comes with drag-and-drop migrations. This can help you get your redesign up and running in no time.
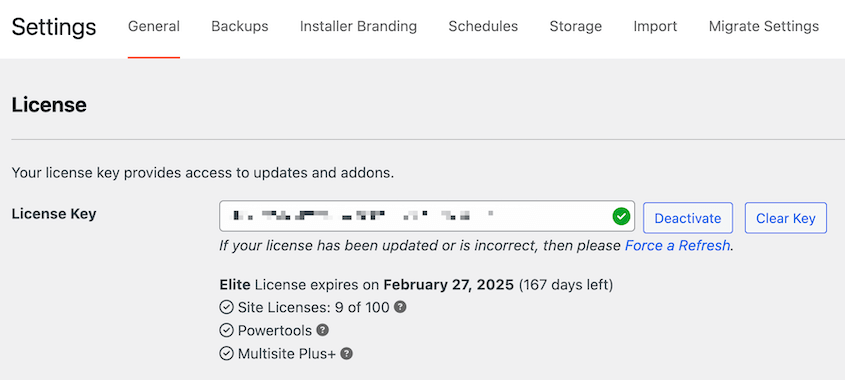
After you finish your purchase, copy your license key. Then, open the dashboard for your live WordPress site and install Duplicator.
Next, go to Duplicator Pro » Settings » General.
Paste your license key and click the Activate button. Now you’re ready to start the redesign process!
Step 2: Create a Copy of Your Live Website
For the next step, you’ll need to create a copy (or backup) of your website. Manual backups can be hard work, but Duplicator makes it simple for beginners.
Duplicator works by backing up all of your WordPress files, themes, plugins, and database tables into a zip file. Once you create a backup, you can easily move it to an entirely new server.
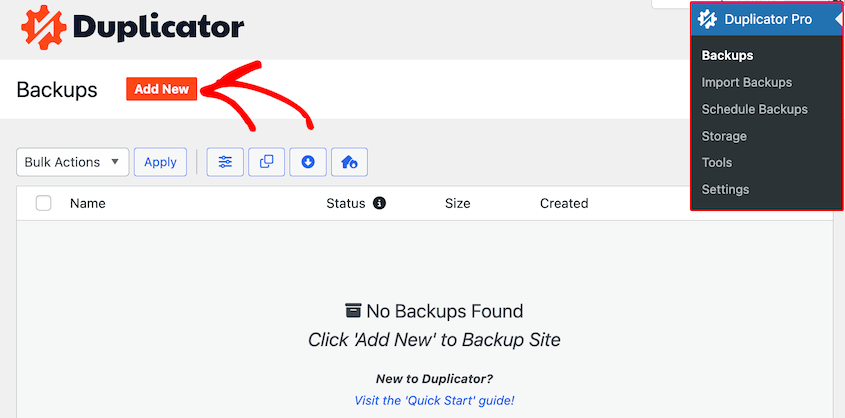
First, head over to Backups » Add New.
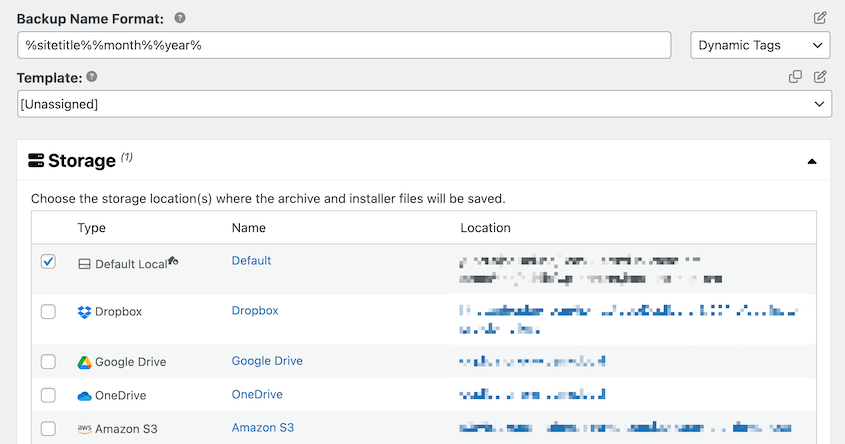
You can use dynamic tags to name the backup. Under Storage, select Local.
In your redesign, you might want to delete certain parts of your site. In this case, you can customize the archive file. Simply expand the Backup section and uncheck any components you don’t want included.
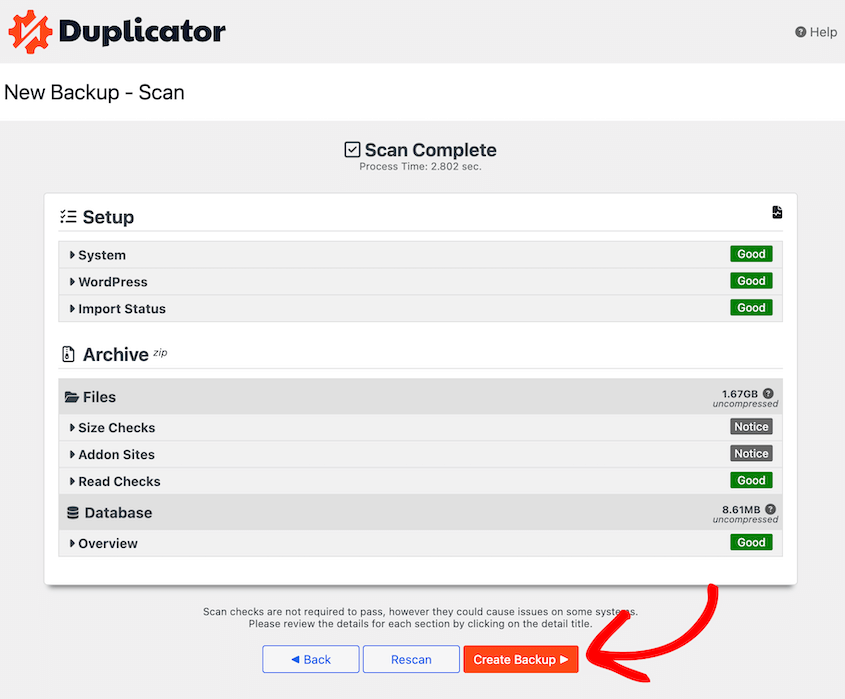
To back up your entire site, don’t make any changes. Then, hit Next.
Duplicator will complete a full scan of your live website. Be sure to review any notices before building the backup.
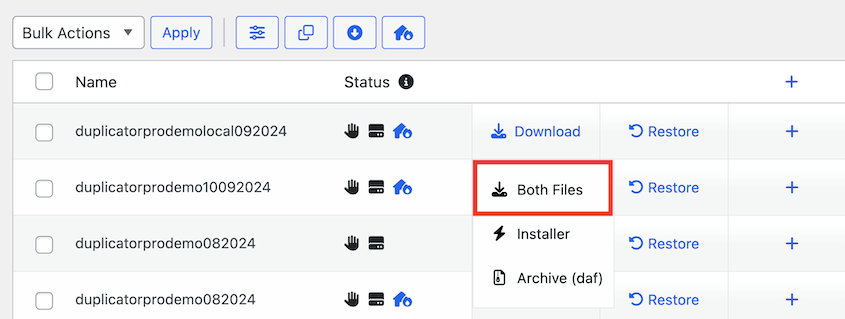
After your backup is created, you can download it.
If you’re planning to use a local staging environment like LocalWP, this software will often install WordPress for you. In this case, you’ll only need to download the archive file.
However, for uploading your backup directly to a server with an FTP client or cPanel, be sure to save the installer.php script as well.
Step 3: Build a Staging Site
When preparing for a big task like a redesign, it’s important to have a staging site. This is a cloned version of your website that you can use to test changes without affecting the functionality or appearance of your live site.
If you redesign your live website, you might accidentally publish glitches to your audience.
Using a staging site, you’ll have a safe and controlled space to ensure that everything is working correctly before going live. Plus, you won’t have to put your existing website in maintenance mode as you redesign it.
Sometimes, your web hosting provider will automatically build a staging area for you. However, you can also easily create one yourself or with a WordPress staging plugin.
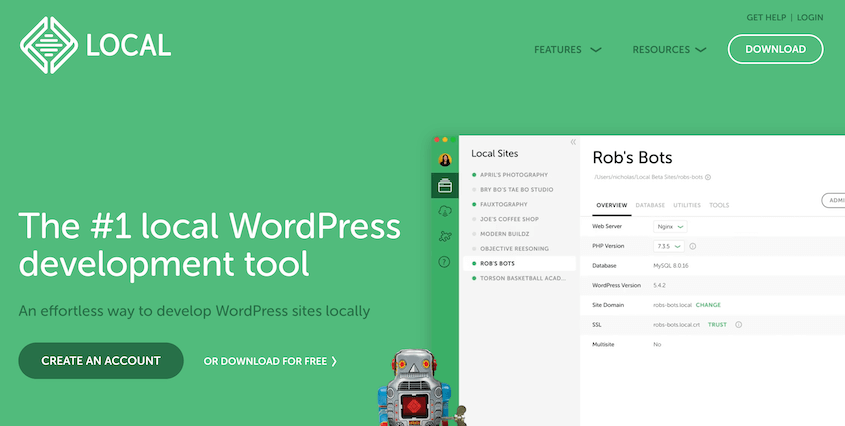
For this tutorial, we’ll be using LocalWP, which is a beginner-friendly local development software. It’ll set up and host a WordPress installation on your personal computer. Plus, it’s free to use.
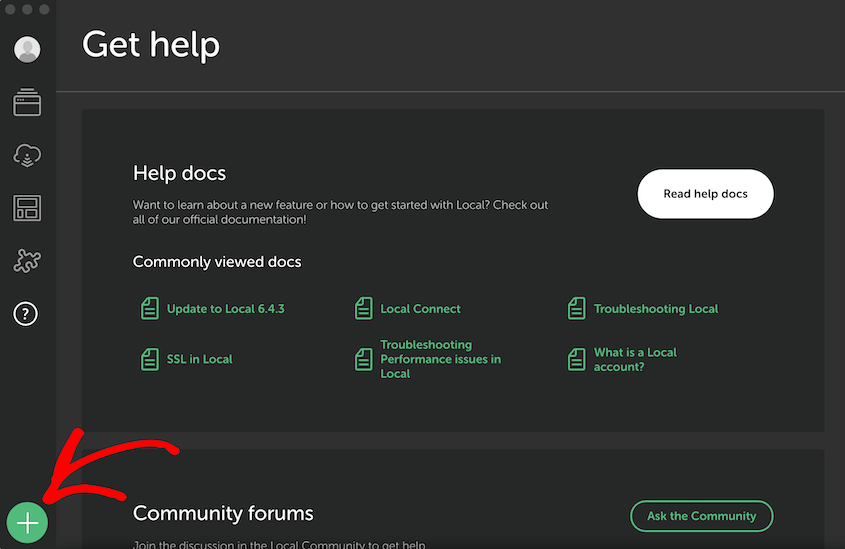
To get started, be sure to download the version of LocalWP that matches your computer’s operating system. Then, add a new site by clicking on the + icon.
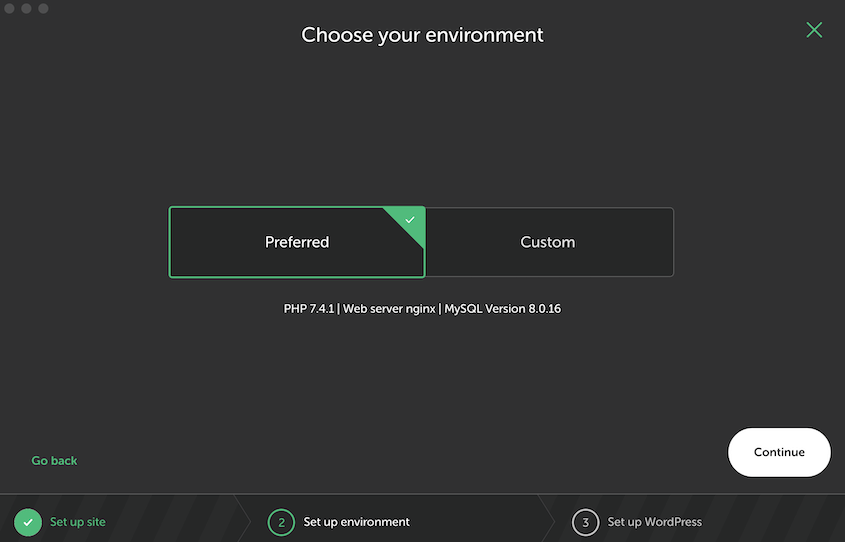
Next, name your staging site. If you’re a developer, feel free to set up a custom version of PHP, Apache, and MySQL. Alternatively, the Preferred option will create a basic WordPress site.
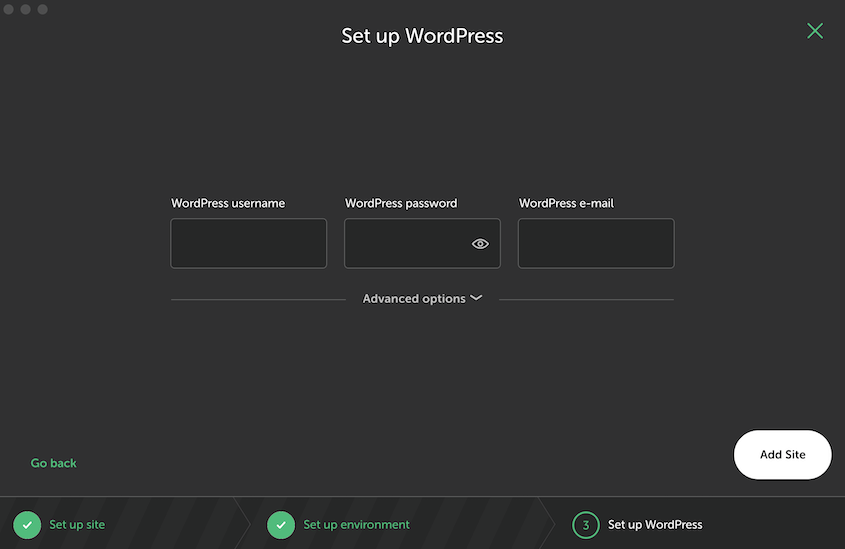
As a last step, enter a WordPress username, password, and email address. You’ll use these credentials to access the dashboard of your staging site.
You might want to host your staging site on the same server as your live website. This will ensure that there won’t be any errors when you migrate changes between the two sites.
To help you do this, check out our tutorial on creating a WordPress staging site.
Step 4: Import Your Backup
After LocalWP builds your staging site, it will be a default WordPress installation. To make it look and feel the same as your live site, you can simply import your saved backup.
On your Local app, select your site and hit WP Admin. This will open the dashboard for the local site.
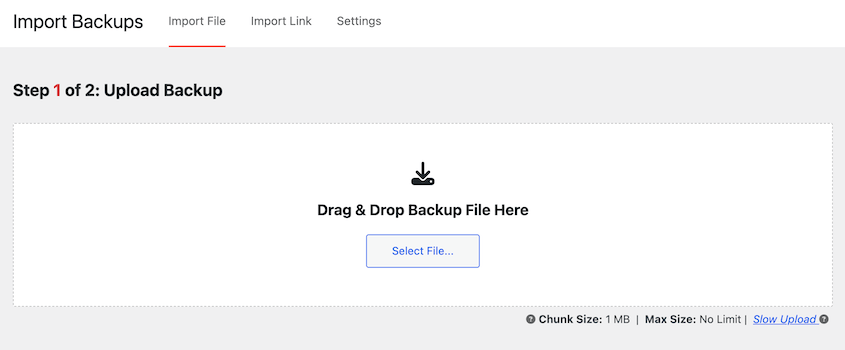
Here, install and activate Duplicator Pro as a plugin. Then, find the Import Backups page and upload the archive file you saved earlier.
Duplicator will notify you when the backup uploads. Click on Continue to start the installation.
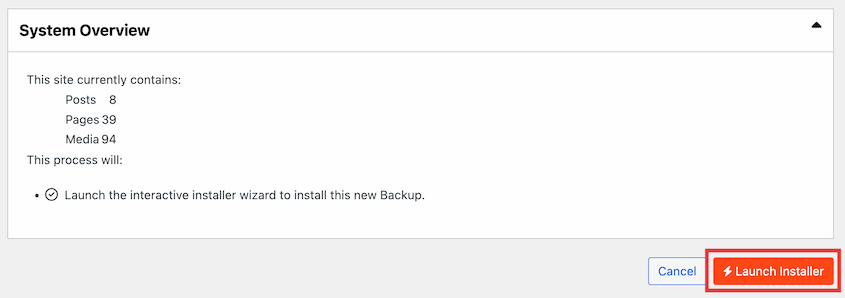
On the next page, hit Launch Installer.
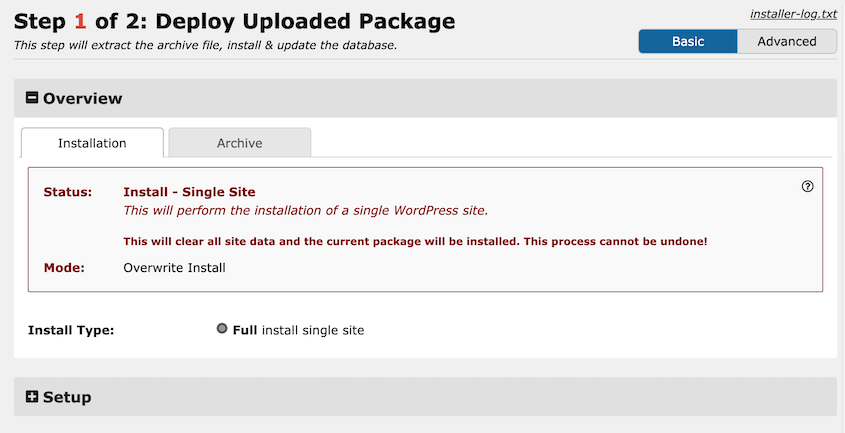
After this, you’ll see step-by-step instructions for deploying your site installation.
Accept the terms and notices. Then, click Next.
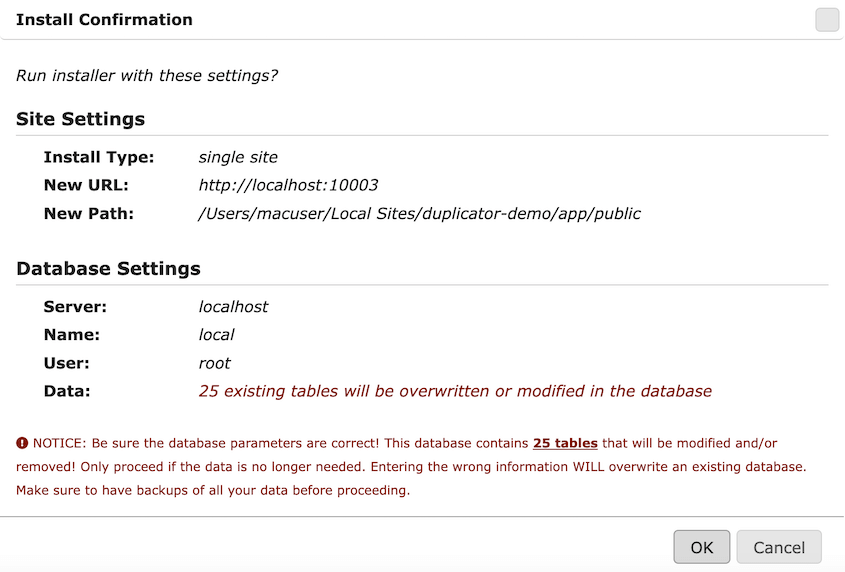
Finally, review the installation settings. If they look correct, hit OK.
Duplicator will then replace the default local site with an exact copy of your live site! You can use the Admin Login button to access your new dashboard.
Step 5: Build Your New Design
Now that you have a staging site, you can do a full redesign while your original website is still up.
Although you could design your website with the built-in WordPress editors, these aren’t very user-friendly or flexible.
To easily design any type of website, I’d recommend using SeedProd. SeedProd is the best website builder because it comes with drag-and-drop editing, over 150 landing page templates, and even pre-built website themes.
Although SeedProd started as a landing page builder, it’s evolved to customize every part of your website. Using its theme builder, you can easily design new pages, headers, footers, and more.
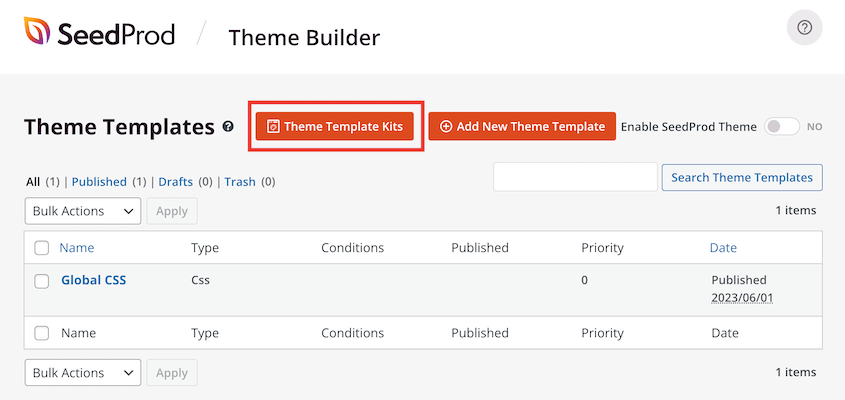
To take advantage of all these features, install and activate SeedProd on your local WordPress site. Then, go to SeedProd » Theme Builder » Theme Template Kits.
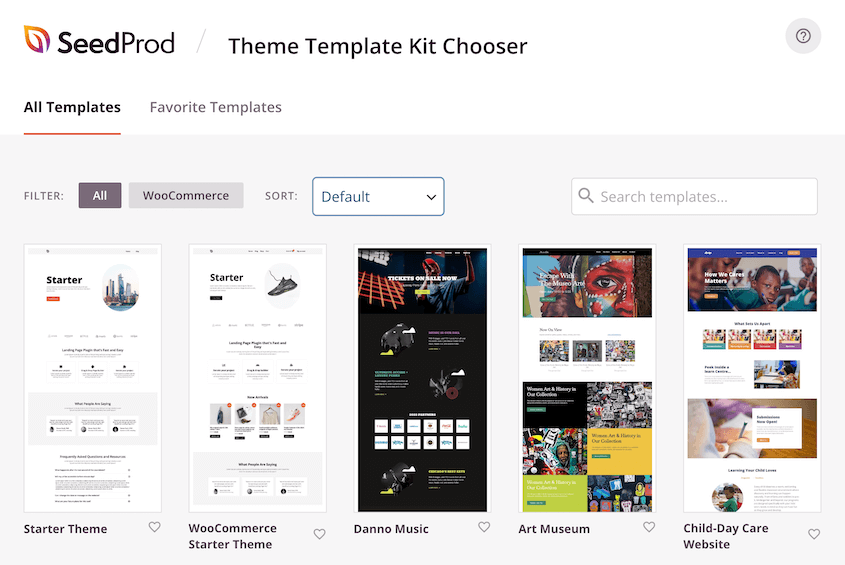
This will give you many different pre-designed theme kits to choose from. Rather than manually coding every page template from scratch, SeedProd can jumpstart the design process.
You’ll find websites for portfolios, online businesses, blogs, and so much more.
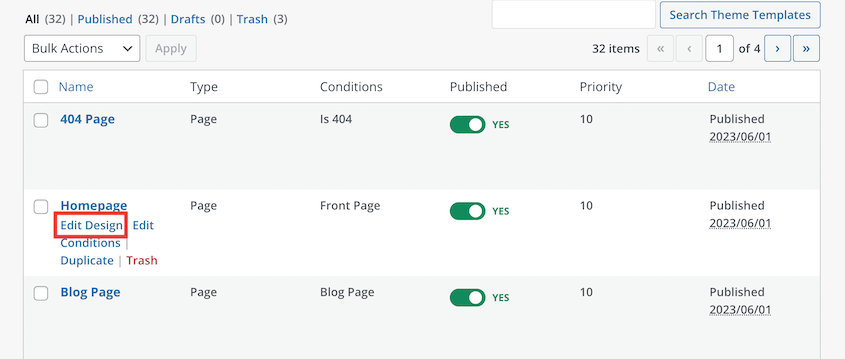
Once you select a new theme, you’ll have templates for your home page, posts, headers, and footers. To edit any of these, click on Edit Design.
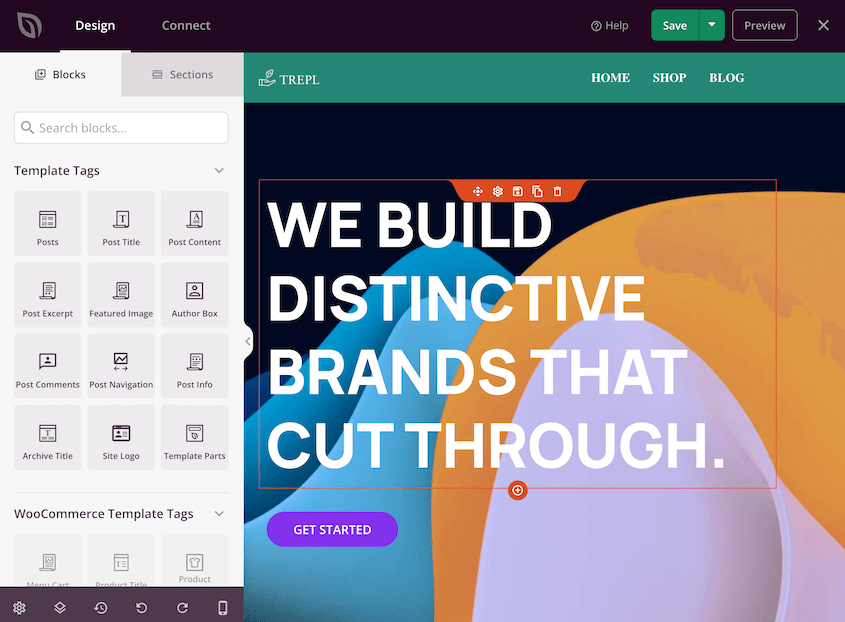
You can then use the SeedProd page builder to fully customize your theme. Feel free to drag and drop new blocks onto the page, edit fonts, update default colors, and make any other changes.
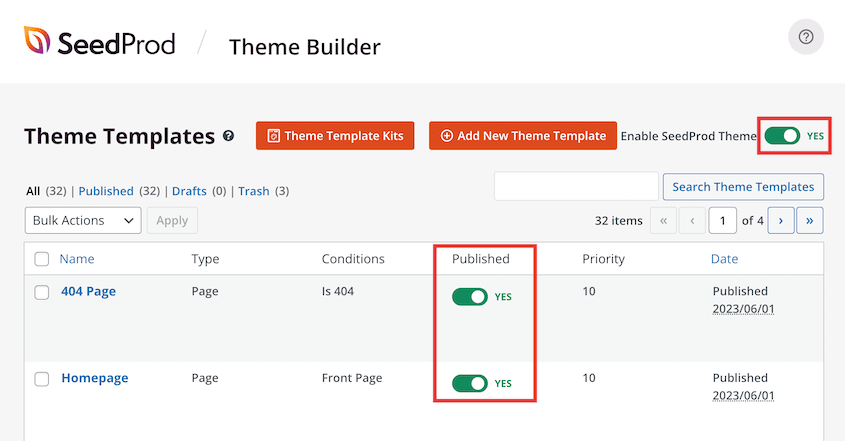
Be sure to save your changes when you’re finished. Then, publish each theme template. At the top of the page, enable the new SeedProd theme.
If you want a more in-depth guide on designing a website with SeedProd, check out this post on how to create a custom WordPress theme without code.
Step 6: Launch Your New Website
Once you’ve fully redesigned your new website, it’s time to publish your changes!
With Duplicator, all you’ll need to do is create a backup of the staging site. Then, download the backup’s archive file.
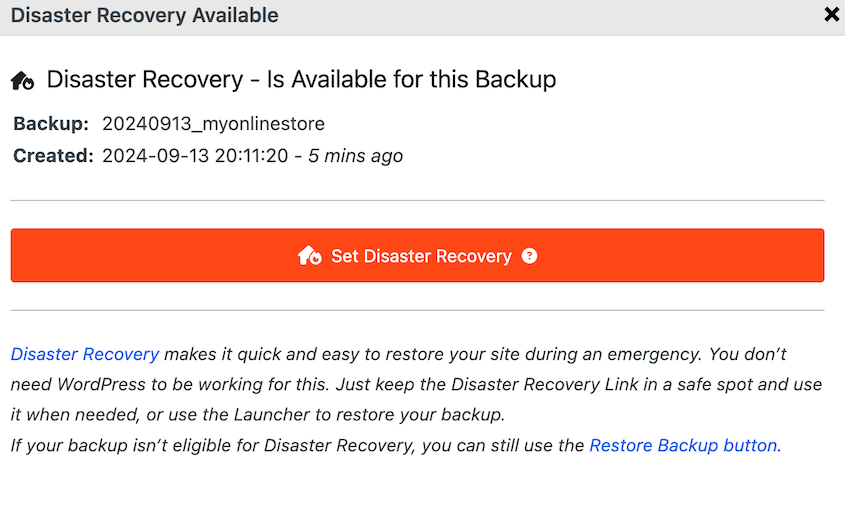
Before you import this into your live website, consider setting a disaster recovery point. Basically, this will save a backup of your site right before you updated its design. If you notice any critical errors that you missed in development, you can simply roll back to this backup.
To do this, build a backup of your original site. Be sure to select Local as the storage location.
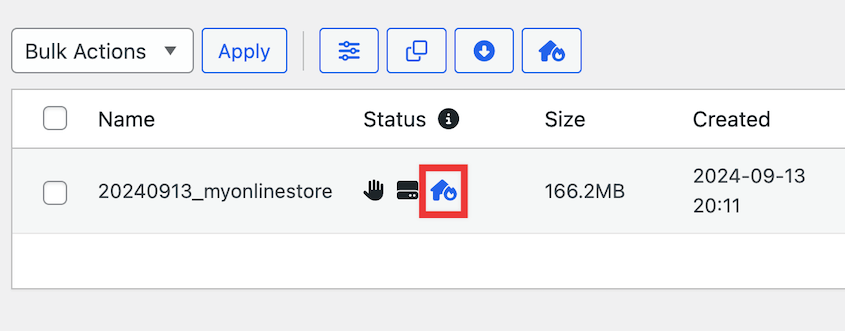
Continue creating the backup. Once finished, click on the blue house icon.
Hit Set Disaster Recovery.
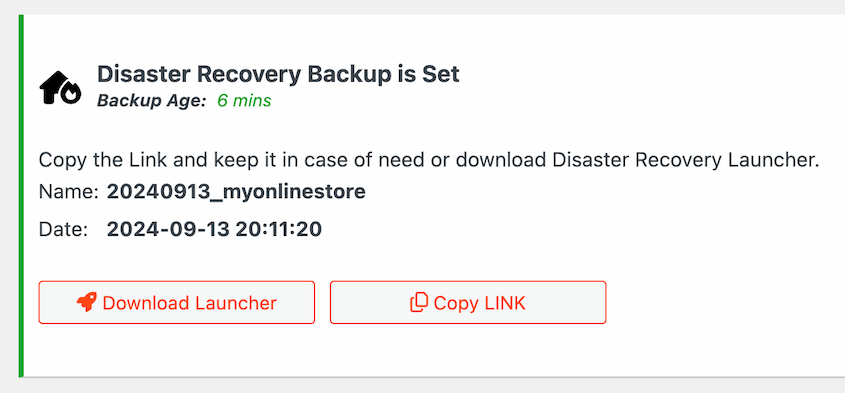
At this point, either copy the recovery link or download the launcher file. If you save these in a safe location, you can use them to instantly recover your site.
Now it’s time to import your redesign. To do this, go to the Import Backups page and upload your staging site’s zip file. Then, Duplicator will walk you through how to import your backup into the website.
For more details, check out our tutorial on how to move a local WordPress site to a live server.
Step 7: Audit Your Redesigned Site
Even if you checked for errors on your staging site, you might miss something. After making your redesign live, it’s important to thoroughly vet your website to make sure it’s looking and functioning properly.
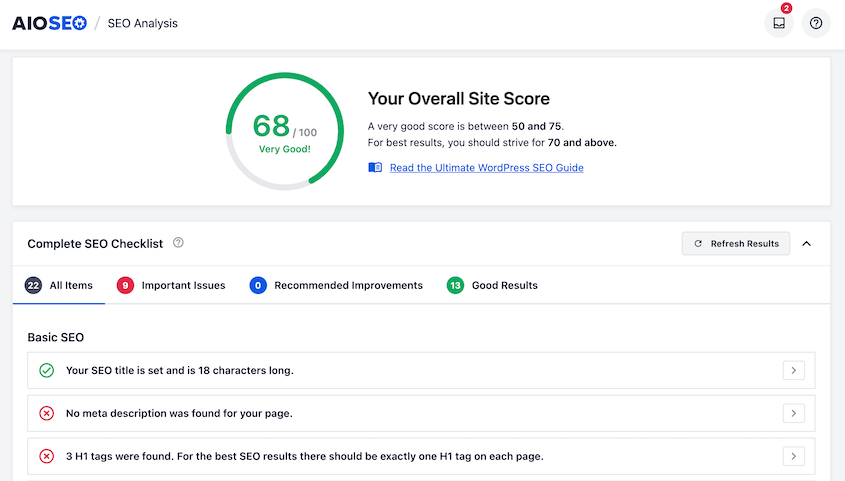
To make sure your Search Engine Optimization (SEO) is on point, consider doing a full SEO audit. All-in-One SEO is the best SEO plugin for this because it gives you a beginner-friendly list of SEO suggestions for your website.
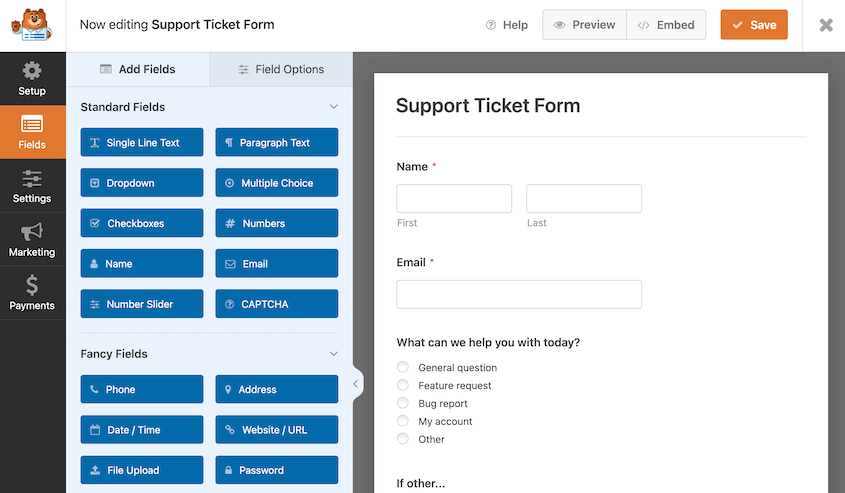
We’d also recommend creating a support ticket form. This way, your audience can report any bugs or 404 errors that impact their experience on your site.
Using a plugin like WPForms, you can start with a support ticket template and edit the contact form to meet your specific needs.
Here are some other tasks you should perform right after a redesign:
After all this, you’ll have a beautiful redesign that attracts new visitors and keeps them coming back to your website again and again!
Frequently Asked Questions (FAQs)
How do I redesign my WordPress site without going live?
By creating a staging site, you can redesign your WordPress site without showing your changes to the public. To do this, create a copy of your live site with Duplicator Pro. Then, you can build a staging site with your hosting provider or set it up on a local server. Lastly, import your cloned site into the staging area and start secretly redesigning your site!
How do I redesign my WordPress site without losing SEO?
The best way to redesign your WordPress site without losing SEO is by making any necessary changes on a staging site. Then, use Duplicator Pro to migrate your redesigned site back to the live server. To optimize for SEO after a redesign, consider installing AIOSEO and completing the SEO audit checklist.
How do I build a new WordPress site while the old site is live?
You can build a new WordPress site on a local staging site. When you’re ready, use Duplicator Pro to create a full backup of the redesigned site. Once you import the updated site, Duplicator will automatically replace your original design with the new one without any downtime. If you updated any pages, be sure to redirect them with AIOSEO.
How do I delete all content and start over in WordPress?
If you’re using WordPress.com, go to Settings » General and click on Reset your site. For WordPress.org, you can install the WP Reset plugin, which will delete your posts, pages, comments, users, custom post types, and custom database tables. However, we’d recommend rolling back your site with Duplicator Pro to avoid completely losing your data.
How often should I redesign my site?
Redesign your website every 2–3 years to keep it modern, user-friendly, and aligned with current web design standards. Update your site sooner if it looks outdated, delivers a poor user experience, isn’t mobile-responsive, or no longer reflects your brand’s messaging and business goals.
Conclusion
That’s it! You’ve learned how to redesign a WordPress site.
While you’re here, you may like these WordPress tutorials and plugin reviews:
You don’t have to spend a lot of time manually moving your website to and from a staging area. Download Duplicator Pro to start using drag-and-drop migrations!
Joella is a writer with years of experience in WordPress. At Duplicator, she specializes in site maintenance — from basic backups to large-scale migrations. Her ultimate goal is to make sure your WordPress website is safe and ready for growth.


