You’ve been working on your WordPress site for weeks. Now it’s ready, but it’s still hidden from the world on a local server.
It’s time to launch your website on a live server!
Whether you’re a small business owner, blogger, or developer, this process is crucial. It’s the bridge between your private project and a public stage.
In this tutorial, I’ll show you everything you need to know about moving WordPress from a local server to a live one.
Ready to share your WordPress website with the world? Let’s get started!
Table of Contents
Quick Summary: How to Move a Local WordPress Site to a Live Server
1. Back up the local site.
To quickly make your local WordPress site live, install
Duplicator Pro. Then, back up your entire local site.
2. Set up the live WordPress site.
Next, you’ll need to fully set up a new WordPress site on a live server. This involves finding a web host, choosing a domain name, and creating a new database.
3. Import the local backup into the live site.
Once you install WordPress, drag and drop the local backup into Duplicator’s Import page on the live site. Duplicator will take care of any complicated migration tasks.
Why You Might Need to Move a Local WordPress Site to a Live Server
Did you know that you can completely build your first website without having to publish it first?
Even if you’re not a developer, you can run WordPress locally on your computer. Basically, this involves creating a staging environment for:
- Troubleshooting your web design
- Creating blog posts
- Updating WordPress
- Learning how to code
- Any other maintenance tasks
On a localhost, you can work on a WordPress site without the risk of publishing errors to an audience.
Plus, it doesn’t require a hosting plan or domain name. You can simply use a local environment like LocalWP, MAMP, WAMP, or XAMPP to host your secret site for free.
Once you’ve added all the features and functionality your site needs, you can easily migrate it to a live server. Since you developed it on a local server first, your website will be fully ready for new visitors.
How to Create a Local WordPress Site
If you don’t already have a local site, you’ll need to start by creating one.
If you’re not sure how, check out this guide on how to move a live WordPress site to a local host. You’ll find step-by-step instructions on building a local staging site.
Then, feel free to make any customizations you want! Your local software will set up a blank WordPress installation, so you can install a variety of plugins to help you create your dream site.
For example, SeedProd is a beginner-friendly page builder that you can use to design your WordPress website.
Since it has a simple drag-and-drop interface and hundreds of pre-designed templates, you won’t have to worry about knowing any code.
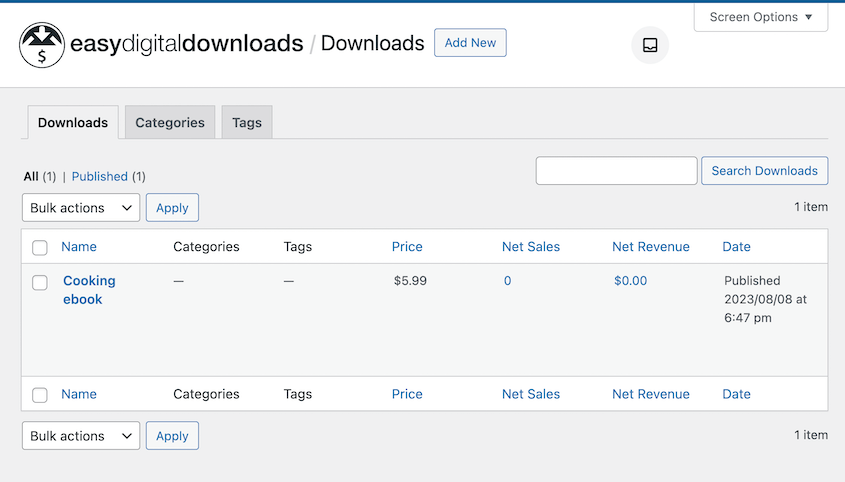
If you’re starting an online store, you can install Easy Digital Downloads. This e-commerce plugin makes it easy to sell anything from software to music.
It helps you set up your products, connect third-party payment options, and even protect certain web pages as membership-only content.
As you can see, you have limitless options when it comes to customizing your local WordPress site.
How to Move a Local WordPress Site to a Live Server
After you’ve installed plugins, activated a theme, and fully personalized your site, it’s time to move it to a live server! This way, anyone can see and interact with your content.
Step 1: Install Duplicator on the Local Site
For a developer, it might not be a problem to manually move a website to another location.
However, this migration can take a lot of time. There’s also a good chance of accidentally breaking your custom site along the way.
A much easier and safer solution is to install a WordPress migration plugin like Duplicator. This powerful tool can back up your entire local website and migrate it to a live server in just a few steps!
To get started, choose a subscription for Duplicator Pro. Although there is a free version available, Duplicator Pro supports drag-and-drop migrations. This feature is essential to get your live site up and running as fast as possible.
See how a web design agency completes 50 migrations a month with Duplicator Pro!
After you check out, copy your license key and download Duplicator Pro. Then, open the WordPress admin dashboard for your local WordPress site. Install and activate the Duplicator plugin.
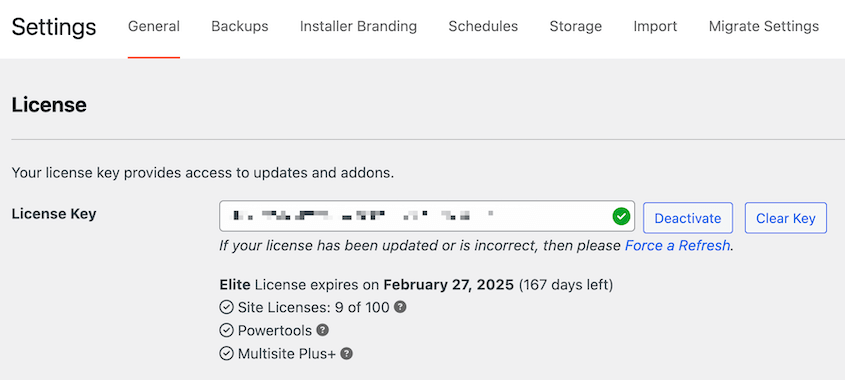
Before you start using Duplicator, you’ll need to activate your license. Head over to Duplicator Pro » Settings » General and paste your license key.
Lastly, hit Activate. You can now move your local WordPress site to a live server!
Step 2: Back Up Your Local Site
Using Duplicator, you can create backups of your site. These are saved copies of your WordPress files, database, plugins, themes, and other data.
Since Duplicator backs up all of this information into a single zip file, it makes it easy to migrate your website to a different server.
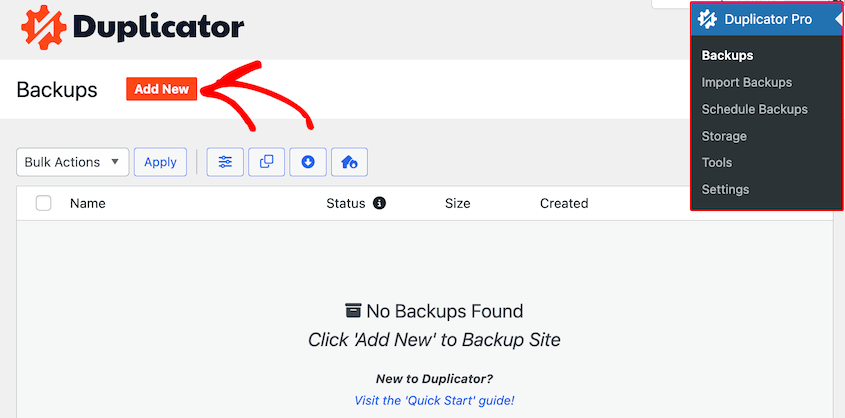
To build a backup, go to Duplicator Pro » Backups » Add New.
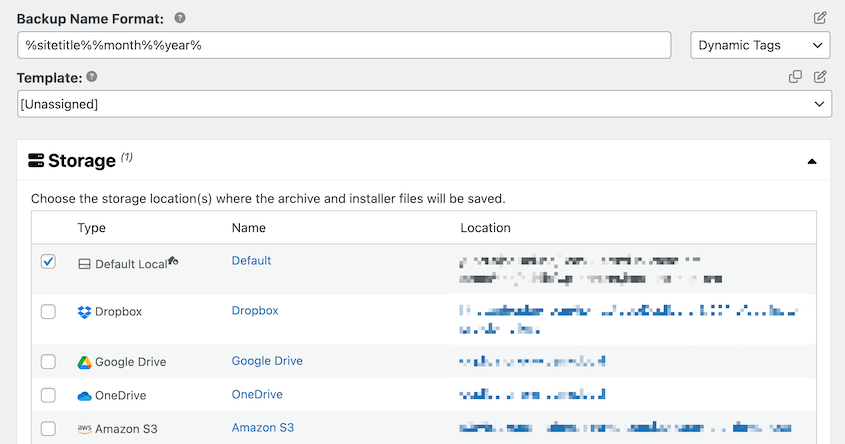
You can give your backup a custom name at the top of the page. Although Duplicator supports many cloud storage locations like Wasabi, Google Drive, and Dropbox, select the Local option.
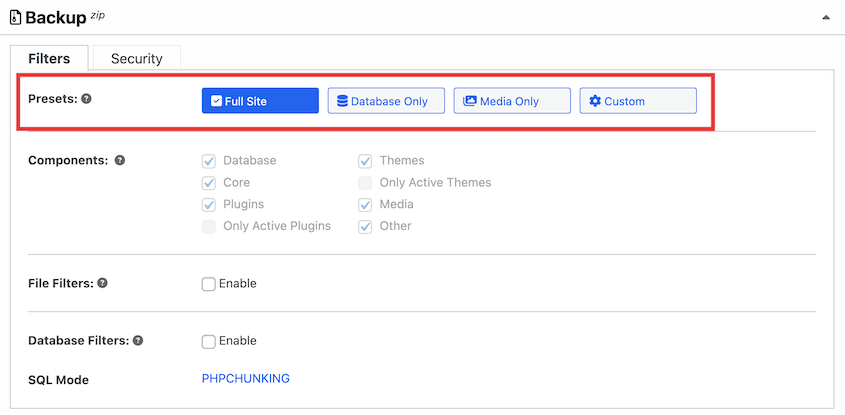
Next, expand the Backup section. This allows you to customize exactly what data from your local site will be transferred to the new live server.
If you want to create a full backup, click on the Full Site preset.
However, you can toggle over to Custom and uncheck your media files, active plugins and themes, the database, or core WordPress files. Only do this if you don’t need the data on your live site.
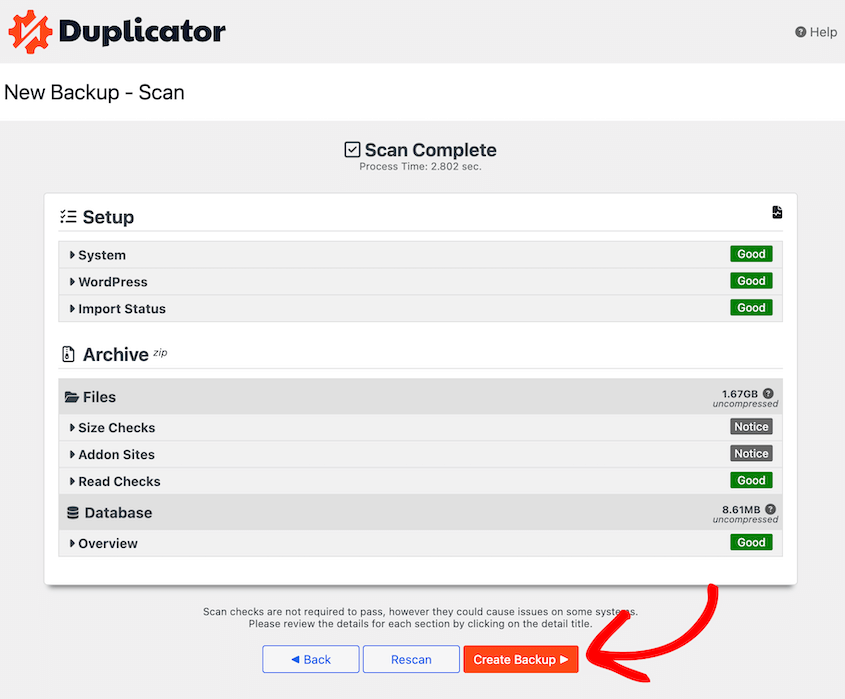
When you’re finished, click on Next. On this page, you’ll see a full scan of your website.
Be sure to review any notices before building the backup. When Duplicator is finished, you’ll see it on the Backups page.
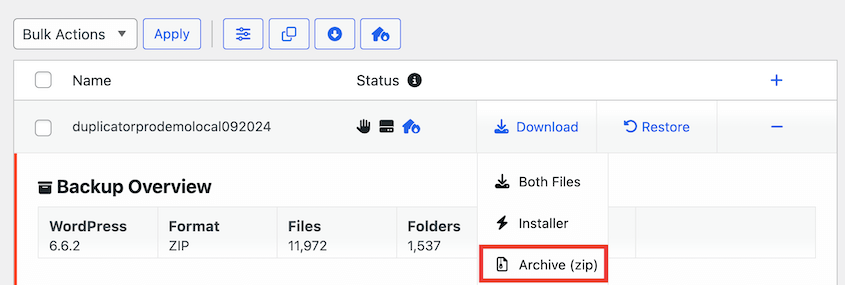
As a final step, download the archive file. Duplicator allows you to simply drop this file into your live WordPress installation and immediately start importing your local site data.
If you’re manually uploading your site to an FTP client like FileZilla, you’ll also need to download the installer file. Even if you don’t have WordPress installed already, this installer.php script will unpack the archive file and install your content on the new location.
Step 3: Set Up Your Live Website
Now it’s time to create your live WordPress website! To do this, you’ll need to find a WordPress hosting provider.
A web host will give you server space and resources for a live website. It provides the infrastructure, server environment, and technical support to ensure your WordPress site is accessible and performs well.
One of the best options is Bluehost. This web host is recommended by WordPress because of its affordability and scalability.
With Bluehost, you can get your local site online for just $2.95 per month. Plus, you’ll have a completely free domain name for the first year.
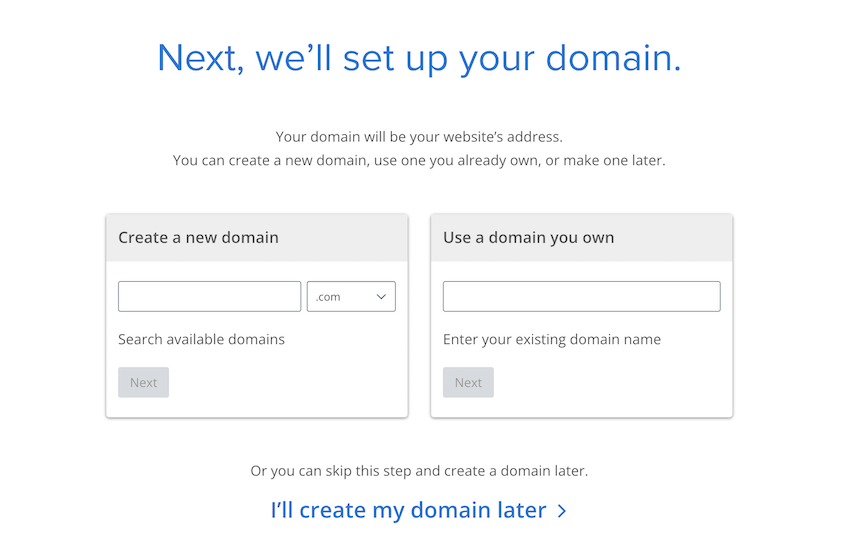
Once you sign up for a plan, you can choose a domain name. This will be the main part of your URL that encourages brand awareness and memorability.
Then, finish creating your hosting account. After this, Bluehost will automatically install WordPress for you. You can simply sign into your hosting dashboard and click on the Log into WordPress button.
This will open your new WordPress dashboard! However, it will be a blank installation, so you’ll need to import your local site to upload your custom data.
Step 4: Create a New Database
Before you start migrating your local site to the new server, it’s important to create a new WordPress database. Usually, your web host will provide an easy way to do this.
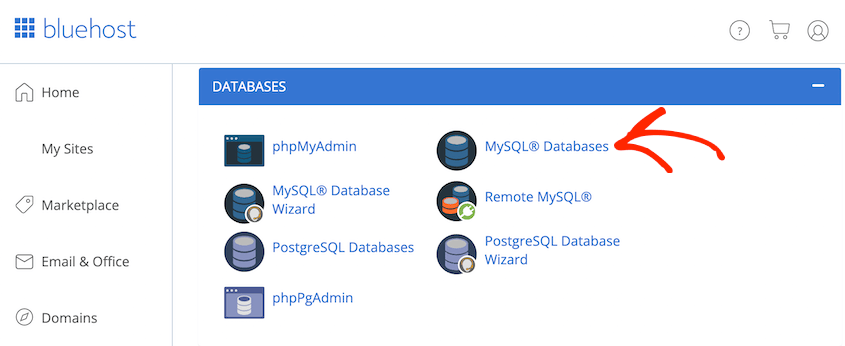
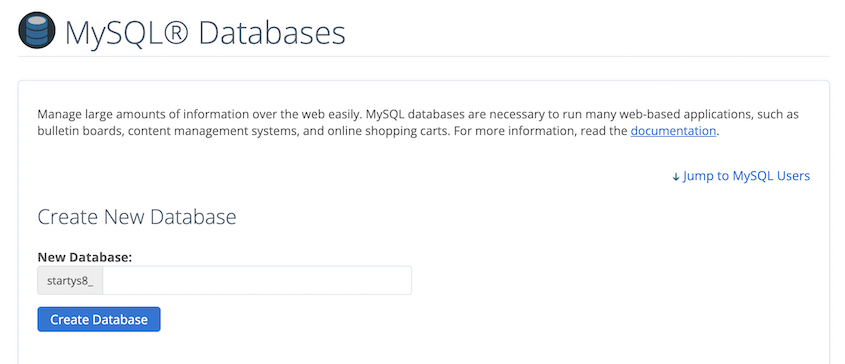
With Bluehost, you can simply find the Databases settings and click on MySQL Databases.
Under Create New Database, enter a name and hit Create Database.
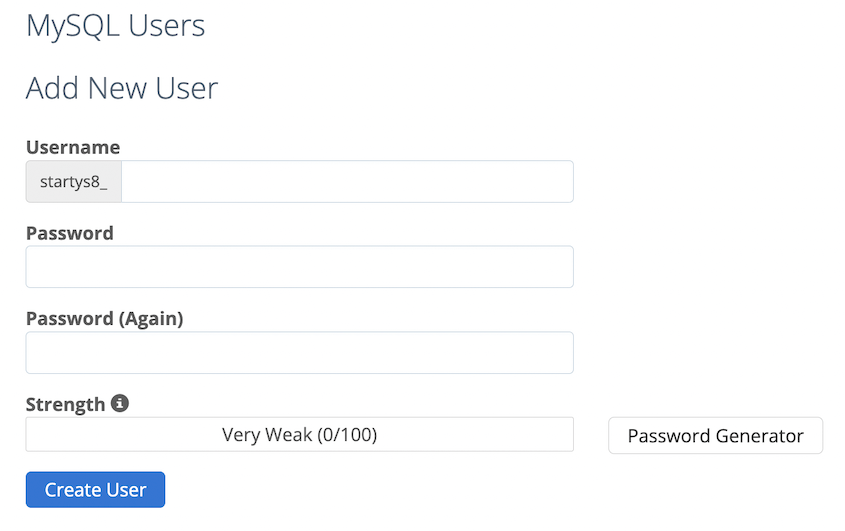
You’ll also need to create a new user and assign it privileges for controlling the database. First, fill out a username and password for the user.
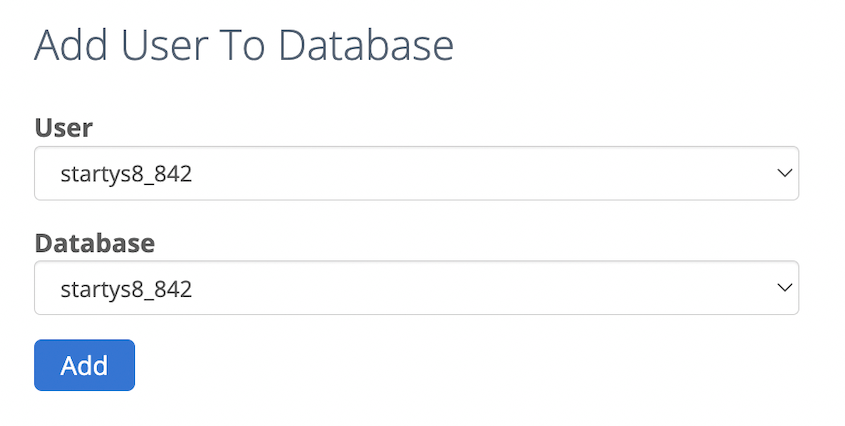
Scroll down to the Add User To Database section. Here, select both the new user and the new database.
As a final step, you can assign all privileges to the user.
Step 5: Import Your Local Site
If you decided to migrate your site manually, you’d have to upload your local site’s files to your new site with a File Transfer Protocol (FTP) client. Also, it would be necessary to use phpMyAdmin to import your old database.
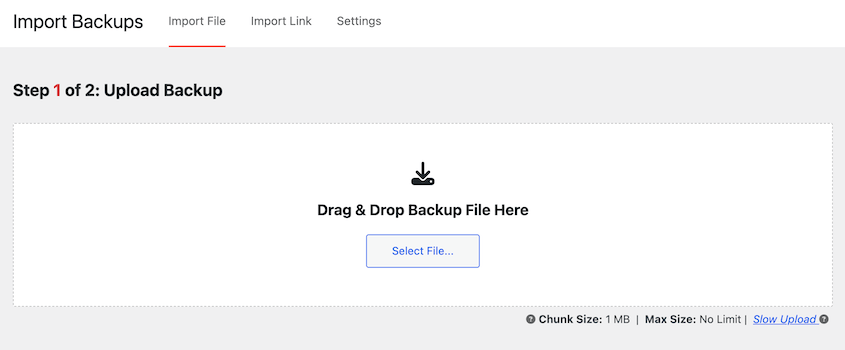
However, Duplicator Pro simplifies this process. After you set up your live website, open your WordPress dashboard and install Duplicator. Then, find the Import Backups page.
Drag and drop your saved archive file into the import box. You’ll see some details about the backup once it’s finished uploading.
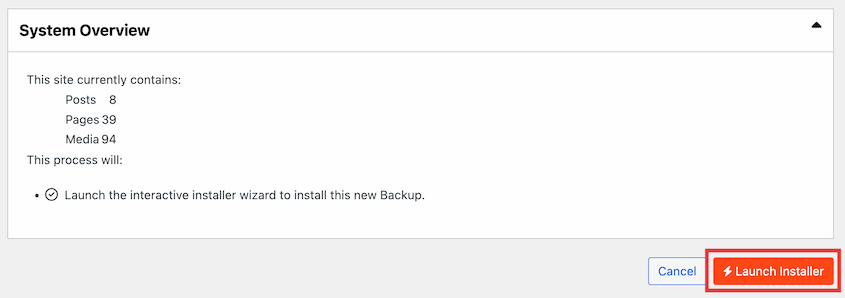
On the next page, hit Launch Installer.
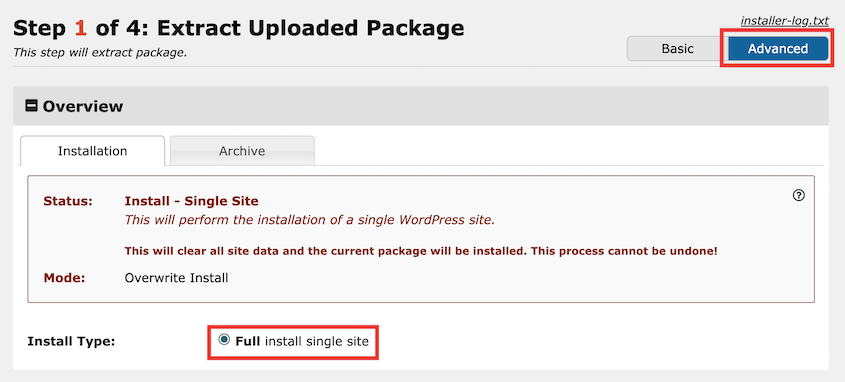
Now, the Duplicator migration wizard will walk you through the installation. At the top, the Install Type should be a Full install single site. You should also choose the Advanced installer mode.
Under Setup, enter your new database name, username, and password. Then, hit Validate.
You’ll need to accept the terms and notices. After you click on Next, confirm the installer settings.
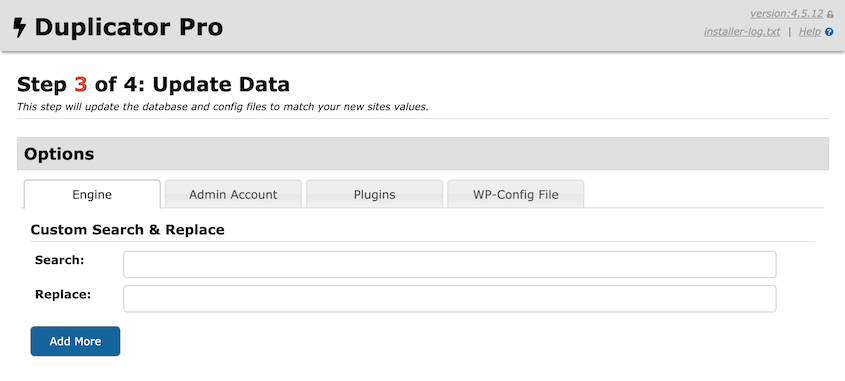
During the installation, you’ll need to replace your local site URL with the live one. On Step 3, add your old URL in the Search field. The new URL goes next to Replace.
Duplicator will automatically replace every mention of the old URL in your database. You won’t need to install an extra search and replace plugin.
Next, your local site will be moved to the live server. You can use the Admin Login button to access your new website!
Frequently Asked Questions (FAQs)
How do I transfer my WordPress site to a new host and domain?
You can transfer your WordPress site to a new host or domain name by installing Duplicator Pro and creating a backup of your current site. Then, install Duplicator Pro on the second WordPress installation and drag and drop your archive file to import it.
After the migration, it’s a good idea to update your DNS, inform Google about the change, add redirects, and check for broken links.
For more details, check out these helpful guides:
How do I migrate a WordPress site to a new host without a plugin?
To migrate a WordPress site to a new host manually, export your database as a SQL file in phpMyAdmin. For a local site, open http://localhost/phpmyadmin/ and select the Quick export method.
Next, use an FTP client or cPanel to export files in your public_html folder, otherwise known as the root directory.
On the new host, open your site’s root folder, right-click on all the files, and delete them. Then, upload your old site files.
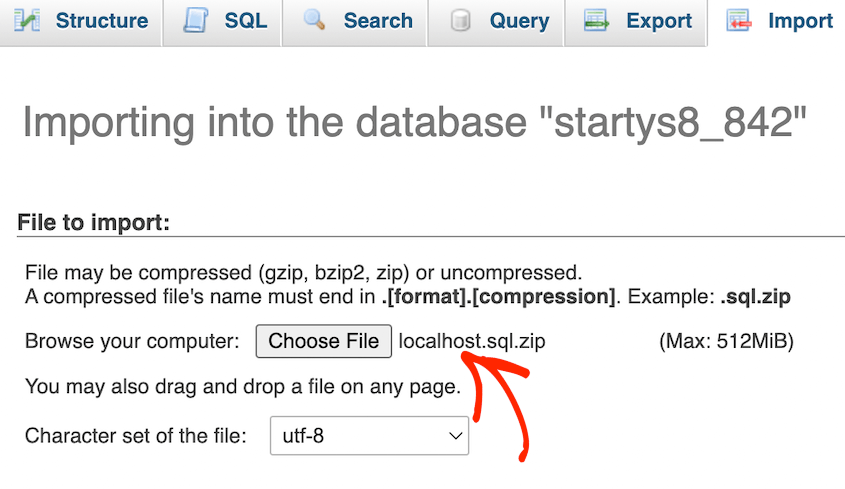
You’ll also need to go to the Import tab in phpMyAdmin, hit Choose File, and upload the original database file.
Even though you’ve fully migrated your content, your database may still point to the local site. To update this, open the wp_options table in phpMyAdmin.
Hit Browse next to wp_options. Then, find and edit the siteurl value in the options_name column:
You’ll also need to update your wp-config.php file. Using an FTP client or cPanel, open this file and find the lines of code that contain your database information:
// ** MySQL settings - You can get this info from your web host ** //

/** The name of the database for WordPress */

define( 'DB_NAME', 'database_name_here' );

/** MySQL database username */

define( 'DB_USER', 'username_here' );

/** MySQL database password */

define( 'DB_PASSWORD', 'password_here' );

/** MySQL hostname */

define( 'DB_HOST', 'localhost' );
Since you moved from a local to a live server, permalinks on your posts and pages might not be working properly. To fix this, find Settings » General. Don’t edit anything before clicking on Save Changes.
Next, go to Settings » Permalinks. Similar to before, save these settings without changing anything.
After a migration, you might deal with some missing images and broken links on your new website. To make sure everything is working properly, you’ll need to replace any localhost URLs with your live site URLs.
To do this, open phpMyAdmin and go to the SQL tab. Here, paste this SQL query:
UPDATE wp_posts SET post_content = REPLACE(post_content, 'localhost/test/', 'www.yourlivesite.com/');
Be sure to update the default link with your live site’s URL. After you hit the Go button, your new visitors will be able to see and interact with your migrated content.
How do I publish my website on a live server?
You can publish your website on a live server by purchasing a web hosting plan and a domain name. Then, use Duplicator Pro to migrate your local site to the live server.
What is the difference between staging and live WordPress?
Your live WordPress site is the publicly visible website that search engines and online visitors can see and interact with. A staging site is an identical copy of your live website, but it’s hosted locally or on your server’s subdomain. Your staging site is a private, secure place to make edits to your site without affecting your live content.
How do I copy a staging site to a live site?
To copy a staging site to a live site, install Duplicator Pro on the staging site. Create a full backup of the staging site. On the live site, upload the backup to Duplicator’s Import page.
Conclusion
That’s it! You just moved your local WordPress site to a live server.
While you’re here, you may like these extra WordPress tutorials:
Do you want to get your local website online? Download Duplicator Pro to instantly move your content to a live server!
Joella is a writer with years of experience in WordPress. At Duplicator, she specializes in site maintenance — from basic backups to large-scale migrations. Her ultimate goal is to make sure your WordPress website is safe and ready for growth.


