
How to Restore a Website from an Incremental Backup
Did an update break your site, or are you moving it to a new host and want to use one of your incremental backups? Duplicator turns any incremental backup into a full backup of your website, which you then restore on the same site or install on a new one.
This guide shows you how to restore a website from an incremental backup with Duplicator Pro.
Before you get started, make sure Incremental Backups is set up on your website and has at least one backup in its list. To learn how incremental backups work and how to set them up, check out our guide on Incremental Backups.
How Restoring an Incremental Backup Works
Each incremental backup in your list stores only what changed since the one before it, so it isn’t a complete copy of your website by itself. When you restore or download an incremental backup, Duplicator Cloud first generates a full backup of your website exactly as it was at that point in time.
That full backup is a regular Duplicator backup: an archive file plus an installer. From there, you restore it on the same website or install it on a new one, just like any other backup.
Choosing the Backup to Restore
To begin, navigate to Duplicator Pro » Incremental Backups in your WordPress dashboard.
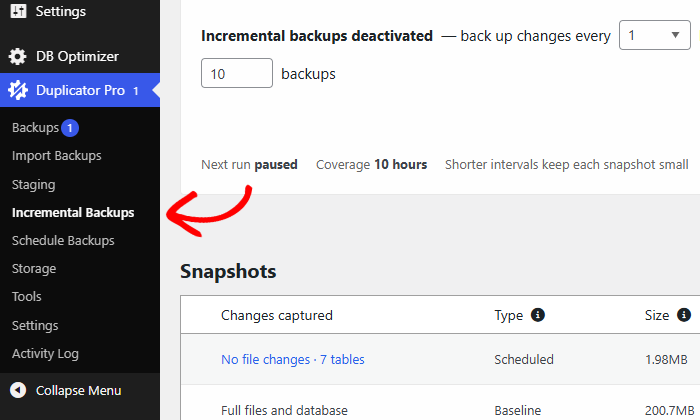
The Snapshots table lists your incremental backups, newest first, with the date of each one in the Age column. To see what a backup captured, click the link in the Changes captured column.
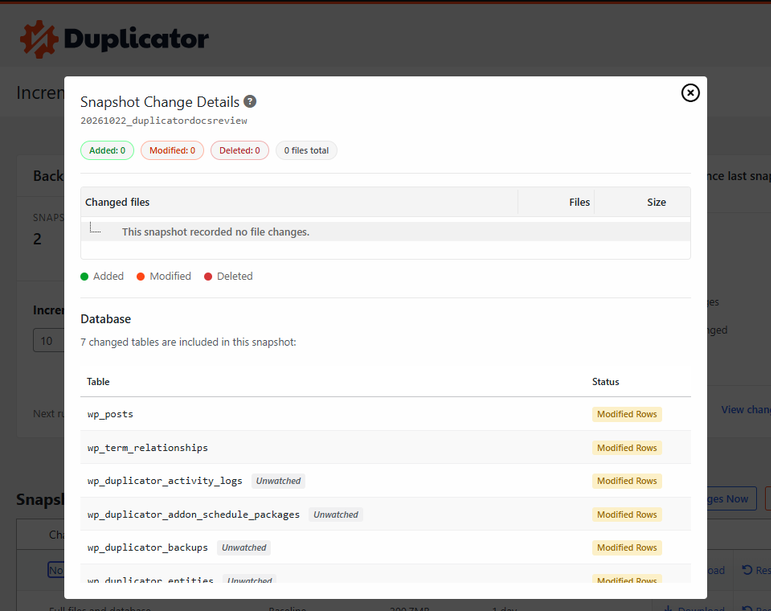
The Snapshot Change Details window lists the files added, modified and deleted, plus the database tables that changed. Use it to find the last backup taken before a problem started.
Generating the Full Backup
Next, click Restore next to the incremental backup you want to use. Clicking Download follows the same first step.
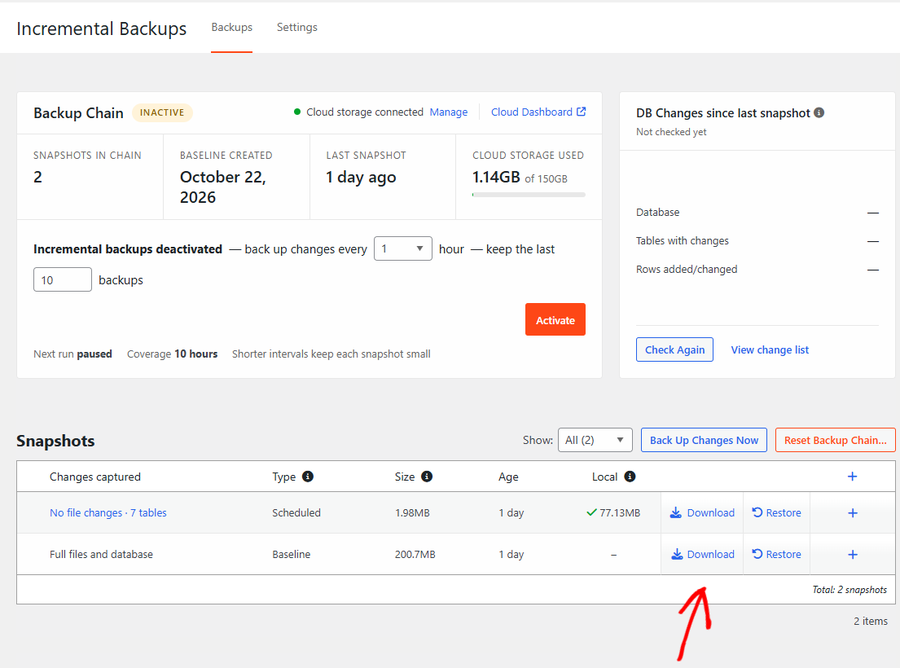
If Duplicator Cloud hasn’t generated a full backup for it yet, the Generate downloadable archive window appears. Click Request Archive.
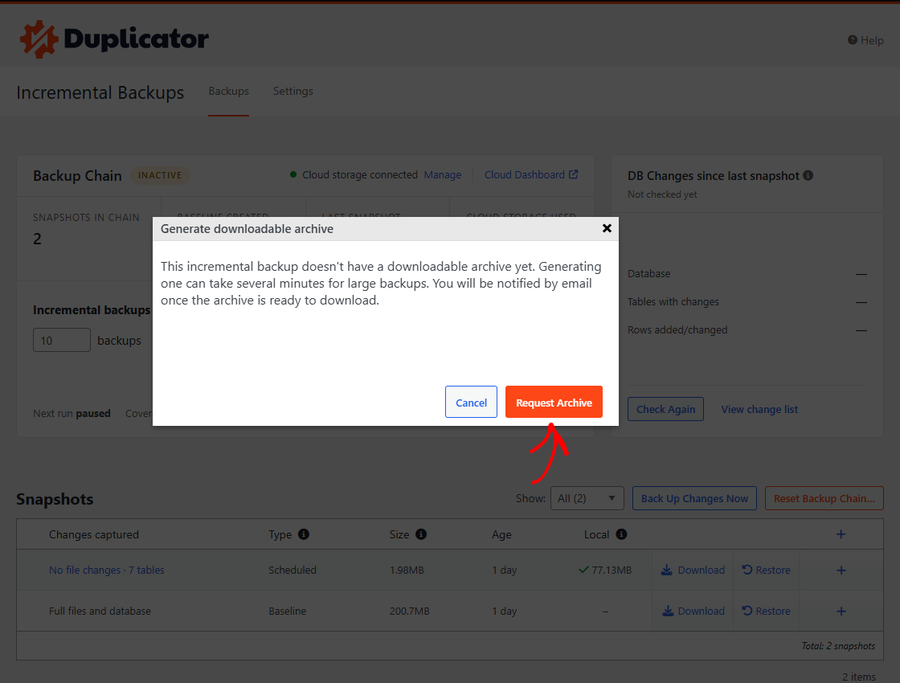
Duplicator then shows the message “Snapshot generation requested.” Generating the full backup takes several minutes for large websites, and we’ll send you an email as soon as it’s ready to download.
Restoring Your Website
When the full backup is ready, go back to Duplicator Pro » Incremental Backups and click Restore next to the same incremental backup.
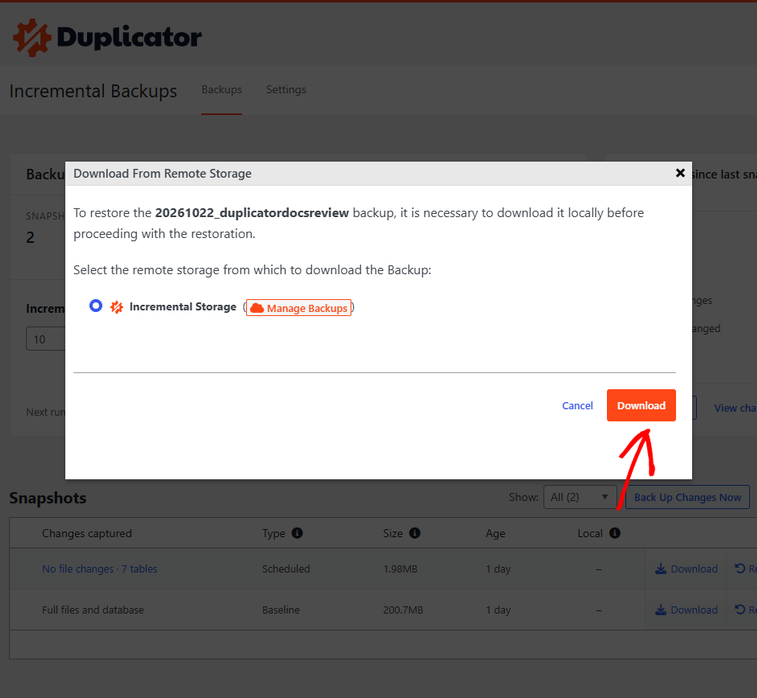
In the Download From Remote Storage window, Incremental Storage is already selected. Click Download to copy the full backup to your server.
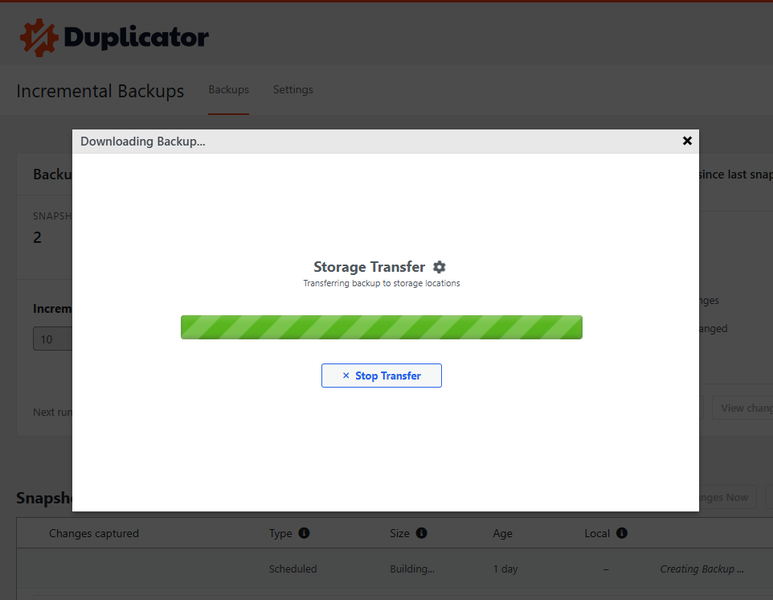
A progress bar shows the transfer. Keep this page open until it finishes.
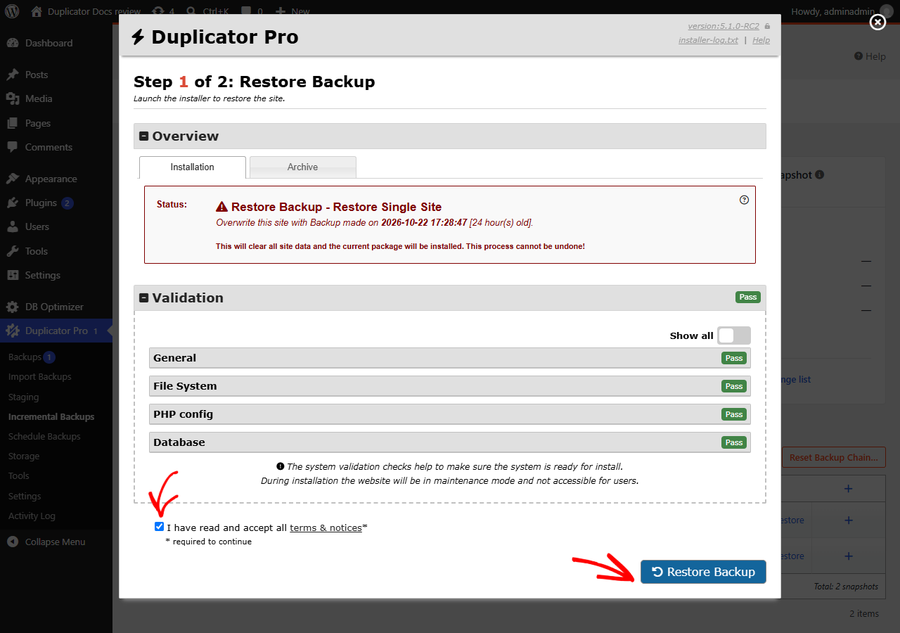
After the download, the installer opens on the same page at Step 1 of 2: Restore Backup. The Status box shows the date of the backup you’re restoring, and the Validation section checks that your server is ready.
Check the box to accept the terms and notices, then click Restore Backup.
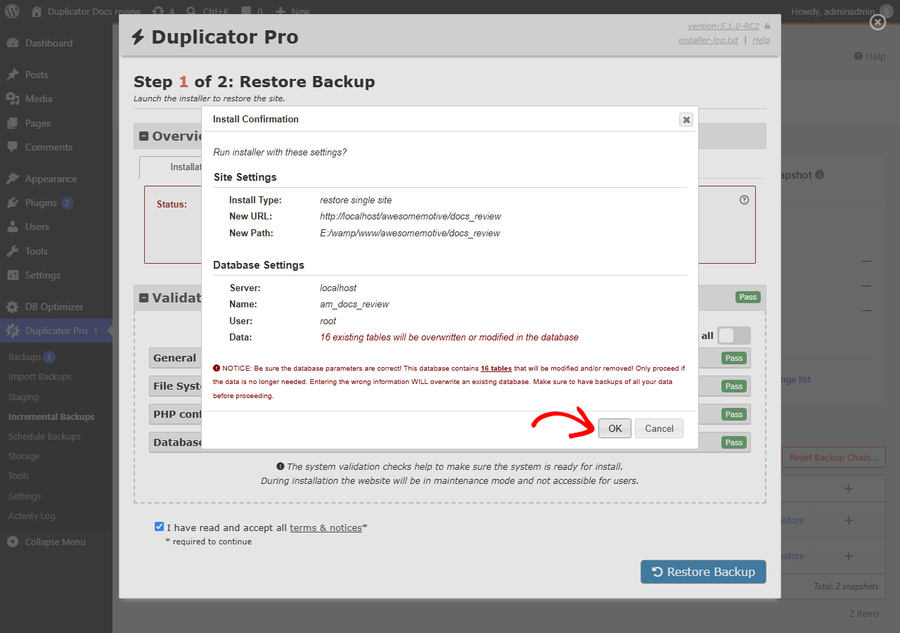
In the Install Confirmation window, review the site and database settings and click OK.
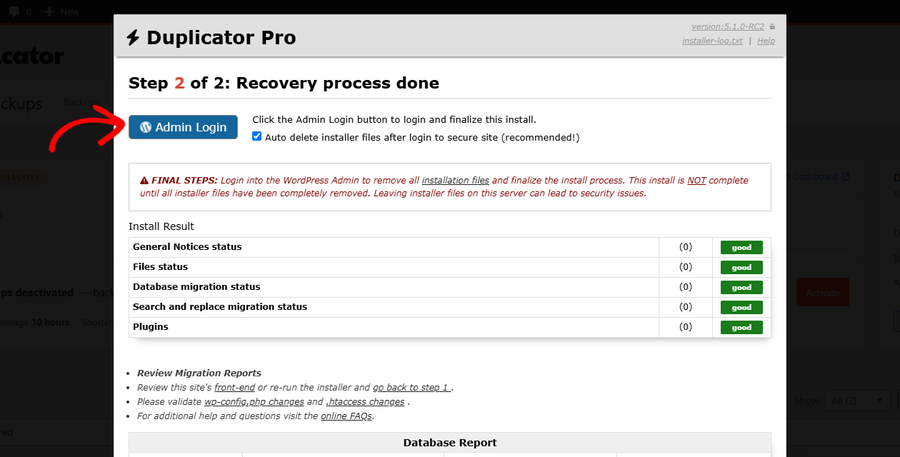
Duplicator extracts the files and restores the database. When it reaches Step 2 of 2: Recovery process done, leave the Auto delete installer files after login to secure site option checked and click Admin Login.
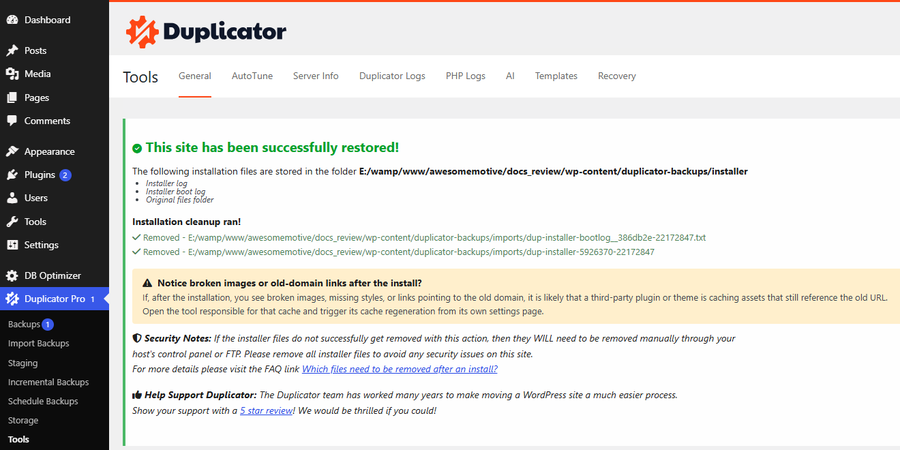
Log in to WordPress. Duplicator confirms “This site has been successfully restored!” and removes the installer files for you.
Migrating to a New Website
To move your website to a different location, download the full backup and install it on the new website.
First, generate the full backup with the steps in Generating the Full Backup above. Then go to Duplicator Pro » Incremental Backups, click Download next to the incremental backup and select Both Files. This saves the archive file and the installer file to your computer.
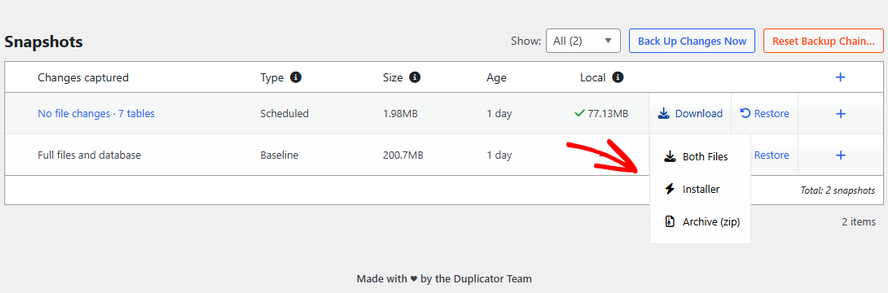
Next, install the backup on the new website with the method that matches it:
- Existing WordPress website:
If WordPress and Duplicator Pro are already installed, follow our guide to the import install method. - Empty website:
If WordPress isn’t installed yet, follow our guide to the classic install method.
FAQs
Below, we’ve addressed some of the most common questions about restoring incremental backups.
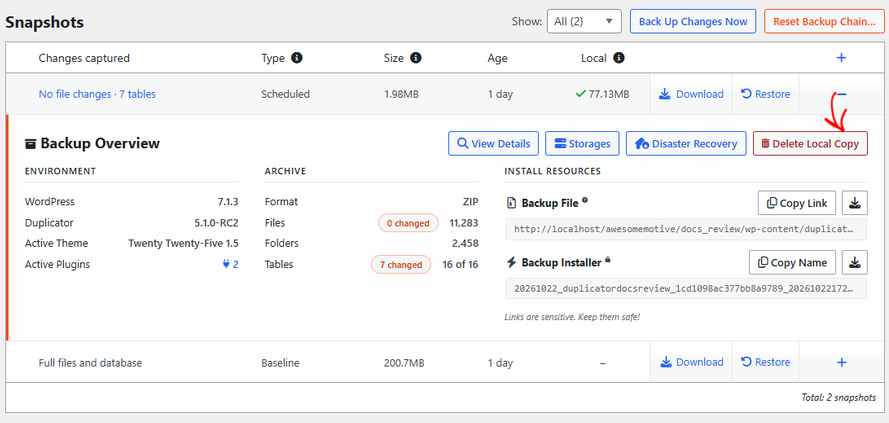
That’s it! You now know how to turn any incremental backup into a full backup, restore it on your website and move it to a new one.