Welcome to our guide on saving your backups in Dream Objects, DreamHost’s Cloud Storage. It’s super important to keep your data safe, and Dream Objects is a great place to do just that. Whether you run a website, do coding, or just want a safe spot for your files, we’ll walk you through each step to smoothly send your backups to Dream Objects. Get ready to boost your data game and keep your important stuff secure with DreamHost’s awesome Cloud Storage service!
Adding a Bucket
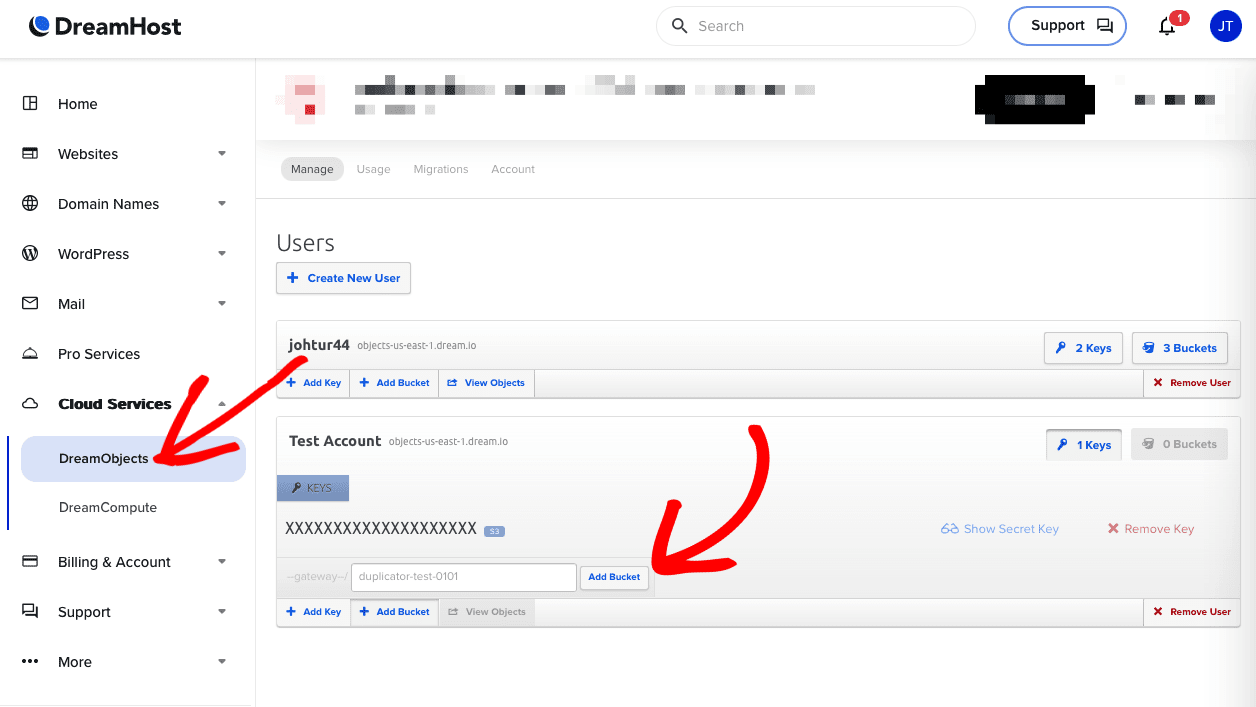
To begin with, navigate to your DreamHost account » Cloud Services » DreamObjects » Under your User account » click on Add Bucket and name it:

Locating Authorization Keys
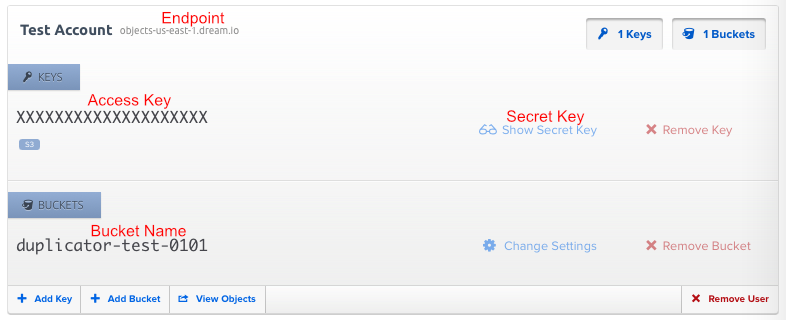
From the same page, you can locate your Authorization details and authenticate it. Please refer to the below image:

Connecting Dream Objects to Duplicator
To begin with, go to Duplicator Pro » Storage » Add New:

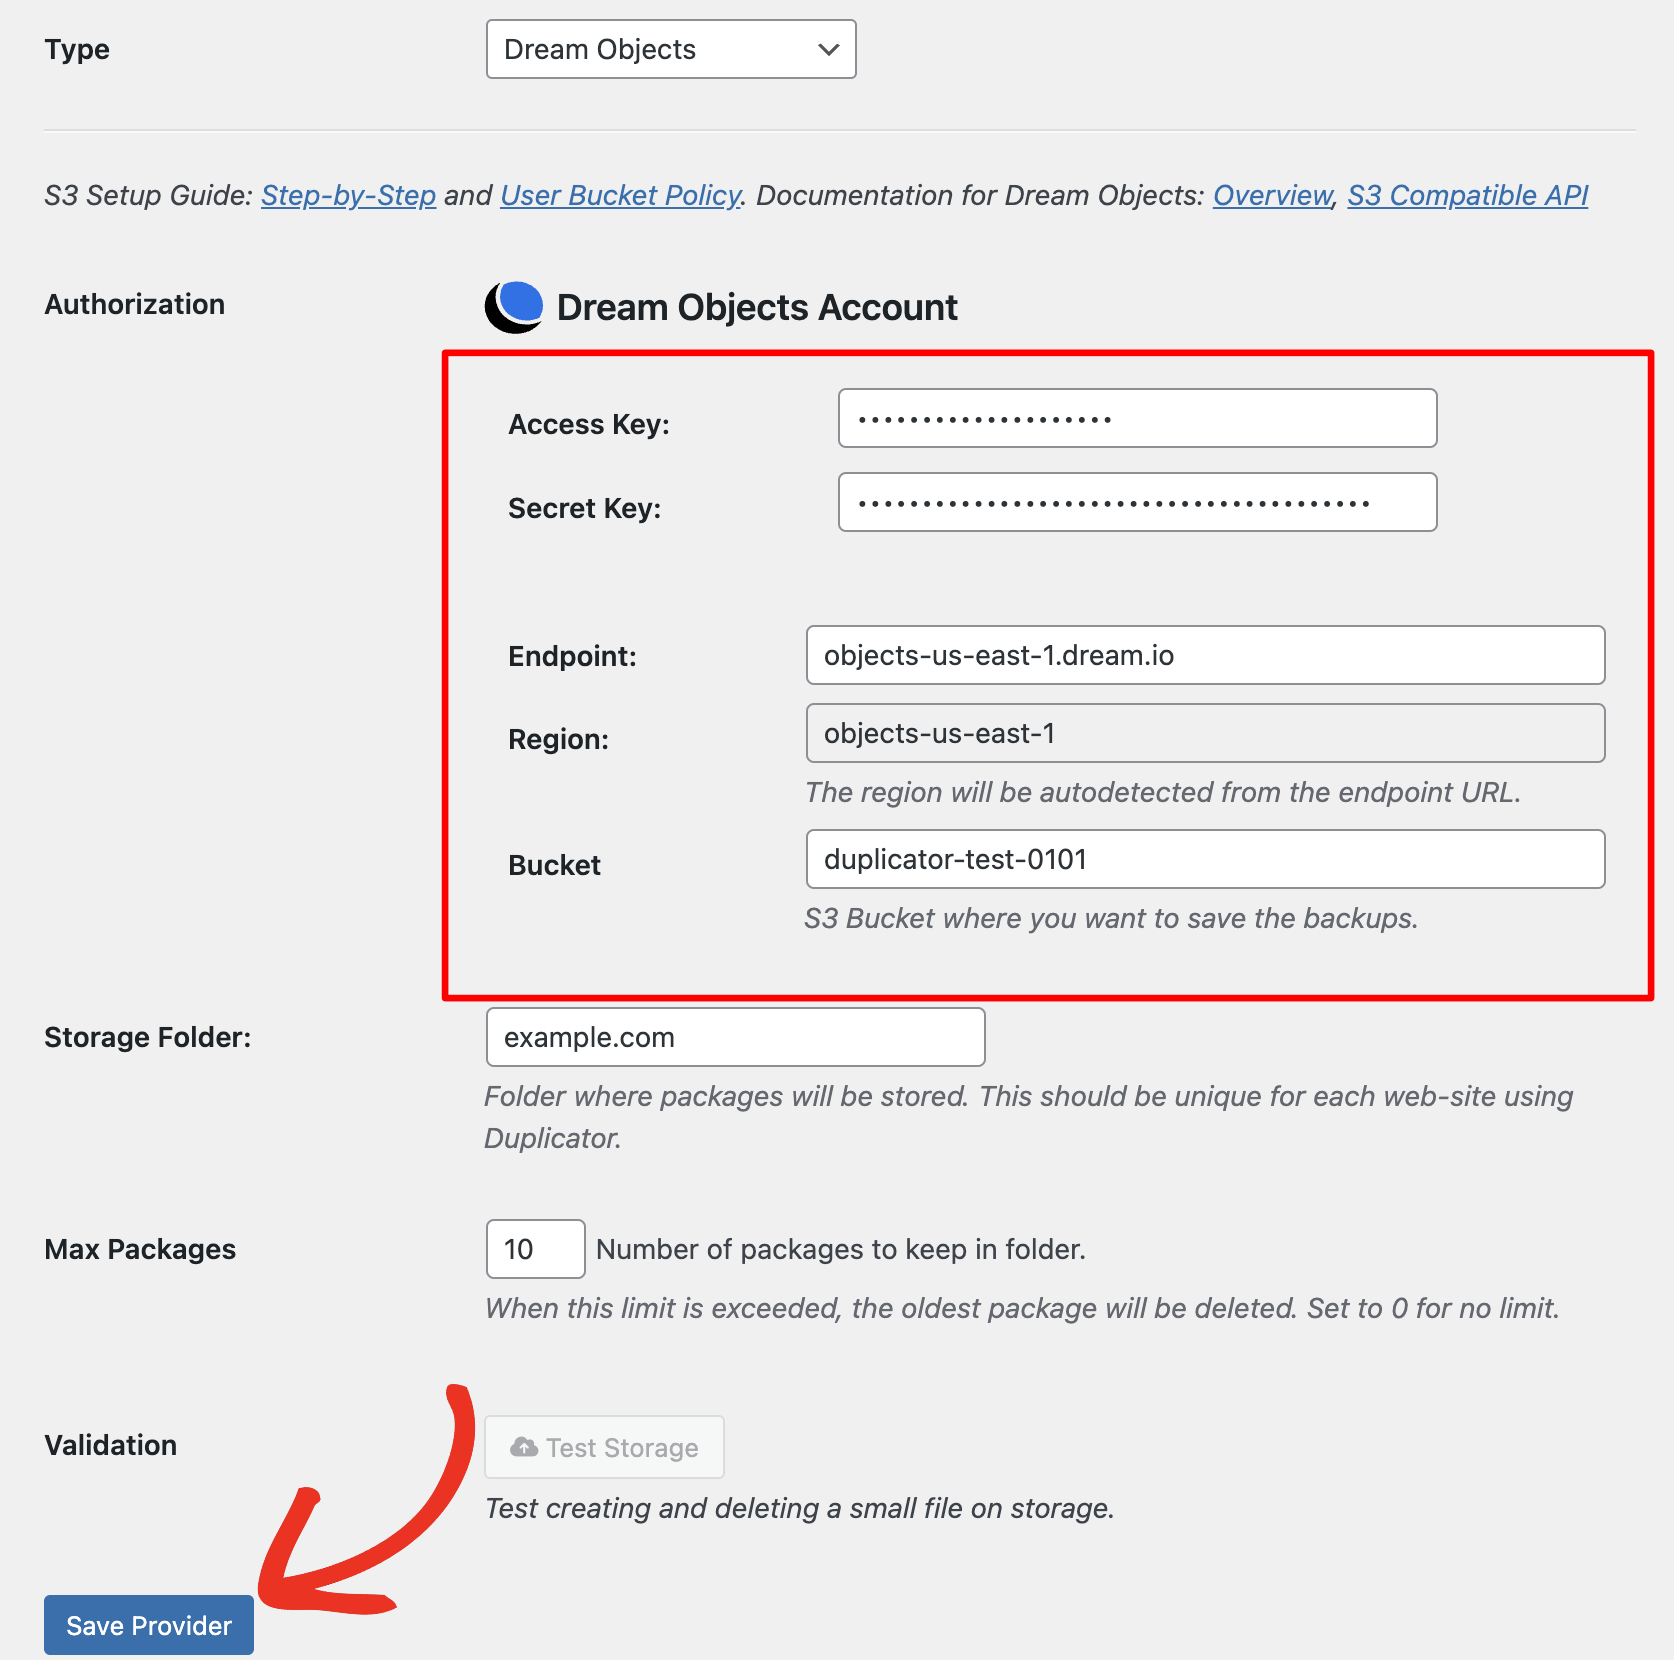
Name the new storage and select the Type as Dream Objects. Under Authorization, copy the Access Key, Secret Key, Endpoint and Bucket Name from your Dream Object Account. Finally click on Save Provider:

Next, go ahead and click on Test Storage and you’ll be able to see a success message. If not, go through the previous steps and make sure you didn’t miss anything.
You can set the number of backups you’d like to store in a defined folder in the Max Backups field.


