
Storing Your Backup to DigitalOcean Spaces
Looking to store your WordPress backups safe on DigitalOcean Spaces? It’s a service made for storing all sorts of stuff, like pictures, videos, and even full website backups. What’s cool about it is that it’s not too pricey and can handle a lot of data, perfect for keeping your site’s info safe in the cloud.
In this guide, we’ll walk you through how to make a backup of your WordPress site using DigitalOcean Spaces!
Create a DigitalOcean Spaces Bucket
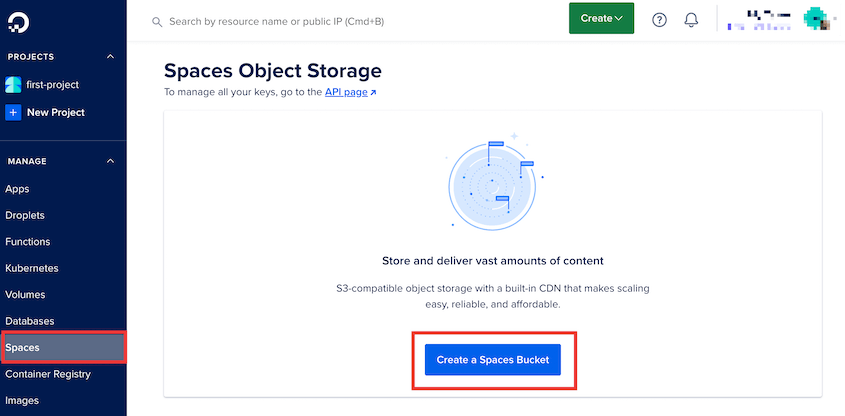
1. Let’s set up a new bucket on DigitalOcean Spaces for your site backups. Just go to your DigitalOcean control panel, click on the Spaces tab, and then hit the button that says Create a Spaces Bucket:
2. Choose the data center region based on your location, and name the new bucket:
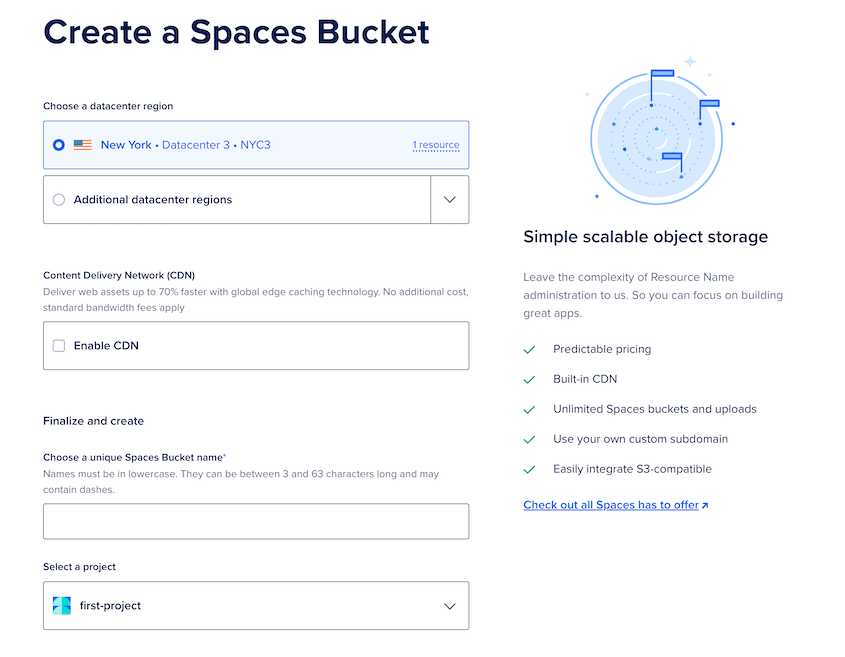
3. Click on Create a Spaces Bucket again and remember the bucket name and datacenter region selected.
Copy Your Access Keys
Duplicator needs permission to make changes to your DigitalOcean Spaces bucket. To do this, you’ll need to generate API keys.
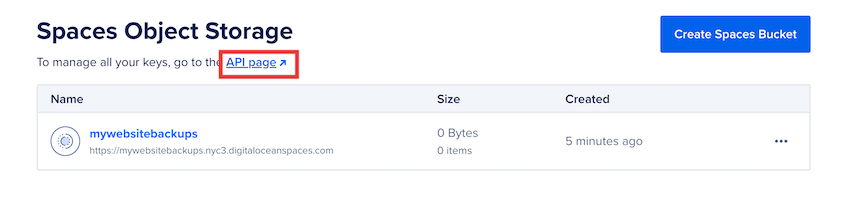
1. On the main Spaces page, find the API page link:
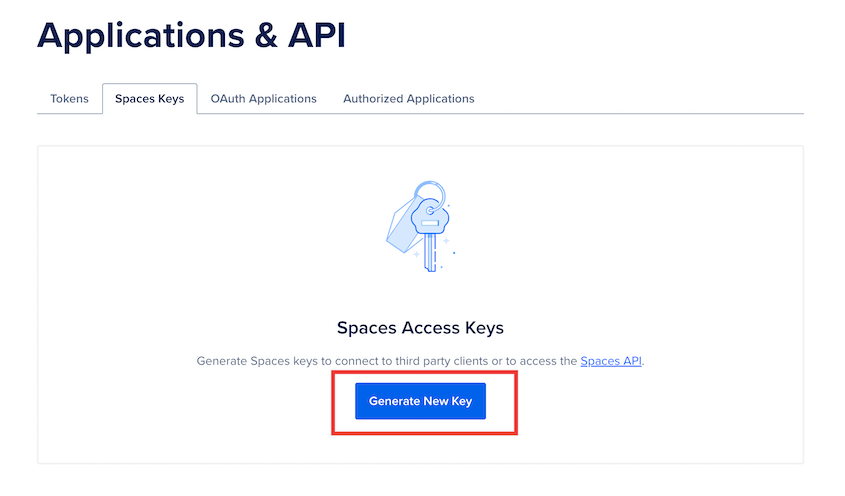
2. Next, click on Generate New Key:
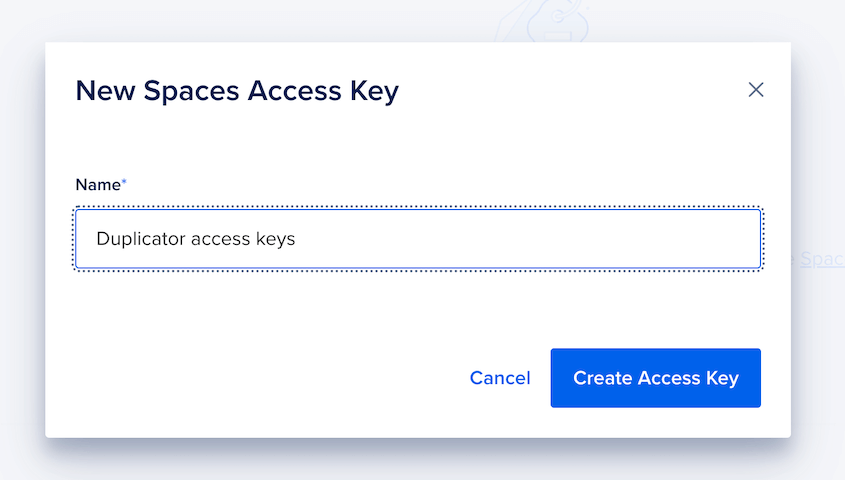
3. Name the access key and hit Create Access Key:
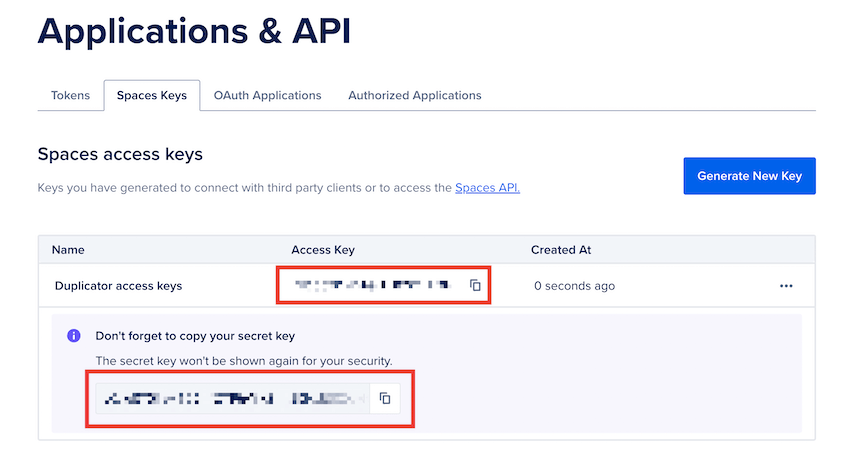
4. You’ll then get a new access key and secret access key. Copy and save both of these:
Now you have everything you need to connect Duplicator and DigitalOcean Spaces!
Connect DigitalOcean Spaces to Duplicator
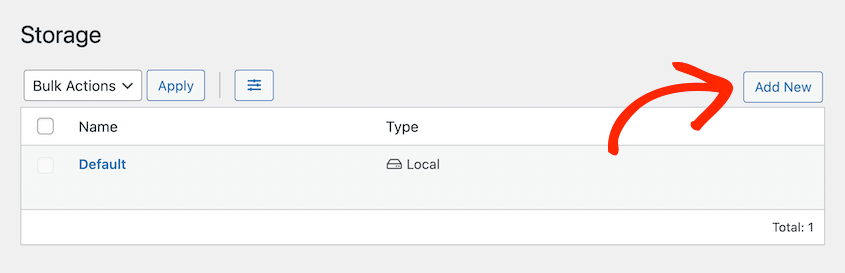
1. Head over to Duplicator Pro » Storage » Add New:
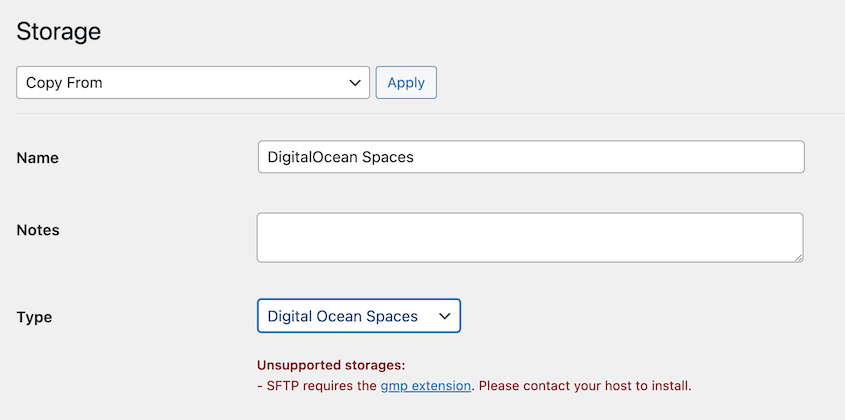
2. Name the storage location and choose Digital Ocean Spaces as the Type:
3. In the Authorization section, paste your access keys, endpoint, and bucket name.
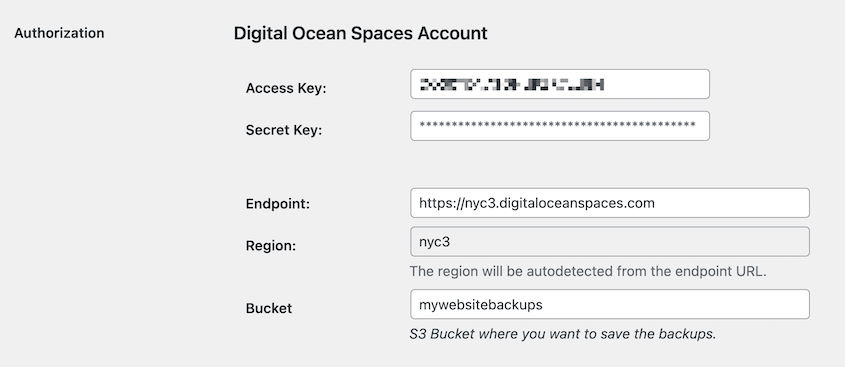
4. The Region field will be automatically filled after you add the endpoint. For the Max Backups value, you can decide how many backups to keep in DigitalOcean Spaces. Once you exceed this number, Duplicator will delete the oldest backup. This prevents you from overloading your storage space:
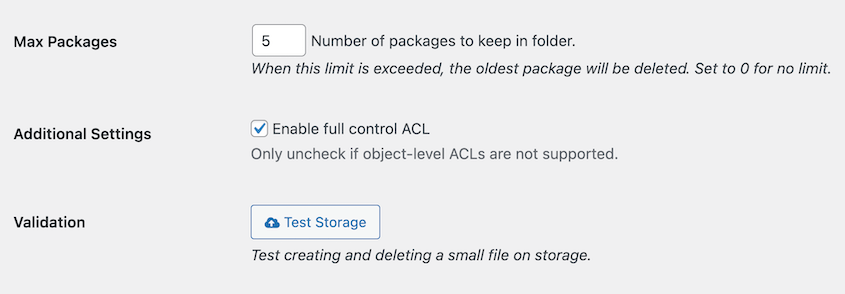
5. Save the new storage provider.
6. Click Test Storage to confirm the setup works. If Duplicator can create and delete a small file in the DigitalOcean Spaces bucket, the new storage location is ready. If the test fails, see How do I fix issues with Amazon S3 or S3-compatible storage types?
With DigitalOcean Spaces connected, backups upload there automatically each time a backup is created, giving the site a secure, off-site copy separate from the web server.
To automate this process, see the guide to Create Automated Backup.