
Storing Your Backup to Google Cloud
Storing your WordPress backups on Google Cloud keeps a copy off-site, away from your web server, so a compromised or crashed site doesn’t take your backups down with it. Duplicator Pro connects directly to a Google Cloud Storage bucket, so every backup you create gets pushed there automatically.
This guide walks you through creating a Google Cloud bucket, generating the access keys Duplicator Pro needs, and connecting that bucket to Duplicator Pro as a storage destination.
Create a Google Cloud Bucket
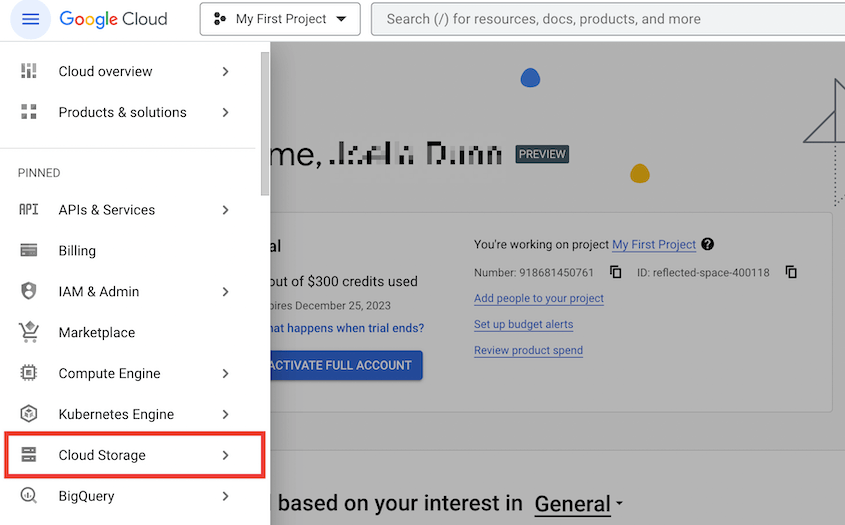
You’ll need to enable billing on your Google Cloud account or use the free tier. Once you log into your Google Cloud console, open the navigation menu and find Cloud Storage:
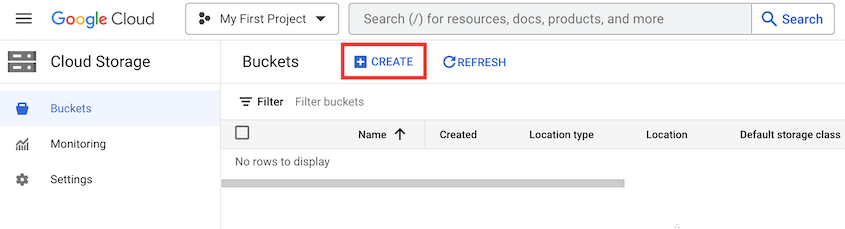
Next, select Buckets » Create:
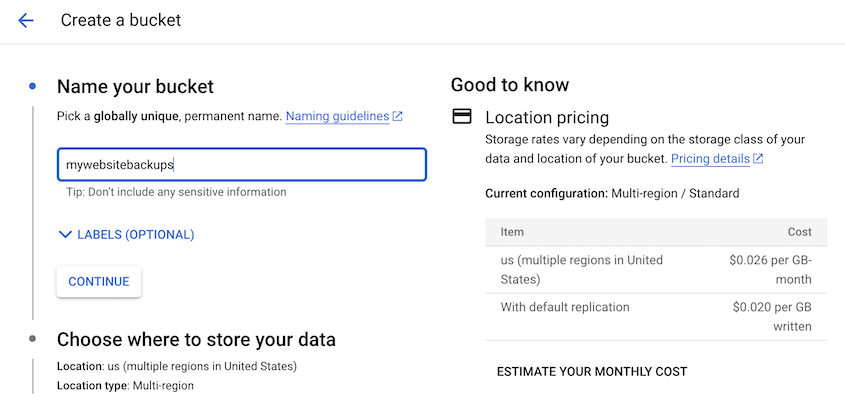
Next, choose the appropriate region where you want to store your data:
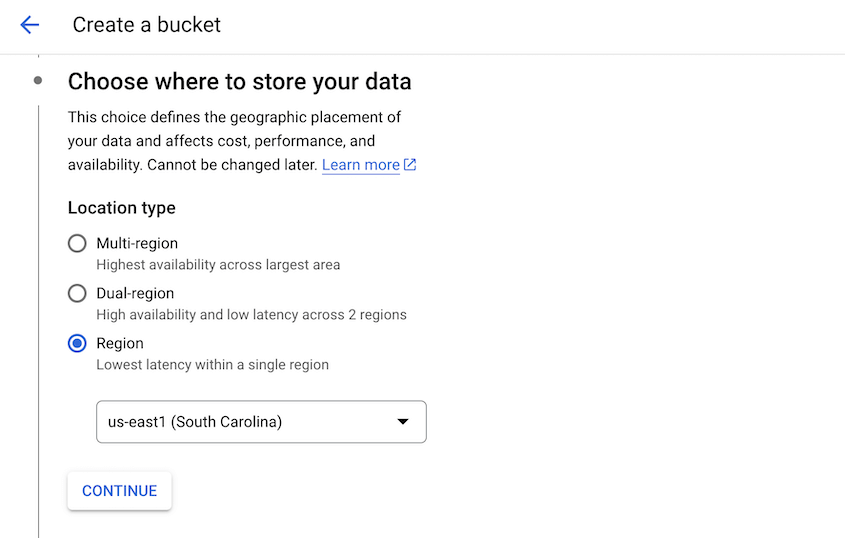
Set a storage class, which determines the cost to store and retrieve data from the bucket. There are four options: Standard, Nearline, Coldline, and Archive. Choose one based on how often you plan to access your backups:
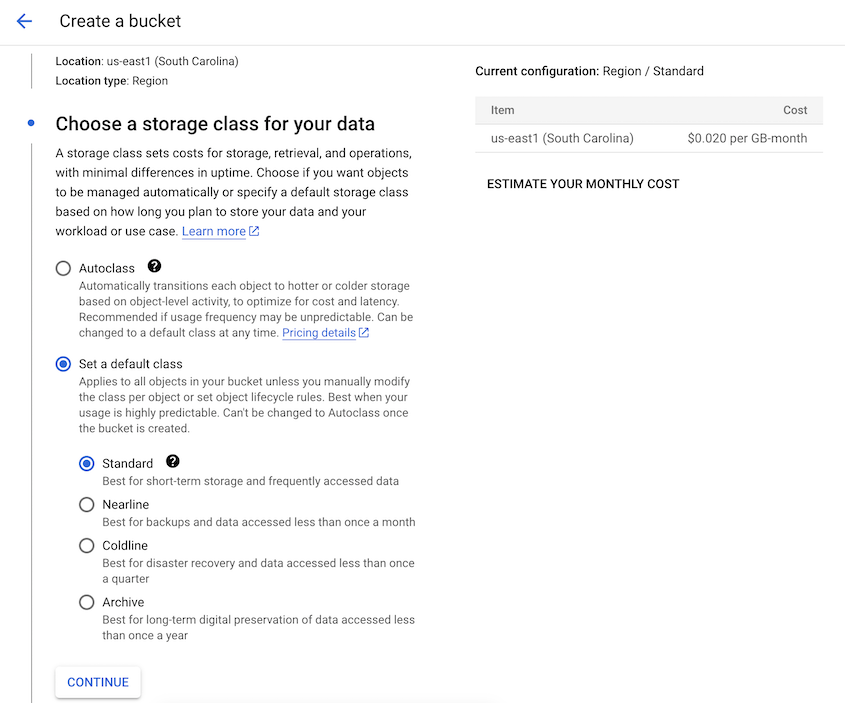
Next, set the access control for the bucket. Uniform access control relies only on bucket-level permissions, while Fine-grained access control allows object-level permissions too:
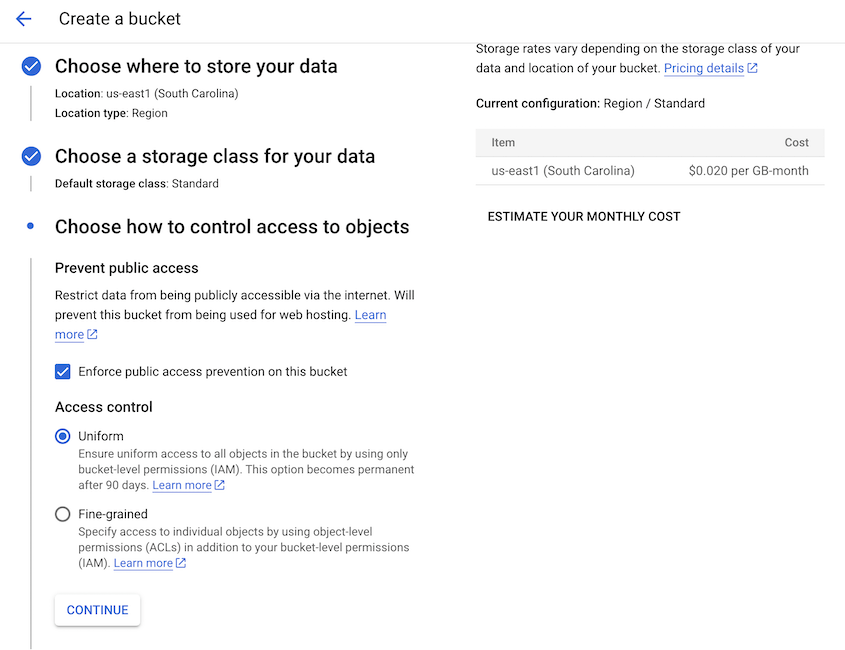
Under Protection tools, choose None or Object versioning:
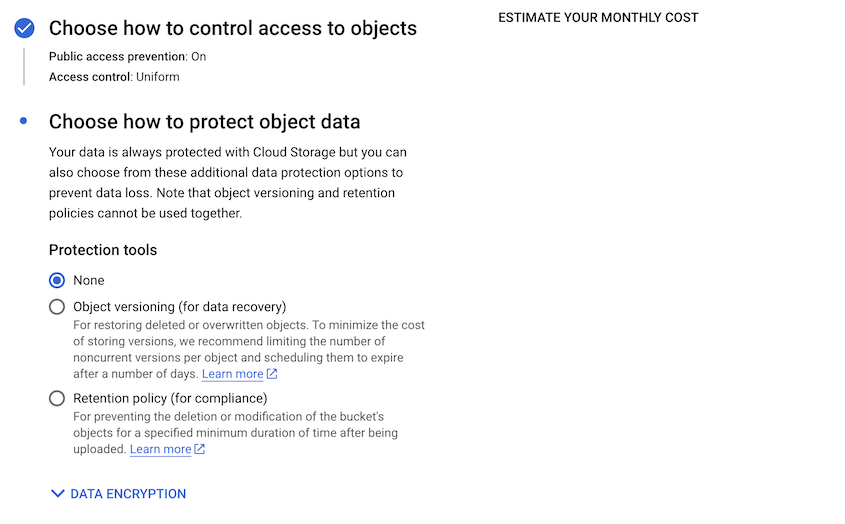
After this, hit Create.
Create Google Cloud Access Keys
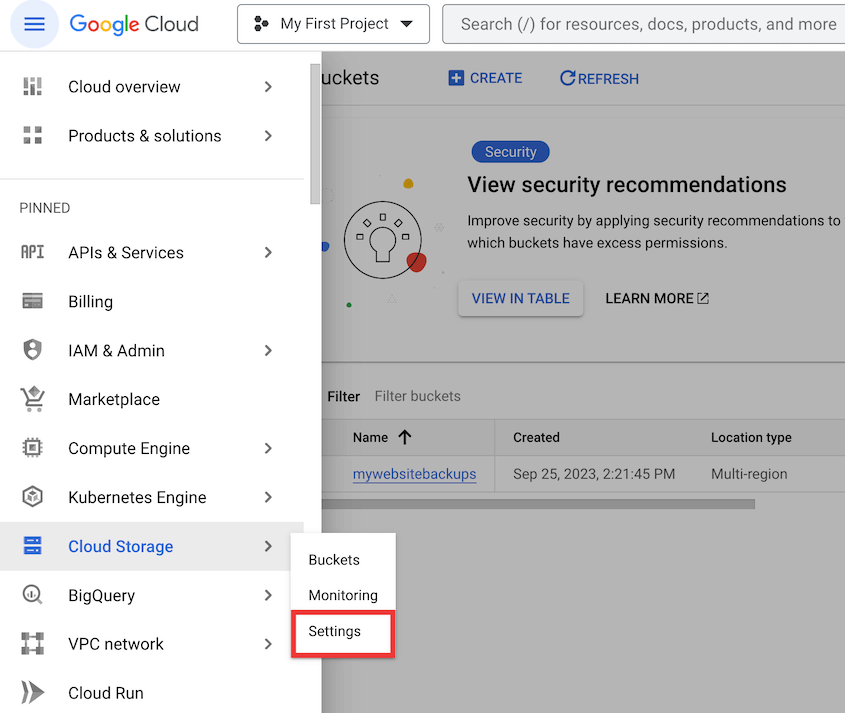
To connect Google Cloud and Duplicator, you’ll need to generate access keys for the new bucket. First, go to Cloud Storage » Settings:
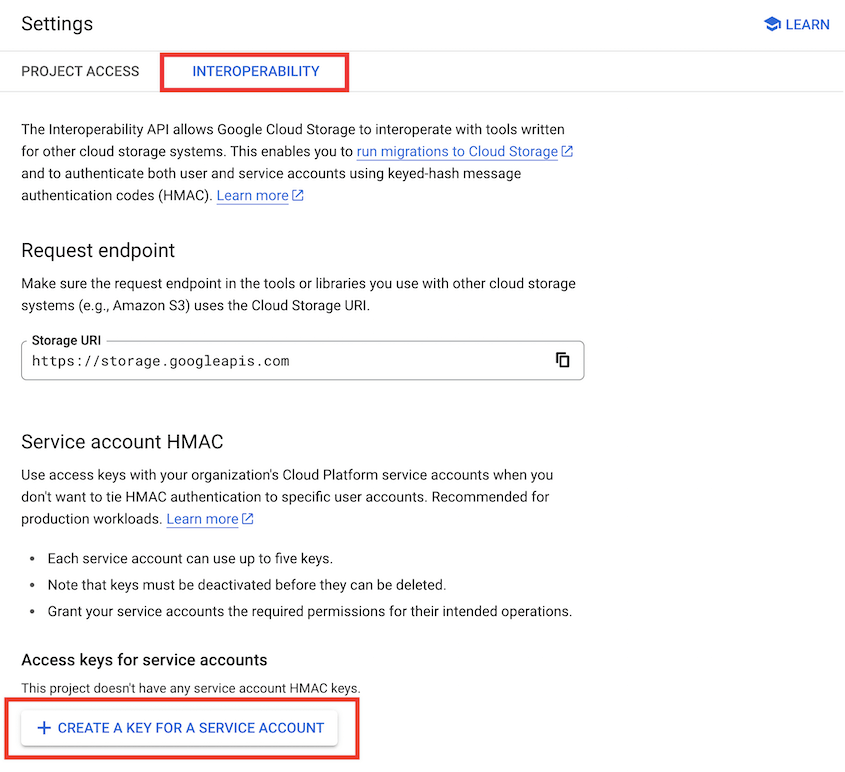
Click on the Interoperability tab. Here, hit Create a key for a service account:
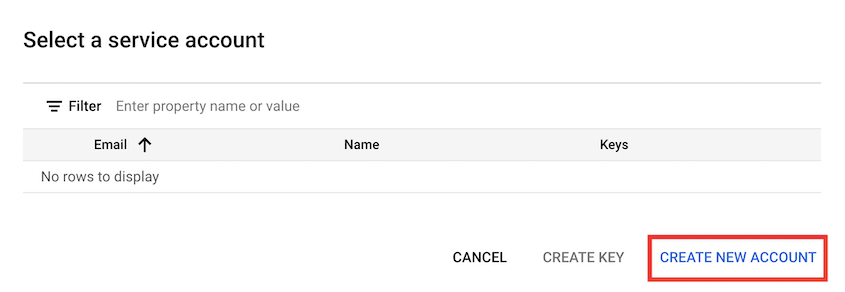
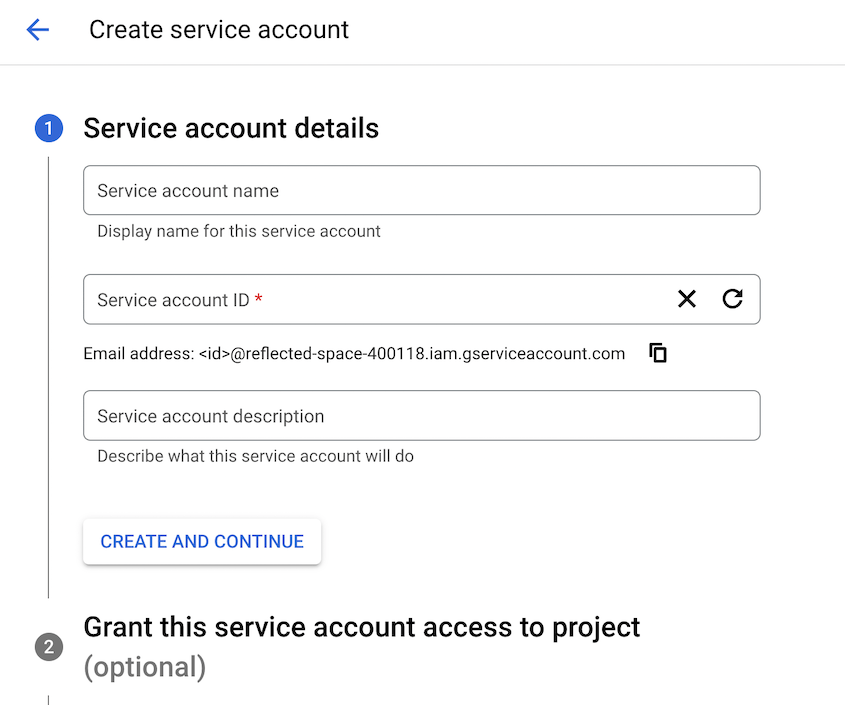
In the pop-up, create a new service account:
Enter an account ID and description:
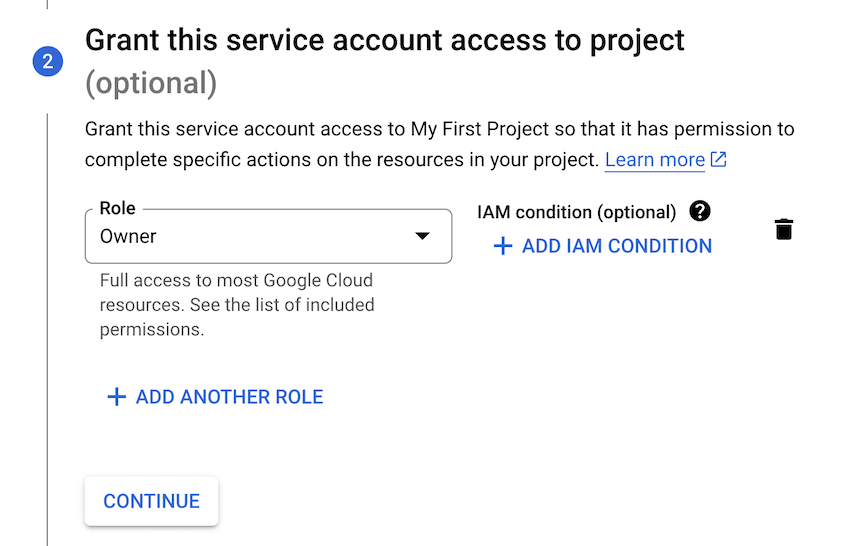
For the Role, select Owner:
Once you finish creating a service account, you’ll automatically get new access keys:
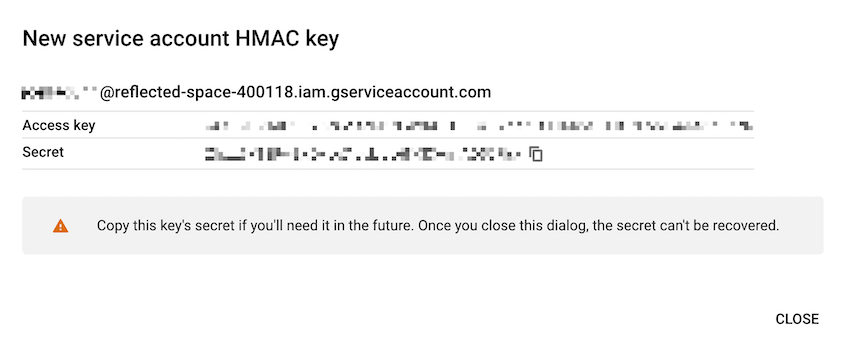
Copy both of these to use in the next step.
Connect Google Cloud to Duplicator
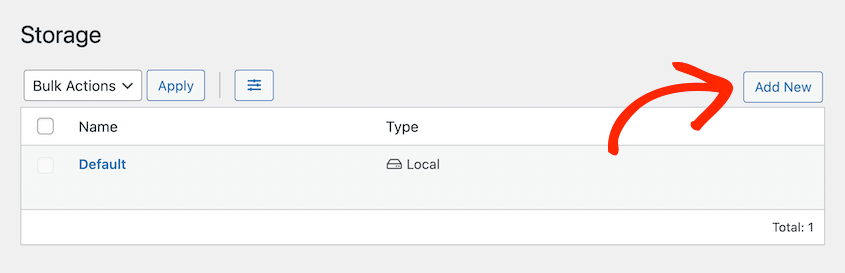
Your Google Cloud account is now fully set up! Go back to your WordPress dashboard and head over to Duplicator Pro » Storage » Add New:
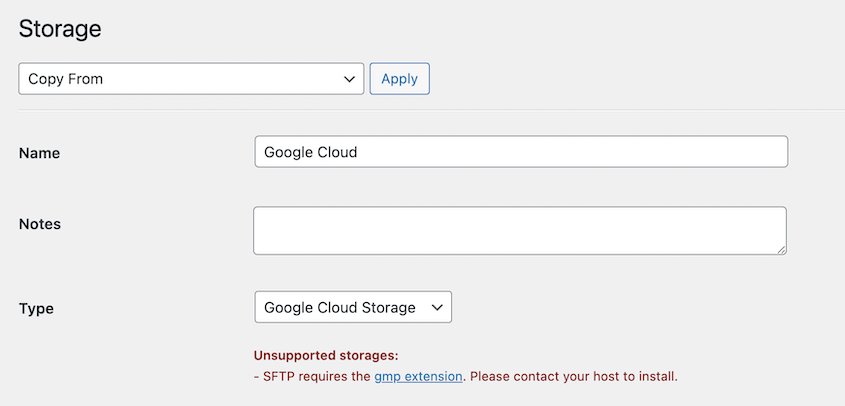
Then, name the new storage and select Google Cloud Storage as the Type:
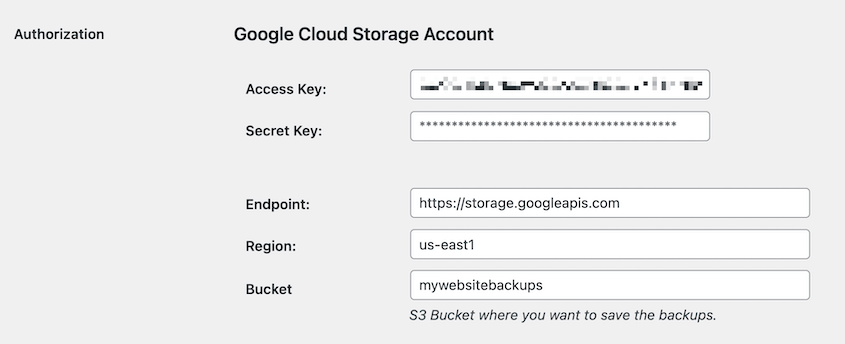
Scroll down to the Authorization section. Paste your access and secret keys:
At the bottom of the page, you can adjust the Max Backups. This is the maximum number of backups allowed in your Google Cloud account at one time:
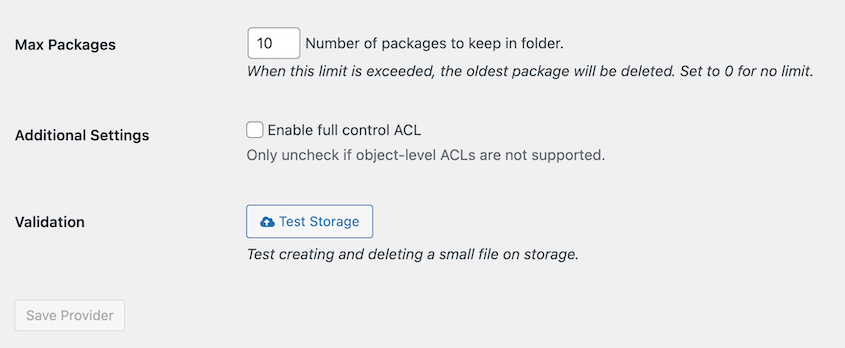
This setting is the Give bucket owner full control (ACL) to all files uploaded by Duplicator Pro checkbox. It only takes effect if the bucket’s access control is set to Fine-grained, since Uniform buckets do not support object-level ACLs at all. If you chose Uniform access control earlier, leave this checkbox as-is, it has no effect either way.
After saving the storage, click Test Storage to confirm the integration is working. Duplicator Pro creates and deletes a small test file on Google Cloud to verify that files can transfer successfully.
If you run into connection errors or failed uploads with Google Cloud Storage, see Troubleshooting Amazon S3 or S3 Compatible Storage Issues, since Google Cloud uses the same S3-compatible integration.
Following the steps in this guide connects Duplicator Pro to Google Cloud Storage, so future backups are automatically transferred to your bucket whenever a backup or schedule using this storage endpoint runs.
Looking for a different storage option? See A Complete Guide to Duplicator’s Storage Options.