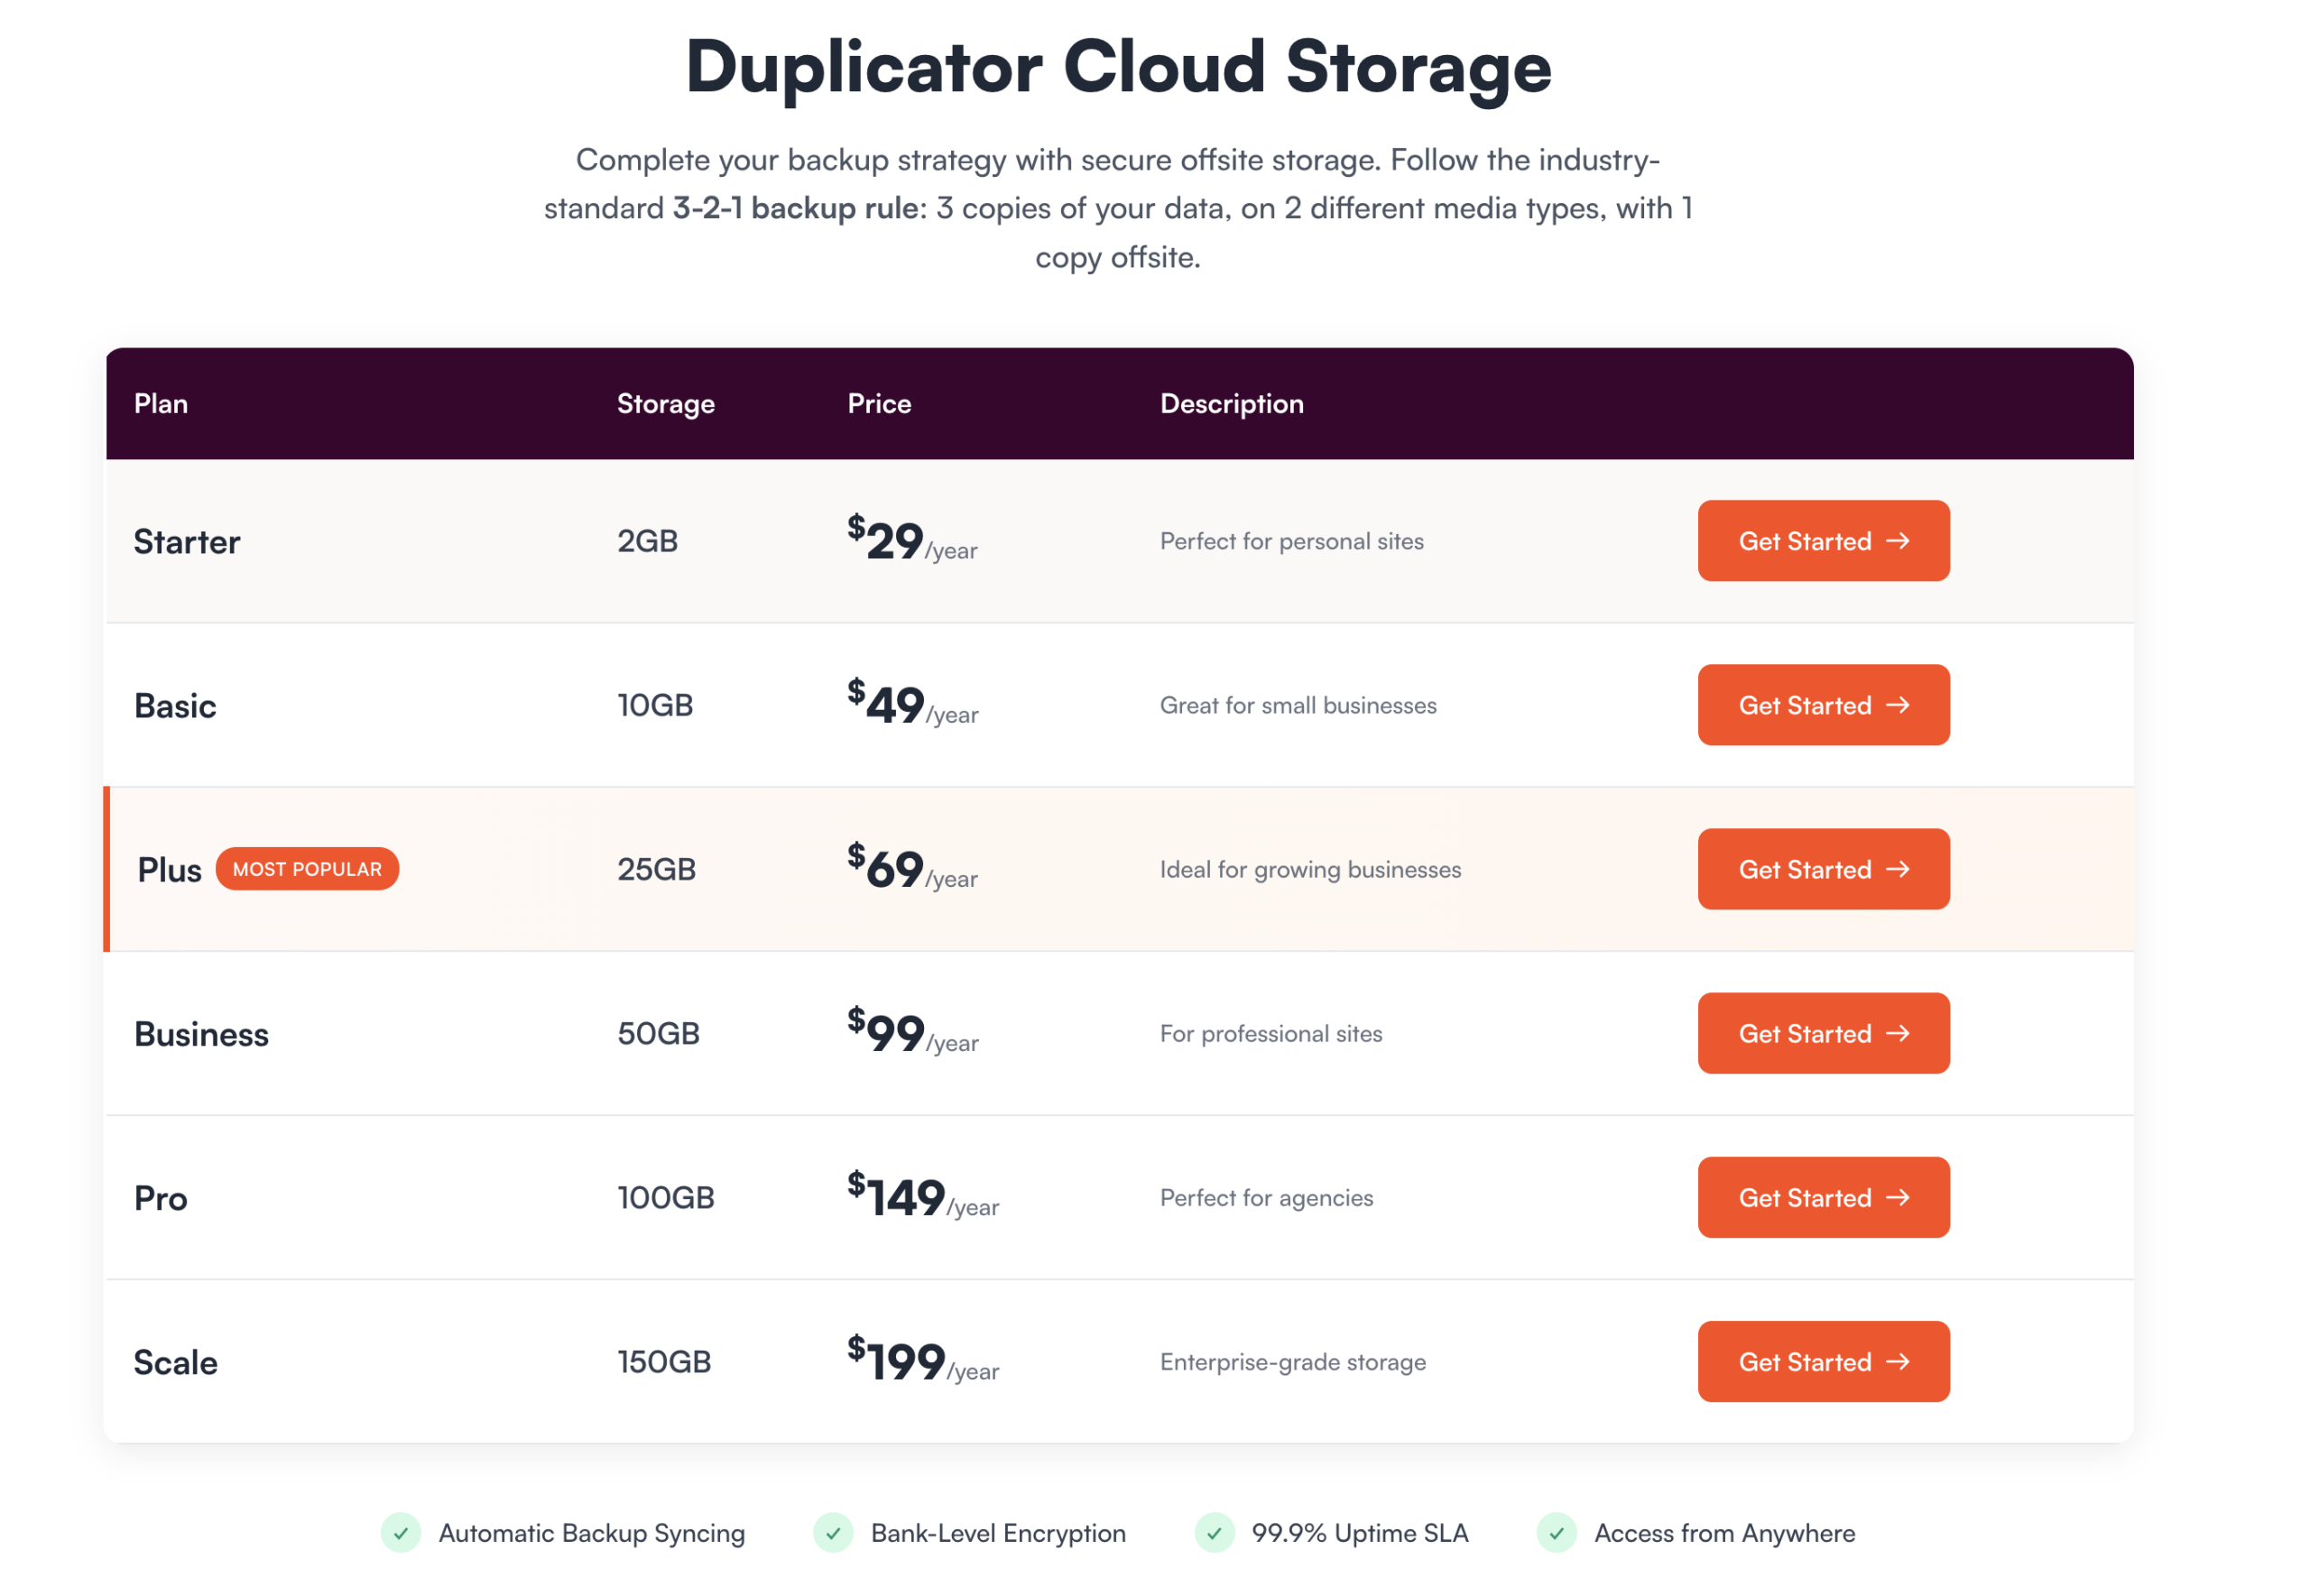
Duplicator Cloud is our in-house cloud storage solution, offering a secure, simple, and integrated way to store your WordPress backups. It eliminates the hassle of managing external credentials and provides a dedicated dashboard within Duplicator Pro to monitor your usage and backup health.
This guide will walk you through purchasing your cloud storage and connecting it to the Duplicator Pro plugin on your WordPress site.
Step 1: Purchase Duplicator Cloud Storage
Before you can use Duplicator Cloud, you must purchase a storage plan that fits your needs.

Select Your Plan: Choose the storage plan that corresponds to your site’s size and backup requirements (e.g., Starter, Basic, Plus, Business, Pro, or Scale).
Complete Purchase: Follow the on-screen instructions to complete your purchase.
Verification
Once the purchase is complete, your new storage will be immediately reflected in your Duplicator account dashboard:
- Access your storage here: https://duplicator.com/my-account/storages/
You are now all set to connect your Duplicator Cloud storage to the Duplicator Pro plugin on your WordPress site!
Step 2: Connect Duplicator Cloud to Duplicator Pro
Connecting your purchased storage is a quick, one-time process that is handled directly within your WordPress admin, eliminating the need for complex API keys or tokens.
A new storage location named Duplicator Cloud will now be available in the storage list when creating a new backup.
Your site’s backup will be created and then automatically uploaded to your secure Duplicator Cloud storage! You can also access your Duplicator Cloud Dashboard from here: https://cloud.duplicator.com/dashboard
You can also manage your storage subscriptions and view usage on your account portal: https://duplicator.com/my-account/storages/


