
![[NEW] Duplicator DB Optimizer: Clean Your WordPress Database Before It Becomes a Problem](https://duplicator.com/wp-content/uploads/2026/06/Announcement-DB-Optimizer.jpg)
How to Push WordPress Staging to Live Without Losing Data
 Joella Dunn
Joella Dunn
Joella Dunn
 John Turner
John Turner
John Turner
I’ve moved staging changes to live more times than I can count, and the times it went wrong all had the same root cause: I rushed the push without checking what I was about to overwrite.
If you’ve spent the last few hours (or days) building out changes on a staging site, you’re probably ready to get them live. New theme, updated plugins, a redesigned page. Whatever it is, you tested it, and it works.
Pushing it to your live site is where things get risky.
I use Duplicator for this because it gives me full control over the process. I can build a migration package from staging, choose exactly which database tables get included, and install it over production on my own terms instead of trusting a single button to make the right call.
That control matters. A careless push can wipe out new orders, log every user out, or break your live site in front of visitors while you scramble to fix it.
This tutorial walks through what you’ll do to push a WordPress staging site to live, including the mistakes that catch people off guard.
Here are the key takeaways:
- Two main paths exist depending on your host: use your hosting provider’s built-in push if it’s available, or use Duplicator’s backup and migration method when it isn’t, since it works regardless of your host.
- A full database push can wipe out live activity. Any orders, comments, or signups added to your site after you created staging get overwritten unless you exclude those tables before pushing.
- Timing matters more than people expect. The longer the gap between creating staging and pushing, the more live data is at risk, so push sooner rather than later.
Table of Contents
- When Do You Need to Push Staging to Live?
- What You Need Before You Start
- Different Methods for Pushing Staging to Live
- How to Push a WordPress Staging Site to Live
- Troubleshooting: Common Errors When Pushing Staging to Live
- Frequently Asked Questions (FAQs)
- Treat Every Push Like a Migration, Because It Is
- Protect Your Site Before the Next Push
When Do You Need to Push Staging to Live?
Not every change you make on staging needs to go live. Knowing the difference saves you from taking on risk you don’t need.
You’ll need a real push when:
- You’ve tested a major theme or plugin update and confirmed it works
- Built new pages or content you’re ready to publish
- Made structural or code changes
- Run a WordPress core update and verified nothing broke
You probably don’t need a full push when you were just checking how something looks, running a compatibility test you’re about to redo anyway, or making changes you don’t plan to keep.
I treat staging as the place to break things on purpose.
Pushing to live is different. It’s the moment you commit.
Every push carries some risk: overwritten data, a few minutes of downtime, or URL mismatches that take time to track down. None of that is worth it for a change you haven’t finished testing.
So before you touch anything, make sure what’s on staging is actually done.
What You Need Before You Start
Before you push anything, get these in place. Skipping this step is how a 20-minute task turns into a multi-hour scramble.
- A fresh backup of your live site, taken right before you start the push
- FTP or SFTP access, or your hosting account’s file manager, in case you need to upload files manually or fix something by hand
- Database access through phpMyAdmin or your host’s database tool, as a fallback if something needs a manual fix
- A clear list of what changed on staging, so you know exactly what you’re pushing and can double-check it landed correctly
- Duplicator Pro installed on your staging site, since it’s what you’ll use to build the migration package in the next section
That backup of your live site is the one item on this list you cannot skip. I’ve seen people skip it because “the push always works.” It doesn’t always work.
When it doesn’t, that backup is the only thing standing between you and rebuilding your site from scratch.
Different Methods for Pushing Staging to Live
Not every WordPress setup has the same tools available, and what works for one site might not exist on another. Here’s what’s out there, depending on your host and plugins, before we get into the step-by-step.
Hosting-provided staging push
Hosts like WP Engine, Kinsta, SiteGround, and Flywheel build staging push tools directly into their dashboards. If your host offers this, it’s usually the fastest option since it’s built around their server setup.
The tradeoff is you’re limited to whatever your host’s plan tier includes, and some plans don’t offer it at all.
Dedicated staging plugin push
Plugins built specifically for staging (like WP Staging) include their own push button with file and database selection. This works well if staging was already your main use case.
The tradeoff is you’re adding another plugin specifically for this one task.
Backup and migration method
This is the method I use, and the one this tutorial walks through in detail.
You build a migration package from your staging site, choose exactly what to include, and install it over production. A tool like Duplicator handles this well.
It takes a few more steps than a single push button, but it works regardless of your host. It also gives you the most control over what gets overwritten.
Manual method (FTP and phpMyAdmin)
Copying files and database tables by hand, one at a time. This is a last resort for when no other tool is available. It works, but it’s slow and error-prone.
I prefer the backup and migration method because it doesn’t depend on my host supporting staging pushes, and I get to decide table by table what’s safe to overwrite.
How to Push a WordPress Staging Site to Live
Here’s what you’ll do, step by step:
- Back up your live site first: Create a safety net so you can restore production in minutes if something goes wrong.
- Decide what you’re pushing: Determine whether you do a full site push or a selective push that protects live data like orders and comments.
- Create a migration package from staging: Package your staging site’s files and database into files Duplicator can install on production.
- Transfer the package files to the live server: Get the installer and archive onto your production server so the install can run.
- Run the installer on the live site: Install your staging changes onto production and updates the database to match.
- Verify the live site: Confirm everything works correctly before you walk away.
Step 1: Back Up Your Live Site First
Backups aren’t optional. Before you touch production, you need a way back if anything breaks.
My favorite tool for the job is Duplicator. Since it’s also a migration plugin, it’ll help you protect your site, set up a staging area, and migrate changes back whenever you need them.
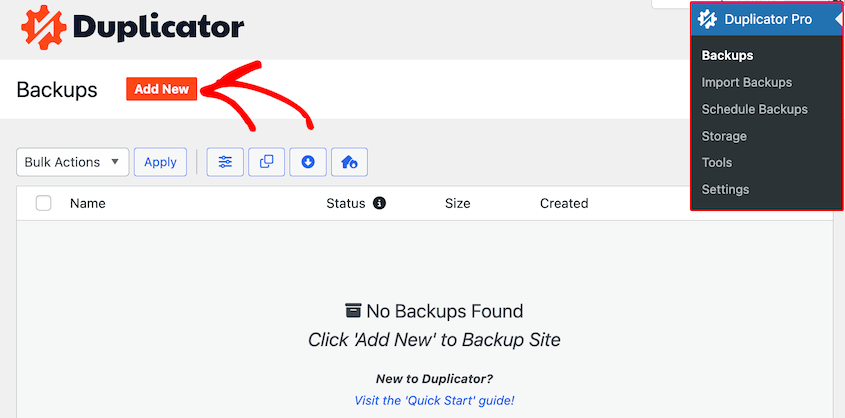
On your live site, open Duplicator and go to the Backups screen. Click the Add New button.
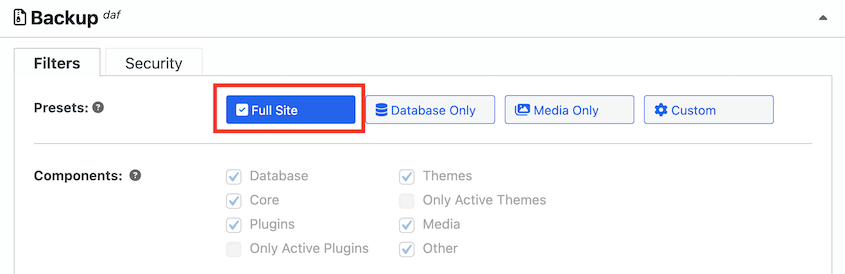
Name the backup something you’ll recognize later, like “pre-staging-push-backup.” Choose the Full Site backup preset to back up everything.
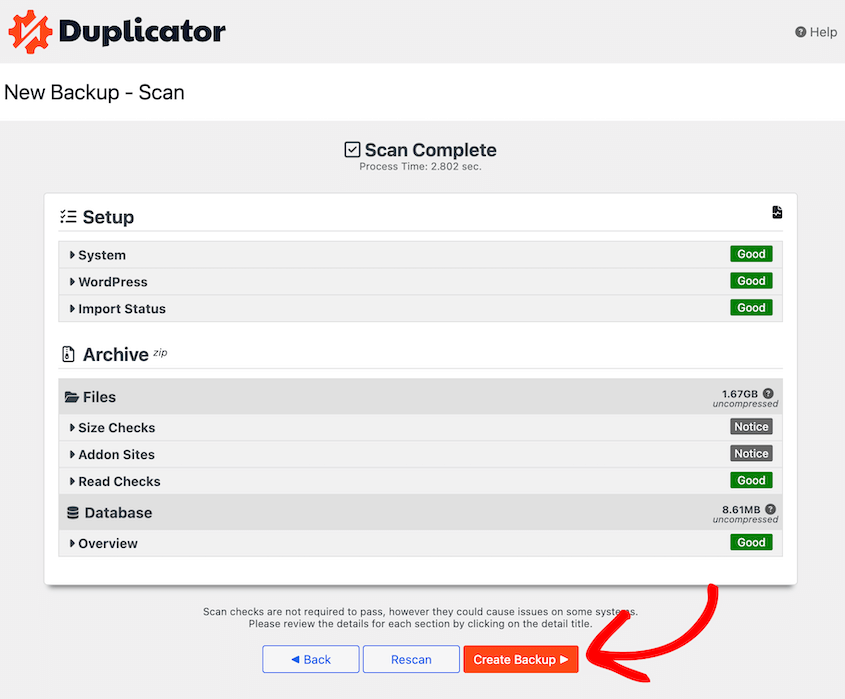
Click Next. Once you review any notices from the scan, build the backup.
Download both backup files. Store them somewhere off your server, like cloud storage or your local computer.
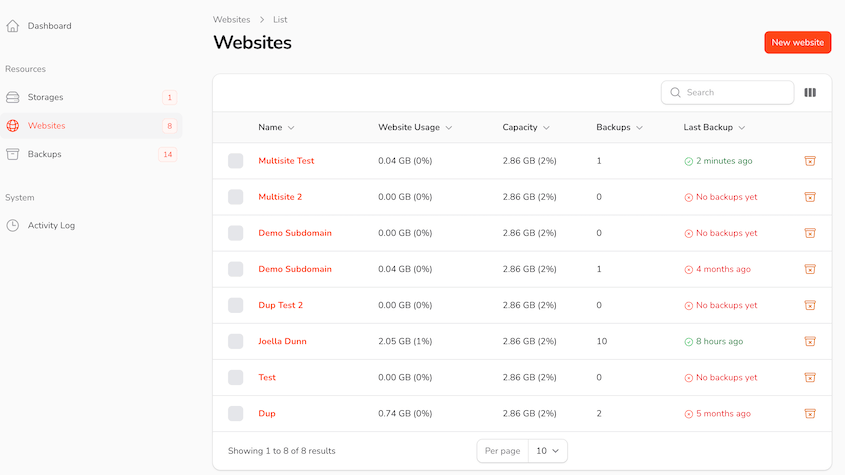
I prefer using Duplicator Cloud since it can restore your site even if it’s offline from a serious error.
Step 2: Decide What Data You’re Pushing
A full push replaces everything: files, themes, plugins, and the entire database. Use this when you’ve made major changes like a new theme or significant structural updates.
A selective push only updates specific files or database tables. Use this when you only changed a few things, since it protects live data your staging site doesn’t have, like new orders, comments, or user signups made on production since you started staging.
If you do a full database push, anything that happened on your live site after you created staging gets wiped out and replaced with staging’s older data.
Before you build your migration package in the next step, decide which tables matter.
If you’re not sure what changed on live since you started staging, check now. It’s a lot easier to ask, “Do I need this table?” before the push than to recover it after.
Step 3: Create a Migration Package From Staging
On your staging site, create a new backup with Duplicator. It’s the same process you used in Step 1, just on staging this time.
In the Backups section, use the backup presets to customize what data is included. You can also use file and database table filters.
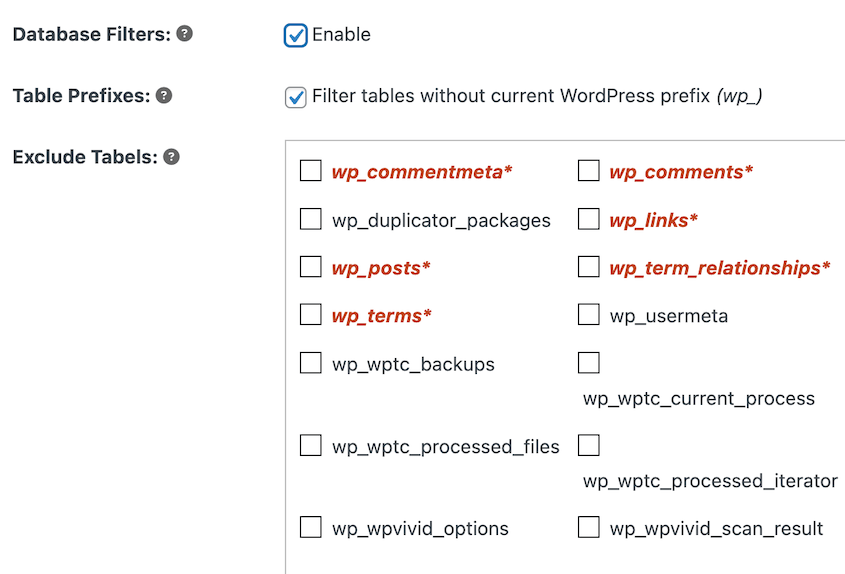
Duplicator lets you exclude specific tables, like wp_woocommerce_orders or wp_comments, from the database build.
Finish creating the backup and download it. You’ll have two files: an installer (installer.php) and an archive (a zip containing your site’s files and database).
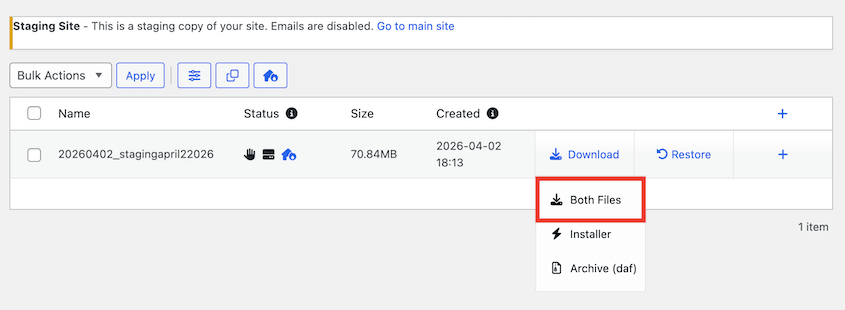
Step 4: Transfer the Staging Files to the Live Server
Connect to your live server using FTP, SFTP, or your host’s file manager.
Upload the installer.php file and the archive file to the root directory of your live site. This is the same folder where your site’s main wp-config.php file lives.
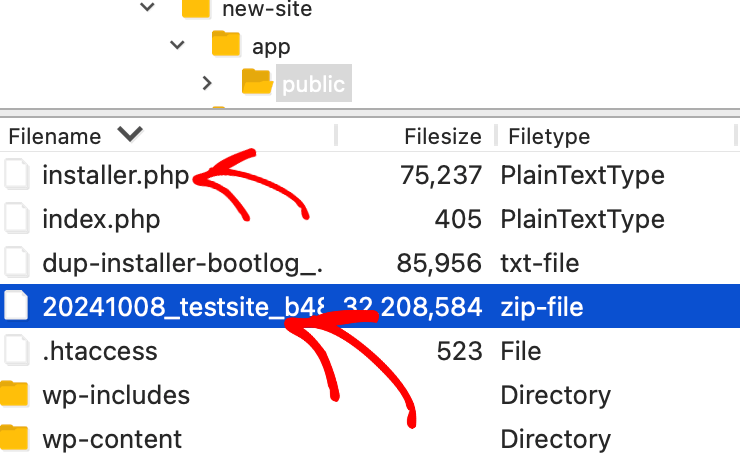
If your staging site lives in a subfolder of the same server, like yoursite.com/staging/, this transfer is often just a file copy rather than a full upload, which saves time.
Confirm both files show up in the live site’s root directory before moving on.
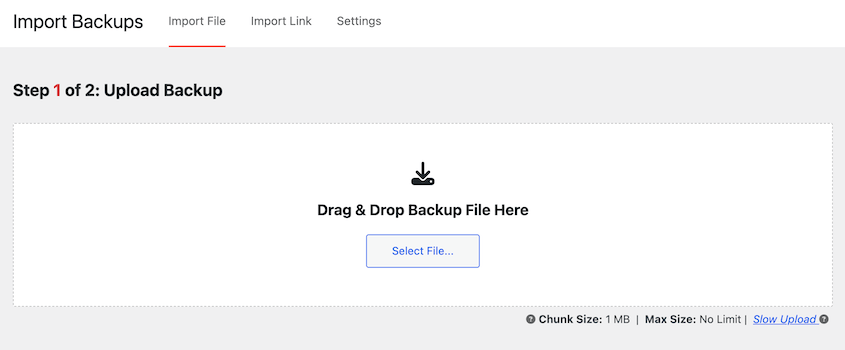
Step 5: Run the Installer on the Live Site
In your browser, navigate to yoursite.com/installer.php, replacing “yoursite.com” with your live domain.
Double check the database connection details. They should point to your live site’s database, not staging’s.
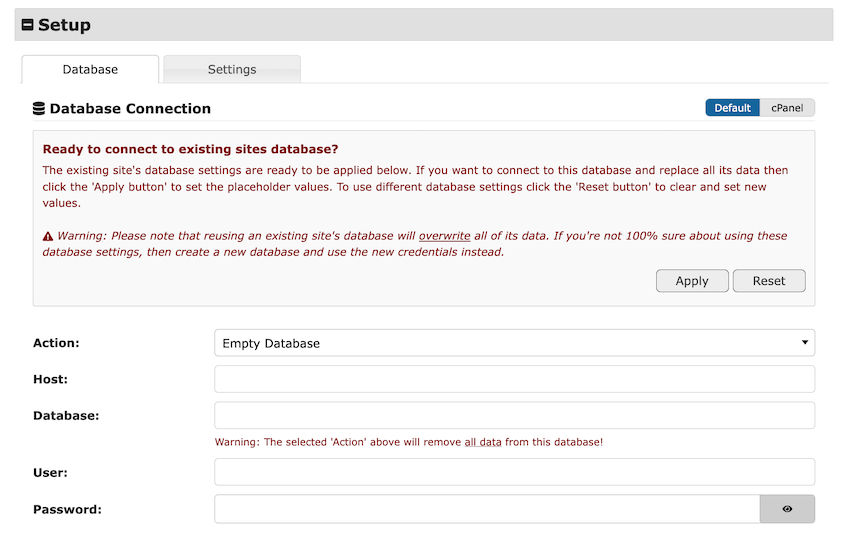
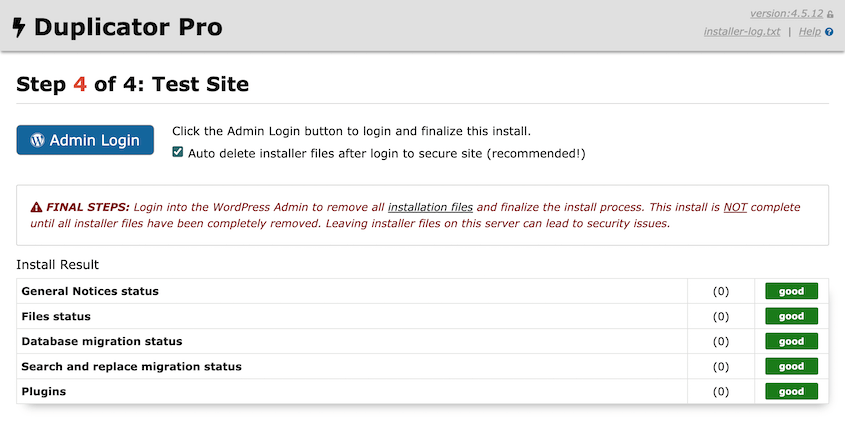
Continue with the installation. When it finishes, log back in with the Admin Login button.
Step 6: Verify the Live Site
Open your live site and check the homepage first.
Click through a few key pages: the ones you changed on staging, plus a couple you didn’t touch, just to confirm nothing unrelated broke.
Try logging into wp-admin with your usual credentials. Test any forms or checkout flows if your site has them.
Clear your caching (both server-level caching and any caching plugin you run), since cached pages can show old content even after a successful push.
Last thing: if your staging site is still up, double-check it’s still set to noindex in its visibility settings. It’s easy to forget, and you don’t want search engines crawling a duplicate site.
Troubleshooting: Common Errors When Pushing Staging to Live
White Screen Right After the Push
You load your live site and get a blank white page with no error message.
This usually means a plugin that worked fine on staging is incompatible with your live server’s environment, often a PHP version difference.
Check your host’s PHP version against what staging was running. If they don’t match, update production to match staging’s PHP version, or roll back the plugin causing the conflict using your Step 1 backup.
Can’t Log In to wp-admin After the Push
You enter your usual login credentials and get “incorrect username or password,” even though you know they’re right.
A full database push replaces your live site’s user table with staging’s, so your live login no longer matches what’s in the database.
Reset the admin password directly through phpMyAdmin or your host’s database tool, or restore your Step 1 backup and redo the push as a selective push that excludes the user table.
REST API Errors or a Broken Block Editor
The block editor won’t load, or you see REST API errors in the browser console.
Serialized data in your database still references your staging URL instead of your live domain, and Duplicator’s URL replacement didn’t catch every instance.
Duplicator will do a search and replace for you. However, you can target any leftover staging URLs in serialized fields with a plugin like Search & Replace Everything.
Missing Orders, Comments, or New Signups
Customers report their recent orders are gone, or comments from the last few days have disappeared.
This happens when a full database push overwrites live tables that had new activity because that activity happened after staging was created.
Restore your initial backup immediately, then redo the push as a selective push that excludes wp_woocommerce_orders, wp_comments, and any other tables with live activity.
The Process Stalls or Times Out Mid Transfer
The install hangs partway through, or your browser shows a timeout error with no clear failure message.
Large archive files can exceed your server’s upload limits or execution time limits, especially on shared hosting.
Check your host’s max upload size and PHP execution time settings, split the package into smaller pieces if your plugin supports it, or contact your host to temporarily raise the limits during the push.
Your Host’s Push Button Is Grayed Out or Missing
You go looking for a staging push option in your hosting dashboard, and it’s either disabled or not there at all.
This usually means your hosting plan tier doesn’t include staging push features, even if staging creation itself is included.
Use the Duplicator backup and migration method instead, since it doesn’t depend on what your host’s plan supports.
Frequently Asked Questions (FAQs)
Does Duplicator have a one-click push to live feature?
No, but it doesn’t need one. Duplicator’s backup and migration tools let you build a package from staging and install it on production with full control over what gets included, which works regardless of your hosting setup or plan tier.
Will pushing staging to live delete my recent orders or comments?
It can, if you do a full database push and your live site has activity that happened after you created staging. Avoid this by doing a selective push that excludes tables like wp_woocommerce_orders and wp_comments before you build the package.
How do I push only specific files without overwriting the whole database?
As you create the backup of the staging site, exclude the specific tables you want to protect before building the package. This keeps those tables untouched on production while still updating the files and tables you actually changed.
Do I need FTP access to push staging to live?
You need it as a fallback, even if your main method doesn’t require it. If staging and live share the same server, you may be able to skip manual transfer entirely, but FTP or your host’s file manager is essential if anything needs a manual fix.
What happens if the push fails halfway through?
Your live site may end up in a partially updated state. Restore the backup you made in Step 1 immediately to get your site working again, then troubleshoot the cause (usually a file size or server timeout issue) before trying again.
Should I take staging offline after pushing to live?
You don’t have to take it offline, but make sure it’s still set to noindex so search engines don’t crawl it. Many people keep staging running for the next round of changes instead of recreating it each time.
Which method should I use if my host doesn’t offer staging push?
Use the Duplicator backup and migration method. It doesn’t depend on your hosting plan including a push feature, since you’re building and installing the package yourself.
Treat Every Push Like a Migration, Because It Is
You’ve now got a full process for getting staging changes onto your live site without guessing whether something will break.
Keep watching for a few things going forward.
Live activity keeps happening while you work on staging, so the longer you wait between creating staging and pushing changes, the more data you risk overwriting with a full push. Check what’s changed on live before every push, not just the first one.
One tip I don’t see covered elsewhere: schedule your push during your lowest-traffic hours, even for a small site. Fewer active visitors means fewer chances of overwriting an order or comment that came in during the few minutes the push takes.
Protect Your Site Before the Next Push
Every push from staging to live carries risk, even when you follow every step carefully. A backup taken right before you start is the difference between a quick fix and rebuilding your site from scratch.
Duplicator Pro is built for exactly this: full-site backups, selective database control, and a migration process that works no matter what your host supports. Over 1.5 million WordPress professionals already use it to protect their sites through changes just like this one.
Don’t wait until a push goes wrong to find out your last backup was a week old.
If this tutorial helped, these guides are worth bookmarking too.
- Do You Need a Staging Site?
- How to Create a WordPress Staging Site
- How to Convert WordPress to a Staging Site
- How to Create a WooCommerce Staging Site (+ What to Test Before Going Live)
- How to Back Up Your Website’s Staging Site Before Every Push
- 9 Best WordPress Staging Plugins (+ Our Expert Reviews)