Website backups are non-negotiable for me. If you’re serious about your website, they should be for you, too.
But here’s an extra step that I always take: I test my backups. Religiously.
Because just having backups? That’s like saying you have a fire escape plan for your house, but never actually practicing using it.
In a real fire, would everyone know what to do? Would the escape route even be clear?
Testing your website backups is like running a fire drill for your website.
It’s how you confirm that your backups are actually working. It’ll help you learn the restore process before you’re in a panic trying to recover from a real website disaster.
Let me show you some data backup testing best practices so you’ll have a plan for your website!
Table of Contents
Why I Consistently Test Website Backups
I’ve seen firsthand what happens when websites go down and backups fail. It’s not pretty.
Sometimes, backups aren’t good enough to restore. They’re incomplete or corrupted. Panic sets in fast when that happens, trust me.
That’s why I test my own website backups regularly.
For me, testing backups is about peace of mind. It’s like knowing you have a spare tire in your car. You hope you never need it. But it’s really good to know it’s there and ready if you get a flat.
Knowing my backups are tested and ready? That’s a huge weight off my shoulders.
It lets me focus on creating content and growing my website, not worrying about losing everything.
What Happens If You Don’t Test Site Backups?
Suddenly, something goes wrong with your website. Maybe it was a hacker or a server problem. Whatever it is, your site is down.
You need to get it back online, fast. So, you go to restore your latest backup.
But wait, you’ve never tested it. You just assumed it was working.
What if that backup is broken? What if it’s incomplete? What if you don’t even know how to restore it?
Untested backups give you a false sense of security. You think you’re protected, but you’re not really.
Without a proper backup testing plan, you could lose everything. Your website data, your content, your customer information, you name it.
Website downtime can cost you money. It can damage your reputation. And it’s incredibly stressful to deal with when you’re unprepared.
Don’t wait until disaster strikes to find out your backups are useless. Test them now. It’s a simple step that can save you a lot of pain later.
Types of Backup Testing
Let’s talk about the different ways you can test your backups. It might sound complicated, but it’s not.
There are quick checks, which I call verification tests. These are like your regular, quick peeks to make sure things seem okay.
And then there are restore tests. These tests involve restoring your website from a backup to make sure it works.
Understanding the key differences between these testing types will help you implement a more thorough testing strategy.
Verification Tests (Quick Checks)
These are your everyday, easy ways to check on your backups. They don’t take long, but they can catch a lot of potential problems early.
Think of them as preventative maintenance for your backups.
Backup Log Review
Every time your backup software runs, it usually keeps a log. These logs record what happened during each backup process.
Checking these logs is a quick way to see if your backups are running correctly. I usually check my backup logs just to make sure everything is still running smoothly.
You want to look for success messages. They tell you that the backup was completed without any problems.
But you also want to look for error messages or warnings. These are red flags, signaling that something might be wrong.
Backup Size and Contents Check
This is a really simple visual check.
Basically, you just check the size of your backup files. Does the size seem about right? Has it suddenly gotten much smaller than usual? A big change in size could indicate a problem.
For example, if your website backup is usually around 500MB, and suddenly you see a backup that’s only 50MB, that’s a red flag.
You might also be able to quickly browse the contents of your backup files. Do you see the folders and files you expect to be there?
This is just a quick sanity check. It’s not perfect, but it can help you catch obvious issues at a glance.
This quick check can save you from relying on a broken backup when you need it.
Restore Tests (The Real Deal)
Verification tests are good for quick checks. But restore tests are where you really put your backups to the test.
With restore tests, you are restoring your website from a backup. This makes sure that the backup files are good and that you know how to restore them.
There are two main types of restore tests we’ll talk about: full restores and partial restores.
Full Restores
A full restore means you restore your entire website from a backup. You restore everything.
It’s important to do this in a staging environment. This is a copy of your website that is not live. It’s a safe place to test things without affecting your real website.
Never, ever test restores on your live website. I can’t stress this enough.
Testing on your live site is risky. Things can go wrong during a restore. You could break your live website even more. Always use a staging environment or a separate testing location.
Partial Restores
Sometimes, you don’t need to restore your whole website. You might just need to restore specific files or a specific part of your website. This is where partial restores come in handy.
Knowing how to perform a recovery test on specific components allows you to quickly address isolated issues without disrupting your entire site.
Let’s say you accidentally delete a folder of images. Or maybe a plugin messed up a specific database table. In these cases, you can do a partial restore to recover just what you need.
Once, I accidentally deleted a whole folder of images from my media library. Luckily, I was able to use Duplicator Pro to restore a media library backup. It saved me a lot of time and effort of having to re-upload all those images.
Verification after a partial restore is focused. You need to make sure the specific component you restored is working correctly and is integrated with the rest of your website.
Did you get back the files or database tables you needed? Are they working with the rest of your site as expected?
How to Test Website Backups
Testing your website backups doesn’t have to be complicated. It’s about being organized and following a few key steps.
Create a Backup Testing Schedule
The first step is to create a schedule for testing your backups. If you don’t schedule it, it’s easy to forget or put it off.
How often should you test? It depends on how often you update your website. If you make changes to your website frequently, you should test more often.
I recommend testing at least monthly. If you update your website less often, quarterly testing might be enough.
But monthly is a good starting point. Put it on your calendar. Set a reminder.
Become Comfortable With Your Backup Software
Knowing your backup tools is key. You need to be familiar with your backup software so you can test and restore quickly when needed.
I use Duplicator for my backups and I’ve become very comfortable with it. It makes testing backups really easy. I know where all the settings are, and I know all the different ways it can restore my site.
Take some time to explore your backup software. Read the documentation. Watch tutorials. Practice doing backups and restores in a test environment.
The more comfortable you are, the smoother things will go when you need to restore your website.
Choose Your Testing Environment
Where will you test your restores? As I mentioned before, never test on your live website.
Here are a few options for your testing environment:
A staging environment is the ideal option if you have it. This is a duplicate of your website that is not live. It’s the safest place to test restores.
If you are a developer, you might have a local development environment on your computer. This can also be used for testing restores.
If you don’t have a staging environment, you can use a separate hosting account or server for testing. This is still much safer than testing on your live site.
Again, I want to emphasize: do not test restores on your live website! It’s too risky. Choose a safe testing environment.
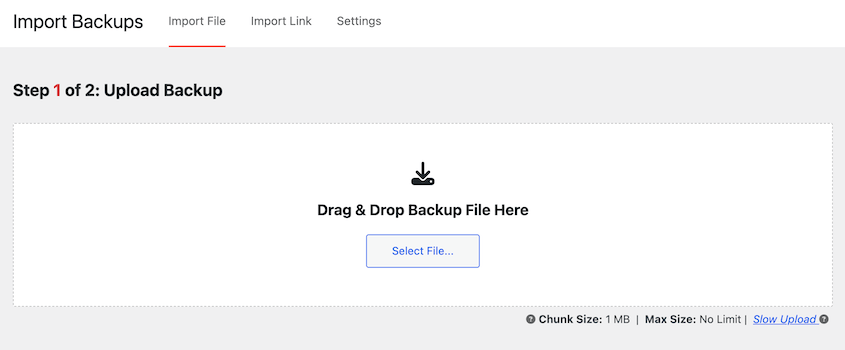
To move your site to a staging area for testing, I’d recommend using Duplicator. Use it to create a full backup of your site. Then, simply drag and drop the backup into the staging area.
Then, you’re good to start testing backups!
Test Full Site Restores
Make sure you regularly test full site restores. This is the most comprehensive test. It makes sure that everything is backed up and can be restored correctly.
I recommend doing a full restore test at least every month, or whenever you make major changes to your website.
With Duplicator, doing a full restore is just a few clicks. Once you have your staging environment set up, find (or create) a full-site backup. Use the Restore button next to it.
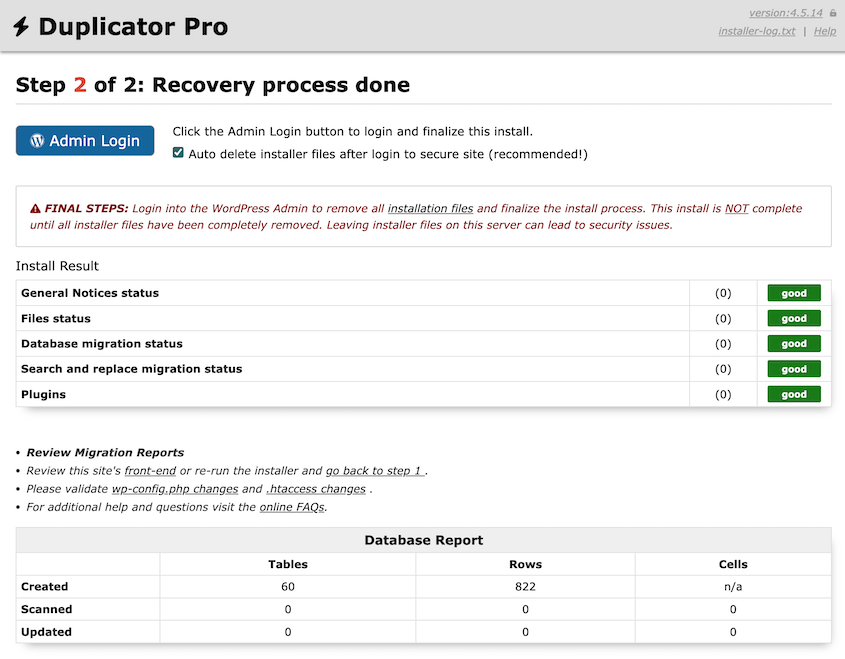
Let Duplicator Pro restore your website. Use the Admin Login button to sign back in.
Afterward, check to see if your site was restored properly.
Set Up Backup Failure Notifications
It’s important to know if your backups are failing. You can’t rely on backups if you don’t know if they are running successfully.
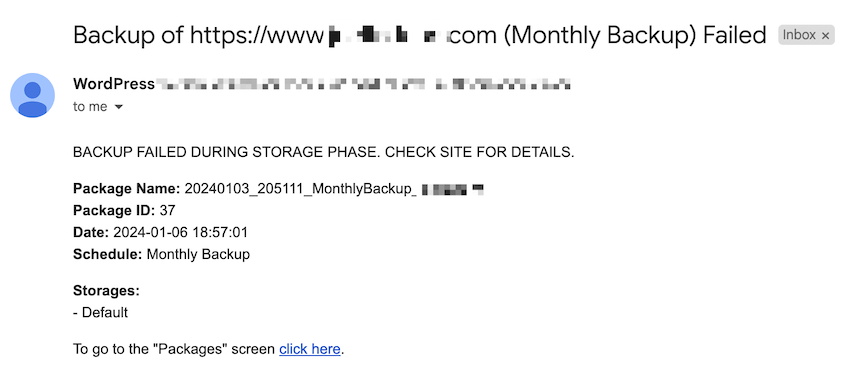
Most backup tools can send you email notifications if a backup fails. This way, you’ll know right away if there’s a problem and you can fix it.
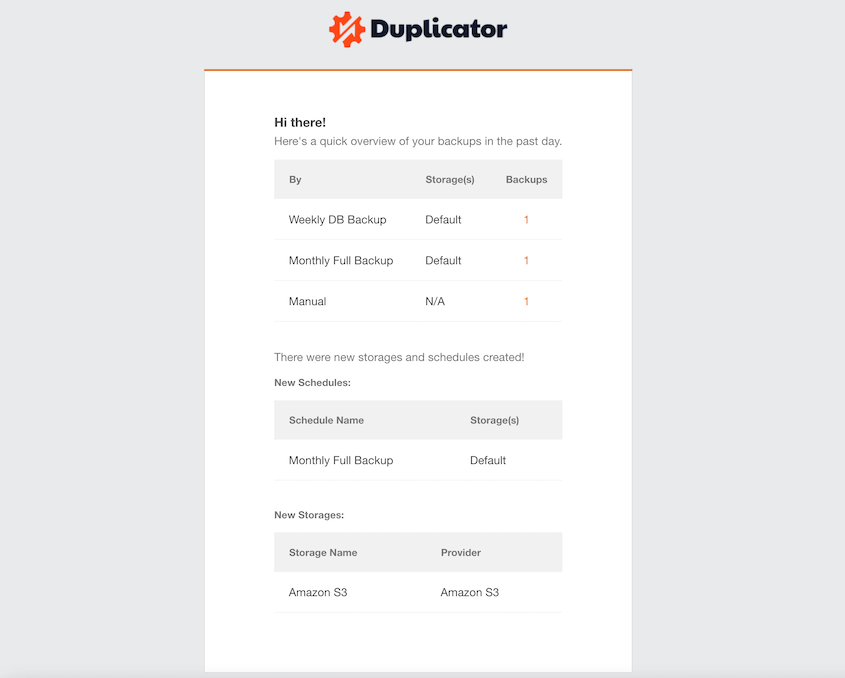
Duplicator sends me email notifications if any of my backups fail. I’ll always be aware of any problems that happen with my backup schedules or cloud storage.
It also sends daily, weekly, or monthly email summaries of my backup activity.
These notifications help me stay on top of my backups and make sure everything is working as expected.
Time Your Backup and Recovery Processes
It’s useful to know how long your backups and restores take. This helps you plan for maintenance and gives you an idea of how long it would take to restore your site in an emergency.
Time your backups and restores. Keep a record of how long they take. If you notice that backups are suddenly taking much longer than usual, it could indicate a problem.
Knowing these times can be really helpful in a disaster recovery situation. You’ll have a better idea of how long your website might be offline and you can manage expectations accordingly.
Restore Remote Backups
If you are backing up your website to remote storage (like cloud services), you should also test restoring those remote backups.
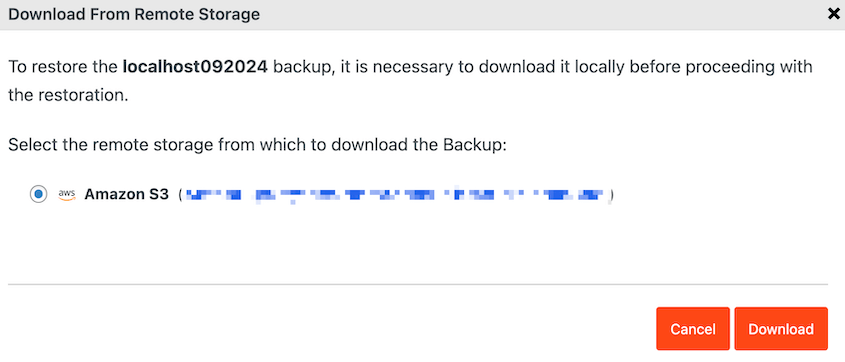
Testing remote restores is important because it verifies that the connection to your cloud storage is working and that you can actually download and restore your backups from there.
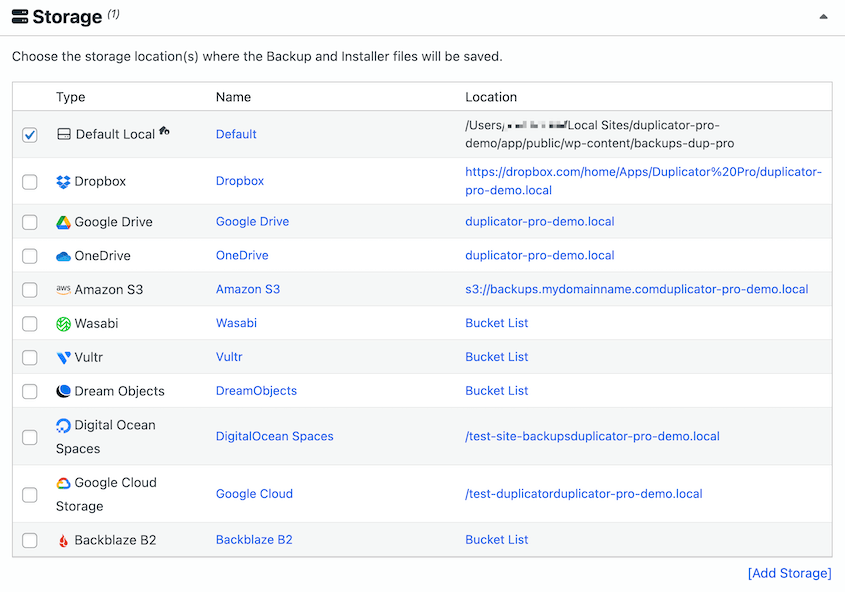
I use Duplicator to back up my sites to cloud storage. Duplicator works with many cloud services like Dropbox, Google Drive, Amazon S3, and more. In fact, it supports 11 different cloud storage locations.
Duplicator makes it easy to restore cloud backups. You can download and restore your cloud backups without even having to log in to the third-party cloud service directly, which makes the process faster and easier.
For example, you could make an AWS backup. To restore it, simply click the Restore button on your Backups page. Duplicator will download and restore it for you.
Set Up and Practice Disaster Recovery
Disaster recovery is about being prepared for the worst. What if your website is completely down and you can’t even access your WordPress admin area? You still need to be able to restore your site.
Having a comprehensive recovery plan in place before disaster strikes is essential for minimizing downtime, ensuring business continuity, and providing data protection.
Duplicator has a special disaster recovery feature to help with this. It lets you restore your site even if you can’t access wp-admin.
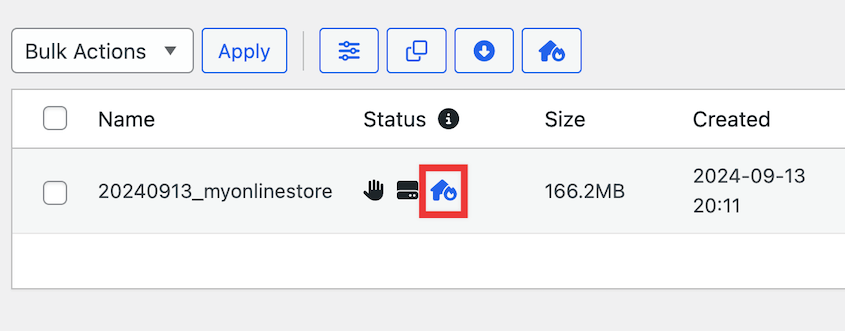
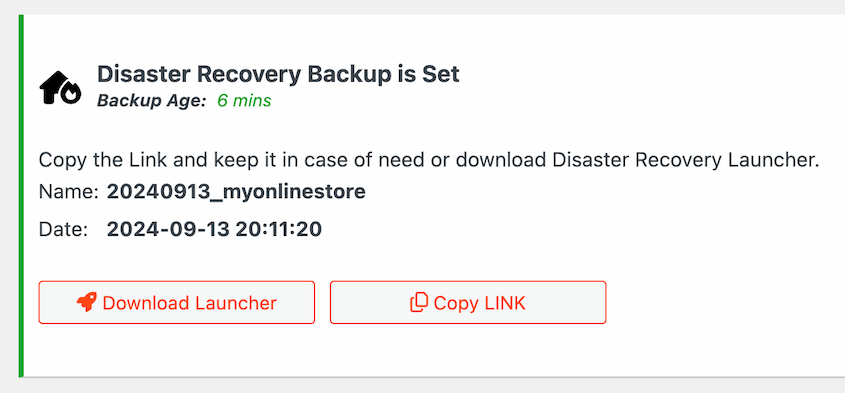
Here’s how it works: create a full-site local backup. Click on the blue house icon to set the backup as the recovery point.
Duplicator Pro creates a special disaster recovery link and launcher file with this backup. If your site goes down and you can’t access your dashboard, use this special link or launcher file to start the restore process directly.
It’s a lifesaver in those critical situations. So, copy this link and download the launcher file.
Practice both these backup recovery testing methods. This way, you’ll be ready if you ever really need it.
Verify the Restore Worked
After any restore, you should verify that it worked correctly. Don’t just assume it worked and move on.
Thoroughly navigate your restored website. Click through all the pages. Test all the forms. Try logging in as a user.
Test all the key features of your website. Make sure everything is working as it should.
Check your important data. Are your recent blog posts there? Are your latest e-commerce orders showing up?
Compare critical data to make sure it’s all present and accurate. You could also check database records directly to verify data integrity.
You can also briefly check the performance of your website in the test environment. Is it loading quickly? Is it performing as expected? This can help you catch any performance issues early.
Document and Analyze Results
Testing your backups is great. But it’s not enough to just run the tests. You also need to keep track of what you did and what happened.
I usually record the outcome of each step of my tests. Did it pass or fail?
For example, for a full restore test, I’d note if the restore was successful, if all pages loaded correctly, if the database was intact, and so on.
If you find any issues or errors during testing, write them down. Note exactly what went wrong.
Once you’ve documented your test results, take some time to analyze them. What can you learn from these tests? Do you see any weaknesses in your backup process? Are there any areas that need improvement?
Maybe you find that restores are taking longer than expected. Or maybe you discover that certain plugins are causing issues during the restore process.
Based on your analysis, you might need to adjust your backup strategy or your restoration process. Use your test results to make things better.
If you use different types of backups, make sure you test them all. Test your full backups. Test your database backups. Test your file backups. Test everything that’s important.
If you have a team that helps manage your website, make sure everyone knows the backup and recovery procedures. Everyone should be on the same page when it comes to the importance of data backups and disaster recovery plans.
Investing in reliable backup testing software can simplify the entire process, making it more likely that you’ll stick with regular testing.
Of course, my go-to backup tool, Duplicator, has features built right in that are incredibly helpful for testing. For example, the one-click restore feature to staging sites makes full restore testing so much faster.
Plus, the ability to easily migrate a site to a staging area simplifies the whole testing environment setup.
If you need to dig into your database after a restore, tools like phpMyAdmin can be helpful. It’ll let you directly access and inspect your database. You can use it to verify that your database was restored correctly and that all your data is there.
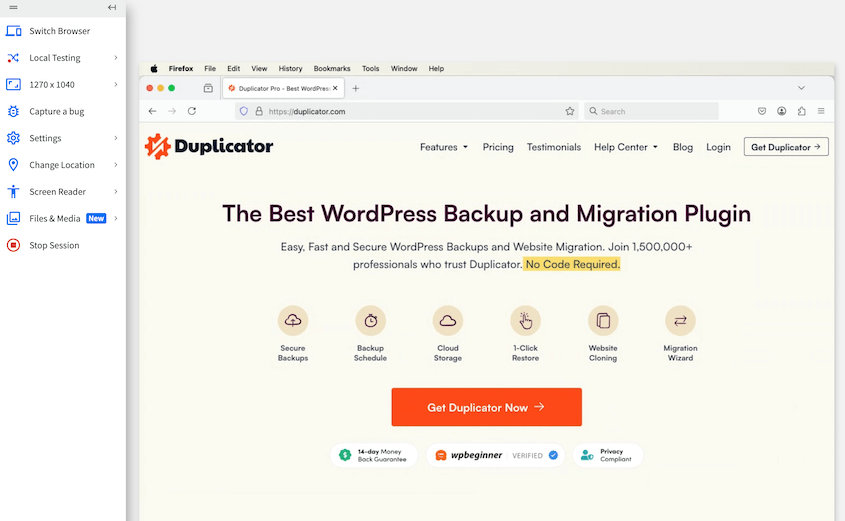
After a restore, I always check my website in different browsers and on different devices. BrowserStack is a great tool for this.
It lets you test your website in tons of different browser and operating system combinations. This helps make sure your website looks and works correctly for all your visitors after a restore.
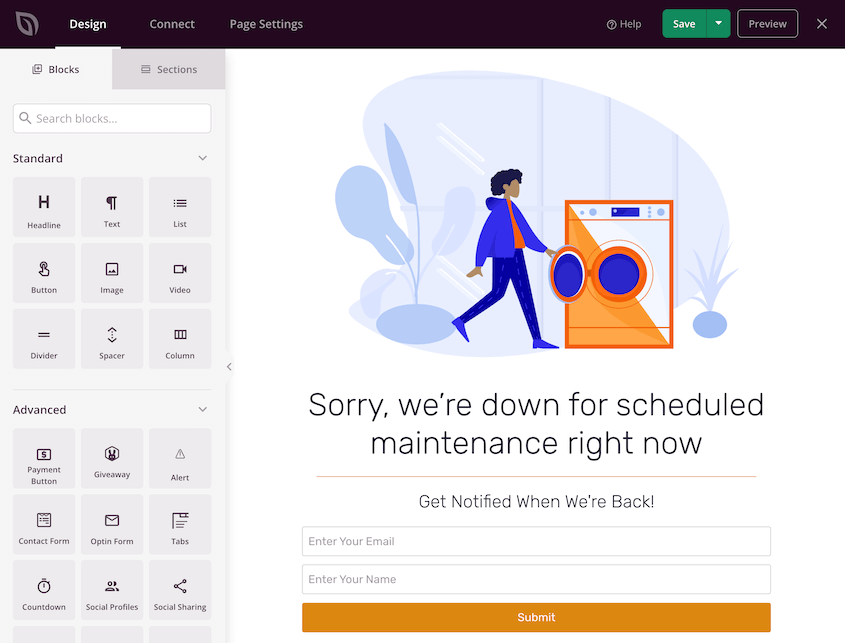
If you have to do testing on your live site and need to put your site into maintenance mode temporarily, SeedProd is a good plugin for that.
It lets you quickly put up a maintenance page so visitors see a friendly message while you are doing your testing. However, remember that staging environments are always safer for testing.
For that performance check after a restore, website speed testing tools can be useful. Tools like the IsItWP Speed Test can give you a quick idea of your website’s loading speed.
This can help you catch any performance regressions after a restore.
Frequently Asked Questions (FAQs)
Why is backup testing important?
Backup testing is important because it verifies that your data backups are working and that you can successfully restore your website when needed. Just having backups isn’t enough; you need to ensure they are reliable and your recovery process is effective before a real disaster strikes. Testing gives you confidence and prevents unpleasant surprises when you need your backups most.
What is the 3-2-1 backup checklist?
The 3-2-1 backup rule means you should have 3 copies of your data, on 2 different types of storage media, with 1 copy stored offsite. This backup strategy ensures redundancy and protection against various types of data loss.
Creating a comprehensive backup testing checklist that includes this 3-2-1 rule is a great idea for extra data protection.
How often should backups be tested?
The frequency of backup testing depends on how often you update your website. For actively updated sites, monthly testing is recommended. If your site changes less frequently, quarterly testing might work for you. Regular testing ensures your backups remain reliable as your website evolves.
What are the risks of not testing backups?
The biggest risk of not testing backups is discovering they are unusable when you desperately need them. Untested backups can be corrupted, incomplete, or you might not know how to restore them properly in an emergency. This can lead to significant data loss, prolonged website downtime, and unnecessary stress.
Final Thoughts
Having a backup plan is essential for protecting your online work. But remember, even if you perform backups, you’ll need to test them.
Make backup testing a regular part of your website routine. Schedule it. Document it. Learn from it!
I use and recommend Duplicator Pro to simplify the whole backup and restore process. It makes testing less of a chore and more of a routine.
Ready to take the stress out of website backups and testing? Learn more about Duplicator Pro and how it can protect your website!
While you’re here, I think you’ll like these other WordPress guides:
Joella is a writer with years of experience in WordPress. At Duplicator, she specializes in site maintenance — from basic backups to large-scale migrations. Her ultimate goal is to make sure your WordPress website is safe and ready for growth.


