Migrating a multisite subsite to a standalone site might seem challenging, but with Duplicator Pro, it becomes a straightforward process. Follow this guide to ensure a smooth migration.
Create a Backup
Begin with creating a backup from your Duplicator Pro Dashboard. Navigate to Duplicator Pro » Packages. Then, to create a new package, click on the Create New button to get started:

Enter a Name for your package:

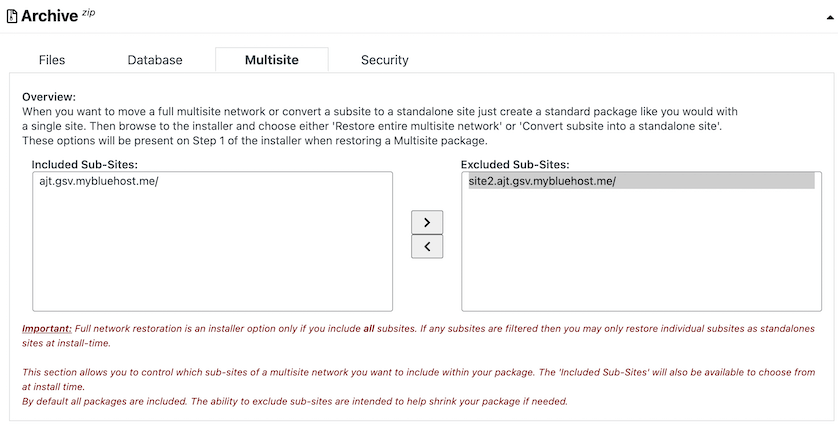
Under Archive » Multisite, then only keep the single subsite in “Included Sub-Site” and move the rest of the sub-sites to “Excluded Sub-Site“.

Navigate to the bottom of the page and click on Next. This will initiate the scan and validate the results. After the scan is completed, proceed by clicking on Build.

This will only create a backup of the Included Subsite (the selected subsite). You can now download its archive file:

This will make it easy to import the subsite into a standalone installation.
Migrate Subsite to a Standalone WordPress Site
You can Migrate the Subsite Backup to your Destination Standalone using the Import Install or Classic Install methods.
This guide will demonstrate Migration using the Import Install (recommended) method.
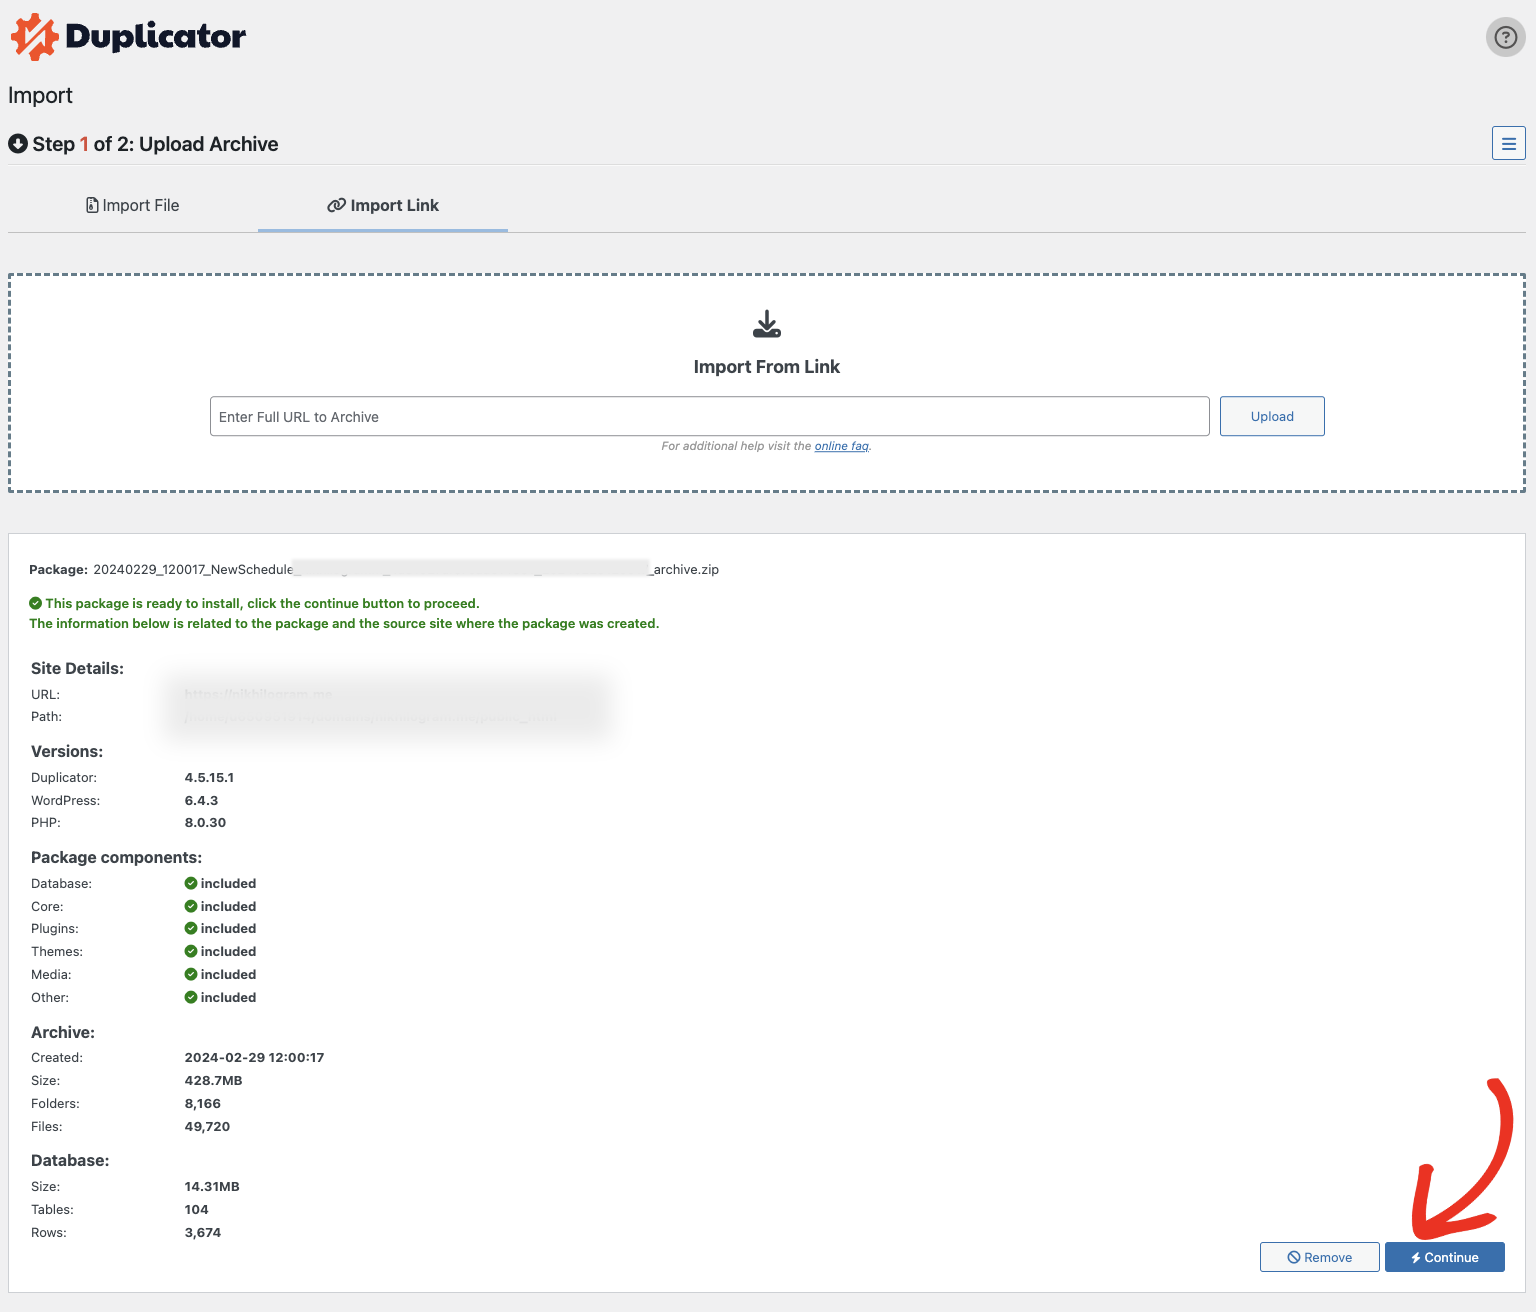
Begin navigating to the Destination Site, and go to Duplicator Pro » Import. Here, you can choose Import using a File or Link.

Proceed with the importing process by clicking on the Continue button at the bottom of the Import Installation.

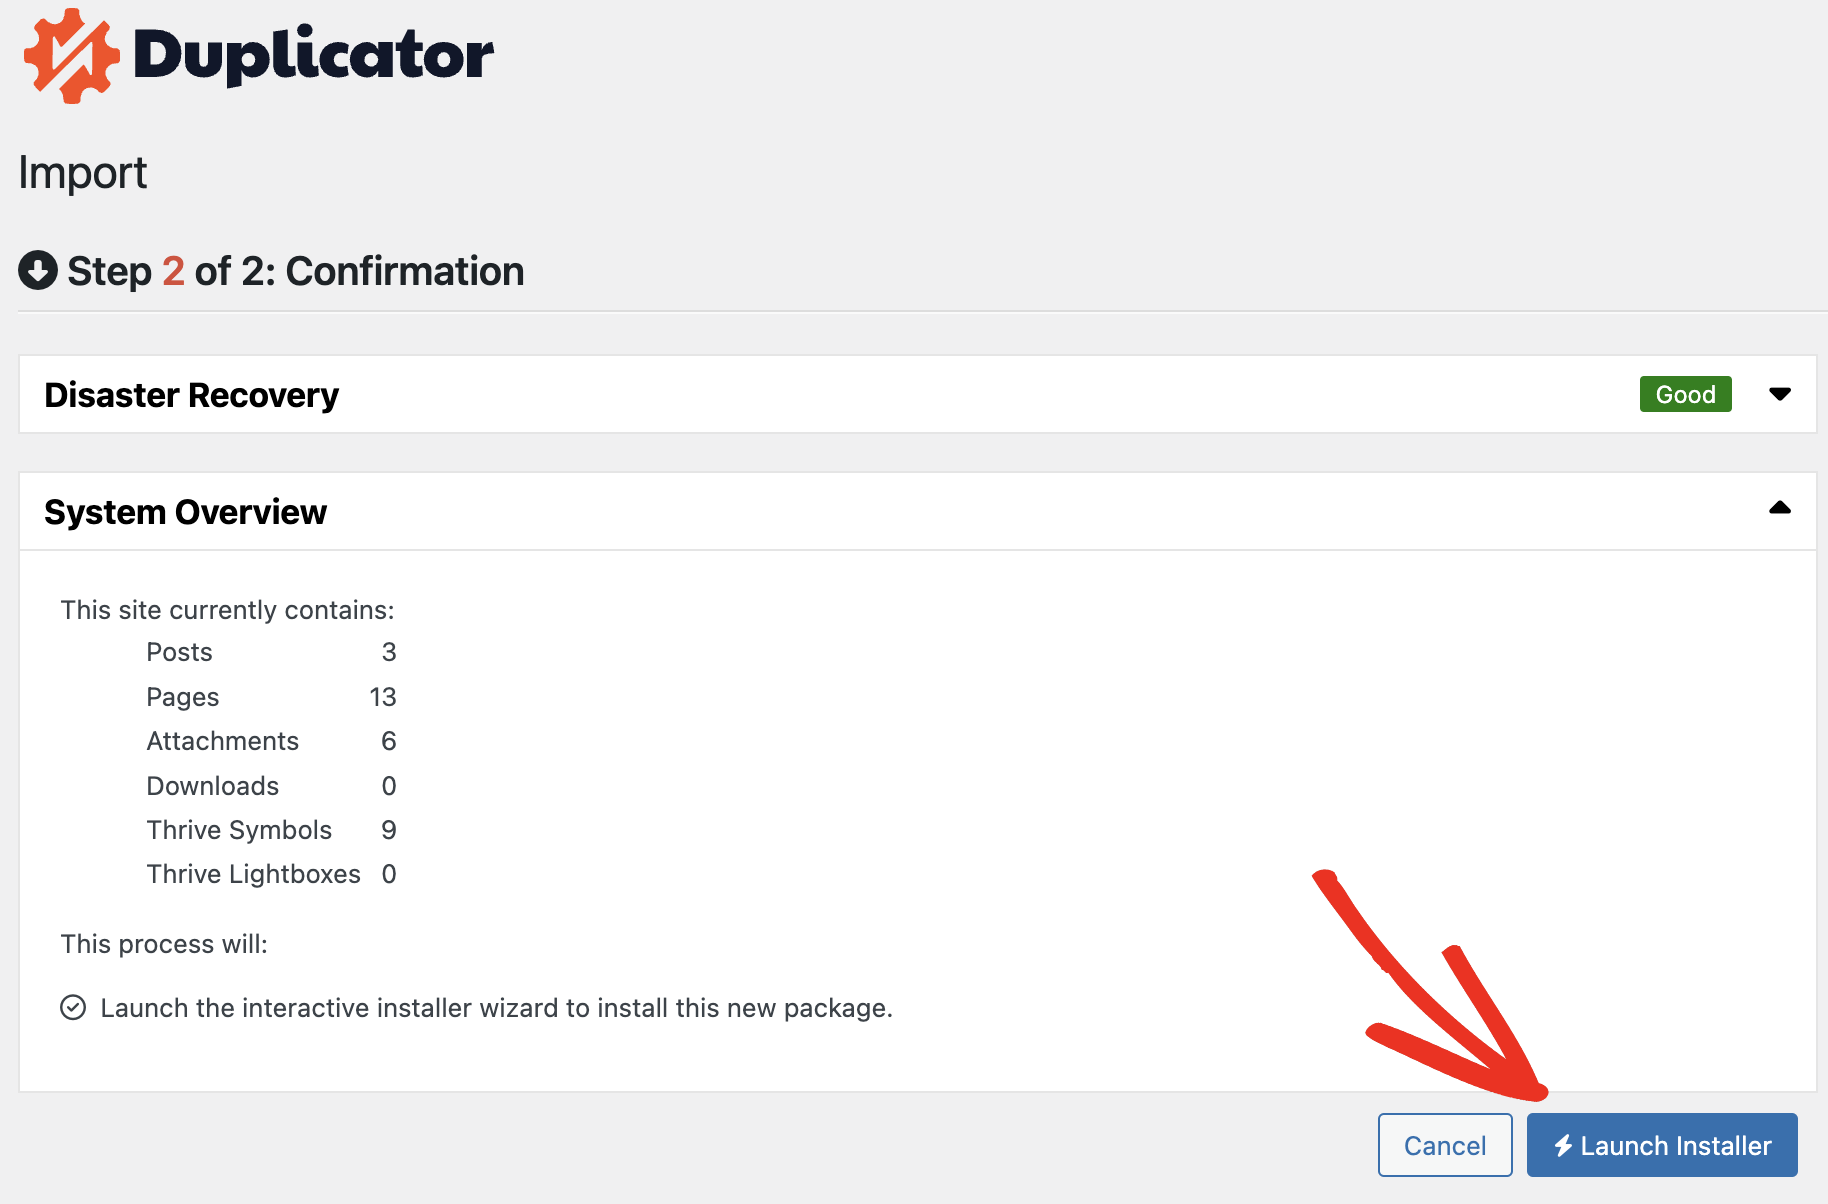
You can launch the Installer in Step 2 of 2: Confirmation.

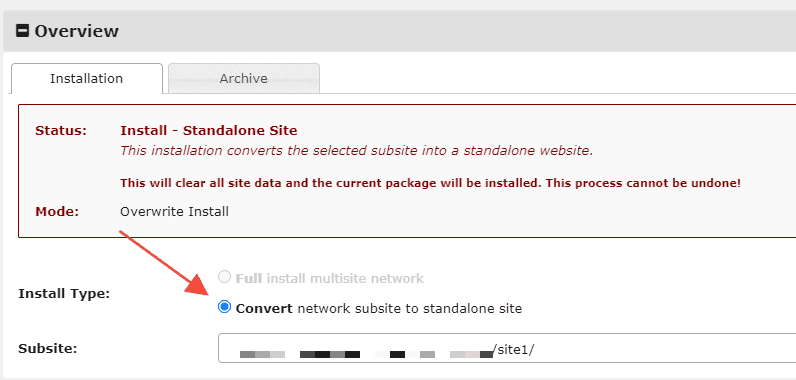
In Installer’s Step 1, under the Installation tab, select Convert network subsite to a standalone site as Install Type.

At the bottom of this installer, check the Terms & Services and click on the Next button:

This will popup an Install Confirmation with Site and Database settings information. Verify the settings and click OK to proceed:

This will initiate the process of Deploying the backup on your Destination Site and you will be able to successfully migrate your subsite to standalone site.


