This guide will take you through securely sending backups to Vultr’s reliable cloud storage. Whether you’re an individual protecting personal files or a business needing scalable data protection, this step-by-step walkthrough will help you efficiently manage your backups. By the end of this tutorial, you’ll know how to implement a secure and reliable backup strategy using Vultr’s powerful cloud infrastructure, improving the safety and accessibility of your valuable data. Let’s simplify backup management with Vultr Cloud Storage.
Create an Object Storage in Vultr
You can visit the Vultr website if you haven’t created a Vultr S3 account yet.
Once your account is all set up with adding Payment Method, completing your profile, and deploying your first instance, add Object Storage.
You can add an object storage subscription in a few clicks.
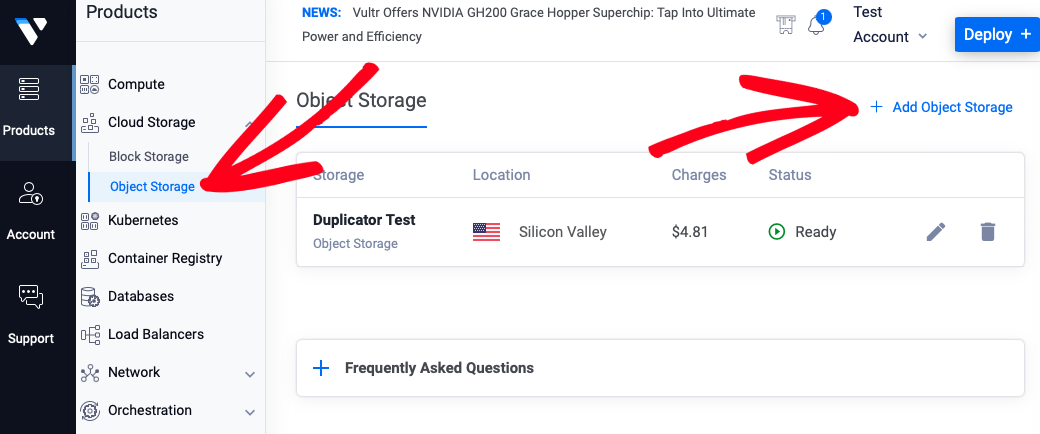
1. Go to the Objects Storage tab in the Vultr customer portal. Under the Products Tab » Cloud Storage,» go to Object Storage » and click on Add Object Storage:
2. Choose a location for your object storage, such as Amsterdam.
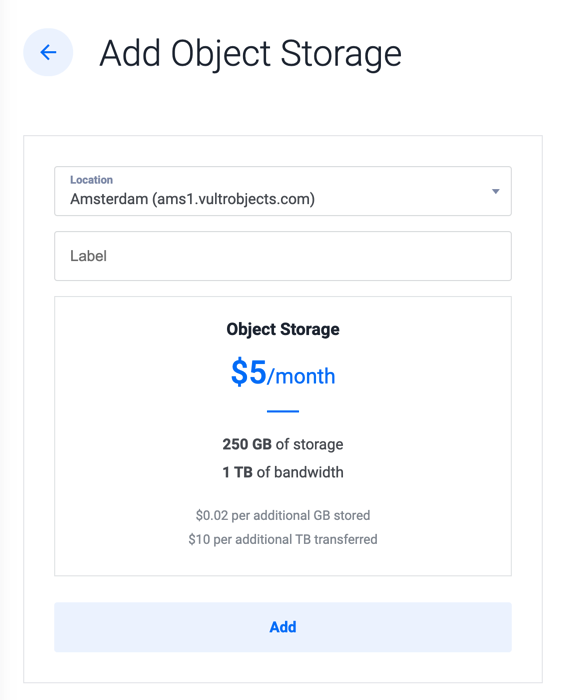
3. Give your new object storage a label to identify it, then click Add. You’ll return to the object storage list, and the status column shows Installing.

Create a Bucket
Now, you’ll need to create a Bucket for the above Object Storage that you’ve created. Go to Manage Object Storage here:
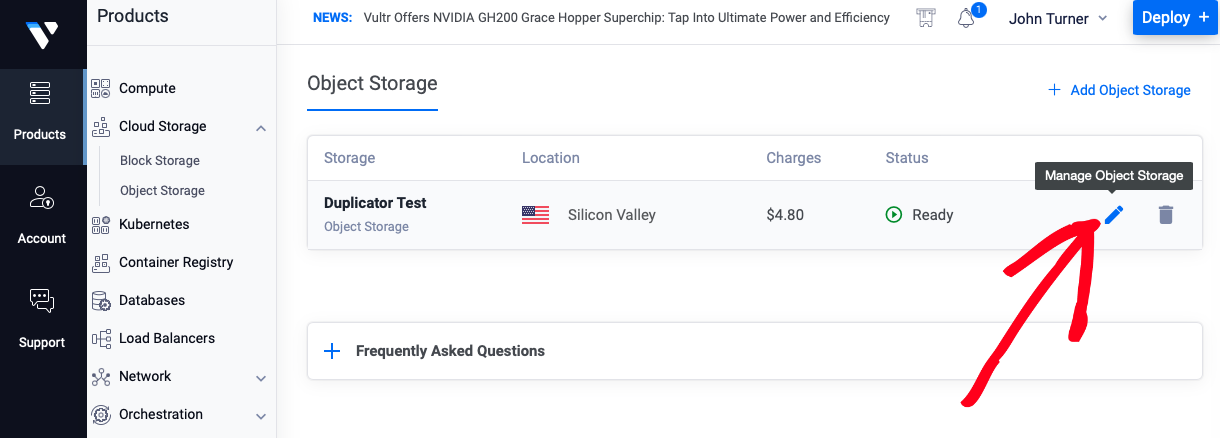
Navigate to the Bucket tab and Create a new Bucket:

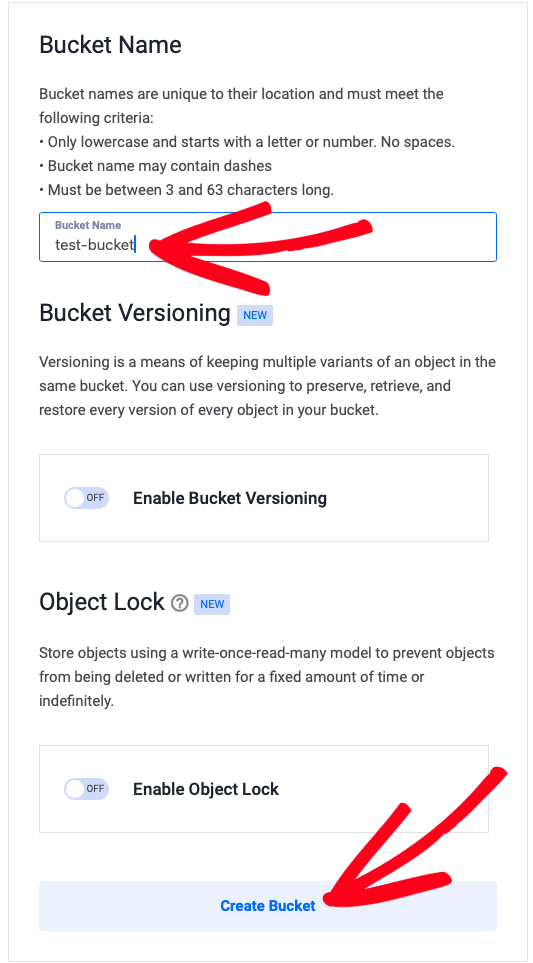
Name your Bucket with the required criteria, and keep the Bucket Versioning and Object Lock disabled.
Locating Your S3 Credentials
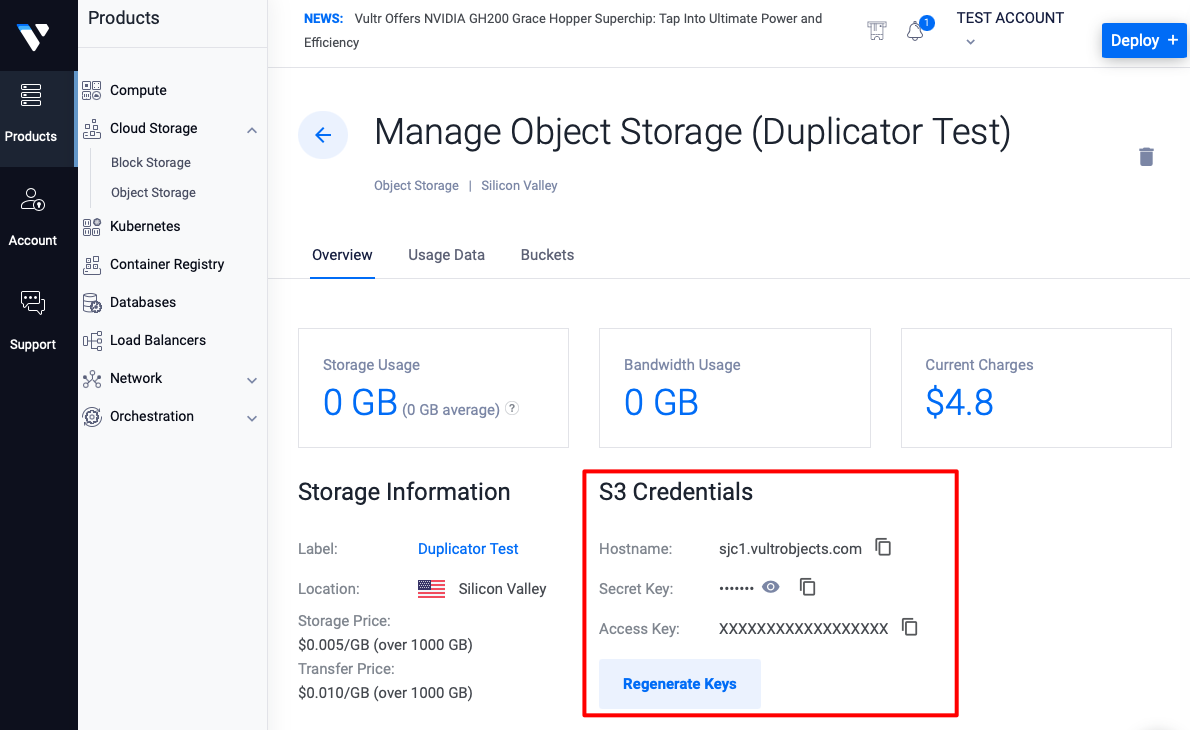
To connect your Vultr account with Duplicator, you’ll need the S3 Credentials like Secret Key, Access Key, and Endpoint. You can keep them handy by navigating to the Overview tab:
Connecting Vultr S3 to Duplicator
To begin with, go to Duplicator Pro » Storage » Add New:

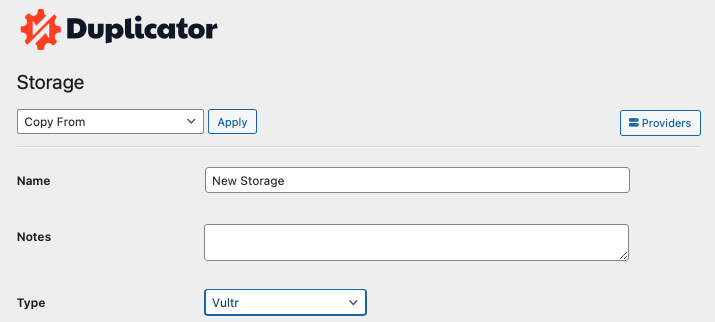
Name the new storage location. Under Type, select Vultr:
Now, scroll down to the Authorization section. Paste the Access key, Secret key, and Endpoint as hostname from the S3 Credentials.
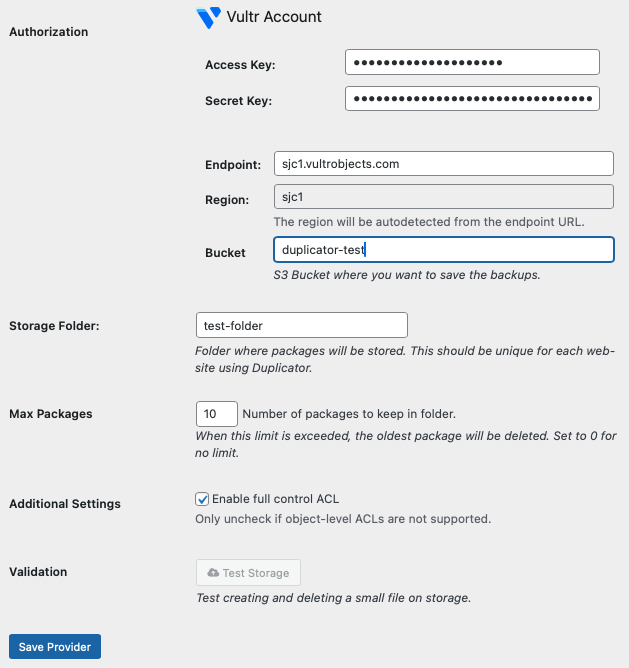
Ensure you set the exact name in the Bucket field created in your Vultr account. In the Storage Folder field, make sure you add the folder name you’d like to save your backups.
You can set the number of backups you’d like to store in a defined folder in the Max Backups field.
Click on the Save Provider button and run a Test. If it reports success, you are good to go. If not, go through the previous steps and make sure you didn’t miss anything.


