
How to Migrate a Website with WP-CLI
 Joella Dunn
Joella Dunn
Joella Dunn
 John Turner
John Turner
John Turner
If you’re managing a large WordPress site and you need to move it to a new host, WP-CLI gives you a faster, more scriptable path.
It won’t give you PHP timeouts on large databases. Plus, you’ll have a process you can repeat or automate across multiple sites.
In this tutorial, I’ll show you how to migrate a WordPress site using WP-CLI. By the end, your site will be running on the new server, and you’ll have confirmed it’s working before a single visitor hits the new host.
Here are the key takeaways:
- WP-CLI migration is faster than plugin-based migration for large sites, but it requires SSH access on both servers and WP-CLI installed on each.
- The
--preciseflag onwp search-replaceis the most important command in this tutorial. Without it, serialized data corrupts silently, and theme settings, widgets, and plugin options reset without any error message. - Copying wp-config.php from the old server to the new one brings the wrong database credentials with it. You must update DB_NAME, DB_USER, DB_PASSWORD, and DB_HOST on the new server before importing.
- Never flip DNS before verifying the migration worked. Step 7 covers a pre-DNS checklist using
wp option get,wp core verify-checksums, and a hosts file preview. wp duplicator buildcreates a full site backup from the terminal before you start. If anything breaks mid-migration, Duplicator’s disaster recovery URL restores the original site without SSH on the old server.- If you’re migrating to a new domain, include
--skip-columns=guidin your search-replace command. Replacing GUIDs breaks RSS subscriptions.
Table of Contents
- When to Use WP-CLI to Migrate a WordPress Site
- What You Need Before You Start
- How to Migrate a WordPress Site with WP-CLI
- Step 1: Back Up the Original Site
- Step 2: Export the Database from the Old Server
- Step 3: Transfer WordPress Files and the Database to the New Server
- Step 4: Update wp-config.php on the New Server
- Step 5: Reset and Import the Database on the New Server
- Step 6: Run Search-Replace to Update URLs
- Step 7: Flush Cache and Verify Before Touching DNS
- Step 8: Update DNS and Go Live
- Step 9: Clean Up with wp duplicator cleanup
- Troubleshooting Common WP-CLI Migration Errors
- Frequently Asked Questions (FAQs)
- Your Site Is on the New Server. Here's What to Watch Next.
- Migrate With Confidence Using Duplicator Pro
When to Use WP-CLI to Migrate a WordPress Site
WP-CLI isn’t the right tool for every migration. Here’s when it makes sense to go the command-line route (and when another approach fits better).
Use WP-CLI when:
- Your site is large enough that browser-based tools hit PHP timeouts or memory limits mid-transfer
- Your host doesn’t give you enough temporary disk space to build a full backup through the browser
- You’re migrating multiple sites and want a repeatable, scriptable process.
wp duplicator buildinside a bash script handles batch backups without any manual work - You want full control over every step: what transfers, what gets replaced, and what gets verified before DNS changes
Consider a migration plugin instead when:
- You don’t have SSH access on the source or destination server
- You aren’t comfortable with the command line
- You want a guided, visual process with progress indicators and rollback built in
Which one you use depends on your setup and preference.
What You Need Before You Start
Get all of this in place before you run a single command. Missing something mid-migration (especially database credentials or file paths) is how you end up with a half-imported database and a site down on both servers.
- SSH access to both servers. You’ll need to run commands on the old server and the new server at different points in this process.
- WP-CLI installed on both servers. If it’s not installed yet, follow the official installation guide. You’ll need it on the new server for the verification steps in Step 7, not just the old server.
- Duplicator Pro installed and active on the old server. This backup/migration plugin has
wp duplicator build,wp duplicator info, andwp duplicator cleanupcommands. - A new database already created on the new server with a user that has full privileges.
wp db importdoes not create the database for you — if it doesn’t exist, the import fails. - Your new server’s database credentials ready: DB_NAME, DB_USER, DB_PASSWORD, and DB_HOST. You’ll need these in Step 4.
- The absolute file paths for both WordPress installs. Run
pwdinside each WordPress root directory and copy the output somewhere handy. - If you’re changing domains: your old URL and new URL ready to copy/paste exactly as they appear in the database, including the protocol (https:// vs http://).
How to Migrate a WordPress Site with WP-CLI
Here’s what you’ll do. Each step builds directly on the last, so work through them in order.
- Step 1: Run a pre-flight check and create a full backup with
wp duplicator infoandwp duplicator build - Step 2: Export the database from the old server using
wp db export - Step 3: Transfer WordPress files and the database to the new server using
rsyncandscp - Step 4: Update wp-config.php on the new server with your new database credentials
- Step 5: Reset and import the database on the new server using
wp db resetandwp db import - Step 6: Run search-replace to update URLs using
wp search-replace(domain changes only) - Step 7: Flush cache and verify the migration before touching DNS
- Step 8: Update DNS and go live
- Step 9: Clean up on the old server with
wp duplicator cleanup
Step 1: Back Up the Original Site
Before exporting anything, you need a clean restore point on the original server. If something goes wrong mid-migration, you want to be able to get back to a working site without scrambling.
I use Duplicator for WordPress backup protection. It’s a backup and migration plugin used by over 1.5 million WordPress professionals and has WP-CLI commands built in.
That means you can create a full site backup without leaving the terminal. For a command-line workflow, that matters.
Start by verifying that Duplicator’s backup configuration is working correctly. SSH into the old server, navigate to your WordPress root, and run:
wp duplicator infoOnce this comes back clean, create your backup:
wp duplicator buildThis creates a full backup of your site from the terminal.
If you want to save the backup to a specific location rather than the default, use:
wp duplicator build --dir=/path/to/backup/locationRun wp duplicator build --help to see all available flags, including --template=<ID> for predefined backup templates and archive engine options like --phpsqldump, --phpzip, and --duparchive.
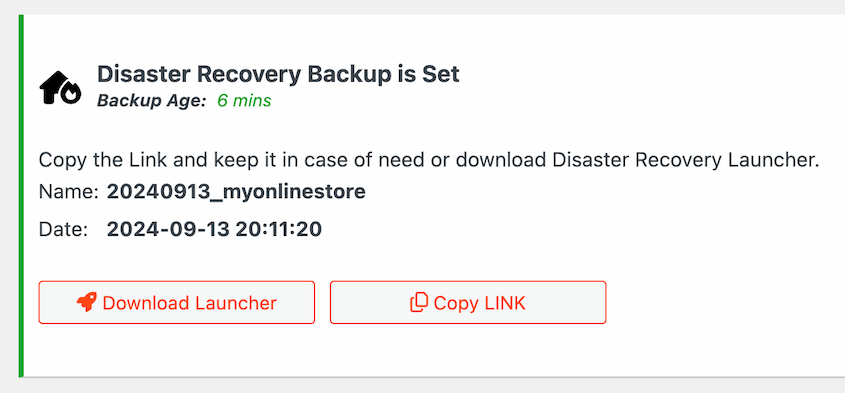
If this migration breaks something, Duplicator’s disaster recovery URL can restore your site even if WordPress is completely locked out on the old server. That’s your safety net before touching anything else.
Step 2: Export the Database from the Old Server
Still on the old server, navigate to your WordPress root and export the database:
wp db export site-backup.sqlWhen it’s done, you’ll see: Success: Exported to 'site-backup.sql'.
The file saves to your current directory. Note where that is, since you’ll transfer it in the next step.
One thing to do before you move on. If your .sql file ends up inside a web-accessible directory like /public_html or /htdocs, move it or delete it immediately after transfer.
An exposed .sql file is a full copy of your database, including usernames, hashed passwords, and every piece of content on the site. It’s not a theoretical risk.
If you’re migrating a WordPress Multisite network, append --all-tables to capture network-wide data:
wp db export site-backup.sql --all-tablesStep 3: Transfer WordPress Files and the Database to the New Server
Two things need to move to the new server: the WordPress files and the .sql export you just created.
For the files, use rsync. It handles large transfers well, shows progress, and picks up where it left off if the connection drops:
rsync -avz --progress /path/to/old-wordpress/ user@newserver:/path/to/new-wordpress/With the slash, rsync copies the contents of the directory. Without it, rsync copies the directory itself, which puts your files one level deeper than expected on the new server.
Run a dry run first to verify what will transfer before committing:
rsync -avz --progress --dry-run /path/to/old-wordpress/ user@newserver:/path/to/new-wordpress/For the database file, use scp:
scp site-backup.sql user@newserver:/path/to/new-wordpress/If you prefer to compress everything into a single archive first, that works too:
tar -czf site_files.tar.gz .
scp site_backup.sql site_files.tar.gz user@newserver:/path/to/new-wordpress/
Then extract on the new server:
tar -xzf site_files.tar.gzThis approach works well for smaller sites or hosts that handle single-file transfers more reliably than rsync connections.
Step 4: Update wp-config.php on the New Server
This is the step most WP-CLI migration tutorials skip over, and it’s the most common reason a migration fails immediately after import.
When you transferred your WordPress files in the last step, wp-config.php came with them. That’s the right file, but it still has your old server’s database credentials in it. If you run the import now, WP-CLI will try to connect to a database that doesn’t exist on the new server.
SSH into the new server, navigate to your WordPress root, and open wp-config.php:
nano /path/to/new-wordpress/wp-config.phpUpdate these four values with your new server’s database details:
- DB_NAME: the name of the database you created on the new server
- DB_USER: the database username
- DB_PASSWORD: the database password
- DB_HOST: usually localhost, but confirm with your host. Some managed hosts use a different value here.
Save and exit. On nano, that’s Ctrl+O to save and Ctrl+X to exit.
Don’t forget this step. If the credentials are wrong, wp db import will connect to the wrong database or fail with “Error establishing a database connection”, and it won’t always be obvious that wp-config.php is the cause.
Step 5: Reset and Import the Database on the New Server
SSH into the new server and navigate to your WordPress root. If you have a fresh WordPress install on the new server, clear its default tables before importing. Skipping this step can cause conflicts between the existing tables and the ones in your export.
wp db reset --yesYou’ll see: Success: Database reset.
The --yes flag skips the confirmation prompt. Without it, WP-CLI will ask you to confirm before dropping all tables.
Now import the database:
wp db import site-backup.sqlAs soon as the import is confirmed, delete the SQL file:
rm site-backup.sqlThen SSH back into the old server and delete it there too.
This isn’t optional housekeeping. A .sql file sitting in a web-accessible directory is a full copy of your database. Delete it from both servers before doing anything else.
Step 6: Run Search-Replace to Update URLs
If you’re keeping the same domain and only changing hosts, skip this step and go straight to Step 7. Your URLs are already correct in the database.
If you’re changing domains, this is where most migrations quietly break. Not with an error — with theme settings that look wrong, widgets that vanished, and plugin options that reverted to defaults. The cause is almost always the same: a search-replace that didn’t handle serialized data correctly.
Before running anything, do a dry run:
wp search-replace 'https://olddomain.com' 'https://newdomain.com' --all-tables --precise --dry-runThis runs the full operation and shows you a table of how many replacements would be made per database table, without saving any changes. Review it.
Look for tables where you’d expect replacements (wp_options, wp_posts, wp_postmeta) and make sure the counts look reasonable. Unexpected zeros on those tables are worth investigating before you commit.
When you’re satisfied, run it without –dry-run:
wp search-replace 'https://olddomain.com' 'https://newdomain.com' --all-tables --preciseWhy --precise matters: WordPress stores some data as serialized PHP. Theme customizer settings, widget configurations, plugin options — these aren’t stored as plain text. They’re stored as structured PHP strings that include character counts.
A standard SQL-based search-replace swaps the URL string but doesn’t recalculate those character counts. PHP reads the count, finds a mismatch, and silently discards the data.
Your theme resets. Your widgets disappear. Nothing throws an error — the site just looks wrong.
The --precise flag forces WP-CLI to use PHP instead of SQL. It unserializes each value, makes the replacement, recalculates the character count, and re-serializes the result correctly. It’s slower on large databases. Use it anyway.
One thing wp search-replace correctly skips by default: the guid column in wp_posts. Don’t try to force it to replace GUIDs.
WordPress documentation explicitly states GUIDs must remain constant. They identify posts to feed readers, and changing them breaks RSS subscriptions.
If you’re migrating a Multisite network, add the –network flag:
wp search-replace 'https://olddomain.com' 'https://newdomain.com' --all-tables --precise --networkStep 7: Flush Cache and Verify Before Touching DNS
Once the search and replace is done, it’s tempting to go straight to DNS. Don’t.
Changing DNS before you’ve confirmed the site is working means any problems you find will be live problems, visible to real visitors. Take ten minutes here and verify everything on the new server first.
Start by flushing the object cache:
wp cache flushThen flush rewrite rules:
wp rewrite flushNow verify the URLs in the database are correct. Run both of these:
wp option get siteurl
wp option get home
Both should return your correct domain. If either returns the old domain, you can update them manually:
wp option update siteurl 'https://newdomain.com'

wp option update home 'https://newdomain.com'
Next, verify your WordPress core files transferred without corruption:
wp core verify-checksumsIf it returns errors, note which files are flagged. A handful of modified files in wp-content is expected and not a problem — those are your theme and plugin files, which aren’t part of the checksum comparison. Errors on core files in wp-admin or wp-includes are worth investigating.
Preview the site before updating DNS. Add a temporary line to your local machine’s hosts file pointing your domain to the new server’s IP address. On Mac or Linux, open /etc/hosts in a text editor and add:
123.456.789.0 yourdomain.comReplace 123.456.789.0 with your new server’s IP. Save the file, then open your domain in a browser. You’re now seeing the new server while everyone else still hits the old one.
Check each of these before moving on:
- Homepage loads correctly
- Admin login works at /wp-admin
- Images display on posts and pages
- Navigation menus are intact
- Widgets appear correctly in the sidebar or footer
- Theme appearance matches the original
When everything checks out, remove the line you added to your hosts file. Then, you’re ready for a DNS update.
Step 8: Update DNS and Go Live
Point your domain’s A record to your new server’s IP address. Where you do this depends on where your domain’s nameservers are pointed: either your domain registrar or your hosting provider’s DNS manager.
Log in, find the A record for your domain, and update the IP.
DNS propagation takes anywhere from a few minutes to 48 hours depending on your registrar and your domain’s TTL (time to live) setting. During that window, some visitors will hit the old server and some will hit the new one. That’s normal. It’s not a sign something broke.
Keep the old server running for at least 24-48 hours after updating DNS. Shutting it down during propagation means some visitors land on nothing.
Once you’re confident propagation is complete, run one final cache flush on the new server:
wp cache flushStep 9: Clean Up with wp duplicator cleanup
With the new server confirmed live and stable, go back to the old server and run:
wp duplicator cleanupThis removes the backup files and any temporary data Duplicator created during the build process in Step 1. It keeps the old server tidy and clears out any migration artifacts before you decommission it.
Only run this after you’re certain the migration is complete. Once the backup files are gone, the disaster recovery option from Step 1 goes with them.
If you want to keep the backup as a long-term archive, move it to remote storage before running the cleanup.
Troubleshooting Common WP-CLI Migration Errors
Even a careful migration can hit snags. Here are the most common failure points, what they look like, and how to fix them.
“Error Establishing a Database Connection” After Import
What you see: WordPress shows a white screen or the “Error establishing a database connection” message on the new server immediately after import.
Why it happens: wp-config.php still has the old server’s database credentials. This is the most common mistake in a WP-CLI migration and it’s easy to miss if you transferred files before updating the config.
How to fix it: Open wp-config.php on the new server and update DB_NAME, DB_USER, DB_PASSWORD, and DB_HOST to match your new server’s database. Save the file and reload the site.
Theme Settings, Widgets, or Plugin Options Reset After Migration
What you see: The site loads, but the theme looks wrong, widgets are missing, or plugin settings have reverted to defaults. No error messages anywhere.
Why it happens: You ran wp search-replace without the --precise flag. The URL replacement corrupted serialized data in the database, and WordPress silently discarded the broken values.
How to fix it: Re-run search-replace with --precise and --all-tables:
wp search-replace 'https://olddomain.com' 'https://newdomain.com' --all-tables --preciseIf the data is already badly corrupted and re-running search-replace doesn’t restore the settings, restore the Duplicator backup you created in Step 1 and run through the migration again.
“wp: command not found” on the New Server
What you see: Any WP-CLI command on the new server returns wp: command not found or command not found: wp.
Why it happens: WP-CLI isn’t installed on the new server, or it’s installed but not in your PATH.
How to fix it: Install WP-CLI on the new server. If you don’t have permission to make the file executable on your host, you can run commands using php wp-cli.phar instead of wp.
rsync Exits with “Permission Denied”
What you see: rsync runs but exits early with one or more “Permission denied” errors on specific files or directories.
Why it happens: Either your SSH key isn’t configured correctly for the destination server, or there’s a file ownership mismatch between the two servers.
How to fix it: Verify SSH key access first with ssh user@newserver. If that fails, sort out the key authentication before retrying rsync. If the connection works but specific files are denied, you may need to chown the transferred files on the new server to match the web user your host uses — commonly www-data on Ubuntu or the account username on cPanel hosts.
Site Loads but Images Are Broken
What you see: Pages load correctly, but images show broken image icons throughout the site.
Why it happens: Either the wp-content/uploads folder didn’t transfer completely, or hardcoded image URLs in post content weren’t caught by search-replace.
How to fix it: Re-run rsync targeting only the uploads folder to catch any files that didn’t transfer:
rsync -avz --progress /path/to/old-wordpress/wp-content/uploads/ user@newserver:/path/to/new-wordpress/wp-content/uploads/Then re-run search-replace with --dry-run to check whether any image URLs still reference the old domain.
Nothing Is Working: Restore and Start Over
If the site is completely broken and you can’t identify a clear cause, don’t spend hours debugging a half-migrated state. Restore the Duplicator Pro backup you created in Step 1.
Duplicator’s disaster recovery URL can bring the old site back even if WordPress is locked out.
Once you’re back to a clean working state, go through the steps again slowly. Use –dry-run on rsync and wp search-replace before committing anything, and double-check wp-config.php credentials before running the import.
Frequently Asked Questions (FAQs)
Do I need WP-CLI installed on both servers to migrate a WordPress site?
Yes. You need WP-CLI on the old server to export the database with wp db export and create the backup with wp duplicator build. You need it on the new server to import the database, run search-replace, flush cache, and verify the migration before DNS changes. You can technically get away with manual mysqldump commands for the export and import steps, but you’ll lose the verification commands in Step 7, which are worth having.
How do I use WP-CLI to change the site URL in the WordPress database?
Use wp search-replace with the --all-tables and --precise flags:
wp search-replace 'https://olddomain.com' 'https://newdomain.com' --all-tables --precise
Always run it with --dry-run first to see what will change before committing.
The --precise flag is critical. Without it, serialized data in the database can corrupt silently, resetting theme settings and widget configurations without any error messages.
Can I migrate a WordPress site to a new domain without a plugin?
Yes. WP-CLI handles the three core tasks natively: wp db export exports the database, rsync and scp transfer the files, and wp search-replace updates URLs across the database. The one step in this tutorial that uses a plugin is the backup in Step 1, which runs via wp duplicator build entirely from the terminal. If your goal is to stay in the command line from start to finish, this process covers it.
What does wp search-replace –precise actually do?
Without --precise, WP-CLI uses SQL to find and replace strings in the database. That works fine for plain text, but WordPress stores some data as serialized PHP, which includes character counts embedded in the data structure. A straight SQL replace updates the string but not the character count. PHP reads the mismatched count and discards the data silently. The --precise flag switches to a PHP-based replace that unserializes each value, makes the replacement, recalculates the character count, and re-serializes the result correctly. It’s slower, but it’s the only way to safely replace URLs in serialized data.
What if my new host doesn’t allow SSH access?
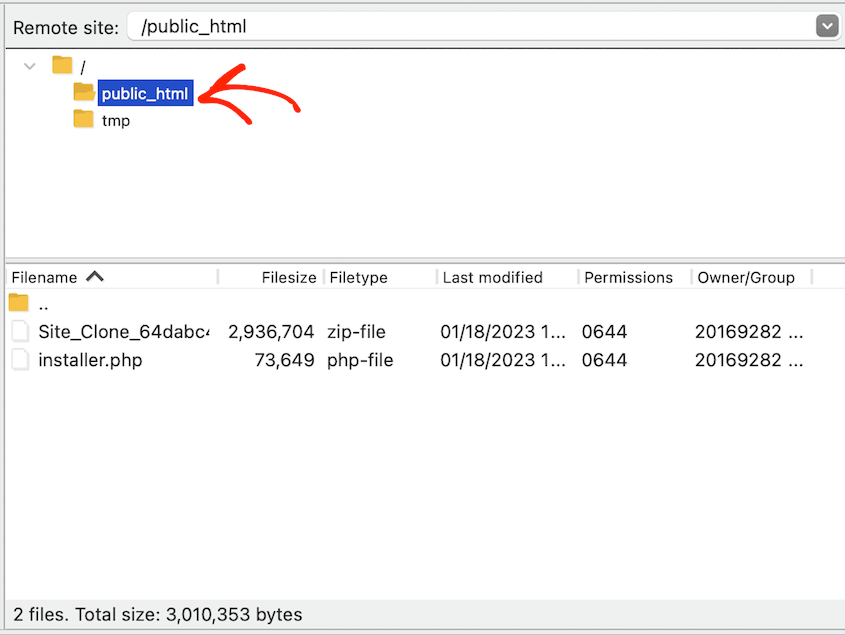
WP-CLI migration requires SSH on both servers. If your new host doesn’t offer SSH, the command-line approach in this tutorial won’t work end-to-end. Duplicator Pro’s standard migration workflow handles this case: create a backup in WordPress on the old server, upload the installer and archive files to the new server via FTP, and run the installer through a browser. No SSH required on either end.
Will this WP-CLI migration process work for WordPress Multisite?
The core steps are the same, but two commands need additional flags. When exporting the database, append --all-tables to capture network-wide tables: wp db export site-backup.sql --all-tables. When running search-replace, add both --all-tables and --network: wp search-replace 'https://olddomain.com' 'https://newdomain.com' --all-tables --precise --network. Everything else in the tutorial applies.
How do I change the site URL in wp-config.php?
wp-config.php stores database credentials, not the site URL. The site URL lives in the database, in the wp_options table. If you need to update it directly, use wp option update siteurl 'https://newdomain.com' and wp option update home 'https://newdomain.com'. You’d only do this as a targeted fix if wp search-replace missed the options table or if you need to correct the URL before the rest of the site is ready.
How long does DNS propagation take after a WordPress migration?
Typically anywhere from a few minutes to 48 hours. The actual time depends on your domain registrar, your hosting provider’s DNS configuration, and the TTL value set on your domain’s A record. A lower TTL means faster propagation. If you want propagation to move quickly, lower the TTL on your A record a day or two before migrating. Most registrars let you set it as low as 300 seconds (5 minutes). Keep the old server running until propagation is fully complete.
Your Site Is on the New Server. Here’s What to Watch Next.
You’ve exported the database, transferred the files, updated wp-config.php, imported, run a search-replace, verified everything on the new server, and flipped the DNS. That’s the full migration.
The first 48 hours are worth paying attention to. DNS propagation means some visitors will still hit the old server during that window, so don’t decommission it yet.
Watch for any caching layers that might be serving stale content. A full cache flush on the new server once propagation is confirmed takes ten seconds and rules out a lot of display issues.
If something still looks off after propagation is complete, use wp search-replace --dry-run as a diagnostic tool before touching anything:
wp search-replace 'https://olddomain.com' 'https://newdomain.com' --all-tables --precise --dry-runThis shows you which tables still contain the old domain without making any changes. It’s the fastest way to confirm whether a lingering URL is a search-replace miss or something hardcoded in a theme file.
Hardcoded URLs in custom theme files won’t be caught by search-replace at all. You’ll need to find and update those manually in the theme code.
Migrate With Confidence Using Duplicator Pro
A migration without a backup is a gamble. Servers behave unexpectedly, imports get interrupted, and serialized data doesn’t always survive a search-replace cleanly.
Having a restore point before you start means any of those situations is a minor setback instead of a serious problem.
Duplicator Pro makes the backup a single command from the terminal: wp duplicator build. And if something does go wrong, the disaster recovery URL gets your original site back even if WordPress is completely locked out.
Over 1.5 million WordPress professionals use Duplicator Pro to back up, migrate, and clone their sites. Join them!
If this tutorial helped, these guides are worth bookmarking too.
- How to Move a WordPress Website to a New Host
- Why You Can’t Log Into WordPress After a Migration
- DNS Migration Done Right: How to Avoid the Most Common Mistakes
- The Complete Post-Migration WordPress Testing Checklist
- How to Audit Content Before a Website Migration
- How to Migrate a WordPress Site for FREE