Are you tired of your WordPress site feeling cluttered and sluggish? You might be surprised to learn that your digital trash can is the culprit.
Like in real life, letting garbage pile up on your website can create unnecessary headaches.
But don’t worry, I’m here to help you take out the trash and keep your WordPress site running smoothly.
In this guide, I’ll walk you through everything you need to know about managing and emptying trash in WordPress.
Ready to declutter your WordPress website and boost its performance? Let’s learn how to empty that trash like a pro!
Here are the key takeaways:
- Keeping trash cleaned up improves site performance and database health
- WordPress trash holds deleted posts, pages, and comments for 30 days before permanent deletion
- You can manually empty trash anytime through Posts, Pages, or Comments sections
- Automatic trash emptying can be customized using code snippets
- Regular backups with tools like Duplicator help recover accidentally deleted content
Table of Contents
What Is Trash in WordPress?
Think of WordPress trash as a temporary holding area for content you’ve deleted but might want to recover later. This feature is WordPress’s way of saying, “Are you sure about that?” before something disappears forever.
So, what ends up in the trash? Just about anything you can create in WordPress:
- Deleted posts
- Deleted pages
- Deleted comments
But items in your WordPress trash aren’t gone for good – at least not right away. They hang around for 30 days, giving you a chance to recover them if you change your mind.
Why bother with trash instead of just deleting things permanently?
We’ve all accidentally deleted something important at least once. It keeps your site tidy without the fear of permanent loss.
Remember: trash isn’t meant to be a long-term storage solution. Letting it pile up can slow down your site, just like having too many files on your computer.
Does WordPress Empty Trash Automatically?
By default, WordPress automatically empties your trash every 30 days. This can be convenient, but it’s not always the best solution for everyone.
This 30-day auto-cleanup is WordPress’s way of keeping things tidy without you having to lift a finger. It’s like having a vacuum that runs on a schedule – great in theory, but sometimes you might want more control.
Why does this matter? Let’s break it down.
Pros of automatic trash emptying:
- Keeps your database lean without you having to remember to clean it up
- Prevents old, unwanted content from clogging up your site
- Saves you time on manual cleanup
Cons to consider:
- You might lose content you wanted to restore if you forget about it
- The 30-day timeframe might be too long (or too short) for your needs
While this automatic emptying can be helpful, it’s not always enough. Depending on how active your site is, you might need to take matters into your own hands more often.
How to Empty Trash in WordPress
Now that we understand what WordPress trash is and how it works by default, let’s roll up our sleeves and empty it.
I’ll cover two main methods: manual emptying and using a code snippet for automatic cleanup. Here’s a quick overview:
- Manual deletion: Navigate to trash sections and use “Empty Trash” button or bulk delete options for immediate cleanup
- Code snippet automation: Install WPCode plugin and add custom PHP code to automatically empty trash on your preferred schedule (1 day, 7 days, etc.)
Method 1. Manually Empty WordPress Trash
Sometimes, you just need to get in there and clean things up yourself.
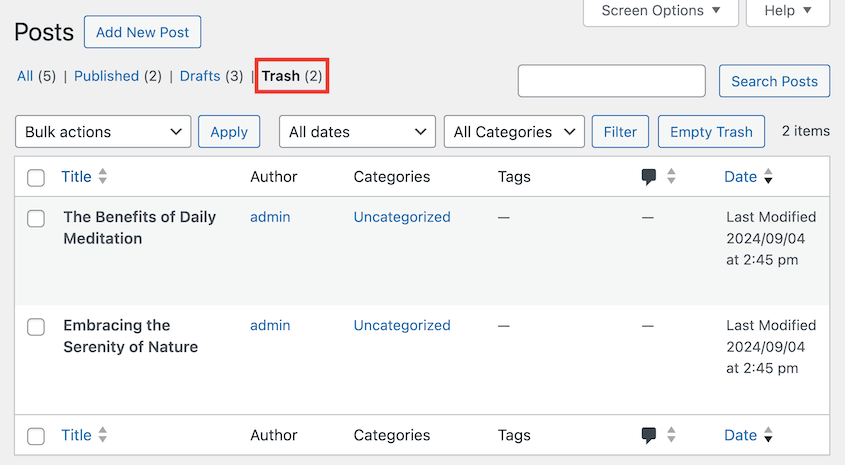
For posts, pages, or comments, open the Trash tab. You’ll see a list of content you’ve deleted.
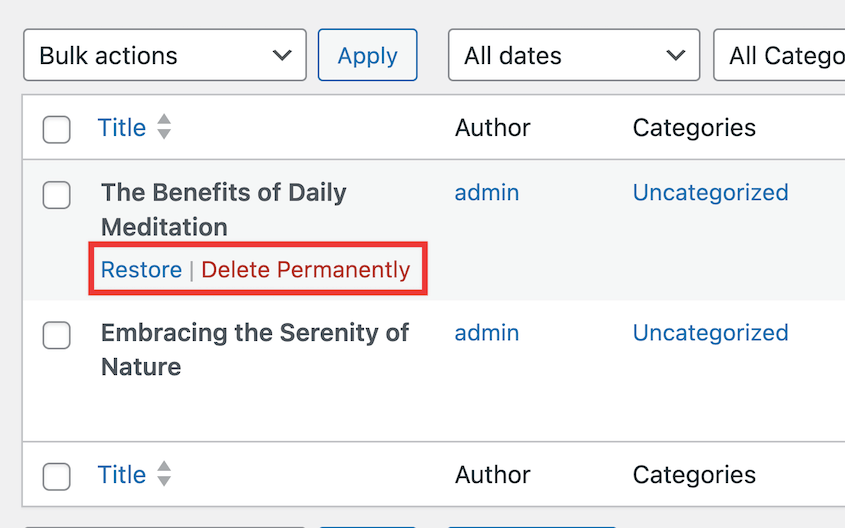
If you hover your mouse over a specific post, you can delete it permanently. You can also restore it if you need to.
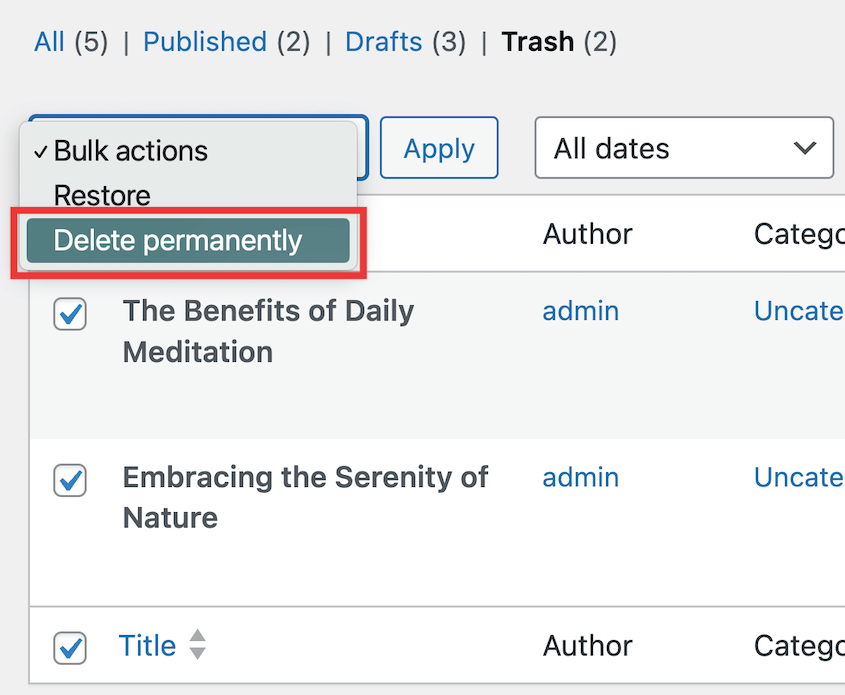
To empty your entire trash, select them all. Open the Bulk actions and click Delete permanently.
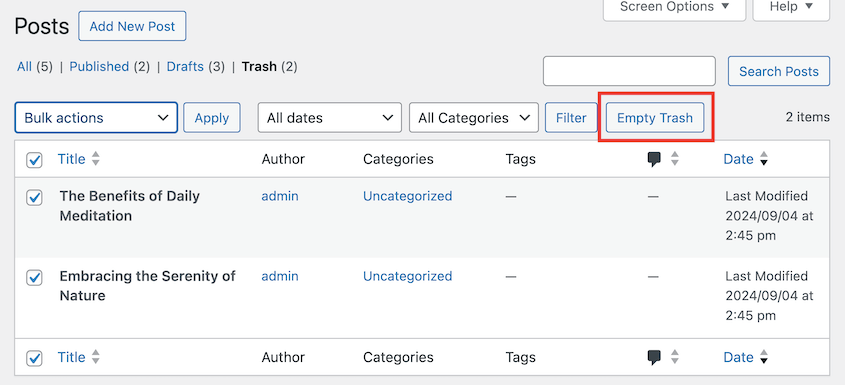
You could also simply click on the Empty Trash button.
Remember, emptying the trash is permanent. Once it’s gone, it’s gone for good (unless you have a backup).
Before you hit that Empty Trash button, take a quick scan through the items. You might find something you want to keep!
This manual method gives you full control, but it can be time-consuming if you have to do it regularly. That’s where our next method comes in handy.
Method 2: Automatically Empty Trash with a Code Snippet
For those who like to set it and forget it, this method is a game-changer. We’ll use a code snippet to customize how WordPress handles trash.
Don’t worry if you’re not a coder, we’ll use a plugin to make it safe and easy.
First, install and activate the WPCode plugin. This is a popular tool for adding custom code snippets to your WordPress site.
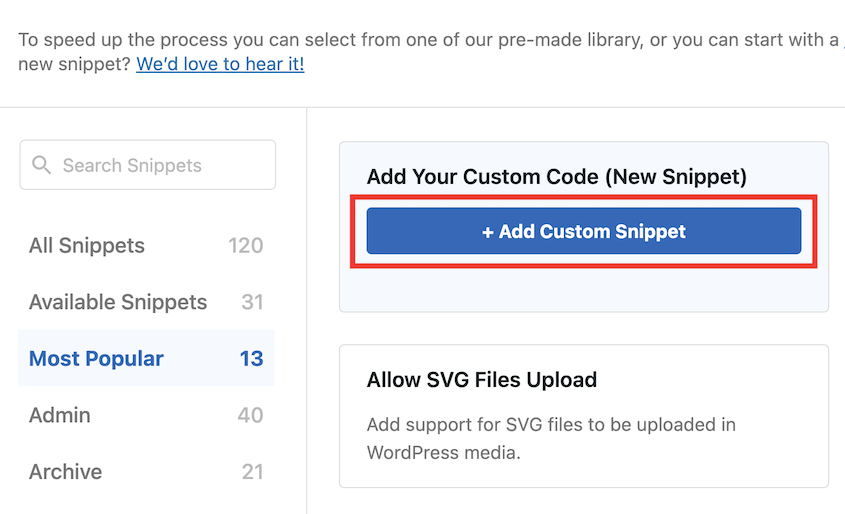
In your dashboard, go to Code Snippets » Add Snippet. Hover over the Add Your Custom Code (New Snippet) and hit Add Custom Snippet.
Give your snippet a name (like “Auto Empty Trash”). Select PHP Snippet as the Code Type.
Paste this code snippet into the preview box:
define('EMPTY_TRASH_DAYS', 1 ); //Integer is the amount of days
This will automatically empty your WordPress trash every 24 hours, but you could easily adjust this to meet your needs. Simply pick the number of days that work for you.
If you set it to 0, you’ll remove the WordPress trash feature entirely. All your deleted posts, pages, and comments will be deleted permanently.
Activate the code snippet and save it.
By using this method, you’re ensuring your WordPress trash stays tidy without you having to remember to clean it out manually.
Alternative: The Change Empty Trash Time plugin can adjust when WordPress deletes your trash. However, it hasn’t been updated in years, so we don’t recommend using it.
How to Restore Accidentally Deleted Content
If you realize you’ve deleted something important, go to the content area (Posts, Pages, Comments, etc.). Click on the Trash link.
Hover over the item you want to restore and hit Restore.
Easy, right? But what if you’ve already emptied the trash?
There are ways to get your content back, and with Duplicator, it’s easier than ever.
Regular backups are your best friend. They’re like a time machine for your website, allowing you to roll back mistakes with ease.
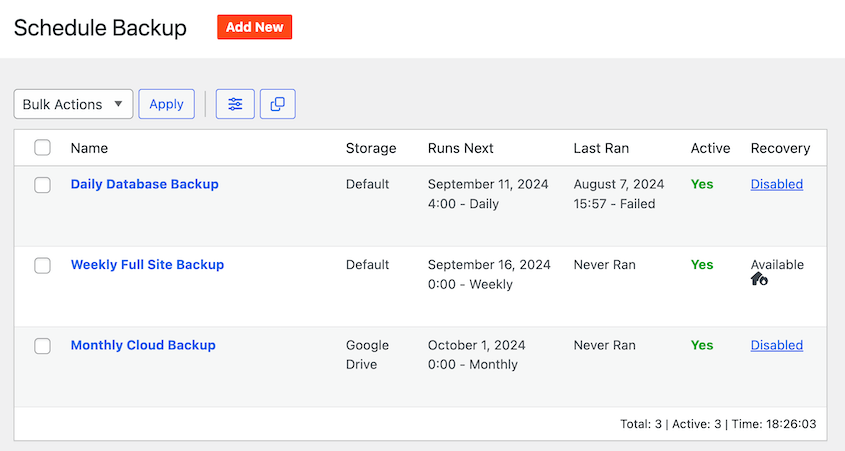
With Duplicator, you can set up automated backups on a schedule that works for you. Daily, weekly, or monthly – you decide how often to create these digital safety nets.
If you’ve accidentally deleted content and emptied the trash, open Duplicator’s Backups page. Find a backup that has the deleted content and hit Restore.
Your site will go back to its pre-mistake state, with all your content intact. You’ll turn back time with just one click.
Remember, the key to stress-free content management is being prepared. Set up those automatic backups with Duplicator, and you’ll never have to worry about losing your hard work again.
Frequently Asked Questions (FAQs)
Where is trash in WordPress?
To find the WordPress trash bin, open the Posts, Pages, or Comments pages. At the top, click on the Trash link. This takes you to your deleted posts, pages, or comments.
How do I delete trash in WordPress?
If you need to delete your WordPress trash, you can go to each content type (Posts, Pages, Comments), open the Trash page, and click Empty Trash. You can also select multiple items and choose Delete Permanently.
To automatically delete trash on a schedule, use a code snippets plugin like WPCode. Create a snippet for emptying trash and save it.
Remember, emptying your trash will permanently delete your content!
How long do items stay in WordPress trash?
By default, WordPress keeps trashed items for 30 days. But you’re not stuck with this. You could use a code snippet to change the duration. You could also empty trash manually for immediate removal.
How do I wipe my WordPress site clean?
To reset your WordPress site to a clean slate, you can reinstall WordPress with your hosting provider’s dashboard. This process typically involves deleting your existing database and reinstalling WordPress, which will erase all your content and settings. Be sure to back up your website first if you have any data you want to keep.
Conclusion
Staying on top of your WordPress trash can make a big difference in your site’s performance and your peace of mind.
With Duplicator Pro in your toolkit, you’re always just one click away from a fresh start or a full recovery. Upgrade today for easy site restores!
While you’re here, I think you’ll like these extra WordPress guides:
Joella is a writer with years of experience in WordPress. At Duplicator, she specializes in site maintenance — from basic backups to large-scale migrations. Her ultimate goal is to make sure your WordPress website is safe and ready for growth.


