
How to Restore Your WordPress Site from a Google Cloud Backup
 Joella Dunn
Joella Dunn
Joella Dunn
 John Turner
John Turner
John Turner
Your backup is sitting in Google Cloud storage. Something went wrong with your site (a bad update, a hack, a migration that didn’t land cleanly), and now you need that backup to restore your data.
The good news is that Duplicator Pro gives you three ways to do this. If your WordPress dashboard still loads, you can restore in a few clicks without ever touching a file.
If the dashboard is down but your server is still reachable, you can pull the backup file from Google Cloud and import it manually.
And if your site is completely offline, there’s an emergency method that works entirely through FTP or cPanel if you don’t have WordPress access.
I’ve used all of these. The one-click restore is what I reach for first, every time. The FTP method is the one I’m glad exists when nothing else works.
Here’s what this tutorial covers:
- Method 1: One-click restore directly from Duplicator’s Backups page (use this when your WordPress dashboard is accessible)
- Method 2: Import the backup using a downloaded archive from Google Cloud (use this when the GCS connection in Duplicator isn’t working, or you want to restore a specific file you’ve already pulled down)
- Method 3: FTP or cPanel installer restore for sites that are completely broken and inaccessible (the emergency method)
Table of Contents
Why You Might Need to Restore a Google Cloud Backup
Most site owners set up cloud backups and never think about them again. But when something forces you back to your Google Cloud bucket, it’s usually one of these situations:
- A plugin or theme update broke the site. A bad update can take down the entire frontend or lock you out of wp-admin entirely.
- A hack or malware infection. Cleaning an infected site file by file is slow and risky. Restoring a clean backup from before the infection is almost always faster.
- Accidental content deletion. A page, post, or chunk of the media library is gone, either by mistake or by someone else on the team.
- A failed migration. Moving to a new host didn’t go cleanly, and the site is sitting in a broken state between two servers.
- A host-side failure. Server crashes, corrupted databases, and botched host-level updates do happen. When your host’s environment is the problem, you can’t rely on their backup system to be intact either.
That last point is why storing backups in Google Cloud storage makes sense. Your backup lives offsite, on infrastructure your host can’t touch. If the server burns down, the backup doesn’t.
How to Restore a WordPress Backup from Google Cloud Storage
Duplicator is a backup plugin that gives you three restore paths depending on what kind of shape your site is in.
Before jumping into steps, spend thirty seconds on the decision below. Starting with the wrong method just means backtracking.
Here are your options for restoring a Google Cloud backup:
- Method 1: One-click restore from the Duplicator Backups page. Duplicator downloads the archive from Google Cloud and runs the recovery wizard automatically.
- Method 2: Restore with the Import Backups Page. You pull the archive file from Google Cloud storage manually, then hand it off to Duplicator to handle the restore.
- Method 3: FTP or cPanel installer restore. You upload both the archive and installer to your root directory and run the restore without WordPress at all.
If your WordPress dashboard loads normally: use Method 1 or 2.
If your site is completely broken, throwing a white screen, or you can’t access WordPress or your files through normal means: use Method 3.
Method 1: Restore with One Click from the Duplicator Backups Page
This is the fastest path. Your WordPress dashboard is up, Duplicator Pro is active, and your Google Cloud storage location is connected. Duplicator handles the download and restore without you ever leaving WordPress.
Step 1: Find Your Google Cloud Backup and Click Restore
In your WordPress dashboard, go to Duplicator Pro » Backups. This screen lists every backup Duplicator has on record, including backups stored remotely in Google Cloud.
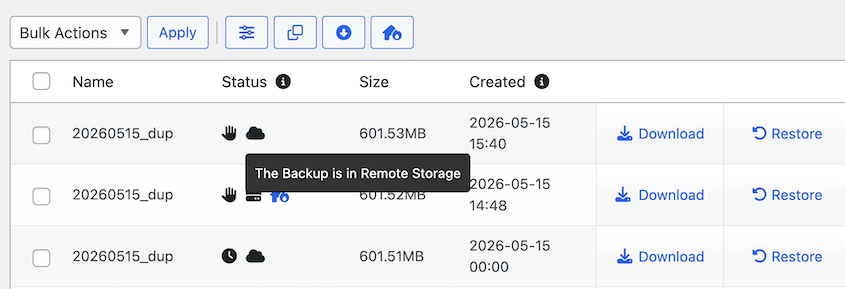
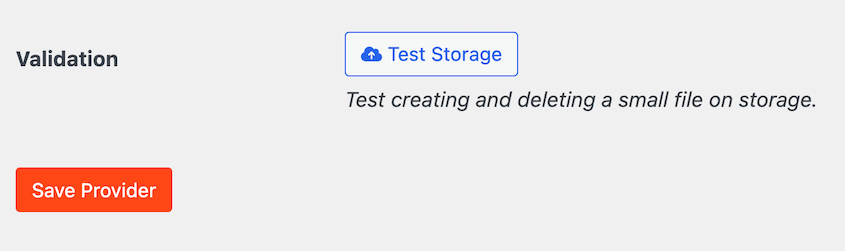
If you don’t see your Google Cloud backups listed here, the storage connection may have lapsed. Before continuing, go to Duplicator Pro » Storage, find your Google Cloud location, and click the Test Storage button to confirm it’s still active.
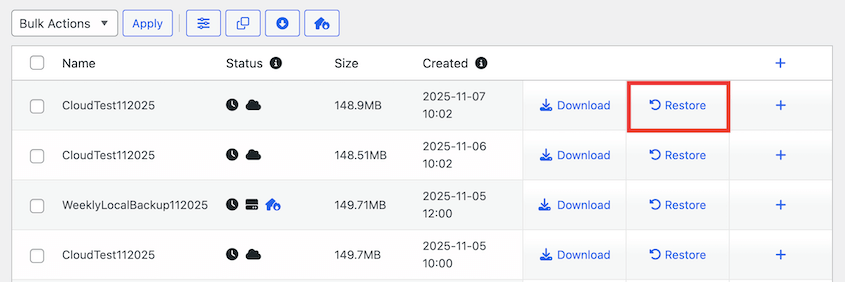
If it’s connected, go back to the Backups page. Locate the backup you want to restore. Each backup stored in the cloud has a cloud icon.
Click the Restore button next to that backup.
In the pop-up, download your Google Cloud backup.
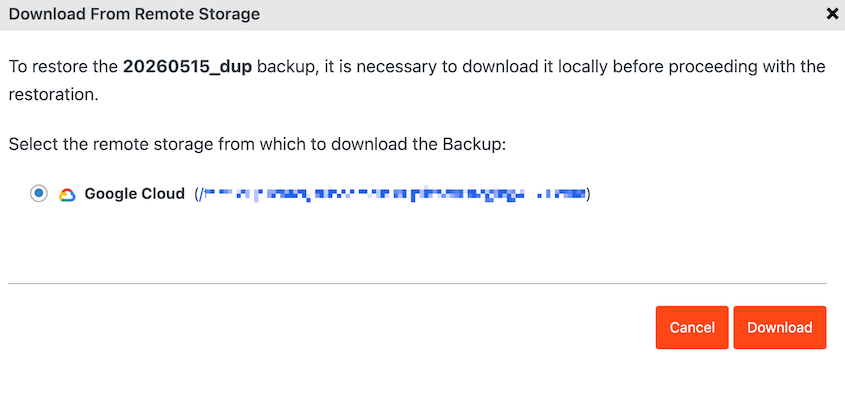
Duplicator will begin downloading the archive from Google Cloud automatically. You don’t need to touch the bucket or download anything yourself.
Step 2: Run the Recovery Wizard
Once Duplicator downloads your backup from Google Cloud, the recovery wizard will open. Accept the terms and notices and click Restore Backup.
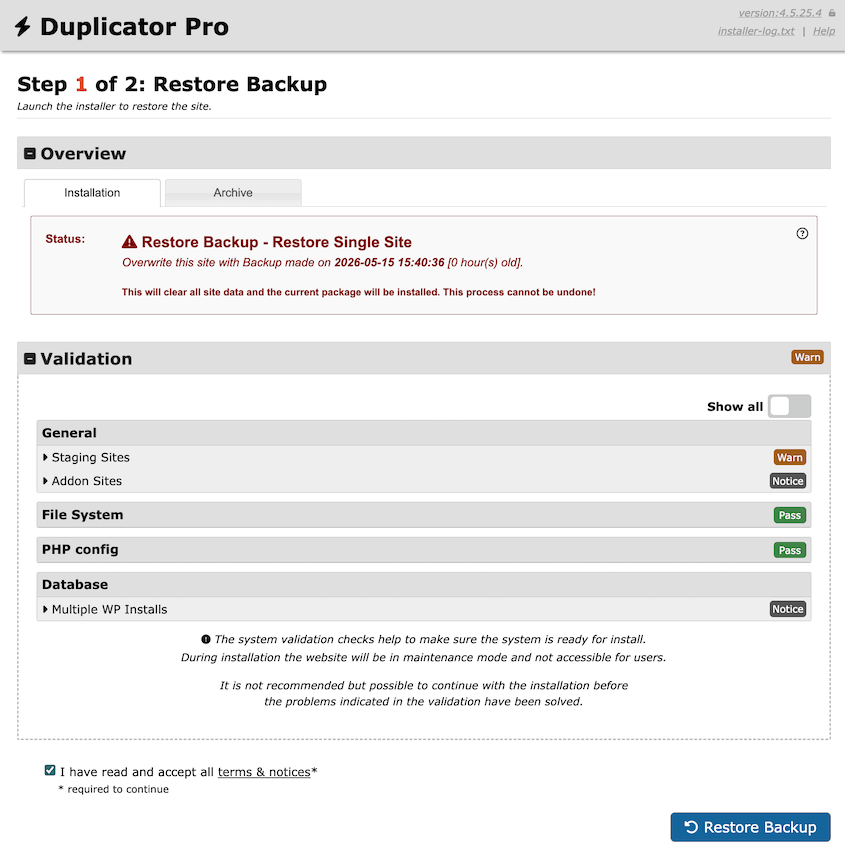
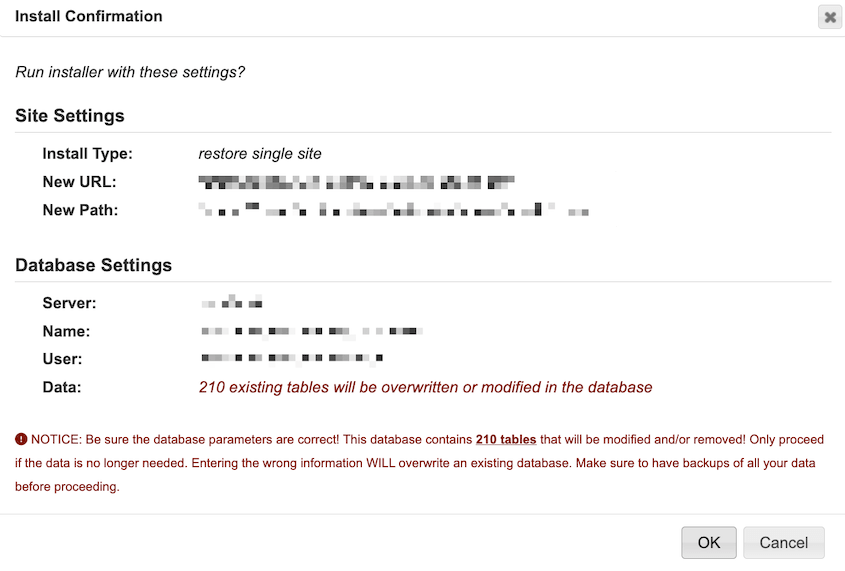
Confirm that you want to replace your current site with the backed up data.
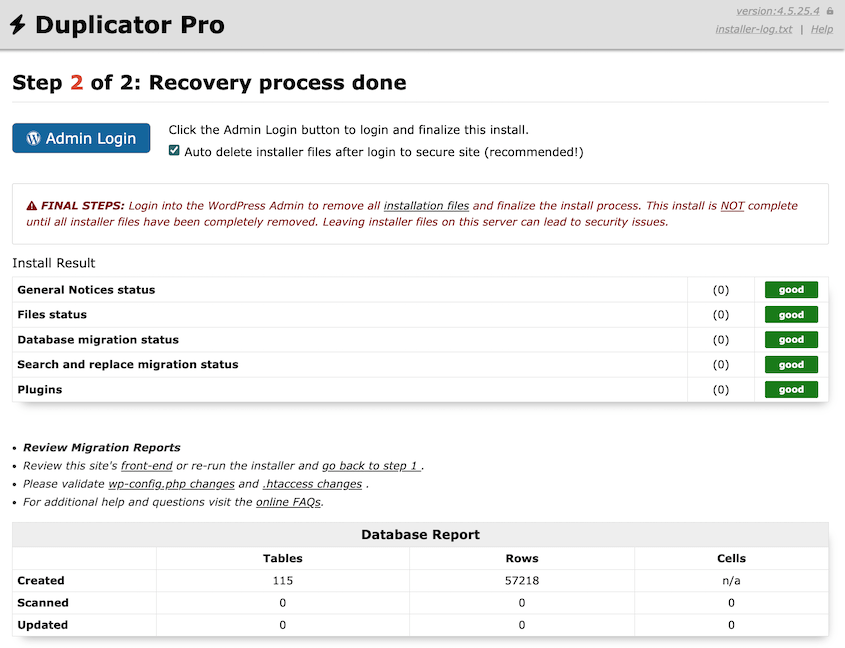
At this point, Duplicator will recover your website from Google Cloud! All you’ll need to do is log back in.
Method 2: Restore Using the Import Backup Page
Use this method when your WordPress dashboard is accessible but the Google Cloud connection inside Duplicator isn’t working. It’s also helpful when you want to restore a specific backup you’ve already downloaded from the bucket.
Step 1: Download the Archive File from Google Cloud Storage
Open your Google Cloud Console. Find the bucket your Duplicator backups are uploading to and open it.
You’ll see two backup files: the archive and the installer.php file. For this method, you only need the archive. It ends in .daf if you’re using Duplicator’s DupArchive format or .zip for zip files.
Download the archive file.
Step 2: Import the Archive into Duplicator
In your WordPress dashboard, go to Duplicator Pro » Import Backups. Drag the archive file into the upload area.
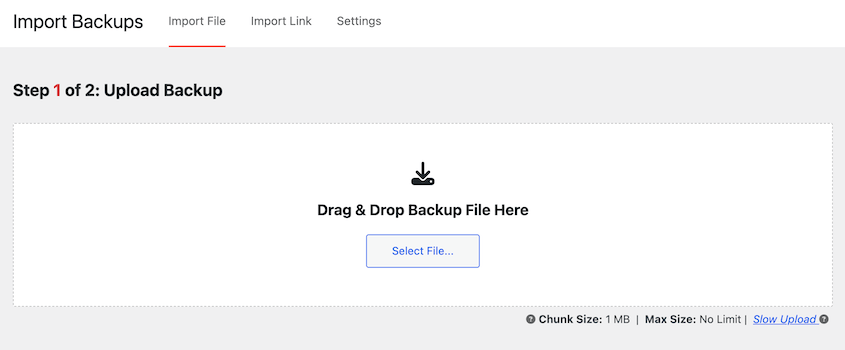
Duplicator scans the file and displays the package details: the original site URL, WordPress version, and file count. Review these before continuing.
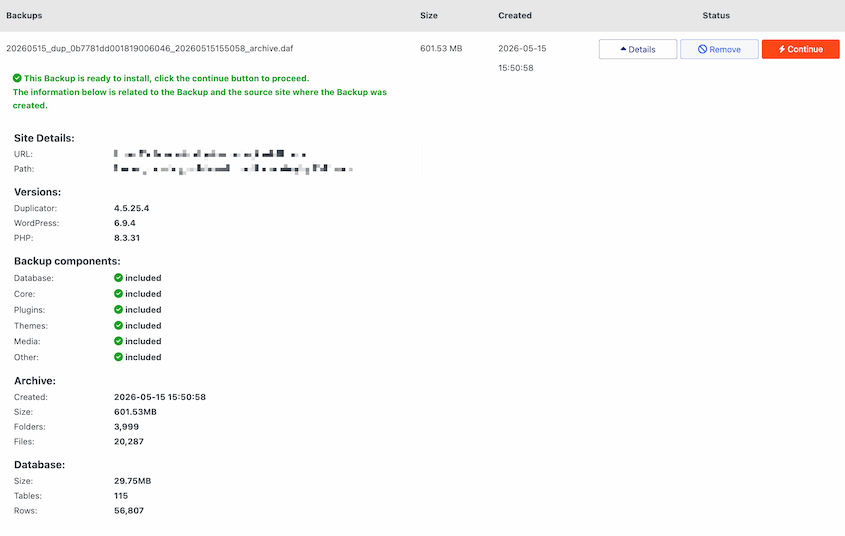
If the site URL or version looks off, double-check that you grabbed the right file from the bucket.
Click Continue to launch the recovery wizard.
Step 3: Complete the Restore
Duplicator will list the data your site currently has and ask you to confirm the installer launch.
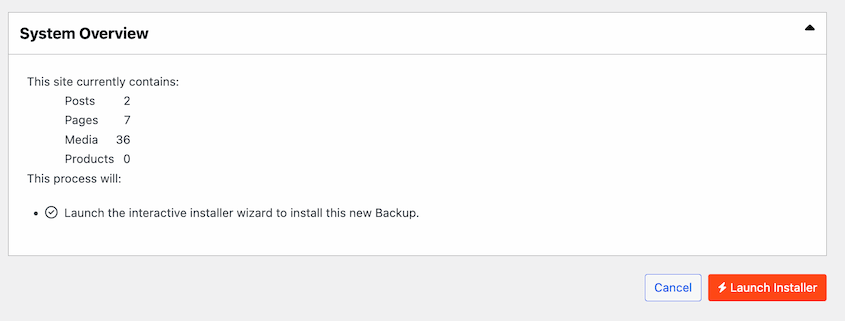
Review any warnings, accept the terms and notices, and continue.
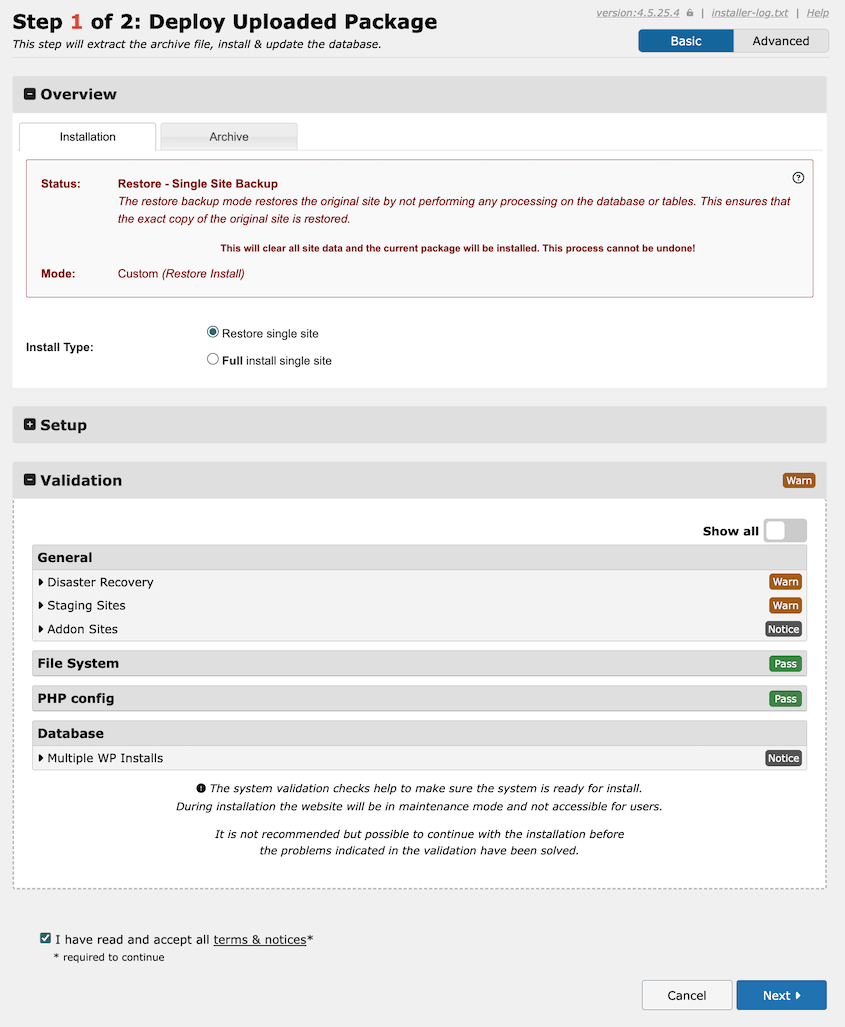
Just like the first method, hit OK to confirm the restore. Log back into your site once Duplicator finishes unpacking the backup.
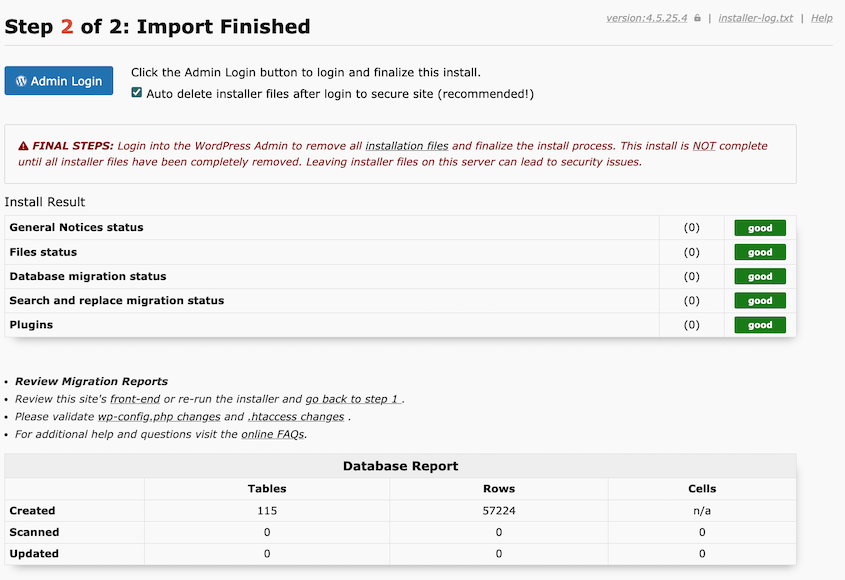
Confirm your site loads correctly and all your data is restored.
Method 3: Restore a Completely Broken Site via FTP or cPanel
This is the emergency method. Use it when WordPress is completely inaccessible due to a white screen, 500 error, or the server is returning nothing at all.
It takes longer than Methods 1 and 2, but it doesn’t require WordPress to be running at any point.
Step 1: Download Both the Archive and Installer Files from Google Cloud Storage
Open your Google Cloud backup. Navigate to your Duplicator backup folder and locate the backup you want to restore.
This time, download both files: the archive (.daf or .zip) and the installer (installer.php).
Step 2: Upload Both Files to Your Site’s Root Directory
Connect to your site via FTP using FileZilla, or open cPanel. Navigate to your root directory, which is usually named public_html.
Upload both the archive and installer.php to the same location. This part matters: both files must sit in the same directory.
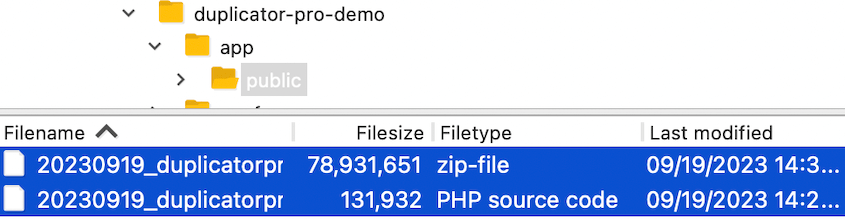
The installer looks for the archive in whatever folder it’s running from. If they’re in different places, the installer won’t find the archive and the restore will fail.
Step 3: Run the Installer
In your browser, go to yoursite.com/installer.php. If the installer is named differently, update “installer.php” in this URL. The Duplicator installer will launch.
Work through the wizard. When you reach the database screen, enter your current hosting account’s database name, username, and password.
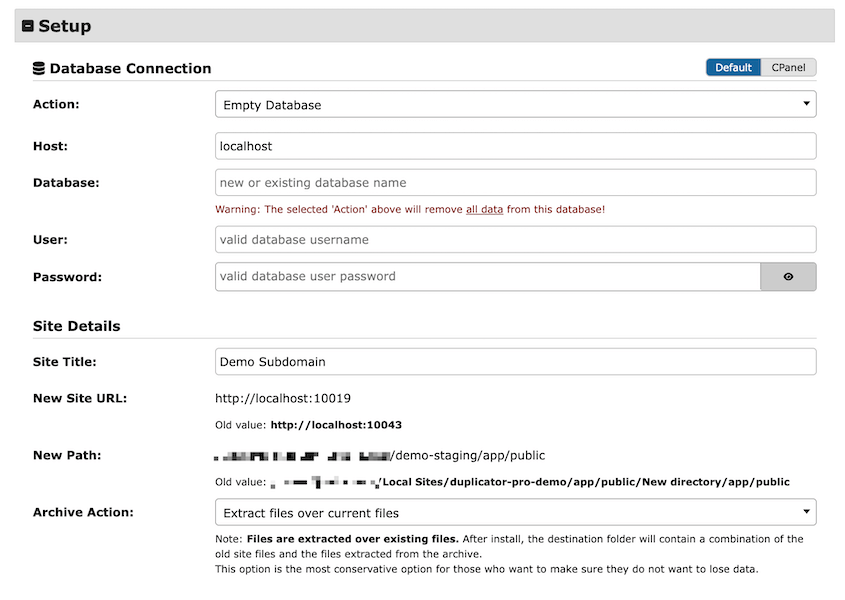
If you’re restoring to a new host, use the new host’s credentials here, not the ones from the original site.
Complete the migration wizard and log back in to confirm the restore worked.
One more thing: delete installer.php from your root directory immediately after the restore is complete. Don’t save it for later; don’t leave it as a backup. An exposed installer.php is a security risk, because anyone who finds the URL can run it.
Frequently Asked Questions (FAQs)
Do I need to delete my old WordPress files before restoring a backup?
No, when you restore a backup with Duplicator it’ll overwrite your old WordPress files. You don’t need to manually delete them.
Can I restore a Google Cloud backup to a different domain or host?
Yes. Install Duplicator on the new host and upload the backup archive file to the Import Backups page. If you don’t want to install WordPress first, upload both backup files to the root folder and launch the installer with yoursite.com/installer.php.
What’s the difference between the archive file and the installer file?
The archive is the compressed backup containing all your WordPress files and database. The installer is a small PHP script that unpacks the archive and runs the restore process. If WordPress is running, you only need to upload the archive file to Duplicator’s Import Backups page to restore it. For more devastating errors that leave you locked out, upload both files to your root directory using FTP or cPanel.
How long does a Google Cloud restore take?
It depends on how long it takes Duplicator to download the archive from Google Cloud, which varies with backup size and your server’s connection speed. A 2GB backup typically takes 5-15 minutes end to end. Manual uploads to FTP are slower because you’re uploading files before the installer even runs. Large sites can take 30–60 minutes just for the upload.
Is it safe to restore over a live site?
The restore will overwrite your current site. If you want to test the restore before touching production, use Duplicator’s staging feature to restore to a staging environment first, verify everything works, then restore production with confidence.
Your Site Is Back: What to Do Next
You’ve just pulled your site out of Google Cloud storage and put it back together. That’s the hard part.
Going forward, it’s worth scheduling a test restore every few months. Not a full production restore, just pulling a backup into a staging environment to confirm the package is intact and the process still works.
A backup you’ve never tested is a backup you can’t fully trust.
Two other things worth setting up if you haven’t already: confirm your Google Cloud storage connection is still active under Duplicator Pro » Storage.
I’d also recommend looking into Duplicator’s disaster recovery feature. It lets you restore your site from a direct URL even when WordPress is completely locked out, which cuts out a chunk of the manual work.
One more thing before you move on: if you restored after a hack, change your WordPress admin password, your hosting account password, and your database password before you do anything else. A clean restore on a compromised set of credentials puts you right back where you started.
A Backup Only Protects You If the Restore Works
Most WordPress site owners have a backup. Far fewer have actually run a restore and confirmed it works. That gap is where the real risk lives.
Duplicator Pro gives you the tools to close it: one-click restores from Google Cloud storage, an import path for when the connection breaks, and an emergency installer for when the site is completely offline.
If you haven’t tested your restore process yet, now is a good time.
If this tutorial helped, these guides are worth bookmarking too.
- How to Back Up WordPress to Google Cloud
- How I Restore a Cloud WordPress Backup to Recover Broken Websites
- The Real Cost of Cloud Storage Limits for WordPress Site Owners
- How to Restore a WordPress Site to a Previous Date Without a Backup
- The Best WordPress Cloud Storage Plugins