
Handling installer validation checks?
When running the installer, validation checks are performed to detect any potential issues that may affect the installation process. These checks help identify problems related to file systems, PHP configuration, and other important factors before proceeding with installation.
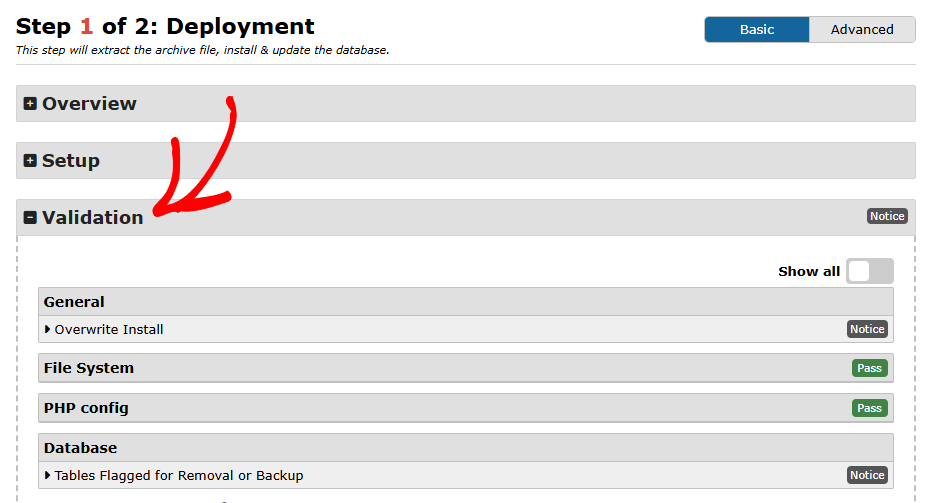
This article explains what the validation checks mean, how to interpret the status codes, and how to address common issues such as file permission problems caused by Imunify360.
Understanding validation status codes
The installer uses color-coded status indicators to help you quickly understand any issues found during validation. Below is a breakdown of the different status levels:
| Status | Description |
|---|---|
| Pass | The check passed successfully; no issues detected. |
| Notice | A minor issue detected with low risk. You can proceed with the installation. If problems arise, consider resolving this notice. |
| Warn | An issue detected with a high risk of causing installation problems. It is recommended to address this issue before proceeding. |
| Fail | A critical issue found. Installation cannot proceed until the issue is resolved. |
General checks
General validation checks confirm your server environment can support the installation. These include:
PHP version – confirms your server is running a supported PHP version.
Memory limit – confirms enough PHP memory is allocated for the install to complete.
ZipArchive – confirms the PHP ZipArchive extension is available (required unless using DupArchive).
Recovery link – checks whether a recovery link is available in case the install needs to be resumed or rolled back.
Wordfence – flags Wordfence if active, since it can interfere with the installer similarly to Imunify360.
If you encounter a PHP-related fatal error during installation, see Resolving Call to Undefined Function Errors.
File System checks
This section covers file system validation checks, including:
- Disk space – confirms enough free disk space exists to extract the archive.
- Writable paths – confirms the installer can write to the required directories.
The most common file system issue is a permissions problem caused by Imunify360, covered below. For general file permission issues unrelated to Imunify360, see Resolving File Permission Issues.
Issue: Permissions problem caused by Imunify360
During archive extraction, you may encounter permission-related warnings, often linked to Imunify360. Continuing with installation under these conditions may result in log errors such as:
Common error messages
- FILE CORE EXTRACTION ERROR:
wp-includes/class-oembed.php(or similar file path) - MSG:
touch(): Unable to create file /some_path/ No such file or directory Invalid glob header markerORInvalid header marker
Solution: Adjusting Imunify360 settings
This problem often occurs because of a security tool called Imunify360, commonly installed by hosting providers. Its “Proactive Defense” feature, set to “Kill” mode by default, can mistakenly identify the installer file as malicious, preventing proper installation.
Steps to resolve the issue
- Log in to your cPanel or hosting control panel.
- Open the Imunify360 application.
- Change the Mode Settings to Disabled or Log Only.
Once Proactive Defense is disabled, proceed with the installation. After completion, you can re-enable Proactive Defense if desired.
Note: If you do not see an Imunify360 option in your hosting panel, contact your hosting provider and request that they temporarily disable the Proactive Defense feature to allow the installation to proceed.
For more detailed instructions, refer to this guide: Disable Imunify360 in cPanel.