
Storing Your Backup to Wasabi
Wasabi provides a secure and budget-friendly option for storing WordPress site backups. Unlike other cloud storage options, Wasabi keeps pricing straightforward, without confusing tiers or hidden charges, making it a solid choice for both businesses and individuals looking to protect their data without breaking the bank.
This guide walks through connecting Wasabi as a storage location for Duplicator Pro backups.
Create a Wasabi Bucket
1. Create a new Wasabi account. Wasabi offers a free trial for 30 days (up to 1TB, no credit card required); afterward, Pay-Go pricing is $7.99 per TB per month (as of July 2026, subject to change).
2. Register with the estimated data storage needed.
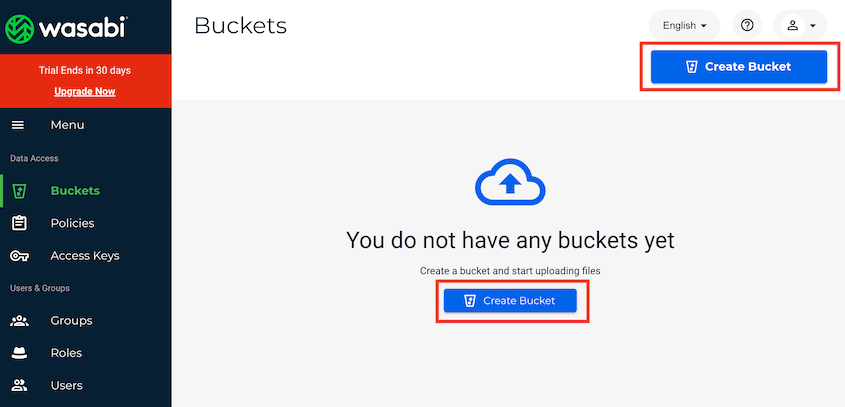
3. After creating your Wasabi account, you’ll see your new Wasabi console. Here, click on Buckets » Create Bucket:
4. Name your new bucket. This should feature your domain and start with a lowercase letter or number:
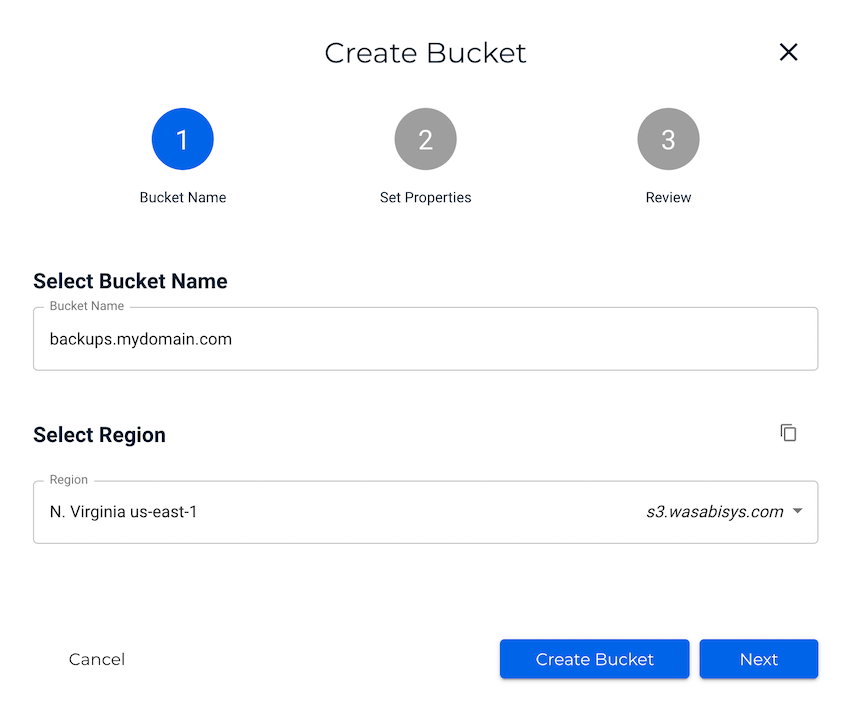
5. After this, select the nearest data center region to you. Hit Create Bucket.
Identify Your Access Keys
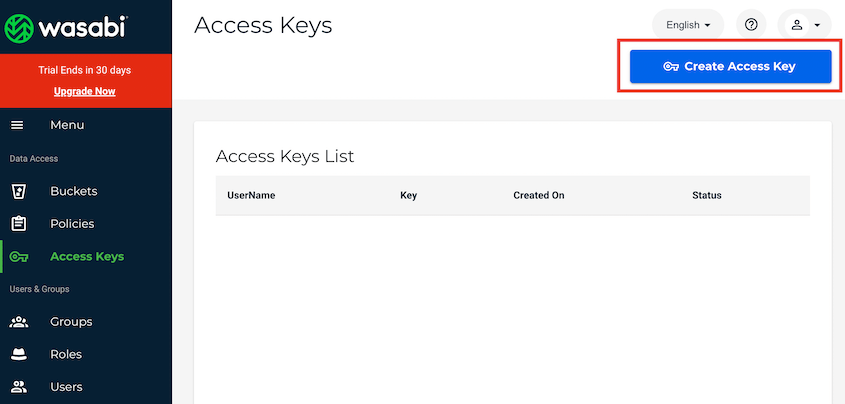
1. Navigate to your Wasabi console and open the Access Keys tab. Next, create a new access key:
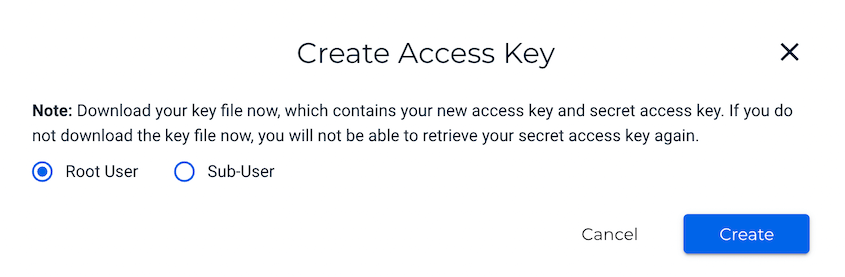
2. In the pop-up window, select Root User and click Create:
3. This will generate the access key and secret key for your Wasabi bucket:
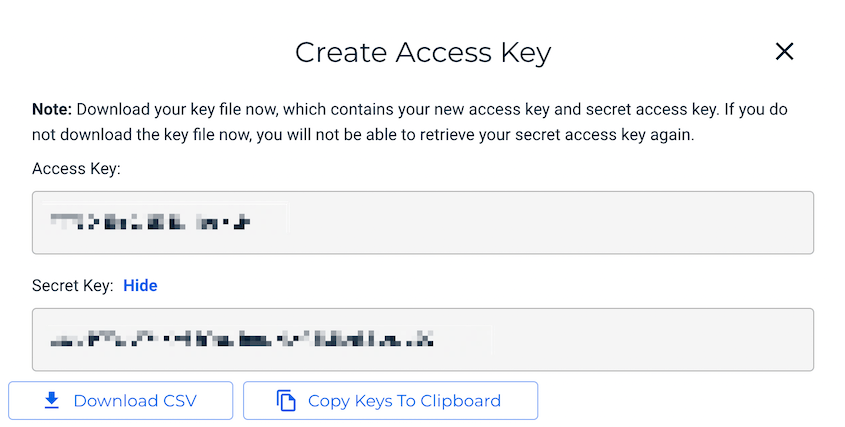
You can copy these keys and save them in a secure location. You can also download them as a CSV file. Either way, make sure you can easily access them for the next step.
Connect Wasabi to Duplicator
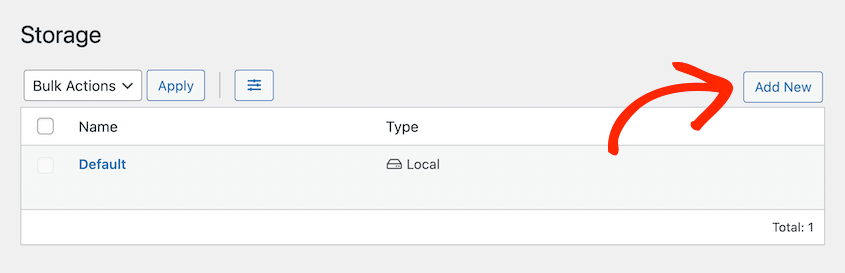
1. To connect, you’ll need to go to Duplicator Pro » Storage » Add New:
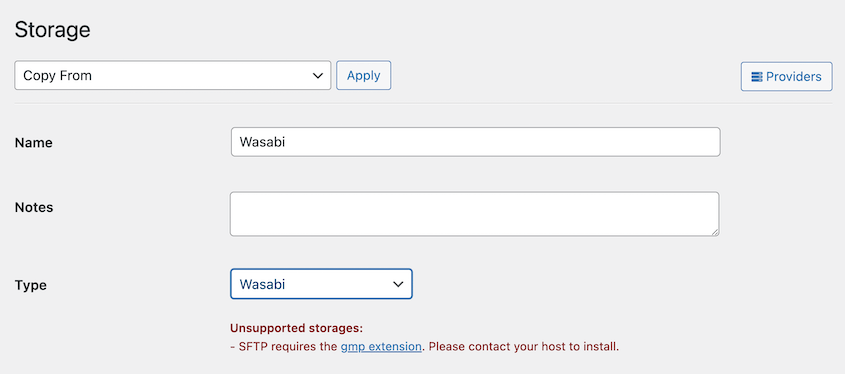
2. Name the new storage location and choose Wasabi as the Type:
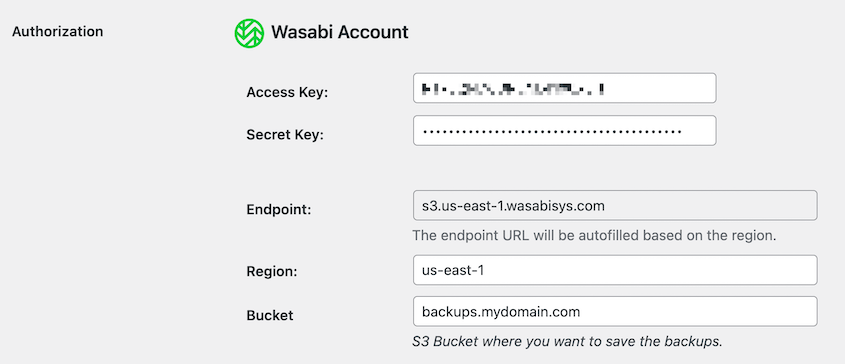
3. Under Authorization, paste your access key and secret key. You’ll also need to fill out your bucket name and region:
4. To optimize cloud storage space, customize the Max Backups field. Duplicator deletes old backups once the set limit is reached:
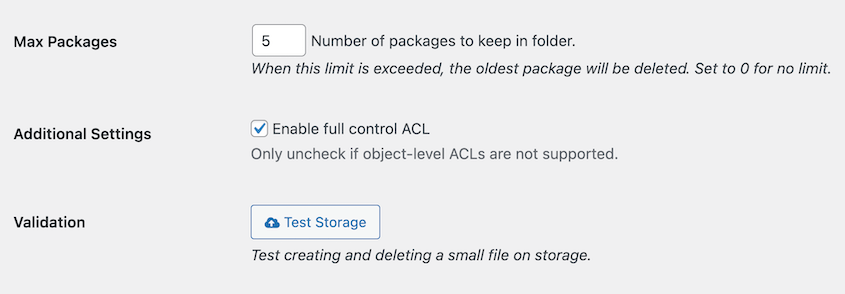
5. After saving the Wasabi storage, click Test Storage at the bottom of the page. Duplicator creates a small file on Wasabi and deletes it, confirming the integration works correctly. If the test fails, see How do I fix issues with Amazon S3 or S3-compatible storage types?
With Wasabi connected, backups upload there automatically each time a backup is created, giving the site a secure, off-site copy separate from the web server.
To automate this process, see the guide to Create Automated Backup.