You’ve spent hours creating content and building your online presence. But something’s off.
Your traffic numbers aren’t matching your effort. Pages that should load instantly feel sluggish. You’re doing everything right, yet your site performance keeps disappointing you.
Often the culprit is hiding in plain sight: redirect chains.
One innocent redirect leads to another, then another. Before you know it, your visitors and search engines are taking a scenic route through multiple stops just to reach your content.
In this guide, I’ll walk you through what redirect chains are, why they hurt your site, and most importantly, how to find and fix them.
You’ll learn:
- What redirect chains are and how they form over time
- How redirect chains hurt your SEO rankings and site speed
- How to identify redirect chains
- Step-by-step methods to fix existing redirect chains
- Prevention strategies to avoid chains in the future
Quick Summary: How to Fix Redirect Chains
Redirect chains happen when URLs bounce visitors through multiple redirects before reaching the final destination, wasting crawl budget and slowing page load times. The solution is straightforward: identify chains with crawler tools, update the first redirect to point directly to the final URL, and implement prevention strategies to keep your site’s redirect structure clean and efficient.
Table of Contents
What Are Redirect Chains?
When someone clicks a link or types in a URL, they expect to land on the final page immediately. But with a redirect chain, they get bounced from one URL to another, then another, before finally reaching their destination.
Here’s what this looks like in practice:
Redirect Chain: Page A » Page B » Page C
Direct Redirect: Page A » Page C
Let’s say you originally published a blog post at /old-blog-post/. Later, you moved it to /blog/new-post/. Then you decided to restructure your URLs again and moved it to /resources/new-post/.
Instead of updating that first redirect to point directly to the final location, many sites end up with this chain: /old-blog-post/ » /blog/new-post/ » /resources/new-post/.
The goal is always a single redirect, straight to the final destination.
How Do Redirect Chains Happen?
In my experience, redirect chains build up gradually. You make changes to your site over months or years, and each change seems perfectly logical at the time.
Here are the most common ways I see chains forming:
Site Migrations: You move from HTTP to HTTPS first. Later, you change your domain name. Now you have http://old-site.com » https://old-site.com » https://new-site.com. That’s already two hops instead of one direct redirect.
Changing URL Structures: WordPress makes it easy to modify permalink settings. You might remove /category/ from your URLs, then later decide to remove dates too. Each change creates another layer in the chain.
Content Updates: You merge two blog posts together, redirecting Post A to Post B. Months later, you rename Post B and create another redirect. Now Post A has to travel through two stops.
Plugin Changes: This one catches people off guard. Your old SEO plugin created redirect rules. You switch to a new plugin that creates its own redirects. The old rules don’t disappear; they just add more steps to the journey.
The tricky part is that each redirect might work perfectly. Your visitors may still reach the right page, but the path they take gets longer and more complicated with every change you make.
How Do Redirect Chains Affect Your SEO?
Redirect chains might seem harmless since people still reach your content. However, they create real problems that hurt your site’s performance.
Wastes Crawl Budget
Search engines don’t have unlimited time to explore your site. Google and Bing allocate a specific crawl budget, which is a set number of pages they’ll check during each visit.
When a search engine hits a redirect chain, it wastes precious crawl budget because it’ll follow unnecessary hops instead of discovering and indexing your important content.
Slows Down Page Load Speed
Every redirect is a separate request to your server. Each hop adds loading time.
When someone clicks a link that goes through a three-step redirect chain, their browser has to:
- Request Page A, get redirected to Page B
- Request Page B, get redirected to Page C
- Finally request and load Page C
Those extra server requests add up. Users expect pages to load in under three seconds, so every millisecond matters for your Core Web Vitals scores.
Potential Loss of Link Equity
Google has stated that link equity (the SEO value passed through links) isn’t lost through properly configured redirects. However, a direct A » C redirect is still the cleanest way to transfer that SEO value.
Why create unnecessary complexity when a simple, direct redirect does the job better?
How Do You Find Redirect Chains?
You can’t fix what you can’t see. I’d recommend using a redirect chain checker tool because manually checking every URL on your site would take forever.
I rely on website crawlers to do the heavy lifting.
Screaming Frog SEO Spider is my go-to desktop tool for this job. It crawls your entire site and generates a detailed report showing every redirect, including chains.
The free version handles up to 500 URLs, which covers most small to medium websites. For larger sites, you can upgrade to the paid version.
If you’re already using Ahrefs or Semrush, their Site Audit features can identify redirect chains too. These tools provide the same information in a slightly different format, but they’re equally effective.
If you prefer staying within your WordPress dashboard, plugins like AIOSEO’s redirect add-on can help identify redirect patterns.
It’s great for managing individual redirects, but AIOSEO doesn’t provide the comprehensive site-wide view that dedicated crawlers offer. I use it more for fixing than finding.
How Do You Fix Redirect Chains?
Once you’ve identified the chains, fixing them is a straightforward process. The goal is simple: make the first redirect point directly to the final destination.
Here’s how to fix redirect chains:
- Identify each redirect chain using your crawler report
- Document the current chain path and target destination
- Update the first redirect to point directly to the final URL
- Clear all caches and test the new redirect thoroughly
- Update internal links to use final destination URLs
Identify Redirect Chains
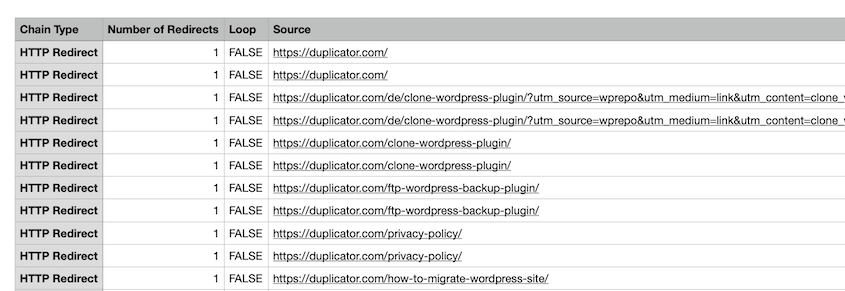
When you run your crawler, look for the redirect report. You’ll see entries that look something like this:
/old-service/ » /services/new/ » /services/final-service-page/
This tells you that someone visiting /old-service/ gets bounced twice before reaching /services/final-service-page/.
Your mission is to make /old-service/ point directly to /services/final-service-page/ and eliminate the middle step.
Document each chain you find. I keep a simple spreadsheet with three columns: Original URL, Current Chain, and Target Fix.
Simplify the Redirect
Now comes the actual fix. You have two main options depending on how the original redirect was created.
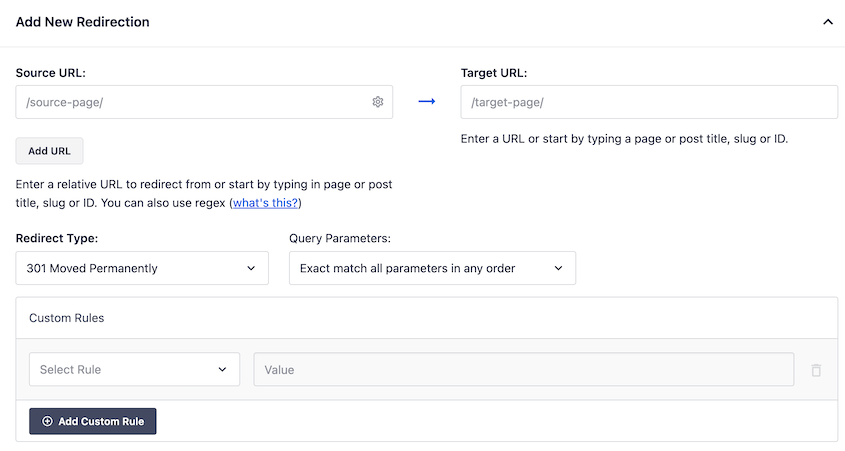
If you’re using a plugin like AIOSEO, log into your WordPress dashboard and navigate to the redirect settings.
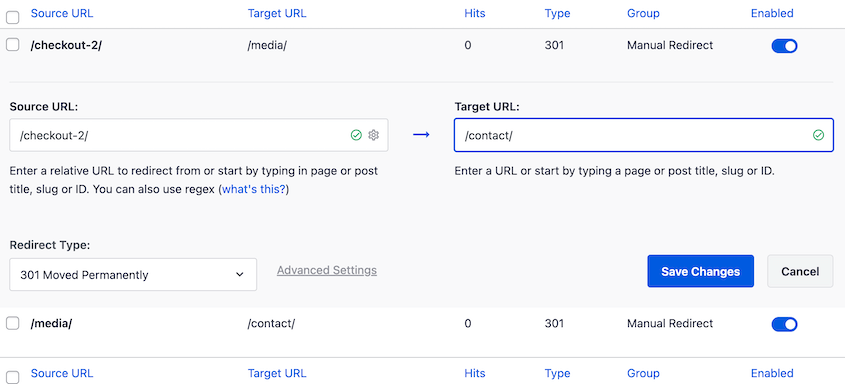
Search for the starting URL. You’ll find the redirect rule that currently sends it to part of the redirect chain.
Edit this rule and change it to the final destination.
Save the changes. That middle hop is now eliminated.
If your redirects are handled through your .htaccess file, you’ll need to access it via FTP, cPanel File Manager, or your hosting provider’s control panel.
First, back up your .htaccess file. I can’t stress this enough—always create a backup before making changes.
Look for redirect lines that mention your starting URL. They typically look like this:
Redirect 301 /old-service/ /services/new/
Change it to go to the final destination instead:
Redirect 301 /old-service/ /services/final-service-page/
Save the file and upload it back to your server.
Test the New Redirect
This step is critical, and I see too many people skip it.
First, clear all your caches: website cache, server cache, and your browser cache. Cached redirects can make it seem like your fix didn’t work when it actually did.
Open an incognito or private browsing window and paste in the original URL. You should land directly on the final destination page without any intermediate stops.
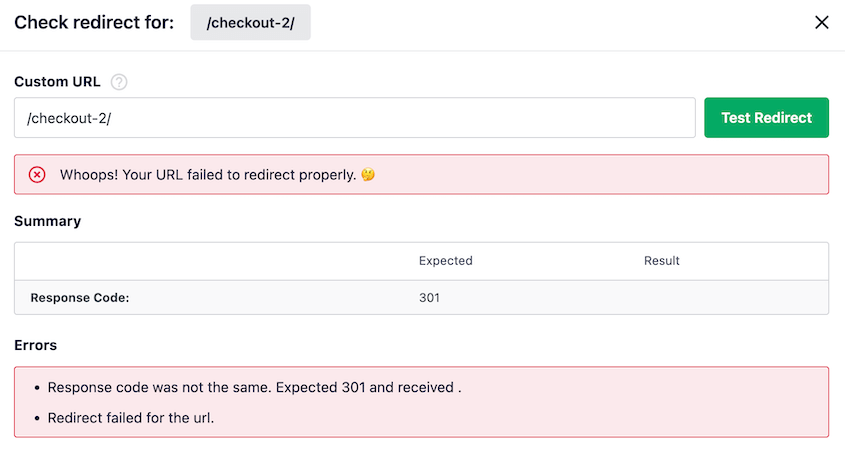
You can also test redirects in AIOSEO. It’ll tell you if anything is wrong with the destination link.
If you’re still seeing the chain, double-check your redirect rules and cache clearing. Sometimes it takes a few minutes for changes to propagate across all systems.
Update Internal Links
Here’s the final step that many people forget: fix your internal links.
Search your website for any internal links that point to the old URLs — both the starting URL and any intermediate URLs in the chain.
Update these links to point directly to the final destination. This removes the need for redirects entirely when people click links from within your site.
A plugin like Search & Replace Everything can help with bulk link updates if you have many to change.
How to Prevent Redirect Chains
Prevention beats cleanup every time. Here’s how I approach redirect management to avoid chains from forming in the first place.
Plan Ahead
Before making any major site changes, create a URL map in a spreadsheet.
List your current URLs in one column and their planned destinations in another. This simple document becomes your roadmap for creating direct redirects instead of accidentally building chains.
When you’re migrating from HTTP to HTTPS and changing your domain name simultaneously, plan the redirect to go straight from http://old-site.com/page/ to https://new-site.com/page/. Skip the intermediate step.
Conduct Regular Audits
I recommend running a site crawler quarterly, and more often if you make frequent changes to your site’s structure.
Set a calendar reminder and actually do it. Most redirect chains I discover during audits have been building for months because no one was checking.
These regular checkups catch problems while they’re still small and easy to fix.
Document Redirects
Keep a simple log of every redirect you create. Include the original URL, destination URL, reason for the redirect, and the date you created it.
This documentation helps you remember why redirects exist and makes it easier to spot potential chain-forming situations before they happen.
A basic spreadsheet works fine. You don’t need fancy software, just consistent record-keeping.
Always Link to the Final URL
Develop the habit of using final destination URLs for all new internal links.
When you’re writing a blog post and want to link to another page on your site, use the current, final URL—not a URL that you know redirects somewhere else.
This practice prevents your internal linking from contributing to redirect chains.
Frequently Asked Questions (FAQs)
How are redirect chains different from redirect loops?
A website redirect chain has a clear endpoint (A » B » C), while a redirect loop is circular (A » B » A). Chains slow down your site but still work, whereas loops break completely and show visitors an error page.
How do I fix permanent redirects?
The word “permanent” just tells browsers the move is long-term, not that it’s locked forever. You can edit or delete permanent redirects in the same place you created them—your .htaccess file or redirect plugin.
How do I get rid of a redirect virus?
This is a security issue requiring tools like Sucuri or Wordfence to scan and remove malicious code. You’ll also need to change all passwords and update plugins/themes. If problems persist, contact your hosting provider or a security specialist.
How do I fix other redirect issues?
Use 301 (permanent) redirects in almost all situations, including page moves, URL changes, and content consolidation. Only use 302 (temporary) redirects when you plan to move content back later, like during maintenance or testing.
Tangled Redirects Don’t Have to Be Your Reality
Redirect chains might seem like a complex technical problem, but fixing them is straightforward once you know what to look for.
The process is simple: find the chains with a crawler tool, edit the first redirect to point directly to the final destination, test your changes, and update your internal links.
Regular maintenance prevents most chains from developing. A quarterly audit and some basic documentation go a long way toward keeping your site’s redirect structure clean.
Speaking of keeping things clean and efficient—if you’re planning a site migration or major URL structure change, consider using Duplicator Pro to handle the process.
These complex moves are where redirect chains often come from. Duplicator Pro makes migrations clean and reliable, helping you avoid the redirect errors that require cleanup later.
When you can prevent the problem entirely, you won’t need to fix it!
While you’re here, I think you’ll like these other hand-picked resources:
Joella is a writer with years of experience in WordPress. At Duplicator, she specializes in site maintenance — from basic backups to large-scale migrations. Her ultimate goal is to make sure your WordPress website is safe and ready for growth.


