
How to Install WordPress on LocalWP
 Joella Dunn
 John Turner
TL;DR: In a hurry? Here’s how to do it step by step:
- Download and install Local by Flywheel
- Create a new local site and environment
- Set up WordPress admin credentials
- Import your live site with Duplicator (optional)
LocalWP (formerly Local by Flywheel) runs WordPress on your own computer, so you can build and test a site offline before anyone else sees it. It’s free, and it handles the server setup for you.
Where to download it: get LocalWP from the official site, localwp.com. It’s available for Mac (Apple Silicon and Intel), 64-bit Windows 10 and 11, and Linux.
Below, I’ll walk you through installing it, creating your first WordPress site, and copying your live site into it.
Here are the key takeaways:
- LocalWP (formerly Local by Flywheel) is a free app that installs WordPress on your computer without needing a live server setup or live internet connection
- You can have a fully working local WordPress site running in minutes, with PHP, MySQL, and SSL all configured automatically
- LocalWP supports importing your existing live site via Duplicator, so you can test changes safely before they go anywhere near production
- Built-in tools like Adminer for database management and one-click WP Admin access remove the need for separate dev tools
- When you’re ready, Duplicator Pro handles the reverse too—pushing your finished local site back to your live server in just a few clicks
Table of Contents
- What Is LocalWP?
- Why Install WordPress on Local by Flywheel?
- How to Install WordPress on Local by Flywheel
- Using Blueprints to Save and Reuse Site Templates
- How to Migrate Your Changes to Your Live Site
- How to Locate LocalWP Files and Database
- The Easier Alternative: One-Click Staging with Duplicator
- Frequently Asked Questions (FAQs)
What Is LocalWP?
LocalWP (formerly known as Local by Flywheel) is a beginner-friendly application that allows you to create and manage WordPress sites on your computer. It’s a local development tool designed to simplify the process of building and testing WordPress websites.
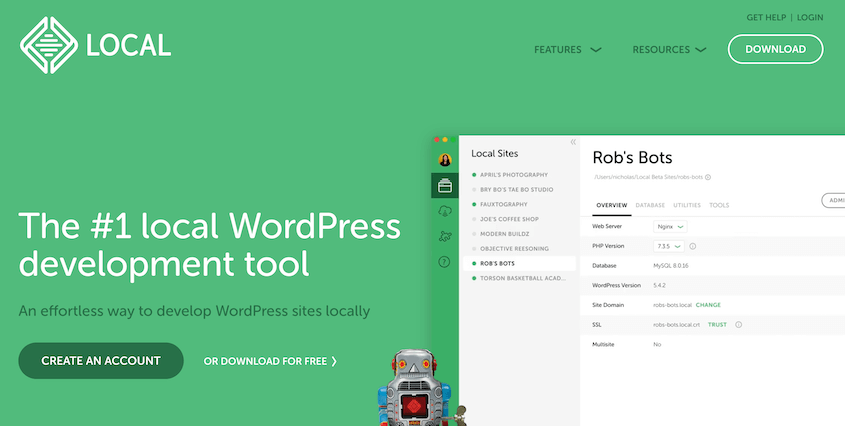
Local now goes by Local by WP Engine. It’s developed by WP Engine (which bought Flywheel in 2019) and has become a popular choice among WordPress developers.
It removes many of the technical hurdles that come with setting up a local environment. Anyone can create, modify, and test WordPress sites without needing a live internet connection.
Key features of Local include:
- One-click WordPress installs
- Easy site management
- Cross-platform compatibility (Windows, Mac, and Linux)
- Built-in tools for database management
- Automatic SSL certificates for local sites
- Cloud backups
- Live links to share your local WordPress website privately
One of the best parts about Local is its simplicity. You can set up a new WordPress site in minutes, without needing to manually configure databases or server settings.
It’s worth noting that Local is free to use, making it an accessible option for developers at all levels.
Why Install WordPress on Local by Flywheel?
Local environments are typically much faster than live servers. This speed boost allows you to make changes and see results almost instantly, accelerating the development process.
Once you’ve set up your local site, you can work on it without an internet connection. This is perfect for developers who travel or work in areas with unreliable internet.
Local makes it easy to create and manage multiple WordPress sites on your computer. You can switch between different projects with just a few clicks, keeping your work organized and efficient.
Local simplifies complex tasks with built-in tools for managing your database, handling SSL certificates, and even pushing your site live when it’s ready.
How to Install WordPress on Local by Flywheel
Ready to install WordPress on Local by Flywheel? Let’s walk through the process step-by-step.
- Step 1: Download and Install Local by Flywheel: Get the free app for Windows, Mac, or Linux from the official LocalWP website and run the installer
- Step 2: Set Up a Local Environment: Create a new site, give it a name and local domain, and choose your PHP version, web server, and MySQL version
- Step 3: Set Up WordPress: Enter your admin credentials, optionally enable multisite, and launch your local site with one click
- (Optional) Step 4: Migrate Your Live Site to LocalWP: Use Duplicator to back up your live site and drop it into LocalWP, replacing the blank install with a full copy of your real site
Step 1: Download and Install Local by Flywheel
To get started, you need to get Local on your computer. But first, make sure your computer meets these requirements:
- 4GB of RAM
- 1.5GB of disk space
For macOS, you’ll need Monterey (12) or a higher version. For Windows, you’ll need Windows 10 or 11, both 64-bit only (32-bit is no longer supported).
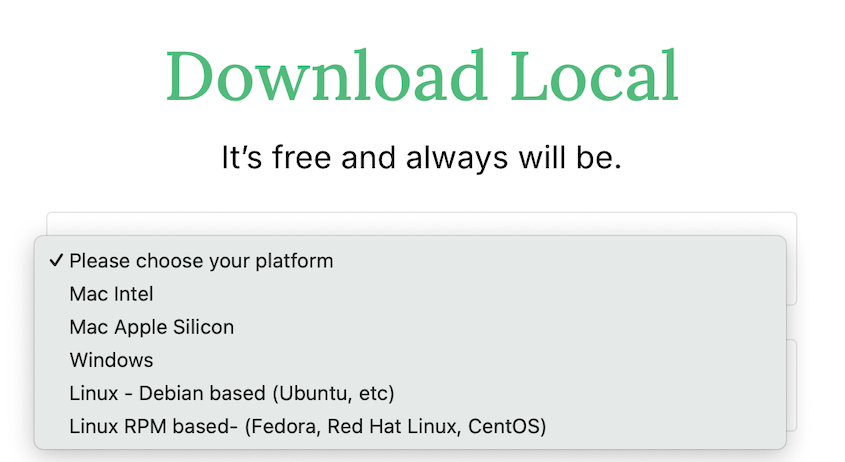
Then, head over to the official LocalWP website and hit the Download button. In the pop-up, choose your platform compatibility.
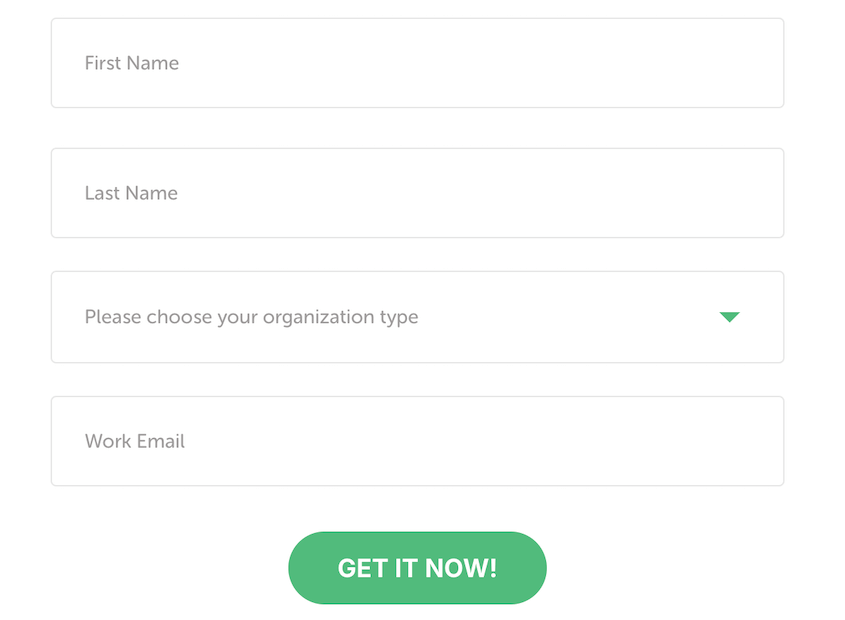
Enter your first name, last name, organization type, and work email. Click Get it now to download Local.
Once the download is complete, run the installer and follow the on-screen instructions.
Step 2: Set Up a Local Environment
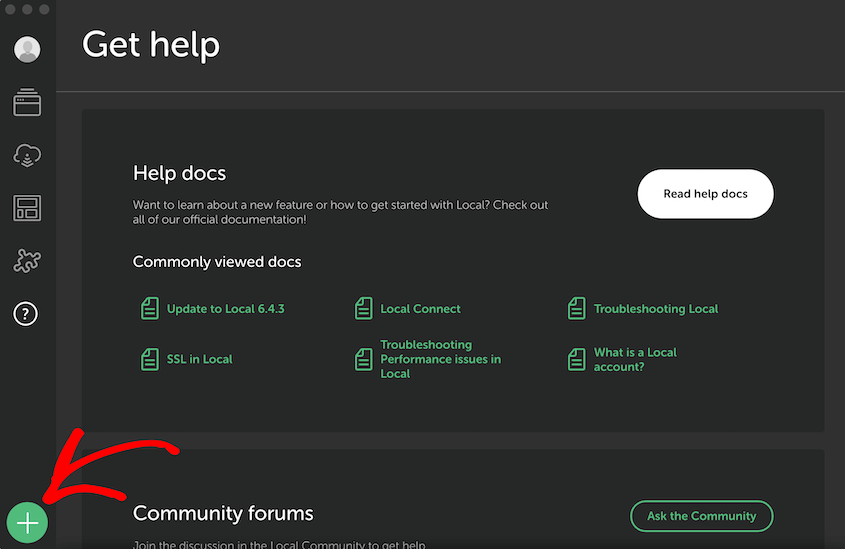
After installing Local, launch the app. Click the + button to add a new site.
LocalWP offers a choice: start with a custom WordPress installation or use a pre-configured “Blueprint.” Blueprints are essentially site templates that you can use to pre-install plugins, themes, and other data.
For a completely blank site, select Create a new site and Continue.
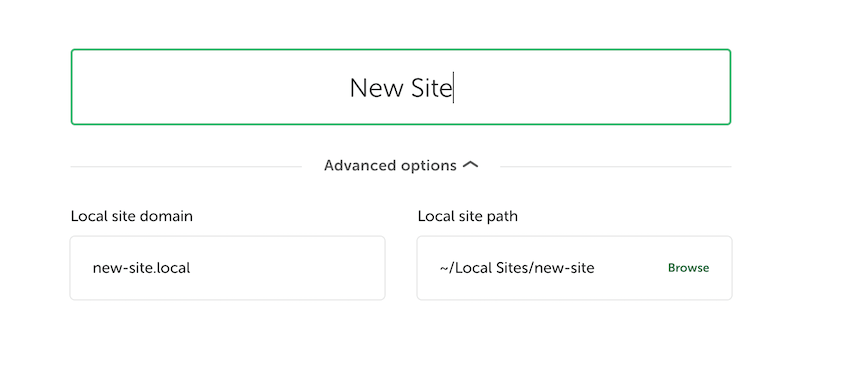
Enter a name for your site. This will also be for the local domain (e.g., mysite.local). However, you can customize the domain and local site path in the Advanced options.
Now it’s time to select your environment preferences. For beginners, choose the Preferred option. LocalWP will set up your site with an optimal PHP version, web server, and MySQL version.
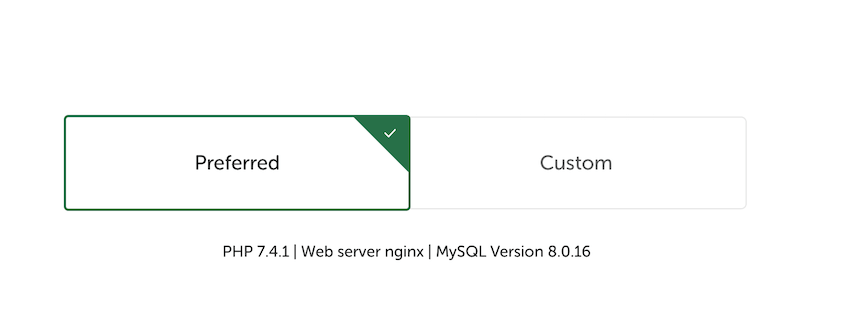
Feel free to set up a custom environment if you’d like. This gives you more flexibility to choose:
- PHP version
- Web server (Nginx or Apache)
- MySQL database version
After this, click on Continue.
Step 3: Set Up WordPress
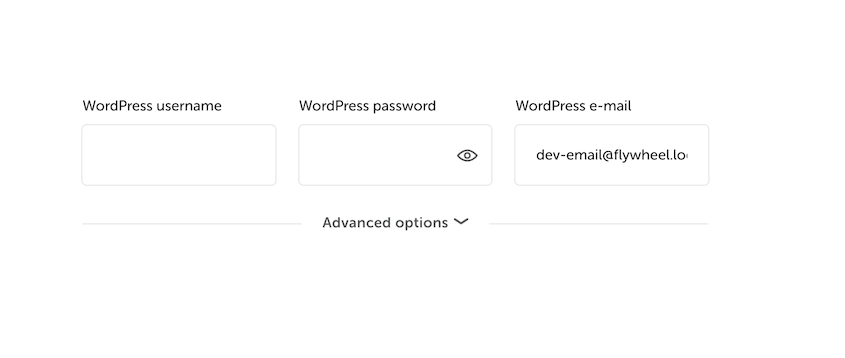
Next, you’ll reach the main setup page. Enter the username, password, and email address you want to use to log into your local wp-admin dashboard.
Normally, creating a WordPress multisite network is a fairly complicated process. With LocalWP, it’s easy.
All you’ll need to do is open the Advanced options and choose a subdirectory or subdomain setup.
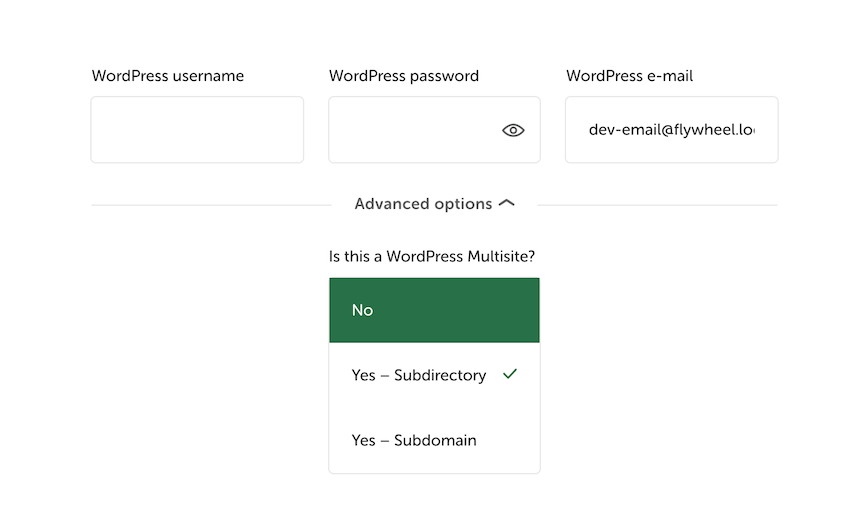
Click the Add Site button, and Local will create your local WordPress site within minutes!
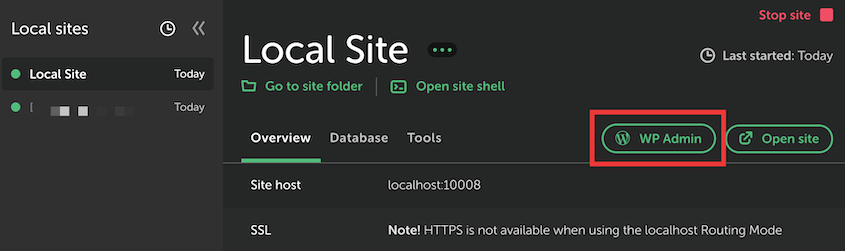
You can access your new site’s WordPress admin panel by hitting WP Admin.
(Optional) Step 4: Migrate Your Live Site to LocalWP
Already have a WordPress website hosted elsewhere? You can easily move it to Local for redesigns or other updates you don’t want to test on your live site.
This is where Duplicator, my favorite WordPress migration plugin, comes in. Duplicator bundles your entire site into a single backup and can move it anywhere that supports WordPress, even a local environment.
On your live WordPress site, install and activate Duplicator.
The free version works for this (I’ll show you how below). I’d still recommend a paid plan for drag-and-drop imports and the 10+ cloud storage destinations. The free version connects to Duplicator Cloud, and paid plans add Google Drive, Dropbox, and more.
Next, find Backups » Add New.
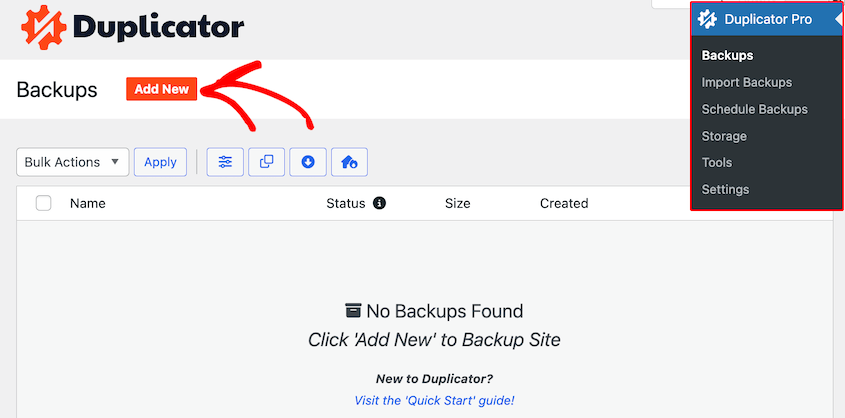
To migrate all of your data over to the local site, select Full Site in the Backups section.
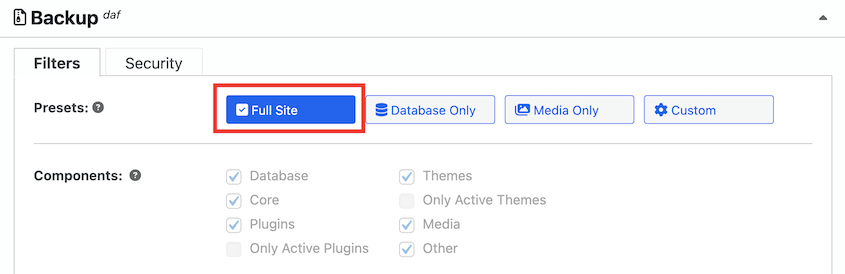
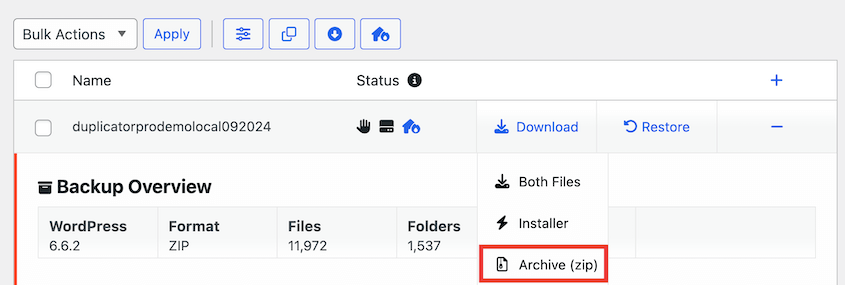
Continue creating the backup. Once it’s done, download the backup archive file.
Open your new LocalWP site and install Duplicator here, too. Find the Import Backups page and drop your backup file into it.
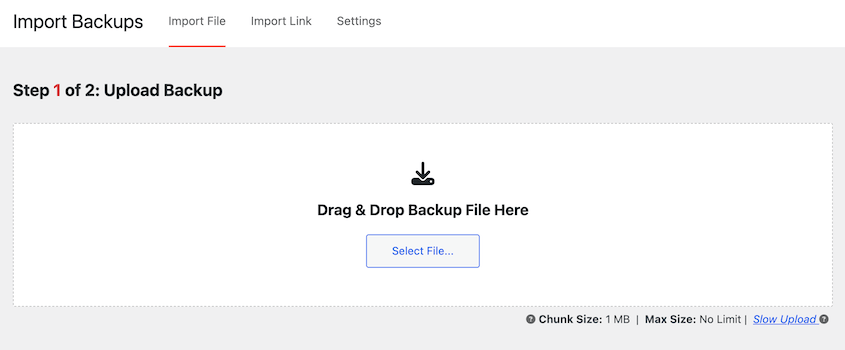
Duplicator will replace the blank local site with a copy of your live site. You can then make changes knowing how they’ll affect your real data.
Using the free version? The Import Backups page is part of the paid plans, but Duplicator Lite gets you to the same place with its installer:
- On your live site, go to Duplicator » Backups, click Add New, and create a full backup.
- Download both files: the archive and the installer (installer.php).
- In Local, click Go to site folder and open app » public. Copy both files in there.
- Make sure the local site is running, then visit yoursite.local/installer.php in your browser (use your own local domain).
- The installer detects the blank local site and fills in its database details for you. Continue through the steps, then log in.
This permanently replaces the blank local site, which is exactly what you want here. Just don’t run it over a site you still need.
Using Blueprints to Save and Reuse Site Templates
If you find yourself installing the same plugins, theme, and settings every time you start a new project, Blueprints save you from repeating that setup.
A Blueprint is a saved snapshot of one of your local sites, including its plugins, theme, and content. Once you’ve built a site the way you like it, turn it into a Blueprint and use it as the starting point for future projects instead of a blank WordPress install.
Make sure the site is running, then right-click its name in the sidebar (or click the ⋮ menu icon next to it) and select Save as Blueprint.
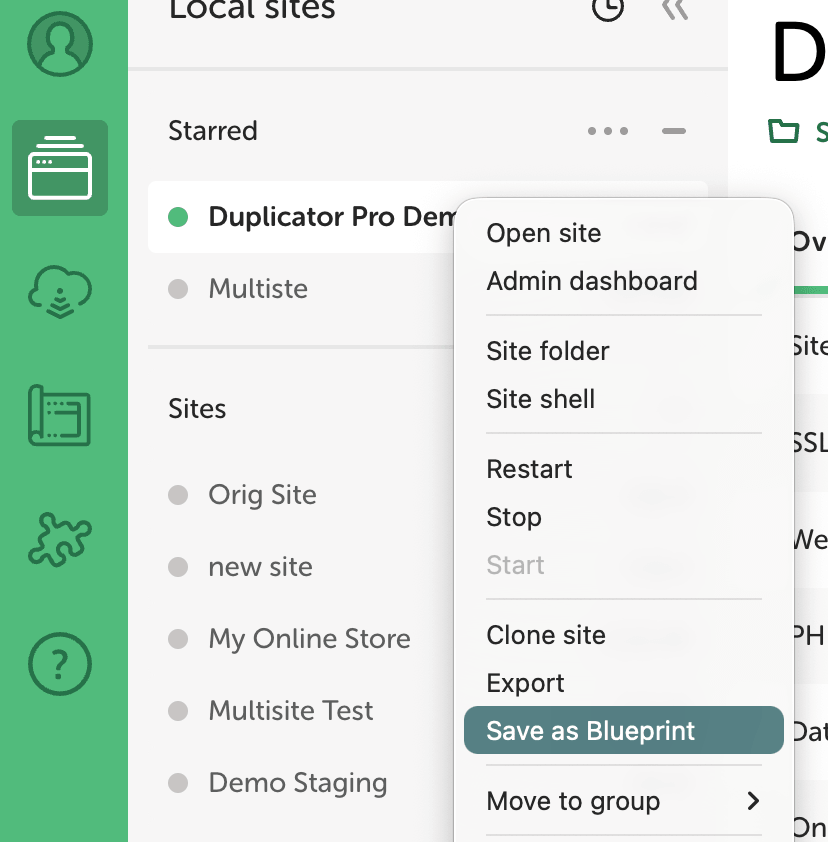
Give it a name, and optionally exclude any file types you don’t want included. Once you hit Save Blueprint, it’s ready to use.
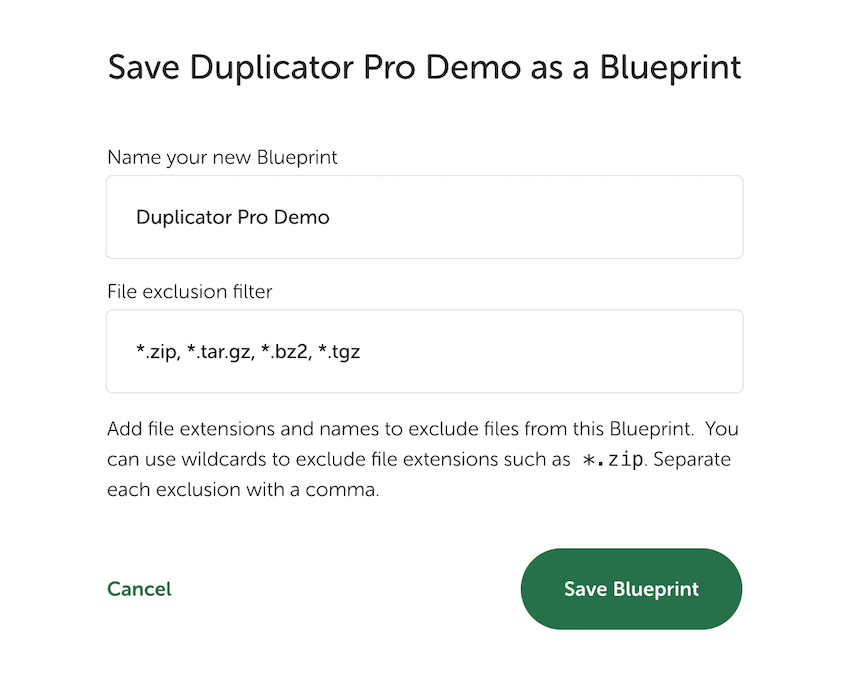
Keep in mind you can’t edit a Blueprint after saving it. If your template needs to change, save a new Blueprint from an updated site instead.
How to Migrate Your Changes to Your Live Site
Finished making changes to your WordPress site locally? It’s time to move them to your live server.
Duplicator Pro allows you to push your local WordPress website to a live server with just a few clicks. Simply create a full backup of your local site and download it.
Then, open your live site and drop the local backup into the Import Backups page. That’s it!
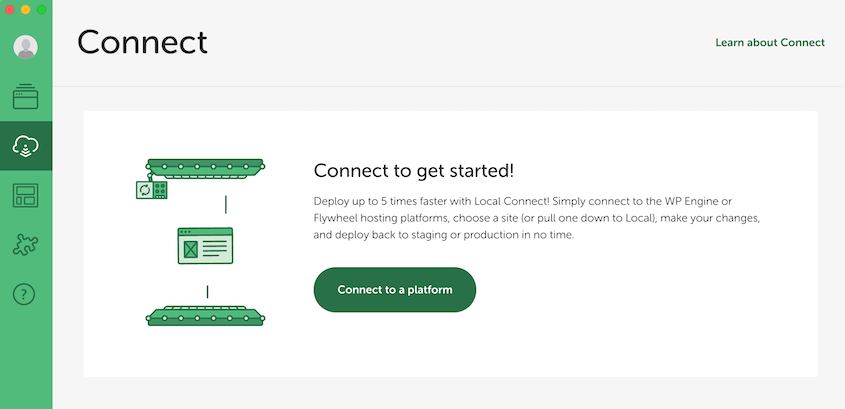
If your live site is hosted on WP Engine or Flywheel, you can use the Connect feature. LocalWP will directly connect to the live site, deploying your changes quickly.
How to Locate LocalWP Files and Database
LocalWP has many code-free methods to create and manage a local WordPress site. But what if you want to make a quick edit to a theme file or inspect your database?
To open your site’s files, find your site on LocalWP. Underneath your site’s title, click on Go to site folder.
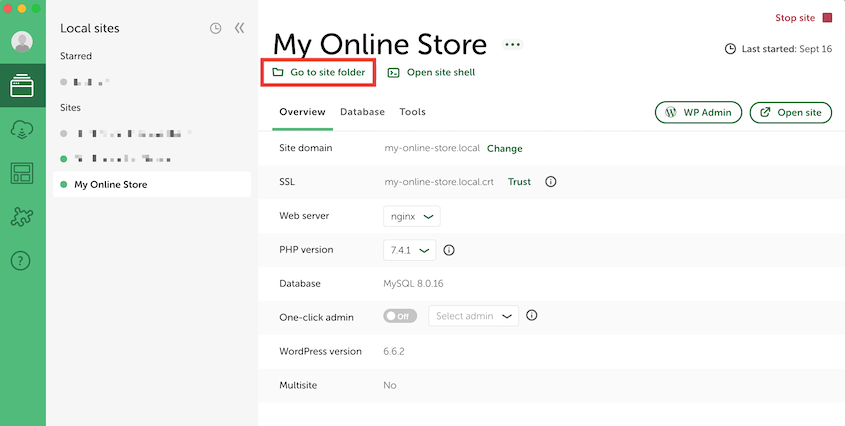
Within your site’s folder, go to app » public. Here, you’ll find the familiar WordPress file structure.
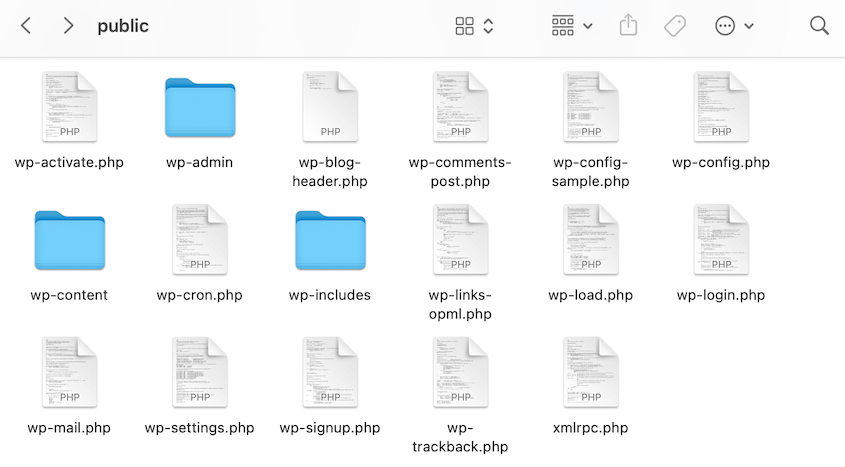
By double-clicking on a file, it’ll open in your default text editor.
Editing your database is a similar process. Reopen LocalWP and find the Database tab. Click on Open Adminer.
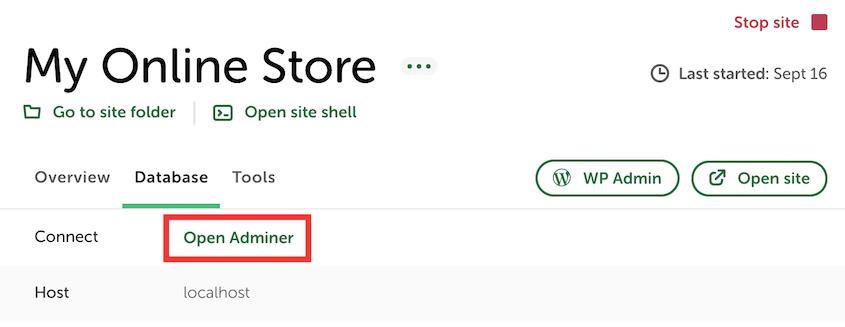
Then, you can use this database manager in a browser window.
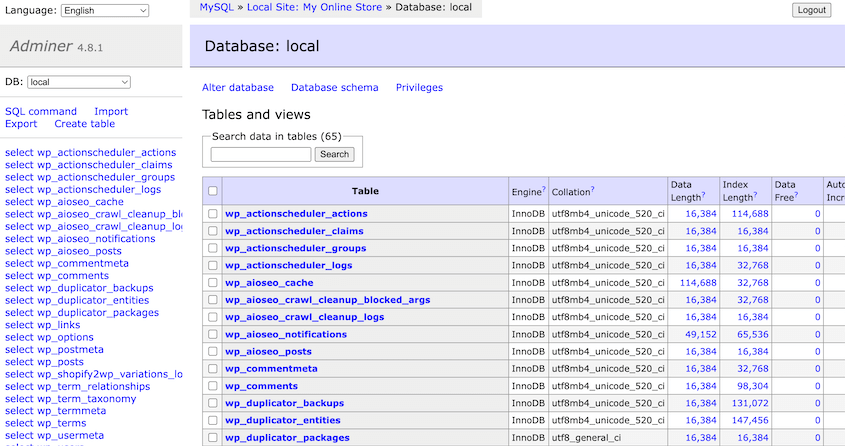
Local by Flywheel takes the mystery out of working with your site files and database, giving you the control you need while keeping everything organized.
The Easier Alternative: One-Click Staging with Duplicator
LocalWP is great, but it does mean installing an app, managing a local environment, and syncing changes back and forth. If you just want a safe place to test something quickly, there’s a simpler option.
Duplicator can turn a full-site backup into a staging site. The copy lives in a subfolder of your live site (like yoursite.com/staging/) with its own database tables, so there’s no separate hosting account to set up and no files to move by hand.
Start by creating a full-site backup.
Go to Staging and create a new staging site from that backup. Pick a unique admin color palette so you’re never confused about which environment you’re editing.
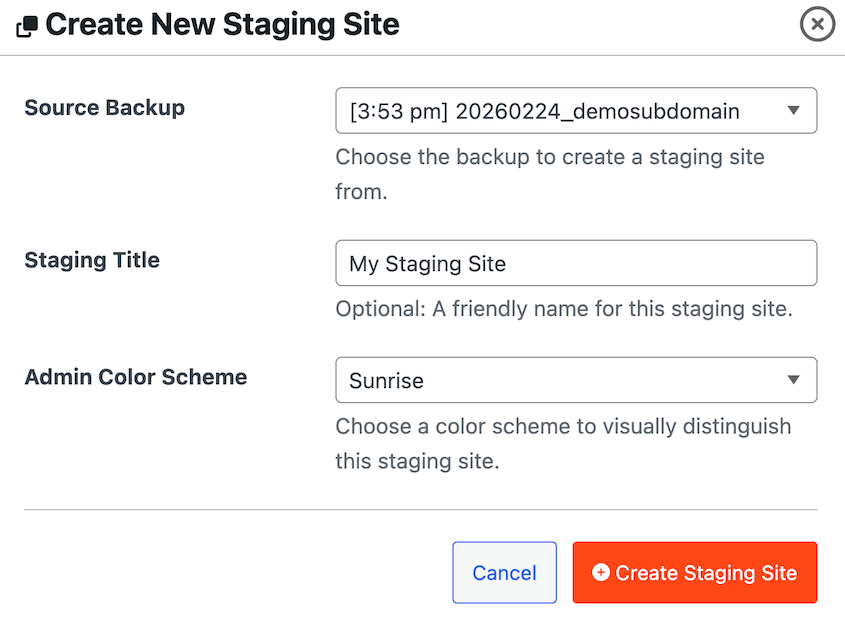
Duplicator builds a staging area that’s an exact copy of your live site. It blocks outgoing email and hides the copy from search engines, so your tests won’t reach customers or Google.
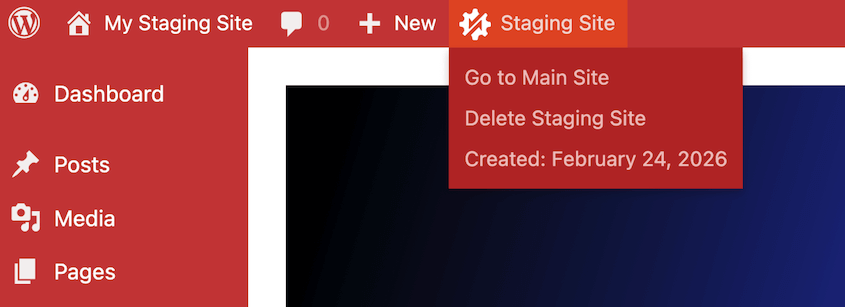
Once a change checks out on staging, make it on your live site with confidence. (Staging is for testing. It doesn’t sync changes back to your live site.)
Frequently Asked Questions (FAQs)
How do I deploy my WordPress site to a local server?
If you want to install WordPress locally, first create a local WordPress site using tools like LocalWP, MAMP, WAMP, or XAMPP. Then, create a backup of your live site with Duplicator Pro. Import it into your local site to replace the default configuration.
How do I import a site into Local by Flywheel?
Install Duplicator Pro on both your live and local sites. Create a full backup of your live site and download it. Then, import it into your local environment using Duplicator’s Import Backups page. On the free version, copy the backup’s archive and installer.php into your Local site’s app » public folder instead, then run the installer from your browser.
How much does Local by Flywheel cost?
Local by Flywheel is completely free to use.
Does LocalWP work offline?
Yes, for everyday building. Once Local is installed, your sites run on your own computer, so you can work on them without an internet connection. Features that go through Local’s web account need a connection: Live Links, the Backups add-on, and Connect for WP Engine and Flywheel.
Can LocalWP be installed on Linux?
Yes. Local comes as a .deb package for Debian-based distributions like Ubuntu and an .rpm package for Fedora, Red Hat, and CentOS. The Local team tests the .deb version on Ubuntu and Pop!_OS.
Is LocalWP better than XAMPP?
LocalWP is better than XAMPP for beginner WordPress development because it provides a dedicated WordPress environment with one-click site creation, SSL support, and built-in development tools. XAMPP is better for developers who need a general-purpose local server for multiple PHP applications, databases, and custom web projects. The better choice depends on whether you prioritize WordPress-specific features or broader development flexibility.
Set Up, Test, and Ship
Installing WordPress on Local opens up a world of possibilities for efficient website development and testing. You’re ready to work offline, experiment freely, and perfect your site before it goes live.
From here, the best next move is to put your local environment to work the way it’s meant to be used. Test plugin updates before they touch production, build out a redesign without disrupting visitors, or experiment with new features until they’re exactly right.
Because spinning up a fresh local site takes minutes, there’s no reason to ever test anything risky directly on a live server again.
When you’re ready to ship, Duplicator Pro makes the push back to your live site just as smooth as the import. Create a full backup of your local site, drop it into your live server’s Import page, and your tested changes are live. No FTP fumbling, no manual database exports, no wondering if you missed a file.
Do you want to move your site to a local testing environment without any data loss? Download Duplicator Pro for easy and safe drag-and-drop migrations!
While you’re here, I think you’ll like these extra WordPress guides:
- How to Move a WordPress Site Between Localhost and Live
- 10 Best Local Development Environments (Expert Pick)
- 7 Best Free WordPress Migration Plugins (Tested in 2026)
- How to Remotely Back Up and Restore WordPress
- 10 WordPress Staging Best Practices That Prevent Live Site Disasters
- How to Back Up Your Website’s Staging Site Before Every Push