Have you ever tried to upload a video or a feature-packed theme to your WordPress website, only to be stopped in your tracks by an error message?
It’s frustrating, isn’t it? You’re all set to add new features to your site, but WordPress seems to have other plans.
Many WordPress users have to deal with file upload limits, and today, we’re going to tackle this problem head-on. I’ll show you how to increase the maximum file upload size in WordPress.
Let’s get started!
Table of Contents
What Is the Maximum File Upload Size in WordPress?
WordPress itself doesn’t set a maximum file upload size. It could be from 2MB to 150MB. This size is set by your server configuration, specifically the PHP settings.
Each hosting provider has a different default WordPress upload size. Some offer generous limits, while others can be quite restrictive. It’s not uncommon to find yourself limited to just 2MB.
High-resolution images, feature-rich plugins, and larger themes often exceed this size limit in WordPress. This restriction can prevent you from uploading large files and tools that could enhance your website.
When to Increase Your Max File Upload Size
Here are some common scenarios where you might need to bump up that maximum file upload limit:
If you’ve ever seen the “exceeds the maximum upload size for this site” error, it’s a clear sign you need a higher limit.
Modern WordPress themes and plugins are often packed with features, resulting in larger file sizes. If you can’t install that perfect theme you’ve been eyeing, it might be time for an increase.
Today’s websites thrive on visual content. If you work with high-resolution images or videos, you’ll likely need a higher upload limit size to showcase your best work.
Moving your site to a new host? A higher upload limit can make the process smoother, especially if you have a large database or a lot of files.
If you’re running an online course or membership site, you may need to upload large PDF files, video lessons, or audio content. You’ll likely need a higher WordPress maximum upload size.
Photographers, designers, and other creatives often need to upload high-resolution files to display their work effectively.
How to Check Your Site’s File Upload Size
Before you start increasing your upload limit, it’s important to know where you’re starting from. Let’s walk through how to quickly check your maximum file upload size.
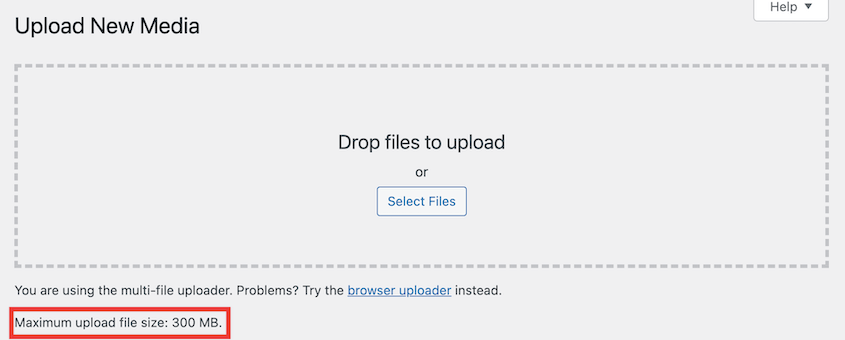
WordPress displays your max file upload size as you’re adding new files to your media library. Go to Media » Add New Media File and look at the bottom of the page. You’ll see a message that says Maximum upload file size: X MB.
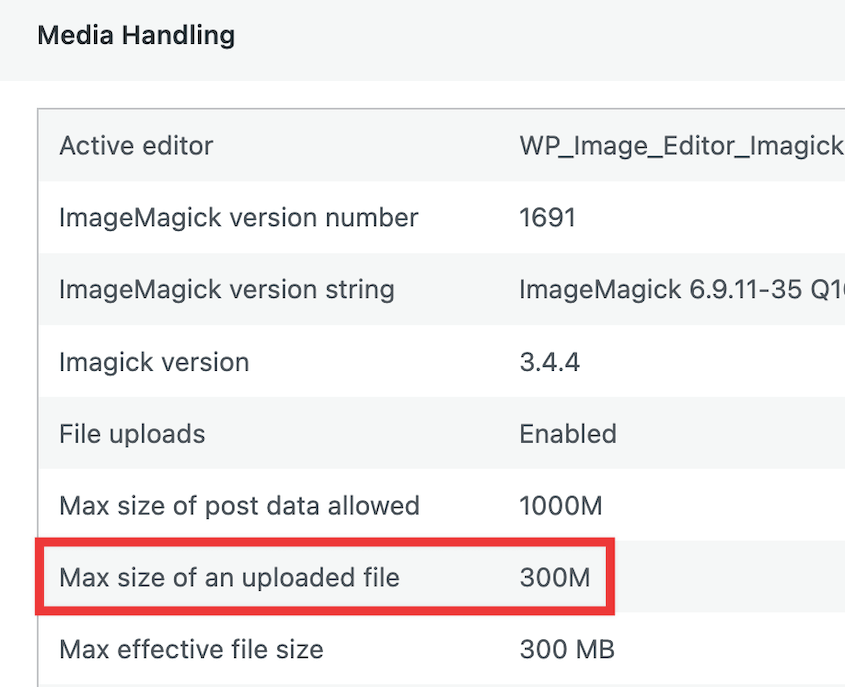
You can also go to Tools » Site Health » Info and find the Media Handling section.
Knowing your current maximum upload size helps you understand how much you need to increase it. If you’re consistently hitting the limit, you might want to consider doubling or even tripling your current size.
How to Increase Maximum File Upload Size in WordPress
Now that you know your current limit, let’s explore several methods to increase upload size limits.
Method 1: Use Duplicator to Migrate Data
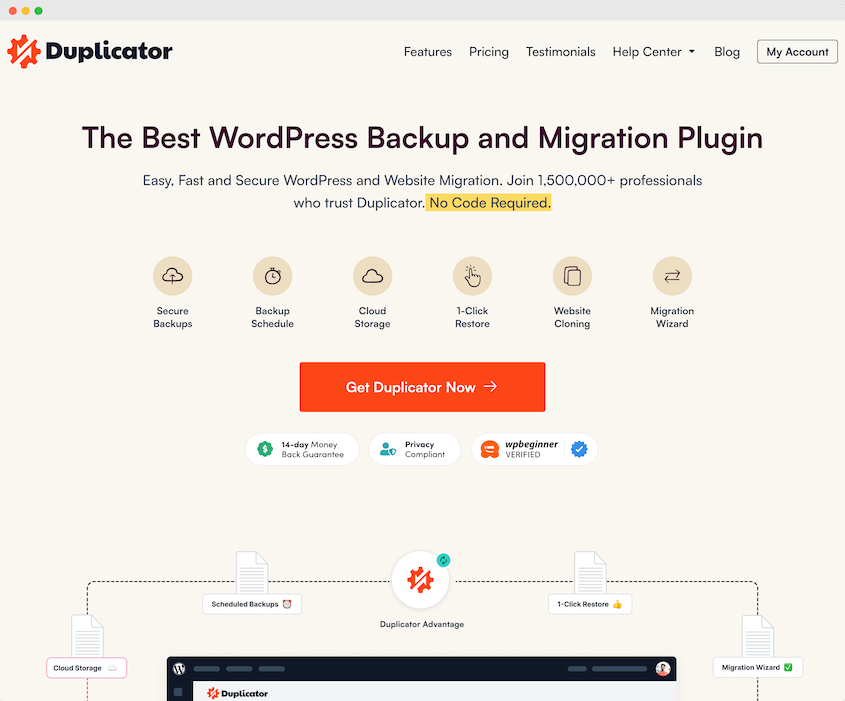
Duplicator is a powerful tool designed to make WordPress migrations smoother, especially when dealing with large files. If you’re having problems migrating your site because of file upload size limits, Duplicator can help.
With Duplicator, you can use a custom file format called DupArchive. This handles large files even on servers with low PHP limits.
Whether you have a large database or a lot of media files, Duplicator can back up your site. Then, it’ll smoothly import it into the new location without errors.
To get started, install and activate Duplicator on your website.
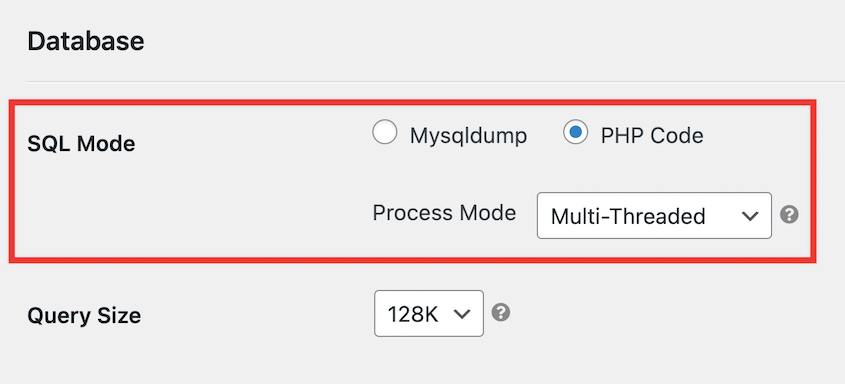
Find Duplicator Pro » Settings » Backups. Go to the Database section and change the SQL Mode to PHP Code and Multi-Threaded.
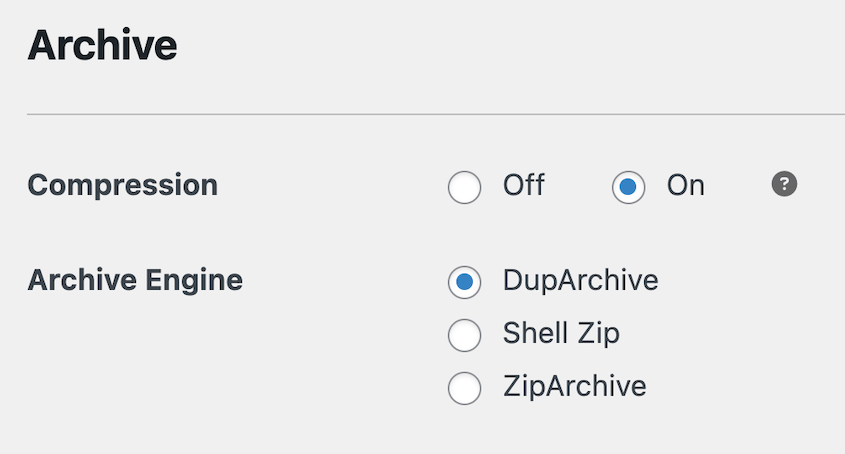
In the Archive settings, set the Archive Engine to DupArchive. Save these changes.
Next, create a new backup of your site. Include all of your data.
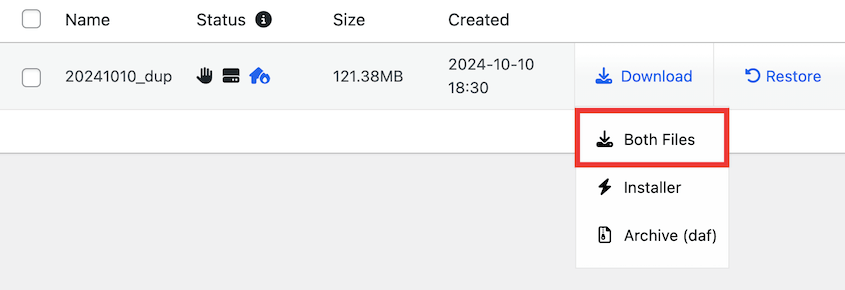
Once the backup is built, download both files.
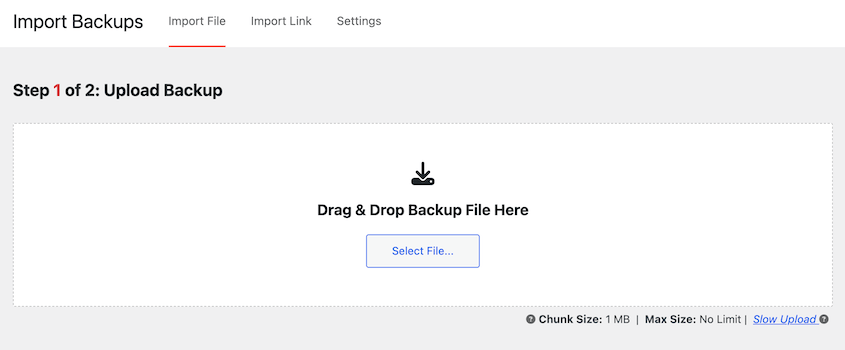
To migrate your site to another location, you can install Duplicator Pro and open the Import Backups page. Drag and drop your backup archive file into the import box.
If you don’t want to install WordPress first, you can also upload the backup files to your new server. Navigate to the installer.php file in your browser with this link: https://your-domain/installer.php
Either way, Duplicator will sidestep the upload size issue and transfer your data to the new host!
While Duplicator is great for migrations, you might still want to increase your upload limit for day-to-day operations. One easy method to increase file upload limits is to contact your web hosting provider.
For beginners, this is the easiest and most recommended method to increase the upload limit of your site. Most hosting providers understand the need for larger file uploads and are often willing to increase your limit upon request.
Reach out to your host’s support team. You can usually do this via live chat (often the quickest option), support ticket, or phone call.
Explain that you need to increase max upload size. Specify the new limit you’re looking for.
You should ask if there are any potential downsides or additional costs involved. However, many hosts will make this change for you quickly and at no extra cost.
This is a simple solution that doesn’t require any technical knowledge!
Method 3: Create/Edit Your php.ini File
If you’re comfortable working with server files, you can increase the max upload limit by editing your php.ini file. If your web host provides cPanel access, this is an easy process.
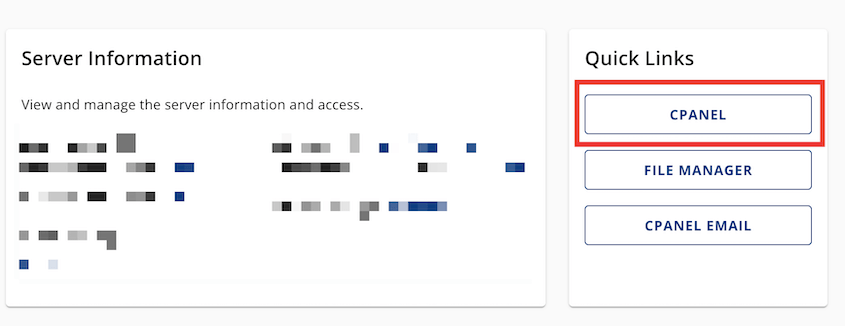
For this tutorial, we’ll be using Bluehost. Sign into your control panel and open cPanel.
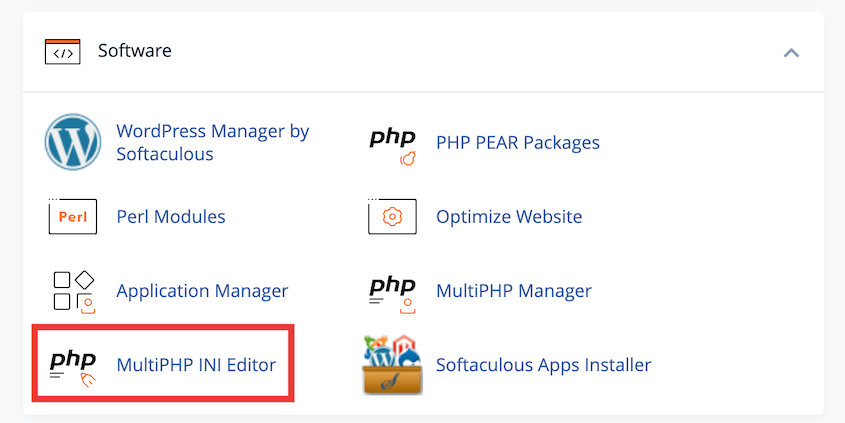
In the Software section, click on MultiPHP INI Editor.
Find the upload_max_filesize setting. Change the value and hit Apply.
If you don’t have cPanel, connect to your server via FTP or use your host’s file manager.
Look for a file named php.ini in your root directory. If it doesn’t exist, create one.
Add or modify the following lines in the file:
upload_max_filesize = 256M

post_max_size = 256M

max_execution_time = 300
Remember, the values above are just examples. Adjust them based on your needs and server capabilities.
Save the file and upload it back to your server if you’re using FTP. Restart your web server for the changes to take effect.
Method 4: Add Code to the functions.php File
If you can’t find or edit the php.ini file, you can try adjusting the upload size limit through your theme’s functions.php file.
Although you could do this manually, you might accidentally break your theme. WPCode offers a safe way to add custom code snippets to your site, and I’d highly recommend using it.
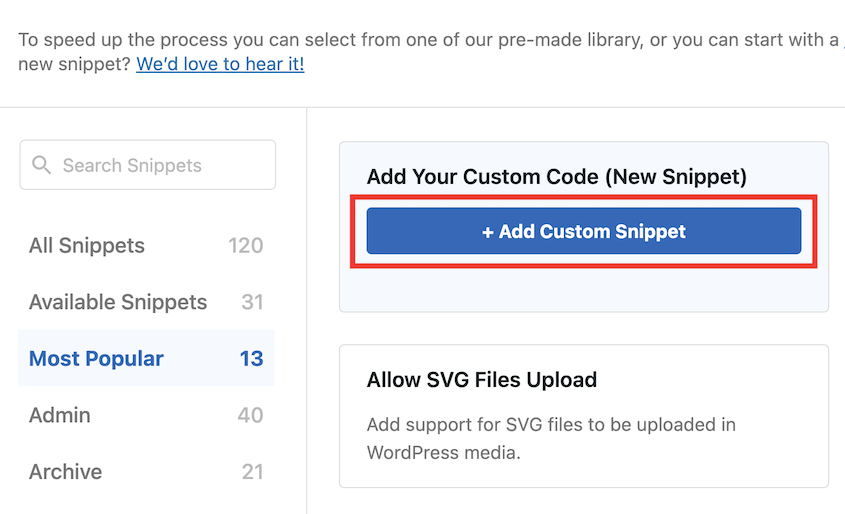
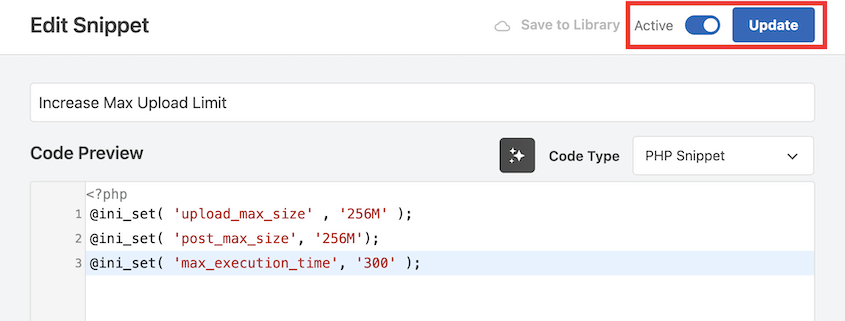
Install WPCode and add a new custom code snippet.
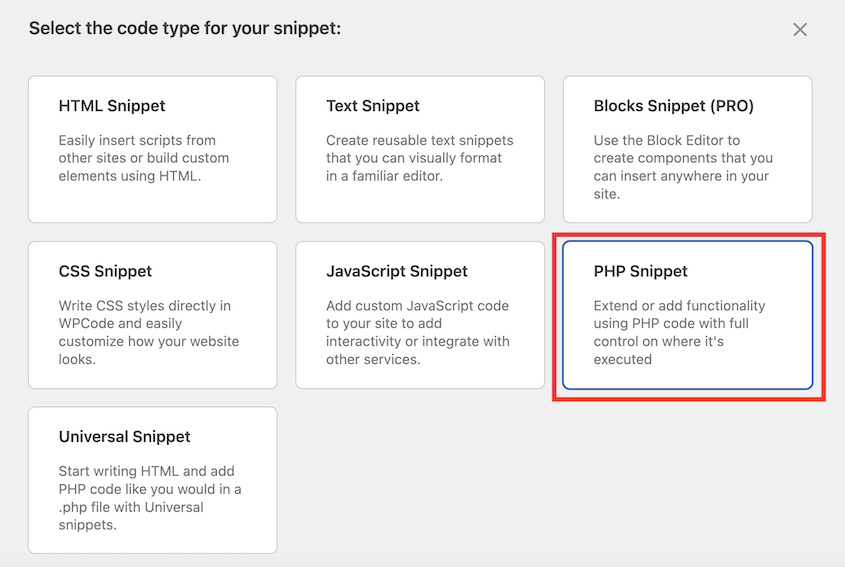
Choose PHP Snippet as the code type.
In the editor, add this code:
@ini_set( 'upload_max_size' , '256M' );

@ini_set( 'post_max_size', '256M');

@ini_set( 'max_execution_time', '300' );
Save and activate the code snippet.
That’s it!
Method 5: Add Code to the .htaccess File
Another way to increase upload file size is by modifying the .htaccess file.
To do this, connect to your website via FTP. Locate the .htaccess file in your WordPress root directory.
Add the following lines to the file:
php_value upload_max_filesize 256M

php_value post_max_size 256M

php_value max_execution_time 300

php_value max_input_time 300
Save the file and upload it back to your server.
Be cautious when editing the .htaccess file, as incorrect modifications can cause your site to malfunction. Always create a backup before making changes.
Method 6. Use a Plugin to Increase WordPress File Upload Size
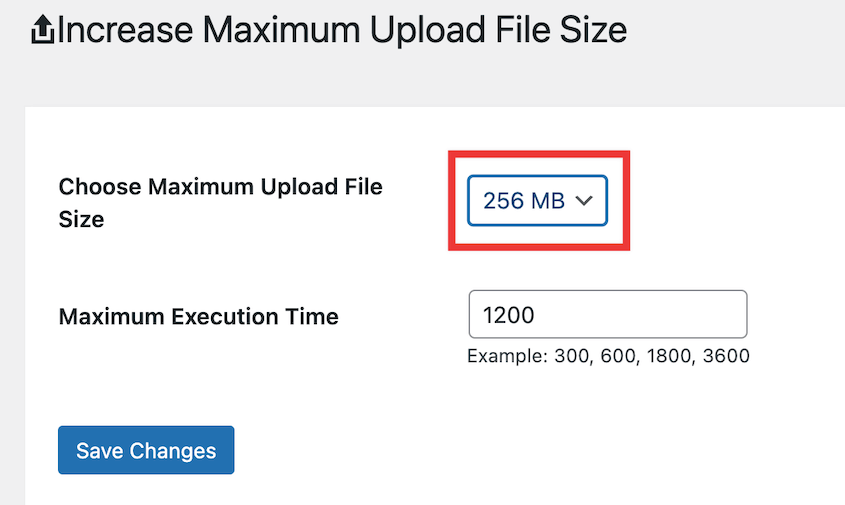
If you’re not comfortable editing files directly, you can use a WordPress plugin to increase your upload limit. Increase Maximum Upload File Size is a good option.
After activating the plugin, find Media » Increase Upload Limit. Select a higher max upload size and save the changes.
The plugin will only give you the highest file upload size allowed by your web host. If you need more, contact your hosting provider.
Method 7: Increase File Upload Size in Multisite
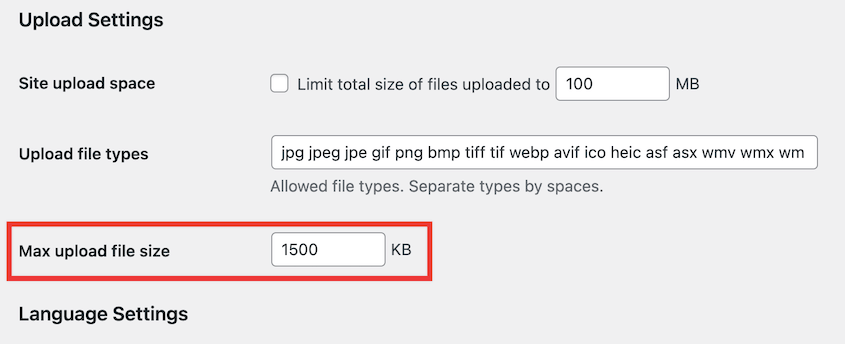
If you’re running a WordPress Multisite network, you can directly increase file upload size in your dashboard.
Sign in to the Network Admin dashboard. Click on Settings » Network Settings. In the Upload Settings, change the Max upload file size value.
If you set this higher than your server allows, your server will ignore it. So, you might also need to contact your hosting provider to increase the limit for your Multisite network.
Frequently Asked Questions (FAQs)
How do I increase the upload size in All-in-One WP Migration?
The free version of All-in-One WP Migration has a file upload limit of 300MB. If you want to increase this value, you’ll need to purchase an extension for $69.
If you want to avoid timeouts and file upload limit errors, consider using Duplicator instead. This migration plugin has a custom file format (DupArchive) that’s built to handle large file transfers.
How do I increase maximum file upload size in cPanel?
In cPanel, open the MultiPHP INI Editor. Look for upload_max_filesize and increase this value as needed. Save your changes.
Conclusion
Whether you’re working with large media files or complex themes, having a higher file upload size allows you to enhance your site without constraints!
While you’re here, I think you’ll like these extra WordPress guides:
If you’re dealing with site migrations or large backups, don’t forget about Duplicator! It’s invaluable for handling large files, especially when dealing with execution time constraints.
Joella is a writer with years of experience in WordPress. At Duplicator, she specializes in site maintenance — from basic backups to large-scale migrations. Her ultimate goal is to make sure your WordPress website is safe and ready for growth.


