
How to Prevent Brute Force Attacks in WordPress (9 Layers of Protection)
 Joella Dunn
Joella Dunn
Joella Dunn
 John Turner
John Turner
John Turner
If your WordPress site is live, it’s probably being attacked right now.
Automated bots scan the internet continuously, testing /wp-login.php on every WordPress site they find. They try “admin” logins first, then a list of the most common passwords.
A site with no protection gets hit by hundreds of these attempts every day, silently, with no visible sign.
What’s worse: failed attacks aren’t free. Every login attempt spins up a PHP process on your server.
Enough simultaneous attempts and your hosting plan hits its limits.
Real visitors start seeing slow load times or error pages. Some hosts throttle your account automatically. This happens even when no attackers get in.
A successful attack is a different problem. Full admin access means content changes, malware injected into your theme files, backdoor accounts created, SEO spam embedded in your posts, or customer data exposed.
Recovery from a successful breach takes hours at best; days if you don’t have a clean backup.
In this post, I’ll give you the best ways to defend your site from brute force attacks.
Here are the key takeaways:
- Even failed brute force attacks hurt your site. They exhaust PHP workers, slow load times, and can trigger hosting throttling before a single password is guessed correctly
- Credential stuffing is not the same as brute force. Attackers use real leaked passwords from other breaches, which means a strong password alone isn’t enough if your users reuse credentials
- WordPress has no built-in brute force protection. Login throttling, 2FA, and WAF functionality all require a plugin or server configuration
- Two-factor authentication is the highest-return step on this list. It stops both brute force and credential stuffing even when a password is correct
- XML-RPC’s system.multicall method bypasses most login-page defenses. Disabling it closes a separate attack surface that rate-limiting plugins don’t cover
- Changing your login URL reduces attack volume but isn’t a primary defense. Treat it as friction, not protection
- A backup you’ve never restored is a backup you don’t actually have. Test your restore process quarterly before you need it under pressure
- More security plugins don’t mean more security. One well-configured plugin beats four partially-configured ones, which can create conflicts and overhead
Table of Contents
- What Is a Brute Force Attack?
- How to Prevent Brute Force Attacks in WordPress
- Layer 1: Start with Your Credentials
- Layer 2: Limit Login Attempts
- Layer 3: Change the Default Login URL
- Layer 4: Add CAPTCHA to the Login Form
- Layer 5: Disable or Restrict XML-RPC
- Layer 6: Use a Web Application Firewall
- Layer 7: Server-Level Hardening
- Layer 8: Keep WordPress, Plugins, and Themes Updated
- Layer 9: Back Up Your Site and Know How to Restore It
- Layer 1: Start with Your Credentials
- How to Monitor for Brute Force Activity
- What Doesn't Work (and Why People Still Recommend It)
- Frequently Asked Questions (FAQs)
- Before the Next Attack, Make Sure You Can Recover From It
What Is a Brute Force Attack?
Most people picture a brute force attack as a bot cycling through random passwords until one works. That happens, but it’s not the only version of this attack, and it’s not even the most common one anymore.
Classic Brute Force vs. Credential Stuffing
Classic brute force is when automated software tries every possible combination of characters until it finds a password that works.
Against a long, random password, this is impractical. A 16-character random password would take longer to brute force than the sun has left to burn.
Credential stuffing is different, and more dangerous.
Attackers buy or download leaked databases from other data breaches: email addresses paired with passwords from compromised services. Then they test those pairs on WordPress sites.
If one of your users signed up with the same email and password they use everywhere else, credential stuffing could gain access to them and log in on the first attempt.
That’s why “I have a strong password” doesn’t fully protect your users. Your password might be strong. Theirs might not be.
Dictionary attacks sit between the two. Instead of every possible combination, they test a curated list of common passwords, known patterns, and variations on real words. Faster than true brute force, more targeted than random guessing.
The XML-RPC Multiplier
WordPress includes a file called xmlrpc.php, originally built for remote publishing and API integrations. It accepts a method called system.multicall that lets one HTTP request test thousands of username/password combinations in a single call.
This matters because most login throttle plugins watch /wp-login.php. A bot using xmlrpc.php bypasses that protection entirely. Rate limiting your login page while leaving XML-RPC open is like locking your front door and leaving the window unlocked.
If you’re not using XML-RPC, closing it is one of the highest-return steps on this list. Layer 5 covers exactly how.
What Even a Failed Attack Costs You
A brute force attack that never guesses a single correct password still costs you something real.
Each login attempt is an HTTP request. Each request spins up a PHP process. On shared hosting, your plan comes with a finite number of concurrent PHP workers.
A high-volume attack fills those workers with login attempts instead of serving your actual visitors. The result is slow load times, timeouts, and in severe cases, a temporary hosting suspension you didn’t see coming.
It also buries legitimate security events in log noise. If an attacker does eventually get in, the failed attempt logs that would have flagged unusual activity are already full of thousands of entries. You’re looking for a needle in a haystack.
Plugin-level protections reduce the damage. Server-level and edge-level protections eliminate it. That’s the core reason this guide is structured as layers rather than a list.
How to Prevent Brute Force Attacks in WordPress
There’s no single setting that makes your site immune. What works is layers: each one catches what the previous one misses.
Your credentials stop most automated bots. Rate-limiting stops the ones that get through. A WAF stops the volume before it hits your server. Backups cover the scenario where everything else fails.
The layers below are ordered by impact and ease of implementation. Start at the top. Go as far as your hosting setup allows. Even the first three layers dramatically reduce your exposure.
Here’s what to do:
- Layer 1: Credentials: change the default admin username, use unique passwords across every account, and enable two-factor authentication for all administrators
- Layer 2: Limit login attempts: throttle failed login attempts via a plugin or, for stronger protection, via Cloudflare or server-level rate limiting
- Layer 3: Change the default login URL: moves the address most bots target, reducing automated attack volume on your login form
- Layer 4: Add CAPTCHA: filters automated bot submissions on the login form; most effective when combined with rate limiting rather than used alone
- Layer 5: Disable or restrict XML-RPC: closes a separate attack surface that lets attackers test thousands of passwords in a single HTTP request, bypassing login-page defenses
- Layer 6: Web Application Firewall: blocks malicious traffic and known bad IPs before they reach your login page; edge-level WAFs like Cloudflare prevent resource exhaustion during high-volume attacks
- Layer 7: Server-level hardening: restrict wp-login.php by IP, implement Fail2ban, and use SFTP with SSH key authentication; for VPS and dedicated server owners
- Layer 8: Keep everything updated: patches the vulnerabilities attackers exploit to establish a foothold before brute-forcing their way deeper
- Layer 9: Back up your site: the final defense layer; a tested offsite backup with a working restore path is the only guarantee that a successful attack doesn’t end your site
Layer 1: Start with Your Credentials
Every automated brute force tool starts with the username “admin” and the most common passwords. Removing both from your site takes maybe five minutes and eliminates the majority of automated attack attempts immediately.
It’s not a complete defense, but it’s the fastest return on time you’ll find anywhere in this guide.
Use a Non-Default Admin Username
When WordPress was first installed on your site, it suggested “admin” as the default username. A lot of sites never change it. Attackers know this, and every brute force tool starts there.
Using a different username forces an attacker to guess two unknowns instead of one. That’s not a dramatic improvement against a sophisticated targeted attack, but it wipes out the vast majority of automated bots that never get past the “admin” guess.
To check your current username, go to Users » Profile in wp-admin. The username field is in the Name settings.
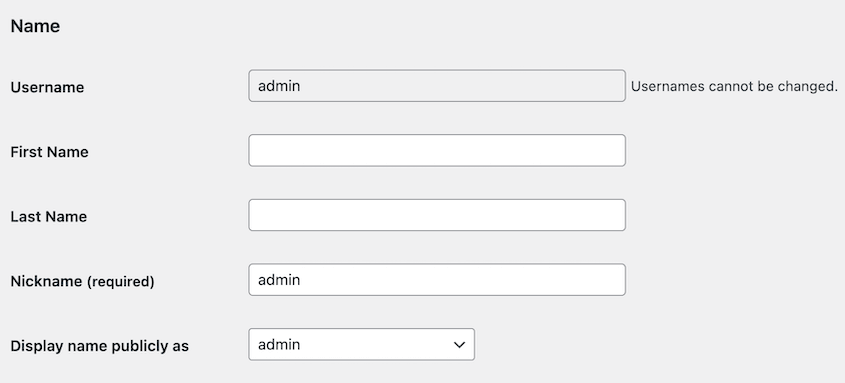
WordPress doesn’t let you change your username directly, but you can create a new administrator account with a different username, transfer ownership of your content, and delete the old “admin” account.
WP-CLI users can do this in one command:
wp user update 1 --user_login=yournameUse Strong, Unique Passwords for Every Account
Every administrator account on your site needs its own unique password.
Credential stuffing works by testing known username/password pairs from other breaches. If a user reused their email password across sites and that password leaked somewhere else, credential stuffing could log in on the first try.
WordPress includes a built-in password strength meter that flags weak passwords on the profile screen. That stops the worst choices, but it doesn’t enforce a minimum length or prevent reuse.
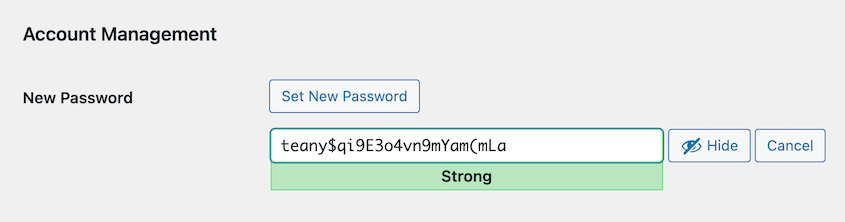
For more control, Password Policy Manager lets you set site-wide password requirements and force resets for accounts that don’t meet them.
Enable Two-Factor Authentication
With 2FA enabled, a correct password isn’t enough to log in. The attacker also needs a time-sensitive code from a physical device they don’t have.
That stops classic brute force, credential stuffing, and dictionary attacks. Even if an attacker has your exact password from a data breach, they can’t log in without the second factor.
WordPress core doesn’t include 2FA. You need a plugin.
WP 2FA is free, actively maintained, and straightforward to configure. It supports authenticator apps like Google Authenticator, Authy, and 1Password.
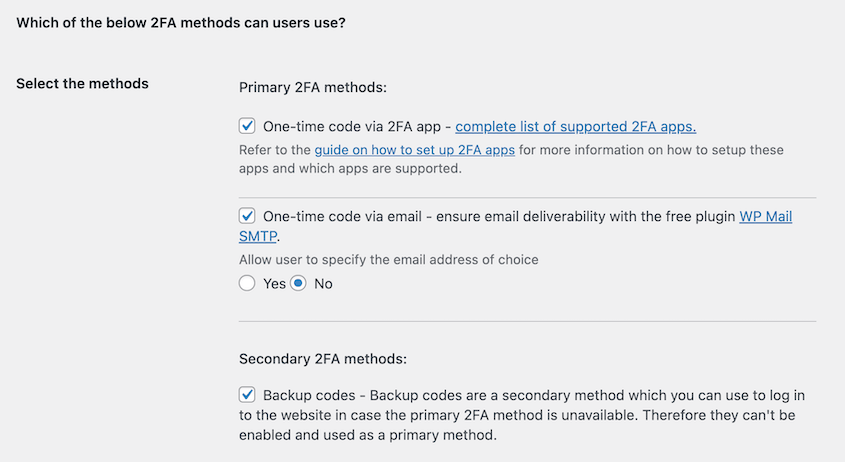
miniOrange 2FA and the Two Factor plugin are other widely used options with additional configuration flexibility.
Passkeys are the newer alternative. They use the WebAuthn standard and are phishing-resistant by design: there’s no code to intercept, SMS to sim-swap, or authenticator app to compromise. Plugin support is still maturing, but if your setup supports it, passkeys are worth considering.
Apply 2FA to every administrator account on the site. Not just yours. One unprotected admin account is all an attacker needs.
Layer 2: Limit Login Attempts
By default, WordPress allows unlimited login attempts. A bot can try ten thousand passwords in the time it takes you to make coffee.
Rate-limiting cuts that off after a handful of tries, locking out the offending IP before it gets anywhere near a correct credential.
Plugin-Based Login Throttling
Login throttle plugins work by tracking failed attempts per IP address. After a set number of failures, the plugin blocks that IP for a defined period. The attacker’s bot moves on.
Limit Login Attempts Reloaded is the most widely used free option, with a straightforward configuration screen and no bloat.
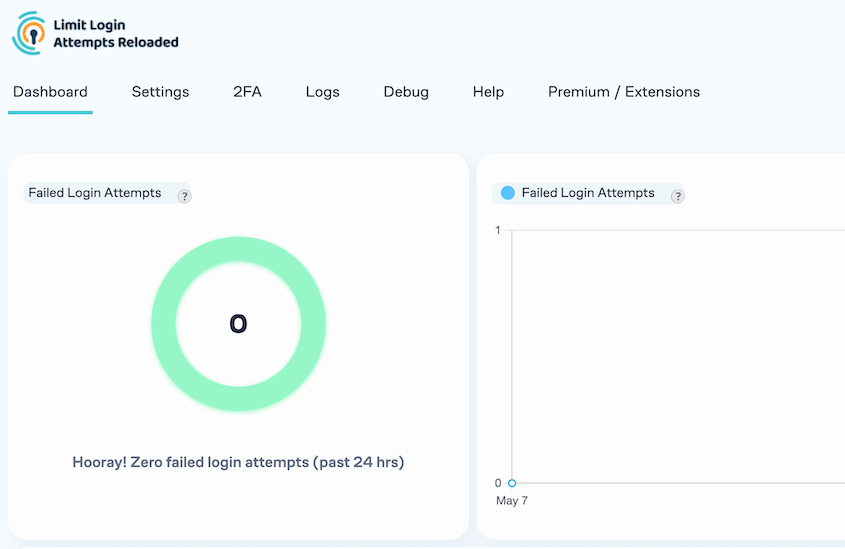
Wordfence includes throttling as part of its broader feature set, which makes it worth considering if you want a single plugin covering multiple security layers.
For most sites, 5-10 failed attempts before a temporary lockout is a reasonable starting point.
Lower thresholds increase security but could create support headaches. Corporate offices, universities, and mobile networks often share a single IP across hundreds of users. One person mistyping their password three times locks everyone else out.
Test your threshold against how your users actually log in.
One limitation worth knowing: application-layer plugins still invoke PHP on every request they process. Under a genuinely high-volume attack, your server is still receiving all that traffic.
The plugin stops the attacker from succeeding, but it doesn’t stop the resource consumption. That’s what the next section addresses.
When to Move Protection Up the Stack
Cloudflare’s free tier lets you create custom rate-limiting rules targeting /wp-login.php and /xmlrpc.php specifically.
Traffic gets filtered at Cloudflare’s edge before it ever reaches your server. Your PHP workers stay free for actual visitors.
This is the most accessible upgrade from plugin-level protection, and it costs nothing.
Layer 3: Change the Default Login URL
Most automated bots target /wp-login.php because that’s where WordPress puts the login form by default. Moving it to a custom URL means the majority of bots never find it. They hit a 404, log your site as a dead end, and move on.
This is a friction layer, not a primary defense. A determined attacker targeting your site specifically can find a custom login URL through other means.
But reducing automated attack volume has real value:
- Fewer failed login attempts
- Less activity log noise
- Less PHP process overhead from throttle plugins processing dead requests
The main risk is losing the URL. If you forget your custom login path and your host doesn’t offer emergency wp-admin access, you’re locked out of your own site.
Before you make this change, store the custom URL in your password manager and confirm your host’s emergency access method. Some hosts offer phpMyAdmin access or a support-assisted login reset.
WPS Hide Login handles this with minimal configuration: install it, set your custom path, and save.
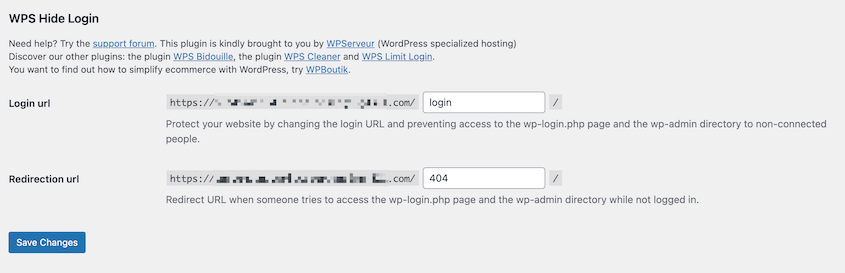
One addition that makes this step more effective: create a Cloudflare rule that returns a 403 on the original /wp-login.php path after you’ve moved it.
Without that rule, the old URL still exists and responds, which means a persistent scanner can still find it by probing common paths. Blocking the old URL at the edge closes that gap.
Layer 4: Add CAPTCHA to the Login Form
CAPTCHA stops automated bots from submitting login forms by requiring proof of human interaction. A script hitting your login page thousands of times per hour can’t solve a visual or behavioral challenge the way a person can.
For most sites, adding CAPTCHA to the login form cuts automated submission volume significantly.
Keep in mind that it’s not unbeatable. CAPTCHA-solving services exist: real humans paid fractions of a cent to solve challenges at scale or machine learning models trained to crack older CAPTCHA formats.
Against a targeted, well-resourced attacker, CAPTCHA is a speed bump. Against the automated bots responsible for the vast majority of brute force traffic, it’s effective.
The three options worth considering each take a different approach.
- Google reCAPTCHA v3 runs invisibly in the background, scoring user behavior and flagging suspicious requests without asking users to do anything.
- hCaptcha takes a privacy-focused stance and is a direct drop-in alternative.
- Cloudflare Turnstile is free, frictionless for most users, and doesn’t send behavioral data to Google.
Of the three, Turnstile is my current recommendation for new setups. The privacy tradeoffs are better, and the user experience is cleaner.
Wordfence includes CAPTCHA options. If you’re already using it, check whether their built-in CAPTCHA covers your login form before adding a separate plugin.
Layer 5: Disable or Restrict XML-RPC
XML-RPC was WordPress’s original remote publishing API, built for a time before the REST API existed. Most sites don’t use it anymore. Leaving it enabled gives attackers a separate attack surface that bypasses most of the login-page defenses you’ve set up so far.
Xmlrpc.php accepts a method called system.multicall that bundles thousands of login attempts into a single HTTP request.
A rate-limiting plugin watching /wp-login.php won’t see it. Your CAPTCHA won’t trigger. The attack lands below your defenses because it’s aimed at a different door.
Before disabling it, check whether you’re actually using it. Jetpack connects to WordPress.com via XML-RPC. Some older mobile publishing workflows depend on it.
If you’re not using Jetpack or publishing from a mobile app, you probably don’t need it.
Security plugins like Wordfence have a one-click toggle in the login settings section.
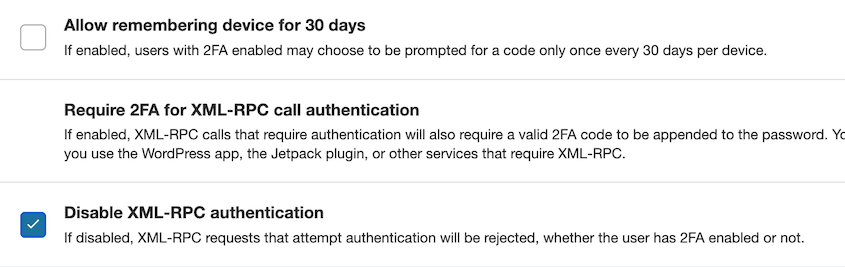
The Disable XML-RPC-API plugin is a lightweight alternative if you’d rather not install a full security suite.
On Nginx or Apache, you can block xmlrpc.php at the server level so the request never reaches PHP at all.
If you do need XML-RPC for Jetpack or another integration, the targeted fix is blocking system.multicall specifically rather than the entire endpoint. A Cloudflare WAF rule can do this without breaking legitimate XML-RPC functionality.
Restricting xmlrpc.php access to specific IP addresses is another option for integrations with known, stable sources.
The REST API is the modern replacement for new integrations. If you’re building something that would have used XML-RPC, build it against the REST API instead.
Layer 6: Use a Web Application Firewall
A Web Application Firewall (WAF) sits between incoming traffic and your WordPress site, inspecting requests and blocking malicious ones before they reach your login page.
The closer to the network edge it operates, the less work your server does under attack. A plugin-based WAF stops attacks after they arrive at your server. An edge-level WAF stops them before they ever get there.
Plugin-Based WAFs
Plugin WAFs like Wordfence and MalCare filter requests at the application layer. They maintain databases of known malicious IP addresses, bot signatures, and attack patterns, and they block matching requests before WordPress processes them.
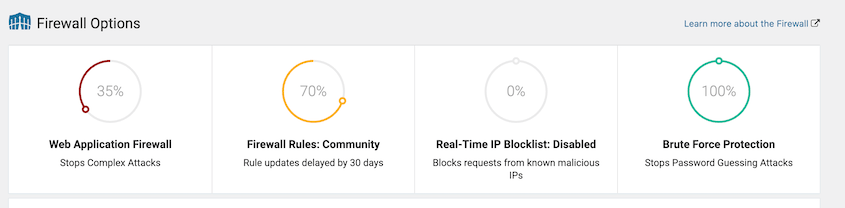
For sites on shared hosting where server configuration isn’t accessible, a plugin WAF is the right starting point.
The limitation is that your server still receives every request the WAF evaluates. Under a large-scale attack, PHP still spins up, the plugin still runs, and your hosting resources still take the hit. The attacker doesn’t get in, but the resource cost is real.
Edge-Level WAFs
Cloudflare’s free tier filters traffic at their global network before it reaches your server. Bot management, rate limiting, and Turnstile CAPTCHA challenges all operate at the edge.
Your server only sees traffic that Cloudflare has already screened. During a high-volume brute force attack, your site stays fast for real visitors because the attack traffic never arrives.
Sucuri offers a managed WAF with WordPress-specific rule sets and a CDN layer included. It’s a paid service, but the managed rule maintenance is worth considering for sites that don’t have a developer monitoring security configurations actively.
Managed WordPress hosts, including WP Engine and Kinsta, include infrastructure-level WAFs as part of their hosting stack. If you’re on one of these platforms, you likely have edge protection already. Confirm with your host what their WAF covers specifically and whether custom rules are available.
One Cloudflare configuration worth implementing: a custom firewall rule blocking all traffic to /wp-admin except from your IP address or your team’s IP range.
For sites managed by a small team logging in from predictable IPs or a shared VPN, this is one of the most effective single steps available. Automated bots can’t reach the admin area at all.
Just confirm that your site doesn’t use /wp-admin URLs for customer-facing functionality (like WooCommerce My Account pages or membership portal logins) before enabling this rule.
Layer 7: Server-Level Hardening
If you manage your own server or VPS, you can push protection upstream of WordPress, blocking attacks before they touch PHP or any WordPress code at all.
This section is for developers and VPS or dedicated server owners. If you’re on shared hosting without server configuration access, skip ahead to Layer 8.
Restrict wp-login.php by IP
If you and your team always log in from predictable IP addresses, such as an office network or a shared VPN, you can restrict /wp-login.php to those IPs at the server level. Every request from any other IP gets a 403 before WordPress loads.
On Nginx, that looks like this inside your server block:
location = /wp-login.php {

allow 203.0.113.10;

deny all;

}
Replace the IP with your own. Add multiple allow lines for multiple IPs. The request from any unlisted address never reaches PHP.
This doesn’t work for WooCommerce sites, membership platforms, or any setup where customers log in through WordPress. It’s best suited to business or portfolio sites with a small, stable team of administrators.
Implement Fail2ban
Fail2ban reads your server logs and automatically bans IP addresses that match patterns you define. For WordPress, that means an IP generating repeated failed login entries in the log gets added to your firewall’s blocklist, usually via iptables or nftables, before it accumulates enough attempts to matter.
It requires a WordPress integration plugin to work: Fail2ban needs to read failed login attempts in a parseable format, and WordPress doesn’t write them to server logs by default.
WP fail2ban handles this, writing authentication events in a format Fail2ban can parse directly.
The result is protection that operates at the network layer: blocked IPs never reach your web server, let alone WordPress. Combined with Nginx rate limiting on the login endpoint, this is the tightest non-enterprise setup available.
Use SFTP and SSH Keys, Not FTP
Brute force attacks don’t only target your login page. FTP runs on port 21 and transmits credentials in plain text. Attackers scan for open FTP ports and run the same credential-guessing approach they use on wp-login.php.
SFTP encrypts the connection. If your host supports it, switch to SFTP and disable FTP entirely. Most modern hosts support this; some disable FTP by default.
For SSH access to your server, use key-based authentication instead of password authentication. An SSH key pair eliminates the password-guessing vector at the server layer: there’s no password to brute force.
Generate a key pair locally, add the public key to your server’s ~/.ssh/authorized_keys, and disable password-based SSH login in your sshd_config.
If you’re managing a VPS and haven’t done this yet, it’s the first thing worth setting up.
Layer 8: Keep WordPress, Plugins, and Themes Updated
Brute force is often the second attack, not the first. Attackers frequently exploit a vulnerability in an outdated plugin to establish a foothold, create a backdoor account, or escalate privileges.
Brute force comes after, aimed at accounts that already exist. Staying updated closes the entry points that make brute force worthwhile in the first place.
WordPress core handles minor version updates automatically by default. Major releases require manual action or an explicit auto-update setting in your hosting dashboard.
Per-plugin auto-updates are available directly in wp-admin. Go to Plugins » Installed Plugins, and you’ll see an Enable auto-updates toggle in the right column for each plugin.
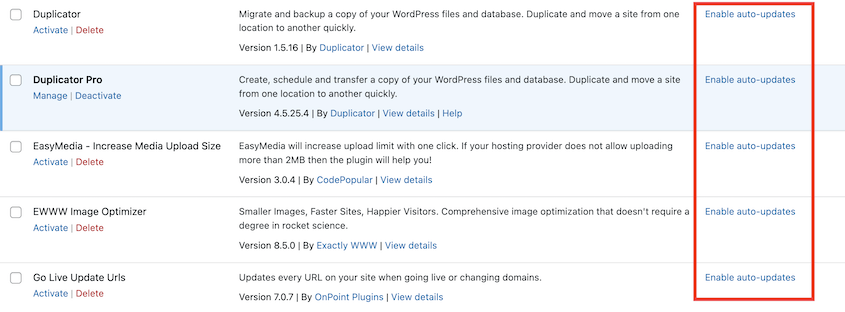
For most sites, enabling auto-updates across all active plugins is the right call. The risk of a breaking update is real but far smaller than the risk of running a plugin with a known vulnerability for weeks after a patch is released.
Themes follow the same logic. An inactive theme sitting on your server with an unpatched vulnerability is still exploitable even if it’s not the active theme.
Delete anything you’re not using. Deactivated does not mean safe.
The same applies to plugins. A deactivated plugin’s files are still on the server and still accessible. If a vulnerability exists in those files, it can be exploited regardless of whether the plugin is active in WordPress.
If you’re not using a plugin, delete it completely rather than leaving it deactivated.
For teams managing multiple sites, tools like ManageWP, MainWP, and Jetpack Manage let you monitor and apply updates across all sites from a single dashboard. Running updates one site at a time across ten or twenty installs is the kind of friction that leads to missed patches.
Layer 9: Back Up Your Site and Know How to Restore It
WordPress.org’s own brute force hardening guide puts it plainly: maintain tested, offline-capable backups and rehearse your restore procedures.
Every layer before this one reduces risk. This one eliminates the worst-case outcome.
If an attacker gets through every other layer, a recent backup is the difference between a one-hour recovery and a total rebuild. The backup doesn’t prevent the breach. It determines how bad the breach actually is.
“Tested” is the word that matters most in that sentence. Testing means running a restore on a staging environment, confirming the site comes up correctly, and knowing exactly what steps the process involves before you need to do it under pressure.
Schedule a restore test quarterly. It takes less than an hour and removes all the uncertainty from the worst moment.
Automate Backups and Restores with Duplicator
What makes a backup useful specifically in a brute force breach scenario: it needs to be offsite, independent of the compromised server, with a restore path that works even when WordPress is completely locked out.
Duplicator Pro covers each of those requirements.
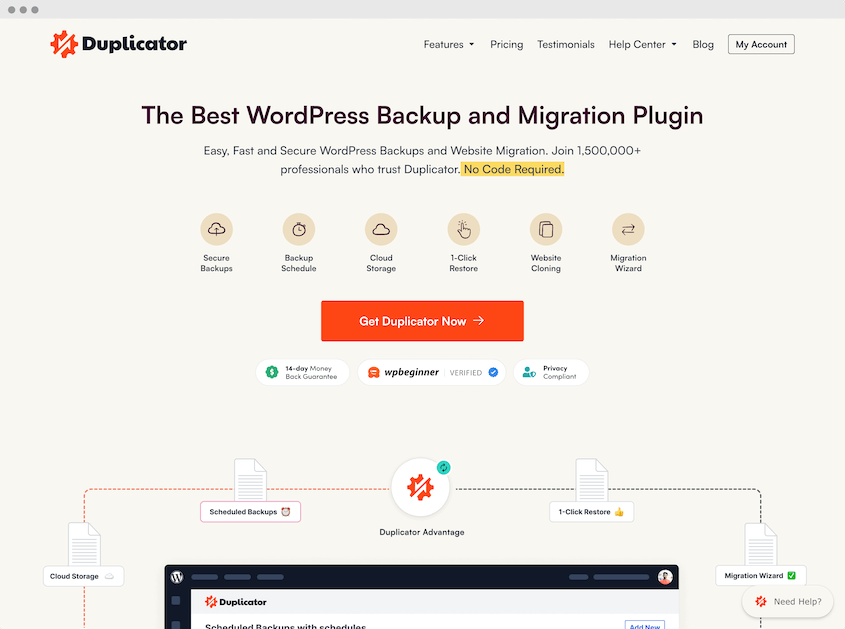
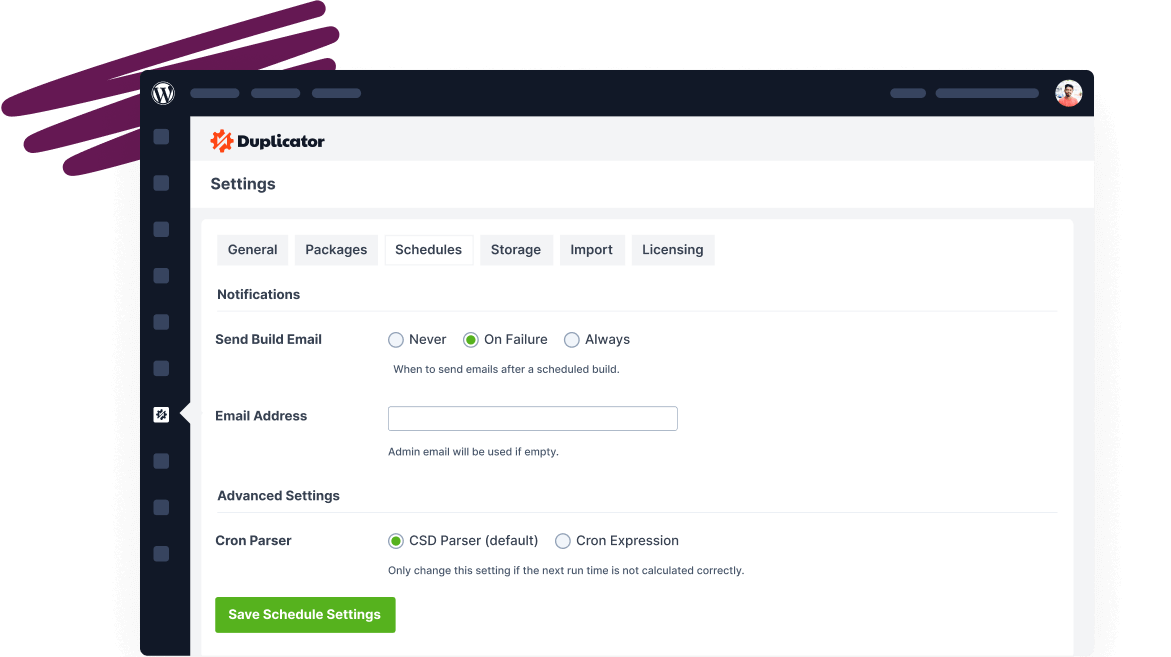
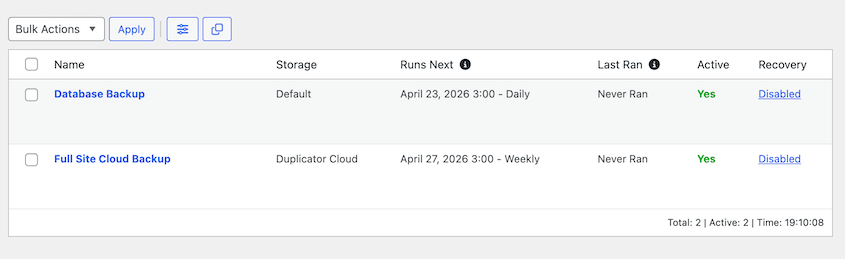
Automatic scheduled backups run on hourly, daily, weekly, or monthly intervals without manual intervention. You set the schedule once and always have a recent restore point.
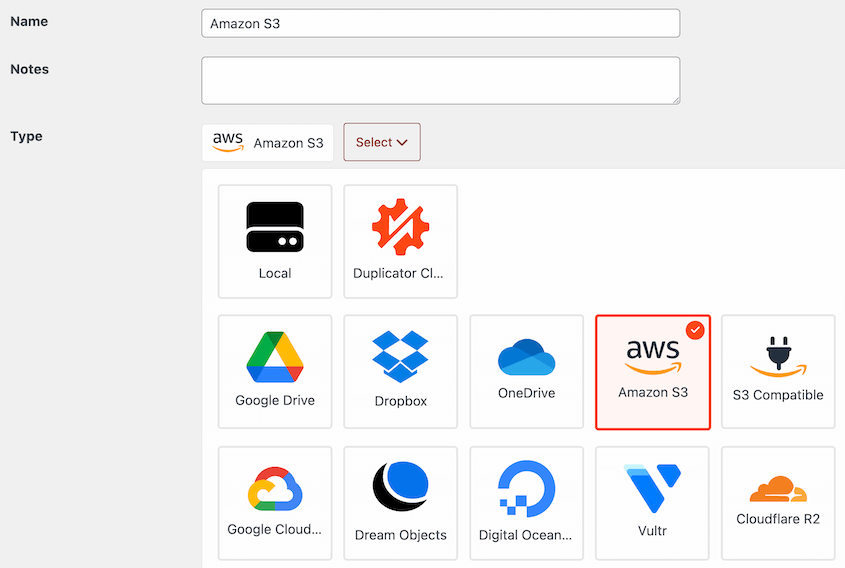
For storage, Duplicator Pro connects to Amazon S3, Google Drive, Dropbox, OneDrive, and other third-party cloud services.
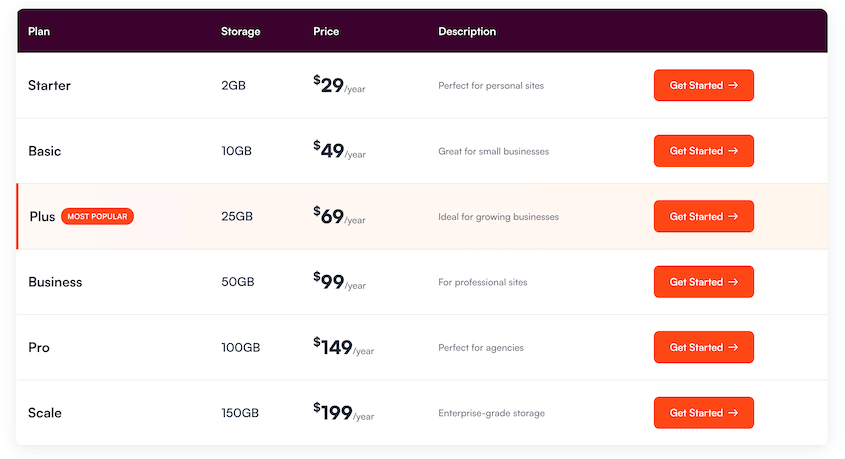
Duplicator Cloud is Duplicator’s own storage: no separate account required, no third-party service to configure. Unlike other options, it was built specifically for WordPress backup storage.
If anything bad happens, you can restore directly from cloud storage without re-uploading files to the server first. When your server is compromised and you don’t trust what’s on it, you pull the restore directly from the cloud copy.
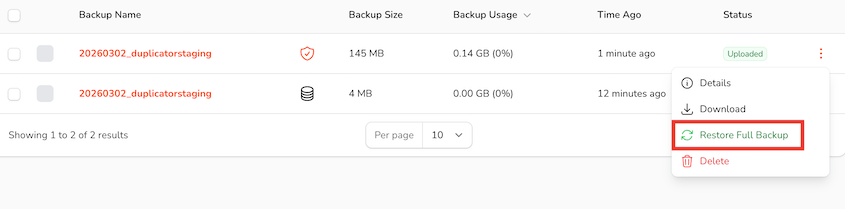
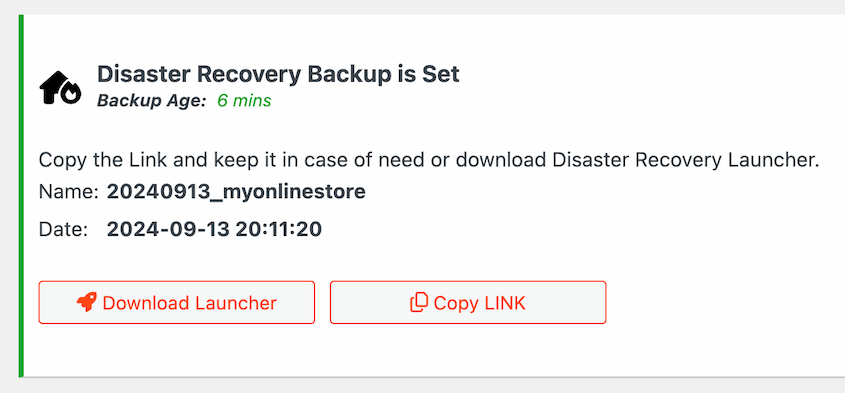
Disaster recovery URLs are the piece most people don’t know about until they need them. After a successful brute force attack, one of the first things an attacker does is change the admin password or create new accounts and lock out the original owner.
A disaster recovery URL bypasses wp-admin entirely, letting you initiate a restore even when you can’t log in. I’ve used this once in a real incident. It’s the feature that makes the difference between recovering in an hour and spending a day on the phone with hosting support.
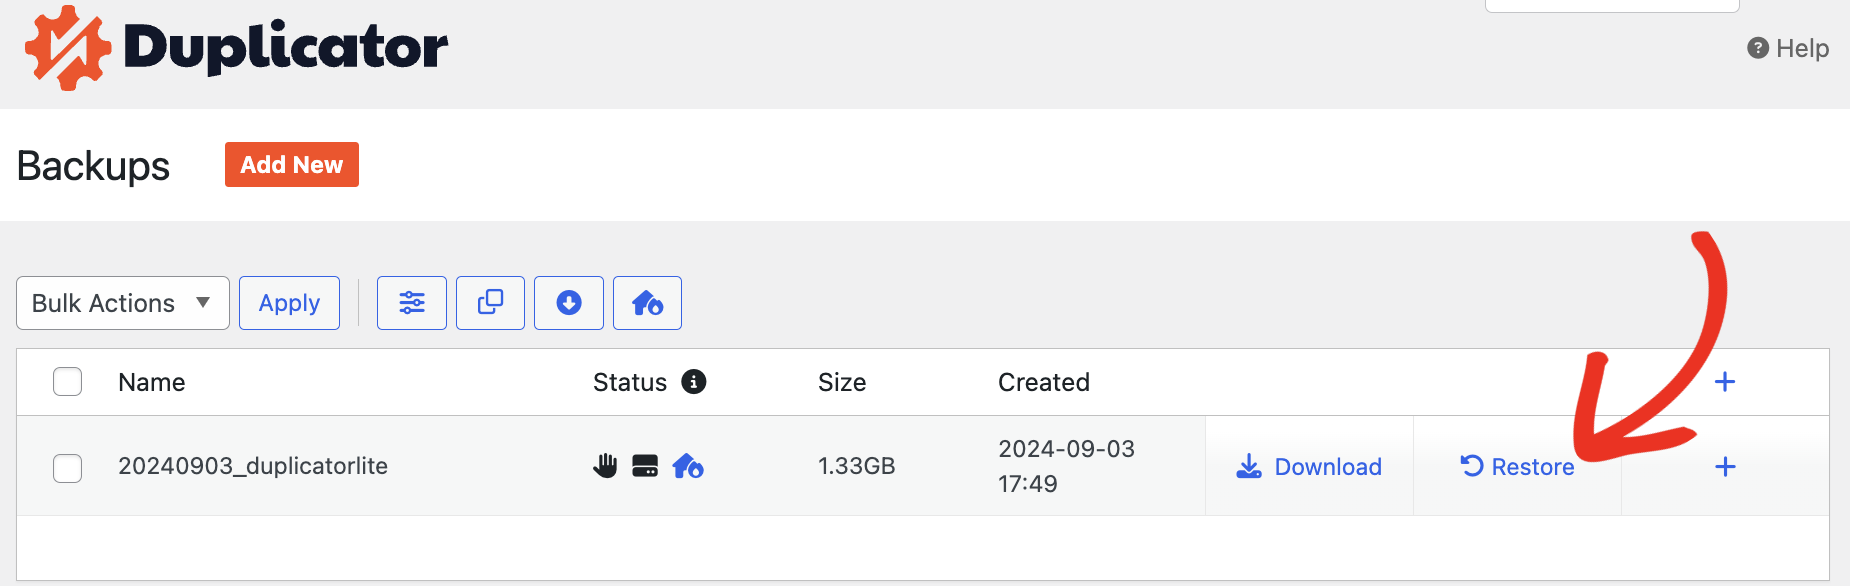
One-click restore handles standard recoveries without manual file transfers or FTP access. Select the backup, click restore, and confirm. That’s the process.
How to Monitor for Brute Force Activity
Most WordPress site owners find out they’re under attack from their hosting provider’s throttling notice, not from their own monitoring. By then the attack has already consumed server resources, filled your logs with noise, and in some cases, succeeded.
Setting up proactive visibility takes less than an hour and means you know what’s happening on your site before your host does.
Proactive Monitoring
Activity Log gives you a full audit trail of every action taken on your site, like failed login attempts, successful logins, user role changes, plugin activations and deactivations, settings modifications, and file edits.
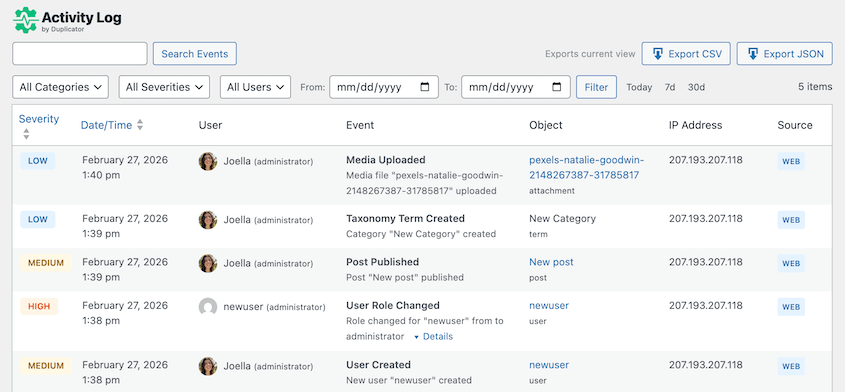
That scope matters after a brute force breach. An attacker who gets in doesn’t just log in; they make changes.
Activity Log surfaces those changes in a readable timeline so you can see exactly what happened and in what order. That’s the information you need to scope the damage and know what to clean up.
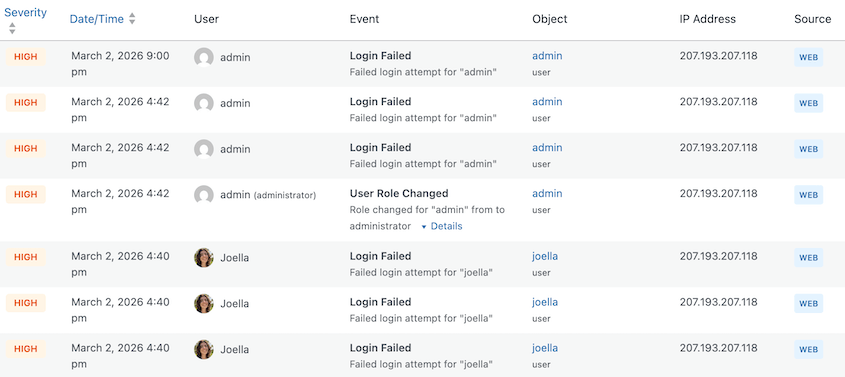
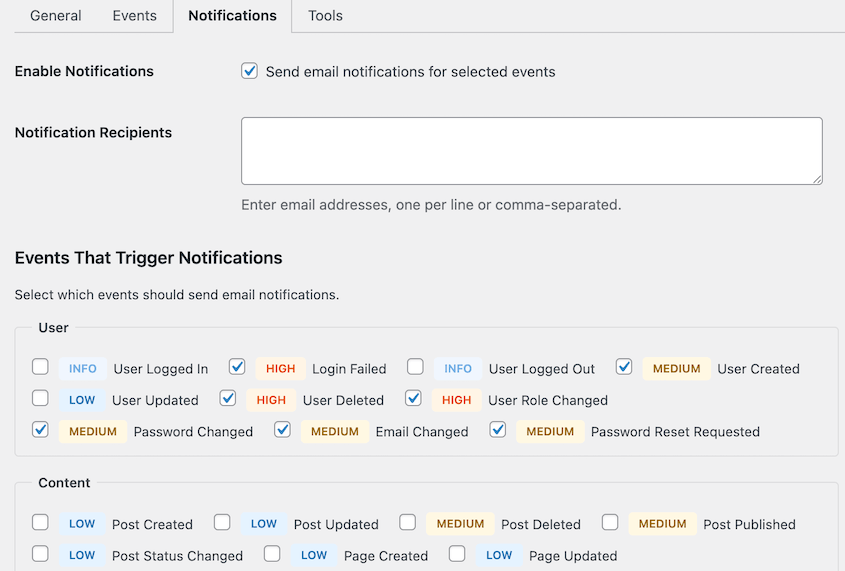
Have Activity Log send you email alerts for unusual login activity. This will help you immediately identify and stop a brute force attack instead of cleaning up after one.
Your hosting control panel is another monitoring layer. Unexplained PHP worker spikes or CPU usage at off-hours are often the first visible sign of a high-volume attack, appearing before your security plugin has logged enough events to trigger an alert.
Signs You’re Already Under Attack
Some attacks announce themselves. Others are quieter.
A sudden spike in failed login notifications in your activity log is the clearest signal. If you normally see two or three failed attempts a day and you’re suddenly seeing hundreds, something changed.
Lockout notices from users who didn’t actually try to log in are a subtler sign. IP-based lockouts affect every user sharing that IP: a corporate office or university network where one person triggers a lockout can block everyone else on the same connection.
If your support inbox starts filling with “I can’t log in” messages from people who weren’t trying to reset their passwords, check your lockout log.
Slow wp-admin response or PHP worker exhaustion errors in your hosting error log point to resource consumption from a high-volume attack. The site still works, but it’s slower than it should be, and the logs explain why.
After any security incident, go to Users » All Users in wp-admin and filter by the Administrator role.
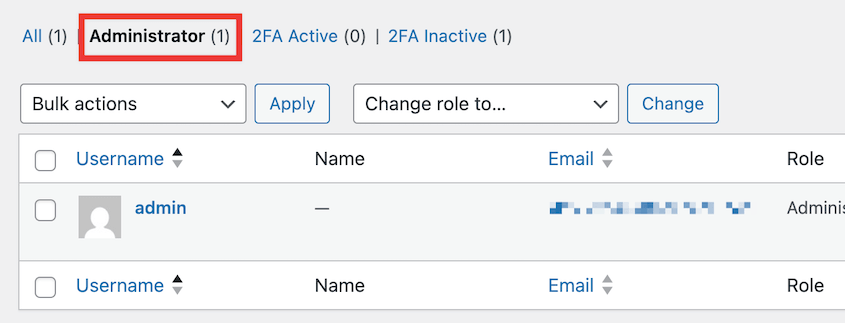
An unauthorized administrator account created during an attack window is a sign the attacker succeeded and left themselves a backdoor. Check this before you consider an incident closed.
What Doesn’t Work (and Why People Still Recommend It)
Some of the most commonly repeated WordPress security advice sounds reasonable but provides little real protection. Knowing the difference saves you the effort of implementing things that give a false sense of security.
Geoblocking by Country
The appeal is obvious: if most of your attacks come from a specific country, block that country. The problem is that botnets don’t work that way.
A botnet is a network of compromised machines: home routers, servers, IoT devices, ordinary computers infected with malware. Those machines are everywhere, including in your own country.
Blocking traffic from Russia or China doesn’t stop a botnet with nodes in the United States, the UK, and Australia. It does block legitimate visitors from those countries. For most sites, the tradeoff isn’t worth it.
Password-Protecting wp-admin with HTTP Authentication
Adding a second password prompt before the wp-admin directory sounds like a useful extra layer. In practice, it can break WordPress AJAX, which wp-admin depends on for core functionality including saving posts, running plugin settings, and handling media uploads.
Sites that implement this correctly with careful AJAX exclusions can make it work, but for most site owners, the configuration complexity outweighs the benefit.
Frequently Asked Questions (FAQs)
What is the most effective way to prevent brute force attacks?
Two-factor authentication, applied to every administrator account. Even if an attacker correctly guesses or obtains a password through a data breach, 2FA blocks the login without the second factor. Combine it with a rate-limiting plugin or WAF rule and a current offsite backup.
Does WordPress have built-in brute force protection?
No. WordPress core does not include login attempt limiting, two-factor authentication, or WAF functionality. You need a security plugin or server-level configuration to add these protections. WordPress.com (the hosted platform) includes brute force protection by default. Self-hosted WordPress.org sites do not.
Can a brute force attack harm my site even if no one gets in?
Yes. A high-volume attack sends thousands of HTTP requests to your server whether or not any credentials succeed. This can exhaust PHP workers, slow your site for real visitors, and trigger hosting throttling or temporary suspension. Server-level or edge-level rate limiting prevents this; application-layer plugins alone do not.
How do I stop XML-RPC brute force attacks?
If you don’t use XML-RPC for Jetpack, mobile publishing, or third-party integrations, disable it via a plugin or server config. If you do need it, block the system.multicall method using a WAF rule or restrict xmlrpc.php access to specific IP addresses.
Is changing the WordPress login URL effective?
It reduces automated attack volume because most bots target the default /wp-login.php URL. That’s a real benefit. However, it shouldn’t be the only defense against targeted attacks. Keep in mind that losing a custom login URL without a recovery plan can lock you out of your own site. Treat it as a friction layer, not a primary protection.
How often should I back up my WordPress site?
For WooCommerce or membership sites with frequent transactions: every few hours or in real time. You could also consider more frequent database backups and schedule full-site backups daily or weekly. The right interval is how much data you can afford to lose. Store at least one backup offsite, test restoration quarterly, and make sure at least one backup includes both the database and all site files.
What is credential stuffing and how is it different from brute force?
Brute force tries every possible password combination. Credential stuffing uses real username/password pairs leaked from other breaches. If a user reused their password across sites, credential stuffing can log in on the first attempt. Two-factor authentication stops both. A unique password stops credential stuffing but not brute force.
What should I do if my WordPress site has already been compromised?
Restore a clean backup taken before the compromise. If you don’t have one, use a malware scanner like Wordfence or MalCare to identify and remove injected code, then reset all passwords and revoke all active sessions site-wide. After recovery, work through every layer in this post before bringing the site back online.
Before the Next Attack, Make Sure You Can Recover From It
Brute force attacks are getting cheaper to run. Cloud-based botnets, credential databases from years of accumulated breaches, and CAPTCHA-solving services have all lowered the cost of running a sustained attack against a WordPress site to nearly zero.
Every protection layer in this post reduces your risk. None of them reduce it to zero. The only guarantee that a successful attack doesn’t end your site is a tested backup you can restore from, even when wp-admin is completely locked out.
Over 1.5 million WordPress professionals use Duplicator Pro for exactly this: automatic scheduled backups to Duplicator Cloud or any major cloud storage provider, remote recovery without re-uploading files to a compromised server, and disaster recovery URLs that restore your site even when you can’t log in.
If this post got you thinking about WordPress security and recovery, these guides are worth reading next.
- How to Protect Your Website From Hackers (Ultimate Security Guide)
- Is WordPress Secure? Revealing the Truth
- WordPress Security Checklist: Step-by-Step Guide to Protect Your Site
- How to Recover a Hacked WordPress Site (9 Expert Tips)
- How to Clean Up a WordPress Site
- Mastering WordPress Debugging: From Basics to Advanced Techniques
- 9 Best WordPress Database Backup Plugins (To Secure Your Data)