Ever felt like your WordPress website is too slow? It might be time for a PHP upgrade.
PHP is the engine that powers your WordPress site. And just like any engine, it needs regular maintenance to keep running smoothly.
But don’t worry, updating PHP isn’t as daunting as it sounds.
In this post, I’ll walk you through the process of updating PHP in WordPress. You’ll learn why updating PHP matters, how to check your current PHP version, and step-by-step instructions for different hosting environments.
(Plus, we’ll share some insider tips to make sure your update goes off without a hitch.)
Here are the key takeaways:
- Update PHP regularly: Newer PHP versions improve security, speed, and compatibility with WordPress, themes, and plugins
- Check your current version: Use WordPress Site Health (Tools » Site Health » Info tab) to see if you’re running an outdated or unsupported PHP version
- Back up before updating: Always create a full site backup with a plugin like Duplicator to protect against potential issues
- Update through your host: Most hosting providers offer simple PHP version management in their control panels (Bluehost, SiteGround, cPanel, etc.)
- Test first when possible: Use a staging site to test the PHP update before applying it to your live site
- Have a recovery plan: If the update breaks your site, restore from backup or revert to the previous PHP version
Table of Contents
Why Update Your PHP Version in WordPress?
Let’s face it — keeping your WordPress website up-to-date can feel like a never-ending task. But when it comes to PHP, staying current is more than just a good habit. It’s essential for your site’s health and performance.
Upgrading PHP might seem like a chore, but it’s one of the most important things you can do for your WordPress site. It’s not just about keeping up with the times, it’s about giving your site the tools it needs to perform at its best.
Here’s why updating the PHP version on your site should be on your to-do list.
Boost Your Site’s Security
Hackers love outdated software. It’s like leaving your front door wide open. Newer PHP versions come with security patches that fix vulnerabilities, keeping those cyber attacks at bay.
Speed Things Up
If your site feels slow, an old PHP version might be the culprit. Each new PHP release brings performance improvements. Upgrading PHP versions can give your site a noticeable speed boost, and we all know visitors love a fast-loading page.
Stay Compatible
WordPress, themes, and plugins are constantly evolving. They often require newer PHP versions to function properly. By keeping your PHP up-to-date, you ensure your site can take advantage of the latest features and improvements.
Avoid the “End of Life” Trap
PHP versions have expiration dates. Once a version reaches its “End of Life,” it stops receiving updates — even for critical security issues.
Running an unsupported PHP version is like driving a car with no brakes. It’s only a matter of time before something goes wrong.
How to Check Your Site’s Current PHP Version
Before you jump into updating, you need to know where you’re starting from.
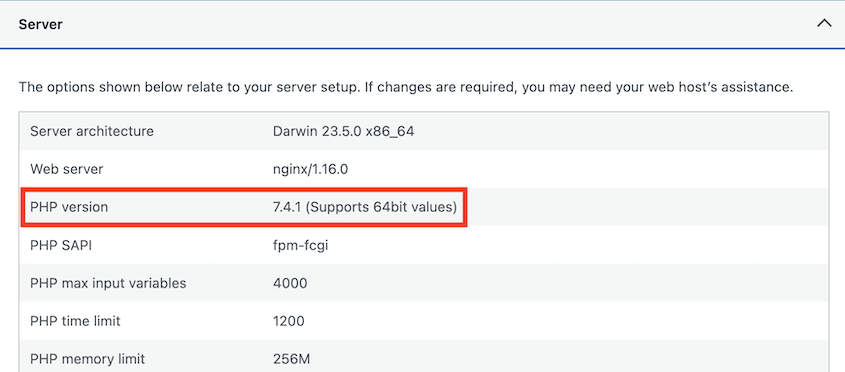
You can check your PHP version in your WordPress dashboard. Head over to Tools » Site Health and click on the Info tab.
Scroll down to the Server section. Look for PHP version – that’s your WordPress PHP version number.
It’s quick, it’s easy, and you don’t need to leave your admin dashboard. Perfect for a quick check-up.
If you’re comfortable with a bit of code, you can create a new file and name it info.php. Add this single line of code:
<?php phpinfo(); ?>
Upload this file to your website’s root directory.
Access it through your browser (e.g., www.yoursite.com/info.php). Look for the PHP version at the top of the page.
Remember to delete this file after checking! It contains sensitive information about your server setup.
Whichever method you choose, knowing your PHP version is the first step in keeping your WordPress website healthy and secure.
To see if you need to update the PHP version on your site, go to the official PHP website. Compare its currently supported versions to what your site is running on.
What to Do Before Updating Your PHP Version
Updating your PHP version is important, but you need to prepare properly to avoid any nasty surprises.
Taking these steps might feel like extra work, but trust me, they’re worth it. They can mean the difference between a smooth update and a site-breaking disaster.
Back Up Your Site
Can’t stress this enough — before you do anything, back up your site. It’s your safety net if things go sideways.
This is where Duplicator comes in handy. With just a few clicks, you can create a complete backup of your site. This backup is easy to restore if you notice any errors after PHP updates.
With Duplicator, create a new backup. Select the Full Site backup preset.
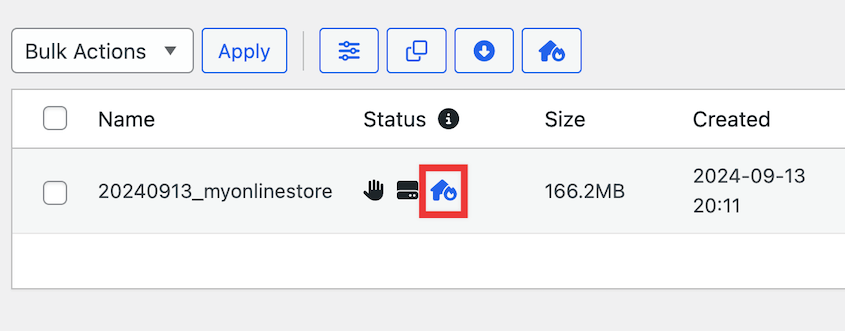
Once your backup is built, I recommend setting it as the disaster recovery point. If anything goes wrong during the update, Duplicator will instantly restore this backup.
Next to the backup, hit the blue house icon.
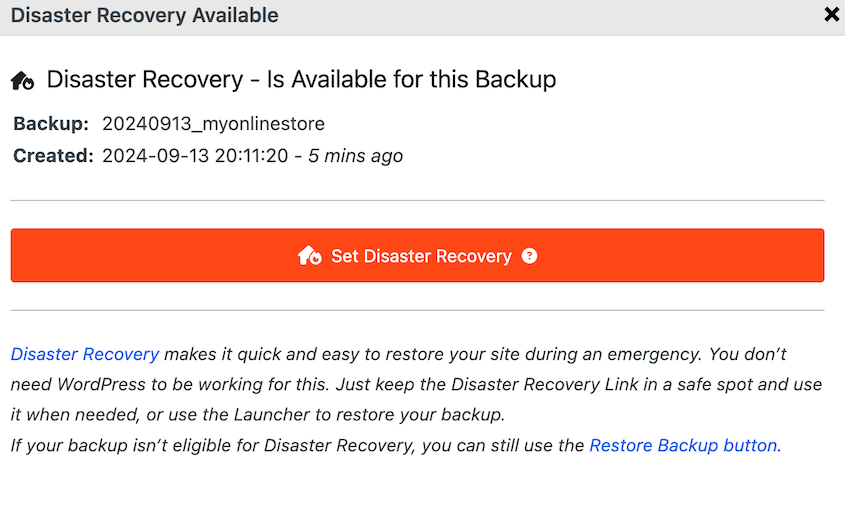
Continue setting disaster recovery.
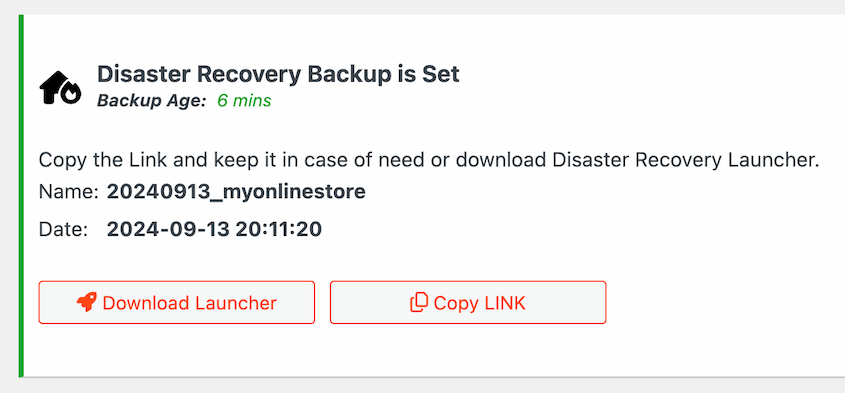
Then, Duplicator will give you a recovery link. Save it in a safe and accessible location in case you need it.
If you notice the PHP update causes errors on your site, paste this link into a new web browser. It’ll launch the recovery wizard, even if your entire site is crashed!
Check Theme and Plugin Compatibility
Not all themes and plugins play nice with newer PHP versions. It’s like trying to use an old key in a new lock — sometimes it just doesn’t fit.
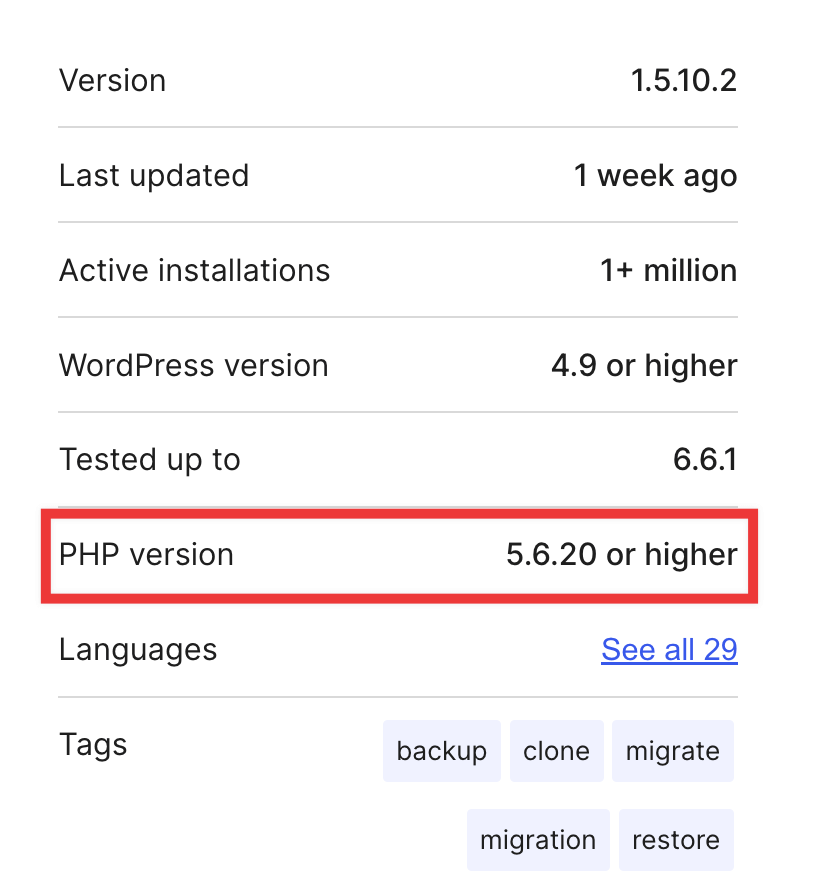
Before you continue with the update, check PHP compatibility information on WordPress.org. In the plugin and theme details, there’s a compatible PHP version.
Before PHP updates, you should also update WordPress core, all of your themes, and plugins. This way, you won’t experience any old compatibility issues.
Test on a Staging Site
If possible, always test the PHP update on a staging site first. This allows you to view and fix any issues before you update your live site.
Duplicator Pro makes this process a breeze. You can easily create a staging site, test the PHP update there, and if all goes well, push the changes to your live site.
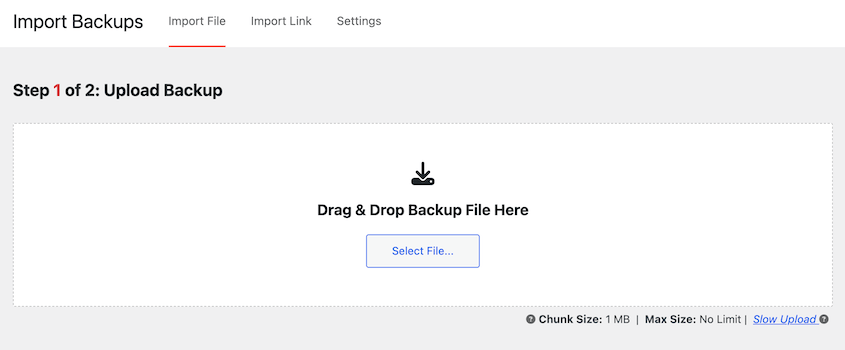
When you’re finished troubleshooting the update, create a backup of the staging site and download it. On your live site, import the backup.
How to Update Your PHP Version with Your Web Host
Updating your PHP version might sound technical, but many web hosts have made it easy.
While each host has its own unique interface, the steps are often similar:
- Log into your hosting control panel
- Find the PHP management section
- Select your desired PHP version
- Apply the changes
Let’s walk through the process for some popular hosting providers.
It’s important to note that newer isn’t always better. Make sure the version you choose is compatible with your WordPress installation, themes, and plugins.
Updating Your PHP Version in Bluehost
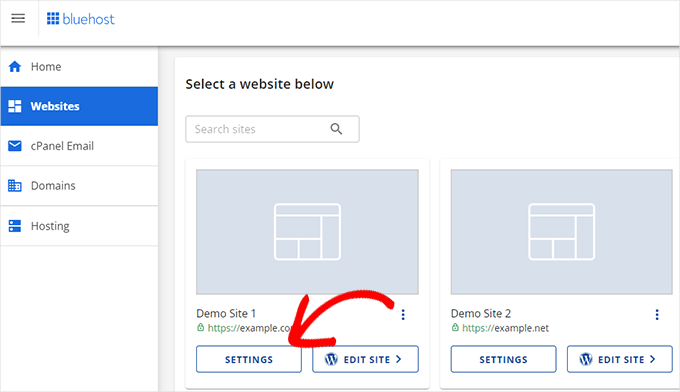
BlueHost users, log into your hosting control panel. Click on Websites, find the website you want to update, and hit the Settings button.
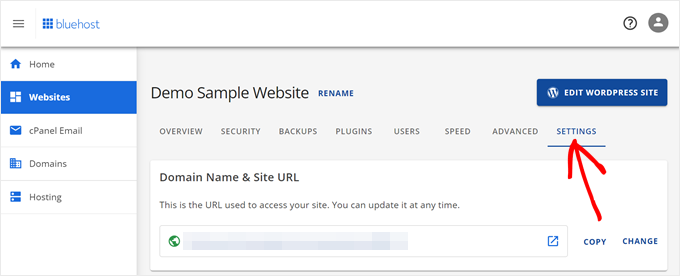
Open the Settings tab.
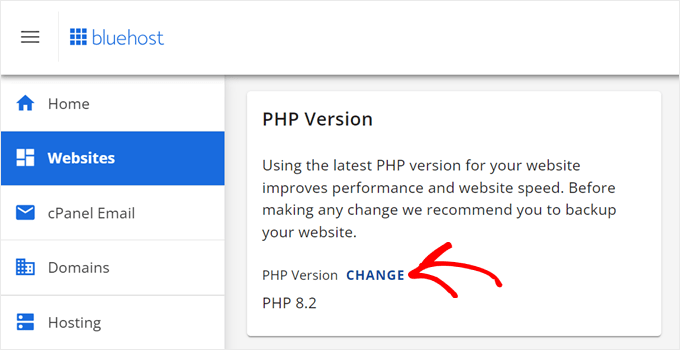
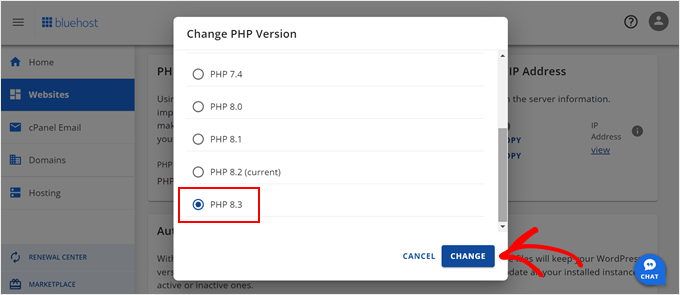
Find the PHP Version section. Click on the Change button.
Choose the version of PHP you want to use, preferably the most recent version.
Hit Change and voila! Your site is using a new PHP version.
Updating Your PHP Version in Hostinger
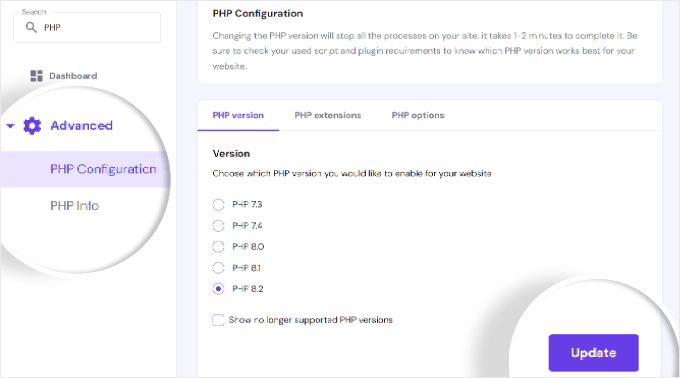
If your site uses Hostinger, sign into hPanel. Open the Websites tab and hit Manage.
Under Advanced, select PHP Configuration. Click on the newest PHP version and confirm your changes.
Updating Your PHP Version in SiteGround
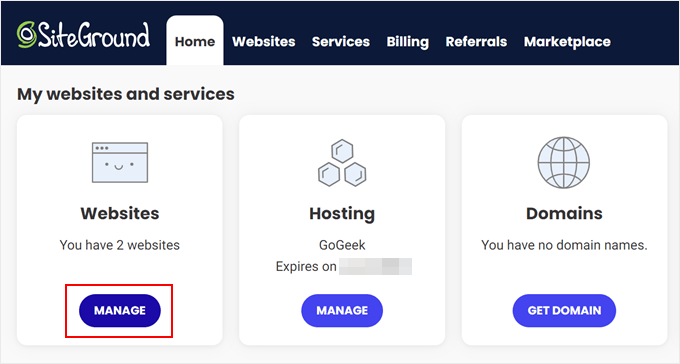
SiteGround users, log into your SiteGround account.
On the home page, locate My websites and services. Here, click Manage.
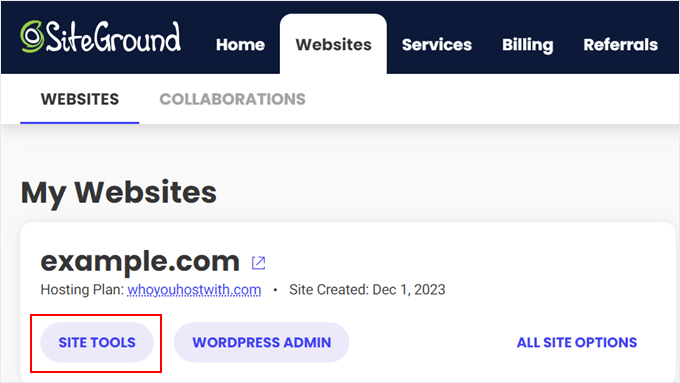
Next, open the Site Tools.
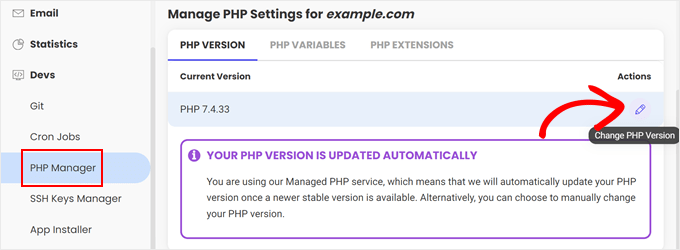
On the left, find PHP Manager. It’ll be under the Devs section. Select the PHP Version tab and hit the pencil icon.
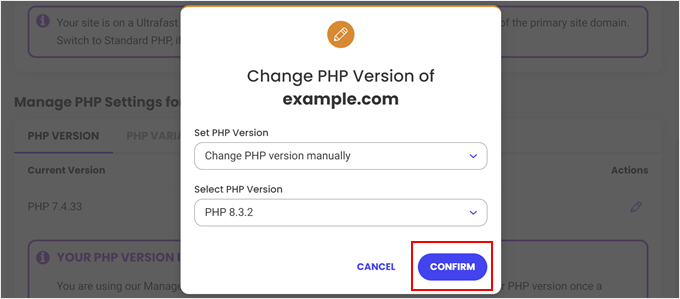
In the pop-up, specify that you want to change your PHP version manually. Choose the right version and confirm your choice.
Updating Your PHP Version in HostGator
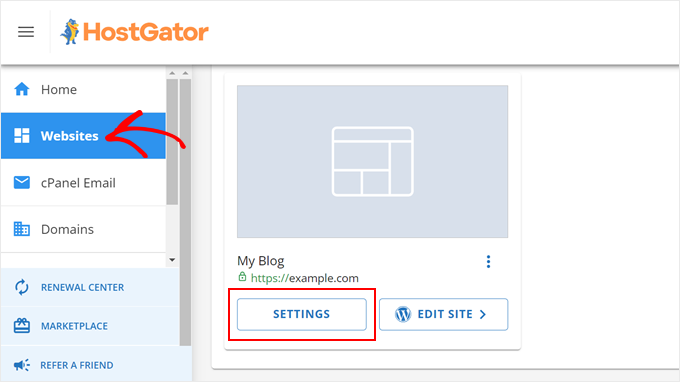
If your web host is HostGator, open your site’s settings.
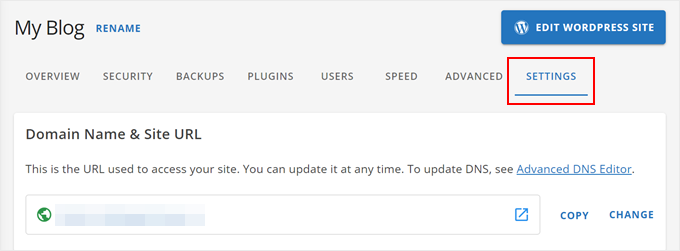
Click on the Settings tab, where you can edit advanced settings.
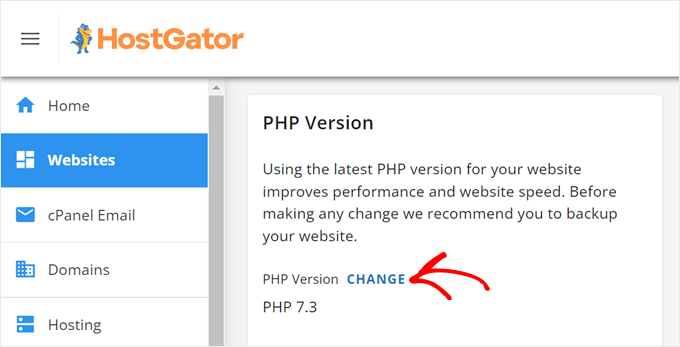
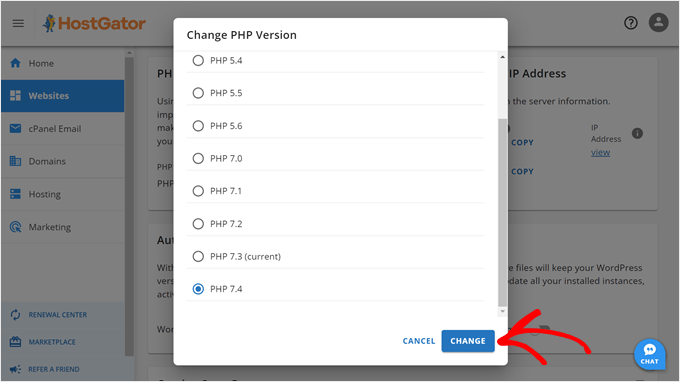
Scroll down to the PHP Version settings. You’ll see your current version. If you want a different one, hit Change.
Then, all you have to do is pick the version you want.
Updating Your PHP Version in DreamHost
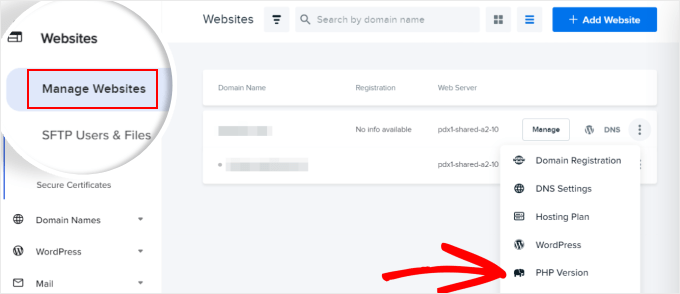
For DreamHost, you’ll need to navigate to the Manage Websites tab. Find your website, click on the three-dot icon, and hit PHP Version.
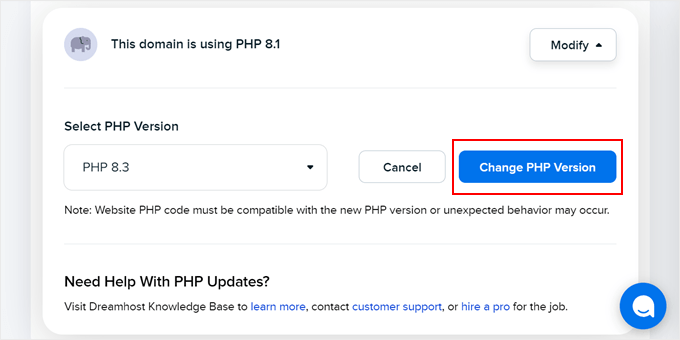
Update your PHP version and click Change PHP Version.
Updating Your PHP Version in WP Engine
WP Engine is a managed WordPress hosting provider, so it manages updates for you. However, it’s good to know how to do it yourself if needed.
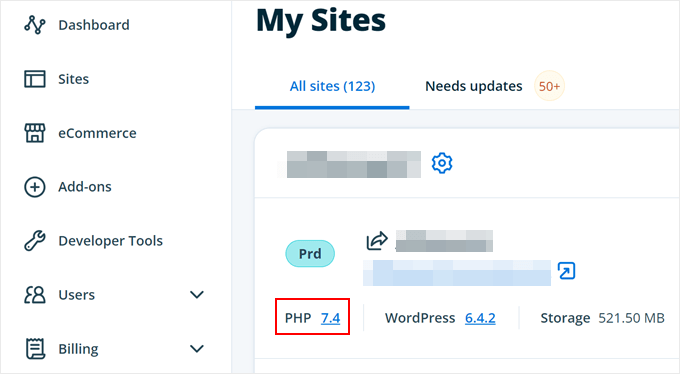
In your WP Engine control panel, go to the My Sites page. Under your website, click on the PHP version number.
On this page, you can preview different PHP versions to see how they’ll affect your website.
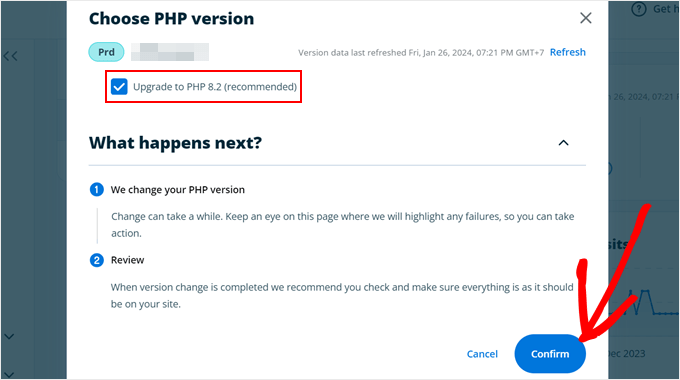
If you’re ready to upgrade PHP versions, scroll to the Updates section. Click on the PHP version number again.
Check the box next to Upgrade to PHP [Version]. Confirm your changes.
Other Hosting Providers
If your host isn’t listed here, don’t worry. Most providers have similar processes. Look for options like “PHP Configuration,” “PHP Manager,” or “PHP Settings” in your control panel.
Can’t find it? Don’t hesitate to reach out to your host’s support team. They’re there to help, and they’ve probably guided plenty of users through this process before.
Also, keep in mind that some hosts might limit which PHP versions you can choose. If you don’t see the version you need, it might be time to contact support.
Remember, if you’re using a managed WordPress host, they’ll handle PHP updates for you. You probably won’t have to worry about updating it yourself.
How to Update Your PHP Version in cPanel
If your host uses cPanel, you’re in luck. cPanel offers a straightforward way to update PHP versions, regardless of your specific host. Let’s walk through the process.
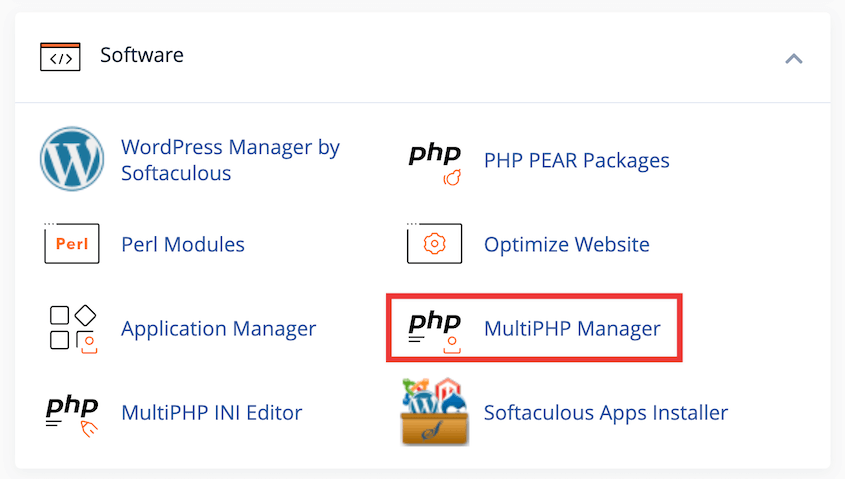
First, log into your cPanel account. Find the Software section and click on MultiPHP Manager.
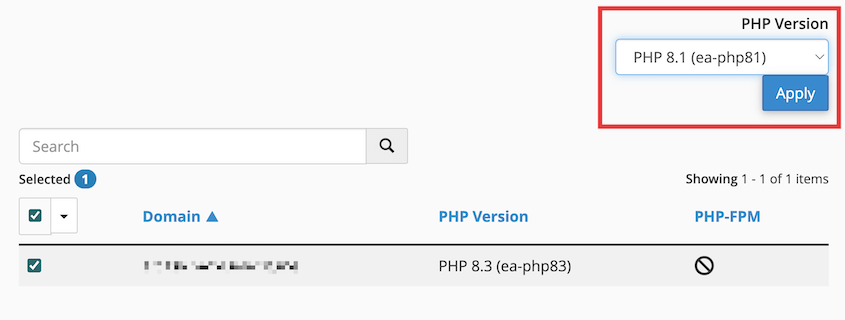
If you have multiple domains, select the one you want to update. You’ll see a dropdown menu with available PHP versions. Choose the latest PHP version.
Click on Apply to implement your new PHP version.
And there you have it! You’ve successfully updated your PHP version through cPanel.
What to Do If the PHP Update Breaks Your Site
So, you’ve updated your PHP version, and suddenly your site breaks. Don’t panic! This happens more often than you might think, and there are ways to fix it.
After a PHP update, your site might display any of these errors:
This is usually because of PHP version compatibility problems. Your new PHP version could conflict with your WordPress themes or plugins.
Remember when we stressed the importance of backing up before updating? This is why.
Duplicator is your best friend in these situations. With a pre-update backup, you can quickly restore your site to its previously working state. It’s like having a time machine for your website.
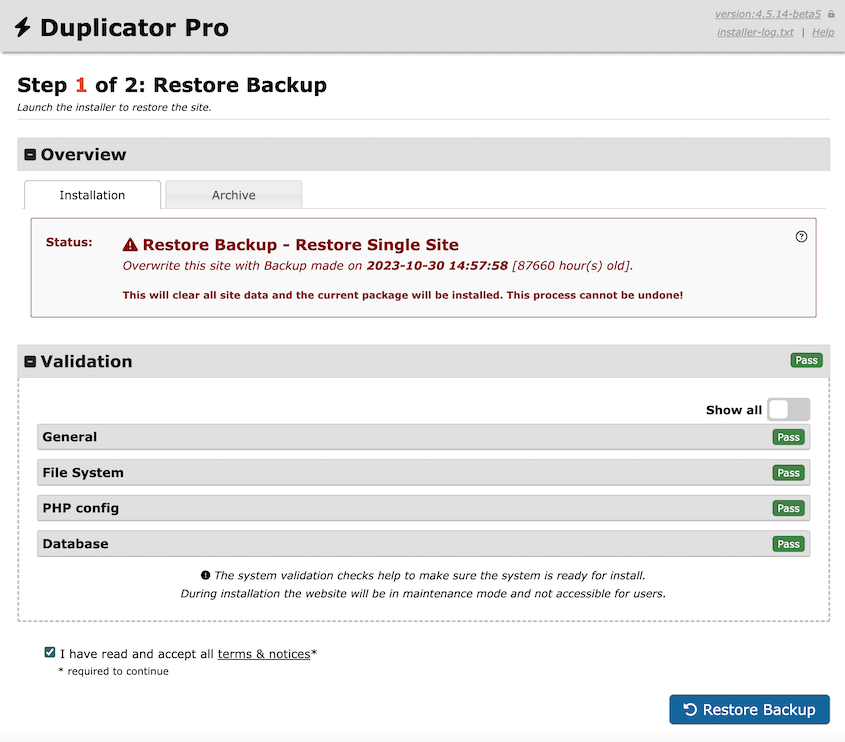
If you can still access your dashboard, find the backup you created before the update. Hit the Restore button next to it.
If you’re locked out, paste the disaster recovery link that you generated earlier. Duplicator will automatically launch the recovery wizard.
Follow the steps to restore your site to normal.
If you don’t have a backup (though you really should!), your next best option is to revert to your previous PHP version.
To avoid future scares, consider using Duplicator to create a staging site. This allows you to test PHP updates in a safe environment before applying them to your live site.
Frequently Asked Questions (FAQs)
How do I update my PHP version in WordPress without cPanel?
If your host doesn’t use cPanel, don’t worry. Many hosts provide custom control panels with similar functionality. Look for options like “PHP Settings” or “PHP Configuration” in your hosting dashboard.
If you can’t find it, reach out to your host’s support team. They’ll be able to guide you through the process or even update it for you.
Should I update PHP in WordPress?
Yes, updating the PHP version on your site offers many benefits including enhanced security, improved performance, and new features. It also ensures continued compatibility with new WordPress versions and your installed plugins and themes.
However, always check compatibility with your themes and plugins before updating. And remember to back up your site before a major change.
How do I change PHP settings in WordPress?
While you can’t directly change PHP settings within WordPress, you have a few options:
- Create a custom php.ini: Some hosts allow you to create a custom php.ini in your site’s root directory.
- Use .htaccess: You can add PHP directives to your .htaccess file.
- WordPress plugins: Some plugins allow you to modify certain PHP settings.
Always back up your site before making changes to these files.
Don’t Let Outdated PHP Slow You Down
Staying current with PHP versions in WordPress is like giving your site a regular health check-up. It keeps everything running smoothly and helps prevent issues down the road.
While you’re here, I think you’ll like these extra WordPress guides:
Whether you’re updating PHP, moving your site, or just keeping things backed up, Duplicator has got your back. Upgrade now to schedule backups and restore them in one click!
Joella is a writer with years of experience in WordPress. At Duplicator, she specializes in site maintenance — from basic backups to large-scale migrations. Her ultimate goal is to make sure your WordPress website is safe and ready for growth.


