Are you not sure how to update WooCommerce?
While you focus on selling products, it’s easy to forget about keeping your WooCommerce software up-to-date. Just like that blinking light on your car dashboard, ignoring these updates can lead to bigger problems down the road.
In this tutorial, I’ll show you how to safely update WooCommerce!
Here are the key takeaways:
- Regular updates provide security patches, performance improvements, and new features for your WooCommerce store
- Always create a full backup and test updates on a staging site before going live
- Schedule updates during low-traffic periods to minimize customer disruption
- Essential tools: Use Duplicator Pro for backups, WP Boom for visual comparisons, and staging environments for testing
- Test all core functionalities including payments, checkout, and product management after updating
- Keep rollback options available and know how to clear caches, update PHP, and increase memory limits
Quick Summary: How to Update WooCommerce
1. Back up your WooCommerce store.
Before you update WooCommerce, create a full backup of your online store. With a plugin like
Duplicator Pro, you can quickly back up your site to the cloud. This way, you can easily roll back any errors caused by the update.
2. Take a snapshot with WP Boom.
You’ll want to know exactly what changed after the update. Rather than manually looking at your site, use WP Boom to track visual changes. Before the update, take a snapshot.
3. Migrate your store to a staging site.
You never know what could happen when you update your live WooCommerce store. We’d recommend migrating your data to a staging site first. This gives you a safe area to troubleshoot errors.
4. Update WooCommerce.
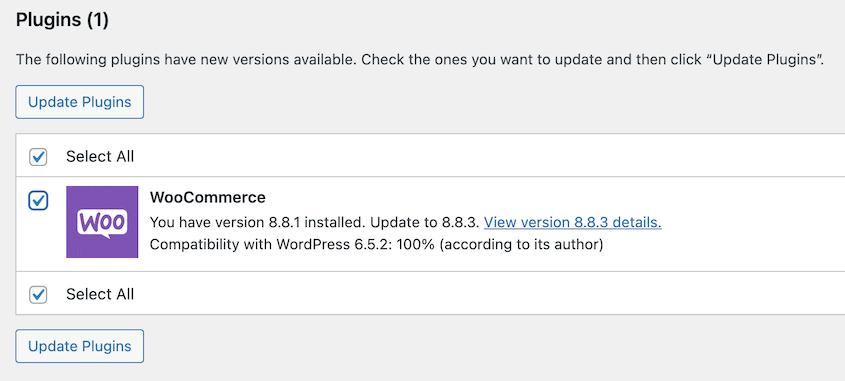
At this point, go to the Updates page on your staging site. Find the WooCommerce update and install it!
5. Fix any bugs and conflicts.
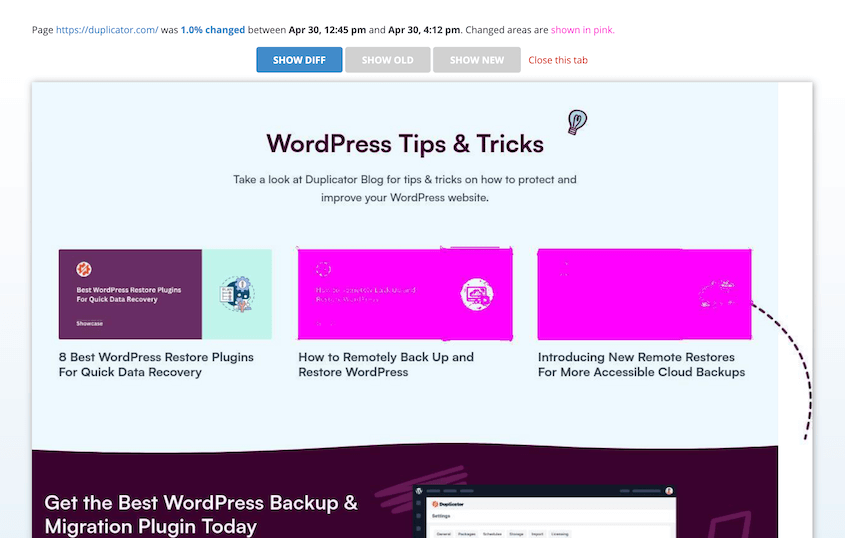
Now, look for any errors that the update caused. If you added your staging site to WP Boom, it’ll show you exact visual changes. Ghost Inspector is another great tool for no-code testing.
6. Push the changes to your live site.
Once you resolve errors, it’s time to move the changes to your live store. With Duplicator Pro, you can simply back up the staging site and drag and drop it into your live site.
7. Test your live site for errors.
To make sure nothing changes for your customers, thoroughly review your website. Go through its key functionality and troubleshoot any new errors.
Table of Contents
Why Update WooCommerce?
You wouldn’t want to run an online store with outdated software. Here’s why it’s so important to always use the latest version of WooCommerce.
Outdated software makes your e-commerce store vulnerable to hackers. Updates patch these holes, keeping your customers’ data safe.
Over time, software can get sluggish. Updates often include bug fixes and performance improvements, making your store run faster and smoother. This lets your customers have a better shopping experience.
New versions of WooCommerce often introduce exciting features. The plugin developers create new enhancements to the e-commerce platform. These can boost your functionality and help you stand out from the competition.
What to Do Before Updating WooCommerce
Before diving headfirst into an update, it’s wise to take some precautions. Here are some key things to do before updating WooCommerce so that everything goes smoothly!
Turn Off Automatic Updates
Automatic updates seem like a convenient way to stay on top of things. However, they can sometimes cause conflicts with your existing theme or plugins.
Imagine you’ve spent hours customizing your storefront with a unique theme, only to have an automatic update scramble your layout or disable key features. To avoid these headaches, let’s take control of the update process.
Disabling automatic updates is a simple process. Open the Plugins page and find WooCommerce. Then, hit Disable auto-updates.
After this, WooCommerce updates will be in your hands! You can control when and how you update WooCommerce, allowing you to better prepare your store.
Check the Support Forum for Bugs
New WooCommerce updates are designed to improve your store, but sometimes unexpected issues can happen. These bugs could cause glitches or other errors within your store.
Because WooCommerce is a WordPress plugin, it has a helpful community that’s available whenever you need it.
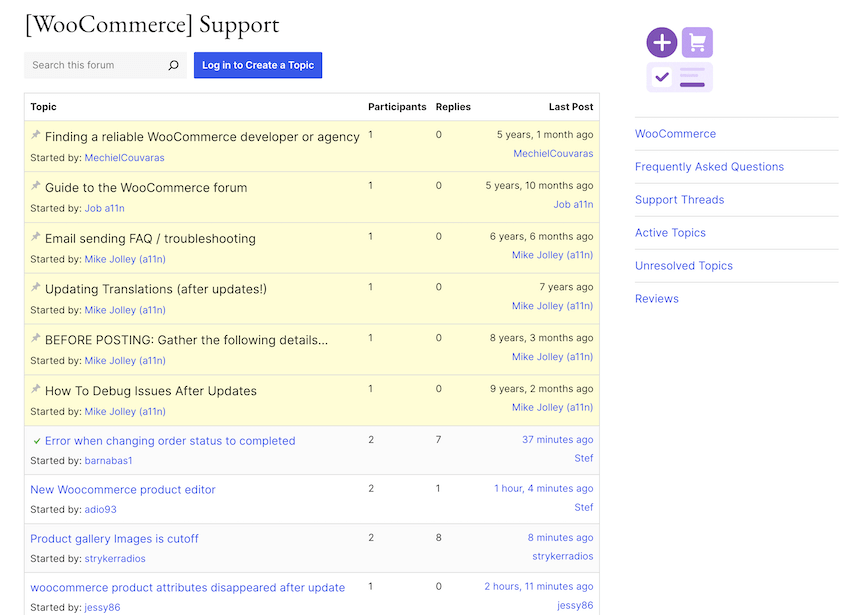
Before updating, check the WooCommerce support forum to see if there are any known bugs related to the specific update you’re planning to install.
If you’re not sure which is the latest version, look at WooCommerce’s changelog. Once you find the right version number, search for it in the WordPress forum.
See if others have encountered issues with the update you’re considering. This will help you decide if it’s safe to update now or if it’s better to wait for a fix.
The right tools can make all the difference when updating WooCommerce.
Here are a few essentials that will help you prepare and test your update smoothly!
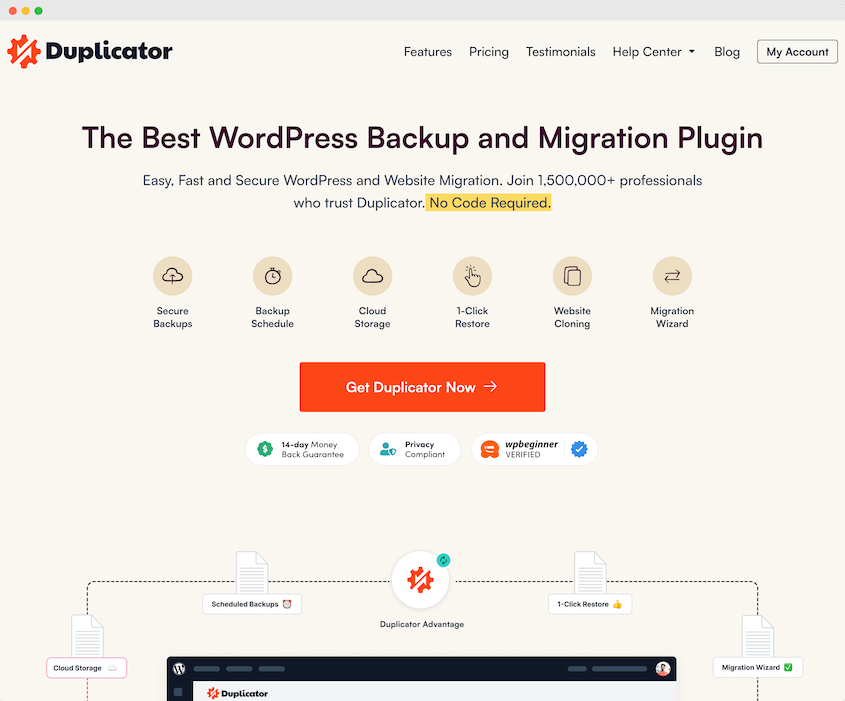
Duplicator creates full backups of your entire store, including themes, plugins, content, and settings. This backup acts as a safety net in case anything goes wrong during the update process.
But Duplicator’s magic doesn’t stop there! It also lets you easily create staging environments – essentially, a clone of your live store in a separate space.
With Duplicator, you can test the update on the staging site first. This way, you can fix any issues before updating your live store. You’ll avoid causing any problems for your customers!
Alternatives: UpdraftPlus and Jetpack are well-known plugins for backups and migrations.
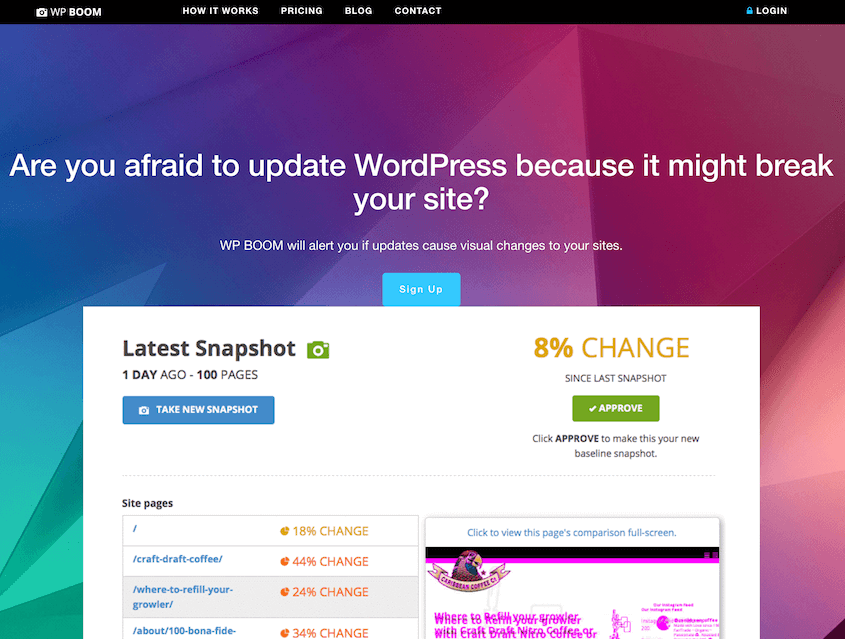
Sometimes, updates can cause minor layout shifts or design changes that might go unnoticed. WP Boom acts like a visual snapshot tool, allowing you to capture the exact look and feel of your store before and after the update.
WP Boom helps you easily identify any unexpected design tweaks. You’ll adjust even the most minor details to maintain a consistent shopping experience.
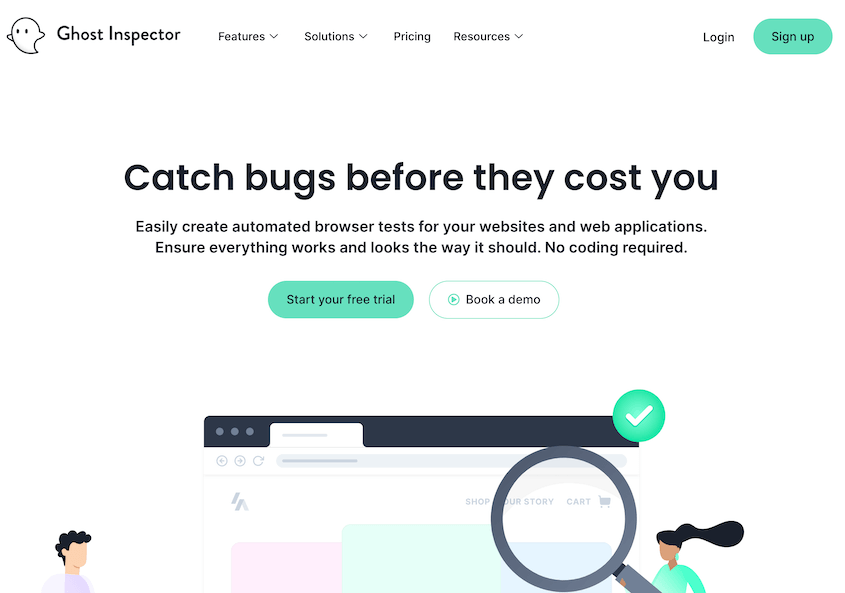
While WP Boom helps with visual comparisons, you’ll need to ensure that all your site’s functionality stays the same after an update. This is where Ghost Inspector comes in.
Ghost Inspector sets up automated tests that mimic real user actions on your store, such as adding products to the cart, going through checkout, and placing an order.
By running these tests before and after the update, you can identify any potential bugs or glitches that might affect your customers’ shopping experience.
Create a Staging Site
Imagine a playground for your WooCommerce store – a safe space where you can experiment without affecting your live site and its customers. This is called a staging site.
A staging site allows you to test the WooCommerce update in a controlled environment. If anything unexpected happens, you can troubleshoot the issue without impacting your live store and its revenue.
For a full step-by-step guide on creating your first WordPress staging site, read this tutorial!
Choose the Right Time to Update
Updates can cause temporary downtime while the new version installs. Even if you test the update on a staging site, you’ll need time to troubleshoot after you make the changes live.
To minimize disruption to your customers’ shopping experience, it’s important to choose the right time to update.
Here are some tips for selecting the best update window!
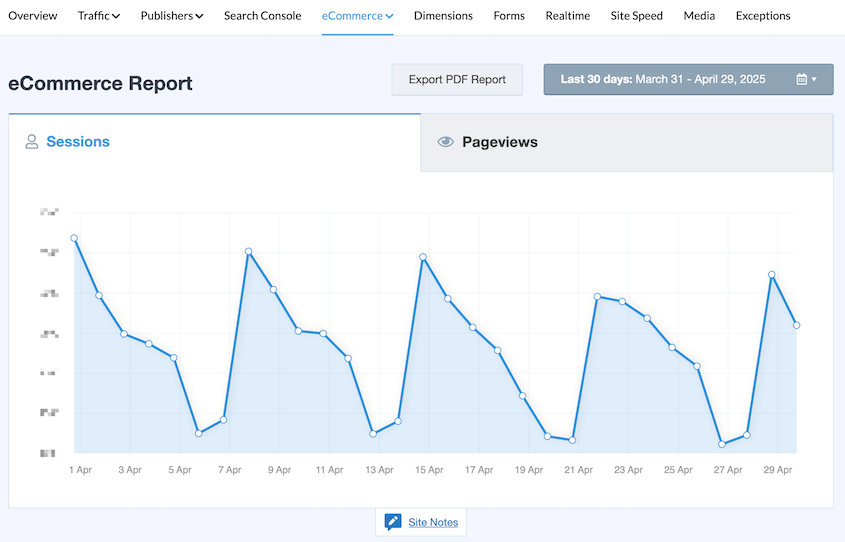
Use website analytics tools like MonsterInsights to identify your store’s typical traffic patterns. Schedule your update for a time when you experience fewer visitors, such as early mornings, late evenings, or even weekends.
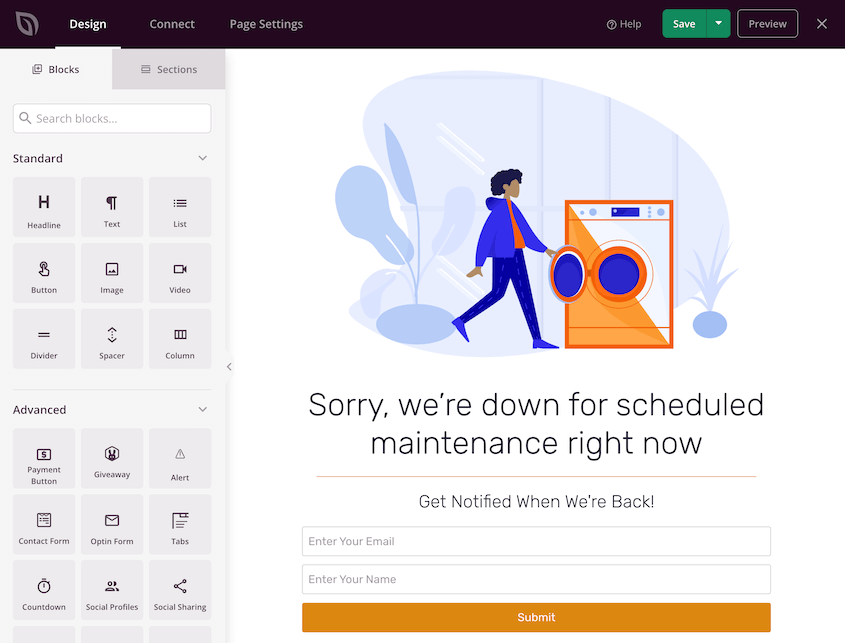
Consider sending a brief notification about upcoming maintenance for a scheduled update. You could also put your store in maintenance mode with a plugin like SeedProd.
By strategically scheduling the update, you can minimize disruption and ensure a smooth transition for your customers.
How to Update WooCommerce
Now that you’ve prepared your store with backups, staging sites, and the right tools, let’s walk through the update process step-by-step!
- Step 1: Back Up Your WooCommerce Store: Create a complete backup using Duplicator Pro to ensure you can restore if anything goes wrong
- Step 2: Take a Snapshot with WP Boom: Capture visual snapshots of your store’s design to identify any layout changes after the update
- Step 3: Migrate Your Store to a Staging Site: Transfer your store to a safe testing environment using your backup files
- Step 4: Update WooCommerce: Install the WooCommerce update on your staging site first for safe testing
- Step 5: Fix Bugs and Conflicts: Test functionality, compare visuals, and resolve any issues discovered during testing
- Step 6: Push the Changes to Your Live Site: Migrate the tested update from staging to your live store using Duplicator Pro
- Step 7: Test Your Live Site for Errors: Verify all functions work correctly on your live site, including payments and checkout
Step 1: Back Up Your WooCommerce Store
Before making any changes, especially when updating software like WooCommerce, create a backup. In case anything goes wrong during the update, you can easily restore your backup and get back to business quickly.
Duplicator Pro is the best plugin for backing up your WooCommerce store. Unlike other backup plugins, it can handle large amounts of data (up to 400GB!)
Here are some other helpful features you’ll get with Duplicator:
- Customizable backups
- Automatic hourly, daily, weekly, or monthly backups
- One-click backup restores
- Cloud storage to Amazon S3, Google Cloud, Google Drive, Dropbox, and more
- Recovery points to roll back large-scale errors
- Drag-and-drop site migrations
- Email alerts for failed backups
Ready to start backing up your WooCommerce store? Download Duplicator Pro!
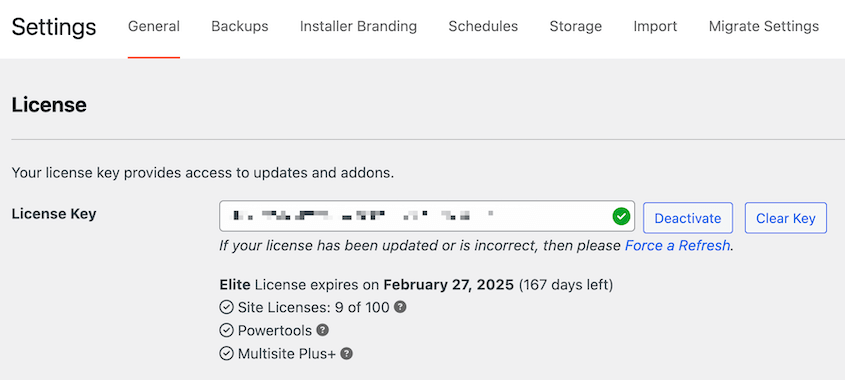
After this, install Duplicator in WordPress. You’ll also need to activate your license key.
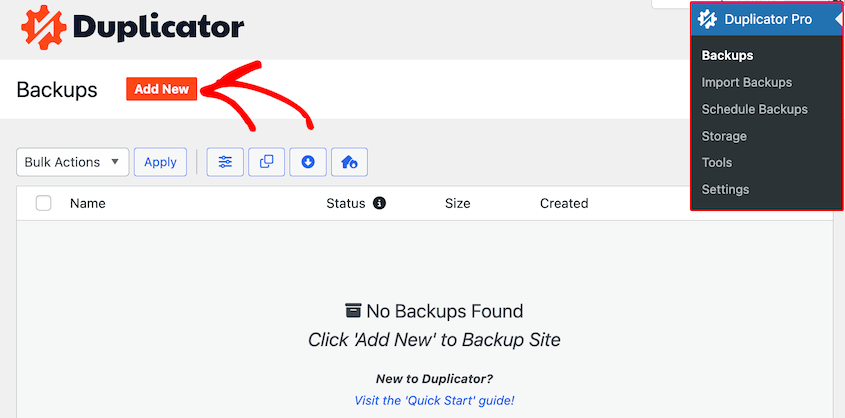
To create a backup, go to Duplicator Pro » Backups » Add New.
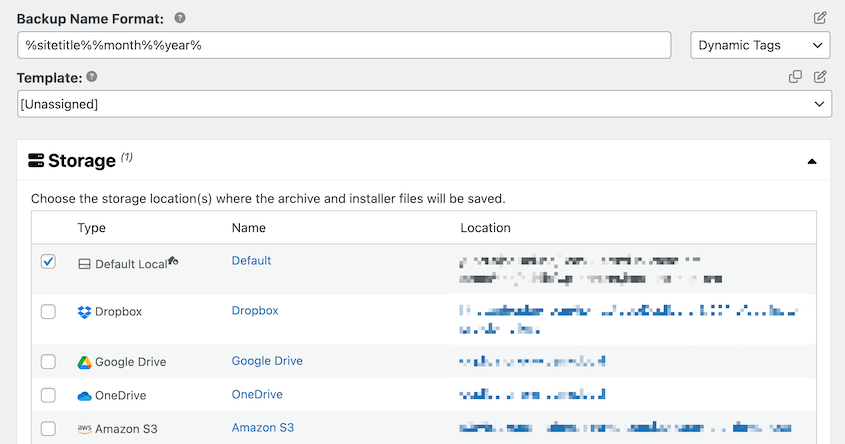
Name the backup with dynamic tags. You can store it on your local server or select a third-party cloud storage location.
I’d recommend backing up everything on your site, so you don’t lose any important data in the update. In the Backup section, click on the Full Site preset.
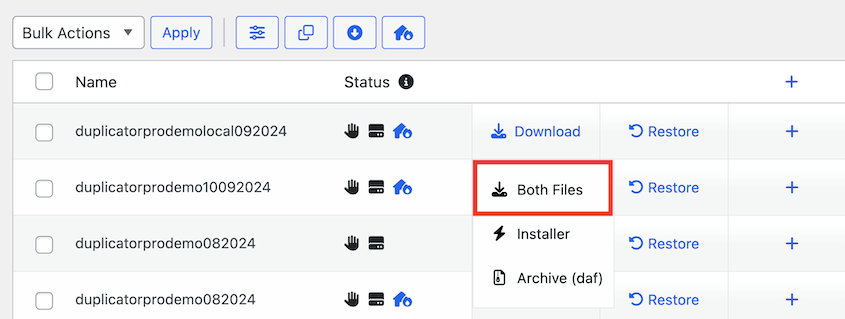
Once you finish the backup, Duplicator will give you two files: an archive file and an installer file. Download both files and store them in a safe location.
If you chose a cloud location, your backup will be automatically sent to remote storage.
Now you have a complete backup of your WooCommerce store! If you face issues at any point, you can quickly roll back your site to this version.
Step 2: Take a Snapshot with WP Boom
As I mentioned earlier, updates can sometimes cause minor layout shifts or design changes. You might not notice them, but your audience will.
Here’s where WP Boom comes in handy. This tool captures a visual snapshot of your store before the update, acting as a baseline for comparison.
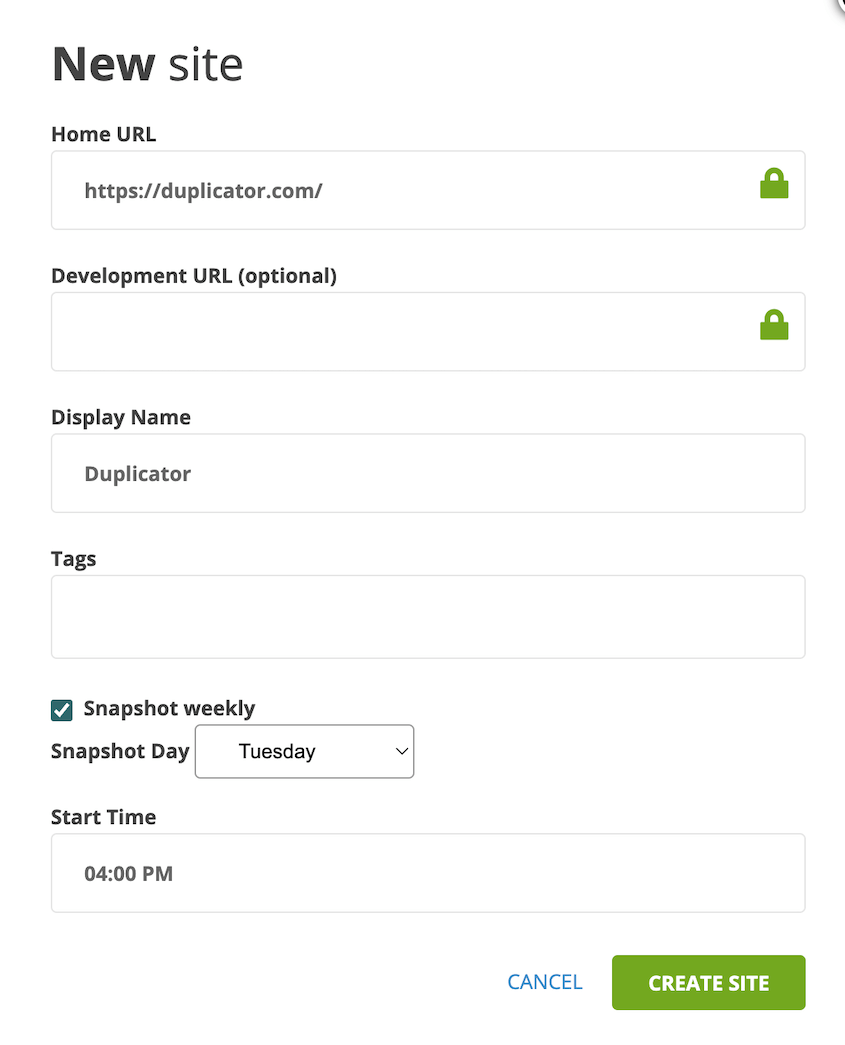
To get started, go to the WP Boom website and create an account. As you sign up, enter your live site’s URL. You can also include your staging site.
Feel free to set up a weekly snapshot. You can routinely check back into WP Boom to see if your site has any unexpected changes.
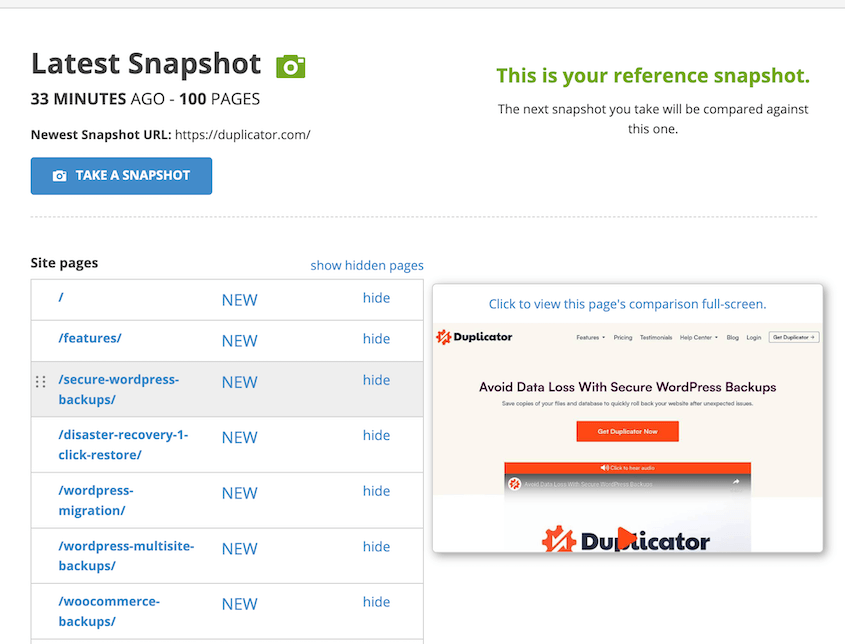
WP Boom will take a comprehensive snapshot of your entire store’s layout and design. This will be the reference for future snapshots.
Now you’ll have a visual record of your store’s original design. You can quickly identify any unexpected layout changes after the update.
Step 3: Migrate Your Store to a Staging Site
Remember the staging site we discussed earlier? This is where it becomes a valuable asset.
By migrating your store to a staging environment, you can test the WooCommerce update in a safe and controlled space, away from your live store and its customers.
First, make sure you have a staging environment for your website. This process typically involves setting up a subdomain on your live server. You could also use a local server.
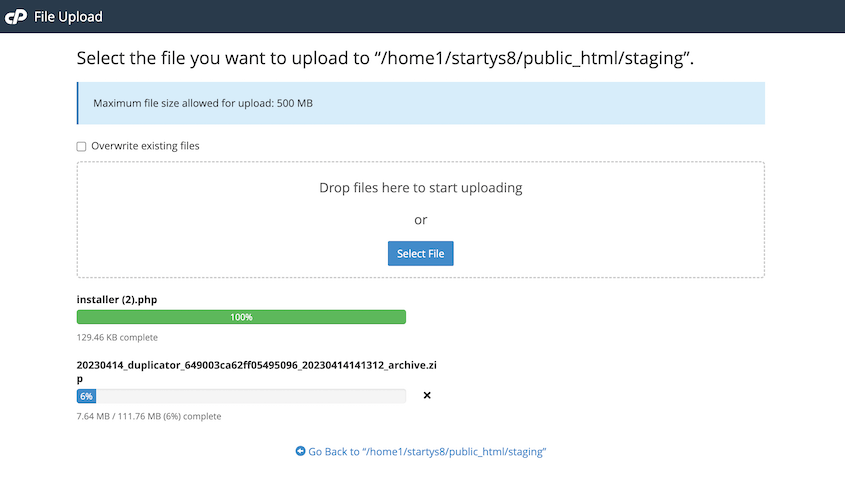
Find the backup you downloaded earlier (for the WooCommerce update). Then, upload both backup files to an empty directory on the staging site.
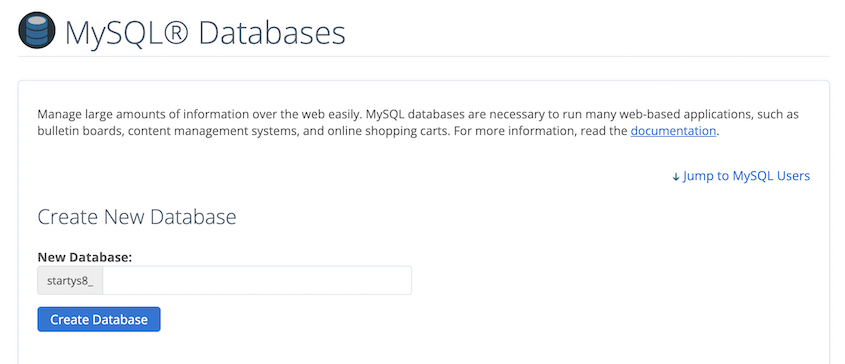
Next, create a database for the staging area. You can usually do this through your web host.
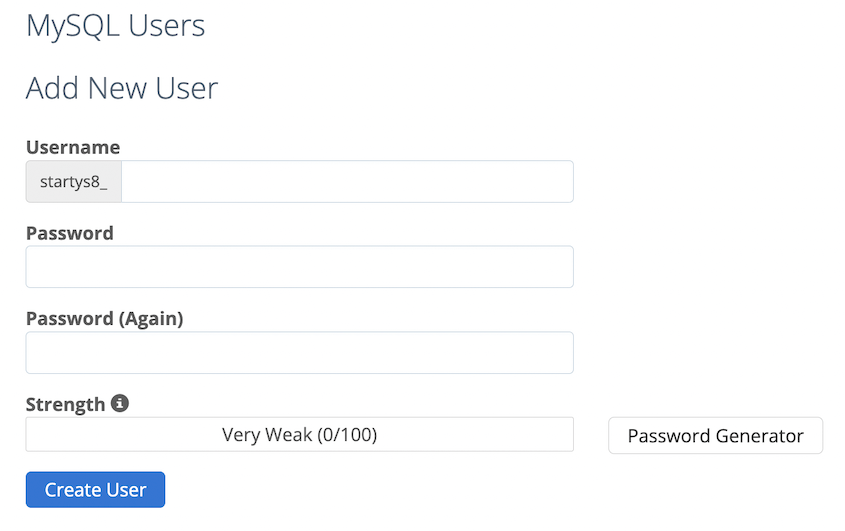
Be sure to create a database user too.
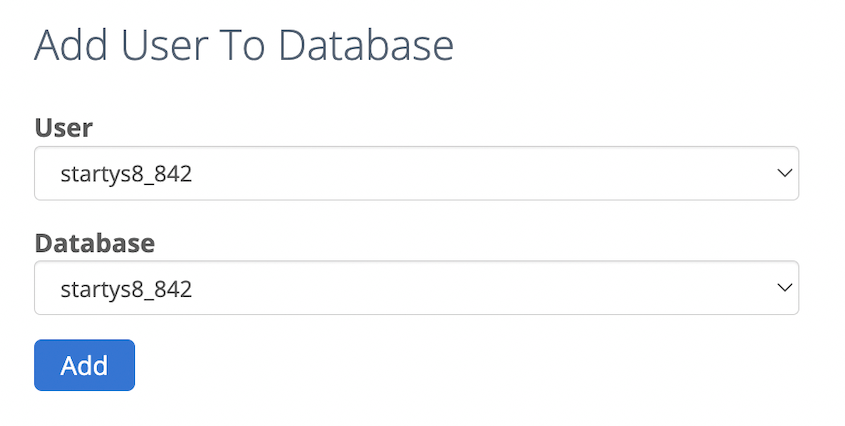
Now assign the new database to the new database user. Assign it all privileges.
To install your original store in the staging site, search for this URL:
https://subdomain.example.com/installer.php
Adjust this URL based on where your staging site is located.
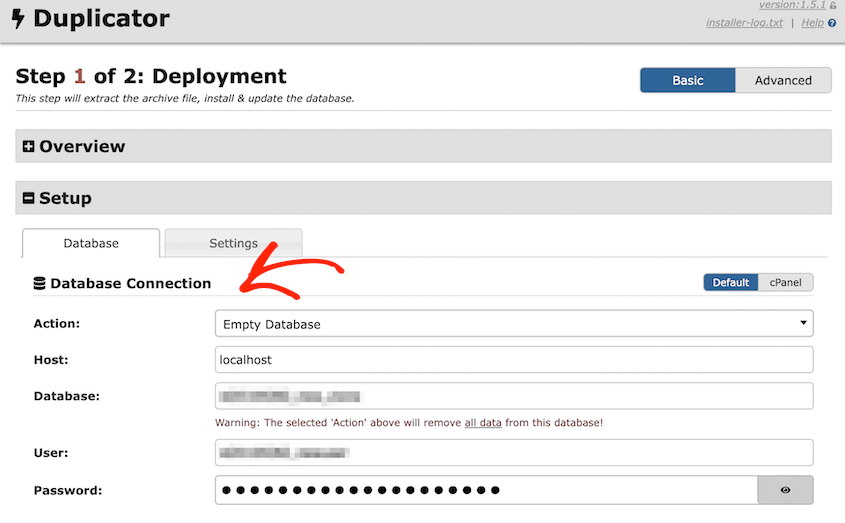
Once Duplicator launches, add the new database information.
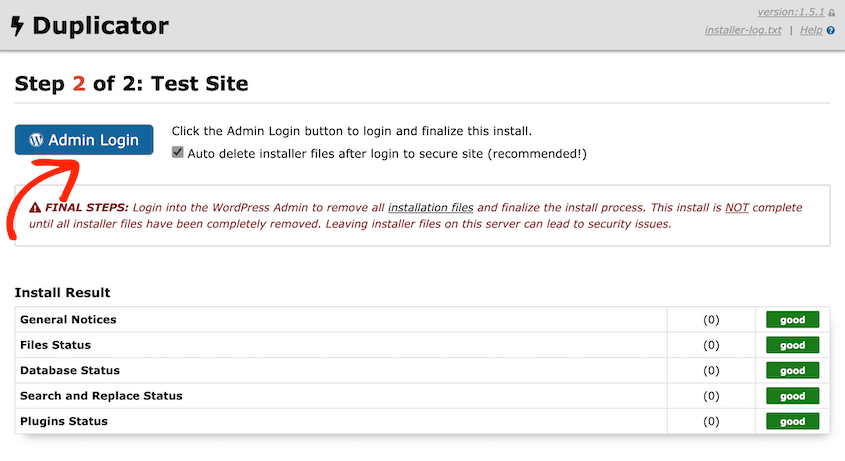
Hit Validate and continue to the next step. Duplicator will automatically migrate your online store! Use the Admin Login button to access an exact replica of your live store on the staging site.
Step 4: Update WooCommerce
Now that your store is safely migrated to the staging site, it’s time to install the WooCommerce update. This controlled environment allows you to test the update thoroughly before pushing it live.
After you log into your testing environment, find the WooCommerce update on the Updates page. You’ll also see an option to update WooCommerce on the Plugins page.
Remember, you’re currently updating WooCommerce on your staging site. This is a test run to ensure everything works smoothly before making changes to your live store.
Step 5: Fix Bugs and Conflicts
After updating WooCommerce on your staging site, it’s important to check for any potential bugs or conflicts. Let’s talk about how to identify and fix these issues.
Remember the snapshot you took before the update? Now’s the time to put it to good use.
Compare the pre-update snapshot with the current state of your staging site on WP Boom. This visual comparison can help you identify any unexpected layout changes introduced by the update.
While WP Boom helps with visuals, it’s equally important to test the functionality of your store after the update.
Go through typical customer actions like adding products to the cart, navigating the checkout process, and placing a test order. Ensure all functionalities work seamlessly to avoid surprises on your live site.
For a more comprehensive testing approach, consider using Ghost Inspector. This tool allows you to set up automated tests that mimic real user actions on your store.
Running these tests before and after the update can help uncover even minor bugs or glitches that might escape manual testing.
By checking for bugs and conflicts on your staging site, you can identify and resolve any issues before pushing the update live. This minimizes the risk of disrupting your customers’ shopping experience on your actual store.
Step 6: Push the Changes to Your Live Site
Once you’ve thoroughly tested the WooCommerce update on your staging site, it’s time to push the changes to your live store.
Remember the full backup you created earlier? If anything unexpected happens during the migration, you can simply restore your live site from the backup.
Duplicator Pro simplifies the process of migrating your updated store from the staging site to your live site. To get started, create and download a backup of the staging site. This time, you’ll only need the archive file.
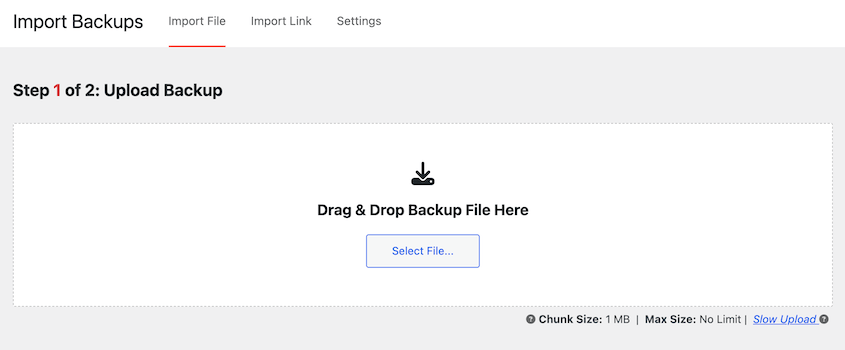
Log into your live site’s WordPress dashboard. Go to Duplicator Pro » Import Backups and upload the staging site backup.
Duplicator Pro will transfer the updated WooCommerce version and all your store’s content to your live site!
Step 7: Test Your Live Site for Errors
Even though you’ve tested extensively on the staging site, it’s wise to double-check everything on your live site. Especially if the staging site is on another server, migrating the data could cause unexpected changes.
I’d suggest going through the core functionalities of your store. Add products to your cart, navigate the checkout process, place test orders, and manage customer accounts. Ensure everything works as expected.
You’ll want to verify that all your payment gateways are functioning correctly after the update. Consider placing a small test order using a real payment method to confirm successful transactions.
It’s a good idea to browse your store from a customer’s perspective. Look for any layout changes or design inconsistencies that might have slipped through the cracks during testing. Again, you can use WP Boom and Ghost Inspector to help you spot errors.
How to Troubleshoot WooCommerce Update Errors
Even with the best preparation, errors can happen after a WooCommerce update. Don’t worry, we’ll help you troubleshoot these errors and get your store back on track.
Check the WooCommerce Version
If the update fails, first check that you installed the right version of WooCommerce. The latest version will usually have better performance and bug fixes.
Login to your WordPress dashboard and navigate to WooCommerce » Status. In the WordPress environment section, you’ll see your current WooCommerce version number.
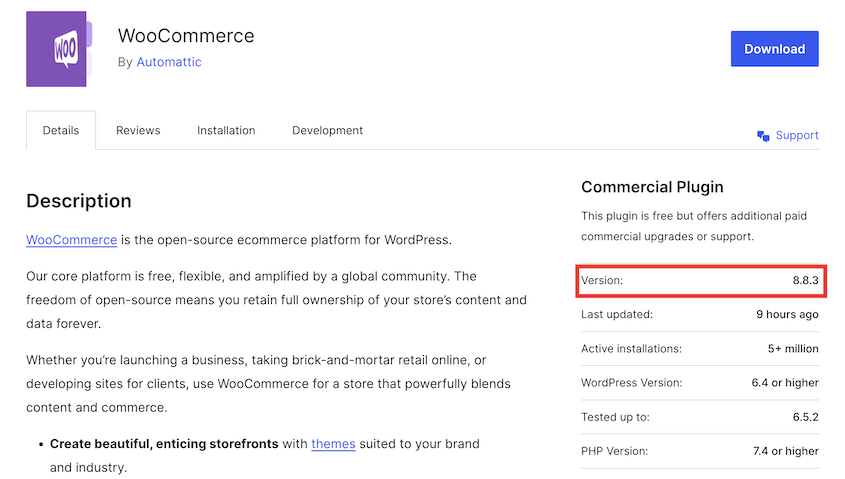
Head over to the WooCommerce page on wordpress.org. The plugin details will show you the latest version.
By verifying compatibility, you can avoid potential conflicts and ensure a successful update.
Update WordPress Core, Themes, and Plugins
Outdated WordPress core software, themes, or plugins can sometimes clash with a new WooCommerce update. So, you’ll want to make sure everything is up to date.
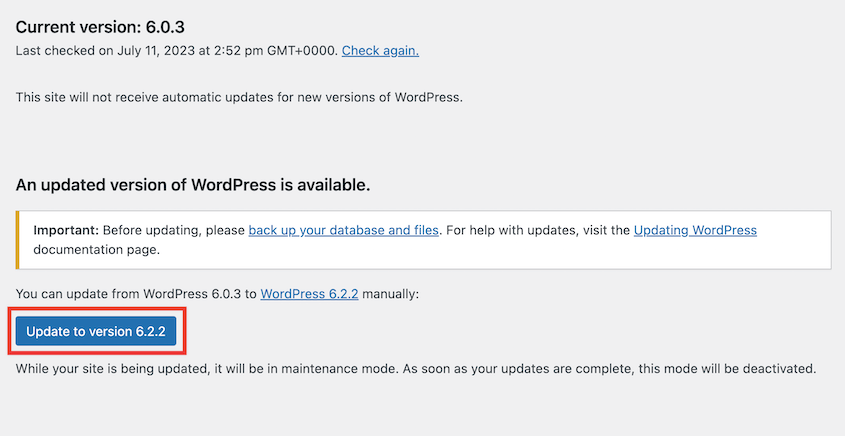
In your WordPress dashboard, navigate to Updates. If a new WordPress version is available, you’ll see a notification there.
Repeat this process for plugins and themes.
Clear Your Cache
Sometimes, cached data can cling to outdated information. After an update, this cached data might still display the old version of your store, causing confusion.
If you’re using a caching plugin like WP Super Cache or W3 Total Cache, these plugins usually have built-in options to clear your website’s cache. Consult the plugin’s documentation for specific instructions.
By clearing your cache, your website will display the latest version of your store after a WooCommerce update.
Update Your PHP Version
PHP is the language your website uses to communicate with the server. Outdated PHP versions might not understand the instructions included in the latest WooCommerce update, leading to errors.
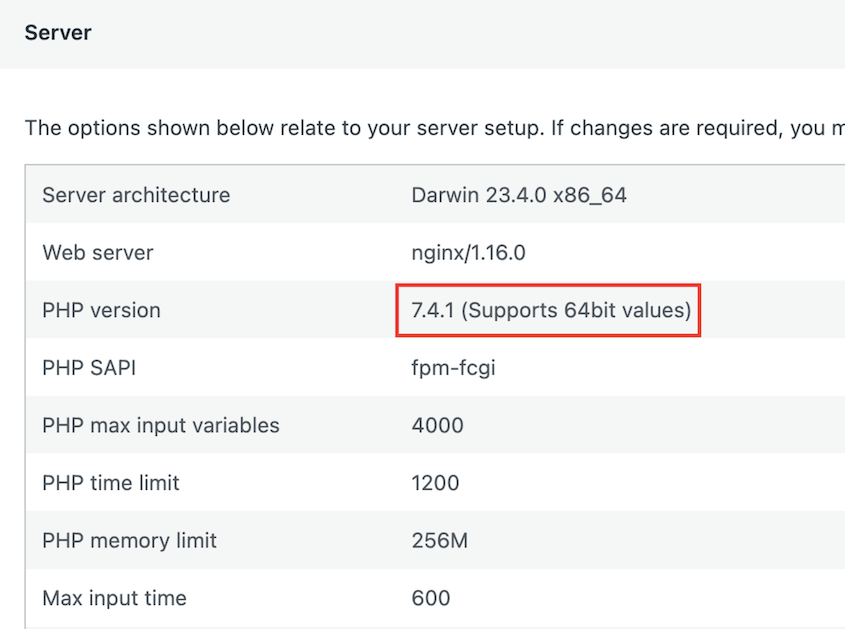
In your WordPress dashboard, navigate to Tools » Site Health. Under the Info tab, you’ll find details like your current PHP version.
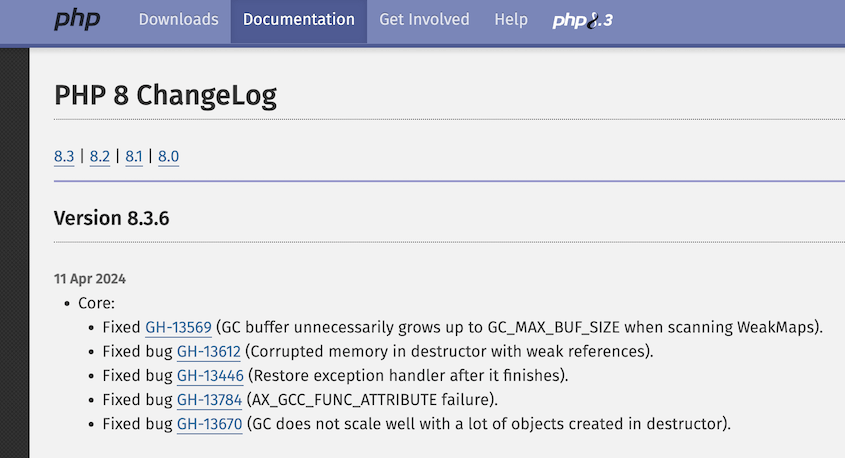
You can see what the latest PHP version is on php.net.
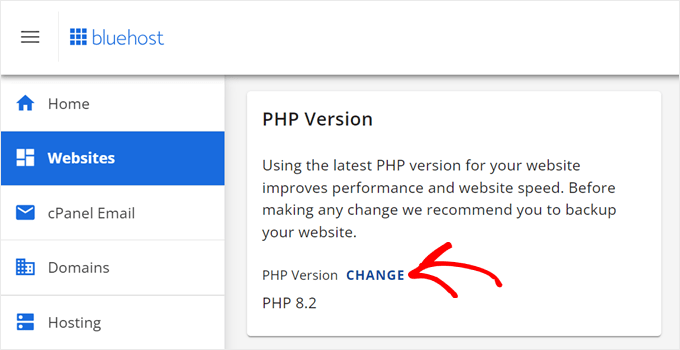
Updating your PHP version typically requires contacting your hosting provider. They can guide you through the update process or may even offer it as a service.
Increase PHP Memory
Insufficient PHP memory allocation can lead to errors after WooCommerce updates. To increase it, you’ll need to edit your wp-config.php file.
Add this code before the ‘That’s all, stop editing! Happy blogging.’ line:
define( 'WP_MEMORY_LIMIT', '256M' );
For more details, see this detailed tutorial on how to increase PHP memory.
After this, you’ll provide your website with the resources it needs to function smoothly after a WooCommerce update.
Roll Back the Update
Maybe the WooCommerce update introduced critical issues on your live site. If you don’t want to troubleshoot, consider reverting your site to a previous version.
Duplicator Pro offers a user-friendly one-click restore functionality. Simply go to the Backups page, where you’ll see all the backups of your site. Find the backup you created before the update and hit Restore.
This rollback feature acts as a safety net, restoring a stable version of your store if needed.
FAQs About Updating WooCommerce
How do I update WooCommerce to the latest version?
To update WooCommerce to the latest version, start by backing up your store. Then, consider using a staging site to test the update. If all goes well on the staging site, migrate the update to your live store. Remember, tools like Duplicator Pro can streamline this process.
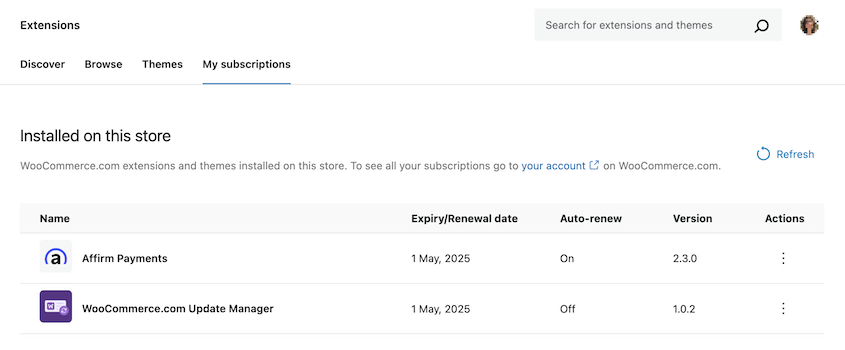
To update any extension you bought from WooCommerce.com (now Woo), go to WooCommerce » Extensions » My subscriptions. This is where you can view version numbers for your WooCommerce extensions and perform updates.
Where do I find my WooCommerce version?
You can find your WooCommerce version easily within your WordPress dashboard. Navigate to WooCommerce » Status. The version number will be displayed under the WordPress environment details.
How do I update the WooCommerce database manually?
You can manually update WooCommerce databases with the command line. First, log into your WordPress site via SSH. Then, use this command to access your root directory:
cd ~/sites/example.com
Enter the following command to update the WooCommerce database:
wp wc update
How do I update all products in WooCommerce?
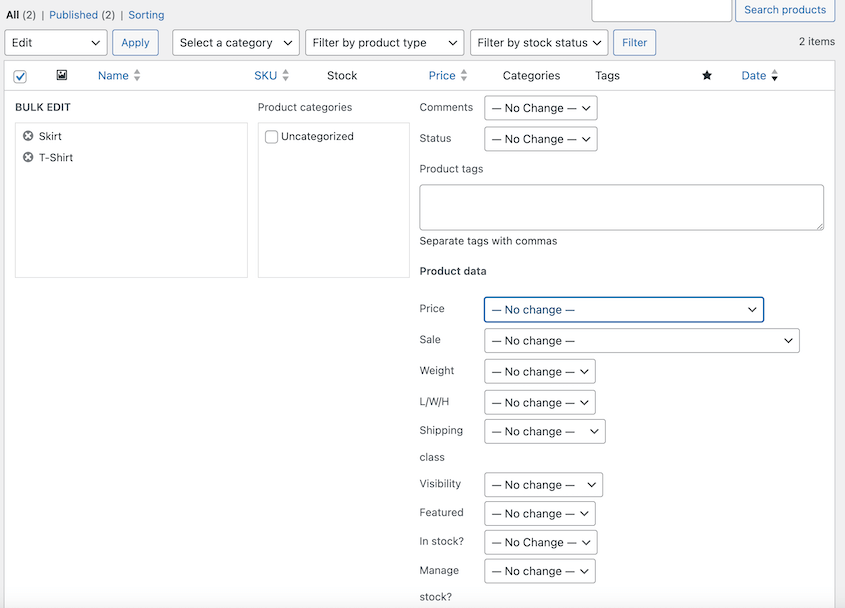
Within the WooCommerce product list, you can select multiple products and edit them in bulk. You can update pricing, stock quantities, shipping, size, sale price, and other key information on your product pages. This is ideal for simple updates that apply to a group of products.
If you have a large number of products or complex edits, consider using product import/export tools. Export your products to a CSV file, make the necessary changes in the spreadsheet, and then import the updated file back into WooCommerce.
Conclusion
Keeping your WooCommerce store updated is essential for security, performance, and access to exciting new features. By following the steps outlined in this guide, you can approach updates with confidence.
While you’re here, I think you’ll like these extra WordPress tutorials:
Ready to take control of your WooCommerce updates? Download Duplicator Pro today!
Joella is a writer with years of experience in WordPress. At Duplicator, she specializes in site maintenance — from basic backups to large-scale migrations. Her ultimate goal is to make sure your WordPress website is safe and ready for growth.


