
![[New] Introducing Duplicator 5.0: AI Backups, AutoTune, and Extra Free Features](https://duplicator.com/wp-content/uploads/2026/09/Duplicator-5-0-Announcement.jpg)
How to Move a Website to WordPress From Any Platform
 Joella Dunn
Joella Dunn
Joella Dunn
 John Turner
John Turner
John Turner
You’ve decided to leave your current platform and move to WordPress. Now you’re trying to figure out how.
Here’s what usually trips people up: they install a WordPress migration plugin, expecting it to pull their content in from Wix, Shopify, or Blogger automatically.
It won’t.
Migration plugins move an existing WordPress site to new hosting. That’s a different job.
If you’re coming from a platform that isn’t already WordPress, you need a different process, one built around exporting content from a system that was never designed to hand it over cleanly.
I’ve walked people through this move from half a dozen platforms at this point. The steps change depending on where you’re starting, but the shape of the problem never does: get your content out, get it into WordPress in one piece, and don’t lose your search rankings on the way.
This post does two things. If you’re moving from Blogger, Joomla, Medium, Wix, Weebly, Squarespace, WordPress.com, or Shopify, it points you to the exact method for your platform.
If you’re coming from somewhere else or a custom-built site, it walks you through the full process step by step.
Either way, you’ll end up in the same place: a working WordPress site with your content intact and your old platform out of the picture for good.
Here are the key takeaways:
- This post covers two paths: a decision hub routing you to a dedicated guide if you’re leaving Blogger, Joomla, Medium, Wix, Weebly, Squarespace, WordPress.com, or Shopify, and a full universal walkthrough for every other platform.
- The biggest mistake people make is installing a WordPress migration plugin expecting it to import a non-WordPress site. Those tools only move WordPress sites to WordPress sites, not Wix or Shopify content into WordPress.
- DNS propagation after you point your domain at your new host can take anywhere from a few minutes to 48 hours, so don’t panic if the site doesn’t switch over instantly.
- Back up your new WordPress site the moment it goes live. Skipping this is the easiest step to forget once the migration itself feels finished.
- Redirects are what protect your search rankings. Skip them, and every indexed page on your old platform becomes a dead link.
Table of Contents
- Why Move Your Site to WordPress?
- Find Your Custom Migration Path
- How to Move Your Website to WordPress
- Step 1: Choose Hosting and Install WordPress
- Step 2: Take a Full Inventory of Your Original Site
- Step 3: Export Your Content From Your Current Platform
- Step 4: Import Your Content Into WordPress
- Step 5: Transfer and Fix Your Images
- Step 6: Rebuild Your Design
- Step 7: Match Your Permalink Structure
- Step 8: Set Up Redirects From Your Old URLs
- Step 9: Test Everything on a Staging Site First
- Step 10: Go Live and Back Up Your New Site Immediately
- Troubleshooting Common CMS-to-WordPress Migration Errors
- Frequently Asked Questions (FAQs)
Why Move Your Site to WordPress?
Whatever platform you’re leaving, the reasons usually come down to the same handful of problems.
You Own Your Site, Not Just Rent It
Platforms like Wix, Squarespace, and Shopify host your site on their terms. Your content lives in their system, under their rules.
WordPress.org is different. Your files and content live on hosting you control. No platform can suspend your account, cap your traffic, or shut down your business because you tripped a terms-of-service clause.
Lower Costs Over Time
Subscription platforms charge you every month, whether you get ten visitors or ten thousand. Store platforms add transaction fees on top of that, taking a cut of every sale.
WordPress hosting plus a one-time theme or plugin purchase often costs less within the first year. There’s no per-sale cut waiting on the other end.
No Limits on Plugins or Functionality
Closed platforms cap what you can add to your site. Want a specific booking system, a custom form, or a membership area? You’re stuck with whatever the platform’s app store offers, if it offers anything at all.
WordPress has a plugin for almost everything. If one doesn’t exist, a developer can build it. That’s not true anywhere else on this list.
Full SEO Control
Page-builder platforms often restrict URL structure, redirects, and technical SEO settings. You get what the platform decided to expose in its settings panel and nothing more.
WordPress, paired with a plugin like AIOSEO, gives you full control over titles, schema markup, redirects, and site structure. You’re not waiting on a platform update to fix something search engines care about.
Find Your Custom Migration Path
Every step in this post is the same no matter where you’re coming from, except one: exporting your content.
That step depends on what your current platform lets you take out, and how.
Some platforms hand you a clean file. Others make you copy and paste every page by hand.
If your platform is listed below, jump to that guide now. It covers the exact export method for your situation, and you can come back here for everything else.
If your platform isn’t on this list, keep reading. The process below still gets you there. You’ll just be handling the export step manually instead of following a dedicated guide.
How to Move Your Website to WordPress
Everything from here on out applies regardless of what platform you’re leaving. For more platform-specific advice, find your current CMS on the list in the previous section.
Here’s what you’ll do:
- Step 1: Choose hosting and install WordPress. Sets up the foundation your content will live on, separate from your old platform entirely.
- Step 2: Take a full inventory of your current site. Gives you a checklist to confirm against later, so nothing goes missing without you noticing.
- Step 3: Export your content from your current platform. The one step that isn’t universal, since it depends entirely on what your old platform lets you take out.
- Step 4: Import your content into WordPress. Gets your exported content into the WordPress database using the native importer or a matching plugin.
- Step 5: Transfer and fix your images. Repairs the broken links and missing files that most exports leave behind.
- Step 6: Rebuild your design. Recreates the look of your old site, since importing content never brings your layout or branding with it.
- Step 7: Match your permalink structure. Keeps your new URLs as close to your old ones as possible, which limits how many redirects you’ll need next.
- Step 8: Set up redirects from your old URLs. Protects your search rankings by sending old links to their new WordPress destinations instead of a dead end.
- Step 9: Test everything on a staging site first. Catches broken links and layout issues privately, before a real visitor finds them.
- Step 10: Go live and back up your new site immediately. Locks in a clean, known-good copy of your finished site before anything else has a chance to break it.
Step 1: Choose Hosting and Install WordPress
WordPress.org itself is free. Hosting isn’t, and this is where most of your monthly cost will actually go.
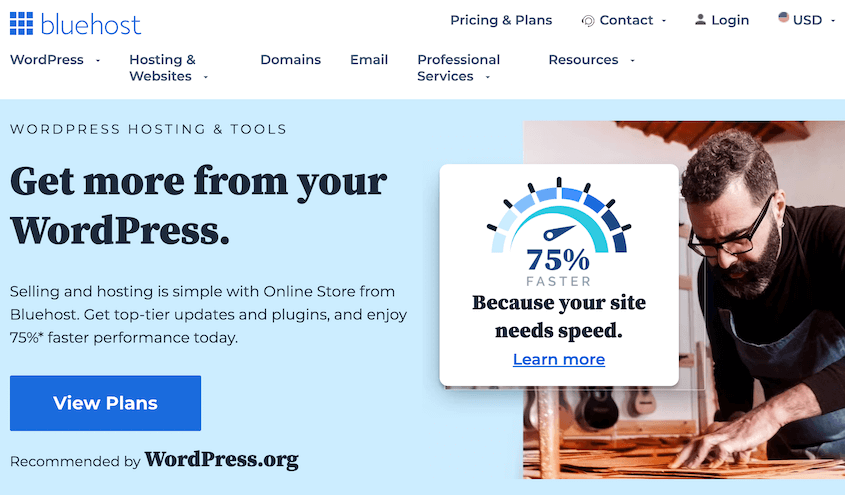
Pick a web host that offers one-click WordPress installs. Nearly all mainstream hosts do at this point, but we always recommend Bluehost as the best option.
If you’re keeping your existing domain and don’t want your old site to go down mid-migration, use a temporary domain or your host’s staging URL for now. You’ll point your real domain over later, in Step 10.
Run the installer. It typically asks for a site name, an admin username, and a password.
Use a strong password here. This is the account that controls everything on your new site.
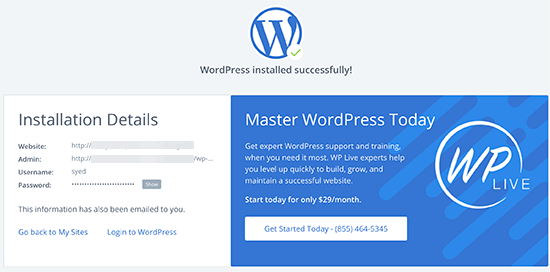
You’ll know this step worked when you can log into yoursite.com/wp-admin and see the WordPress dashboard.
Step 2: Take a Full Inventory of Your Original Site
Before you export or copy anything, catalog what you have on your site:
- Number of pages
- Number of blog posts
- Number of images
- Contact forms
- Product count
Skipping this step is the single most common reason content goes missing during a migration. Without a list to check against, you won’t notice a missing page until a customer emails you about it.
Step 3: Export Your Content From Your Current Platform
If you followed a link from the Find Your Migration Path section above, you’ve already handled this step using the exact method for your platform. Skip ahead to Step 4.
If your platform wasn’t on that list, here’s the order to try things in:
- Check for a native export tool. Most platforms have some kind of export or download option buried in account or site settings. Look for words like “Export,” “Download,” or “Data.”
- Check for an RSS feed. Most blogging platforms publish one automatically, usually at yoursite.com/feed or similar. It won’t capture everything, but it’s a reliable way to pull post content.
- Look for a third-party conversion tool. Plenty of tools exist to convert one platform’s export format into something WordPress can read. Search for “[your platform] to WordPress converter.”
- Manual copy-paste, as a last resort. For small sites, or platforms with no export option at all, copying content by hand into new WordPress pages is slow but reliable. It’s tedious, so you’ll need to budget time for it.
Step 4: Import Your Content Into WordPress
Once you have an export file, head to your WordPress dashboard and go to Tools, then Import.
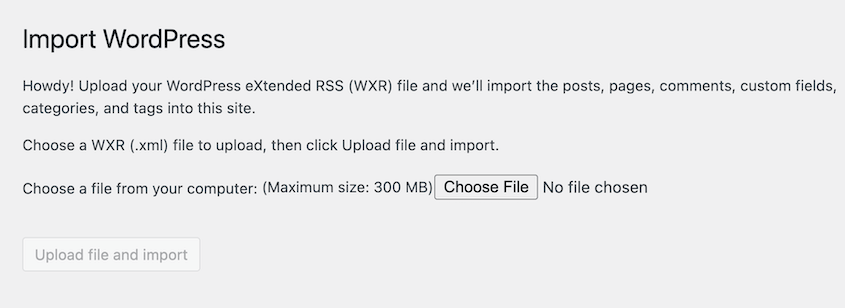
If your file is in XML or WXR format, WordPress’s native importer handles it directly. Choose WordPress from the list of importers, install the importer plugin if prompted, and then upload your file.
For other formats, you’ll need a dedicated plugin matched to your export type.
For content that didn’t export cleanly at all, you’re back to manual entry: creating new pages and pasting content in directly.
Large export files can stall or fail here. If your import hangs or throws an error, jump to the troubleshooting section below before trying again.
You’ll know this step worked when your posts and pages show up under Posts and Pages in the WordPress dashboard, even if they don’t look right yet. Formatting comes next.
Step 5: Transfer and Fix Your Images
Images are where most migrations fail. Even a clean XML import often leaves you with broken image links or missing files entirely.
Check your imported posts and pages for broken image icons or blank boxes where a photo should be.
For images that didn’t come through, download them from your old site (or your local files, if you have them) and re-upload to the WordPress Media Library.
While you’re in there, rename image files to something descriptive before uploading. “product-blue-jacket.jpg” helps your SEO. “IMG_4821.jpg” doesn’t.
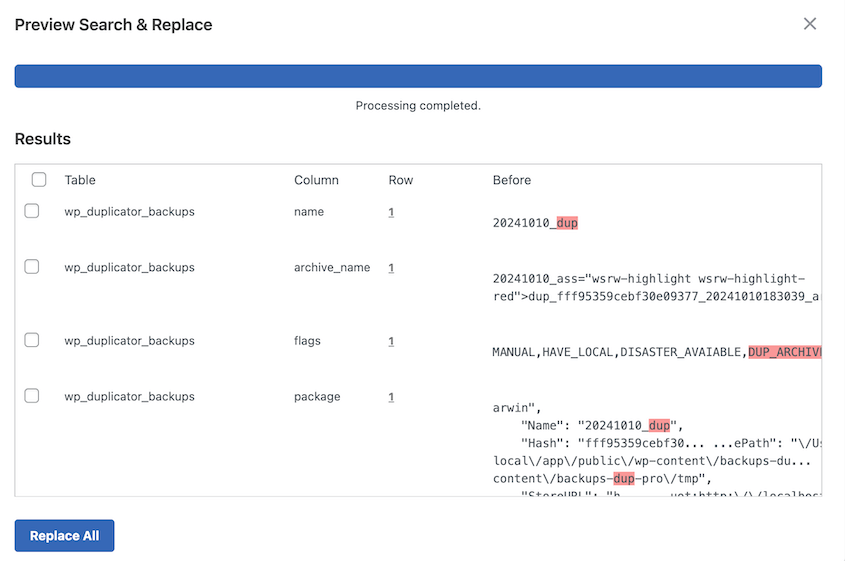
If you’re dealing with dozens of broken image links scattered across old content, a plugin like Search & Replace Everything can fix the links in bulk rather than one by one.
Step 6: Rebuild Your Design
WordPress won’t recreate your old site’s look. That import brought over your content, not your layout, colors, or branding.
Pick a WordPress theme close to the style you want. Then use a page builder like SeedProd to rebuild your layout: headers, footers, homepage sections, and any custom pages that mattered on your old site.
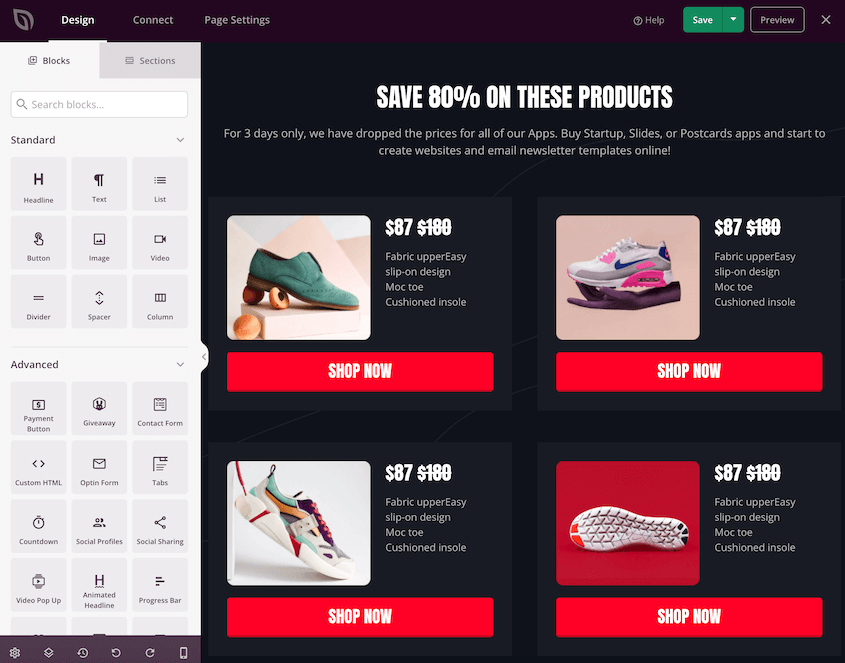
This is the most time-consuming step for design-heavy sites. If your old site had a custom layout with a lot of visual polish, expect this to take longer than every other step combined. That’s normal.
Step 7: Match Your Permalink Structure
Your URLs matter more than most people expect going into this. Every link pointing to your old site (from Google’s index to someone’s bookmarks bar) points to a specific URL structure.
Go to Settings » Permalinks in your WordPress dashboard. Choose a structure that mirrors your old platform’s URLs as closely as possible.
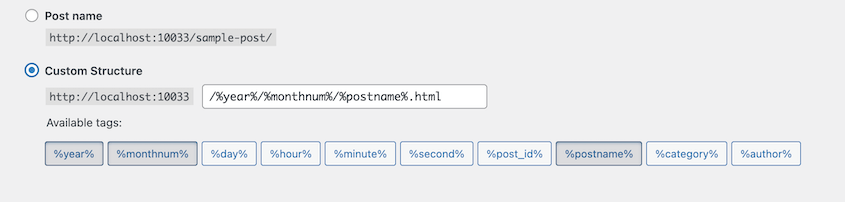
If your old blog posts lived at yoursite.com/2024/03/post-title, choose the permalink option that matches that pattern instead of WordPress’s default.
You won’t always get an exact match, especially if you’re moving from a platform with a very different URL pattern. Get as close as you can. The closer you get, the fewer redirects you’ll need in the next step.
Step 8: Set Up Redirects From Your Old URLs
301 redirects protect your search rankings. Skip this step, and every page Google has indexed on your old platform becomes a dead link when you delete the original site.
For every URL on your old site that doesn’t match its new WordPress equivalent, set up a 301 redirect pointing the old address to the new one.
A plugin like AIOSEO handles this without touching server configuration files directly.
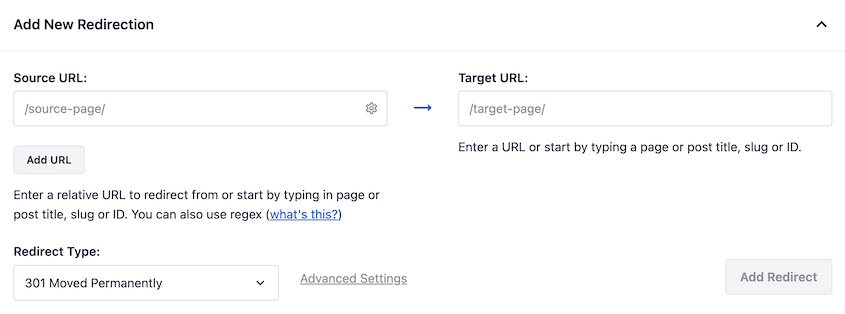
Work from the content inventory you built in Step 2. Go through it URL by URL. It’s tedious, but it’s the difference between keeping your search rankings and starting over from zero.
Step 9: Test Everything on a Staging Site First
Don’t point your domain at this new site yet. Test it somewhere private first.
Duplicator’s one-click staging feature turns your new WordPress build into a private, password-protected staging site you can test without it being publicly visible. Search engines can’t index it, and casual visitors can’t stumble onto it.
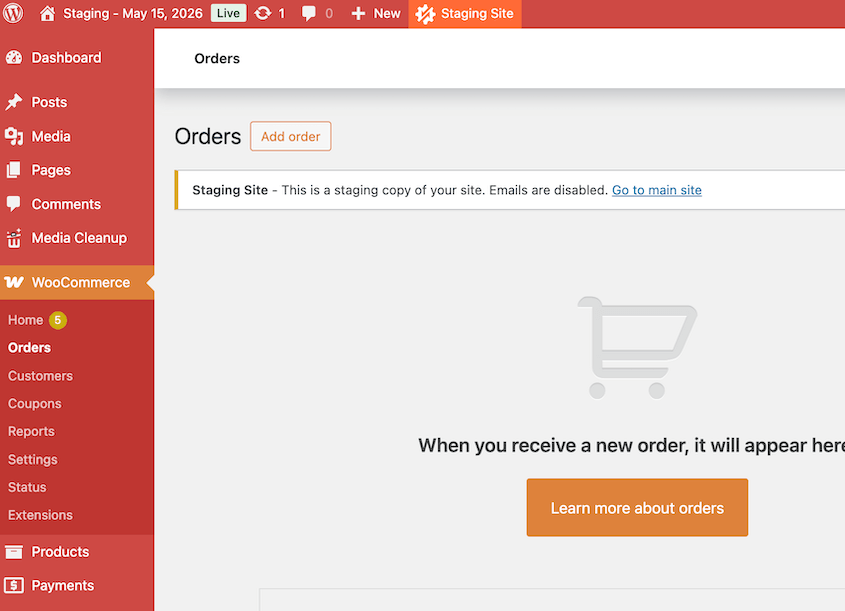
Click through every page. Submit your contact form. Check your site on mobile. This is where you catch the broken link or missing image you missed earlier, before a real visitor does.
Step 10: Go Live and Back Up Your New Site Immediately
Once staging checks out, point your domain to your new WordPress host. This usually means updating your domain’s nameservers or DNS records.
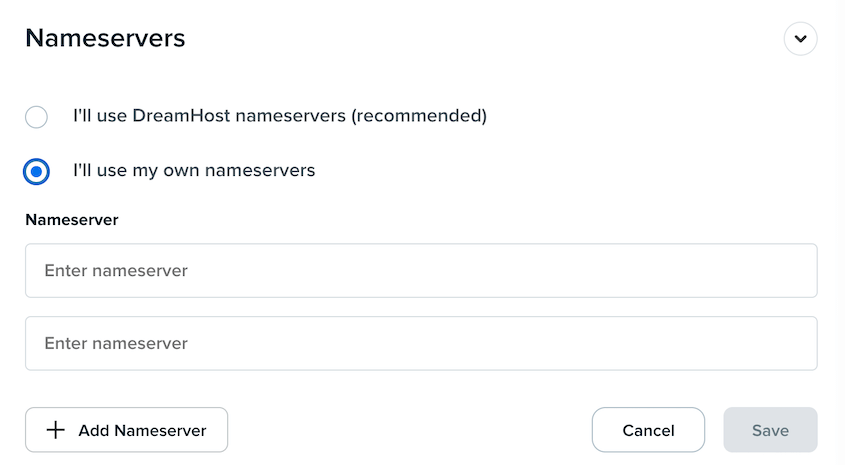
It can take anywhere from a few minutes to 48 hours to fully propagate depending on your registrar.
The moment your site is live, back it up.
This gives you a clean, known-good copy of your brand-new WordPress site before anything else touches it. If something breaks next week, you’ll have a point you can return to.
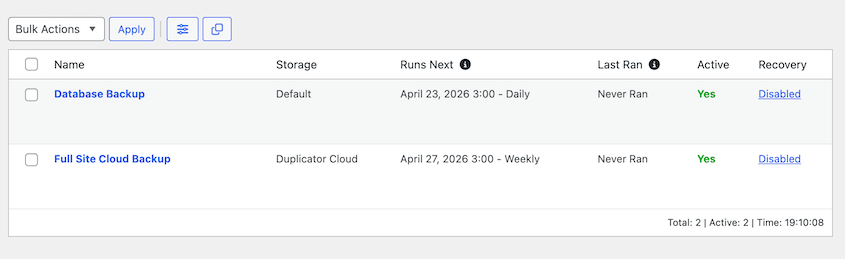
Open Duplicator, go to the Backups screen, and create your first full backup. Then, set up automatic backups so you have ongoing protection.
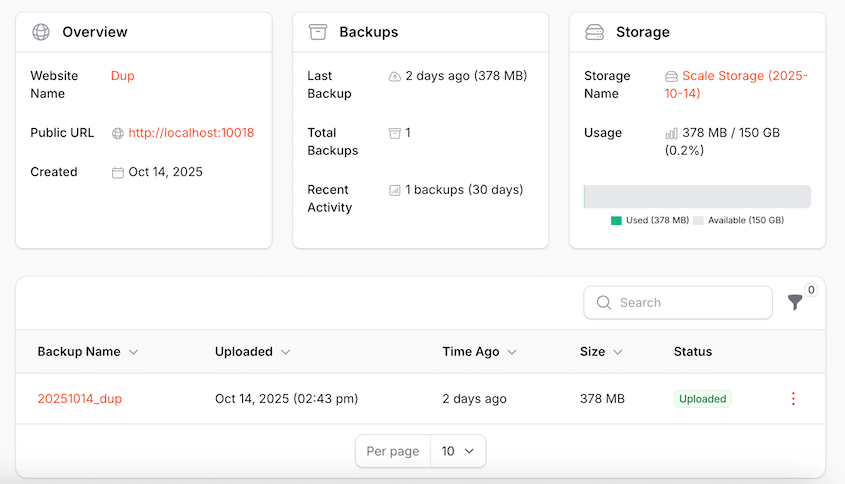
I also recommend sending your backups to a safe, off-site location like Duplicator Cloud. On your old CMS, you had no control over your data. Now, you can keep data in secure cloud storage and never worry about losing it!
Troubleshooting Common CMS-to-WordPress Migration Errors
These are the failure points that come up most and how to fix each one.
My migration plugin doesn’t show my old site’s content
You installed Duplicator, Migrate Guru, or a similar plugin expecting it to list your Wix or Shopify content, and it’s empty or only shows your current WordPress install.
This happens because WordPress migration plugins move WordPress sites to WordPress sites. They can’t read a platform that isn’t WordPress in the first place.
Go back to Step 3 and use the correct export method for your platform instead. If your platform has a dedicated guide linked above, that’s your fastest path.
Images are broken after import
You’re looking at broken image icons or blank gray boxes where photos used to be.
Most exports carry relative image paths: links written as if the images still live on your old platform’s servers. Once that platform is gone, those paths point nowhere.
Re-upload the missing images through your WordPress Media Library, or use a plugin like Search & Replace Everything to fix broken links in bulk if the problem is widespread.
Old URLs return 404 after go-live
Someone clicks a bookmarked link or a Google search result, and lands on WordPress’s “Page not found” screen instead of your content.
This almost always comes down to a permalink structure that doesn’t match your old URLs or a redirect you meant to set up in Step 8 but missed.
Go to Settings » Permalinks and click Save Changes without altering anything. This forces WordPress to regenerate its permalink rules and fixes a surprising number of 404s on its own.
If that doesn’t resolve it, go back through your content inventory and check for missing redirects.
Search traffic drops after the move
Your rankings were fine before the migration. A few weeks later, traffic to pages that used to rank well has dropped.
The usual causes are missing redirects, a canonical tag still pointing at your old domain, or a noindex setting left on from your staging environment that never got turned off before launch.
Check your live site’s Settings » Reading page to confirm Discourage search engines from indexing this site is unchecked. Then work through this SEO migration checklist for a full audit.
Import file won’t upload or times out
You try to upload your export file, and the import stalls, times out, or throws a server error partway through.
This usually means your export file is larger than your hosting account’s PHP upload limit allows.
Ask your host to raise the upload and execution time limits or split large export files into smaller batches before importing them one at a time.
Frequently Asked Questions (FAQs)
Do I need to know how to code to move my site to WordPress?
No. Most of this process is exporting files, clicking through import screens, and using plugins built for non-technical users. Design rebuilding with a page builder is drag-and-drop.
How long does it take to move a website to WordPress?
It depends on your site’s size and how design-heavy it is. A small blog with a handful of posts might take an afternoon. A content-heavy site or an e-commerce store with hundreds of products and a custom design can take several days, mostly spent rebuilding layout and checking links.
Will I lose my Google rankings when I migrate?
Not if you handle redirects correctly. Rankings drop when old URLs return 404 errors instead of redirecting to their new WordPress equivalents. Work through your full content inventory and check our SEO migration checklist before you go live. Use AIOSEO to audit your SEO after the move.
What if my current platform isn’t in your list of guides?
You’re not stuck. The universal process in this post covers typical migration tasks. You’ll just be handling the export step manually. Check for a native export tool, then an RSS feed, then a third-party conversion tool, then manual copy-paste as a last resort.
Can a WordPress migration plugin import my Wix or Squarespace site?
No. Plugins like Duplicator, Migrate Guru, and All-in-One WP Migration move an existing WordPress site to new hosting. They can’t read content from a platform that isn’t already WordPress. You’ll need the export method specific to your current platform instead.
Do I need to keep my old site live while I migrate?
Yes, I recommend it. Keep your old site running until your new WordPress site is fully tested, redirects are in place, and you’ve confirmed everything works. Once you’re confident, you can take the old site down, though setting it to private for 30 days first gives you a safety net if something turns up missing.
What’s the difference between moving to WordPress and moving an existing WordPress site to a new host?
This post covers moving from a non-WordPress platform (like Wix or Shopify) to WordPress for the first time. If your site is already running on WordPress and you just need to switch hosting providers, that’s a simpler process. Read our post on how to move a WordPress website to a new host instead.
Your Old Platform Doesn’t Get a Vote Anymore
Now, your content lives on hosting you control. No platform can throttle your traffic, change its pricing overnight, or shut your site down over a policy you never agreed to.
Keep an eye on things over the next few weeks. Rankings can dip slightly before they settle back to normal as Google reindexes your new URLs.
Watch for stray broken links in old blog posts you didn’t catch during testing, and double-check that every redirect is still firing correctly a few days after launch.
Don’t cancel your old platform account the day you go live. Set it to private or read-only and keep it around for about 30 days. If you discover a missing page, a lost image, or a form submission you needed, you’ll still have the source to pull it from.
Protect Your New WordPress Site From Day One
Your migration is done, but here’s the part people forget: a fresh WordPress site with no backup history is the most exposed it will ever be. One bad plugin update or one wrong click, and you’re rebuilding everything you just finished moving.
Duplicator Pro is trusted by over 1.5 million WordPress professionals for exactly this reason. It gives you full-site backups on a schedule, one-click staging to test changes, and a disaster recovery URL that can restore your site even if WordPress is completely locked out.
You just spent real time getting this site right. Protect it before anything has the chance to undo that work.
If this tutorial helped, these guides are worth bookmarking too:
- WordPress Maintenance Checklist: 20 Essential Tasks
- How to Fix Your WordPress Site Not Working After a Migration
- How to Create a WordPress Site From Scratch
- How to Optimize Your WordPress Database: Get a Fast Site in 10 Steps
- How Many WordPress Plugins Are Too Many? (Definitive Guide)