I remember when I first had to move my website to HTTPS. Honestly, it felt like a chore.
I kept seeing articles about it, about security and Google rankings. But it also sounded… technical. Like something that could easily break my website.
Maybe you feel the same way. You know you should probably switch from HTTP to HTTPS, but the thought of messing with your website’s settings? It can be nerve-wracking.
Here’s the thing I learned: HTTP to HTTPS migration isn’t as scary as it seems, and it’s absolutely essential. It’s about protecting your visitors’ information, building trust, and helping your website show up higher in Google search results.
In this tutorial, I’ll show you how to migrate your website from HTTP to HTTPS. Let’s get started!
Table of Contents
What Is HTTPS?
HTTPS stands for Hypertext Transfer Protocol Secure. If you’re already familiar with HTTP, you know it’s the language of the internet, how browsers and websites communicate. Think of it as the standard way information travels online.
HTTPS is essentially the secure version of this standard HTTP. The key difference is that extra “S” at the end, which stands for Secure. That single letter adds an important layer of protection.
The security of HTTPS comes from encryption. To understand encryption, imagine sending a letter. If you use regular HTTP, it’s like sending a postcard – anyone can read it as it travels.
However, with HTTPS, you’ll place that letter in a locked box before sending it. Only the person with the key can open and read it when it arrives.
This “locked box” is created by SSL/TLS certificates. These certificates encrypt the communication between your browser and the website’s server.
So, when you visit a website using HTTPS, all the information is scrambled into a secret code. This code becomes unreadable to anyone who might be trying to intercept it.
Essentially, encryption creates a private conversation between your computer and the website. Only your computer and the website’s server have the “key” to understand this code, while everyone else just sees meaningless data.
This is the fundamental way HTTPS keeps your data safe as it moves across the internet.
Why Migrate From HTTP to HTTPS?
So, why should you make the switch from HTTP to HTTPS? There are several really good reasons.
Security
First and foremost, security is the biggest reason to switch to HTTPS. When your website uses HTTPS, it protects your visitors’ data.
People might enter passwords on your site. They might fill out contact forms with personal information. If you run an online store, they might even enter credit card details.
With HTTP, all this information is sent in plain text. Anyone with the right tools can grab that information, which hackers love.
HTTPS changes everything. It encrypts this data, scrambling it so that only the intended recipient can understand it.
This means that even if someone intercepts the communication, they just see meaningless gibberish. Your visitors’ sensitive information stays safe.
Trust and Credibility
Think about how you browse the internet. When you land on a website, what’s one of the first things you notice in the address bar?
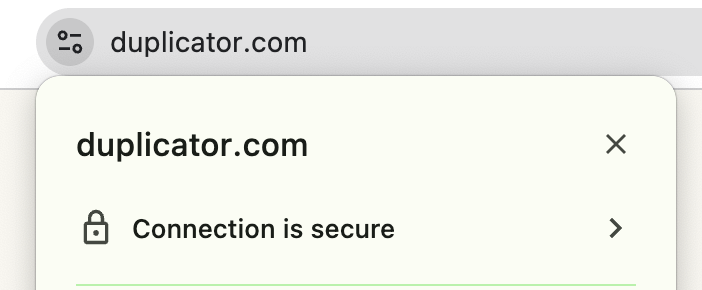
The padlock icon. That padlock is the visual cue that a website is secure with HTTPS. Browsers like Chrome actively highlight this. They make it clear when a site is secure and, importantly, when it’s not secure.
If your website is still on HTTP, Chrome might even show a “Not Secure” warning right in the address bar.
How do you think that makes visitors feel?
People might hesitate to browse your site. They might worry about entering information. They might even leave and go to a competitor’s site that looks more secure.
On the other hand, that padlock icon signals trust. It tells visitors, “This website takes your security seriously.” It makes people more comfortable engaging with your content, exploring your site, and doing business with you.
SEO Benefits
Want to rank higher on Google?
Google uses HTTPS as a ranking signal. This means that a website using HTTPS is likely to rank higher than a website still using HTTP.
Google officially confirmed this years ago because they want to encourage a more secure web. So, they give a ranking boost to secure websites.
While it might not be the biggest ranking factor, it’s still a significant one, especially when you consider how competitive online ranking is. Every little advantage helps.
Beyond the direct ranking boost, think about user experience again. If Chrome marks your HTTP site as “Not Secure,” that can scare visitors away.
Higher bounce rates and lower engagement can negatively impact your SEO. So, HTTPS indirectly helps your SEO by improving user experience and building trust.
There’s an old myth that HTTPS slows down websites, but that’s simply not the case anymore. In fact, HTTPS can even make your website faster.
Modern protocols like HTTP/2 are designed to work better with HTTPS. HTTP/2 offers significant performance improvements over the older HTTP/1.1.
So, by switching to HTTPS, you can actually unlock these performance benefits.
Think faster loading times and a smoother user experience. These are crucial for keeping visitors engaged and happy.
Happy visitors are good for business and SEO. Don’t let outdated performance concerns hold you back from migrating to HTTPS. In reality, it can be a performance booster.
Before Migrating to HTTPS
Moving to HTTPS isn’t usually complicated, but it’s still a significant change to your website. Like any important project, a little preparation goes a long way.
These are the key things to consider before you start the migration process.
Back up your website (and have a plan B).
This is rule number one. Always, always back up your website before making any major changes.
Things can sometimes go wrong. Maybe a setting gets misconfigured. Maybe there’s a plugin conflict you didn’t anticipate. In rare cases, something might break during the migration process.
If you have a recent backup, you can quickly restore your website to its previous state. It’s like hitting the “undo” button for your website.
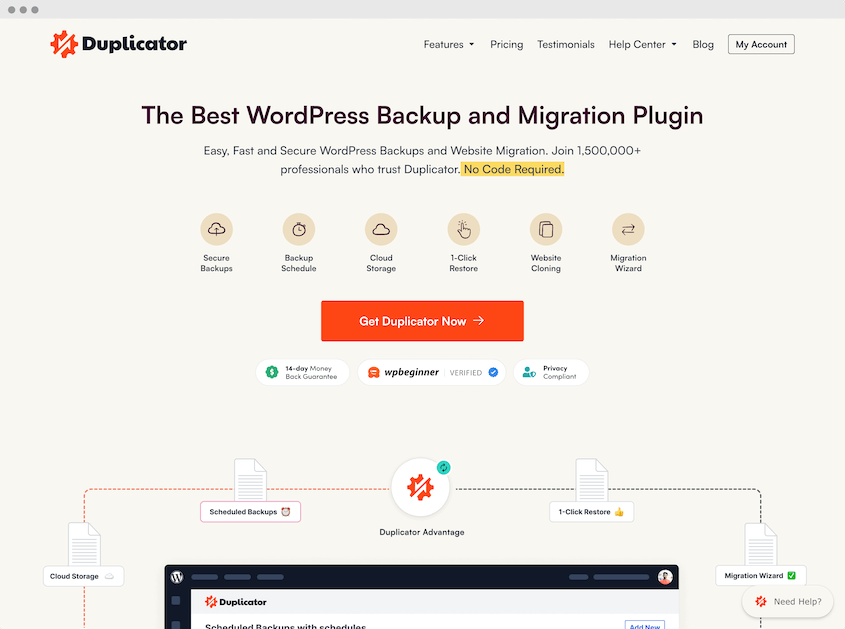
Duplicator is a WordPress backup plugin that creates a complete copy of your website – your files, your database, everything. It makes the process straightforward, even if you’re not a tech expert.
All you have to do is install the plugin. Create a new backup and choose the Full Site backup preset.
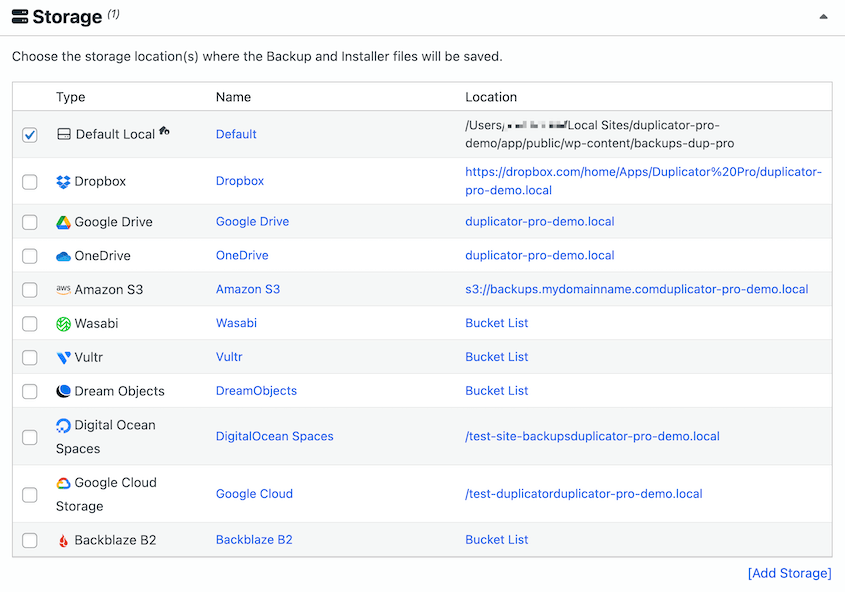
Duplicator connects with many cloud storage locations, including Google Cloud, Dropbox, Wasabi, and others. You can select one to store the backup in a safe place, separate from your website hosting.
Beyond just having a backup, think about your disaster recovery plan. What will you do if something goes wrong?
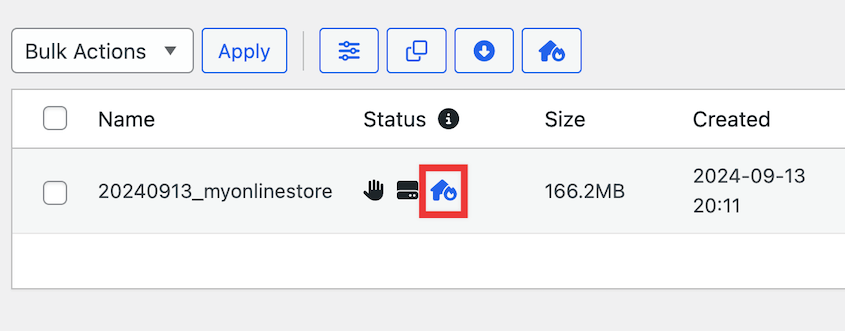
Once you have a full-site backup, click on the blue house icon next to it. This lets you set the backup as a disaster recovery point.
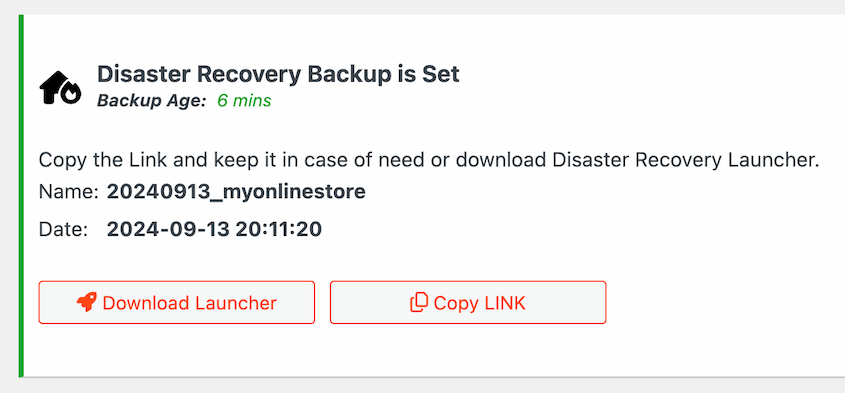
You’ll get two ways to restore the backup: a recovery link and a launcher file. I prefer to copy the link and save it in a safe place. If you need to get your site back online, paste it into a browser window.
Even if this migration accidentally wrecks your site, Duplicator will roll it back to a functional state!
Check if your website is ready for HTTPS
Good news: most modern websites are already compatible with HTTPS. The technology is well-established, and most themes and plugins work seamlessly with secure connections.
However, it’s still wise to do a quick check to make sure everything is in order.
You’re probably using third-party services like Google AdSense or social networks. Make sure these work with HTTPS. The same goes for key features on your website like JavaScript or embedded videos.
How to Migrate From HTTP to HTTPS
Now let’s migrate your site to HTTPS!
Step 1. Get an SSL Certificate
Many web hosting providers now offer free SSL certificates as part of their hosting packages. This simplifies the whole process and saves you money.
SSL certificates are essential for HTTPS. They create that secure connection between your website and your visitors’ browsers. And thanks to initiatives like Let’s Encrypt, free and reliable SSL certificates are widely available.
So, the first thing you should do is check if your web hosting provider offers free SSL.
Here are some of the best WordPress hosts that offer free SSLs:
Once activated, your website should be accessible via HTTPS! You can check this by typing https://yourdomain.com into your browser and seeing if the padlock icon appears.
Using your web host’s free SSL option is generally the easiest way to get HTTPS up and running. It’s cost-effective and often requires minimal technical effort on your part. For many website owners, this is the recommended first step.
If your web host doesn’t offer a free SSL, you might want to consider migrating your site to a new hosting provider.
You can also buy an SSL certificate from Domain.com. I’d recommend having your web host install SSL certificates for you.
Step 2. Set Up HTTPS With a Plugin
WordPress plugins can be incredibly helpful for all sorts of tasks, and migrating to HTTPS is no exception.
One of the most popular and highly recommended plugins for this is Really Simple Security (formerly Really Simple SSL). It can migrate your site from HTTP to HTTPS in a few clicks.
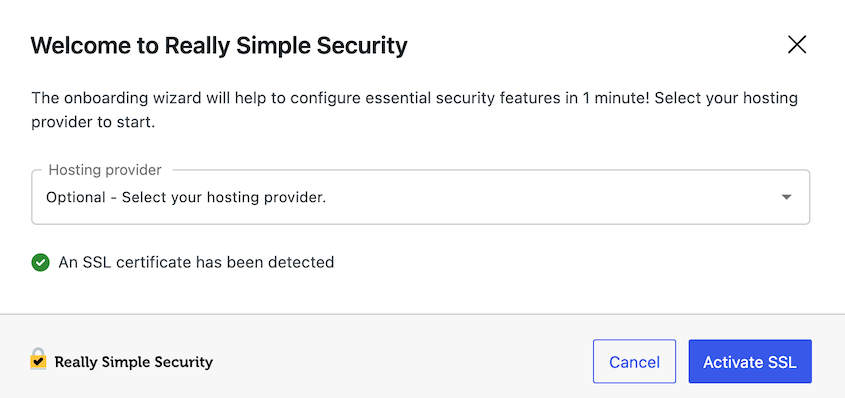
First, install and activate Really Simple Security. If you’ve set up the SSL on your web host, the plugin will automatically detect and activate it.
Really Simple Security will now configure your WordPress site to work correctly with HTTPS. It’ll redirect HTTP to HTTPS and even fix mixed content.
Setting Up HTTPS Manually
You might not want to use a plugin like Really Simple Security. If you ever decide to deactivate it, your SSL and HTTPS protocol will be disabled.
Instead, you could set up HTTPS manually. Be sure to install the SSL certificate on your host before continuing.
Update WordPress URLs
After installing the SSL certificate, you need to make sure WordPress knows you’re now using HTTPS.
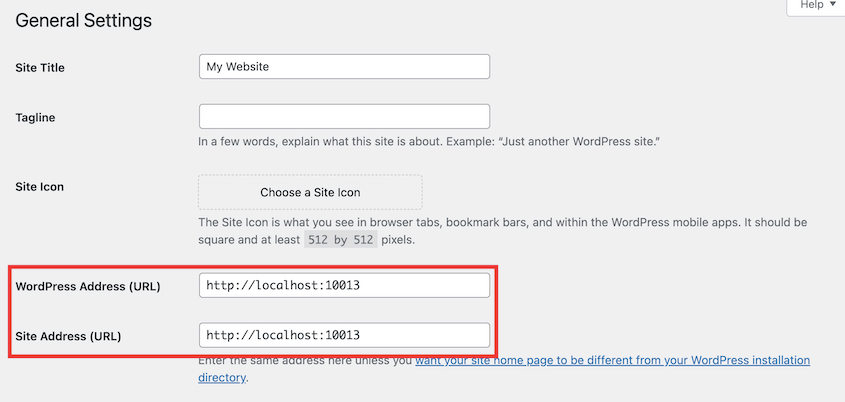
One simple but important step is to update your WordPress URLs. This essentially tells WordPress to use https:// for your website URLs.
Log in to your WordPress admin dashboard. Go to Settings » General. Replace http links with https.
This step is quick and easy but essential to ensure WordPress is aware of the HTTPS change.
Edit Your .htaccess and wp-config.php Files
Forcing HTTPS often involves making changes to two important files: .htaccess and wp-config.php.
Always back up these files before making any edits! A small mistake in these files can cause website errors.
If your server is running Apache (which is common), you can use the .htaccess file to automatically redirect all HTTP requests to HTTPS. This ensures that anyone trying to access your site using http:// is automatically redirected to the secure https:// version.
Here’s the code snippet you can add to your .htaccess file:
<IfModule mod_rewrite.c>

RewriteEngine On

RewriteCond %{HTTPS} off

RewriteRule ^(.*)$ https://%{HTTP_HOST}%{REQUEST_URI} [L,R=301]

</IfModule>
If you have an NGINX server, add this code to your configuration file:
server {

listen 80;

server_name example.com www.example.com;

return 301 https://example.com$request_uri;

}
You might need to force SSL and HTTPS on your WordPress admin pages. To do this, add the following code to your wp-config.php file:
define('FORCE_SSL_ADMIN', true);
This works for WordPress multisite networks, too.
Fix Mixed Content
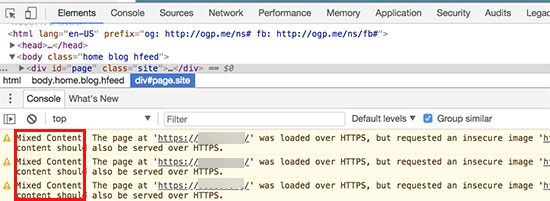
Mixed content is a common issue you’ll see after migrating to HTTPS. It happens when your website is loaded over HTTPS, but some resources on the page (like images, scripts, stylesheets, iframes) are still being loaded over HTTP.
Browsers will often display warnings or block mixed content, as it undermines the security of the HTTPS connection.
You need to ensure that all resources on your HTTPS website are also loaded over HTTPS. You can see mixed content errors using the Inspect tool.
A common source of mixed content is URLs stored in your WordPress database. For example, image URLs or links within your content might still be using http://.
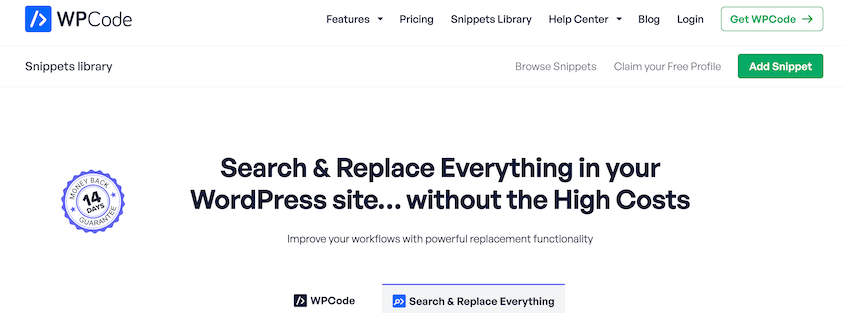
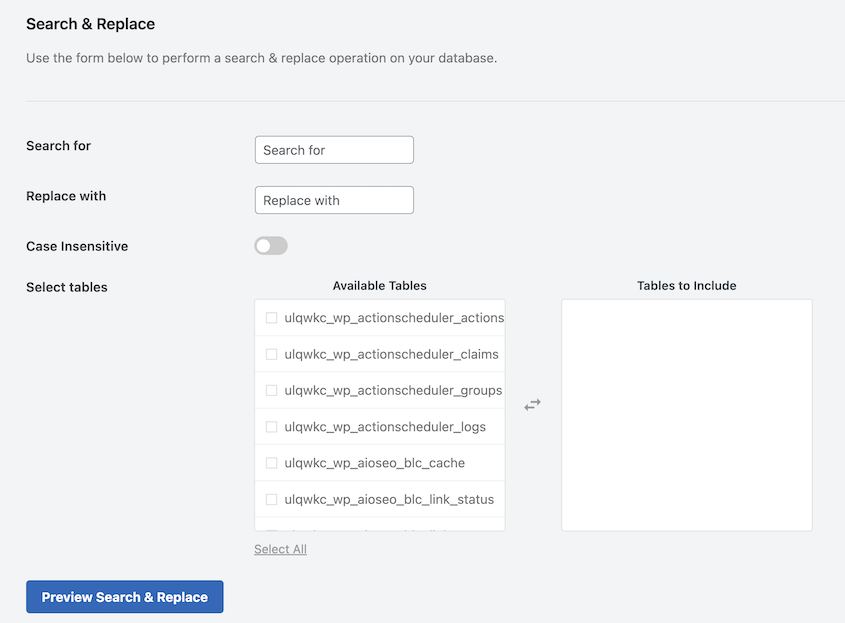
A search and replace plugin can help you update these URLs in bulk. I’d recommend using Search & Replace Everything.
Find Tools » WP Search & Replace. In the Search for field, add your website’s URL with HTTP. Replace it with the new HTTPS URL.
Select all of your WordPress database tables. Preview the changes before finishing the search and replace.
Hardcoded HTTP URLs might also exist in your WordPress theme. Theme files like header.php, footer.php, template files, or CSS files might have direct http://yourdomain.com URLs for images, stylesheets, or scripts.
Open theme files and search for http://yourdomain.com. Replace these with https://yourdomain.com.
Some plugins might also load resources over HTTP, causing mixed content. Review your plugin settings for any URL fields. Update any http:// URLs to https://.
In rare cases, plugins might have hardcoded http:// URLs directly in their code. If you suspect this, contact the plugin developer to fix mixed content issues.
After Migrating From HTTP to HTTPS
It’s important to verify that the migration was successful and that your website is now running smoothly and securely over HTTPS.
These are the key checks to perform after you’ve completed these migration steps. Consider this your post HTTPS migration checklist.
Check that SSL Is Working
First, you need to confirm that your SSL certificate is correctly installed and that HTTPS is working on your website.
Open your web browser (like Chrome, Firefox, or Safari) and type your website address into the address bar, starting with https://.
Once your website loads, look at the address bar. You should see a padlock icon to the left of your domain name. This padlock icon confirms that your SSL certificate is working and your connection is secure.
If you don’t see a padlock icon, or if you see a “Not Secure” warning or a broken padlock icon, there’s likely an issue with your SSL setup or mixed content.
For a more detailed analysis, use an online SSL checker. Enter your domain name into the tool, and it’ll perform a comprehensive check of your SSL certificate and configuration.
Submit Your Site to Google Search Console
Google treats the HTTP and HTTPS versions of your website as separate properties in Google Search Console.
After migrating to HTTPS, you need to add the HTTPS version of your website as a new property in Google Search Console.
You should now have two properties in your Google Search Console: one for the HTTP version and one for the new HTTPS version (which will become your primary property).
Verify Site Availability
After the migration, ensure everything is working correctly for visitors.
Navigate through different pages of your website. Click on links, visit various sections, and test different functionalities. Make sure all pages load correctly and without errors.
Specifically test important functionalities on your website, such as:
- Forms: Submit contact forms, newsletter signup forms, or any other forms on your site to ensure they are working correctly after the HTTPS migration.
- Logins: Test user logins (if you have user accounts or a membership area). Make sure users can log in and out successfully via HTTPS.
- E-commerce transactions: If you run an online store, thoroughly test the entire checkout process. Make sure users can add items to their cart and complete transactions via HTTPS.
- Comments: If you have comments enabled, check if users can still post comments and that comments are displayed correctly.
As you browse your site, keep an eye out for any broken links or broken images. While the search and replace and mixed content fixes should have addressed most URL issues, it’s always good to check.
Keep an eye on your website analytics (e.g., Google Analytics) to ensure traffic is being tracked correctly after the HTTPS migration. You might see some temporary fluctuations in traffic as Google re-indexes your site, but overall, traffic should remain stable or improve over time.
Fetch and Crawl Your HTTPS Site
To help Google quickly discover and index the HTTPS version of your website, you can use the URL Inspection tool in Google Search Console. This allows you to fetch and request indexing for individual URLs.
Log in to your Google Search Console account and select the HTTPS property you just added. In the left-hand menu, click on URL inspection.
In the inspection bar at the top, enter the HTTPS URL of your website’s homepage. After Google Search Console retrieves information about the URL, you’ll see the indexing status.
If the page is not yet indexed or if you want to speed up indexing after the HTTPS migration, click the Request Indexing button. Google will then prioritize crawling and indexing this URL.
You can repeat this process for other important pages on your website, such as your main category pages, key content pages, or product pages. Focus on getting your homepage and most important pages indexed quickly.
Resubmit the Disavow File
If you previously submitted a disavow file for your HTTP website in Google Search Console, you need to resubmit it for the newly added HTTPS property.
A disavow file is used to tell Google to ignore certain backlinks to your website. You might use a disavow file if you’ve seen low-quality or spammy backlinks pointing to your site that could be harming your SEO.
Since Google treats HTTP and HTTPS as separate properties, a disavow file you submitted for your HTTP site does not automatically apply to your HTTPS site.
Open the Google Search Console disavow links tool for your old GSC property. Download the disavow links file.
Upload or resubmit your disavow file for your HTTPS property.
If you didn’t previously use a disavow file for your HTTP website, you don’t need to do anything in this step. Resubmitting the disavow file is only relevant if you were already using this tool for your HTTP site and want the disavow rules to apply to your HTTPS site as well.
Frequently Asked Questions (FAQs)
How do I migrate HTTP to HTTPS without an SSL certificate?
Migrating from HTTP to HTTPS without an SSL certificate isn’t possible. HTTPS requires an SSL/TLS certificate to encrypt data. To enable HTTPS, obtain an SSL certificate from a Certificate Authority (CA) and install it on your server. Free SSL options include Let’s Encrypt.
How do I change HTTPS to HTTP in Google Chrome?
Downgrading from HTTPS to HTTP is strongly discouraged and generally not recommended for live websites due to significant security risks. HTTPS is designed to protect your visitors and their data. Switching back to HTTP removes this protection and exposes your visitors to potential security vulnerabilities.
Google Chrome and other modern browsers prioritize security and will often actively encourage or even force HTTPS connections when available. They may also display prominent “Not Secure” warnings on HTTP sites.
While you might find temporary workarounds to access an HTTP version of a site in Chrome, these are not intended for use on public, live websites.
For live websites, the goal should always be to fix any HTTPS issues, not to downgrade to HTTP. If you are encountering problems with HTTPS, focus on troubleshooting and resolving those issues (like mixed content, certificate errors, etc.) rather than reverting to the insecure HTTP protocol.
Final Thoughts
HTTPS is the bedrock of a secure and trustworthy website. It protects your visitors’ data, builds their confidence in your site, and gives you a valuable SEO boost.
If you haven’t already migrated to HTTPS, now’s the time! Don’t let outdated HTTP hold you back.
And remember, a crucial first step before any website migration is a solid backup. Tools like Duplicator Pro can back up your site in one click and even give you disaster recovery options!
While you’re here, I think you’ll like these other WordPress guides:
Joella is a writer with years of experience in WordPress. At Duplicator, she specializes in site maintenance — from basic backups to large-scale migrations. Her ultimate goal is to make sure your WordPress website is safe and ready for growth.


