“WordPress!” everyone said. “It’s so easy!” Famous last words, right?
While WordPress is incredibly powerful and flexible, stepping into that world for the first time can feel like being dropped into a new city without a map. Suddenly, you’re bombarded with terms like hosting, domains, themes, plugins, and widgets.
Choosing the right hosting, understanding the difference between themes and plugins, and even just figuring out how to get WordPress installed – it all feels like climbing a mountain.
But guess what? I made it to the other side, and now I have websites I’m truly proud of.
The journey, as frustrating as it was at times, taught me so much. That’s why I wanted to share my experience and create this guide.
Let’s turn that blank screen into the website you’ve been dreaming of!
Here are the key takeaways:
- WordPress.org gives you full control and ownership of your site, while WordPress.com is limited but easier for hobbyists
- Basic startup costs range from $50-$3,000/year for hosting, domain, and optional premium themes/plugins
- You don’t need coding knowledge; WordPress offers no-code tools, themes, and drag-and-drop builders
- Essential steps include choosing a web host, purchasing a domain, installing WordPress, and customizing with themes and plugins
- Key plugins to install early: backups (Duplicator), analytics (MonsterInsights), contact forms (WPForms), and SEO (AIOSEO)
Table of Contents
What Is WordPress?
WordPress is a free and open-source Content Management System (CMS). Originally launched in 2003 as a simple blogging platform, it is now the most popular CMS globally.
WordPress allows you to create any type of website, from personal blogs to large online stores. It’s incredibly user-friendly and versatile, perfect for both beginners and professionals.
You don’t need any coding or technical knowledge to create a beautiful, functional website with WordPress. There are plenty of no-code tools to help you set up your site.
WordPress.org, also known as “self-hosted WordPress,” is a free, open-source platform. To use it, you’ll need a domain name and a web hosting service, which you’ll have to pay for.
The upside is that WordPress.org gives you full control over your website. You can customize your site, install any theme or plugins you want, and even monetize it.
On the other hand, WordPress.com is a “hosted” platform. This means that the company takes care of the hosting for you.
This might sound convenient, but you get less freedom. You’re limited in the themes and plugins you can use, and you can’t profit off ads unless you upgrade to a premium plan.
If you want complete control, monetization opportunities, and can manage your own hosting, WordPress.org is the go-to option. However, if you’re seeking ease of use as a hobbyist blogger, WordPress.com may be a suitable choice.
Why Create a WordPress.org Site?
With WordPress.org, you have total control over every part of your website. You can add custom features, create your site layout, pick your favorite theme, and install any plugin you need.
WordPress.org is known for its extensive library of themes and plugins.
Whether you want to set up an e-commerce store, create a portfolio, or start a blog, there’s a theme for it. Also, plugins can add any functionality imaginable to your site.
With WordPress.org, you are the ultimate owner of your site. This means no unexpected advertisements on your website and you’re always in control. Your site, your rules!
WordPress.org is SEO-friendly, which helps your site rank higher in search engine result pages. You also have the freedom to install an SEO plugin to further optimize your website’s ranking.
Want to make money from your website? With WordPress.org, you can. It doesn’t limit how you can monetize. Running ads, setting up paywalls, selling products, you name it.
How to Create a WordPress Site
Ready to create your WordPress site? Here are the key steps:
- Step 1: Choose the Right Web Host: Find a reliable hosting provider that supports WordPress, offers good uptime, and fits your budget
- Step 2: Buy a Domain Name: Select a memorable, relevant web address that represents your brand
- Step 3: Install WordPress: Use your host’s one-click installer to get WordPress up and running
- Step 4: Customize Your Site With a Theme: Pick from thousands of free or premium themes to define your site’s look
- Step 5: Create Content: Build pages and posts using the Block Editor or page builder plugins
- Step 6: Edit Settings: Configure your site title, home page, comments, and other important options
- Step 7: Add a Navigation Menu: Create menus to help visitors easily navigate your site
- Step 8: Install Plugins: Extend your site’s functionality with plugins for backups, SEO, forms, and more
- Step 9: Optimize Your Site Speed: Improve performance with caching, image optimization, and CDNs
- Step 10: Expand Your WordPress Knowledge: Continue learning through resources like WPBeginner
- Step 11: Customize Your Site: Add e-commerce, memberships, or other features specific to your goals
Step 1: Choose the Right Web Host
WordPress requires you to choose your own web hosting provider. This will give you server space and resources for your website.
You’ll want to make sure it’s reliable, has the necessary features, and fits your budget.
Here are a few things you should keep in mind while choosing a web host:
While many hosts support WordPress, some specialize in it. These WordPress hosts often provide one-click WordPress installations, which can make your life a lot easier.
- Performance and Reliability
Look for hosts that offer excellent uptime (the amount of time your website is online and accessible) and fast server speeds.
Even with the best planning, you might run into issues. When that happens, it helps to have a host with responsive and helpful customer support.
As your site grows, you’ll want a host that can grow with it. That means choosing one with scalable hosting plans.
While you often get what you pay for in hosting, expensive doesn’t always mean better. Balance the price with the features and services provided.
Take your time and select a web host that fits your needs. Your choice can be the difference between a site that’s a pleasure to manage, or one that causes endless headaches.
If you’re not sure where to start, I’d recommend Bluehost. This is an affordable hosting service that will help you get online in no time. With our referral link, you’ll get discounted hosting, a free SSL certificate, and a free domain!
Step 2: Buy a Domain Name
Alright, you’ve found the perfect web host. Now, let’s get you a great domain name.
Your domain name is the digital address where visitors will find you online.
Here’s how to find the right domain name:
- Brainstorm: You want your domain name to be relevant, memorable, and easy to type.
- Check Availability: Many hosting companies offer domain search tools on their website. If it’s not available, you may need to think of alternative names.
- Purchase: Found the perfect domain name and it’s available? The next step is to purchase it through your hosting company. You’ll typically be billed annually for your domain name.
Remember, your domain name is a key part of your online identity, so take the time to choose one that matches your business or brand effectively.
Avoid overly long or complex names, and try to stick to common domain extensions like .com, .net, or .org for maximum credibility.
Step 3: Install WordPress
After choosing a reliable web host and securing a domain name, it’s time to install WordPress. If you chose a WordPress hosting provider, you’ll usually be able to install WordPress in one click.
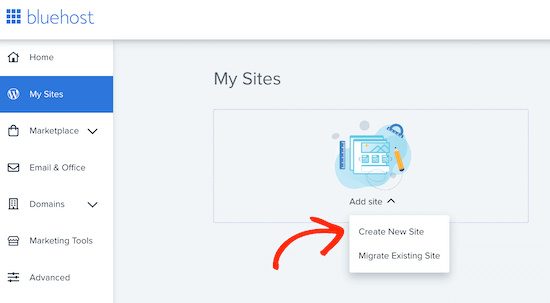
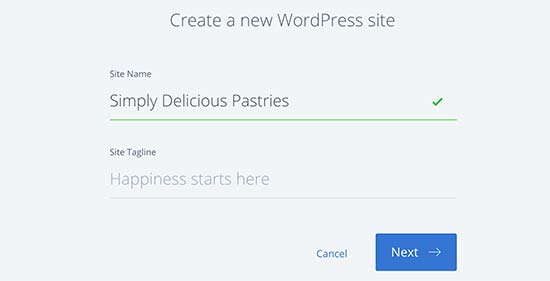
Let’s show you how to do this with Bluehost. After you create an account, add a new site.
Then, give the site a title and tagline.
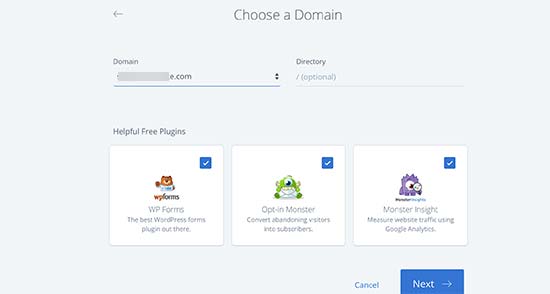
At this point, you can choose a domain. If you just purchased one, select it with the dropdown menu.
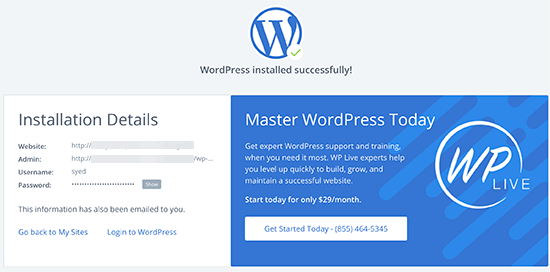
Now Bluehost will automatically install WordPress for you! Once it’s finished, you’ll get your login information.
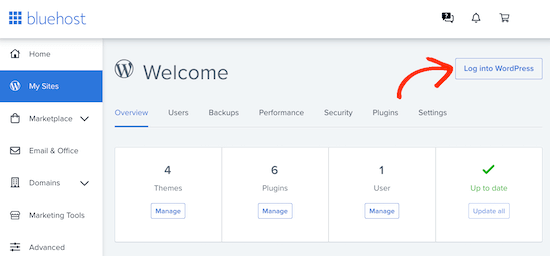
You can also log into your dashboard by finding My Sites » Manage Site » Log into WordPress.
Are you not sure how to install WordPress using your web host? This guide shows you WordPress installation instructions for some popular hosting providers.
Step 4: Customize Your Site With a Theme
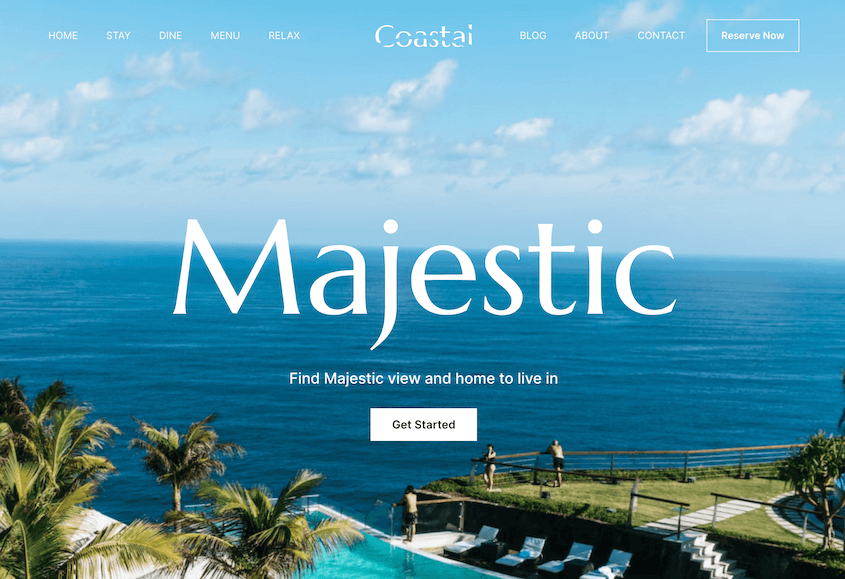
It’s now time to make your site look incredible, and that’s where themes come in. Themes define the general look and feel of your WordPress site including things like color schemes, font styles, and page layouts.
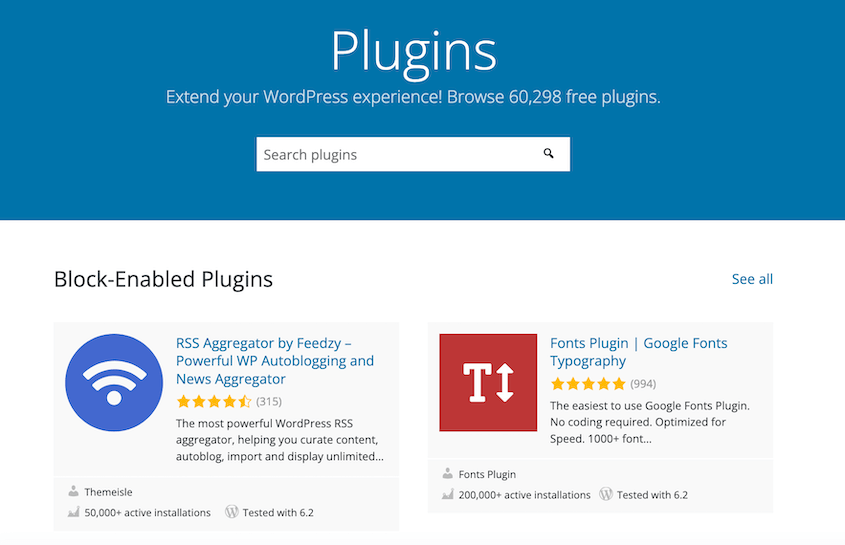
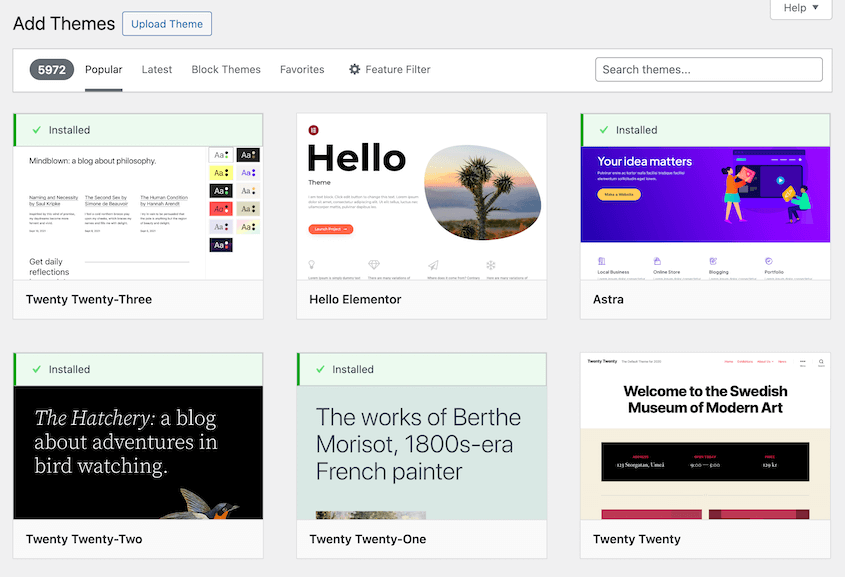
WordPress has a catalog of thousands of free themes. To start using one, open your WordPress dashboard and navigate to Appearance » Themes » Add New Theme.
Here, you can use the search bar to find a specific type of theme.
Once you find a new theme that catches your eye, click Install. After installation, hit Activate to apply the new website design.
Free themes are decent, but sometimes, you might want a bit more pizzazz. That’s where premium themes come in.
With a more unique web design, better functionality, and dedicated support, they can make your site stand out.
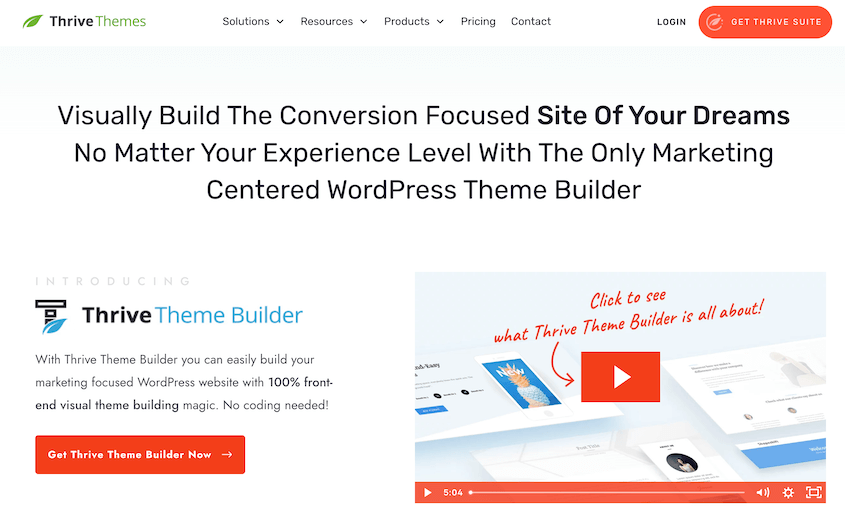
For example, Thrive Themes has a theme builder that can help you easily build your entire website. Known for its engaging, conversion-focused designs, it’s a fantastic option for those wanting to take their WordPress site to another level.
If you decide to purchase a premium theme, you’ll receive a .zip file. You need to go back to the Themes page in your dashboard, click on Add New Theme, and then Upload Theme.
Remember, the theme you choose doesn’t have to be set in stone. You can change your theme anytime you want. So, go ahead and experiment until you find the perfect look for your site.
Step 5: Create Content
In WordPress, there are two types of content: posts and pages.
Pages are static, timeless parts of your website like a Contact Us or About Us page. These provide information that doesn’t change frequently.
Posts are dated, dynamic pieces of content like blog posts, news, or articles. They’re designed to encourage conversation and can be organized using categories and tags.
To create your first page, click on Pages » Add New Page.
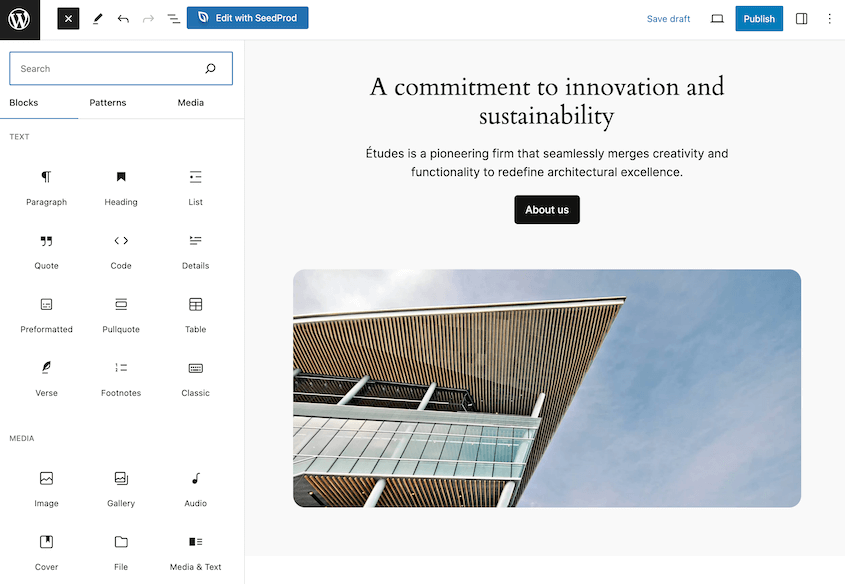
This will open the Block Editor, which allows you to add different types of content like text, images, and videos in blocks. You won’t have to worry about knowing HTML or CSS.
When you’re finished, save it as a draft or hit Publish.
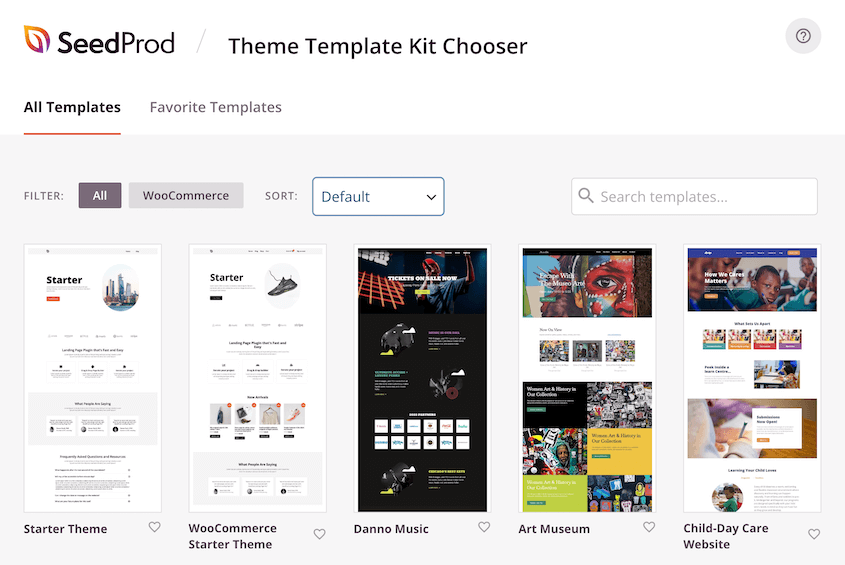
Some people prefer using a page builder plugin for more flexible website building options. I like SeedProd because it gives you a drag-and-drop page editor and pre-made page templates.
SeedProd Pro also comes with a theme builder and full website kits, allowing you to build your entire site with SeedProd. This offers more flexibility than the default WordPress customization options.
Step 6: Edit Settings
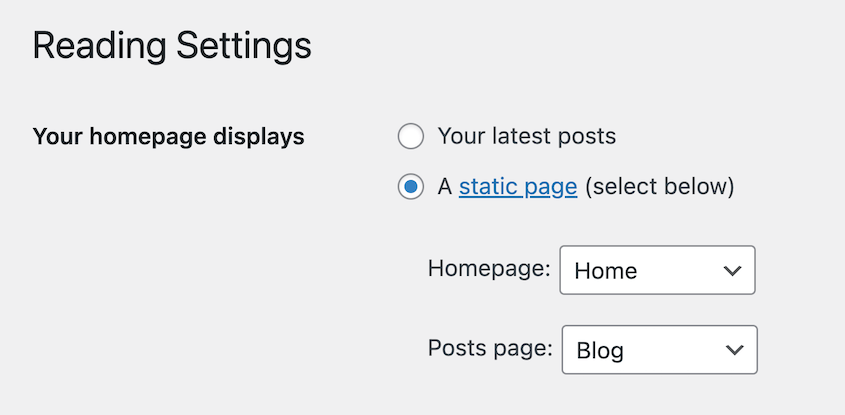
WordPress will automatically display your blog posts on your site’s home page. However, you can easily set up a static front page. This provides a consistent, welcoming look every time your visitors land on your site.
Find Settings » Reading. Next to Front page displays, select A static page. Then, choose the pages you created as your home and blog pages.
Now, your home page will be displayed as the front page. Your blog posts will be shown on the blog page.
When you first installed WordPress, you chose a site title and tagline. If you need to change this, go to Settings » General.
The site title is most often your website name. The tagline conveys, in a few words, what your site does.
Anyone can leave comments on your blog posts. Although this can be great engagement, it can lead to comment spam.
In your Discussion settings, you can choose to manually approve each comment.
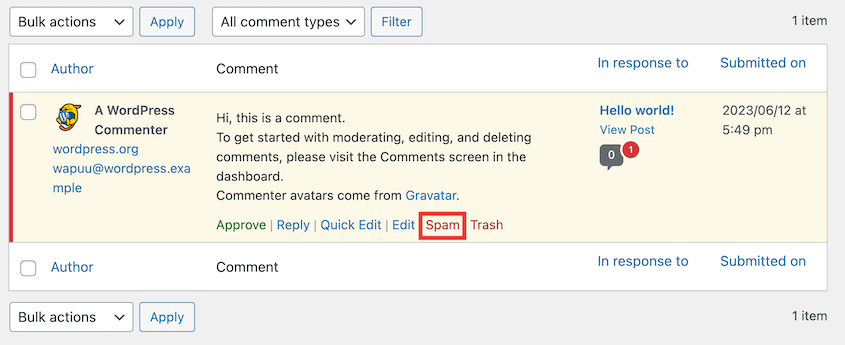
Whenever someone comments, you can approve it or send it to spam.
This keeps discussions around your content meaningful and relevant. By removing comment spam, you’ll enhance your site’s credibility and security. So don’t forget to check those comments!
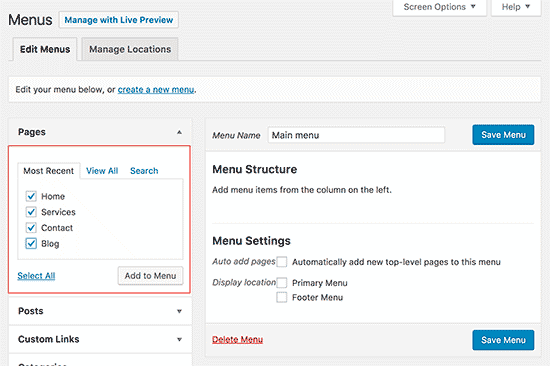
A navigation menu is an important part of your website that guides visitors through your content. It acts as a roadmap, directing users to key sections such as your blog, services, contact page, and more.
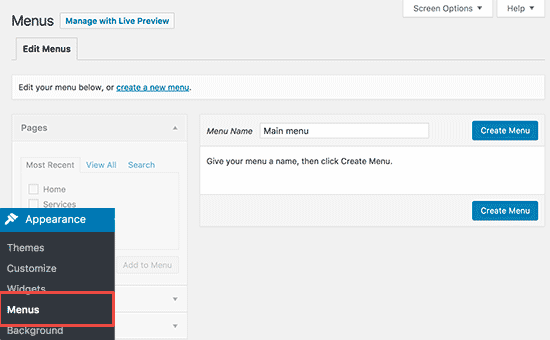
How you create a navigation menu depends on the theme you’ve chosen. For a classic WordPress theme, you can go to Appearance » Menus.
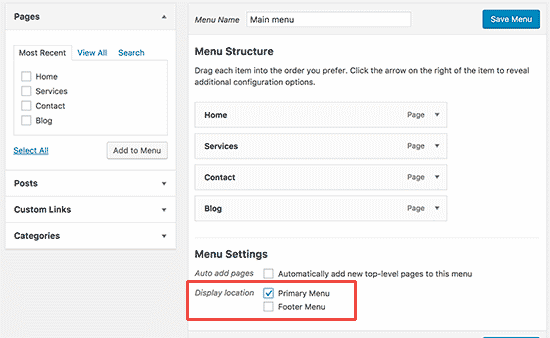
Name the menu and hit Create Menu. Then, you can select specific web pages you want to add to your navigation menu.
Lastly, choose where you want your menu displayed.
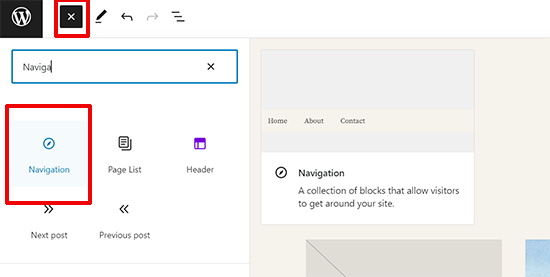
If you’re using a block-based theme, open Appearance » Editor. Select a page template (usually the header). Then, add a navigation block.
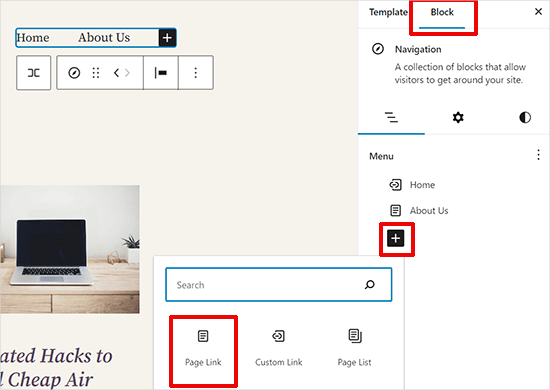
Simply click on the + icon to add a new page link. Continue this process until the navigation menu has all the links you want to feature.
And voila! You just created your first menu. Now, your visitors will be able to easily navigate your site.
Step 8: Install Plugins
Think of plugins as apps for your WordPress website. They extend functionality and add new features that aren’t included by default.
WordPress has thousands of free plugins for you to use. You can also purchase premium plugins from third-party developers.
But what can you do with plugins? Pretty much anything.
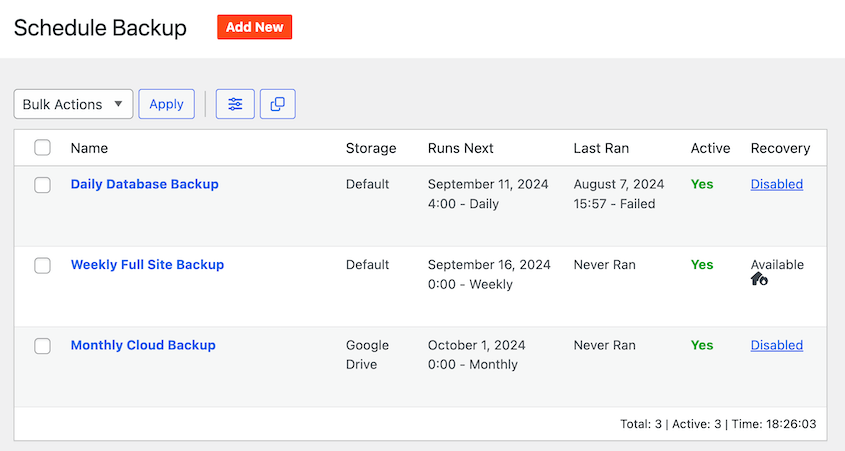
As a new website owner, you need to find a reliable backup plugin. Duplicator is the best option because it supports automatic backups, cloud storage, and easy backup restoration. It’ll protect your site on a regular schedule.
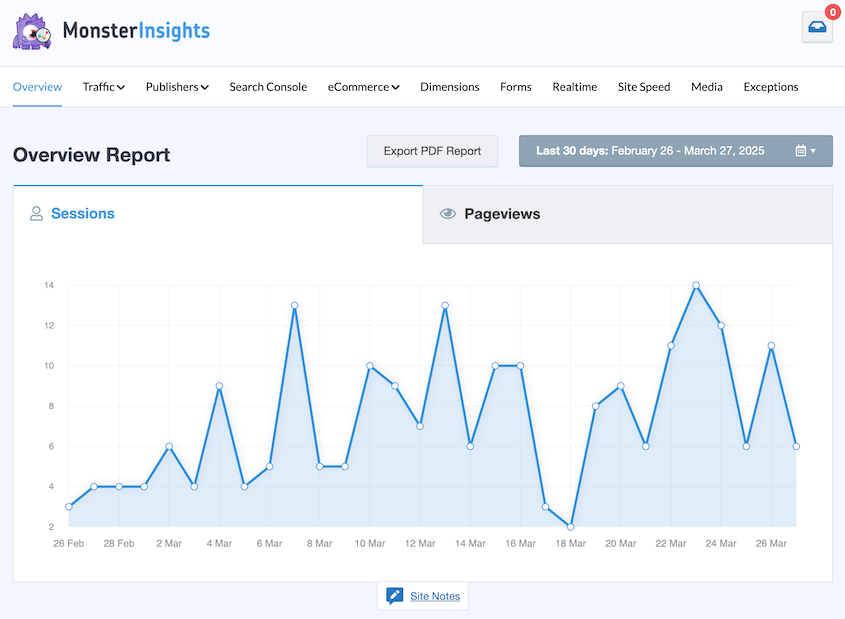
To start growing your website, I’d recommend using MonsterInsights. It connects your WordPress site with Google Analytics, simplifying website visitor tracking.
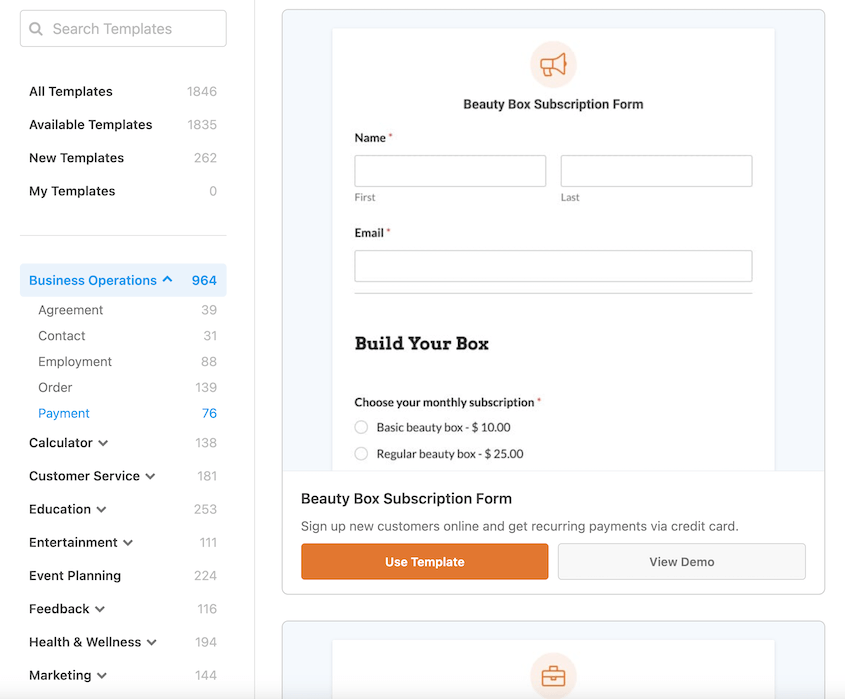
No matter what kind of website you’re running, you’ll need a contact form. WPForms is the best contact form plugin. It allows you to build surveys, collect user feedback, manage event registration, and much more.
And let’s not forget about SEO.
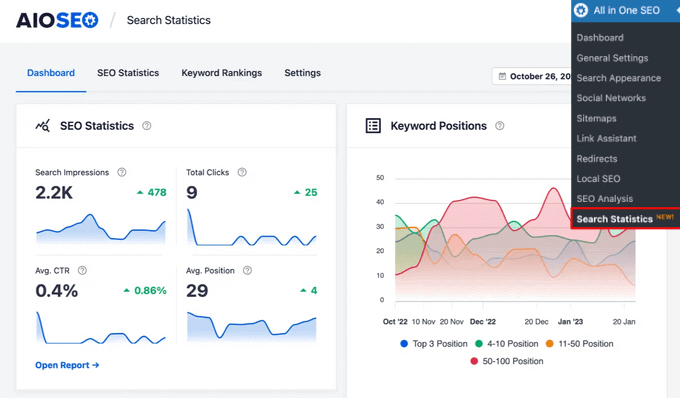
All in One SEO (AIOSEO) is a WordPress SEO plugin that optimizes your WordPress site for search engines like Google. That’s a big deal when you want your website to rank higher in search results.
Alternative: Yoast SEO is another popular plugin for SEO.
Here are some extra WordPress plugins you might need:
There’s countless WordPress plugins that tailored to every need. Be sure to check out our post on the best WordPress plugins to explore more possibilities.
Step 9: Optimize Your Site Speed
Site speed has a significant impact on your user experience and even your site’s ranking in search engines. So, how can you make sure your WordPress site isn’t slow?
- Choose a Performance-Oriented Theme
Not all themes are created equal. Some are far more efficient than others, so always be sure to opt for a theme known for its performance.
Here are the best WordPress themes you can find!
Large, uncompressed images can slow your site down dramatically. It’s best to use plugins that automatically optimize your images, like EWWW Image Optimizer.
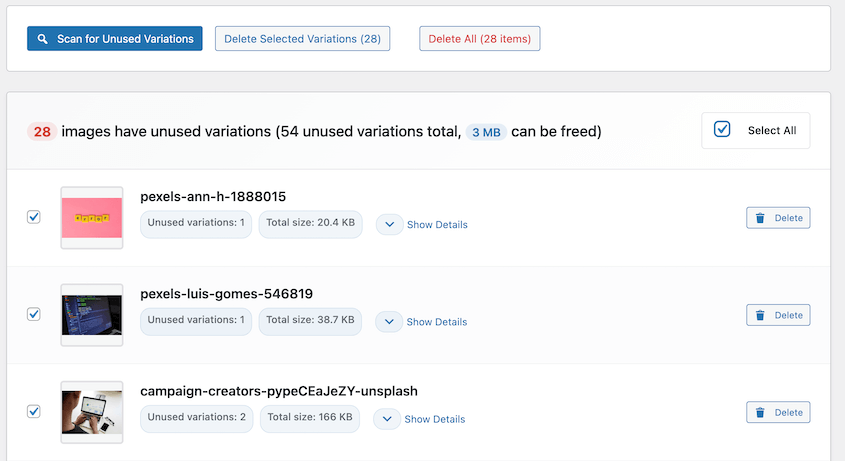
WordPress automatically generates multiple variations of every image you upload. To remove any unused media files cluttering your site, use WP Media Cleanup. It quickly scans for unnecessary variations and deletes them with one click.
- Clean Up Your Website Regularly
Over time, things like unused plugins, stored drafts, and dated backups can begin to weigh your site down. To clean up your website, you can use a plugin like WP-Optimize.
Caching plugins like W3 Total Cache or WP Super Cache can dramatically speed up your website by caching a static version of your site.
- Use a Content Delivery Network (CDN)
If you have a global audience, a CDN like Cloudflare can boost your page speed. It stores a cached version of your website in different geographical locations, making your content closer to international visitors.
Step 10: Expand Your WordPress Knowledge
When you fully understand the ins and outs of WordPress, you can use the platform more effectively. It allows you to customize your site to your specific needs.
An excellent resource is the WPBeginner blog, where you can find countless free resources. It’s a treasure trove of information that will help you understand how to manage and grow your WordPress site effectively.
With these in-depth tutorials, you’ll tackle technical issues, improve SEO, boost security, and perform other essential tasks. By the end, you’ll have much more control over your site’s function and performance.
Step 11: Customize Your Site
Every website is different. So, you might have to customize your site a little more to reach your unique goals.
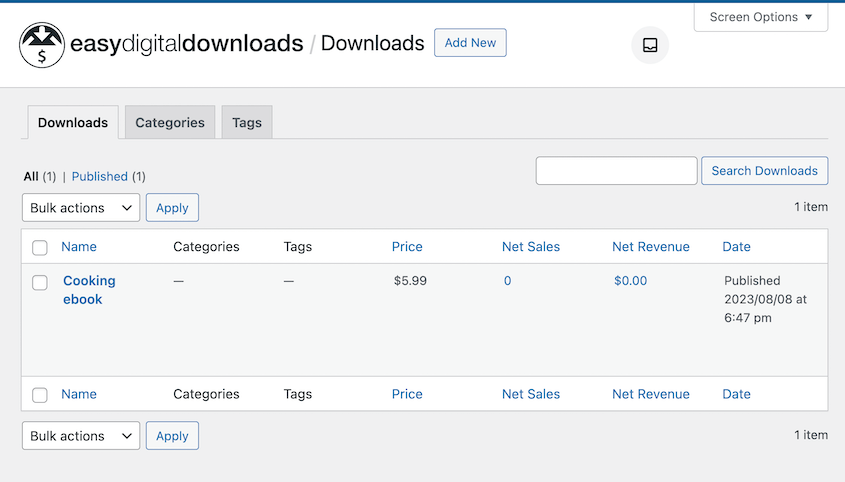
If you want to dive into e-commerce, you can set up a small business. With a plugin like Easy Digital Downloads, you’ll quickly list digital products for sale and monetize your site.
Or maybe you’re interested in creating a membership site? MemberPress can help with that. You can create courses, add paywalls to blog posts, and set up drip content.
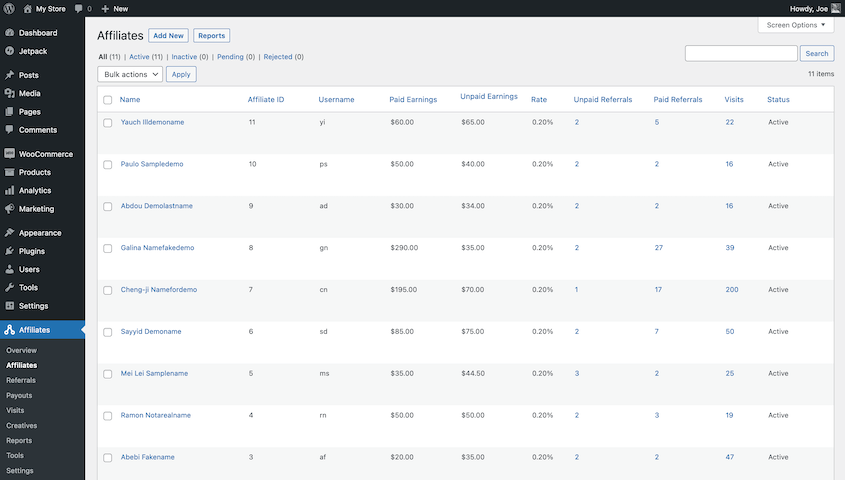
To grow your store’s revenue and expand your reach, consider setting up an affiliate program. A plugin like AffiliateWP helps you manage affiliates, track referrals, create coupons, and increase your revenue.
Remember, your WordPress site can become whatever you want it to be! If we didn’t cover your specific goal, check out this guide on the different types of websites you can make with WordPress.
FAQs About Creating a WordPress Site
How do I create my own WordPress site?
To create a WordPress site, you’ll need to find a web host, purchase a domain name, and install WordPress. Then, you can customize your site by choosing a theme, creating content, and installing plugins.
Can I create a WordPress website for free?
You can create a completely free website on WordPress.com. However, this comes with limited customization and monetization opportunities. A better option is to find an affordable web host and domain name for WordPress.org. Then, you can install free WordPress plugins and a free theme.
How much does it cost to start a WordPress site?
The cost to start a WordPress site can range from as little as $50 to $3,000 per year, depending on your needs. Some basic costs include web hosting and a domain name. Plus, there might be added expenses for premium plugins and themes, web developer fees, or extra security.
Can I make a WordPress website without hosting?
What are some common mistakes to avoid when creating a WordPress site?
Some common WordPress mistakes to avoid are using a poor-quality host, ignoring updates, installing too many plugins, overlooking SEO, and not backing up your website. By avoiding these common pitfalls, you’re setting a solid foundation for your WordPress site.
Next Steps After Creating a WordPress Site
At this point, you have a new WordPress site!
To make your website look and perform its best, check out these tutorials:
If you want to avoid losing any data, you’ll need a reliable backup plugin. Download Duplicator Pro to start setting up automatic backups!
Joella is a writer with years of experience in WordPress. At Duplicator, she specializes in site maintenance — from basic backups to large-scale migrations. Her ultimate goal is to make sure your WordPress website is safe and ready for growth.


