
![[NEW] Duplicator DB Optimizer: Clean Your WordPress Database Before It Becomes a Problem](https://duplicator.com/wp-content/uploads/2026/06/Announcement-DB-Optimizer.jpg)
How to View Your WordPress Backup as a Working Website
 Joella Dunn
Joella Dunn
Joella Dunn
 John Turner
John Turner
John Turner
Website backups are your safety net when things go wrong (like crashes, errors, or the white screen of death).
But backups are way more powerful than just emergency restore buttons.
Did you know you can view your website backup as a fully functional website? It’s like stepping back in time to see your site exactly as it was at a specific point.
This is a good way to test out a new plugin on a copy of your site, without risking your live website. Or easily grab that blog post you accidentally deleted last month, without a full restore.
Viewing your backup as a website unlocks a ton of possibilities. It’s not just about disaster recovery anymore. It’s about control, testing, and easy access to your website’s history.
In this tutorial, I’ll walk you through exactly how to view your website backup as a website.
Table of Contents
Why View Your Backup as a Website?
So, you’ve got backups. Great! But why go the extra step of viewing them like a real website? Is it really worth it?
YES!
Testing
You think your latest backup is fine, but when you restore your website… surprise! It’s broken.
By viewing the file first, you can quickly confirm your backup is healthy before you mess with your live site.
Plus, it’s the perfect testing ground. Want to try out a new plugin? Thinking about a major theme change? Do it on your backup first!
You can experiment, break things, and learn without touching your live website. It’s like having a website sandbox.
Content Retrieval
Ever accidentally deleted a page? Or maybe a client wants that old blog post from 2023, but it’s no longer on your site?
Instead of restoring your entire website, you can simply view your backup and rescue content. Browse your backup like a normal website, find that missing page or image, and grab what you need.
Troubleshooting and Diagnosis
Website acting weird? Errors popping up? Figuring out what went wrong can be a headache.
Instead, you can compare a working backup (from before the problems started) with your current, broken site. Spot the differences and pinpoint when things went wrong.
It’s like having a time machine for troubleshooting. By viewing backups from different dates, you can often track down the source of issues much faster.
Development and Design
For developers and designers, backups allow you to instantly create new testing environments.
Need to tweak your theme files? Test some custom code? Build a new feature? Do it on your local backup! It’s a safe, isolated space to experiment and build.
No more messing around directly on your live site. Develop and design in your local backup, then push the changes to your live site when you’re happy.
Digital Time Capsule
Websites evolve. Designs change. Content gets updated. Viewing old backups lets you revisit past versions of your site.
Maybe you want to see how your website looked five years ago. Or grab an old logo. Or just reminisce about your site’s journey. It’s all there in your website backup history!
Where Are Your WordPress Backup Files Stored?
The steps below assume you’re making a fresh backup. If you already have one and just need to find it, here’s where backup plugins keep their files.
- Duplicator Lite: wp-content/backups-dup-lite/
- Duplicator Pro: wp-content/backups-dup-pro/
- UpdraftPlus: wp-content/updraft/
- All-in-One WP Migration: wp-content/ai1wm-backups/
- BackWPup: a folder under wp-content/uploads/ beginning with backwpup- (the rest of the name is a random string)
You can reach any of those with an FTP client or your host’s file manager. These plugins also list their backups in wp-admin, which is usually quicker.
Two places the file won’t be:
- Host backups generally don’t live in your site folder at all. Look in your hosting control panel instead, where they’re usually offered as a download.
- Cloud backups sit wherever the plugin was told to put them, in a folder it created in your Google Drive, Dropbox, or S3 bucket. Download the file back to your computer before you go any further.
If your site is already gone and the backup is all you have left, skip Step 1 entirely and start at Step 2.
How to View a Backup as a Website
Ready to view one of your backups as a website? It boils down to a simple three-step process. Here’s what you’ll do:
- Grab your backup. You need that website snapshot, right?
- Set up a local testing site. We’re talking about a local environment – a copy of your website living on your computer.
- View your backup. You’ll import your backup into this local environment, turning a blank staging site into a perfect copy of your live website.
That’s it!
Once you’ve done these three things, you’ll be able to view your backup as a website right on your computer.
I’m going to break down each step in detail. I promise it’s easier than it sounds.
Step 1: Back Up Your Website
Backups are your digital insurance policy. They’re your undo button for your website, protecting you from data loss.
Now, what kind of backups are we talking about? There are a few main types:
- Full backups: Files, database, WordPress core, plugins, themes, images… everything. This is the gold standard.
- Database backups: Just the database where all your posts, pages, settings, etc., are stored. Smaller than full backups, but still crucial.
- File backups: Just the files – themes, plugins, uploads. Good to have, but not enough on their own for a full restore.
For viewing your website as a backup, you want a full backup. It’s the most complete picture of your website.
Plugins like Duplicator simplify the whole backup process. Once you install it, you can immediately back up your website.
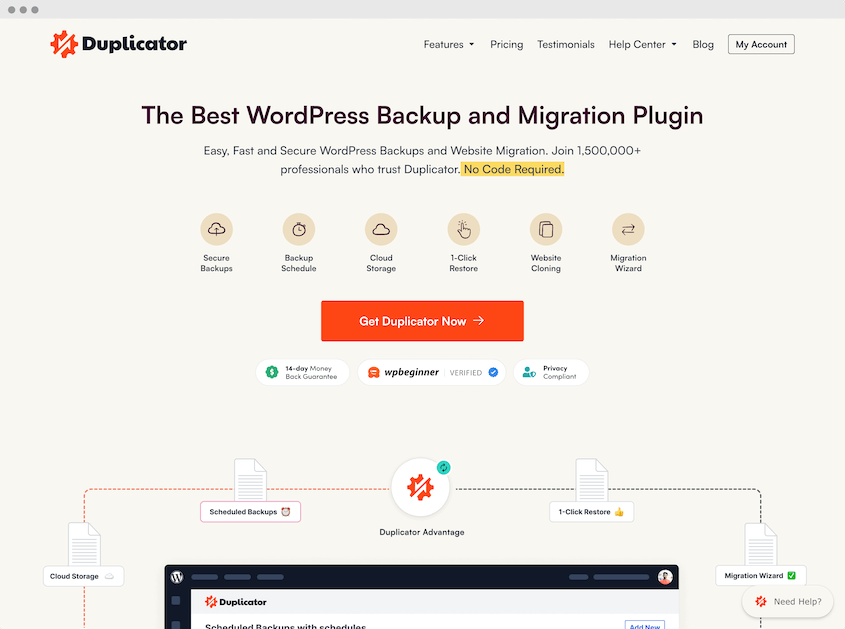
There are easy presets to help you customize your backups. For now, choose the Full Site preset.
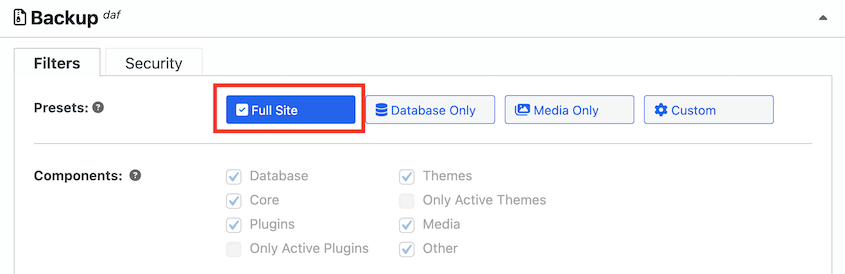
The plugin will chug away in the background, gathering all your website files and database into a nice, neat backup package.
Once it’s done, Duplicator will give you two files to download: an installer file and an archive file (usually a ZIP file). Download both.
The drag-and-drop import in Step 3 only needs the archive, but that import is a paid feature, and the free route uses the installer.
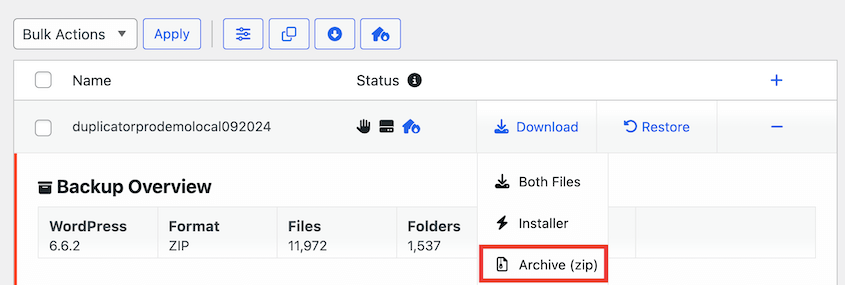
If you’re feeling adventurous, you can do manual backups. This usually involves using tools like:
- cPanel or your web hosting control panel: Many hosting providers offer backup tools in their control panels. These can work, but they can sometimes be a bit clunky.
- FTP (File Transfer Protocol): You can use FTP to download all your website files to your computer. A bit more technical, but doable.
- phpMyAdmin: For database backups, phpMyAdmin is a common tool. Again, a bit more technical.
However, manual backups are more work and error-prone if you’re not careful. For most folks, plugins are just way simpler and safer.
Bottom line: Get yourself a good backup plugin (like Duplicator!). Set up regular backups. Download those backup files. You’ll thank yourself later.
Step 2: Create a Local Testing Environment
A local environment is where you can safely test, experiment, and, in our case, view your website backup without affecting your live website. It’s completely offline and separate.
You need some special software to create this local website server on your computer. Think of these tools as local server starter kits. They bundle everything you need to run a website server on your computer.
If you’re a beginner, Local by Flywheel is my top recommendation. It makes setting up local WordPress sites incredibly simple and user-friendly. Plus, it’s free!
XAMPP is a bit more technical than Local, but it’s powerful and works for all sorts of websites, not just WordPress. It’s free and cross-platform (works on Windows, Mac, and Linux). Great if you want more control and flexibility.
MAMP is for macOS and WAMP is for Windows. Similar to XAMPP, these are also popular, free, and give you a good level of control. Slightly less beginner-friendly than Local, but still solid choices.
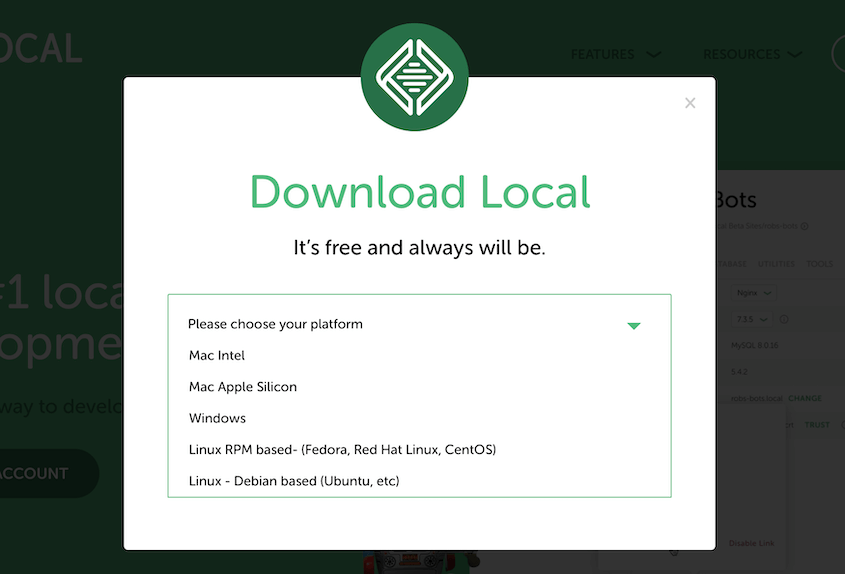
To keep things simple, I’ll use Local in this tutorial. First, download the software to your computer. Finish the installation steps.
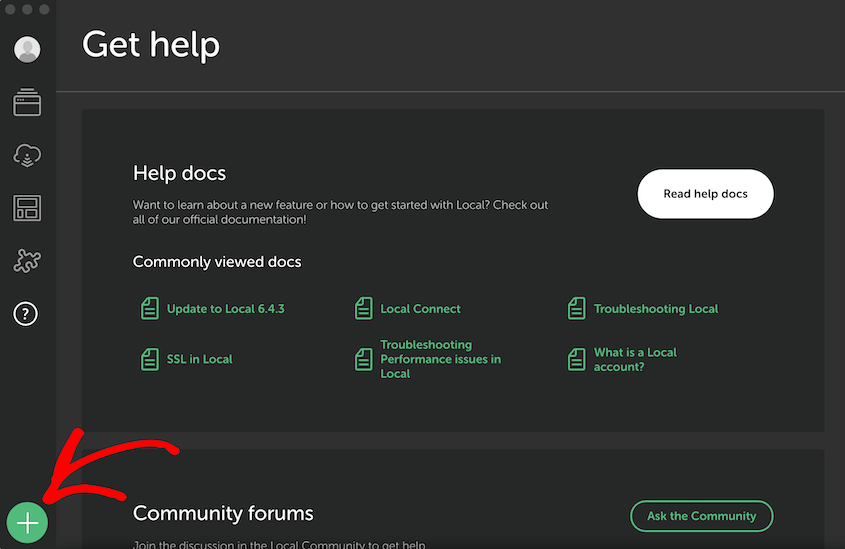
Then, hit the green + icon in the bottom left corner. This allows you to build a new WordPress site.
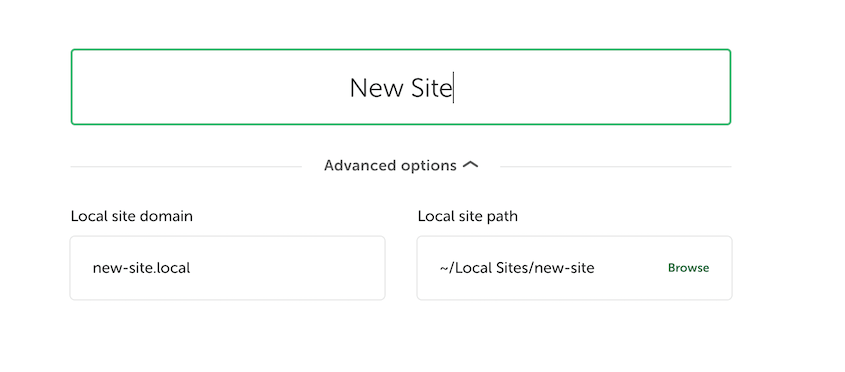
Name your new local site and continue.
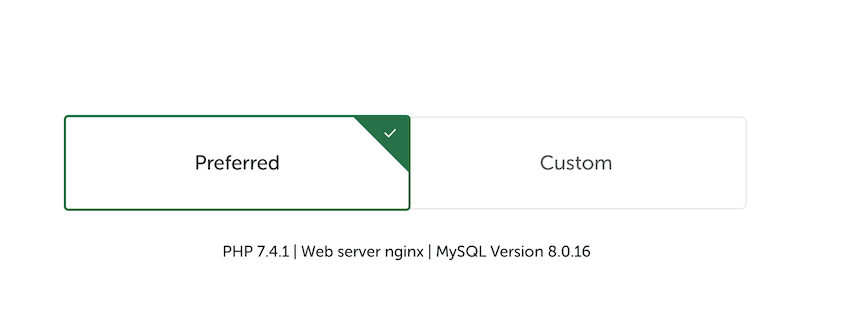
For the environment, keep things simple with the Preferred option. However, you could customize the PHP version, web server, and MySQL version.
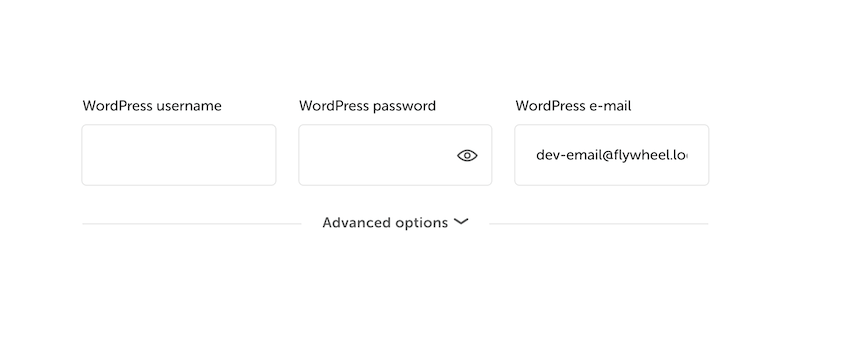
Finally, choose a username, password, and email address for your local WordPress admin dashboard.
After this, the software will set up all the behind-the-scenes stuff for your local server. This might take a few minutes.
Once it’s done, you should have a brand new, blank local website ready to go!
Step 3: Import Your Backup
We’re going to take those backup files you downloaded and restore them into your local environment.
To access your new local site, open Local and select the site you just created. Click on the WP Admin button.
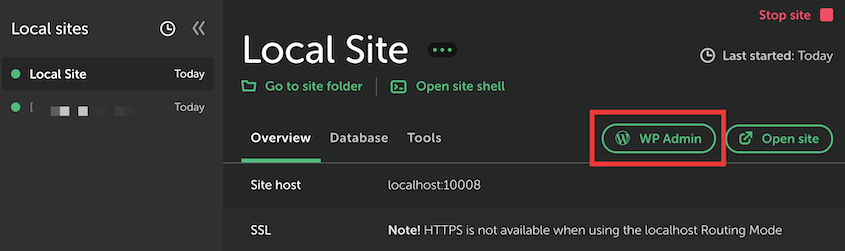
Log into the WordPress dashboard. Then, install Duplicator Pro.
Go to Duplicator Pro » Import Backups. Drag and drop the archive you created earlier into the import box and hit Continue.
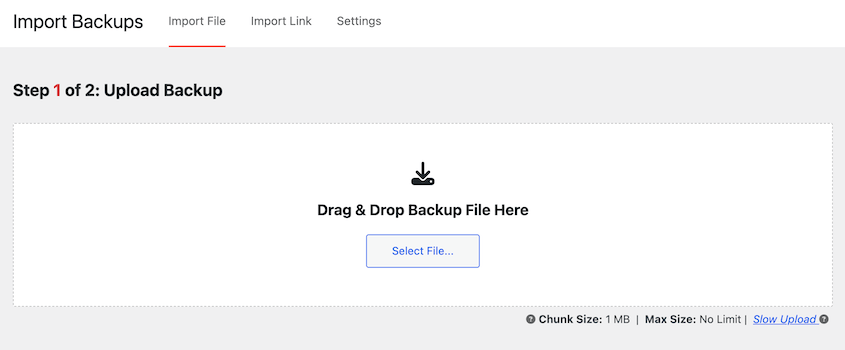
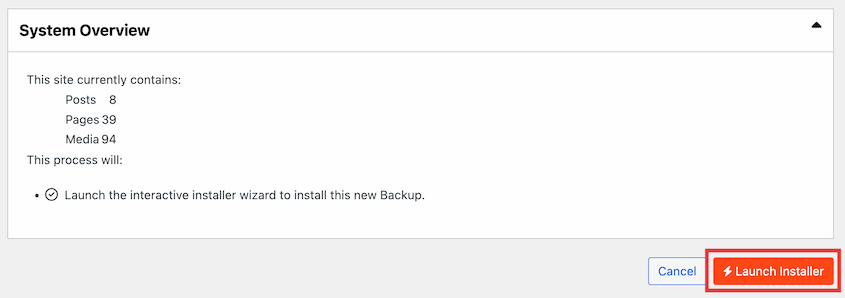
Scroll to the bottom of the page and launch the installer.
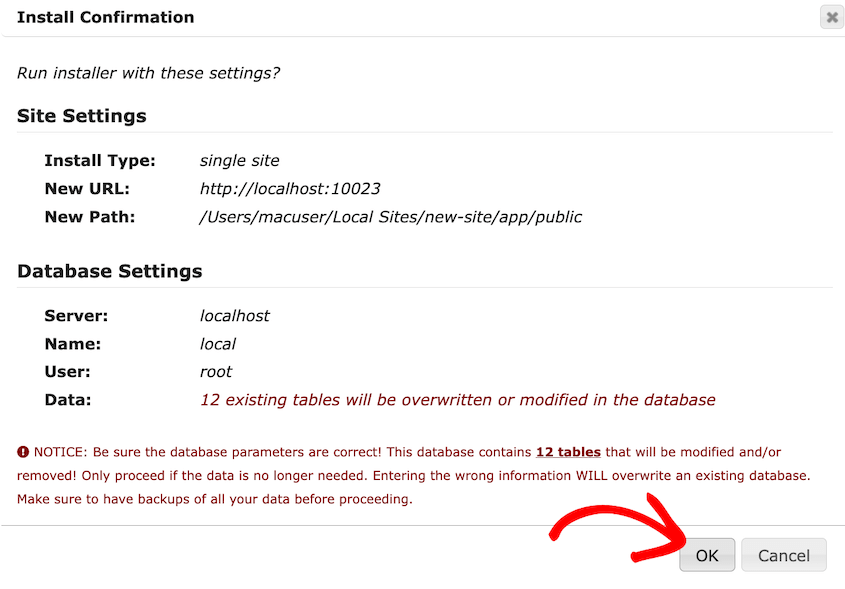
In the installer, accept the terms and notices and click Next. Confirm the installation using the pop-up window.
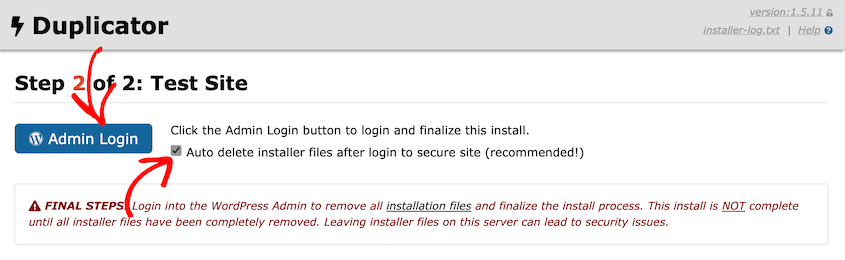
Now, Duplicator will replace the blank WordPress installation with your backup files. Use the Admin Login button to sign into your local staging site.
What If Your Backup Wasn’t Made With Duplicator?
Plenty of people arrive here holding a backup somebody else made, in a format Duplicator didn’t create. The good news is that most of them still open. The route just changes.
- UpdraftPlus splits a backup into several files (one for the database, then separate ones for plugins, themes, uploads, and everything else). Install UpdraftPlus on your local site, upload these files, and restore from there.
- All-in-One WP Migration produces a .wpress file, and only that plugin can read it. Install All-in-One WP Migration on the local site and use its own import. Local’s ZIP importer won’t recognise the format.
- Host backups usually arrive as a .tar.gz or a control-panel archive. Extract it and you’ll find your site’s files plus a database dump ending in .sql.
That last case is the general fallback, and it works for anything with files and a .sql dump inside. Make a blank site in Local, copy the files into its app/public folder, then import the .sql using the database tool Local opens for you.
If the backup came from a different domain, the old URL will still be written all through the database. You’ll need to do a search and replace afterwards, or the local copy will keep trying to load images and links from a site that may no longer exist.
Key Considerations for Viewing Backups
Viewing your backup locally is super useful, but it’s not exactly the same as your live website. Here are a few things to remember.
Backup Age
First off, your backup is a snapshot of your website at a specific point in time. Think of it like a photograph. It captures a moment, but things change after the picture is taken.
If your backup is a week old, it won’t have any changes you made to your site after that backup was created.
New blog posts? New products? Recent design tweaks? They won’t be in your backup if they happened after the backup was made.
So, when you’re viewing your backup, remember: it’s a historical record. It’s not a real-time mirror of your current live site. Keep the backup’s age in mind when you’re using it for testing or data extraction.
Local Environment Quirks
Your local environment is great for testing and viewing backups. However, it’s not a perfect replica of your live hosting server.
Why? Well, your live server has its own specific setup, software versions, and server configurations. Your local environment might be slightly different.
This means that sometimes, things might behave differently locally than they would on your live site.
For most testing and viewing purposes, it’s more than close enough. But for super-critical, highly technical testing, you might still want to use a staging environment that more closely matches your live server. But for 99% of use cases, local is fantastic.
Performance
Your local website might feel a bit faster or slower than your live website because it’s running on your computer, not your hosting server’s hardware.
If you have a super-powerful computer, your local site might actually feel faster than your live site. If your computer is a bit older or slower, it might feel slower.
Also, internet speed doesn’t affect your local site, because it’s offline. So, if your live site sometimes feels slow due to internet issues, your local site won’t have that problem.
Don’t get too hung up on comparing local speed to live speed. The main thing is that your local environment lets you view and interact with your backup functionally. Speed differences are usually minor and not a big deal for most purposes.
Frequently Asked Questions (FAQs)
How do I make a website backup?
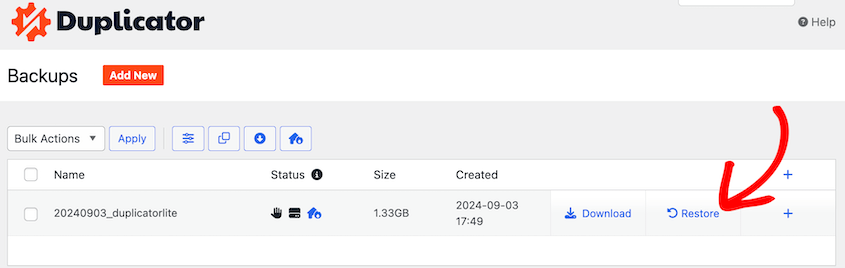
The easiest way to make a website backup is with a plugin like Duplicator. Generate a new backup, download both the installer and archive files, and store them securely. To restore, upload the files to your server and run the installer. Or, use the one-click restore button.
How do I download website backup files?
Download website backup files by accessing your WordPress backup plugin. Locate the backup section, select the desired backup, and download it. Regularly downloading backups ensures you have a copy for restoration if needed.
How do I read a backup file?
To “read” or, more accurately, access the contents of your backup, you need to restore it to a local environment or a live server. Once it’s restored, you can browse the website, access the files through the WordPress dashboard or FTP, and interact with the database through phpMyAdmin.
How do I view a backup on Google Drive?
If you’ve been backing up your website to Google Drive, open your cloud account. Navigate to the directory where your backup files are saved. Select your backup files and download them. To view this data, restore the backup on a local development environment like Local by Flywheel.
Final Thoughts
Learning to view your backups as websites is a game-changer. It’s not just about disaster recovery anymore. It’s about testing, troubleshooting, content rescue, and even just plain curiosity.
So, go make a backup, set up a local environment, and give it a try! You might be surprised at how powerful this little trick can be.
And hey, if you’re finding Duplicator (the free version!) awesome for this, imagine how much more time you could save with Duplicator Pro.
We’re talking cloud backups, scheduled daily backups, and even more advanced features to make your backup workflow completely hands-off. If you’re serious about your website (and your sanity), check out Duplicator Pro – it’s the ultimate peace-of-mind upgrade.
While you’re here, I think you’ll like these other WordPress guides:
- How to Create a WordPress Staging Site
- How to Restore WordPress from a Backup (In Less Than 5 Minutes)
- How to Back Up a Large WordPress Site
- 9 Best WordPress Backup Plugins
- Migrations Without the Money: Best FREE WordPress Migration Plugins
- How to Remotely Back Up and Restore WordPress
- Best Website Backup Services: Never Worry About Backups Again