
Storing Your Backup to Google Drive
Duplicator Pro can push your backups to the Google Drive cloud service. All backups are initially built on the local server and then pushed up to Google Drive using its API services.
Storing your site backups with a cloud service like Google Drive provides a secure safeguard against server errors and potential hacks. Utilizing off-site storage ensures consistent access to your backups, allowing you to quickly restore your website in the event of a crash or other unexpected issue.
In this tutorial, we’ll show you how to back up a WordPress site to Google Drive!
Connect Google Drive Account
First, go to Duplicator Pro » Storage. On this page, you’ll see that the default storage location is your local server. This will save your website backups to this URL path: /wp-content/backups-dup-pro.
To start using Google Drive, hit Add New:

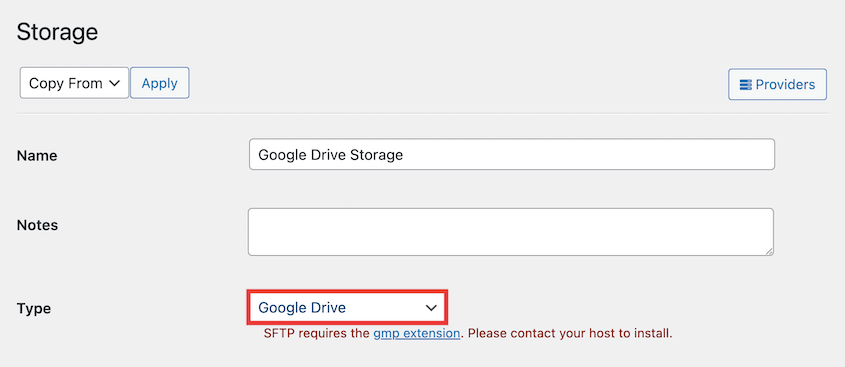
Then, name the new storage. Using the Type dropdown menu, choose Google Drive:
After this, you’ll see an option to Connect to Google Drive:

New steps will appear to walk you through the setup process. First, hit Authorize Google Drive:

This will open a new tab, where you’ll need to sign in to your Google account using your Gmail address. You should also give Duplicator Pro access to your Google Drive account.

Once you do, you’ll get a unique code:

Copy this and go back to your WordPress dashboard. Then, paste the Google Drive API code into the Step 2 input field:

Lastly, click on Finalize Setup. If the connection is successful, you’ll see details about your Google account and quota usage:

Before you create a backup, you can test this connection. Go to the bottom of this page and hit Test Storage. This will send a small file to and from your account:

You can also consider adjusting the Max Backups setting. This will be the number of backups that will be stored to your Google Drive storage. If the number of backups in the Google Drive storage will exceed the Max Backups value, the oldest backup will be removed.
If you’re using a free Google Drive account, you’ll have to avoid exceeding 15GB of backups. So, don’t set the max backups value too high. Duplicator will delete old backups to optimize your storage space.
Create and store a backup on Google Drive
Now that you’ve added your Google Drive account as a cloud storage location, it’s time to store your first backup to the cloud. You can do this by finding Duplicator Pro » Backups » Create New:

Duplicator will automatically generate a name for your backup. However, you can also rename it so it’s more memorable for you. This will make it easy to find if you need to restore it later:

Next, expand the Storage settings. Here, you’ll see that Google Drive is now listed as a backup option. Be sure to select it:

Usually, you’ll want to do a full backup of your WordPress site’s files and database. This will save the complete setup of your site.
To create a full backup, don’t make any changes to the archive or installer files before hitting Next.
However, you can easily edit the archive file to only include certain data in the backup. For example, feel free to do a database backup if you just want to save data like customer information, posts, or pages:

After you configure your backup, Duplicator will scan your website. You can look over this evaluation for any issues. To continue, click on Build:

When Duplicator finishes building your backup, it will be transferred to your Google Drive folder.
Set Up Automatic Backups
As a website owner, you’ll know how important it is to regularly back up your website. If you always do manual backups, you may not save your data as often as you should. To make this process easier, you can set up automatic backups.
If you create a scheduled automatic backup, your website will be backed up at a certain time. This ensures that you always have a copy of your site on hand in case of an emergency.
To set up automatic backups in Duplicator, go to Duplicator Pro » Schedules. Then, click on Add New:

You can name your schedule at the top of the page. If you want to make customizations to the default backup settings, consider creating a backup template. Alternatively, Duplicator will simply perform a full backup:

Under Storage, select Google Drive. This will transfer the backup created during the automatic backup to Google Drive:

Then, choose a schedule for your automatic backups. Duplicator supports monthly, weekly, daily, and hourly backups. For each of these options, you’ll be able to customize when you’d like the backup to start:

You can also select a Start Time for the schedule. Lastly, select the checkbox next to Enable This Schedule:

After you save this scheduled backup, your website will be automatically backed up to Google Drive!
Restore your website using backups stored on Google Drive
Duplicator Pro offers multiple ways to restore your backups. If you’ve uploaded your backups to Google Drive using Duplicator Pro, you can easily restore your website to a previous version or recover it in case of a crash. The following methods detail how to restore your website from backups stored on Google Drive:
Use the Download option to restore your website:
To restore your website to a previous version using a backup stored in your Google Drive account, follow these steps:
- Go to Duplicator Pro » Backups
- Click the Download button for the backup you need to restore

- After the download completes, click the Restore button to restore the backup
Use a backup stored on Google Drive to restore your website:
If you accidentally make a coding mistake or experience an unexpected WordPress error, you’ll need to restore a backup. To do this, follow these steps:
Open your Google Drive account and find the folder with your Duplicator backups:

Here, you’ll see your recent backup files. Select your archive file and hit Download:

Then, open your WordPress dashboard and go to Duplicator Pro » Import. Instead of manually uploading the file to a File Manager or File Transfer Protocol (FTP) client, you’ll be able to directly import your backup:

Drag and drop your archive file into the upload box. After it uploads, you’ll see information about the backup. If everything looks correct, continue to the next page:

Now you’ll see an overview of your current site. To rewrite it with the uploaded archive, click on Launch Installer:

Then, the Duplicator recovery wizard will walk you through the process of restoring a backup. First, be sure to select Restore single site as the Install Type:

Next, hit Validate. Duplicator will provide warnings if there is anything wrong with the installation. To continue, accept the terms and notices and click on Next:

As a final step, confirm that you want to proceed with the backup restoration:

Duplicator will automatically replace your current site with the saved backup. Once finished, you’ll see an Admin Login button:

Now you can sign back into your restored website!


