Maybe you want to revamp your website’s design, test out some new plugins, or experiment with custom code. How do you do this without breaking your live site?
Many developers use local WordPress hosts to solve this problem.
Moving your live WordPress site to a local host opens up a world of possibilities. It’s like having a sandbox where you can play with your website without any consequences.
In this tutorial, I’ll show you how to move a copy of your live website to a local host! You’ll benefit from faster development, offline availability, and secure troubleshooting.
You’ll learn:
- The benefits of having a locally hosted copy of your website for development and testing
- Different methods to set up a local development environment
- How to back up your live site using migration plugins
- The step-by-step process to import your live data locally
- How to move changes from staging back to production
Quick Summary: How to Move a Live WordPress Site to a Local Host
1. Back up your live site.
First, use a backup plugin like
Duplicator to back up your entire live website. You’ll get backup files that will help you import your content into the local site.
2. Build a local website.
You can use local development software like LocalWP, MAMP, or WAMP to build a local WordPress site.
3. Create a database for the local site.
Open your local host’s phpMyAdmin dashboard and create a new database for the local site.
4. Import the backup into the local site.
If you already installed WordPress on the local site, drag and drop the live site’s backup into Duplicator’s Import page. You can also just upload the backup archive and installer files to the local server and launch the installer.
Table of Contents
Can You Locally Host a WordPress Site?
Using software like XAMPP, MAMP, WAMP, or LocalWP, you can set up a local server environment on your computer. This will install WordPress and run it locally, allowing you to develop and test your website without needing an internet connection or a live server.
Why Locally Host Your WordPress Site?
Whether you’re a developer, designer, or just want to make a few changes to your website, it’s a good idea to build a locally hosted site. Essentially, this involves creating a copy of your live WordPress site and hosting it on a local server on your computer.
This gives you an exact copy of your website to mess around with while your live site remains unchanged.
You can edit your WordPress theme, update plugins, and add new content all without affecting the functionality of your actual website.
Let’s dive into the main benefits of having a local WordPress site.
Build an Isolated Testing Environment
With a local host, you’ll have an independent testing environment. Here, you can freely experiment without impacting the live site.
This allows you to test new themes, plugins, and code changes without the risk of breaking anything on the production website. You can also push changes without downtime, so you won’t harm your SEO.
Start Learning WordPress
If you’re new to development or design, you can create a local site to build your skills. You’ll be free to learn coding on an offline, free website.
I only started becoming familiar with WordPress a few years ago. LocalWP is my go-to local environment for creating sandbox sites, doing whatever I want, and learning what works. It’s super easy!
Offline Availability
Local hosting allows you to work on your WordPress site even without an internet connection. This is useful when you are traveling or in situations when a stable internet connection is not readily available. You can continue to develop, design, and test your website regardless of your internet access.
Faster Development
Hosting WordPress locally gets rid of the dependency on internet connectivity and server response times. This results in a faster workflow, allowing you to make changes, test them, and see immediate results.
Confidentiality and Privacy
Local hosting ensures that your work remains confidential and private. You can work on sensitive projects without the risk of exposing them to the public. This is especially important when working on your clients’ websites.
Cost Savings
If you don’t have a live WordPress website, you can create a local site before paying for web hosting services, saving you money in the long run. You can build your first website without any extra costs. This might benefit individuals or small businesses on a tight budget.
How to Move a Live WordPress Site to a Local Host
Now that you know the benefits of hosting your WordPress site locally, let’s walk you through the process of moving your data to a local server!
Here are the key steps to move a live WordPress site to a local host:
- Install a reliable migration plugin like Duplicator Pro for easy transfers
- Create a complete backup of your live site
- Set up a local development environment
- Create a new database for the local site
- Import your backup files to complete the migration
I’ll show you the best export method to move your site to a local server. However, some web hosts (like Bluehost) allow you to set up a staging site on your live server.
For more details, check out my tutorial on how to create a WordPress staging site!
Step 1: Install a WordPress Migration Plugin
If you want to start testing site changes in a local environment, you’ll want to migrate an exact copy of your data to a local server. Although this sounds like a difficult task, Duplicator simplifies the process.
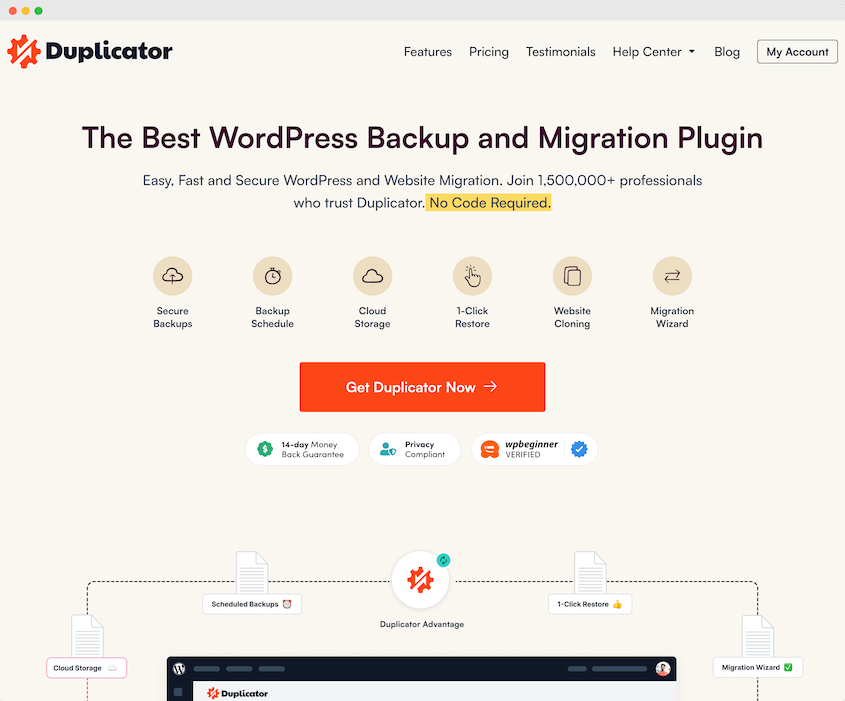
Duplicator is the best WordPress backup and migration plugin. It can bundle your entire live website into a single zip file.
This allows you to easily transfer all of your WordPress files, plugins, themes, and database tables to a new location.
Here are some more useful features included in Duplicator Pro:
- Manual and automatic backups
- Cloud backup storage
- Supports large sites and Multisite networks
- Disaster recovery points for quick site restoration
- One-click restores
- One-click remote restores
- Drag-and-drop imports
- Empty site support
- Email notifications for timeouts
First, select a subscription for Duplicator Pro. There is a free version of the plugin, but a premium plan supports drag-and-drop migrations. This can help you quickly move changes to and from your production site.
See how Rock Lobster Webdesign uses Duplicator Pro to migrate client sites to testing environments!
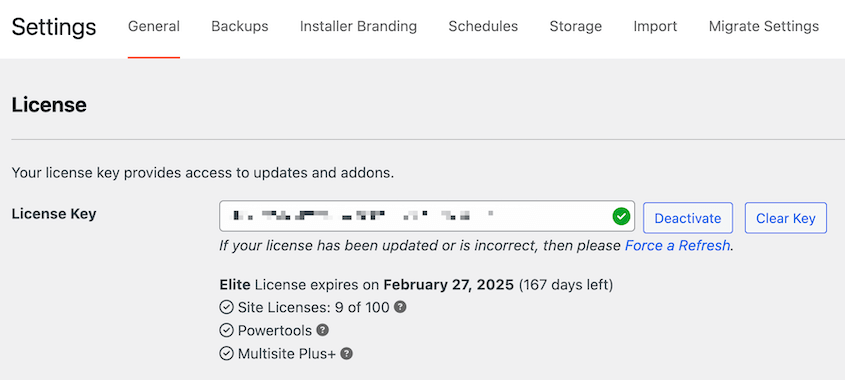
After your purchase, copy your license key. Then, install and activate Duplicator Pro on your live WordPress site.
Before you start using Duplicator, you’ll need to activate your license. Go to Duplicator Pro » Settings » General.
Paste your license key and hit Activate. Then, feel free to continue to the next step!
Step 2: Back Up Your Live Site
Duplicator allows you to duplicate your entire website. To create this copy, you’ll need to create a backup. This can then be easily transferred to a local host.
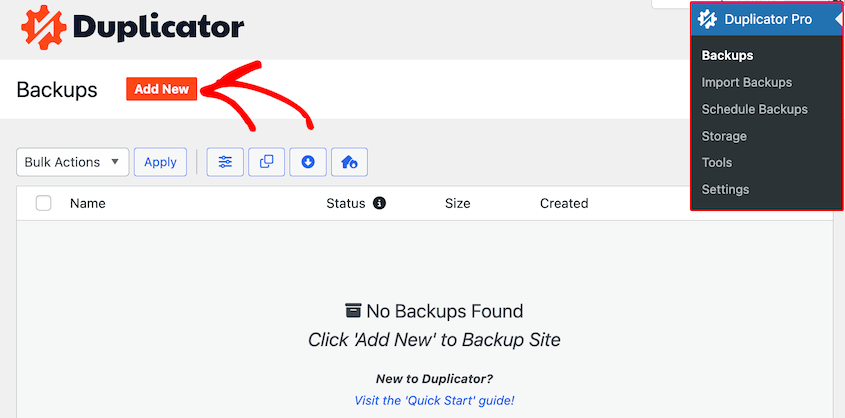
To get started, navigate to Duplicator Pro » Backups » Add New.
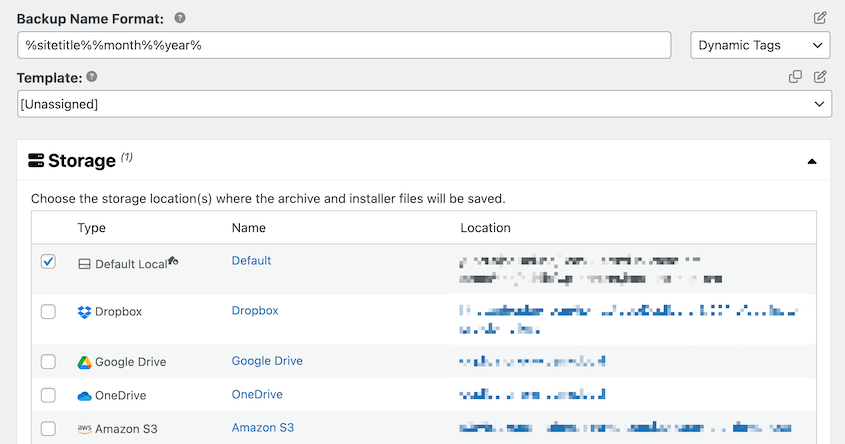
Give the backup a name and choose Local for the storage location.
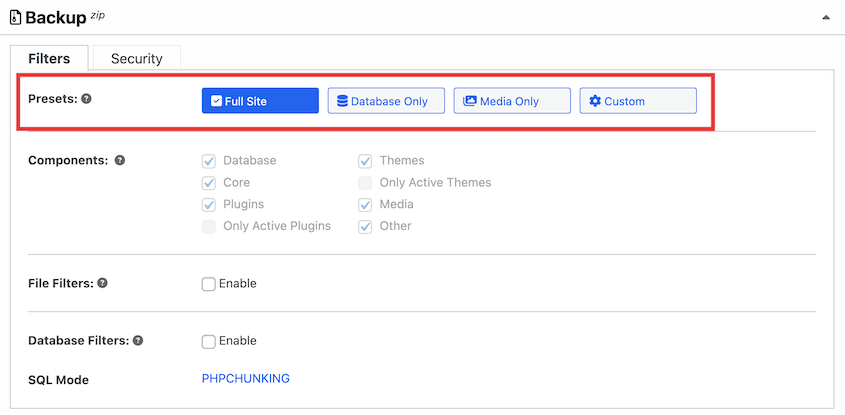
If you want to move all of your data, select Full Site. However, you can also exclude certain site files or only back up your WordPress database instead.
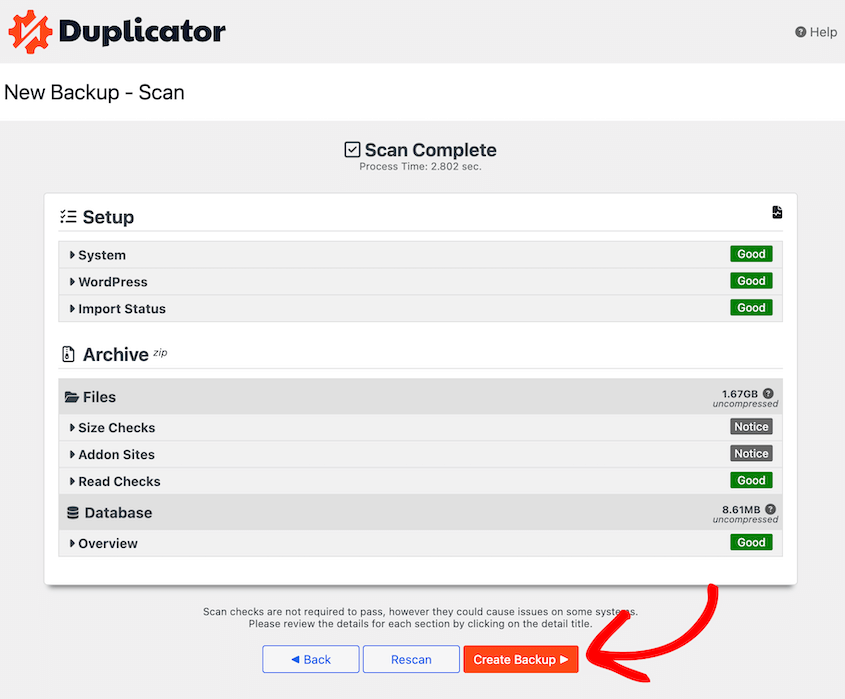
When you’re done with this, click on Next. Then, Duplicator will scan your live website. You’ll see notices if anything needs your attention.
After reviewing these notices, hit Create Backup. Once Duplicator automatically builds a copy of your website, you’ll see it on the Backups page.
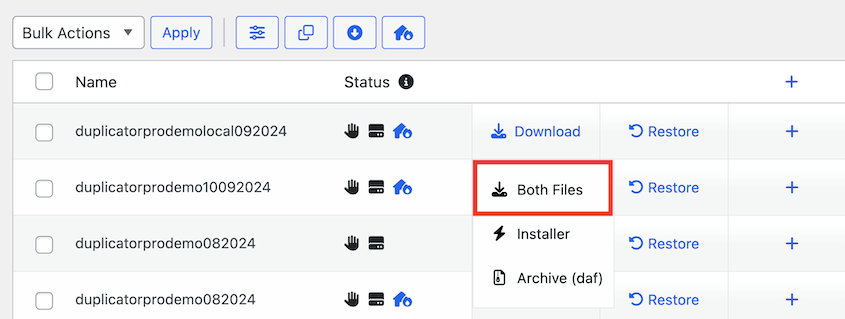
Be sure to download both the archive and installer files.
Step 3: Build a Local Site
Next, you’ll need to set up a local site that’s hosted on your computer. To do this, it’s important to find a local server environment.
Here are some effective options:
In this tutorial, we’ll be focusing on LocalWP and MAMP.
Method 1: Building a Local Site Using LocalWP
LocalWP is one of the most popular tools for building local WordPress sites. With just one click, it will automatically install WordPress for you.
Unlike other local software, LocalWP is compatible with Mac, Windows, and Linux.
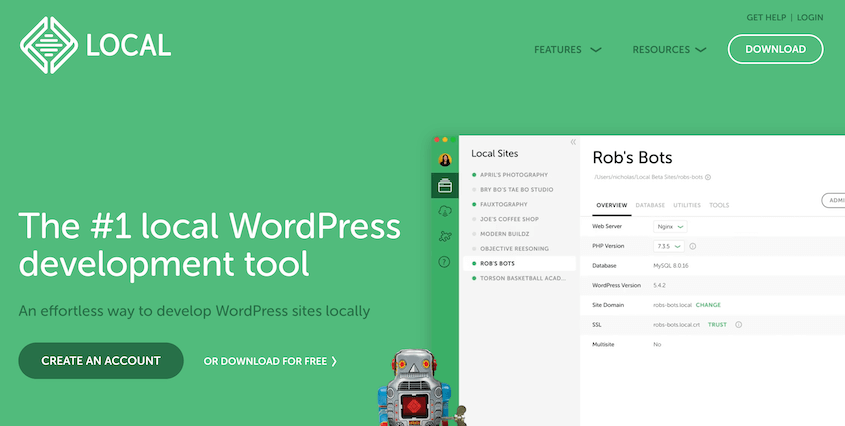
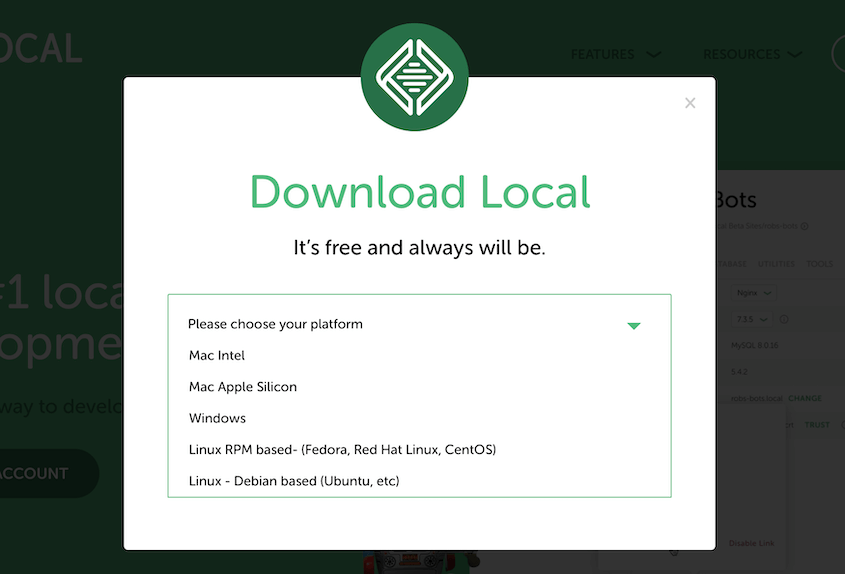
To start creating your local site, go to the LocalWP website and click on Download For Free. Then, choose your operating system.
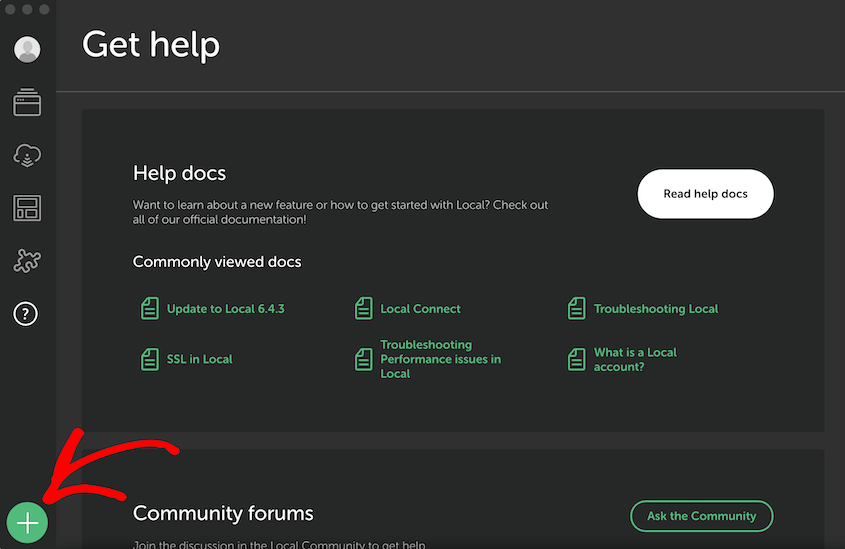
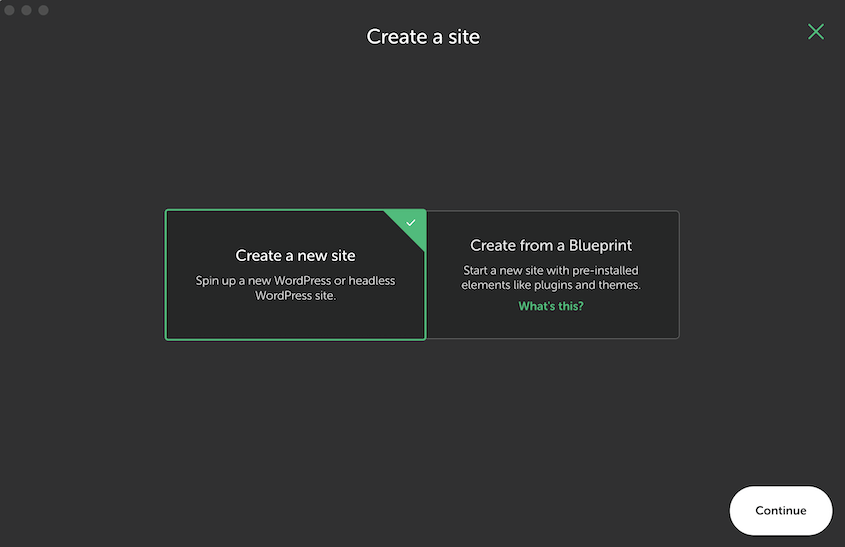
After you install the app, click on the + icon in the bottom left corner. This will allow you to add a new local site.
Select Create a new site and continue.
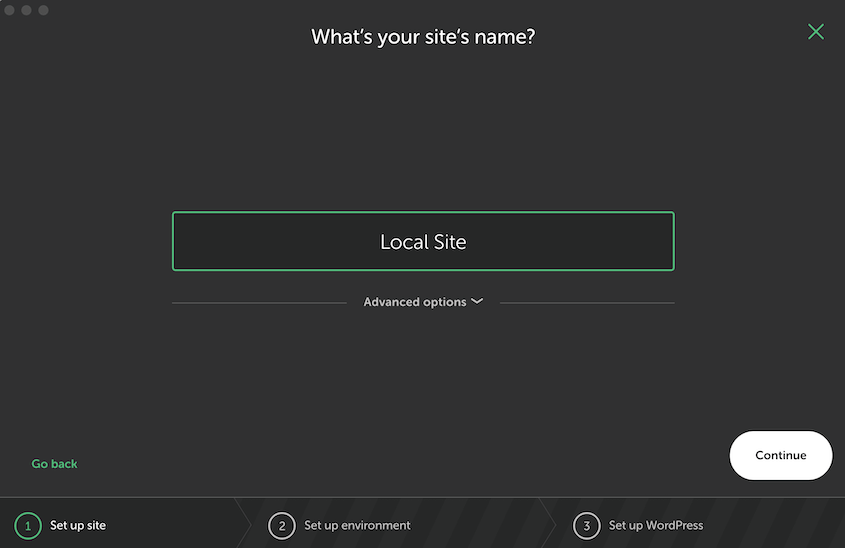
Then, name the new local site.
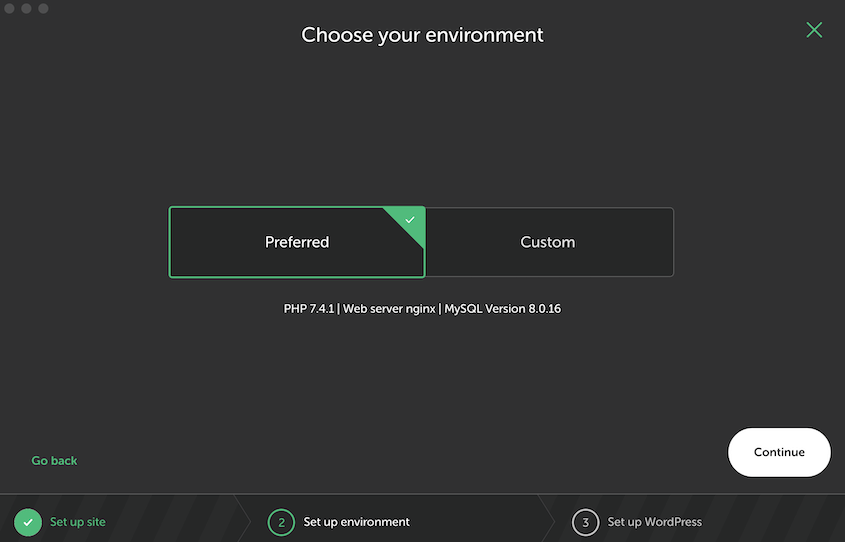
If you’re a developer, you can customize the local environment with a specific version of PHP, Apache, and MySQL. To do this, select Custom.
However, Preferred will set up a general WordPress installation for you.
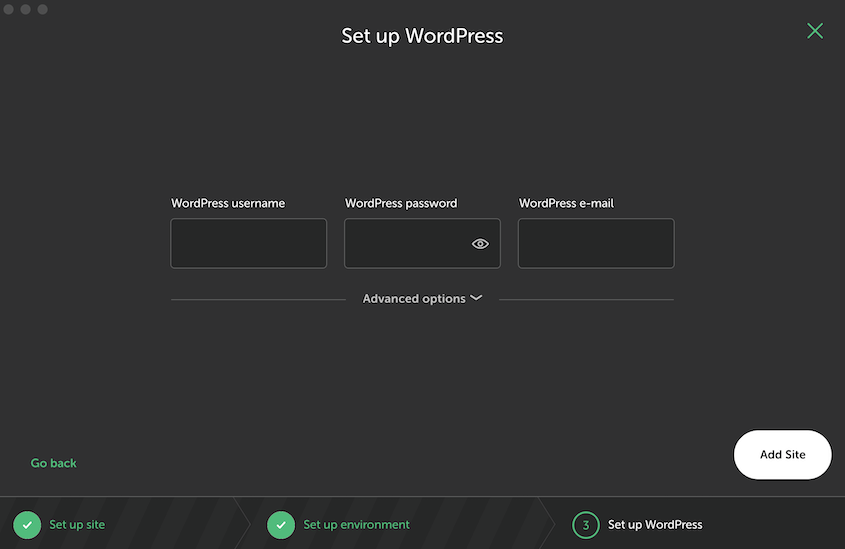
Lastly, provide a username, email address, and password for the site.
LocalWP will take just a few minutes to set up your new local WordPress site.
Method 2: Building a Local Site Using MAMP
Many people decide to use MAMP for Mac computers and WAMP for Windows. Either of these options will quickly install WordPress and host it on your local computer.
Since I personally use a Mac, I’ll be using MAMP in this guide.
You’ll need to start by going to the MAMP website and downloading the version that is compatible with your computer.
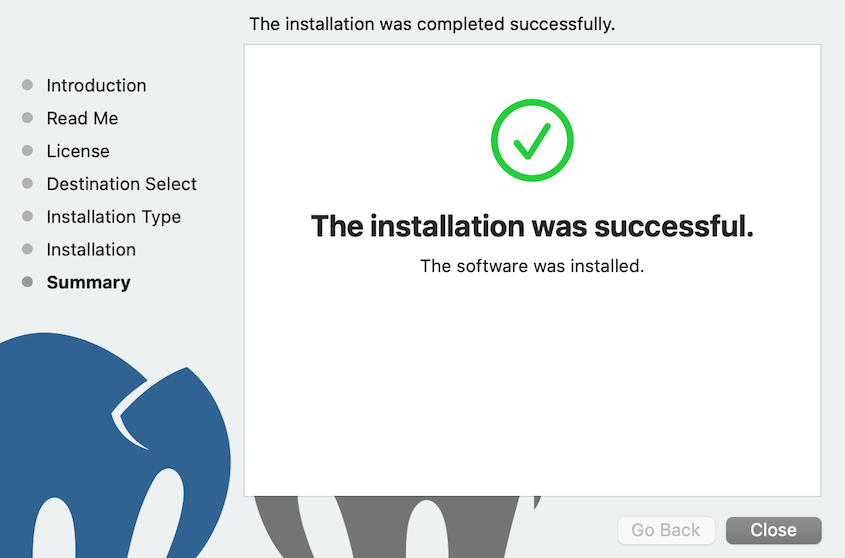
When you open this file, MAMP will walk you through some installation instructions. If you follow these steps, you’ll see a success message.
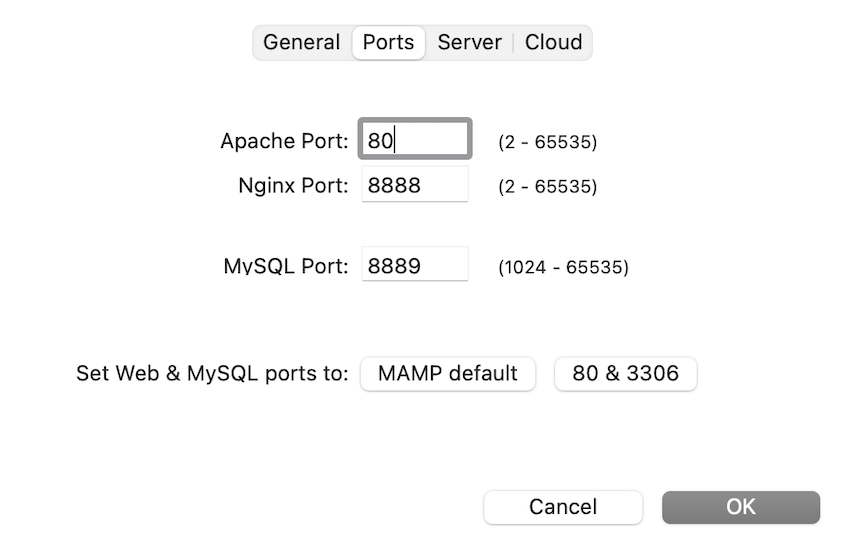
Now, open the MAMP app and click on Preferences » Ports. Here, set the Apache Port to 80 and hit OK.
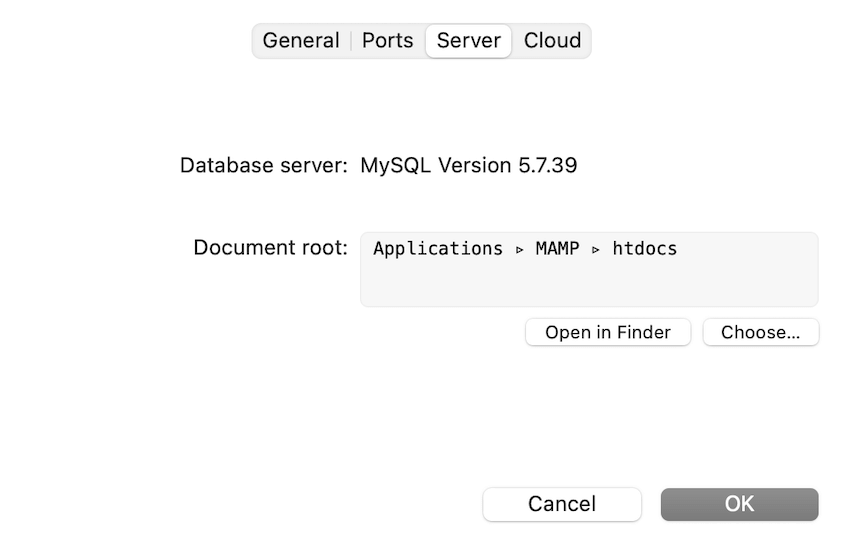
After this, head over to the Server tab. Under Document root, you can choose a folder to store your local site.
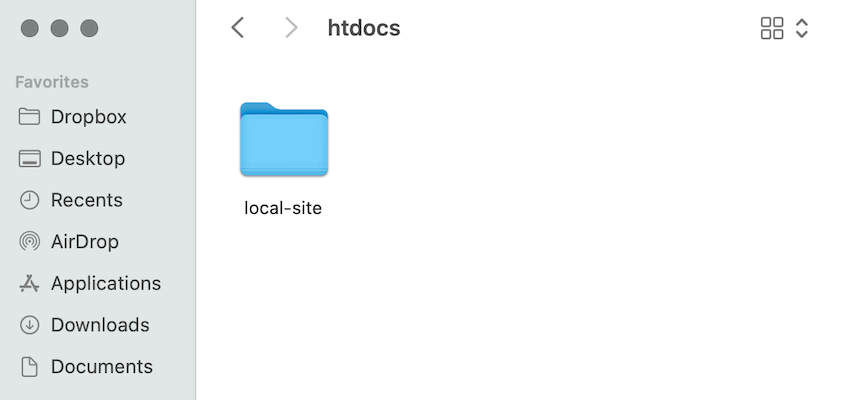
By default, this will be Applications » MAMP » htdocs.
Step 4: Create a Database
Before you start moving your original files to the local site, you’ll need to create a new database. You can do this in your phpMyAdmin dashboard. To find this, open one of the following links:
http://localhost/phpmyadmin/
http://localhost:8080/phpmyadmin/
Then, click on New. Add a name for your new site’s database and hit Create.
Now you’re free to install your backup on the local site!
Step 5: Install Your Backup Files
To make sure your local site looks and feels exactly the same as your live site, you’ll need to import the backup that you saved earlier. I’ll show you how to do this using both LocalWP and MAMP.
Method 1: Installing Your Backup Files on LocalWP
If you have WordPress already installed on the local site, you can simply drag and drop your archive file into it.
This is my favorite method! I found it the easiest way to get a local site online when I first started out as a WordPress newbie.
With LocalWP, open the app and select your local site. Along with details about the site, you’ll see a WP Admin button.
Click on this to access your new local environment. If you’re opening it for the first time, you’ll need to sign in. Then, install Duplicator Pro as a plugin.
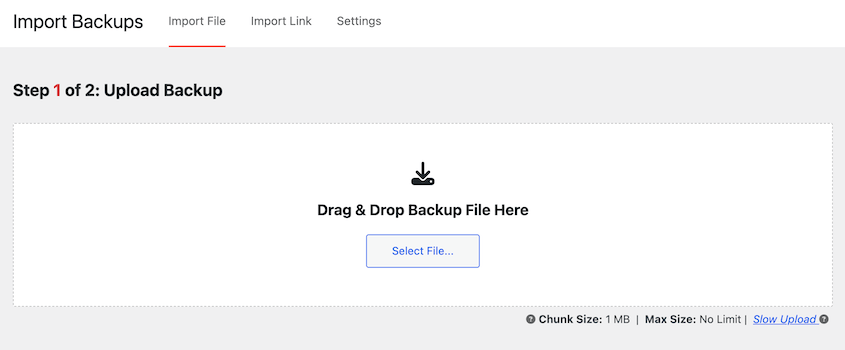
After activating Duplicator, find the Import Backups page. Here, you can simply drag and drop your saved archive file.
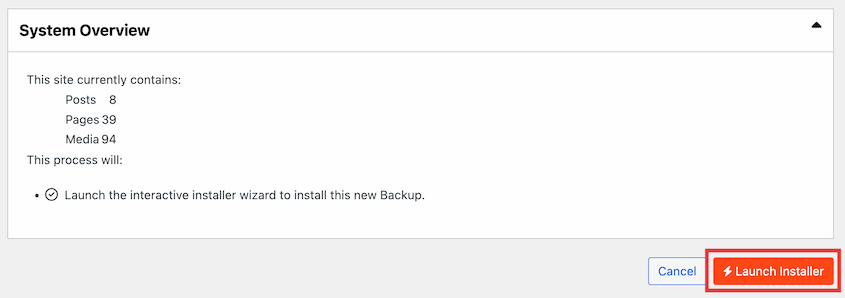
Once the backup is ready to install, continue.
You’ll need to confirm that you want to launch the installer and replace any content currently on the local site.
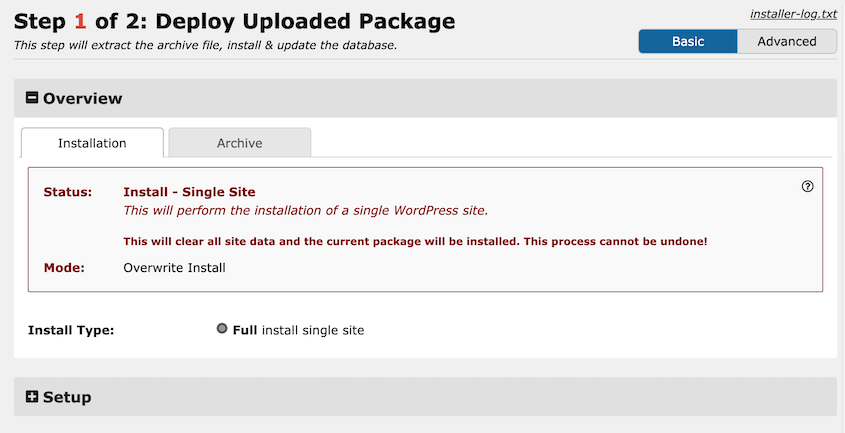
Then, Duplicator will walk you through the installation. First, make sure the Install Type is a Full install single site. Then, accept the terms and notices and hit Next.
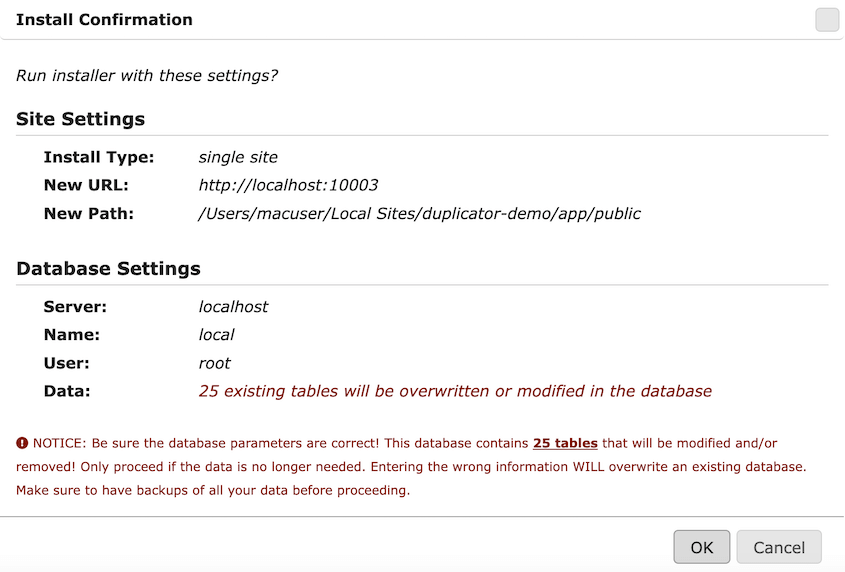
Lastly, confirm the installation.
Your production website will automatically be imported into the local site! When this is finished, use the Admin Login button to start testing your site locally.
Method 2: Installing Your Backup Files on MAMP
If you created your local site with applications like MAMP or WAMP, WordPress won’t be automatically installed. But don’t worry, Duplicator can import your website into a completely blank local site.
First, find the folder where you installed MAMP. In our case, it was Applications » MAMP » htdocs. Here, create a new folder for your local site.
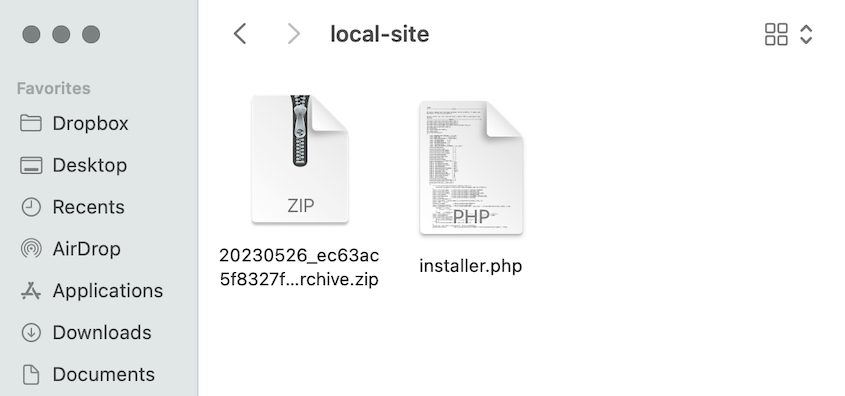
Copy both the archive file and installer script that you downloaded with Duplicator. Paste them into this folder.
Now, open a browser window and run the installer.php script. To do this, simply search for this URL:
http://localhost/local-site/installer.php
However, remember to replace local-site with the custom name of your folder.
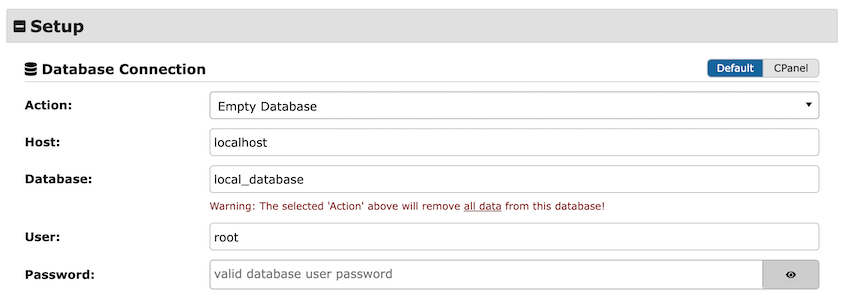
This will open the Duplicator installer. Scroll down to Setup, where you’ll enter your new database information.
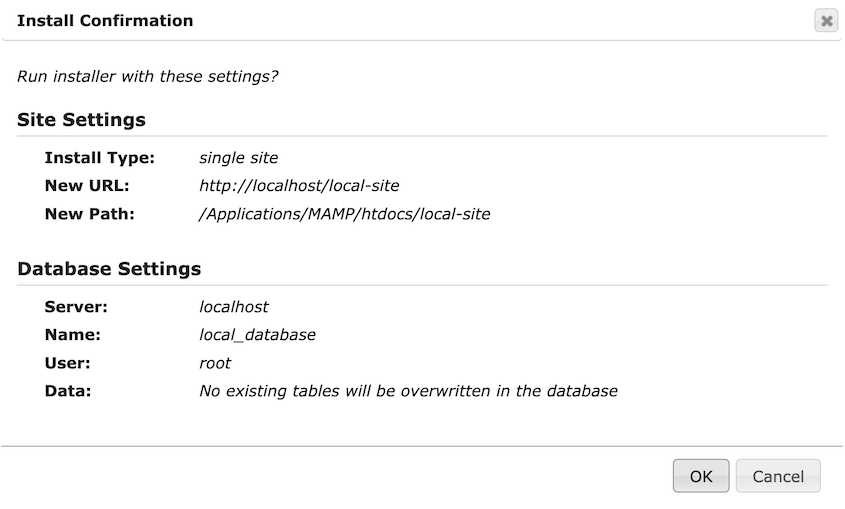
Enter the new database name. For local sites, the host name is localhost and the user is root. Usually, you can leave the password blank, but this could also be root.
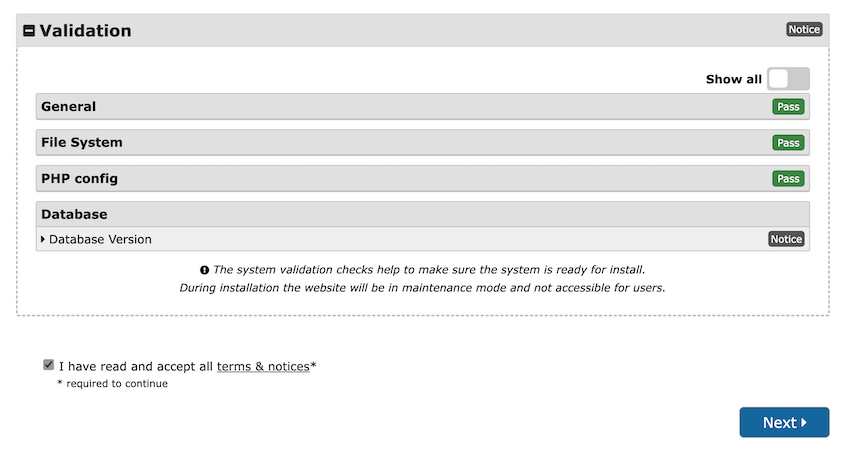
After this, hit Validate to test the database. Review any notices, accept the terms and notices, and continue.
Just like we did with the LocalWP site, you’ll need to confirm your installation settings.
The Duplicator plugin will then extract the archive file. You’ll see an option to log into the WordPress dashboard for your new local site!
How to Move Changes From Staging to Production
On your local staging site, you can completely change your web design. You could also use it to safely update software, test out new coding, and more!
Once you’re finished, you’ll need to move these changes to your live site. To do this, make sure Duplicator is installed on the local site. Then, create a full backup of the site and download it.
Next, open your live WordPress admin dashboard. Go to Duplicator Pro » Import Backups and upload the local site’s backup archive file.
You’ll see some details about the backup. At the bottom of the page, click Continue.
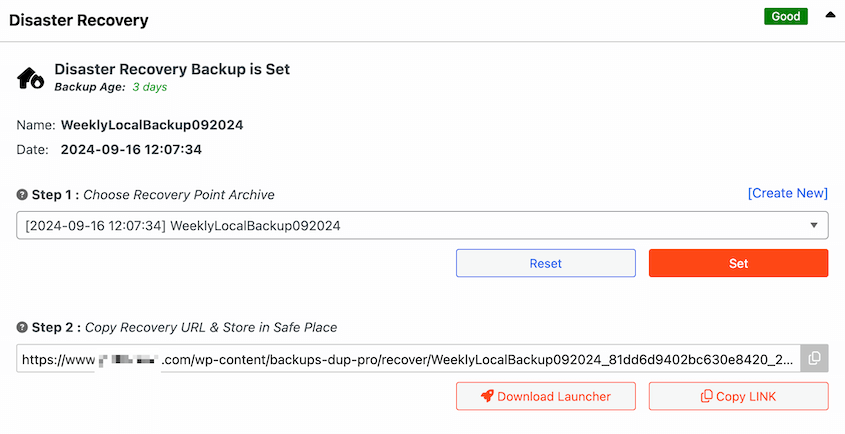
To protect your site from any unexpected errors, consider setting a recovery point. Then, launch the installer.
The step-by-step installer wizard will walk you through the rest of the migration!
This will import your local staging site’s data into the live site. You’ll successfully deploy any new changes.
Frequently Asked Questions (FAQs)
How do I create a local copy of a live WordPress site?
To create a local copy of a live WordPress site, start by installing Duplicator Pro. Then, back up your live website. After you create a local staging site, import the backup. You can do this by uploading the archive and installer files to the server or simply dragging the archive file into the Import page.
How do I move my WordPress site without cPanel?
You can move your WordPress site without cPanel by installing Duplicator Pro. This WordPress plugin allows you to download a backup of your site that bundles its files and database information. Then, you can install Duplicator Pro on a second site and drag and drop your site backup directly into it.
Can I start a WordPress site without a domain?
Yes, you can create a WordPress site on a local server without needing a domain name or a hosting provider. You’ll first need to choose a local development software like LocalWP, XAMPP, MAMP, or WAMP. These will guide you through the process of installing WordPress.
How do I manually move a live WordPress site to a local host?
To move your site manually, open your hosting account dashboard. Then, log into phpMyAdmin and export your database as a SQL file. You’ll also need to use a File Manager or FTP client like FileZilla to export files in your public_html folder.
Install MAMP or WAMP and create a folder for your local site. Here, copy and paste your exported WordPress files.
Next, open phpMyAdmin for the local site. Open the Import tab and click on the Choose File button. Then, add your zipped database file.
After this, it’s time to search and replace all the URLs in the database that reference your live site. To do this, go to the SQL tab in phpMyAdmin and paste this SQL query:
UPDATE wp_options SET option_value = replace(option_value, 'https://www.example.com', 'http://localhost/local-site') WHERE option_name = 'home' OR option_name = 'siteurl';
UPDATE wp_posts SET post_content = replace(post_content, 'https://www.example.com', 'http://localhost/local-site');
UPDATE wp_postmeta SET meta_value = replace(meta_value,'https://www.example.com','http://localhost/local-site');
Remember to replace all the URLs with your unique production site and local site links. Also, be sure to use HTTPS if you have an SSL on your live site. Then, hit the Go button.
Lastly, you’ll need to update the wp-config.php file. Find your local site folder and open this file in a text editor. Here are the MySQL database values you’ll need to update:
- DB_HOST
- DB_NAME
- DB_USER
- DB_PASSWORD
Finally, to make sure every URL links to the local site, open your WordPress options table in phpMyAdmin. For both siteurl and home, change the option_value to your localhost URL.
Conclusion
You now have a locally hosted website where you can safely update your live WordPress site!
While you’re here, you may like these extra WordPress tips and tricks:
Are you ready to start enjoying the benefits of a local host? Download Duplicator Pro to seamlessly migrate your live data to your local computer!
Joella is a writer with years of experience in WordPress. At Duplicator, she specializes in site maintenance — from basic backups to large-scale migrations. Her ultimate goal is to make sure your WordPress website is safe and ready for growth.


