I’ve seen many WordPress migrations go spectacularly wrong.
Especially if you have a multisite network, there is a lot of data to handle. Everything needs to be transferred to the new location successfully, which can be difficult.
Whether you’re switching hosts for better performance or rebranding your network, migrating a WordPress multisite requires careful planning and execution. One wrong move could mean broken links, lost content, or worse.
In this guide, I’ll walk through every scenario you might encounter when migrating WordPress multisite – from moving single sites into a network to performing full network migrations.
Here are the key takeaways:
- Use Duplicator Pro to automate the entire process and support all multisite migration scenarios, from single site imports to full network transfers
- Create full backups of your source data using multisite-compatible backup plugins to prevent data loss
- Manual migration is possible but risky; it involves exporting databases, transferring files via FTP, and editing wp-config.php, but leaves more room for human error
- Duplicator’s built-in search & replace function updates all URLs in your database, preventing broken links after migration
- Set disaster recovery points before importing to easily restore your network if anything goes wrong
Quick Summary: How to Migrate WordPress Multisite
To migrate WordPress multisite, back up your source data with multisite backup plugins like Duplicator, set up your destination (new hosting/WordPress install), and import using either Duplicator’s automated tools or manual database/file transfers. Always test your migration in a staging environment first, and update your wp-config.php file with new database credentials when migrating manually.
Table of Contents
Why Migrate WordPress Multisite?
As your online presence grows and evolves, so do your website management needs. Eventually, you may consider moving your WordPress multisite network to a different location.
Here are some reasons to migrate WordPress multisite.
- Better performance and scalability
You might need to move to a new web host that offers more resources, better uptime, and faster page speed.
By migrating to a new domain name, you’ll rebrand your entire network. This can boost brand recognition.
Additionally, you may want to move one subsite to its own domain instead of a subdomain in your multisite.
- Managing clients’ websites
To add a client to your WordPress maintenance plan, you can migrate their site into your network. After working on a client’s site in your network, you can move it to a single server.
How to Migrate WordPress Multisite
Even if you’ve moved a single WordPress installation before, you might not have tackled a full multisite network migration. It has extra subsites, so it can be difficult to move them correctly.
Don’t worry! I’ll show you how to easily migrate your WordPress multisite without losing data or SEO rankings.
Here are the multisite migration methods I’ll cover:
- Single Sites to Multisite Network: Consolidate individual WordPress sites into one network
- Subsite to Standalone Site: Extract a subsite from a network and convert it to an independent WordPress installation
- Subsite to Different Network: Move a subsite from one multisite network to another while preserving all content and settings
- Clone Subsite Within Network: Duplicate an existing subsite on the same network for development or template purposes
- Full Network Migration: Move an entire multisite network to a new host, domain, or server
- Manual Migration: Advanced database and file transfer method for direct control over the migration process
Method 1. Migrating Single WordPress Installations Into a Multisite
If you’re a freelancer or you run an agency, you might manage many different clients’ sites. To streamline your workflow, you can set up a multisite.
Migrate all your individual clients’ websites into the network. They’ll be subsites on one WordPress installation, which saves you valuable time when performing backups, updates, or other maintenance tasks.
Let’s show you how to migrate single site installations into a multisite network!
Step 1: Back Up Each Website
You’ll need to create copies of every individual WordPress website you want to migrate into the network. One easy way to do this is by installing a WordPress backup plugin.
Duplicator Pro is the best plugin for WordPress backups, migrations, and cloning. Using this tool, you can quickly back up your clients’ sites and move them to a single network.
There is a free version of Duplicator, but I’d recommend upgrading so that you can customize your site backups.
Plus, you’ll be able to drag and drop your single sites into a network instead of worrying about a manual website migration.
See how digital agency CodeVidia migrates multisite networks with Duplicator!
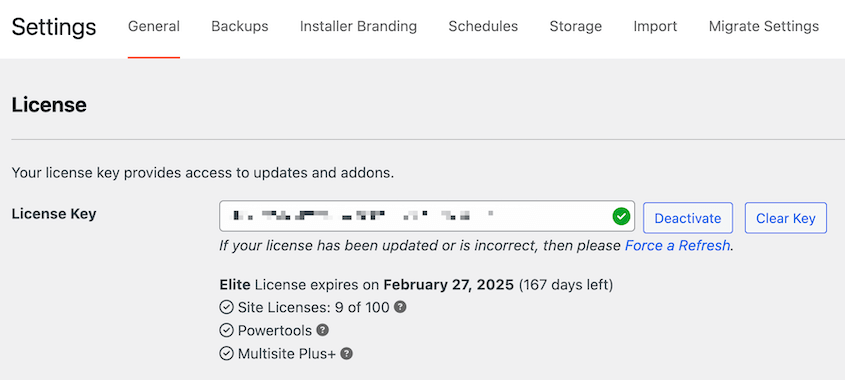
Install the plugin on each of your WordPress sites. Then, activate the license key to unlock its premium features.
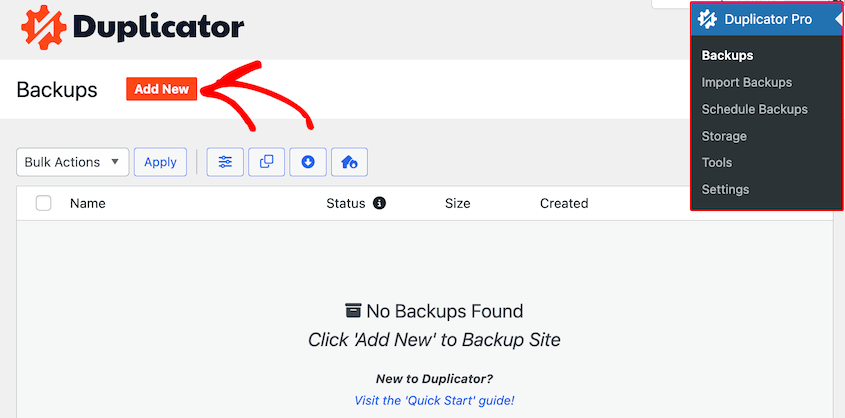
After this, you’re ready to create your first site backup! Head over to Duplicator Pro » Backups » Add New.
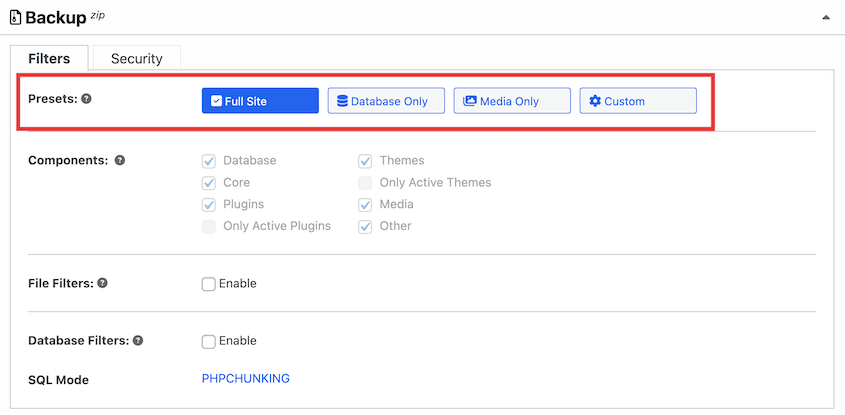
Give the backup a name. Next, expand the Backup section. Customize what data you want to move into your network.
For a full backup, select Full Site.
Consider cleaning up your network by only migrating active plugins, themes, and other necessary files. You can also add filters to exclude certain database tables if you’d like.
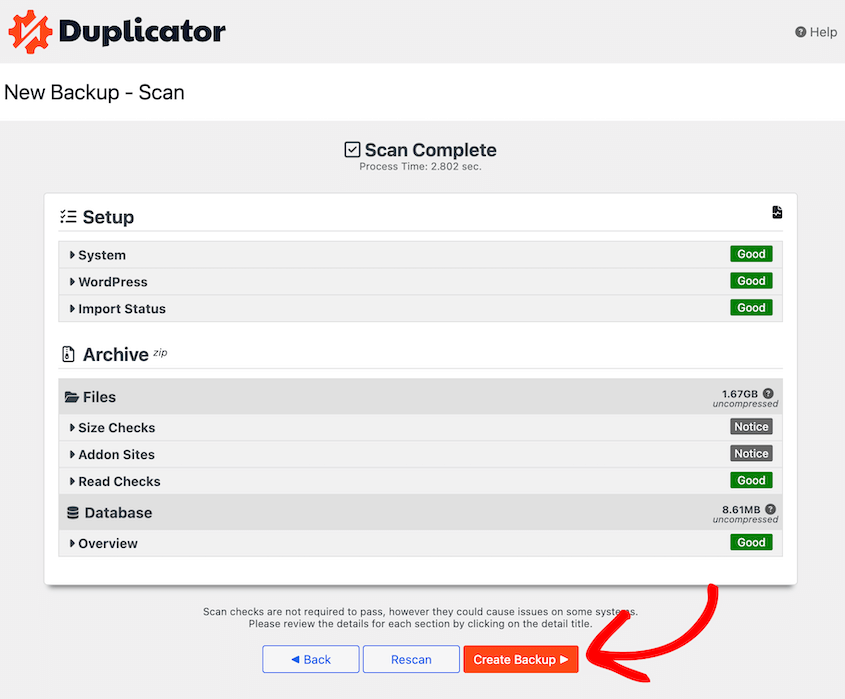
Once you continue, Duplicator will scan your site.
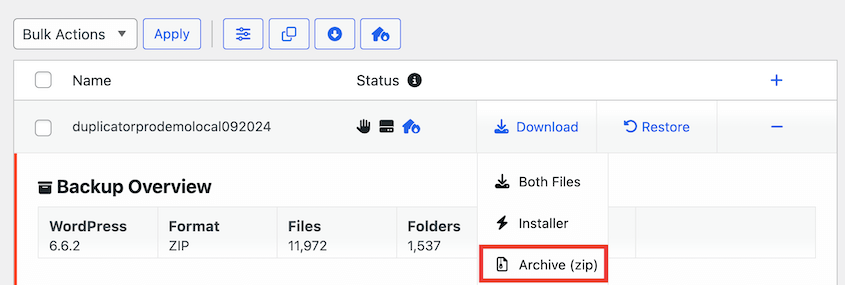
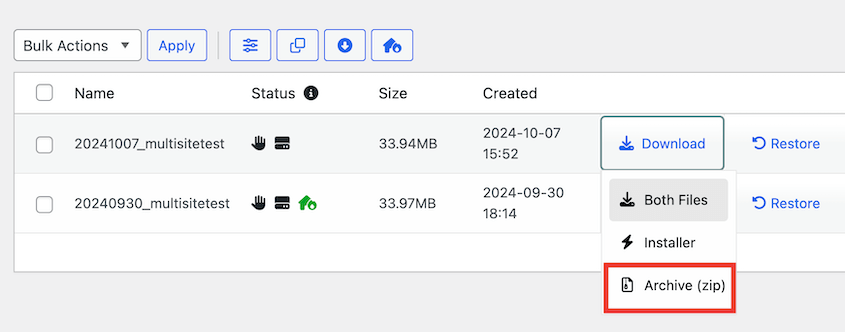
Review any notices and hit Create Backup. Download your backup archive on the Backups page.
Repeat this process for every single site you want to migrate into your multisite network. Save each archive file so you can easily access them later.
Step 2: Activate Your Multisite Network
For the next step, you’ll need to set up your WordPress multisite network. When you sign up for a new web host, they’ll usually offer this as a service.
However, you may need to enable WordPress multisite yourself. Open your new site’s files in a File Transfer Protocol (FTP) client, cPanel, or your host’s custom file manager.
Find and edit your wp-config.php file. Add this code before That’s all, stop editing! Happy blogging:
/* Multisite */

define( 'WP_ALLOW_MULTISITE', true );
Save the file and re-upload it to your server.
In your new WordPress dashboard, deactivate all your active plugins. Then, go to Tools » Network Setup.
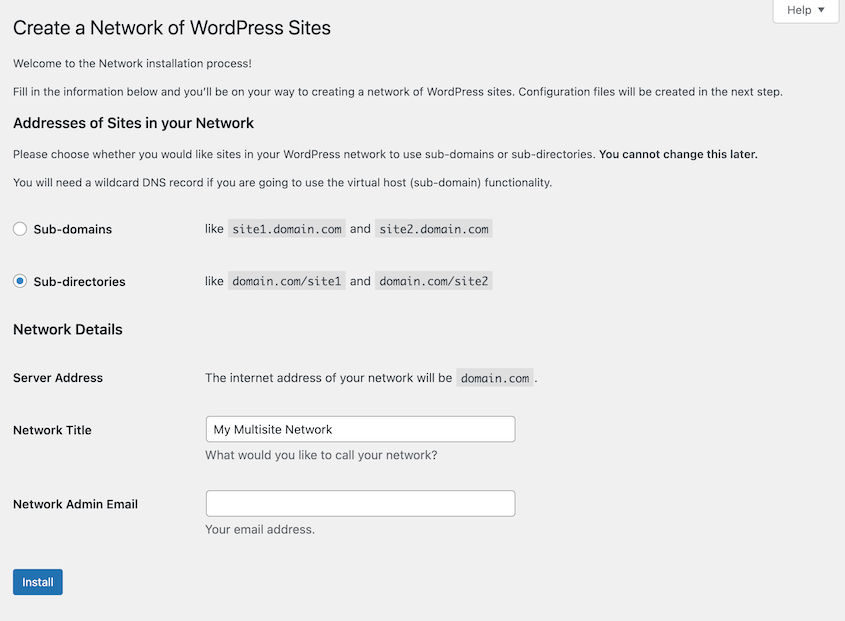
On this page, choose how you want to set up your network’s addresses. There are two different options:
- Sub-domains: site1.example.com
- Sub-directories: example.com/site1
Enter a title for your network and an admin email address. After this, hit Install.
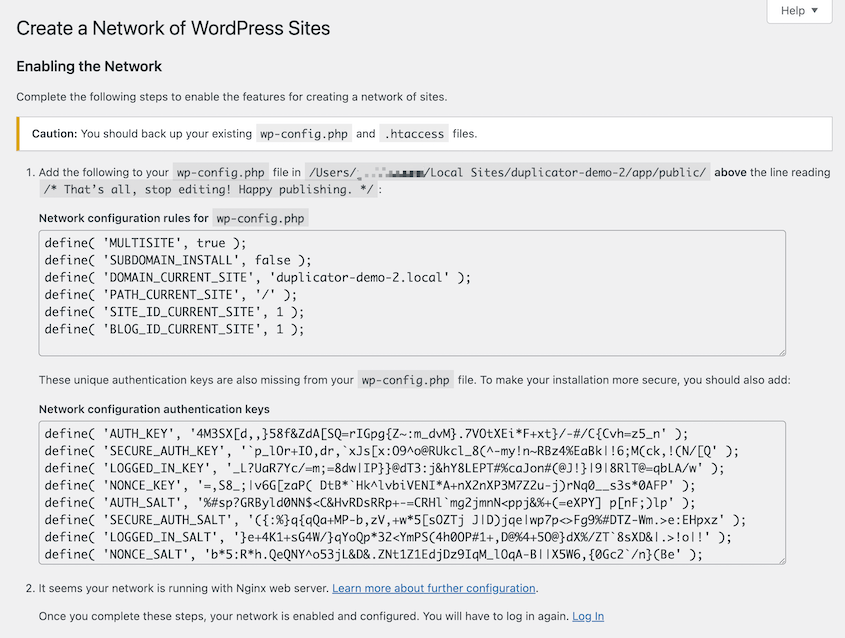
To finish setting up your multisite, you’ll need to add some code to your wp-config.php and .htaccess files. Copy the code shown and update these files.
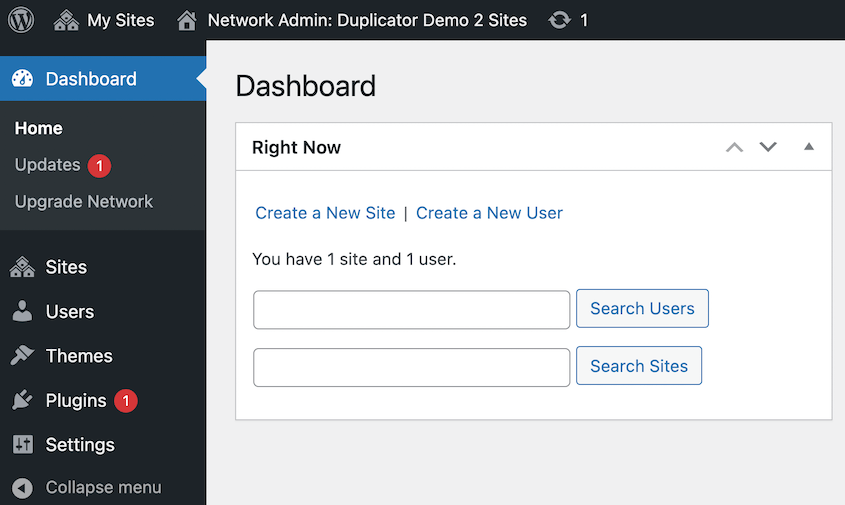
Finally, log back into your wp-admin dashboard.
Now you’ll have a WordPress multisite network!
If you chose the subdomain URL structure, you’ll need to create a wildcard subdomain. You can do this by adding a new subdomain to your hosting account and entering an asterisk (*) in the text field.
Step 3: Import Your Subsites
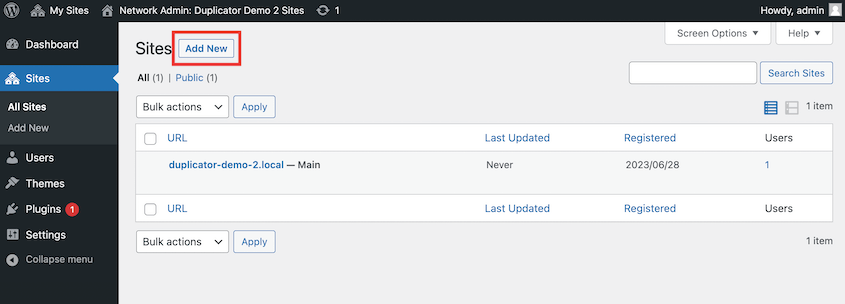
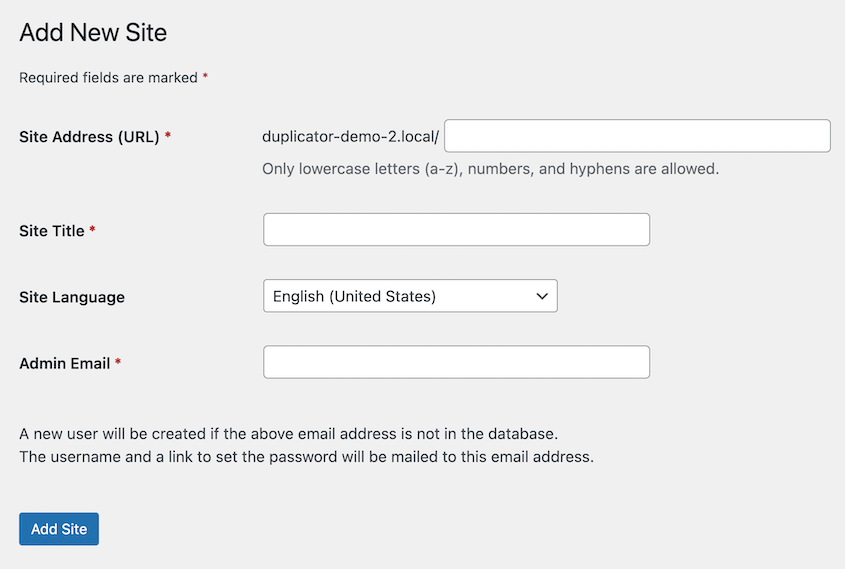
If you want to create a new subsite from scratch, head over to My Sites » Network Admin » Sites » Add New.
Fill out the information for the new subsite.
This will set up a blank WP site.
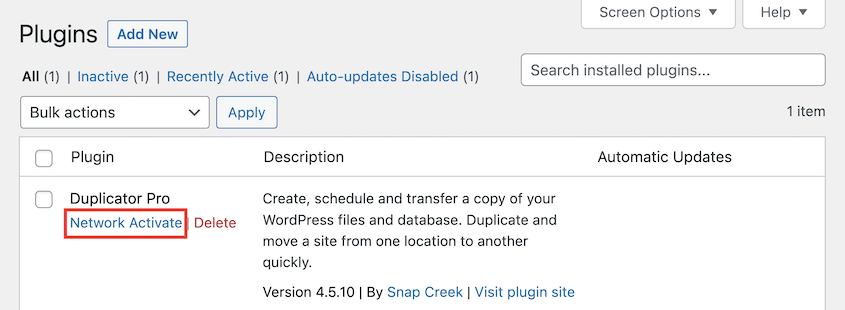
Instead, you might want to import your pre-existing websites into the network. To do this, install Duplicator Pro and activate it for the network.
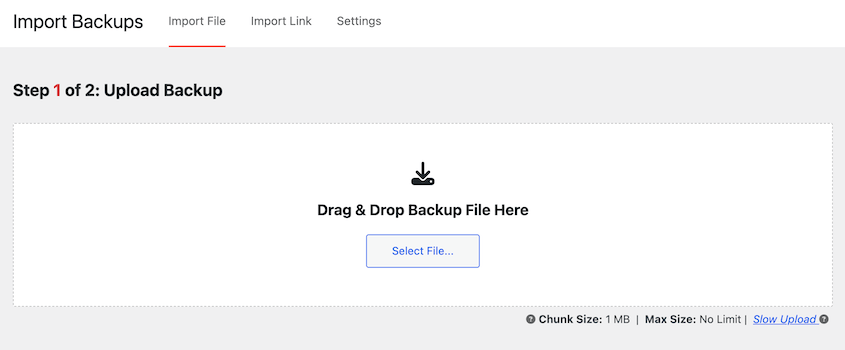
Next, open Duplicator Pro » Import Backups. Upload one of your single site’s archive files.
When it finishes uploading, hit Continue.
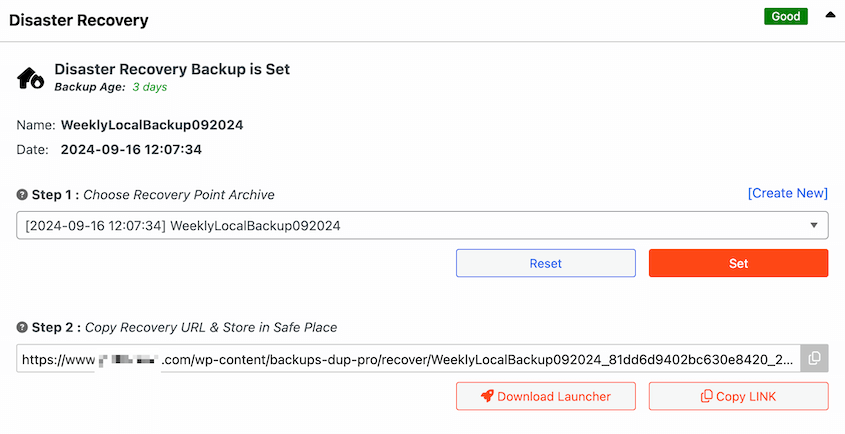
If you already have created other subsites or customized your multisite in any way, I’d recommend setting a recovery point. This way, you can easily restore your network if the installation causes any issues.
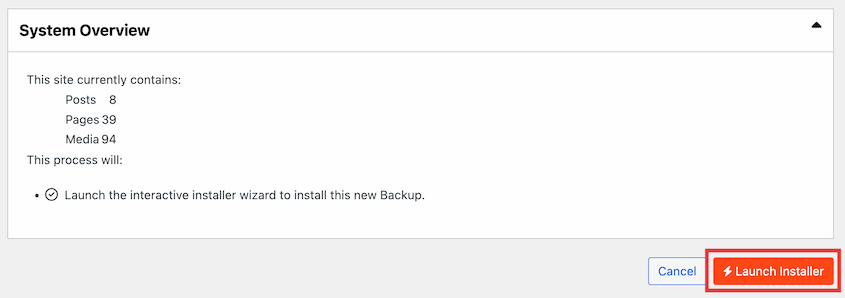
After this, click on the Launch Installer button.
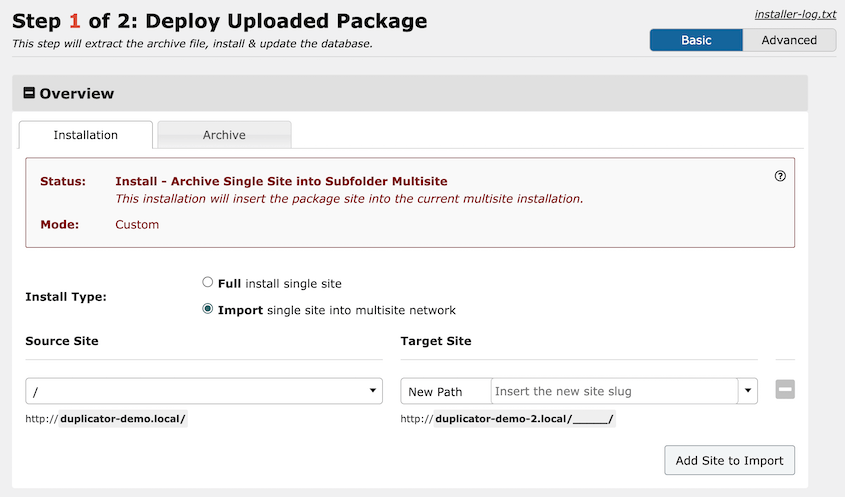
Using the Duplicator installer, you can choose a new URL path for the imported subsite.
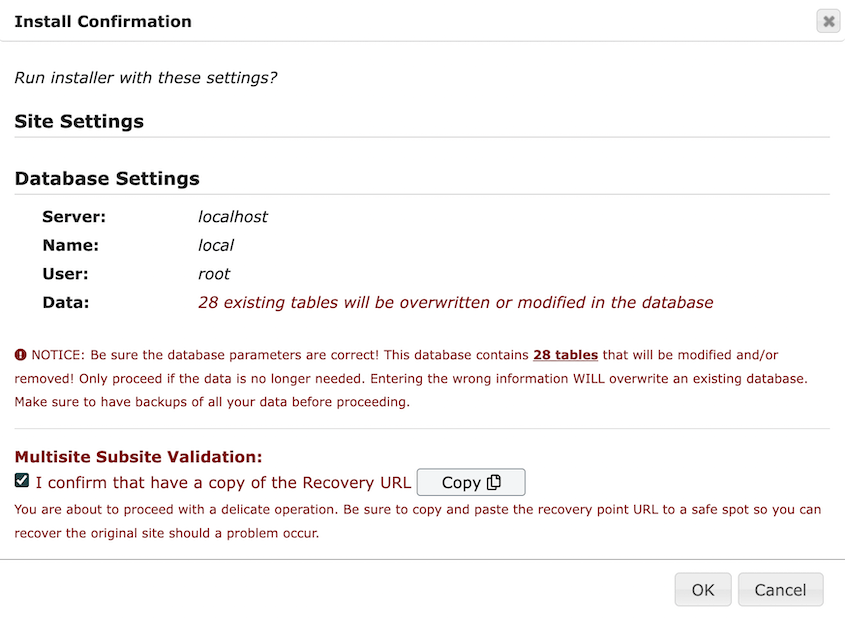
Accept the terms and notices and continue. In the pop-up, hit OK.
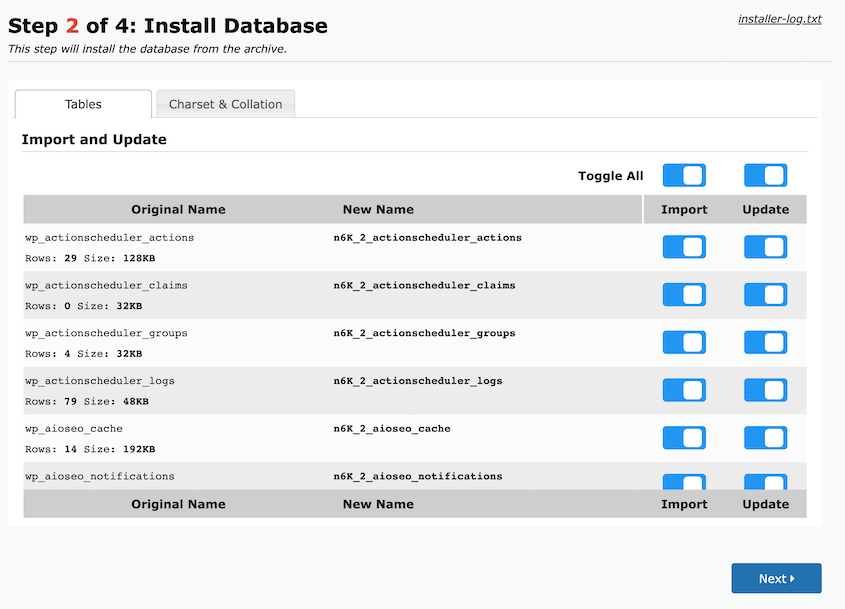
You can import your entire database, or choose specific tables to include.
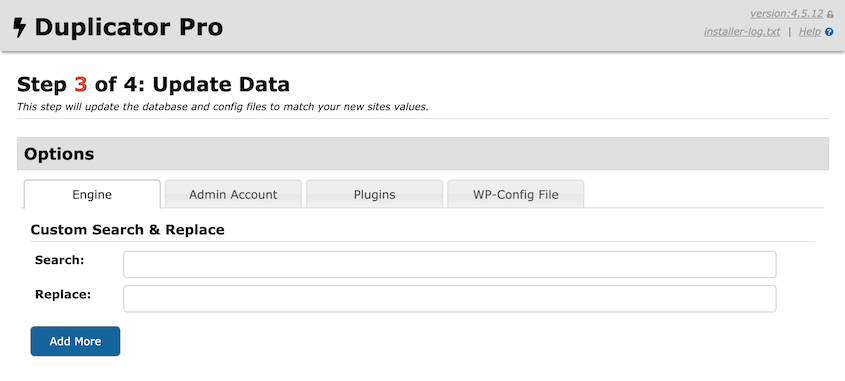
To finish creating your subsite, you’ll have to search for its old URL and replace it with the new one.
Fortunately, Duplicator has a built-in search & replace tool. Simply enter your old domain and the updated subsite URL.
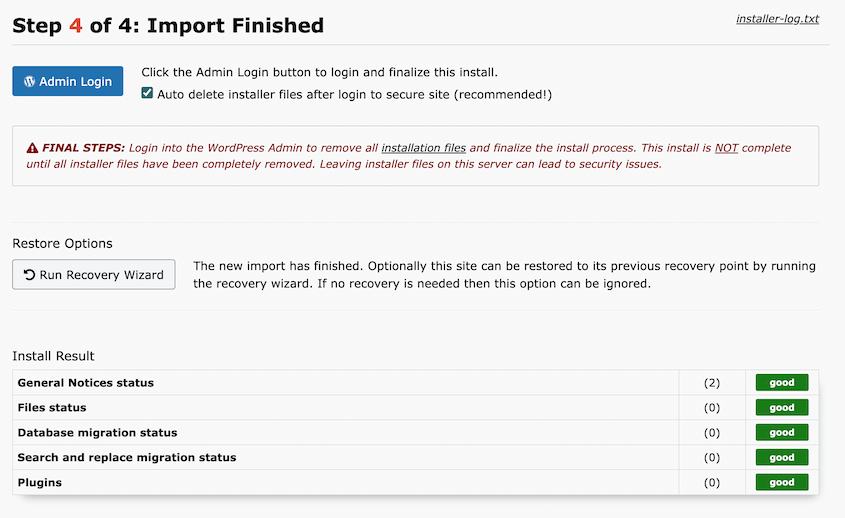
Duplicator will automatically import the single site into the network as a subsite. You can use the Admin Login button to access your updated network admin.
Feel free to import all of your individual WordPress installations into your network!
Method 2. Migrating a Subsite Into a Standalone Site
Once you’re finished designing your client’s website, you’ll need to migrate it out of your network onto its own server. I’ll show you how to do this!
Step 1: Back Up the Subsite
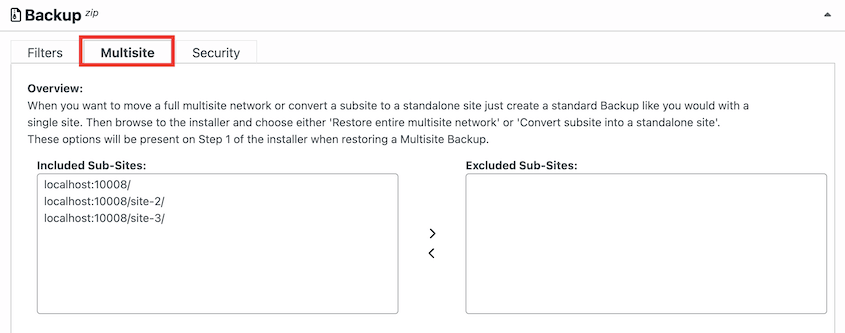
On your multisite, open your network admin and create a new backup with Duplicator. In the Backup section, click on the Multisite tab.
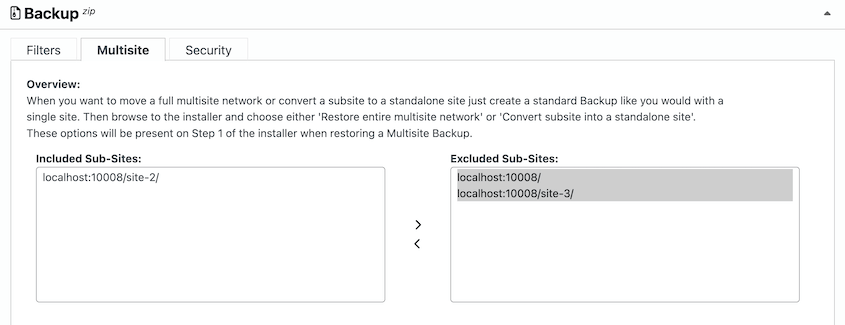
Then, only include the client’s site in the left-hand box. Move all other subsites to the Excluded Sub-Sites box.
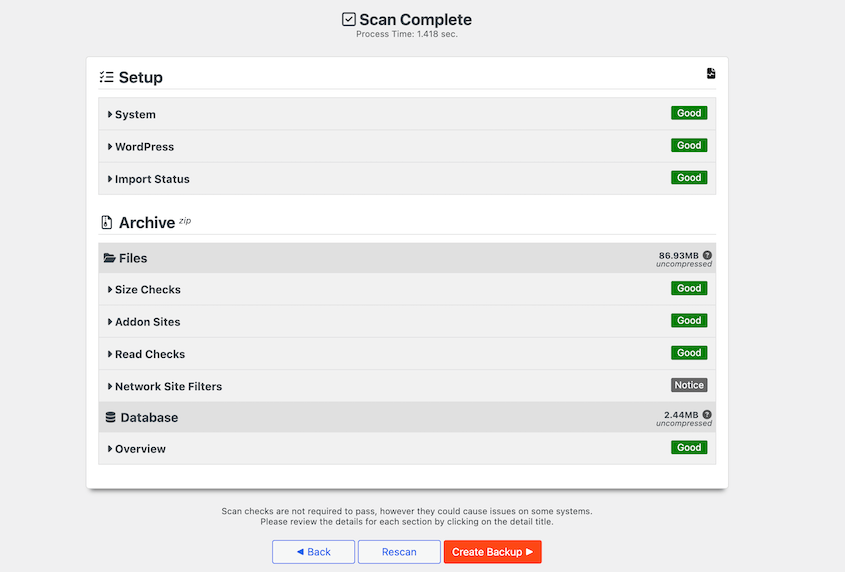
Look over the scan of the subsite. If everything looks correct, hit Create Backup.
Duplicator will then save a copy of just your subsite. Download the backup archive file.
This will make it easy to import the subsite into a standalone installation.
Step 2: Set Up a New WordPress Installation
At this point, you’ll need to create a new WordPress website. First, find a web hosting provider.
Here are some that I recommend:
Most WordPress hosting plans include one-click WordPress installations. If you’re not sure how to get your new site up and running, check out this guide on how to install WordPress.
Step 3: Import the Subsite
Once you install WordPress, be sure to install Duplicator Pro and activate it. Then, find the Import Backups page.
Upload the subsite’s archive file and hit Continue.
If you’d like to, set a recovery point and launch the installer.
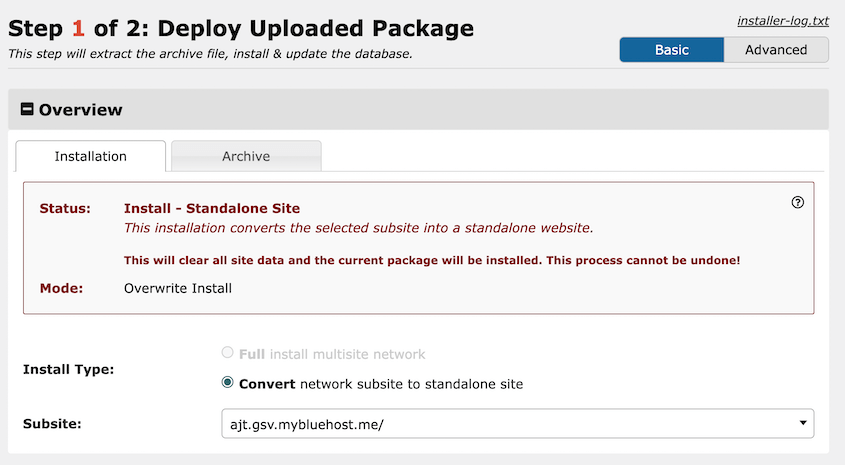
The Install Type should be Convert network subsite to standalone site. Make sure the subsite URL is correct.
Click Validate to allow Duplicator to test the database connection. Accept the terms and notices and continue.
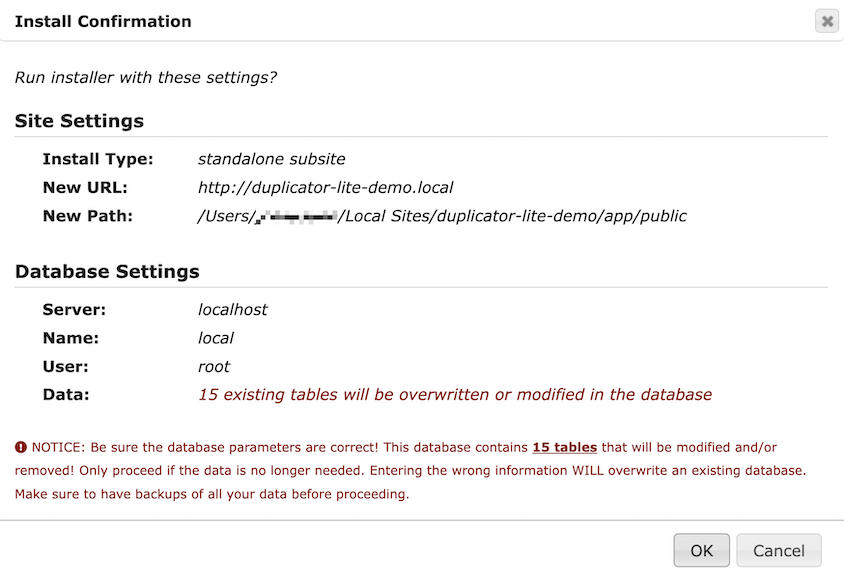
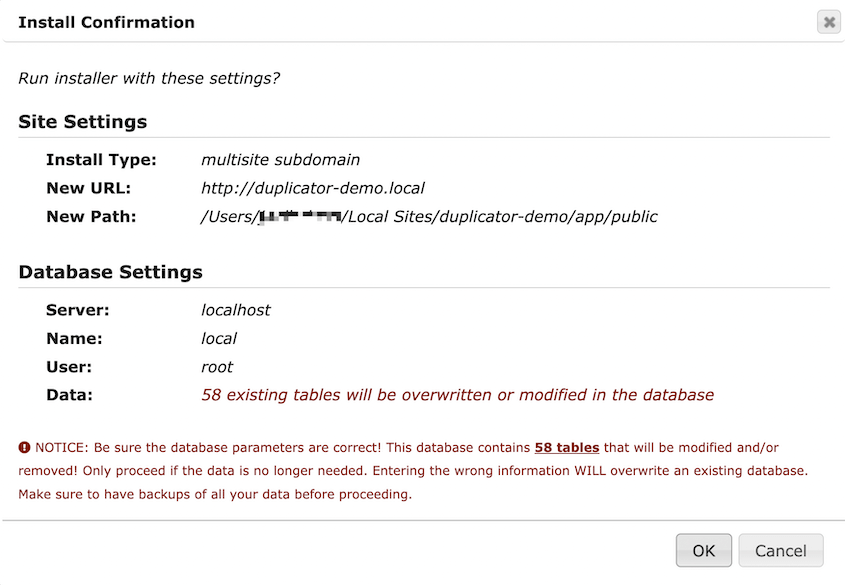
Next, confirm the installation settings.
After Duplicator migrates your subsite into the WordPress installation, use the Admin Login button to access your newly migrated site.
You’ll see that everything on the previous subsite was imported, including media files, plugins, and themes.
Method 3. Migrating a Subsite Into a Different Network
With Duplicator, you can also migrate any subsite into a different WordPress multisite installation. All you’ll need to do is back up the subsite you want to move.
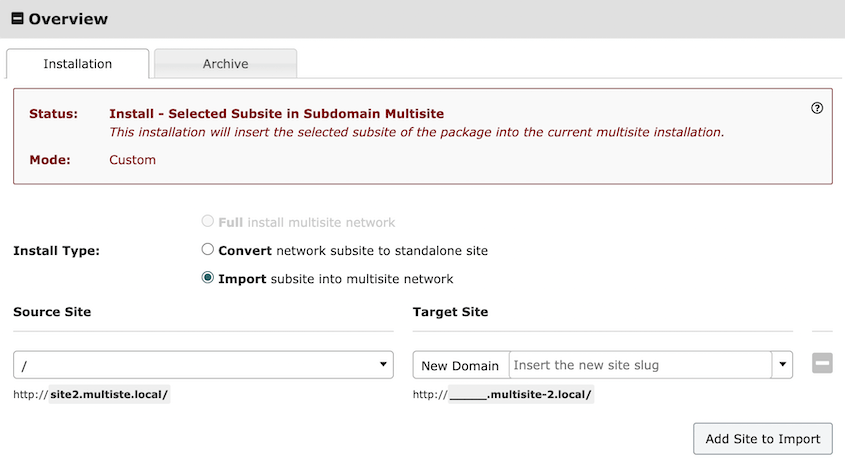
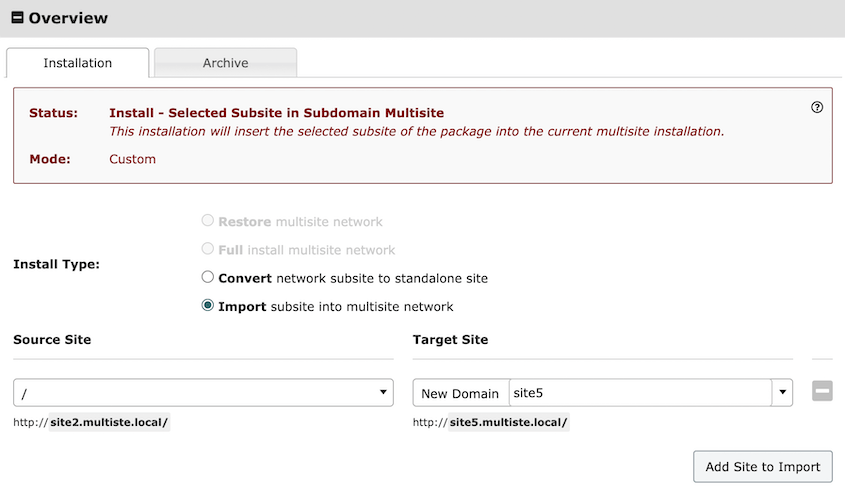
Similar to the other methods, open Duplicator » Import Backups and upload the backup archive file to the new network. Once the installer launches, choose to Import subsite into multisite network.
You’ll see the URL of the old site. In the New Domain field, customize the new URL for the imported subsite.
If you use the Advanced import option, you’ll be able to search and replace any old URLs on your database. This prevents you from having to use third-party tools like the Better Search Replace plugin.
Log back into the new multisite dashboard. You’ll now have an extra subsite from the old network.
Method 4. Cloning a Subsite on the Same Network
You might want to create a copy of one of your subsites. Especially if you’re a developer or designer, you can save time by building one pre-configured site and using it as a template for other sites.
Start by creating a backup of the subsite. Using Duplicator Pro, you’ll need to specify that you only want to include one subsite out of your entire network of sites.
Then, use the import tool to upload the backup to your multisite network. The Duplicator installer wizard will allow you to set up a new subsite with a new domain.
This makes it easy to use the same web design, plugins, and settings on multiple subsites. You can instantly create new subsites in the blink of an eye!
Method 5. Full Multisite Migration
What if you want to migrate the entire network to another location?
As your network grows, your WordPress hosting plan may not be able to support it. This means you’ll have to find a new host and migrate every subsite onto the new server.
To make this migration process easy, you can use Duplicator Pro. As you’re backing up your site, make sure every subsite is included.
Finish building the backup. Then, download the generated archive file.
Just like migrating a subsite, you can move an entire network by importing it into another WordPress installation. Once you install WordPress on a new host, import the multisite backup.
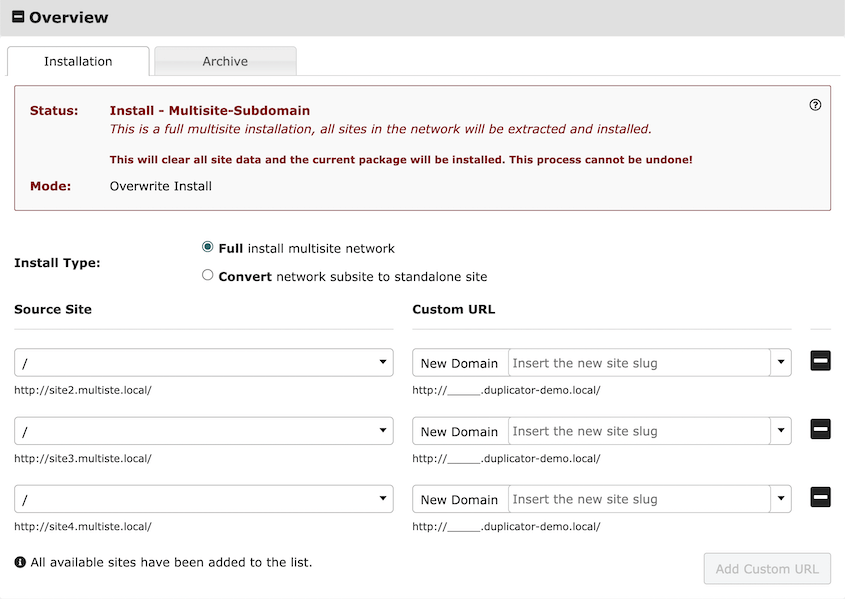
In the Duplicator installer, choose Full install multisite network. Next, add custom site URLs for each of the subsites.
Validate the installation and hit Next. Be sure to confirm that you want to replace the existing site.
Duplicator will then install your multisite network on the new server.
Method 6. Manually Migrate WordPress Multisite
Even if you’re an expert, I’d recommend using a migration plugin to migrate your WordPress multisite. This ensures that you don’t lose any precious data along the way.
However, you can also manually migrate your multisite. This can prevent you from using too many plugins, but keep in mind that this method is not ideal for beginners. It takes more time and has lots of room for human error.
If you decide to take this route, back up your site beforehand!
Step 1: Download Your Multisite Database
The two main parts of your WordPress multisite are the core WordPress files and the MySQL database. To start migrating your site, you’ll need to export a copy of your database.
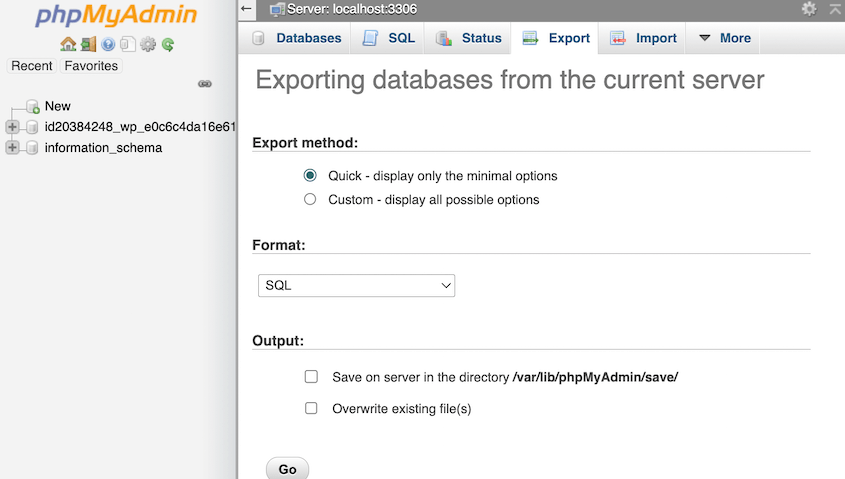
Log into your database manager, which will likely be either phpMyAdmin or Adminer. I’ll be using phpMyAdmin.
Select the database for your multisite network. Then, click on Export.
Be sure to choose SQL as the file format.
Hit Go to finish downloading your database as a SQL file.
Step 2: Transfer Your Multisite Files to a New Server
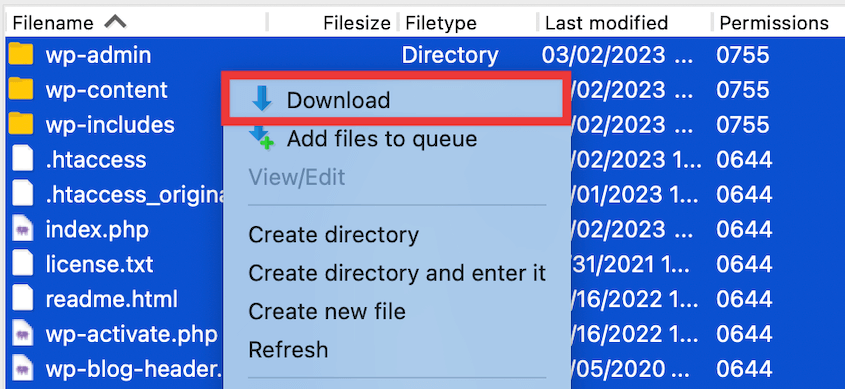
Now, you’ll need to download your site’s files. Using an FTP client, find and download all the files in your root directory.
This is usually called the public_html folder, which contains files like wp-content, wp-admin, and wp-includes.
Once you download these files, compress them into a single zip file.
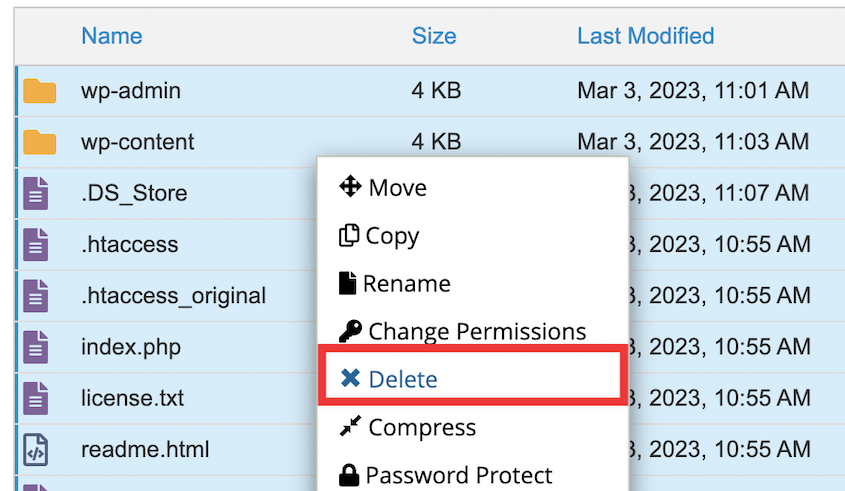
Next, open the file manager for the new multisite installation. Open the public_html folder for this site and delete all the included files.
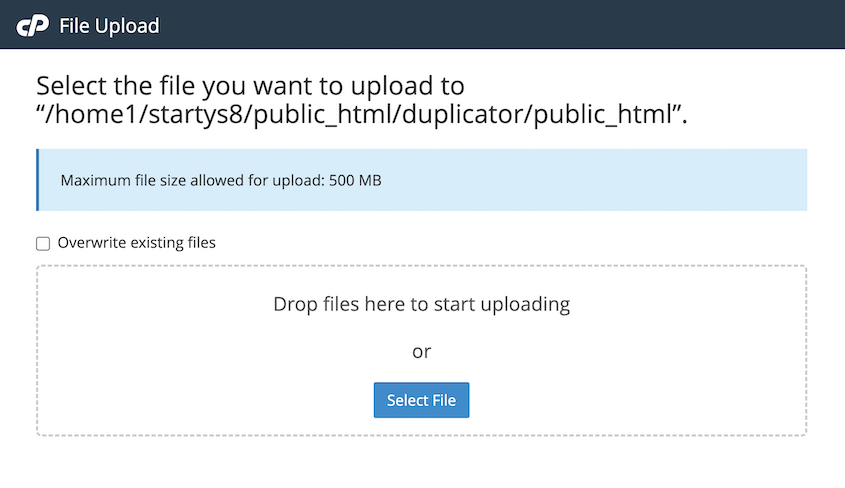
Upload the zipped file with your original multisite data.
This will transfer all of the information from your old network to the new location!
Step 3: Create a New Database
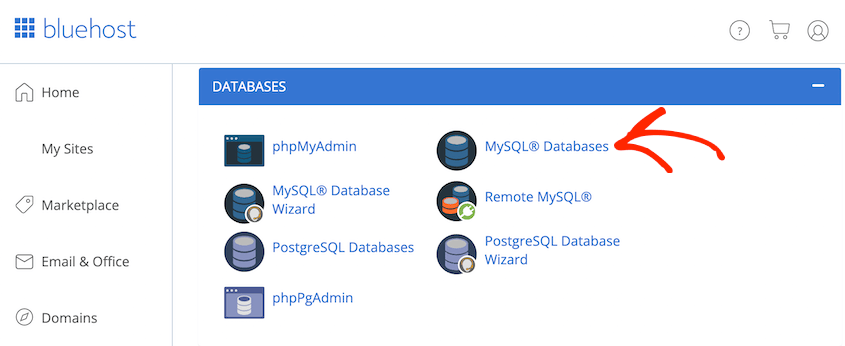
For the next step, it’s time to create a database for the new multisite. Usually, your web host will give you a way of editing your MySQL databases.
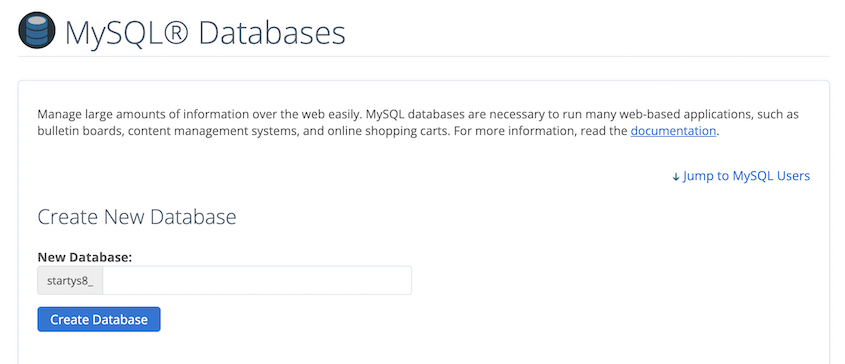
If you’re using Bluehost, enter a database name and hit Create Database.
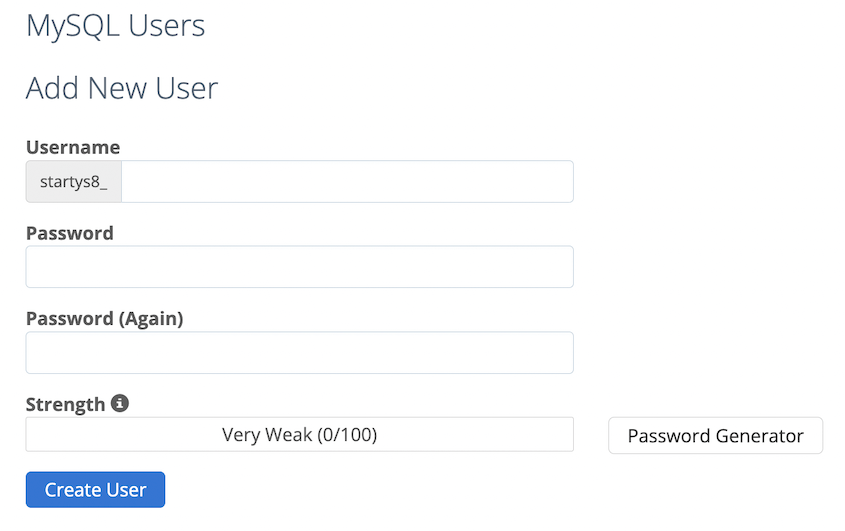
You’ll also need to create a new user for the database.
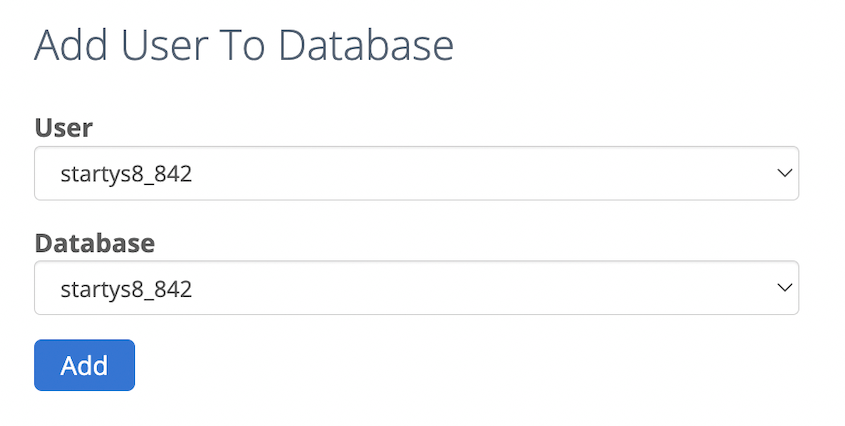
Lastly, assign the new user to the new database.
You can give the new user all privileges so that you can fully edit your multisite database.
Step 4: Import Your Multisite Database
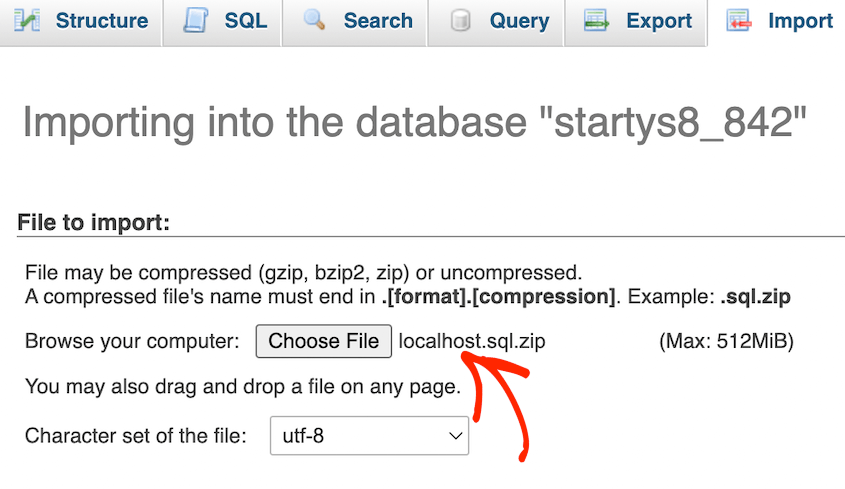
Remember the database you downloaded earlier? Now, you’re going to import that file into the new database.
Sign into phpMyAdmin for the new site. Then, click on the Import tab.
Upload your original multisite database. After you hit Go, your old database information will import into the new database.
Step 5: Edit Your wp-config.php File
At this point, you uploaded your old wp-config.php file to the new site. This means that it still contains information about your old database. You’ll need to point it to the new one.
Open your file manager for the new multisite. Navigate to public_html » wp-config.php. Once you open this file, update these values:
- db_user
- db_name
- db_password
- db_host
Make sure to replace any information about your old database with the one you just created. Then, save the file and close it.
Frequently Asked Questions (FAQs)
How do I move my WordPress multisite to a new host?
To move your WordPress multisite to a new host, create a full backup of the network with Duplicator Pro. After setting up your new WordPress installation, install Duplicator and open the Import page. Upload the old multisite’s archive file and continue following the Duplicator migration wizard.
How do I export a WordPress multisite subsite?
You can export a WordPress multisite subsite by installing Duplicator Pro on your network. Then, create a backup that excludes all other subsite data. Download the backup’s archive file and import it into another WordPress site.
Alternative: You can also use the built-in WordPress export tool to download each single subsite as XML files. Go to Tools » Export and hit Download Export File.
Does Duplicator work on multisite?
Yes, Duplicator Pro works on multisite. You can use this migration plugin to move your full network to a new server, web host, or domain name. It also enables you to easily migrate sub-sites into and out of the network. Plus, plans that support multisite only start at $199.50 per year.
Does All-in-One WP Migration work on multisite?
To access multisite support with All-in-One WP Migration, you’ll have to purchase a premium extension. This costs $319 per year and allows you to export/import subsites, clone subsites, and export the entire multisite network.
How do I back up my WordPress multisite?
To back up your WordPress multisite, install Duplicator Pro and hit Network Activate. Add a new backup and choose a backup storage location. Before building the backup, choose which subsites you want to include. Finally, download the backup.
If you don’t want to waste time creating manual backups, consider setting up an automatic backup schedule!
Migrate WordPress Multisite in Minutes
Whether you’re consolidating multiple client sites into one network, extracting a subsite to its own server, or moving your entire multisite to a new host, you have a clear path forward. The methods I’ve covered give you flexibility for any migration scenario you’ll encounter.
Manual migration is possible, but Duplicator will save you countless hours and eliminate the risk of broken links or lost data. With automated backups, built-in search & replace, and disaster recovery, you can confidently migrate your multisite network without touching a single line of code.
Ready to upgrade your migration method? Download Duplicator Pro today to experience stress-free WordPress multisite migrations!
While you’re here, you may like these extra WordPress guides:
Need Professional Migration Assistance?
While Duplicator Pro gives you complete control over your WordPress migrations, sometimes you need experts to handle the entire process for you. Duplicator’s migration service takes care of everything – from backup creation to final testing – with zero technical work required on your end.
Joella is a writer with years of experience in WordPress. At Duplicator, she specializes in site maintenance — from basic backups to large-scale migrations. Her ultimate goal is to make sure your WordPress website is safe and ready for growth.


