That knot in your stomach when you think about migrating your WordPress site? I get it.
I’ve been there myself — staring at my website, knowing I need to move it but paralyzed by all the things that could go wrong.
Will my data survive? How long will my site be down? What if I break something that took months to build?
Here’s what I’ve learned after managing dozens of migrations: successful website moves aren’t about luck. They’re about preparation.
In this post, I’ll give you a battle-tested roadmap I’ve built from real migrations. Follow this free pre-migration checklist, and you’ll transform that stomach-churning anxiety into confidence!
You’ll learn:
- What a pre-migration checklist is and why it’s important for success
- The risks of migrating without proper preparation
- A complete step-by-step checklist to follow before any migration
- Essential pre-migration benchmarking and testing strategies
Table of Contents
What Is a Pre-Migration Checklist?
A pre-migration checklist is a detailed to-do list of everything you need to handle before you actually move your WordPress site.
Think of it like preparing for a physical move. You don’t just throw everything in boxes and hope for the best. You sort through your belongings, label boxes clearly, and plan your route beforehand.
Your website deserves the same level of preparation.
The checklist covers everything from backing up your data to testing your migration method. It’s your roadmap for avoiding the common mistakes that turn smooth migrations into disasters.
Why Do You Need to Prepare for a Website Migration?
I’ve seen enough migrations go sideways to know that winging it is expensive. Not just in terms of money (though emergency developer calls aren’t cheap), but in lost trust, damaged rankings, and sleepless nights.
Here’s what happens when you skip migration preparation:
- Data Loss: Your posts, pages, and customer data could disappear in a hasty migration. I once watched a client lose three months of blog content because they didn’t verify their backup before starting.
- SEO Damage: Broken links, missing redirects, or slow performance can tank your search rankings. Recovery can take months.
- Bad User Experience: Nothing drives visitors away faster than a broken site. First impressions matter, and you rarely get a second chance.
The worst part? Most of these problems are completely preventable with proper migration planning.
Your Ultimate Pre-Migration Checklist
This is where we get into the nuts and bolts. I’ve organized these steps in the order I always follow them — each one builds on the previous steps to create a foolproof migration plan.
Here’s a quick overview of what to do before a migration:
- Define your migration goals and project scope
- Identify potential risks and complications
- Choose the right migration method for your needs
- Notify stakeholders and assemble your team
- Prepare and test your new hosting environment
- Clean and optimize your current website
- Benchmark your site’s current performance
- Create a disaster recovery plan
- Run a complete test migration
- Establish your timeline and budget
Define Your Goals and Scope
Before you touch a single file, get crystal clear on why you’re migrating.
Are you switching hosts for better performance? Moving to a new domain? Redesigning while you migrate?
Each scenario changes how complex your project becomes.
Your “why” determines everything else — the tools you’ll need, the timeline, and how much can go wrong. This forms the foundation of your migration strategy.
Identify Potential Risks
A simple blog will migrate differently than an e-commerce store with thousands of products.
I audit every site before migration to spot potential headaches:
- Complex plugins (WooCommerce, membership systems, or booking tools)
- Custom code or child theme modifications
- Hard-coded URLs in content or widgets
- Server compatibility issues (PHP versions or memory limits)
- Large media libraries or databases
- Third-party integrations (payment gateways or email services)
When you identify data dependencies, it helps you understand which elements require special attention during the migration process.
You don’t need to solve every problem now. You just need to know what you’re dealing with so nothing surprises you mid-migration.
Choose Your Migration Method
You have three main options for migrating a WordPress site, and honestly, two of them make me nervous.
Manual Migration: This involves manually downloading files, exporting databases, and reassembling everything on the new server. It has a high risk of human error, so I only recommend it if you’re already a WordPress developer.
Host-Assisted Migration: Your new host handles everything for you. It sounds great in theory, but you lose all control. If something breaks, you’re at their mercy. Plus, many hosts only offer this for simple sites.
Plugin Migration (like Duplicator): This gives you the best of both worlds — automated reliability with full control over the process. The plugin packages your entire site into a single file that you can deploy anywhere.
Notify Stakeholders and Assemble Your Migration Team
I always send a heads-up to anyone who might be affected by the migration.
You might need to notify marketing teams who need to pause campaigns, support staff who should expect questions, or content creators who need to avoid major updates during the migration window.
Define clear roles upfront. Who’s performing the migration? Who’s testing afterward? Who makes the final call if something goes wrong?
Even if your team is just you, write down what you’re responsible for. It keeps you focused when things get hectic.
Prepare Your New Environment
Another important step in your data migration plan is setting up the second destination. Your new server needs to be ready before you start the migration.
This means setting up your new hosting account, installing WordPress, and creating databases if needed.
You should also check PHP version compatibility. I once spent hours troubleshooting a migration only to discover the new server was running PHP 7.4 while the site required PHP 8.0. It’s a simple check and a major headache if you skip it.
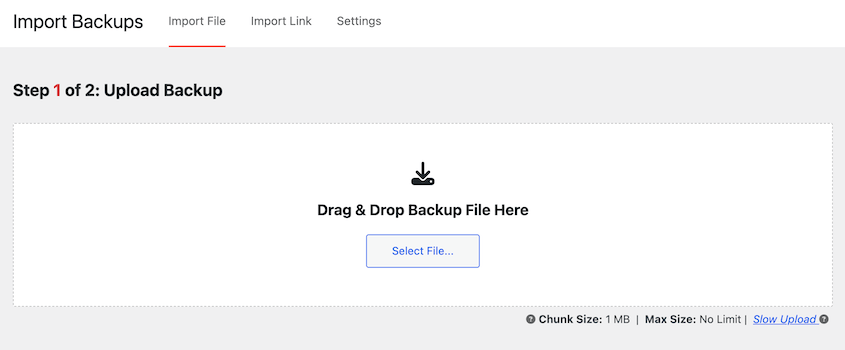
A plugin like Duplicator offers simple drag-and-drop migrations. This is a beginner-friendly migration method, but you’ll need to have WordPress installed on the second location.
Have your host install it for you, or install WordPress yourself. It’s a fairly simple process.
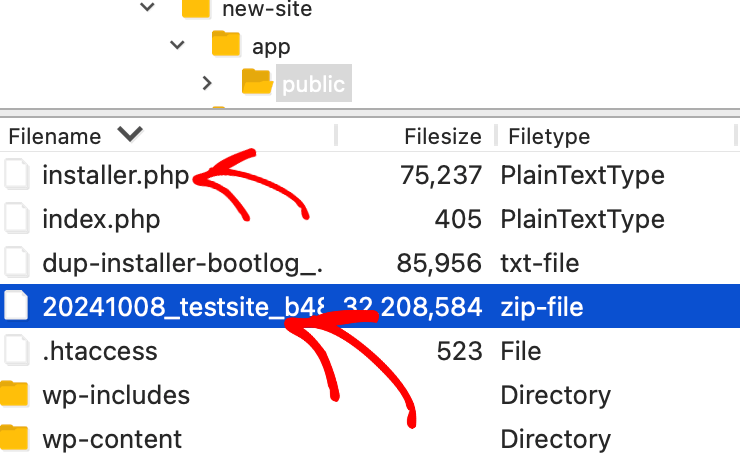
Keep in mind that Duplicator doesn’t require WordPress to work. If you’re familiar with FTP clients, you can skip WordPress installation and upload your original backup to the new server.
It depends on your experience level and how much effort you want the migration to be. Choose the method that works best for you!
If you’re changing domains, update your hosts file to point to the new server. This will trick your computer into thinking your site has already moved, allowing you to troubleshoot issues before updating your DNS.
Clean and Optimize Your Current Website
Here’s a step most people skip: spring cleaning. Data cleanups are essential for a smooth migration.
A bloated site is harder to migrate, takes longer to transfer, and gives you more opportunities for something to break. I always do housekeeping before any migration.
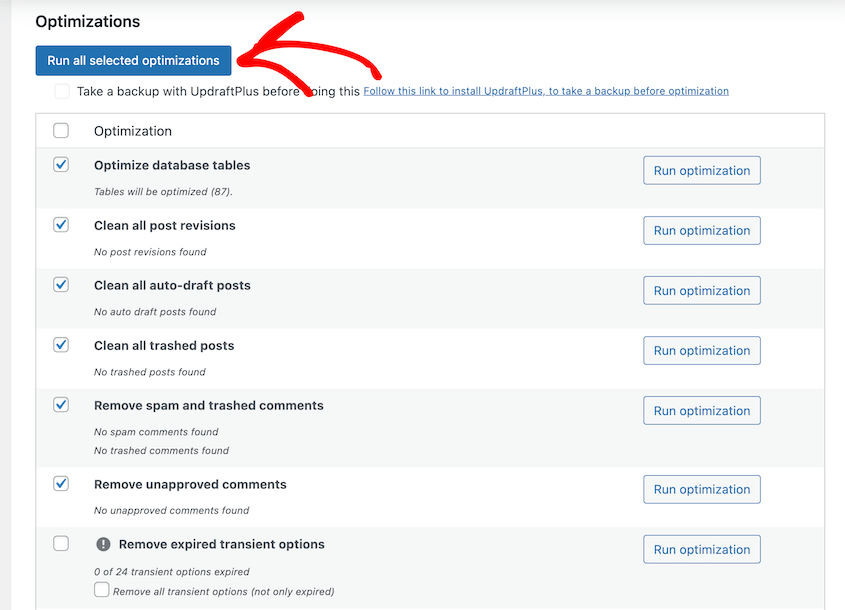
Delete unused plugins and themes, because even deactivated ones can cause conflicts. Clear out spam comments, post revisions, and drafts you’ll never publish. Remove unused media files (carefully—make sure they’re not referenced anywhere).
Run a plugin like WP-Optimize to clean your database. The goal is to migrate only what you actually need.
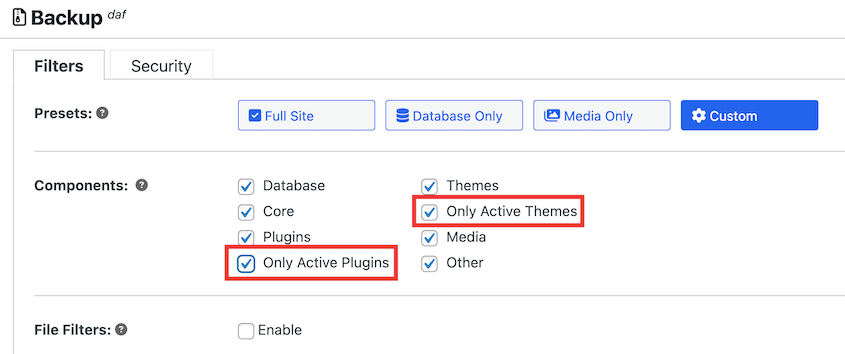
As you begin the migration, you can use Duplicator to automatically clean up your website. Instead of creating a complete backup, deselect inactive plugins, themes, and other unnecessary data.
When you re-upload this backup to the new location, your site will be optimized and free of unused tools!
Benchmark Your Site for Post-Migration Comparison
You need a “before” snapshot to measure success.
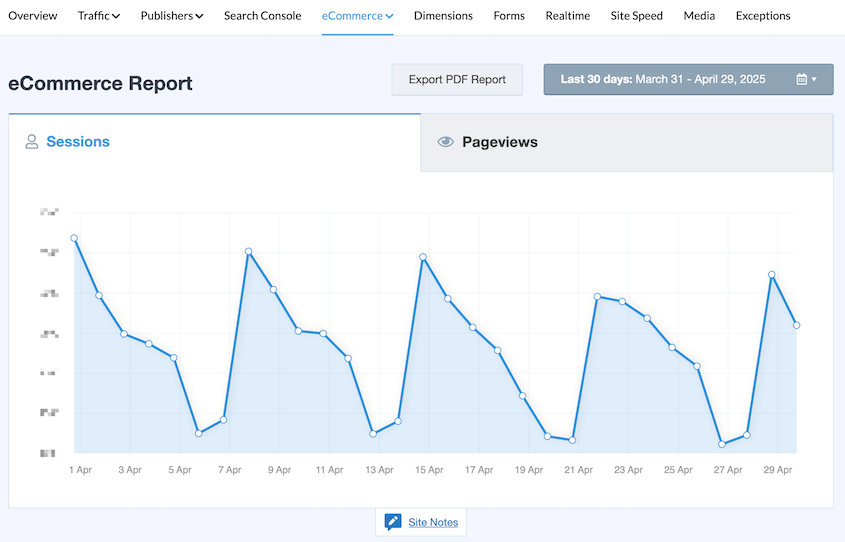
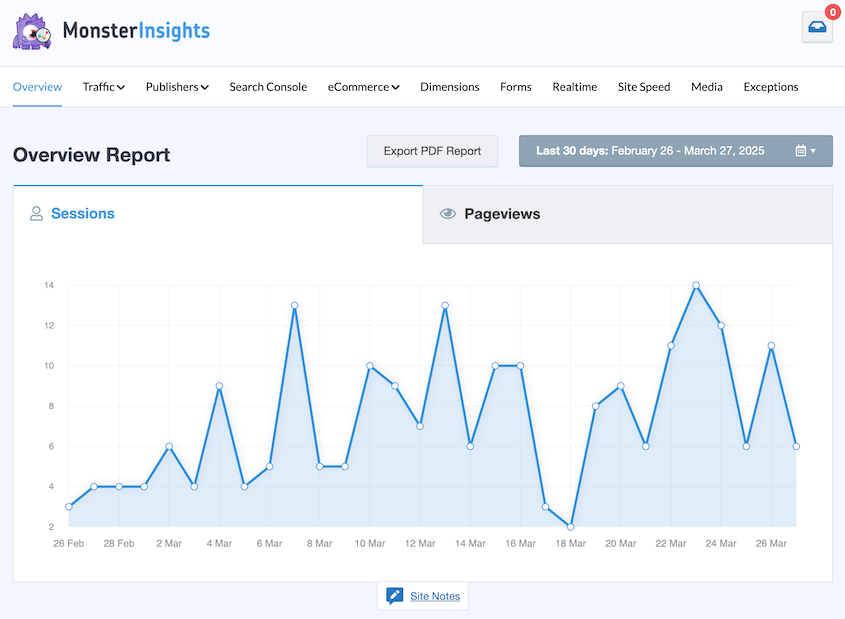
I run speed tests on key pages using tools like GTmetrix or Google PageSpeed Insights. For tracking and analytics, I check MonsterInsights to record current traffic patterns and conversion rates.
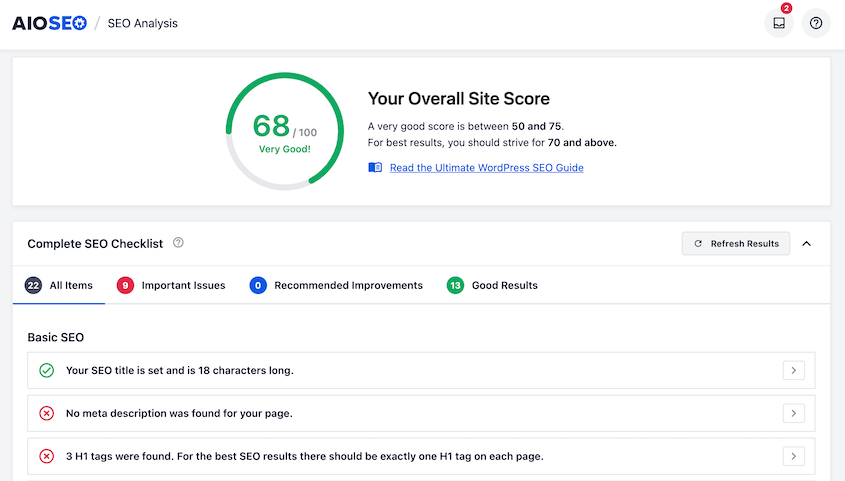
If you’re serious about SEO, AIOSEO’s audit tools give you a comprehensive baseline of your site’s search performance and technical health.
I also note current keyword rankings for important terms and do a site crawl to get a baseline URL count and identify any existing broken links. This process includes data mapping to understand how your current site structure will translate to the new environment.
These metrics help you spot problems immediately after migration instead of discovering them weeks later when the damage is done.
Document everything. Screenshots, exported reports, whatever it takes to have a clear record of how your site performed before the move.
Create a Disaster Recovery Plan
This is the step I never skip, no matter how confident I am about the migration.
Your disaster recovery plan is simple: a recent, complete backup of your live site that you’ve actually tested.
You can easily set this up with Duplicator. Create a full backup of your current site with the Full Site backup preset.
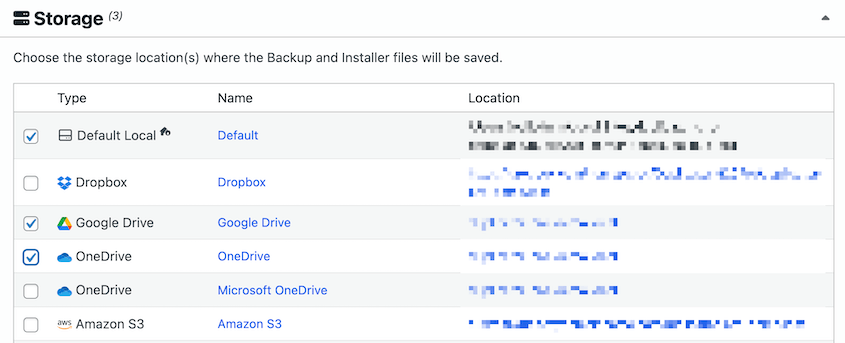
Save this backup locally. You might also want to select a cloud storage location for multiple recovery options.
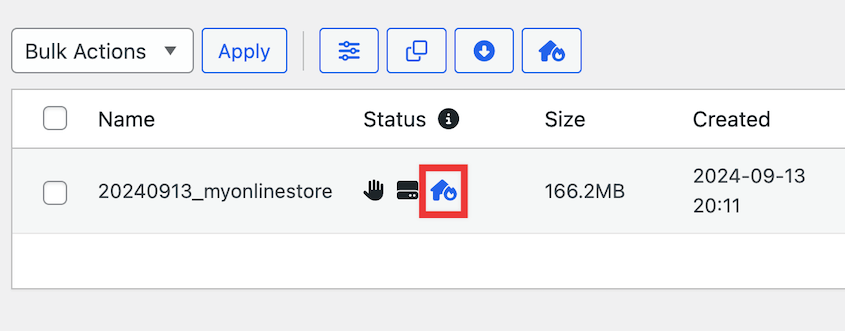
When your site is backed up, click on the house icon. This sets the backup as the disaster recovery point.
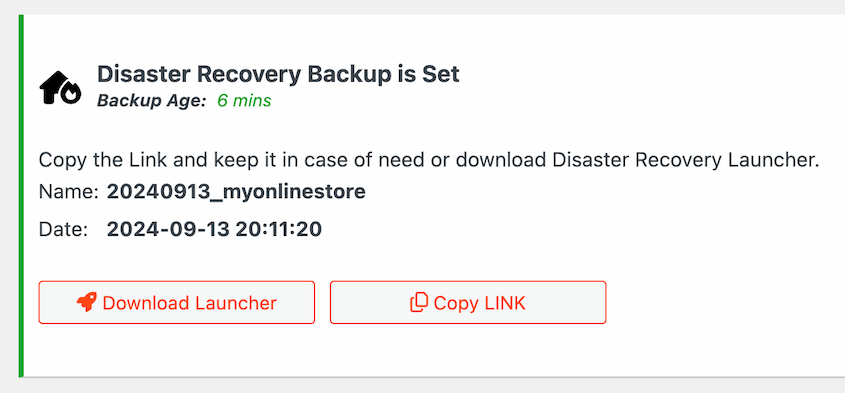
You’ll have two recovery options: a link and a launcher file. Save both of these in a safe location (off your website).
If anything goes wrong during the migration process, paste the link into a browser or open the launcher file. Duplicator will instantly restore your original site.
Keep this backup until you’re 100% certain the migration was successful. It’s your insurance policy against catastrophe.
Run a Test Migration
This is where you find problems while they’re still fixable.
Set up a staging environment or development site and perform your entire migration process there first. Use the same method, tools, and steps you’ll use for the real migration.
I catch about 80% of potential errors during test migrations. Plugin conflicts, missing dependencies, or configuration issues — they all surface in testing where they can’t hurt your live site.
Don’t skip this step to save time. A test migration that reveals issues will save you hours compared to troubleshooting a broken live site.
Establish a Timeline and Budget
Finally, nail down when the migration will happen and how much it’ll cost.
Schedule your migration for your lowest-traffic period. For most sites, that’s late night or early morning on weekends. E-commerce sites should avoid peak shopping times.
I’d suggest using MonsterInsights to pinpoint your peak migration time. It’ll show you when your traffic has been historically low.
Budget for any tools or services you’ll need: premium migration plugins, temporary hosting for staging, or developer time if you need help.
You can absolutely migrate your entire website for free. However, factor in the costs of new hosting or a new domain name in your migration budget.
For more insights, learn how much a WordPress migration really costs.
Set realistic expectations for how long each phase will take. A simple blog might migrate in a few hours, but a complex e-commerce site could need days of preparation and testing.
Frequently Asked Questions (FAQs)
How much downtime should I expect during a migration?
With proper planning, downtime can be minimal, often just the time it takes for DNS changes to propagate, which is usually under an hour. The actual migration happens behind the scenes while your old site stays live.
Is it necessary to clean up my site before migrating?
Yes, you should clean up your site before a migration. While technically optional, cleaning your site makes the migration faster, more reliable, and less prone to errors. Think of it as spring cleaning so you don’t have to move as much data to the new location.
How long does this pre-migration process take?
It depends on your site’s complexity. A simple blog might need just a few hours of preparation, while a large e-commerce site with custom integrations could require several days of planning and testing.
Have a Migration Plan to Avoid Data Loss
Here’s the bottom line: successful migrations don’t happen accidentally.
They’re the result of methodical planning, careful preparation, and thorough testing. Every step in this checklist exists because I’ve seen what happens when you skip it.
Follow this data migration checklist, and you’ll turn a nerve-wracking process into a routine procedure. Your data stays safe, your downtime is minimal, and you sleep better at night.
Ready to put this plan into action? While this checklist gives you the strategy, you still need the right tool to execute it.
Duplicator Pro takes the guesswork out of migrations. It’ll package your entire site into a single, moveable zip file. You can drag and drop backups into new locations, speeding up complicated moves.
Try it out today!
While you’re here, I think you’ll like these hand-picked WordPress resources:
Joella is a writer with years of experience in WordPress. At Duplicator, she specializes in site maintenance — from basic backups to large-scale migrations. Her ultimate goal is to make sure your WordPress website is safe and ready for growth.


