Your stomach sinks when you realize something’s gone terribly wrong with your WordPress site and you don’t have a backup.
We’ve all been there. Between managing content, handling customer data, and juggling updates, creating regular backups often falls to the bottom of the priority list. Until disaster strikes.
Maybe it was a rogue plugin update that crashed your site. Perhaps a hacking attempt corrupted your files. Or possibly a simple human error deleted something critical.
Even without a backup, there are still ways to recover your WordPress site. Search engines and web archives have been quietly preserving copies of your site, and they might just save the day.
In this guide, I’ll show you how to restore your WordPress site without a traditional backup. Plus, you’ll get prevention tips so you never face this situation again.
Here are the key takeaways:
- Contact your hosting provider first: Most web hosts automatically run backups and can restore your site through their support team
- Use the Wayback Machine for archived content: The Internet Archive may have saved snapshots of your site that you can extract and restore
- Check Google Search Console’s cached pages: If your site is verified, you can recover HTML content from Google’s crawled versions
- Recovery without backups has major limitations: You’ll only get basic HTML content, not databases, plugins, or dynamic functionality
- Prevention is easier than recovery: Set up automated backups with Duplicator to avoid ever facing this situation again
- Disaster recovery points save the day: With proper backups, you can restore your entire site in minutes, even if locked out of your dashboard
Table of Contents
Why Back Up Your WordPress Site?
As you manage your WordPress website, you’re always updating it. Over the years, you’ll add new content, save customer data, customize your theme, and more.
To avoid losing any of this data, it’s important to regularly back up your WordPress site. This involves creating copies of your website’s core files, database, media library, and other content.
Once you create backups, you can restore your site in case anything goes wrong. You’ll roll back your website to a functional version, keeping your website healthy.
Here are some key benefits of saving WordPress backups:
- Boost your security: If your site experiences hacking attempts, malware infections, and accidental data loss, you can restore a recent backup and instantly remove these security threats.
- Rollback software conflicts: If you have a backup, you can confidently implement updates, knowing that you can revert to a stable version if anything goes wrong.
- Undo human errors: Whether you accidentally deleted important files or made a coding error, a backup lets you reverse these errors quickly and efficiently.
WordPress backups offer a safety net that preserves your hard work and maintains your website’s functionality. They provide peace of mind to confidently manage your WordPress site, knowing that you have a reliable backup to fall back on whenever you need it.
How to Restore a WordPress Site to a Previous Date Without a Backup
If you’re a new website owner and you don’t have the right backup strategy in place, you might forget to back up your site consistently. When a cyber-attack or server crash happens, you won’t have a backup to restore.
Without a backup, things might seem hopeless. However, there are still a few ways you can recover your lost data.
- Method 1: Wayback Machine: Search the Internet Archive for saved snapshots of your site, then extract and save the HTML code from archived pages
- Method 2: Google Search Console: Use the URL Inspector tool to access cached versions of your pages that Google has crawled and stored
Most web hosting providers automatically run backups of your website. If you need to restore your website, contact the support team through your hosting account. As a beginner, this is much easier than manually downloading your site’s cached HTML files.
Method 1: Restore Your WordPress Site with the Wayback Machine
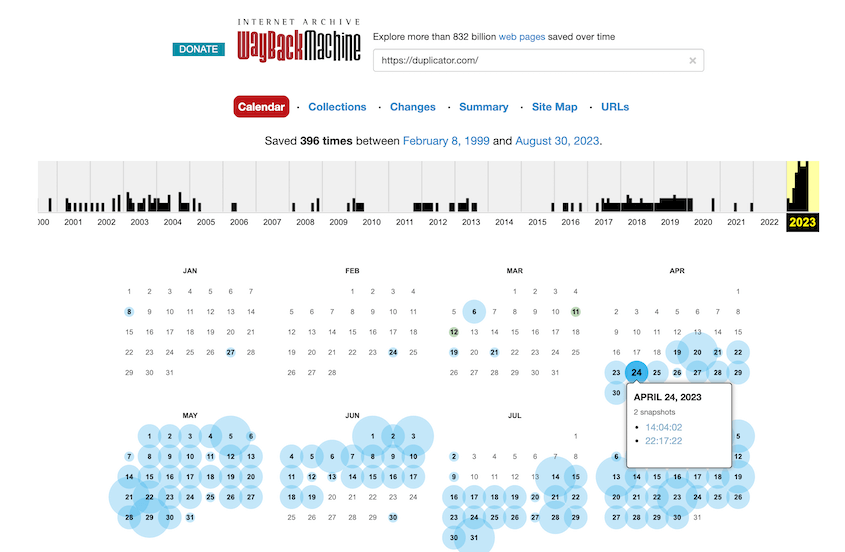
Another way to restore your site without a backup is to use the Internet Archive Wayback Machine. Since it has over 900 billion saved web pages, it’s the oldest and largest web archive.
To get started, search the archive for your website. It will show you how many times your site has been saved. Plus, you’ll see an exact timeline of all of your site’s snapshots.
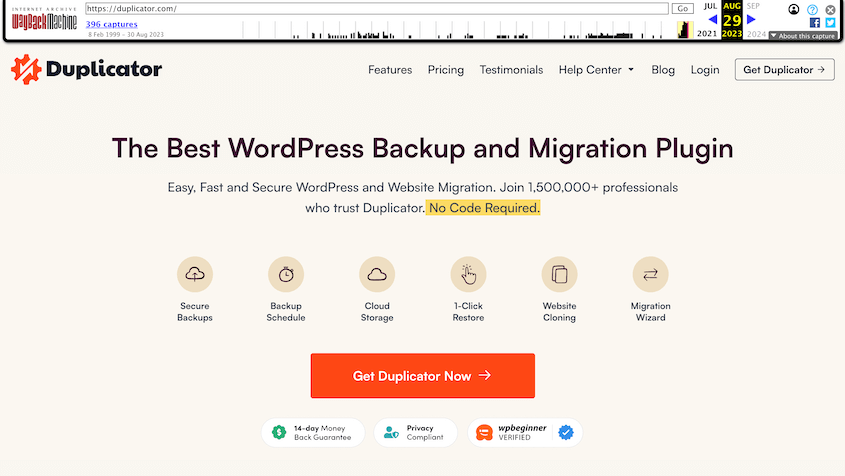
Click on a snapshot that was taken before your site had a catastrophic error. You’ll see a saved version of your site.
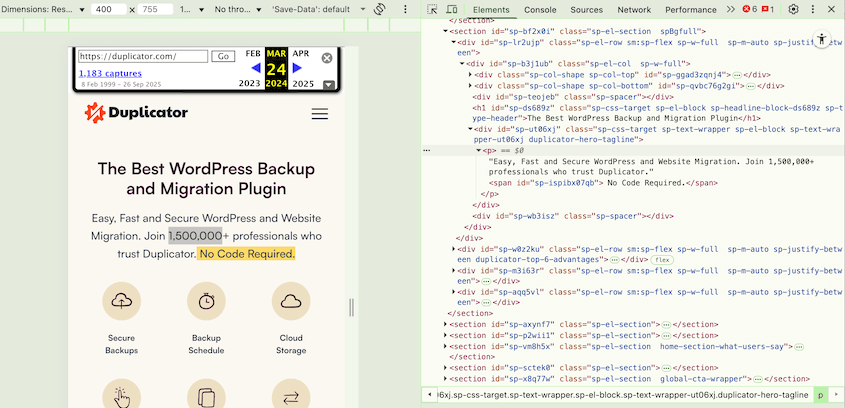
Right-click and hit View Page Source. Then, you copy and paste the code into a text editor.
Navigate to each page on the site, saving text, images, and code. You’ll need to then upload these to your server to restore your WordPress site to a previous date.
Method 2: Use Google Search Console’s URL Inspector
If your site is verified with Google Search Console, you have another option for recovering content. The URL Inspector tool shows you the cached version of your pages that Google has crawled.
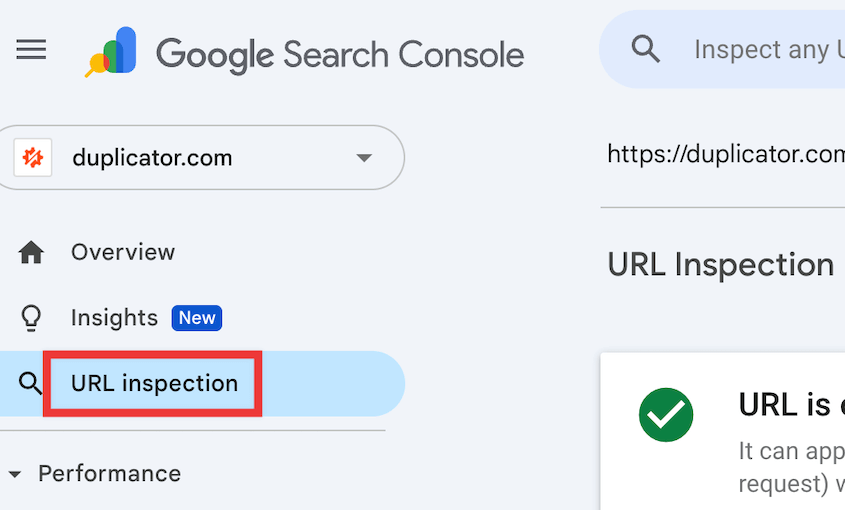
To access this, log into your Google Search Console account and select your property. Find the URL Inspector tool in the left sidebar.
Enter the URL of the page you want to recover. Google will show you information about that page, including when it was last crawled.
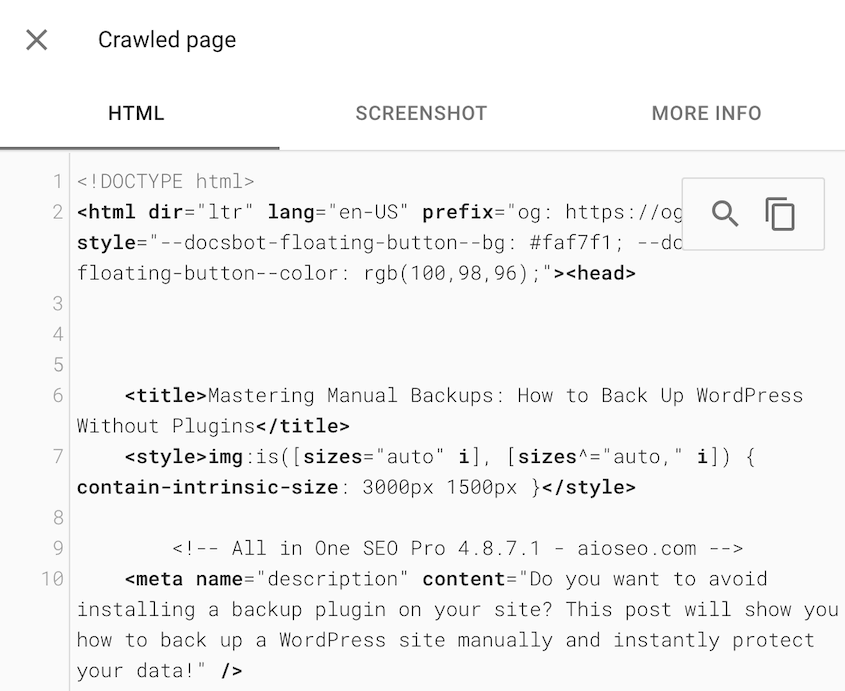
Click on View Crawled Page to see Google’s saved version. This will show you the HTML content that Google has stored.
Copy the HTML code and save it to a text editor like Notepad.
You’ll need to repeat this process for each page you want to recover. Keep in mind that Google’s cache only stores basic HTML content, so dynamic elements, databases, and server-side functionality won’t be included.
Once you’ve saved all the HTML from your cached pages, you can manually recreate your content in WordPress or upload the HTML files to your server.
This method works best for recovering text content and basic page structures. However, it’s time-consuming and won’t restore your full WordPress functionality, theme customizations, or plugin settings.
Restoring a Backup: The Easiest Way to Recover a WordPress Site
As you can see, it’s not easy to restore a WordPress site to a previous date without a backup.
You’ll need to rely on Google Search Console or the Wayback Machine saving cached copies of your site. If your site isn’t cached right before the error, you might not be able to recover your content.
Plus, new website owners will probably find it difficult to navigate the coding involved with this process. You’ll have to be familiar with HTML and how to upload it to your server.
You also may not be able to restore non-HTML elements on your site. Pages with PHP or server-side scripting won’t be properly cached and stored by search engines, meaning that they’re likely lost for good.
Here’s the good news: You can easily restore your website at any time if you have a good backup strategy in place! With a WordPress backup plugin, you’ll be able to easily automate backups and recover them after any critical site error.
Duplicator is the best WordPress backup plugin because it supports automatic backups, off-site backup storage, and easy recovery. Anyone can set up a backup plan that protects their site (at all times)!
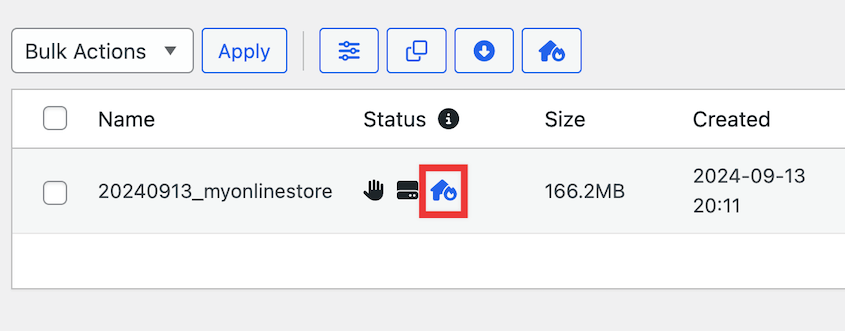
Once you create a backup with Duplicator, you can set it as the disaster recovery point. This allows you to restore your site, even if an error locks you out of your WordPress dashboard.
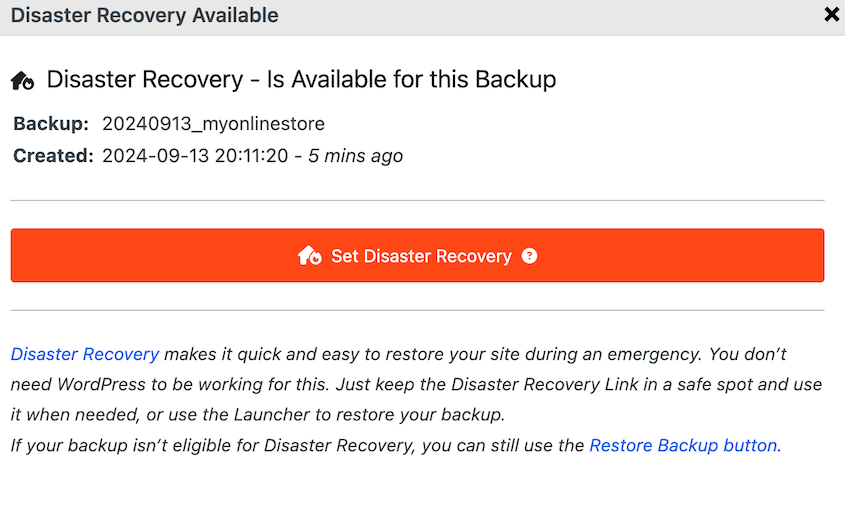
To do this, find a local full-site backup. Click on the blue recovery icon next to it.
In the pop-up window, click on Set Disaster Recovery.
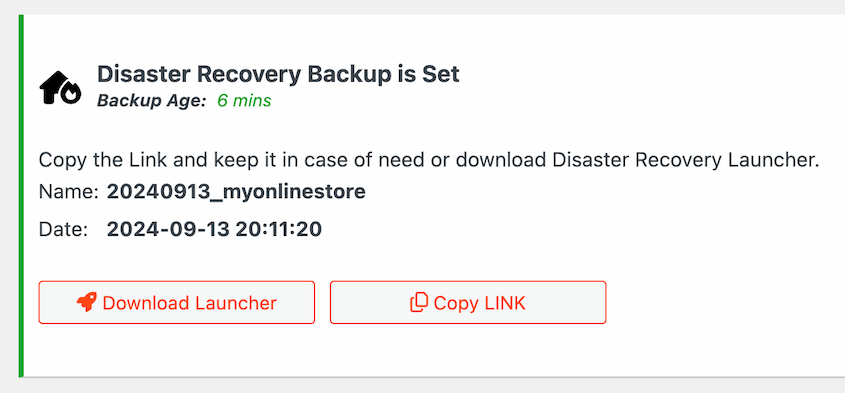
You can then restore the backup two different ways. You can copy the recovery link or download the recovery launcher file.
Save these in a safe place, separate from your WordPress admin dashboard. If a server crash, hack, or data breach happens, simply paste the recovery URL into a new browser window. Alternatively, open the launcher file.
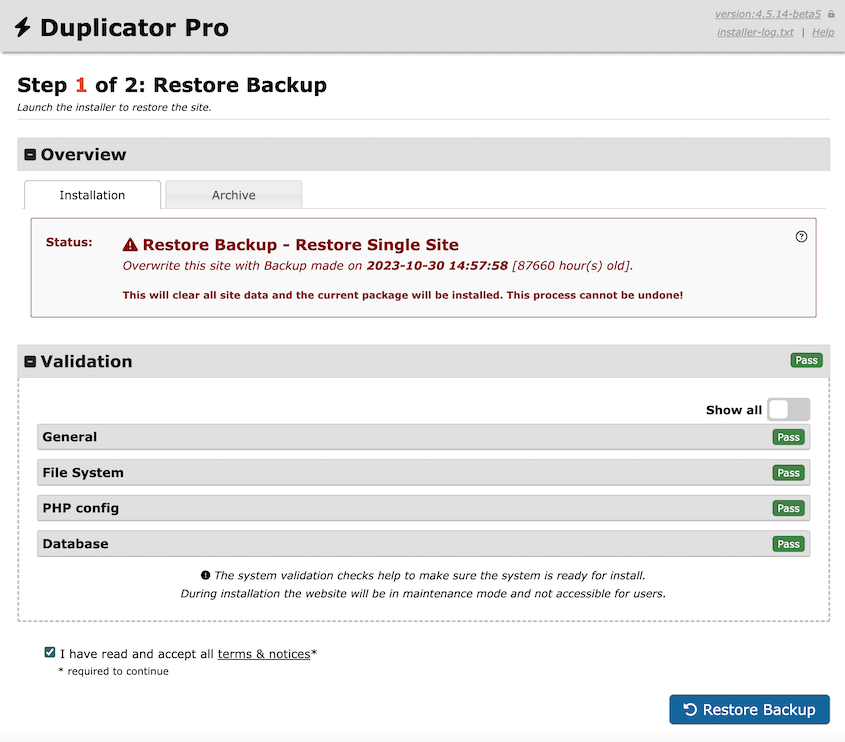
This automatically launches Duplicator’s recovery wizard. You can follow two simple steps to recover your site and get it back to normal!
FAQs About Restoring WordPress Without a Backup
How do I restore WordPress to a previous date?
If you have a backup file on hand, you can re-upload this to your server to restore your WordPress site to a previous date. This will install a functional version of your website.
The best way to back up and restore a WordPress site is to use a WordPress backup plugin. Duplicator Pro is the most powerful and flexible option.
With Duplicator, you can automate regular backups. This tool will give you a recovery URL, which you can use to restore your website even if you’re locked out of your dashboard.
Other popular backup plugins include UpdraftPlus, BlogVault, and BackupBuddy. To find the best option for your needs, check out our comparison of the best WordPress backup plugins.
Can I restore WordPress without the database?
No, you can’t restore WordPress without the MySQL database. It stores data like posts, pages, users, custom fields, and WordPress settings. Whenever you create a full website backup, make sure this includes your database, so you can properly restore your entire site.
If your database ever becomes corrupted, you can restore it! For more details, check out our guide on how to create a WordPress database backup.
How do I back up and restore my WordPress site for free?
You can back up and restore your WordPress site for free using Duplicator Lite. This free plugin allows you to compile your WordPress files and database into a single zip file. If anything goes wrong on your site, you can upload this backup to your server and overwrite the corrupted files.
How do I manually restore my WordPress site?
To manually restore your WordPress site, you’ll need to check that you’ve downloaded a copy of your website files and database. If you have, open phpMyAdmin and import your database as a SQL file. Then, use an FTP client, cPanel, or other file manager to delete your old files and replace them with the uploaded backup.
Conclusion
We hope this guide helped you restore your WordPress site to a previous date without a backup!
Here are some extra WordPress tips and tricks so you can get the most out of your website:
Want to easily restore WordPress websites whenever you need to? Download Duplicator Pro to set up automatic backups and one-click restores!
Joella is a writer with years of experience in WordPress. At Duplicator, she specializes in site maintenance — from basic backups to large-scale migrations. Her ultimate goal is to make sure your WordPress website is safe and ready for growth.


