Ensuring your website’s security involves secure storage for backups. Duplicator Pro simplifies this process by creating backups and automating transfers. It supports multiple providers: Google Drive, Dropbox, OneDrive, Amazon S3, Backblaze B2, Google Cloud and more, including FTP, SFTP, local server storage and Duplicator Cloud.
Ready to automate your backup transfers? Let’s explore backing up to Duplicator Cloud, using similar procedures for other storage options.
Cloud Storage Options We Have
- Local Storage
- Duplicator Cloud
- SFTP/ FTP
- Dropbox
- Google Drive
- Microsoft OneDrive
- Amazon S3
- Google Cloud
- Cloudflare R2
- Wasabi
- DigitalOcean Spaces
- Dream Objects
- Vultr S3
- Backblaze B2
Connect Storage to Duplicator Pro
By default, Duplicator will save your backups to your local server. If you want to start using cloud storage options like Duplicator Cloud, you’ll need to connect your account.
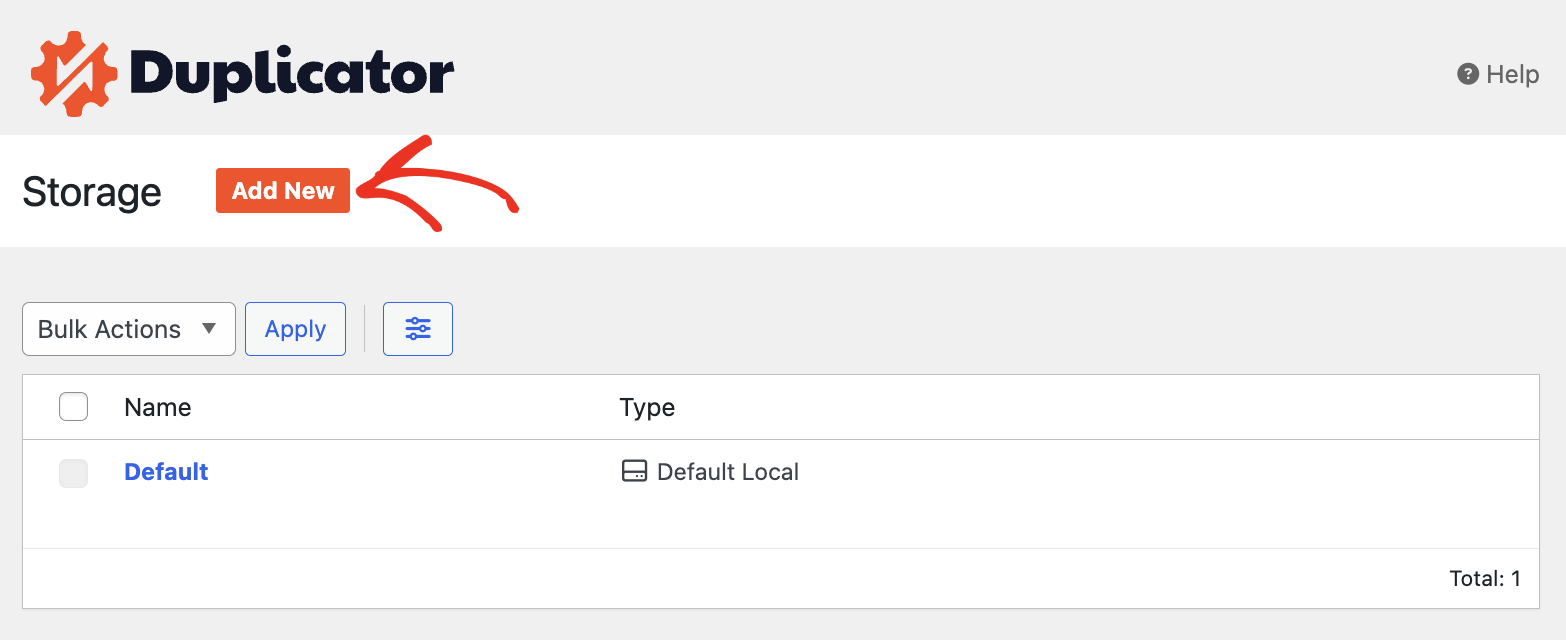
First, go to Duplicator Pro » Storage. Here, you’ll see the default local storage option. To add Duplicator Cloud, click on Add New:
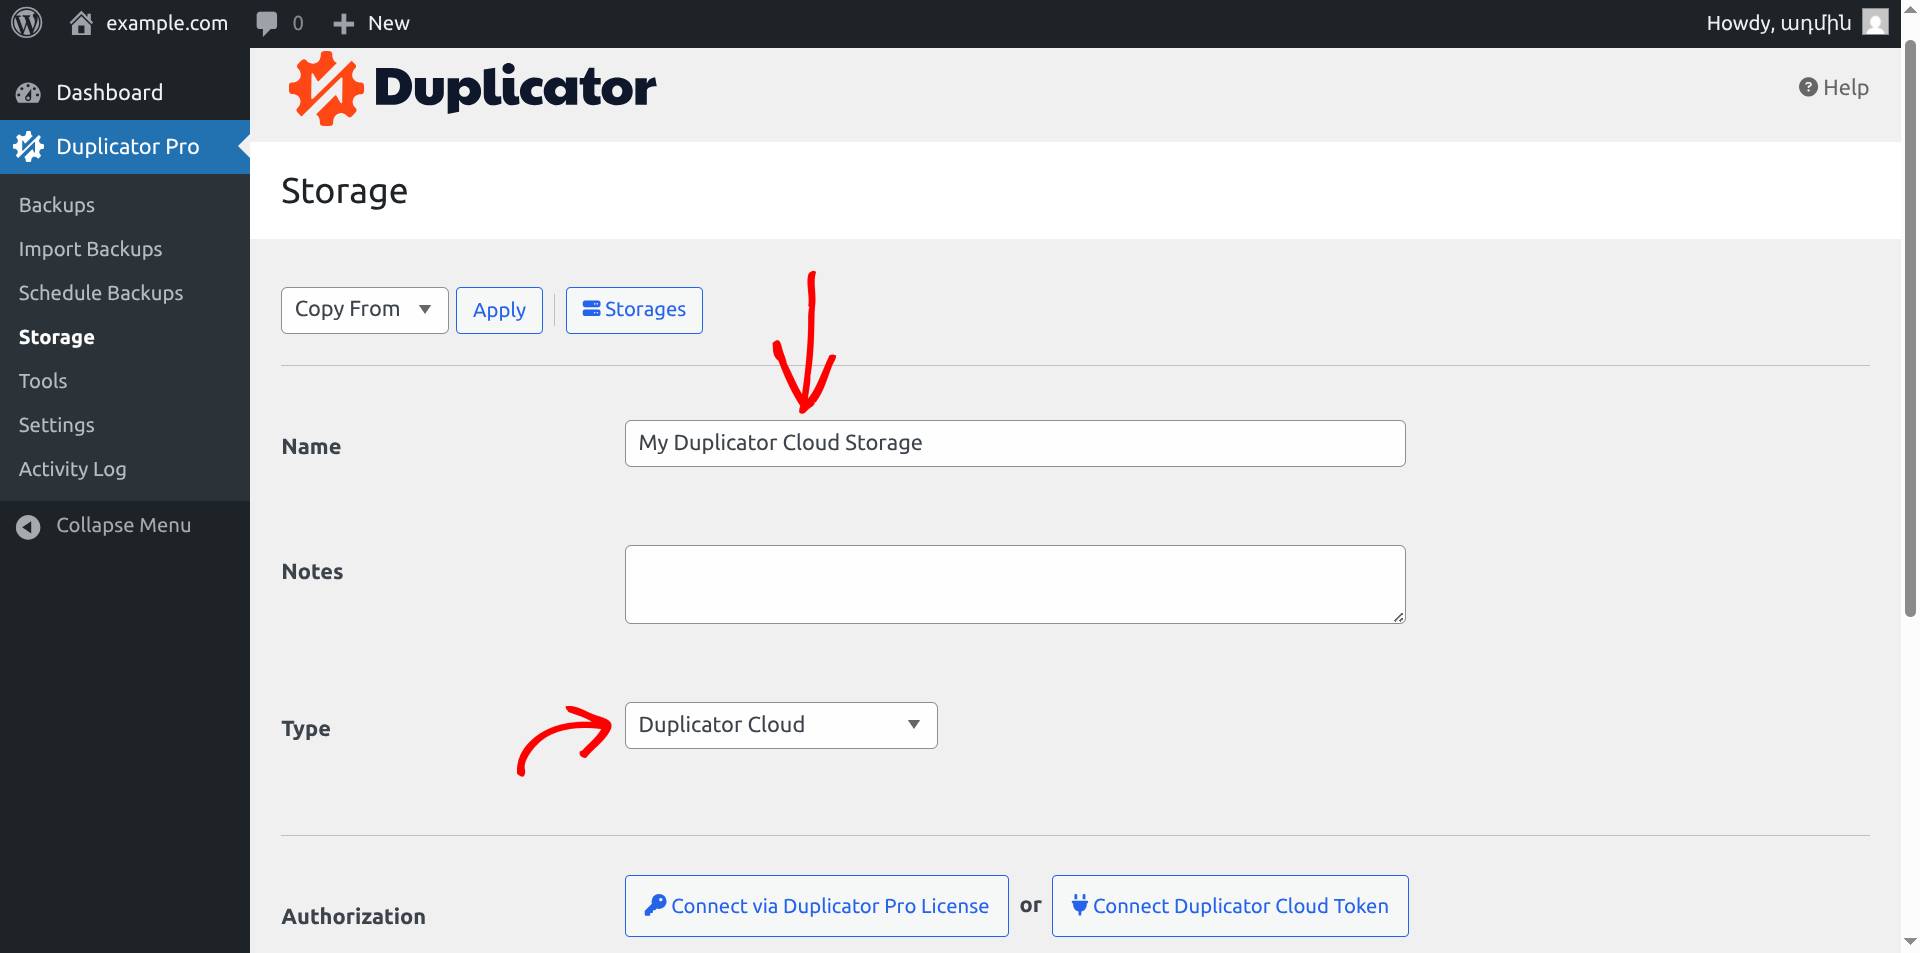
Add a Name for the storage location and select Duplicator Cloud from the Type dropdown.
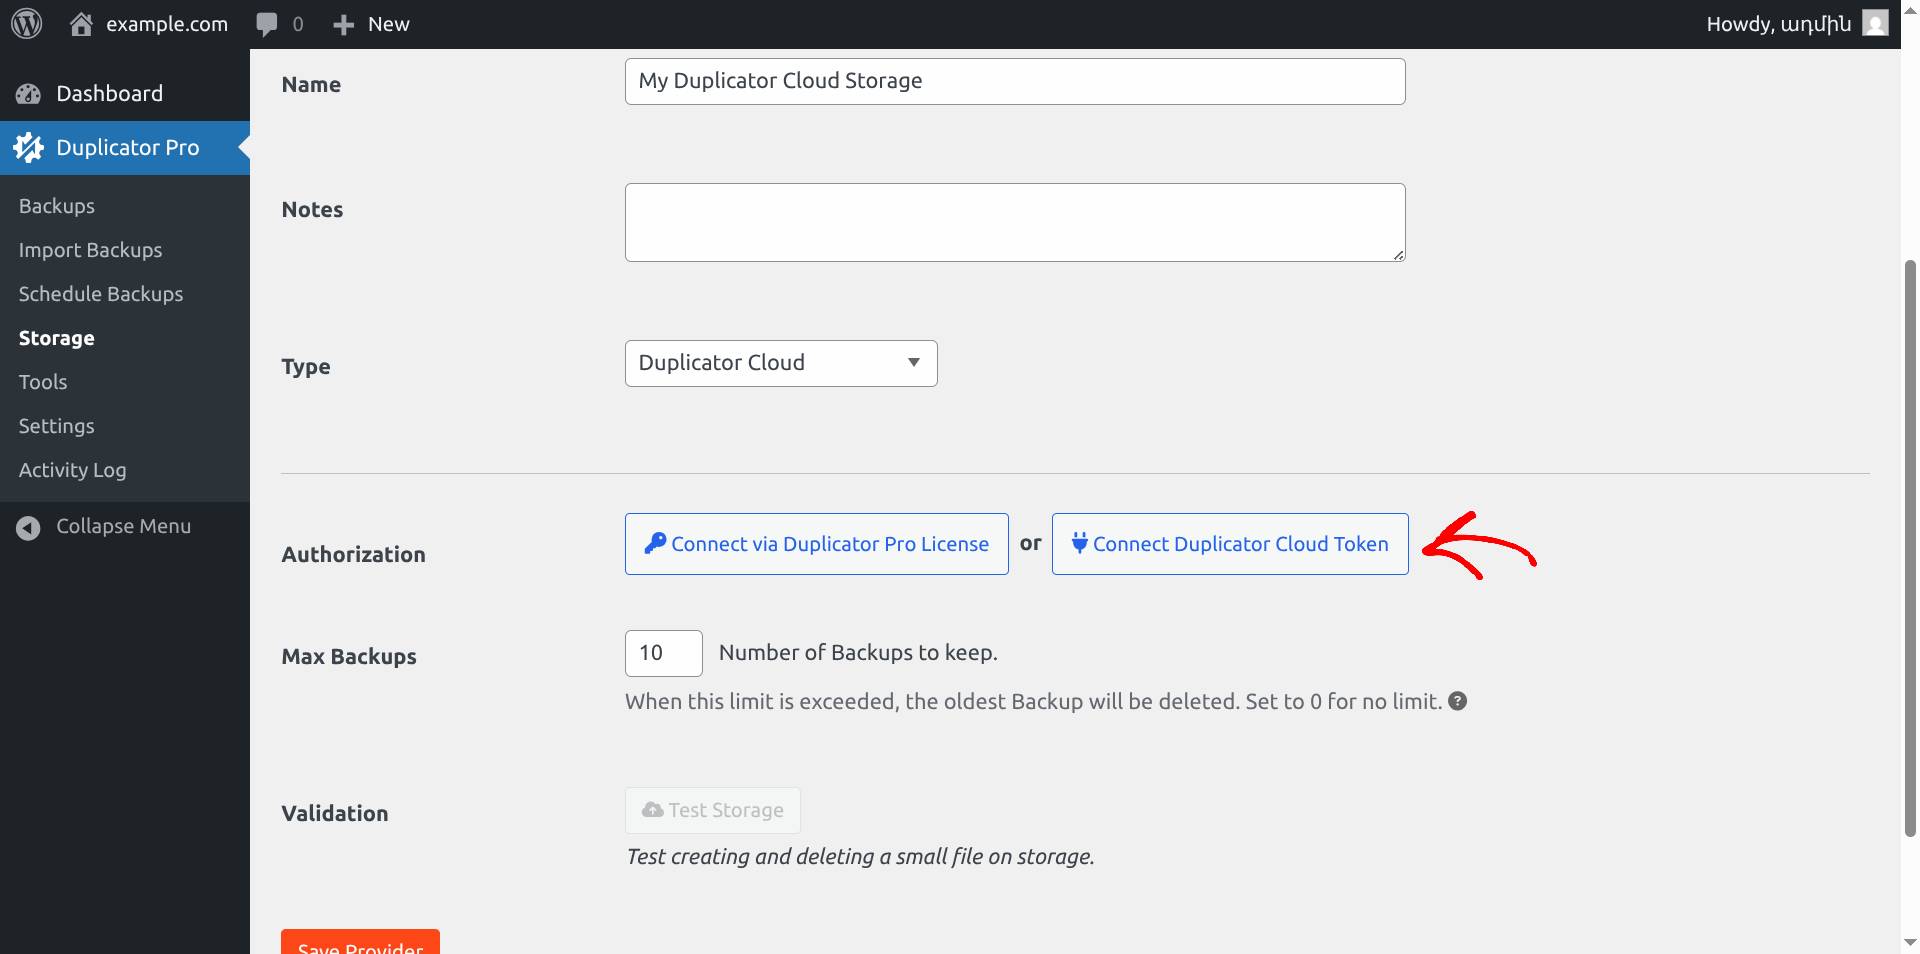
The screenshots below demonstrate how to connect and authenticate Duplicator Cloud. Click the Connect Duplicator Cloud Token button to continue.
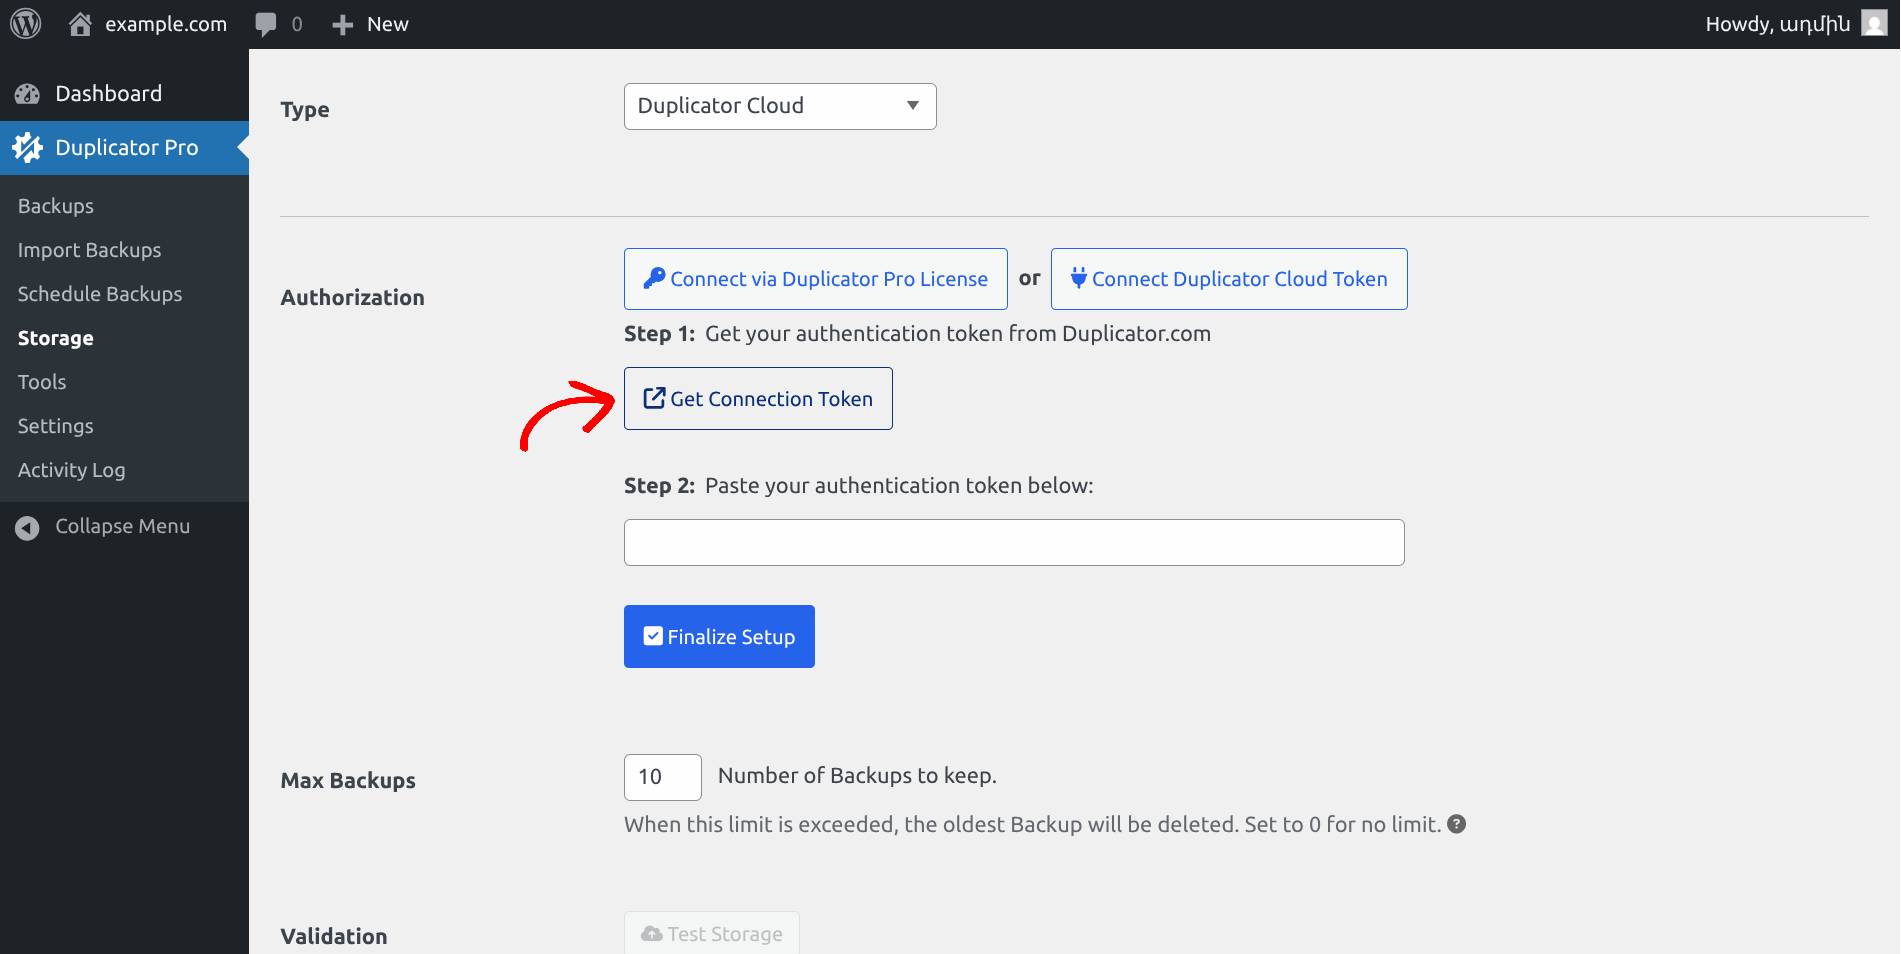
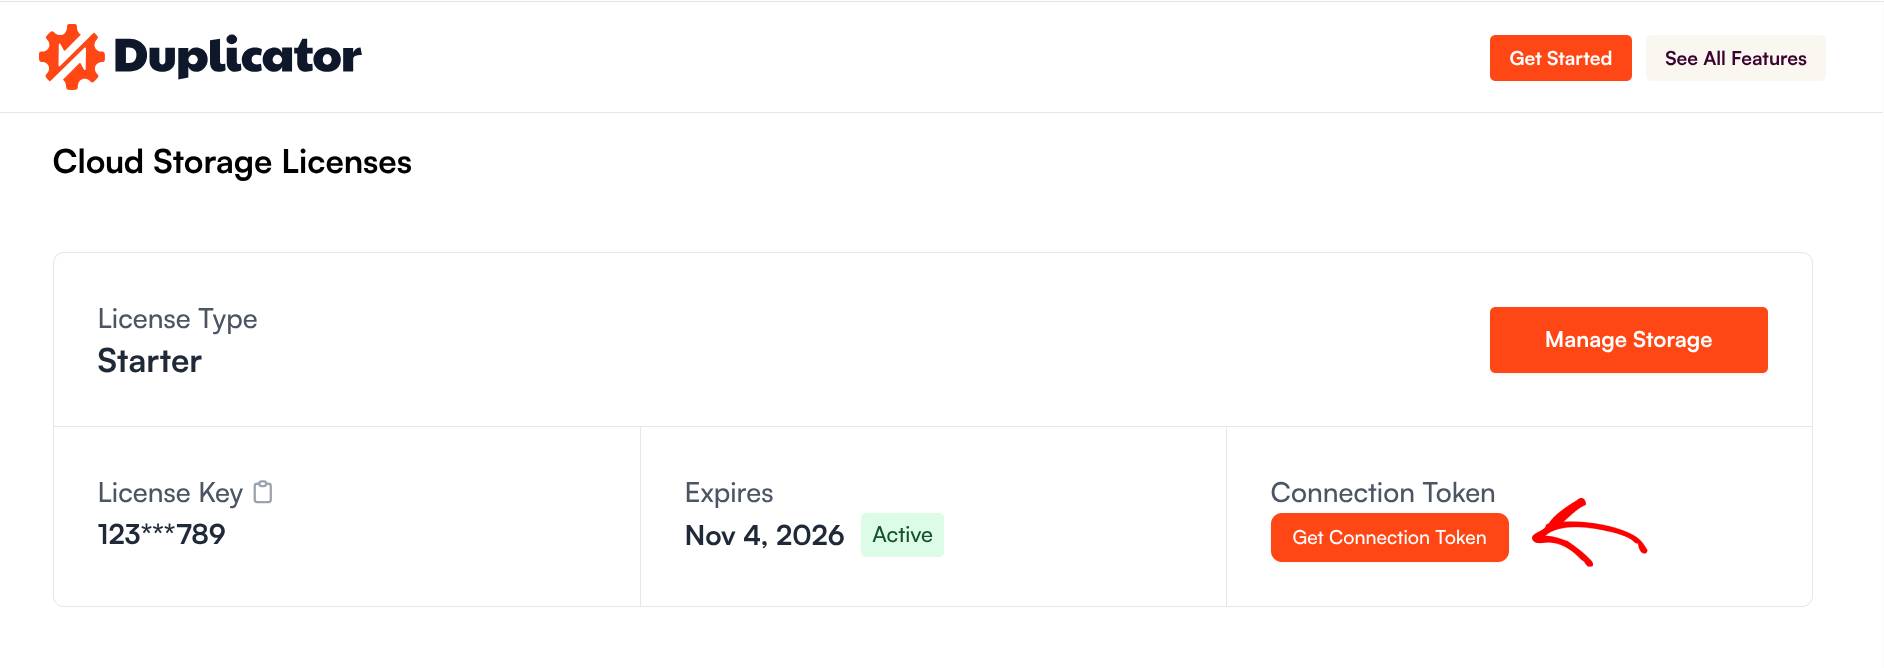
Now, you’ll see the Get Connection Token button, click on it to open duplicator.com in a new tab:
You can now locate your preferred Duplicator Cloud license type and click on Get Connection Token.
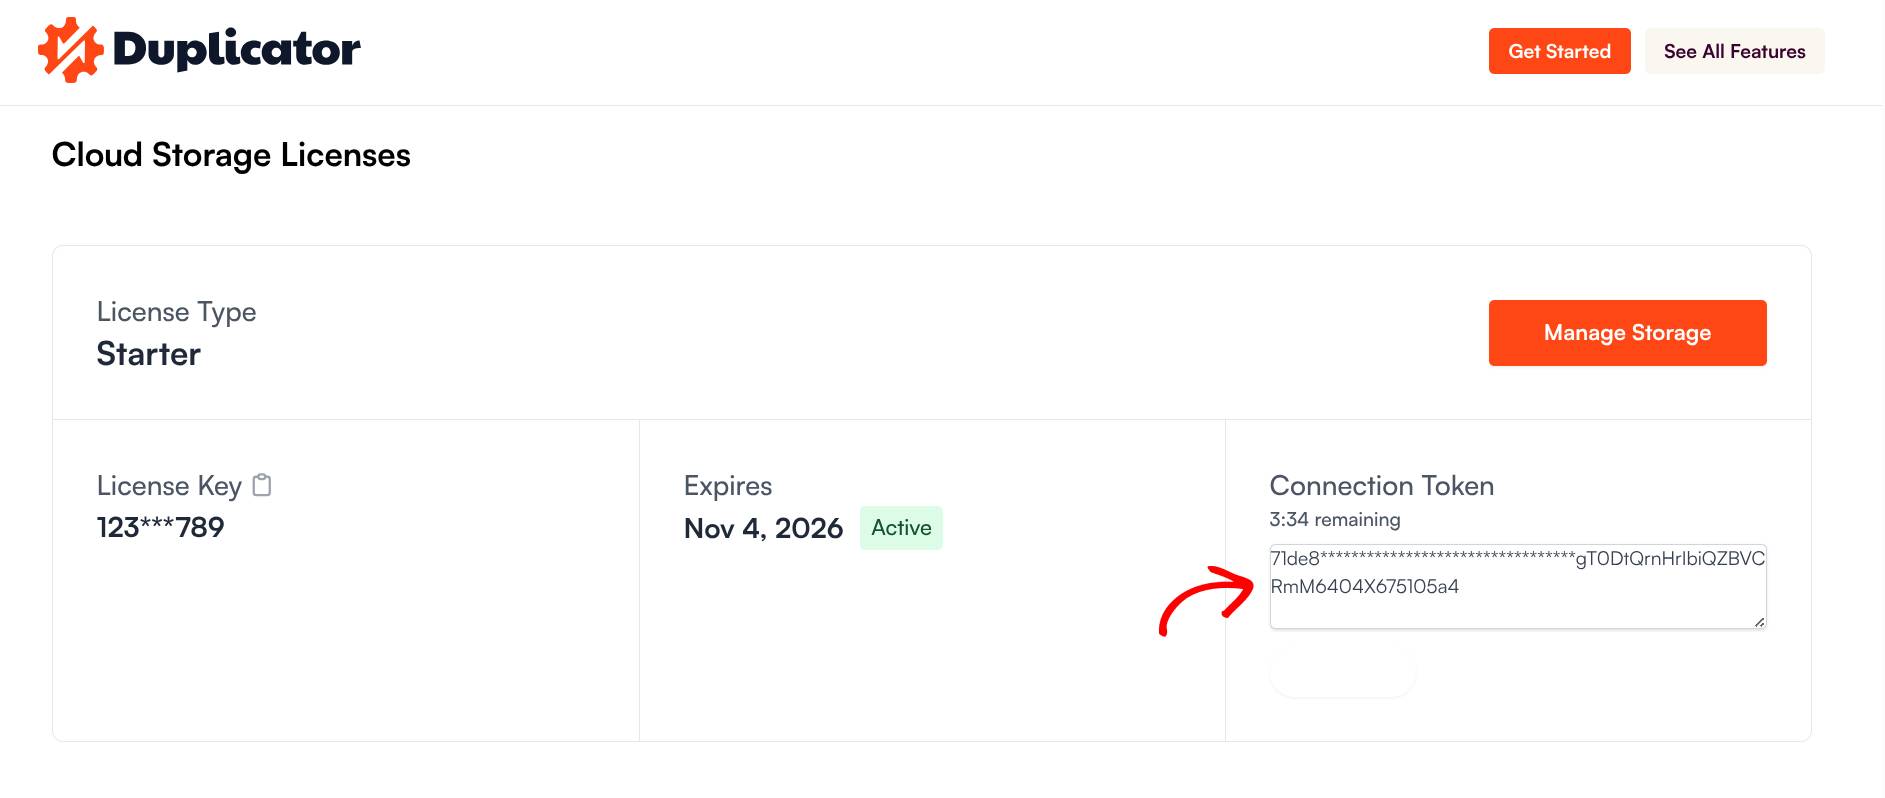
This will generate an authorization code. Copy the code and go back to the Duplicator Pro storage setup page:
Under Step 2 of the Authorization section, paste the authentication token, then click Finalize Setup. Before finalizing, make sure to configure the Max Backups setting — this helps you avoid editing the storage again later. However, you can still update these settings even after finalizing the setup if needed.
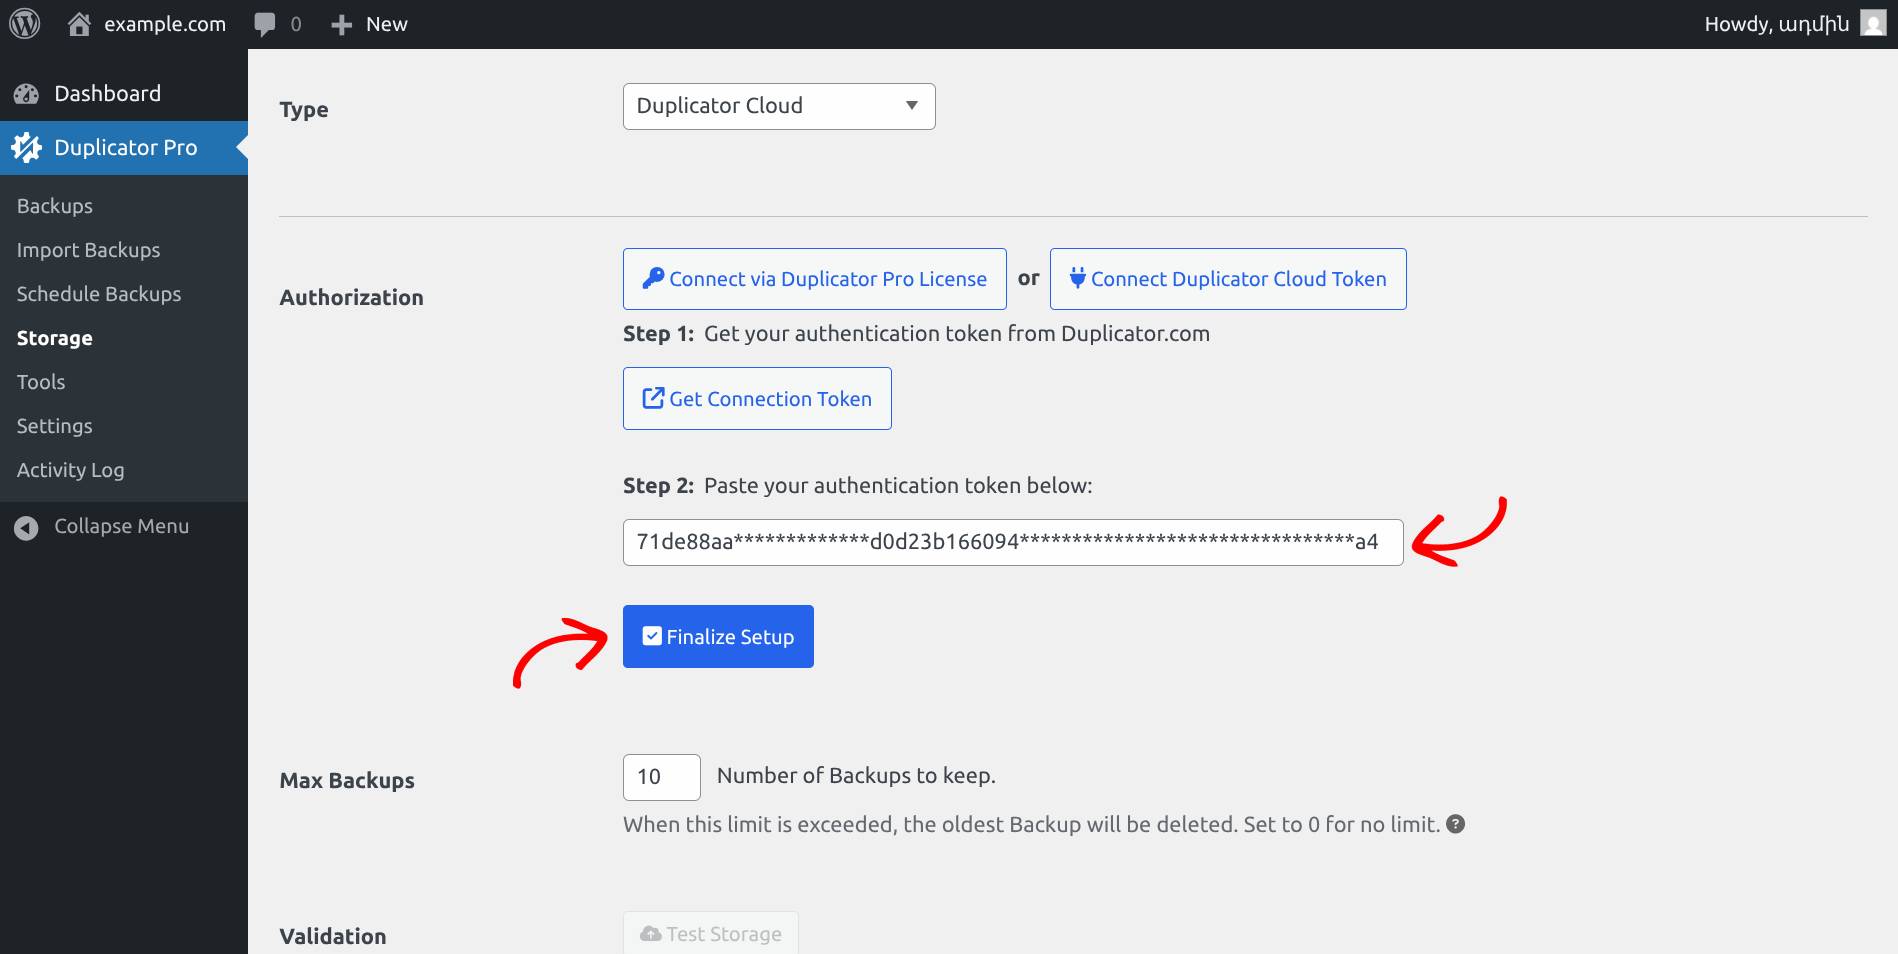
- Maximum Backups: You can set how many backups to keep in this storage. Once the limit is reached, the oldest backup will be automatically deleted to make room for new ones.
- Validation: You can quickly test whether it’s possible to successfully transfer files to the storage, confirming that the storage is accessible and valid.
Create an Instant Backup
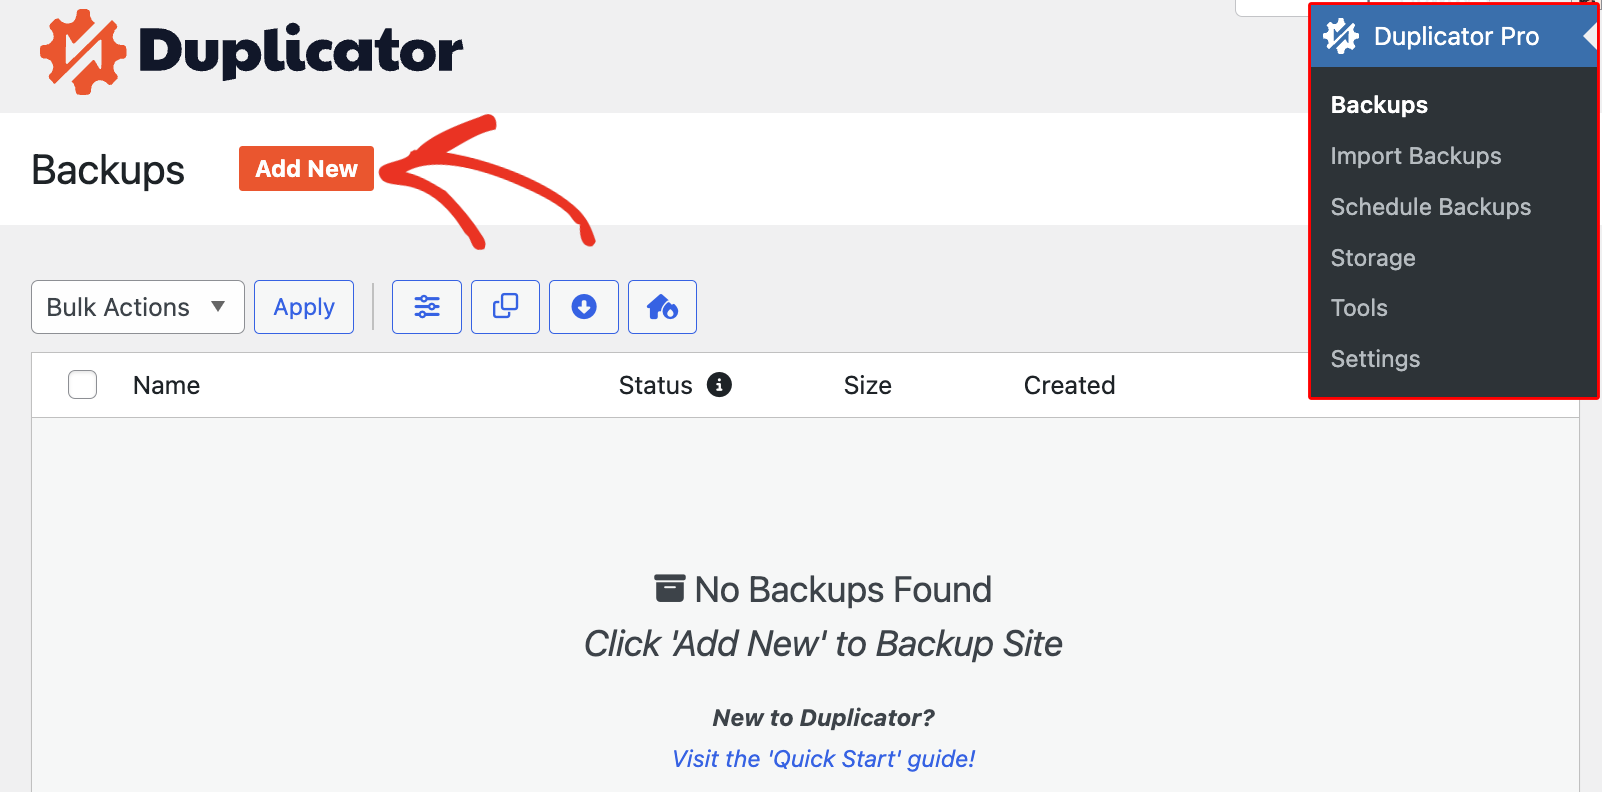
You are now all set to create a cloud backup of your site. To do this, navigate to Duplicator Pro » Backups » Add New:
Set the backup name format and set the storage to Duplicator Cloud. Under the Storage section, you’ll see all the cloud storage options connected to your site. Selecting Duplicator Cloud here:
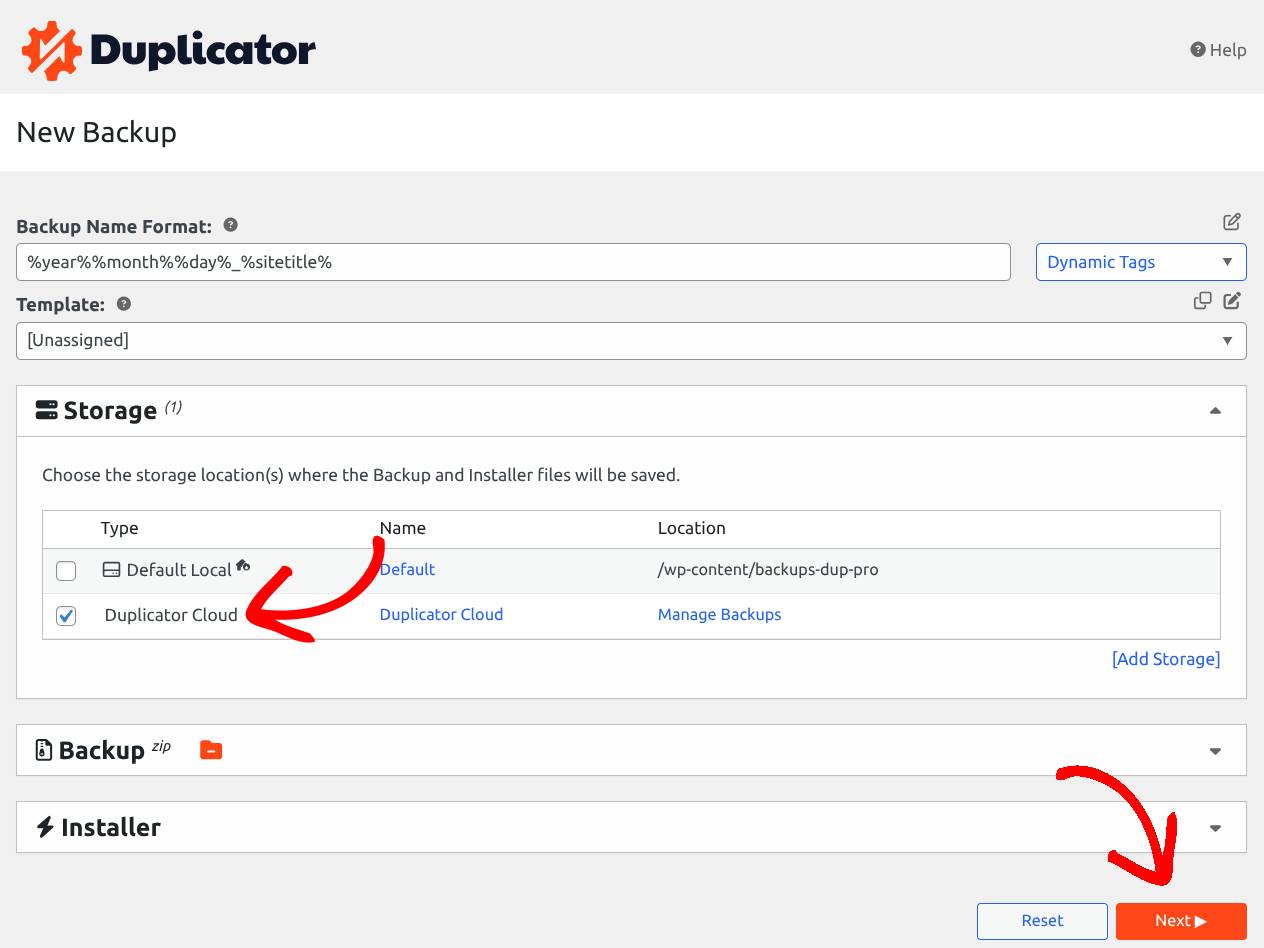
After you click Next, Duplicator will scan your site and notice if there are any issues:
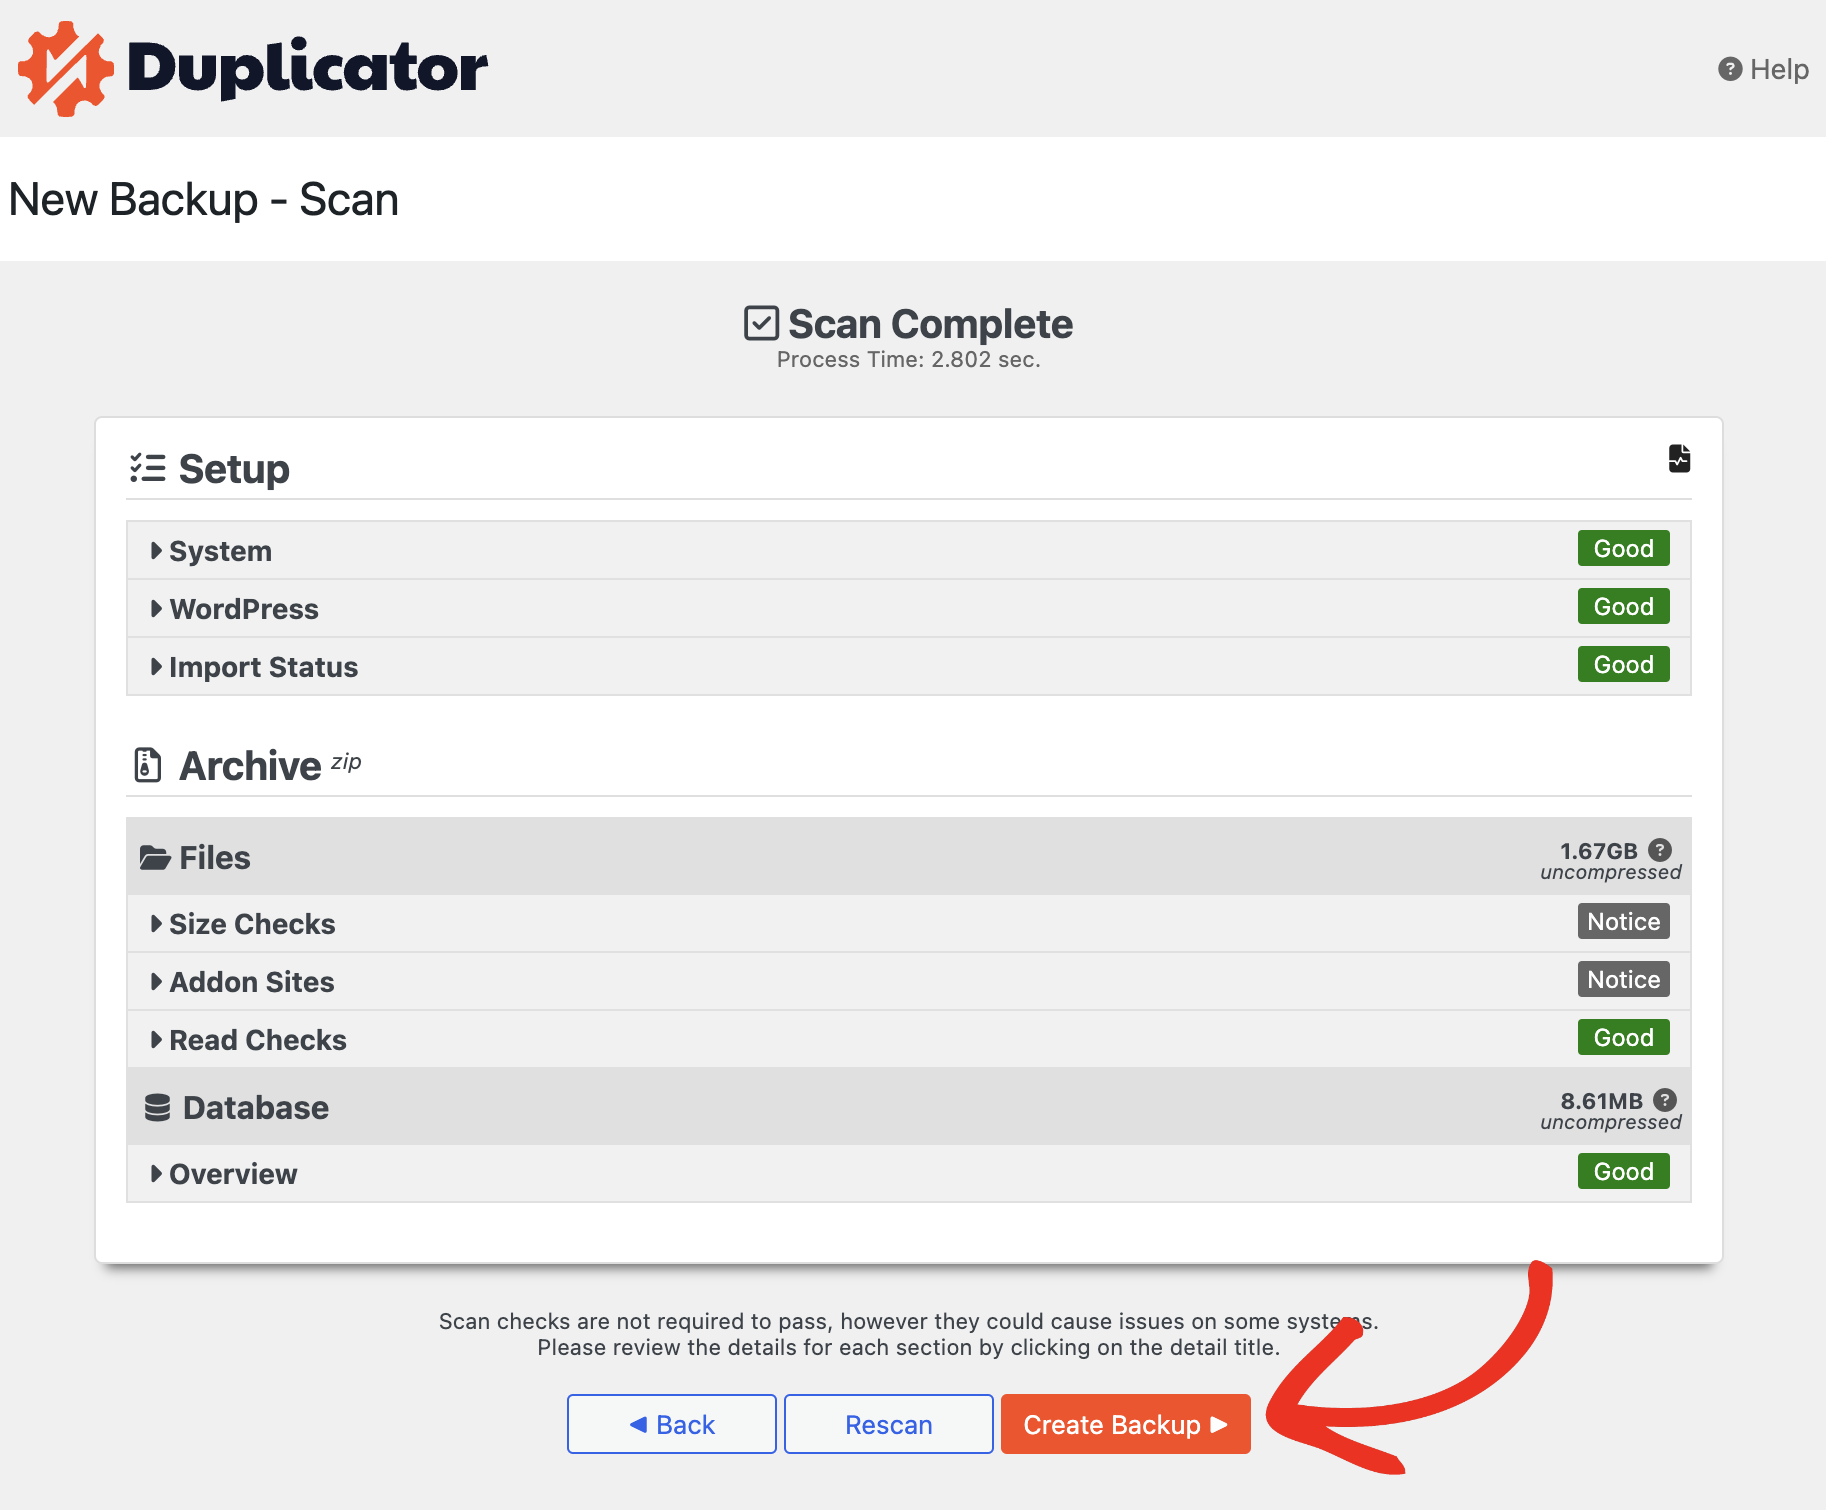
To finish your backup, click on Create Backup. This way, your backup will be built and transferred to Duplicator Cloud.
You can then use the files to restore the website using the Classic install, or the import install methods. This process can also easily be replicated with all the other cloud storage types.
Duplicator Pro’s Storage feature is vital for enhancing your website’s security. Beyond facilitating backup transfers to the cloud, Duplicator Pro empowers you to automate this process seamlessly via the Scheduled Backups functionality.


