I never thought that moving my WordPress site to a new host would become one of my most challenging technical adventures.
What I thought would be a simple database transfer turned into a week-long ordeal of troubleshooting, late nights, and hard-earned lessons.
It seemed straightforward: export database, import database, point to new server, done.
But between corrupted SQL files, character encoding issues, and mysterious white screens of death, I discovered firsthand why so many website owners approach database migrations with caution.
My journey taught me that preparation and understanding the process are crucial!
In this post, I’ll walk you through a proper WordPress database migration and the solutions that ultimately saved my website.
Here are the key takeaways:
- WordPress database migrations can be done using plugins like Duplicator or manually through phpMyAdmin
- Essential prep work includes creating full backups, updating plugins/themes, and disabling non-essential plugins
- Plugin method involves creating database-only backups and importing them to new locations
- Manual method requires exporting via phpMyAdmin, creating new databases, and importing SQL files
- Common issues include database connection errors, white screens of death, and plugin conflicts
- Duplicator Pro offers the easiest solution with drag-and-drop migrations and automatic search and replace operations
Table of Contents
Why Migrate a WordPress Database?
All of your WordPress site’s posts, pages, categories, users, and other data are stored in a database. It saves changes and serves content to visitors.
When you want to migrate your website, you’ll typically want to move both the files and the database to the new hosting server. These two elements work together to display your website.
However, your website might be large. You might need to move the site files and database separately to avoid timeouts on your old host.
You might also have a staging site to test out new changes. To make sure your local site is fully updated, you can upload your database and overwrite the old one.
Having a backup can help you restore data after an emergency. For extra security, consider migrating your database to cloud storage.
Important Pre-Migration Steps
Before diving into the database migration process, a little preparation can go a long way toward a stress-free experience.
Start by creating a comprehensive backup of both your database and files. These backups are your safety net and allow you to quickly recover if anything goes wrong.
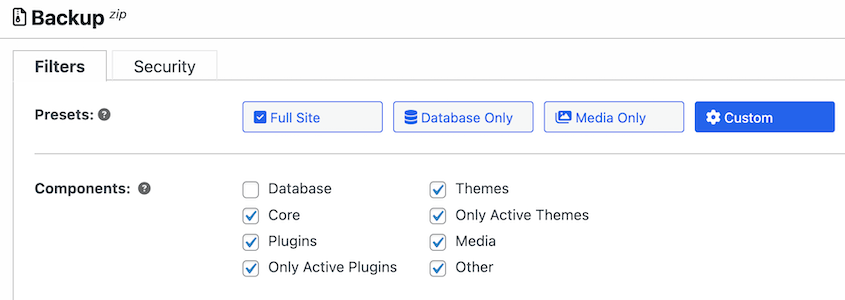
You can do this with Duplicator, a backup plugin with over 4,000 five-star reviews. Create a backup and select the Full Site preset to save everything on your site.
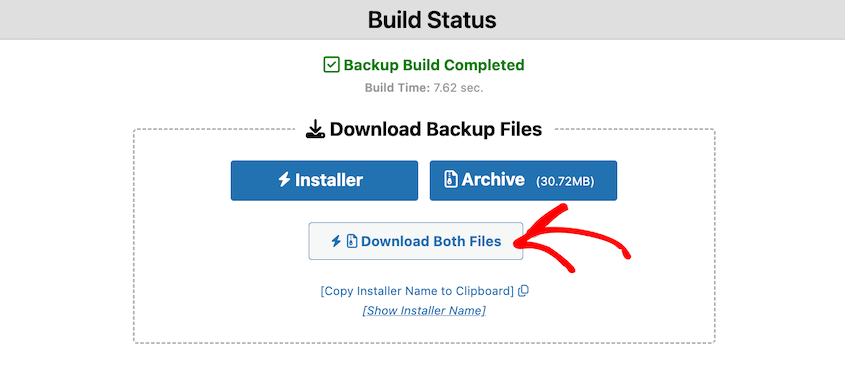
Be sure to download both backup files.
Next, update your WordPress plugins and themes to their latest versions. Outdated software can often cause compatibility issues during migration.
It’s also a good idea to disable any non-essential plugins to minimize potential conflicts. Caching and security plugins tend to create errors, so you can reactivate them after the move.
These proactive steps will help smooth the migration path and prevent unnecessary problems!
How to Migrate a WordPress Database
There are a few different reasons to migrate a WordPress database, but you might not know how to get started. Let’s walk through the migration process, step by step!
Here’s a quick overview:
- Method 1 (Plugin): Install Duplicator, create a database-only backup, and drop it into the new location
- Method 2 (Manual): Export your database via phpMyAdmin, create a new database on the target server, and import the SQL file
Method 1. Use a WordPress Migration Plugin
The easiest way to migrate WordPress data is to use a WordPress migration plugin. A tool like Duplicator Pro is built to save and transport your files and database.
Step 1: Install Duplicator
If you’re looking to migrate your WordPress database in minutes, try Duplicator. This is the best WordPress migration plugin I’ve found. It allows you to send databases to the cloud, a new host, or any other location.
To get started, purchase a subscription for Duplicator Pro. There is also a free version, but it doesn’t support drag-and-drop migrations.
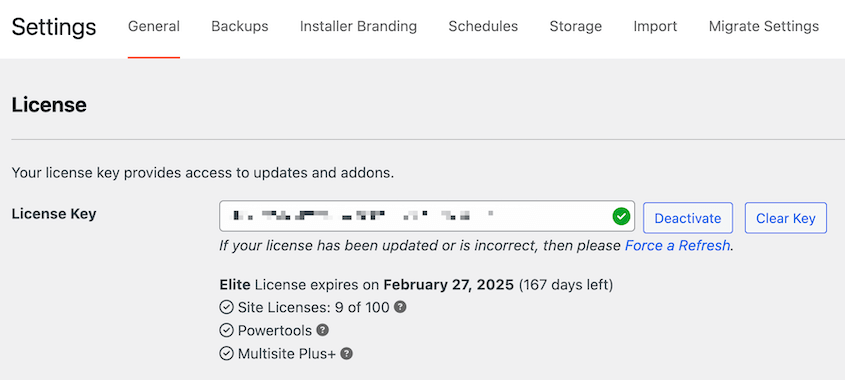
Be sure to copy your license key. Then, install Duplicator in your WordPress dashboard.
Lastly, go to Duplicator Pro » Settings » General. Paste your license key here.
Activate it to start using Duplicator!
Step 2: Create a Database Backup
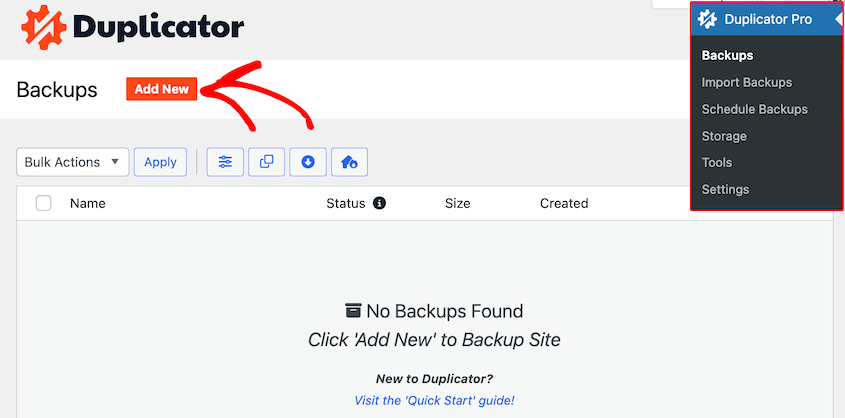
To migrate your database, you’ll need to create a database-only backup. First, find Duplicator Pro » Backups » Add New.
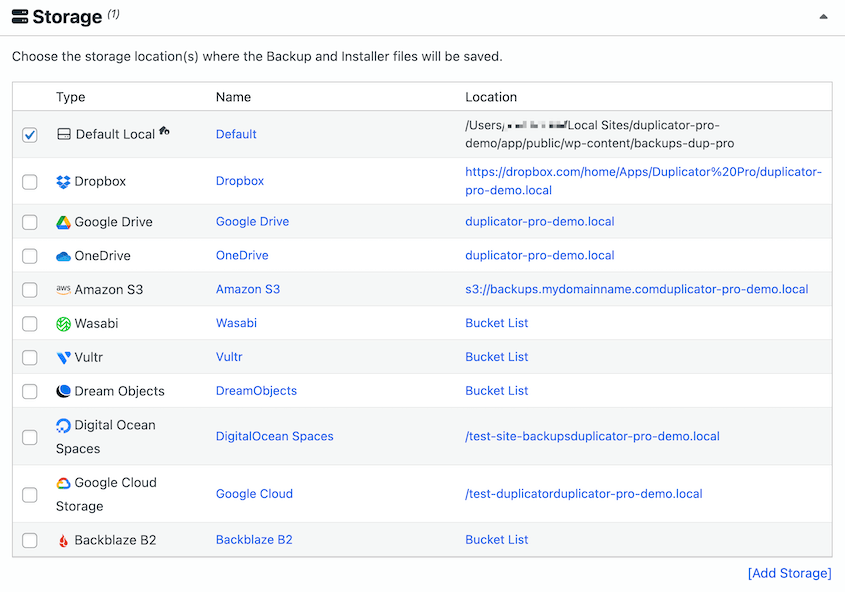
Name the backup. If you want to migrate the database to the cloud, choose a cloud storage location. Duplicator supports all of these options:
If you’re planning on migrating your database to a localhost, new live host, or new domain, select local storage instead.
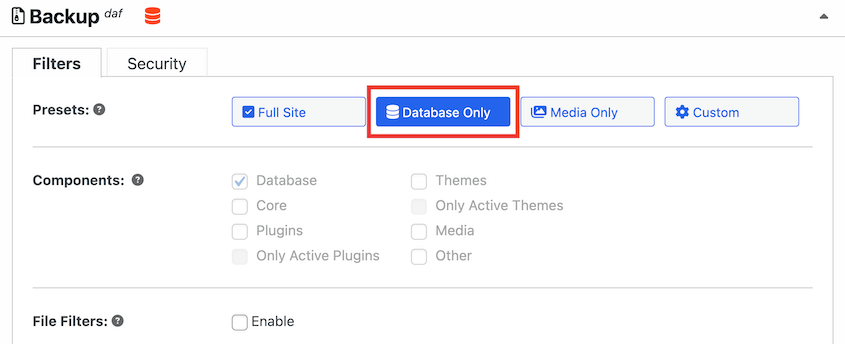
Expand the Backup section. Here, choose the Database Only preset. This excludes any files from your backup.
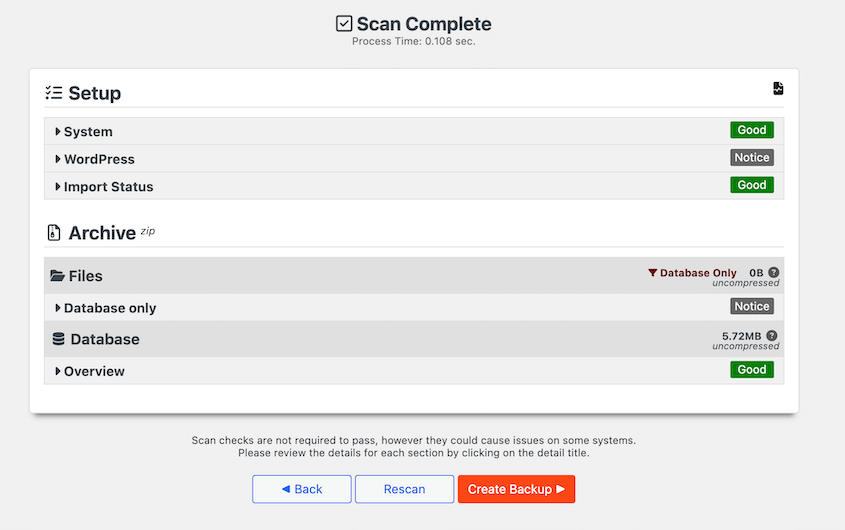
Click Next. Duplicator will fully scan your database, informing you of any issues.
After this, hit Create Backup.
If you chose a cloud storage location, your backup will be sent off-site. However, the local storage option will save the backup on your dashboard.
Before you migrate it, download the database backup.
If you’re using Duplicator Pro, you’ll only need the archive file. For free users, be sure to download the installer as well.
Step 3: Import Your Original Database
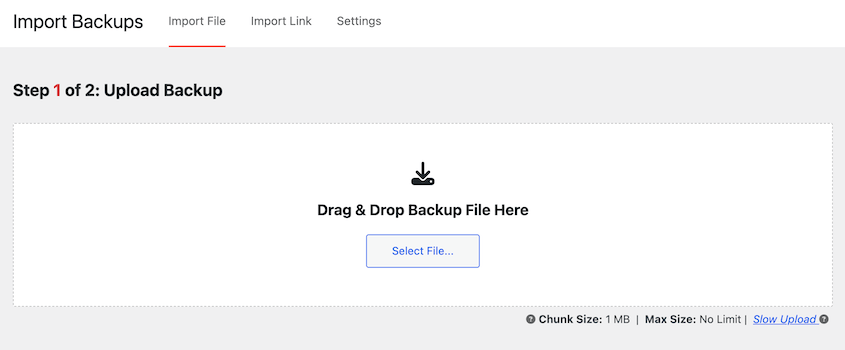
Now it’s time to migrate your database to a different location. On the new website, install Duplicator Pro. Then, open the Import Backups page.
If you’re using the free version of Duplicator, upload both the archive and installer to your server with an FTP client like FileZilla. Then, visit this URL: https://your-domain/installer.php
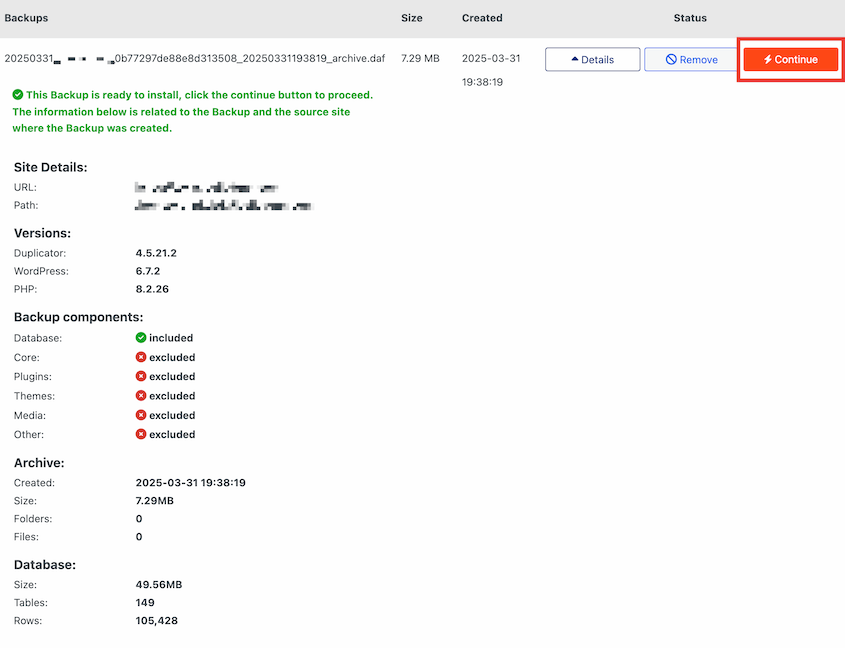
Upload the database backup archive. Review the backup details and click Next.
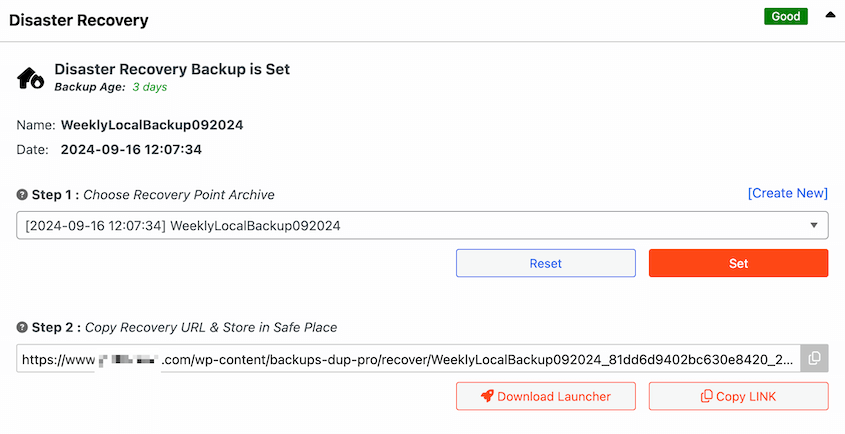
Just in case something goes wrong, feel free to set a recovery point. Choose a recent backup of the site and copy the recovery URL.
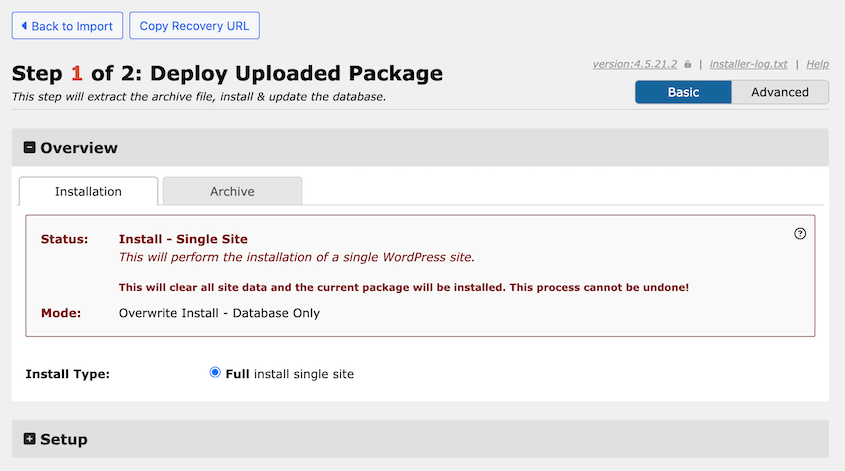
Then, hit Launch Installer.
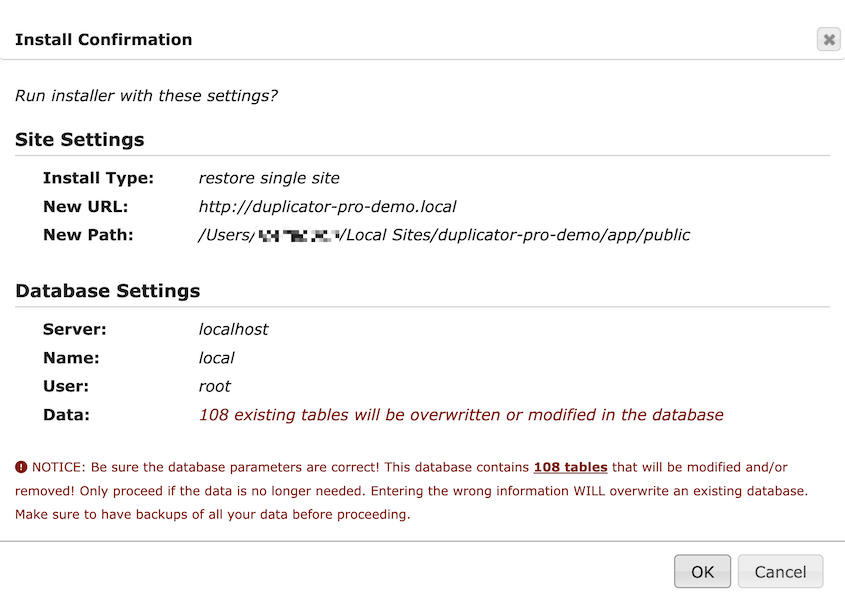
In the installer, you’ll see that only the database will be overwritten.
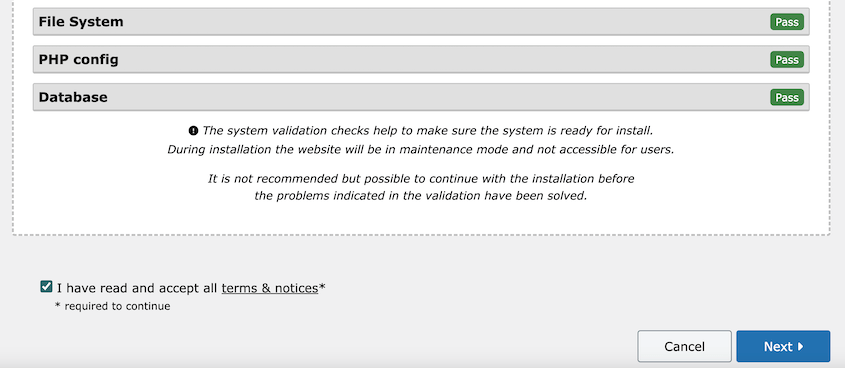
Click on the Validate button. Accept the terms and notices and continue.
In the pop-up window, hit OK.
Now, Duplicator will migrate your database! It will be installed, overwriting the old one.
Method 2. Migrate Your Database Manually
If you don’t want to install another plugin or you like to be more hands-on, you could try manually migrating your database.
However, be aware that this will take more time and technical experience. Plus, there’s always the risk of error.
Step 1: Export Your Database
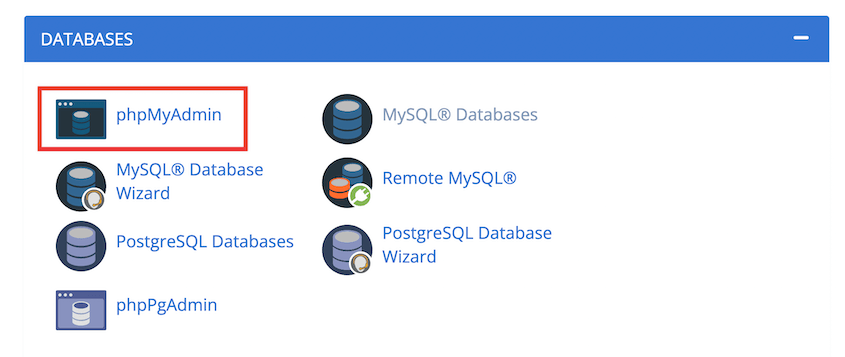
First, you’ll need to export your database with phpMyAdmin. Normally, your WordPress hosting plan will give you access to phpMyAdmin through your hosting account’s control panel (cPanel).
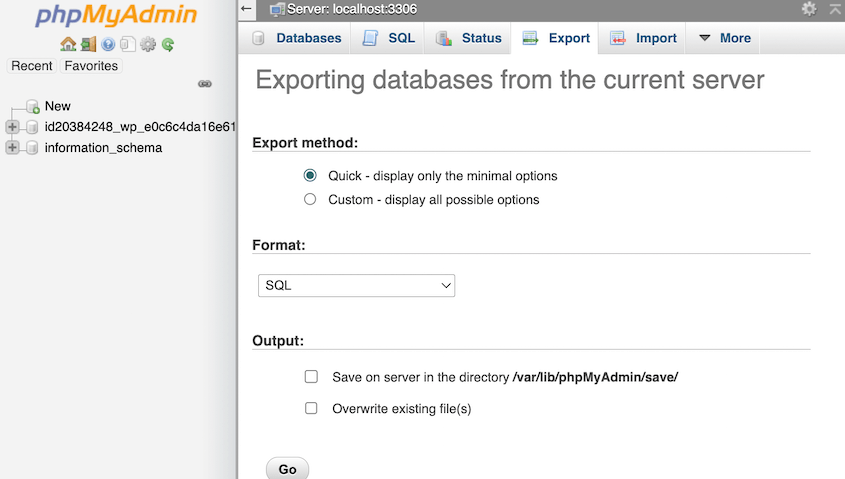
On the left, click on the database you want to export. Then, open the Export tab.
Choose the SQL file format and hit Go.
This will download your site’s database as a SQL file. Next, compress it into a zip file.
If you want to move your entire site, connect to the old site via FTP or file manager. Download all the files in your root directory (public_html). By migrating your website files and folders (like wp-content and wp-admin), you’ll preserve the functionality of your old site.
Step 2: Create a New Database
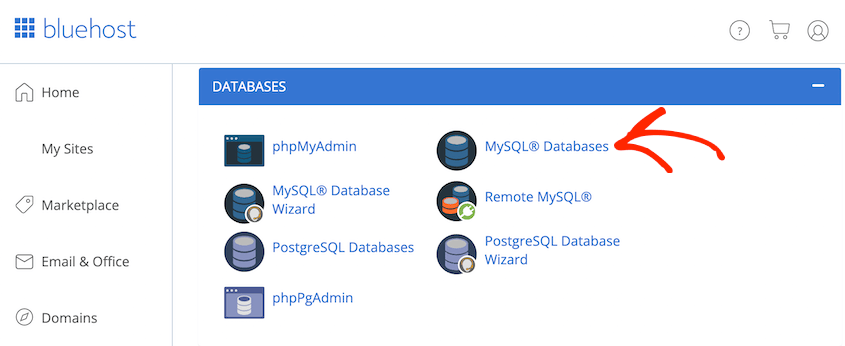
On the new server, you’ll have to create a new database. To do this, open cPanel and find Databases » MySQL Databases.
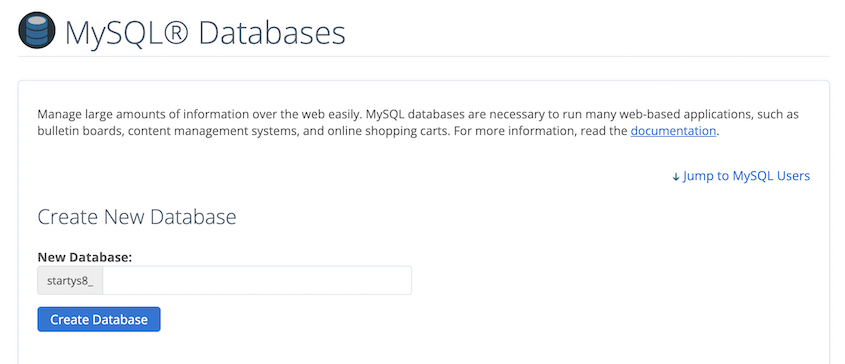
Set up a new database name.
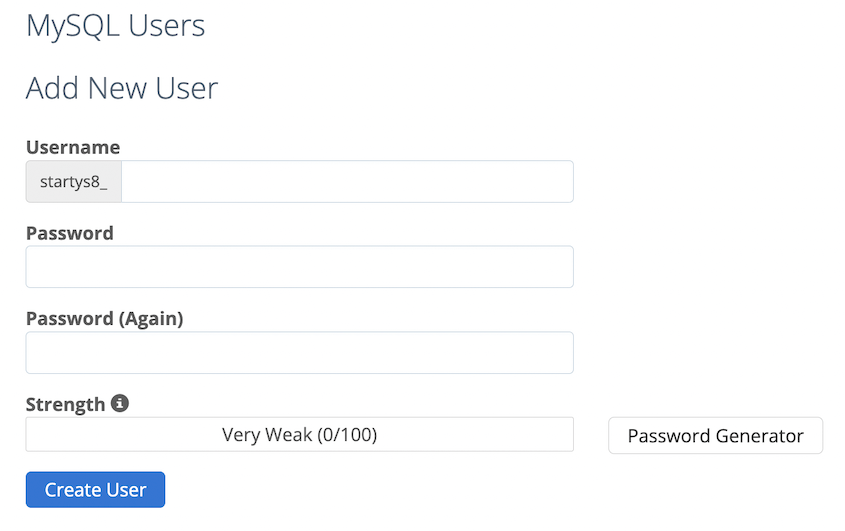
Add a new user by choosing a username and password.
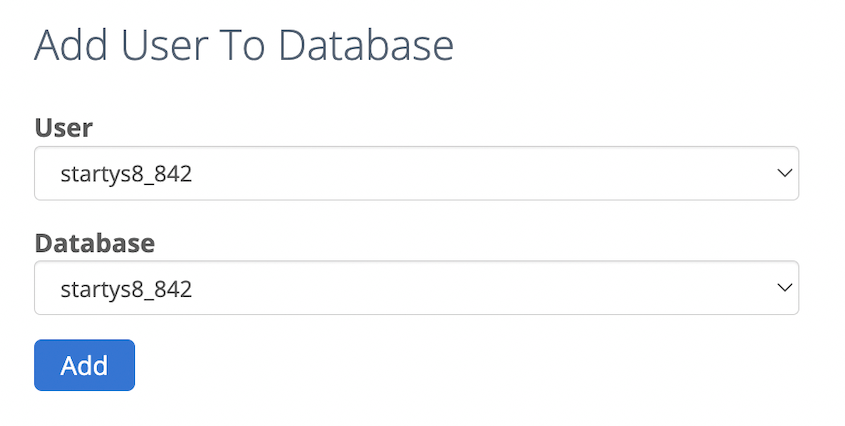
Finally, assign the new user to the new database.
Grant this user all privileges, so that you can control the new database.
Step 3: Import Your Original Database
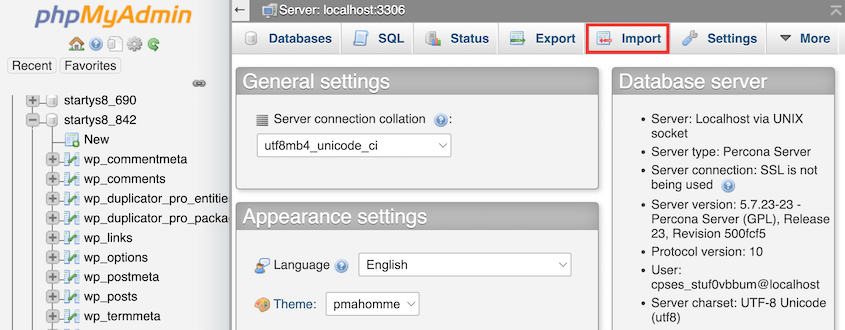
At this point, you can import your database backup into the new database. Open phpMyAdmin again and find the Import tab.
Upload the database backup file you downloaded earlier. Hit Go to import all of your original database tables into the new database.
Troubleshooting Common Database Migration Issues
When migrating your WordPress database, unexpected problems can occasionally pop up. Let’s explore some common troubles and how to fix them.
A frequently encountered issue is the database connection error, often caused by incorrect credentials. Make sure the username, password, host, and database name in your wp-config.php file are accurate.
If you encounter the notorious white screen of death, plugin conflicts might be the culprits. Try deactivating your plugins by renaming the plugins folder temporarily.
For more debugging solutions, read our guide on common WordPress errors and how to fix them!
FAQs About Migrating a WordPress Database
How do I migrate a WordPress database?
To migrate a WordPress database, you can either use a WordPress migration plugin like Duplicator or do it manually. Both methods require you to create a backup of your existing database, which you can then import into a new location. With Duplicator, build a database-only backup and drag and drop it wherever it needs to be migrated to.
How do I transfer my WordPress database to another domain?
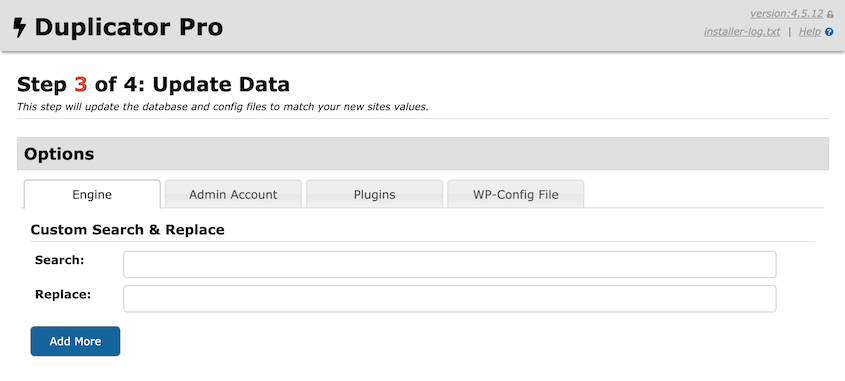
To transfer your WordPress database to another domain name, back up your entire website with Duplicator Pro. Then, import the backup into your new site. Be sure to select the Advanced view so you can easily search for your old domain and replace it with the new site URL.
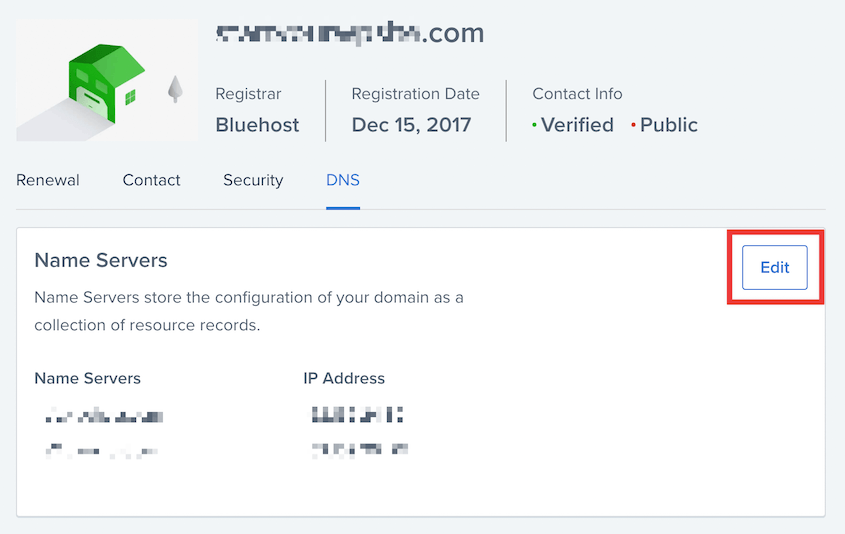
After the move, make sure to point your nameservers and IP address to the new domain in your DNS records.
As a last step, open your wp-config.php file and update the DB_USER, DB_NAME, and DB_PASSWORD values.
These values should reflect the new database and hosting company’s information.
How do I export my WordPress database?
Exporting a WordPress database is a straightforward process. Start installing Duplicator, then download a database-only backup. Alternatively, you could manually export your database with phpMyAdmin.
How do I transfer content from one WordPress site to another?
To transfer content from one WordPress website to another, create a Duplicator backup that includes all the data you want moved. You can easily include or exclude media files, WordPress files, plugins, themes, or databases.
Then, import this backup into the new website. The Duplicator installer will do the rest!
What is the best WordPress migration plugin?
The best WordPress migration plugin is Duplicator Pro. It allows you to effortlessly move to a new web hosting provider, domain name, or server without any downtime. With one-click restores, you can easily roll back any errors along the way.
Alternatives: All-in-One WP Migration and UpdraftPlus are other plugins that allow for free migrations. However, Duplicator supports quick drag-and-drop migrations. Since it has a standalone installer, you won’t even have to worry about setting up a new WordPress installation first!
Your Database Migration Journey Starts Here
I hope this guide has been helpful in showing you how to successfully migrate your WordPress database.
Whether you choose to use a plugin like Duplicator or prefer the manual route, remember that careful preparation and following each step can help ensure a smooth migration.
Do you want to quickly and easily migrate your WordPress database? Download Duplicator Pro to create database backups and drop them anywhere that supports WordPress!
While you’re here, you may also like these WordPress guides:
Joella is a writer with years of experience in WordPress. At Duplicator, she specializes in site maintenance — from basic backups to large-scale migrations. Her ultimate goal is to make sure your WordPress website is safe and ready for growth.


