Website errors, hacks, and hosting issues can strike when you least expect them.
But what if you could tuck your entire WordPress site safely away in DreamHost’s cloud storage?
DreamObjects offers a secure, scalable, and surprisingly affordable cloud storage solution, especially if you’re already using DreamHost as a web host. It’s built to be reliable and scalable as your website grows. So, you’ll never lose a backup when you need one.
In this tutorial, I’ll show you how to back up WordPress to DreamObjects.
Here are the key takeaways:
- DreamObjects provides 99.99999% data durability at just $.025 per GB monthly
- The Duplicator Pro plugin automates the entire backup process to cloud storage services including DreamObjects
- Six simple steps to back up WordPress to DreamObjects: install Duplicator, create a bucket, copy access keys, connect DreamObjects to Duplicator, create a backup, and schedule
- Automatic restoration wizard makes recovery effortless when disasters strike
Table of Contents
What Is DreamObjects?
DreamObjects is a scalable and secure object storage service offered by DreamHost. It’s based on open-source technology that’s fully compatible with AWS S3.
This cloud storage system is perfect for storing backup files or even building web applications. With DreamObjects, you can store massive amounts of data without worrying about high costs or limited space.
DreamObjects is an excellent location to save your WordPress backups. You’ll get peace of mind knowing your precious website data is securely stored away, ready to retrieve whenever you need it.
Why Back Up Your WordPress Site to DreamObjects?
DreamObjects is an object-based storage service, meaning it has nearly unlimited capacity.
Object storage works by storing unstructured data as objects in buckets. Since it can hold large amounts of data, DreamObjects is highly scalable.
With DreamObjects, you’ll get 99.99999% data durability. This significantly reduces your chances of data loss, so your website stays secure.
DreamObjects costs $.025 per GB of monthly storage. However, it gives you free API requests. You can also reduce the price by opting for a pre-paid plan.
Want to explore different cloud storage options? Here are the best cloud storage services for WordPress backups!
How to Back Up Your WordPress Site to DreamObjects
I’ll walk you through the process of automating DreamObjects backups for your WordPress site. Here’s a quick overview of the process:
- Step 1: Install a Backup Plugin Compatible with DreamObjects: Set up Duplicator Pro for automated cloud backups
- Step 2: Create a DreamObjects Bucket: Set up a new bucket in DreamHost’s cloud storage
- Step 3: Copy Your Access Keys: Gather authentication credentials for your DreamObjects bucket
- Step 4: Connect DreamObjects to Duplicator: Create a new storage location in Duplicator and add your authorization keys
- Step 5: Create a DreamObjects Backup: Generate your first full-site backup to the cloud
- Step 6: Set Up Automatic DreamObjects Backups: Schedule regular backups to run without manual intervention
Step 1: Install a Backup Plugin Compatible with DreamObjects
If you want to start sending WordPress backups to DreamHost’s object storage, it’s a good idea to find an automation tool for the task. This way, you don’t waste time manually downloading backups and uploading them to DreamObjects.
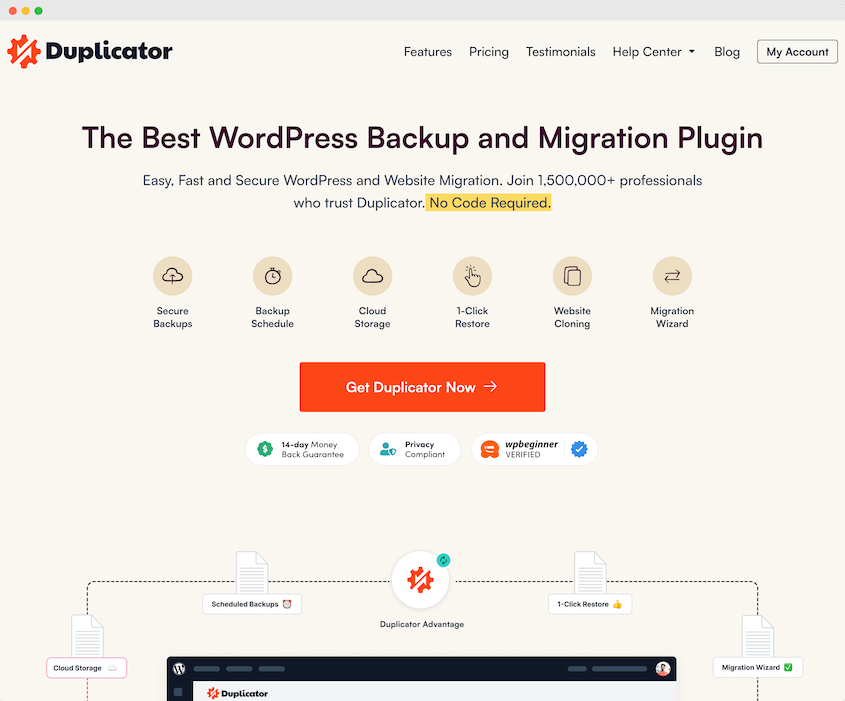
A WordPress backup plugin offers the easiest way to send backups to cloud storage. With Duplicator Pro, you can effortlessly schedule DreamObjects backups!
Duplicator doesn’t limit your options to just DreamObjects. It supports all of these cloud storage locations:
Plus, you can use Duplicator for many other WordPress management tasks. It makes it easy to migrate your entire site to a new host. You’ll be able to quickly set up staging sites, clone your current website, boost your security, and much more!
To get started, choose a subscription for Duplicator Pro. There is a free version, but you’ll need to upgrade to use cloud storage and automated backup schedules.
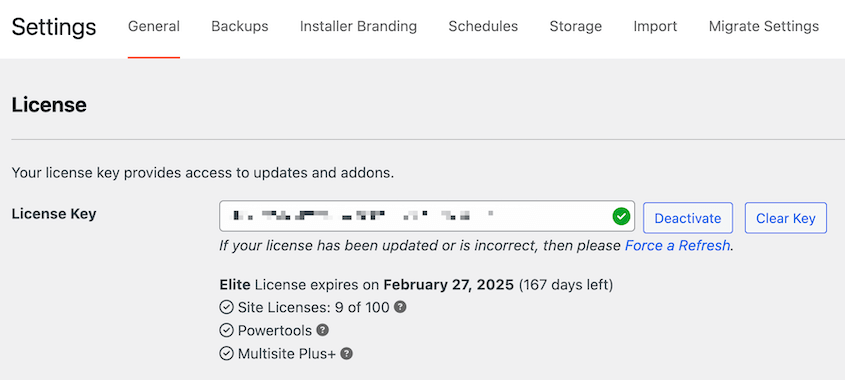
Then, download the plugin’s zip file and copy your unique license key. Open your WordPress dashboard and install Duplicator.
Finally, go to the settings of Duplicator Pro. In the General tab, paste your license key.
You now have everything you need to create DreamObjects backups!
Step 2: Create a DreamObjects Bucket
Once you set up Duplicator, it’s time to create your DreamObjects account. You can sign up for a paid account or try it free for 60 days.
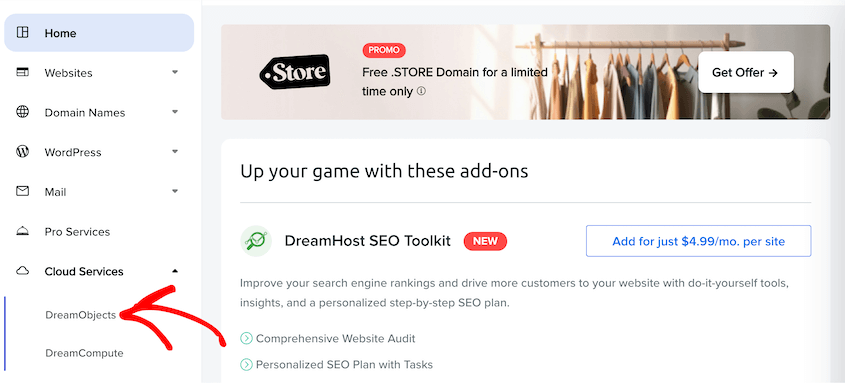
In your new DreamHost panel, go to Cloud Services » DreamObjects.
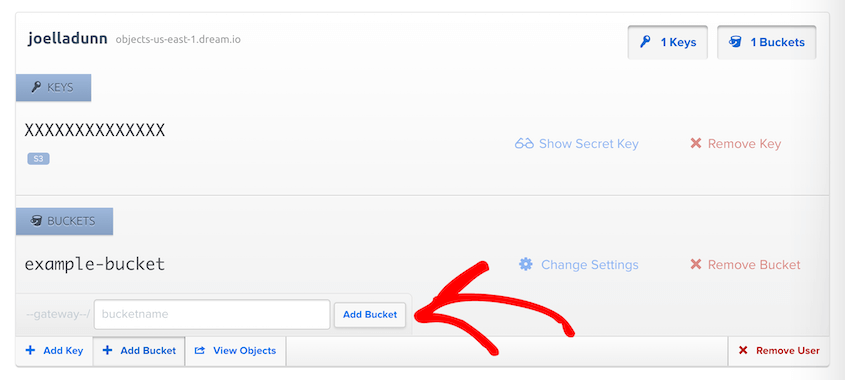
During signup, DreamHost will automatically create a new user for the DreamObjects account. Under your user account, click on Add Bucket.
Give the bucket a name and hit Add Bucket again.
Step 3: Copy Your Access Keys
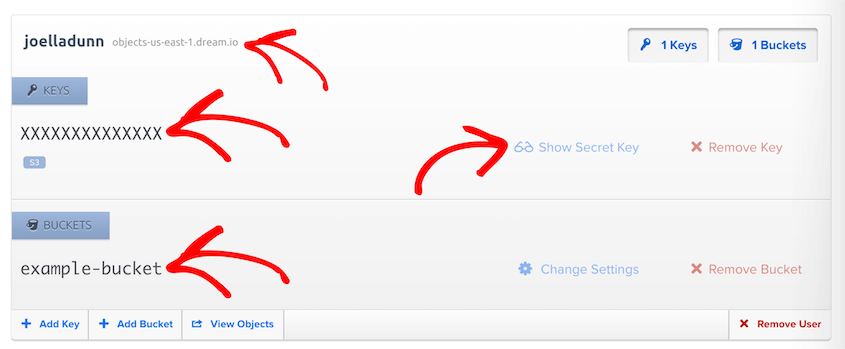
On the same page, you’ll see your access keys for the bucket.
Here’s everything you need to copy and save for the next step:
- Access key
- Secret access key
- Endpoint
- Bucket name
Step 4: Connect DreamObjects to Duplicator
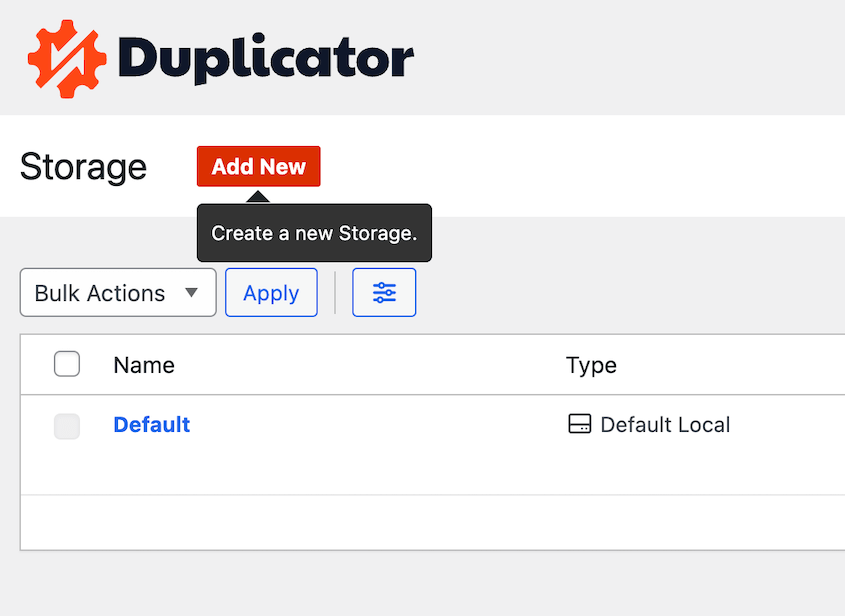
Now it’s time to start setting up DreamHost backups in Duplicator. But first, you’ll need to configure DreamObjects as a new storage location. To do this, navigate to Duplicator Pro » Storage » Add New.
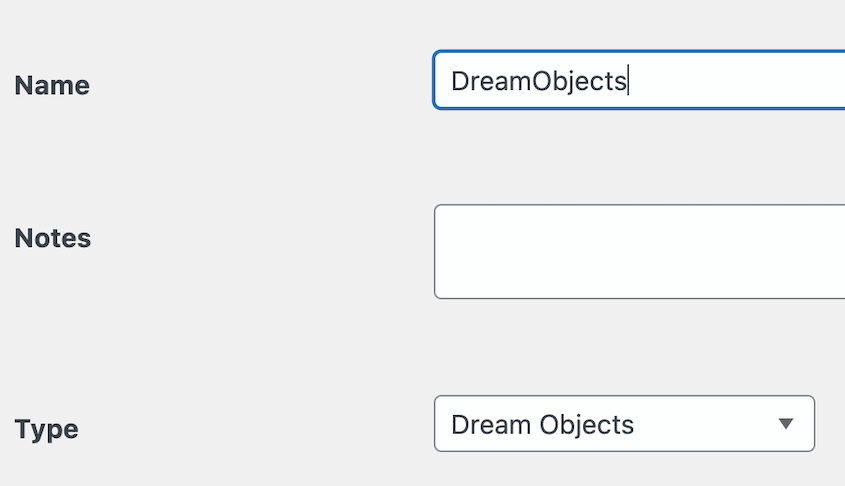
Name the new storage location and choose DreamObjects as the Type.
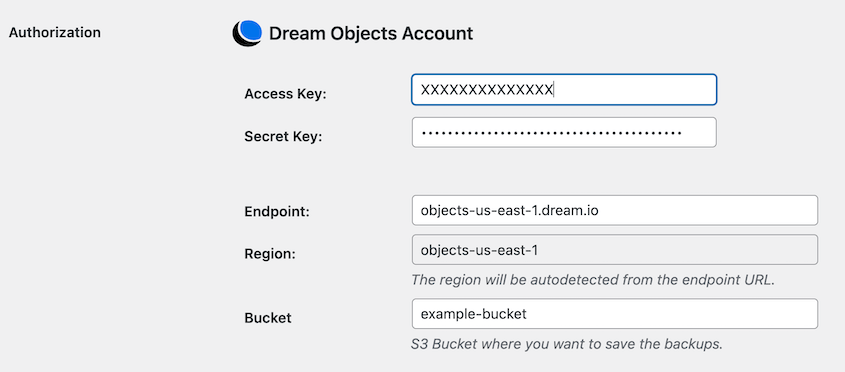
Under Authorization, paste all of the information you copied earlier.
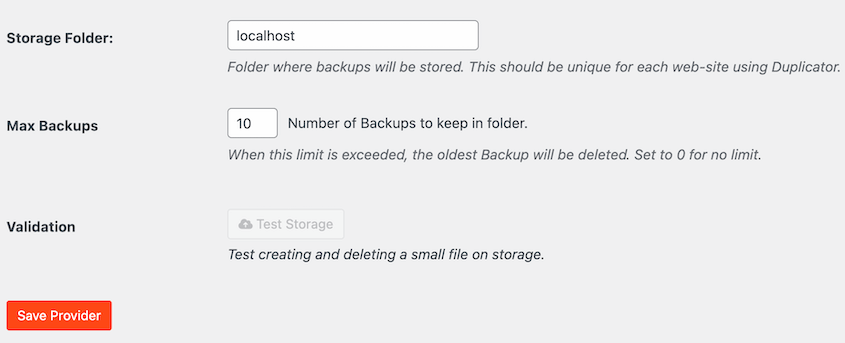
You can customize the storage folder name where Duplicator will store the backups of your site. Also consider adjusting the Max Backups value, which is the number of backups that will be kept in the bucket.
Save the new storage location.
To see if it is working correctly, hit Test Storage. If Duplicator can store and retrieve a small file on DreamObjects, your backup location is good to go!
Step 5: Create a DreamObjects Backup
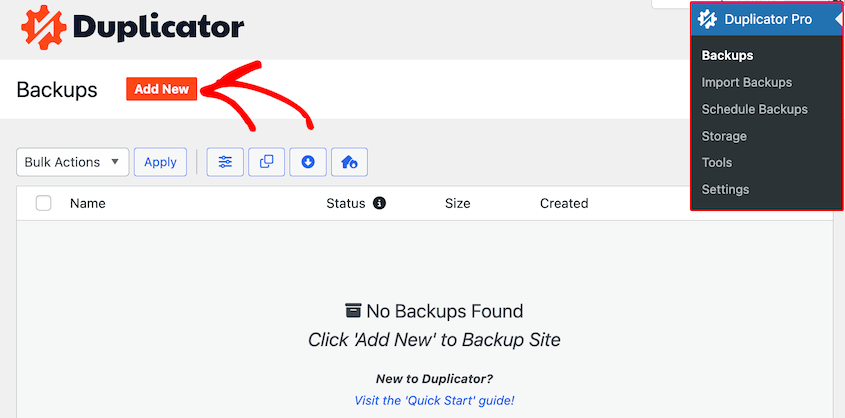
At this point, you can create your first DreamObjects backup! Go to Duplicator Pro » Backups » Add New.
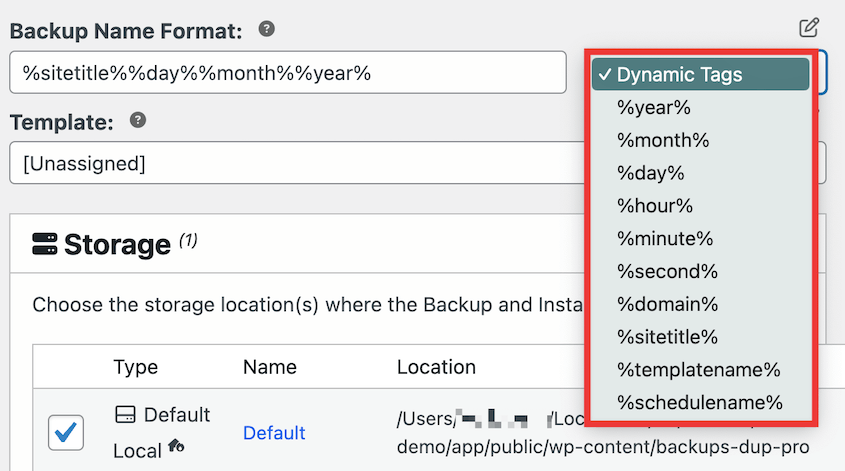
Duplicator will give you a custom backup name, but you can change this if you want. Use dynamic tags so you can restore the right backup if you need to.
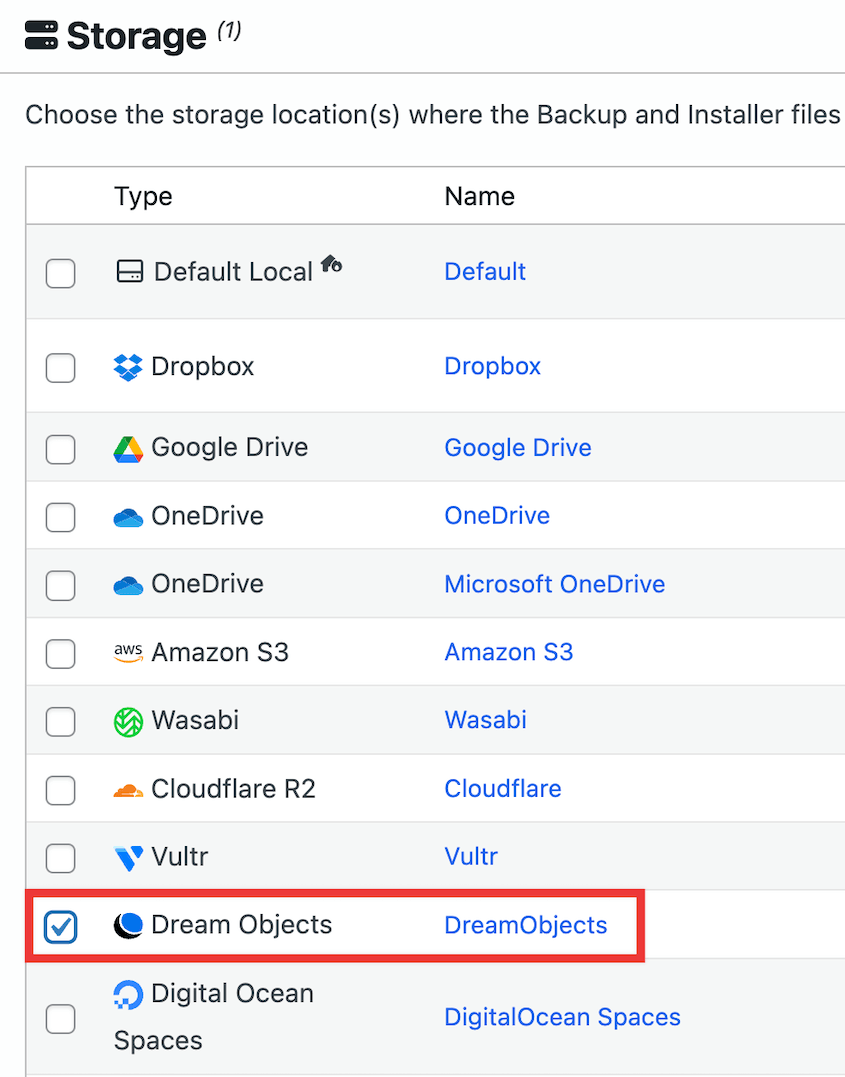
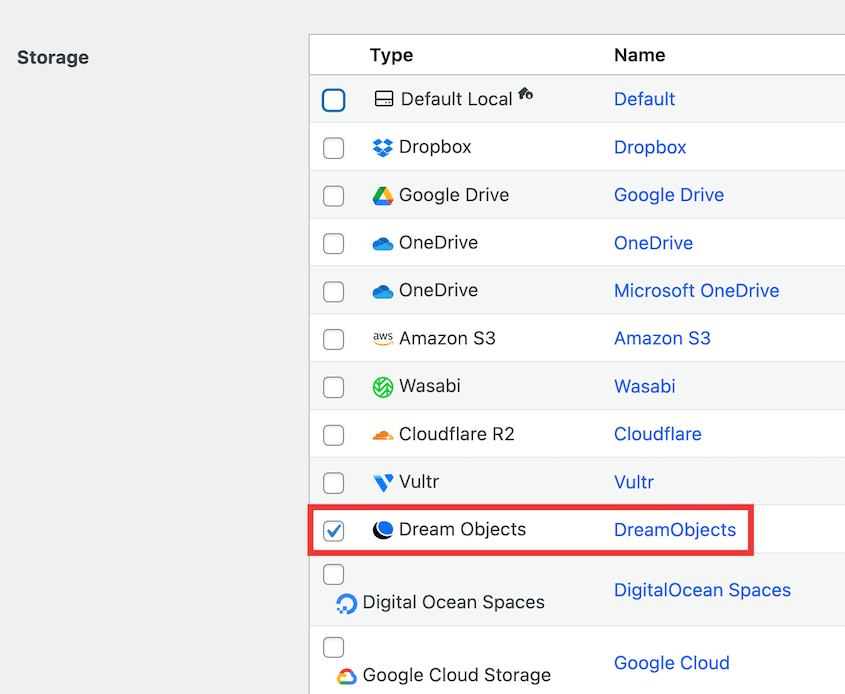
Under Storage, choose DreamObjects.
Expand the Backup section. If you want your entire site backed up, select the Full Site preset.
However, you can also create custom backups by deselecting your database, core WordPress website files, plugins, themes, or media files.
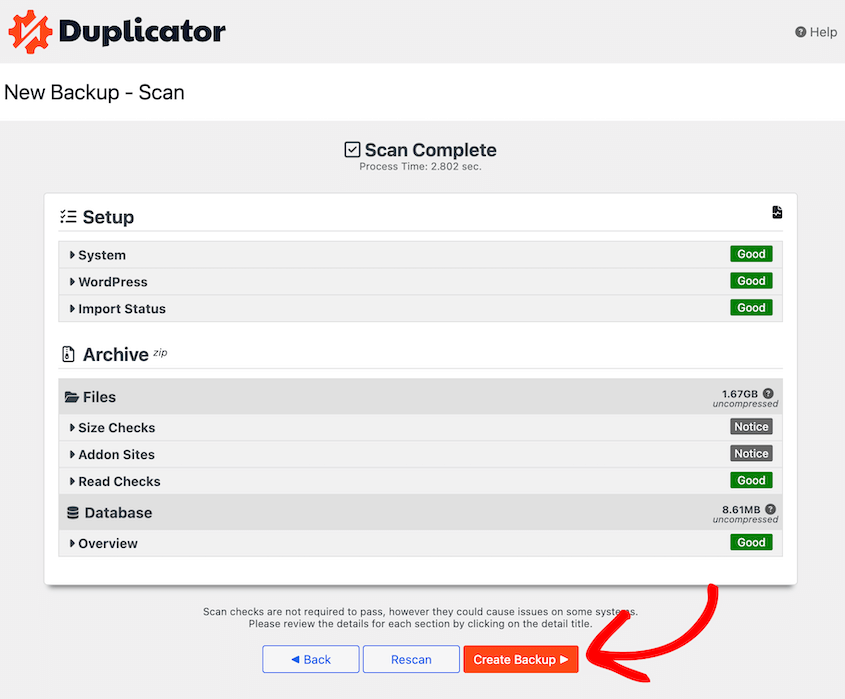
Hit Next. Duplicator will give you a full website scan so you can fix any issues before continuing.
Finally, click on the Create Backup button. Now, your site will be backed up and automatically transferred to DreamObjects!
Step 6: Set Up Automatic DreamObjects Backups
As a website owner, you’ll need to frequently back up your site to avoid data loss. To make this process easier, consider setting up automatic backups.
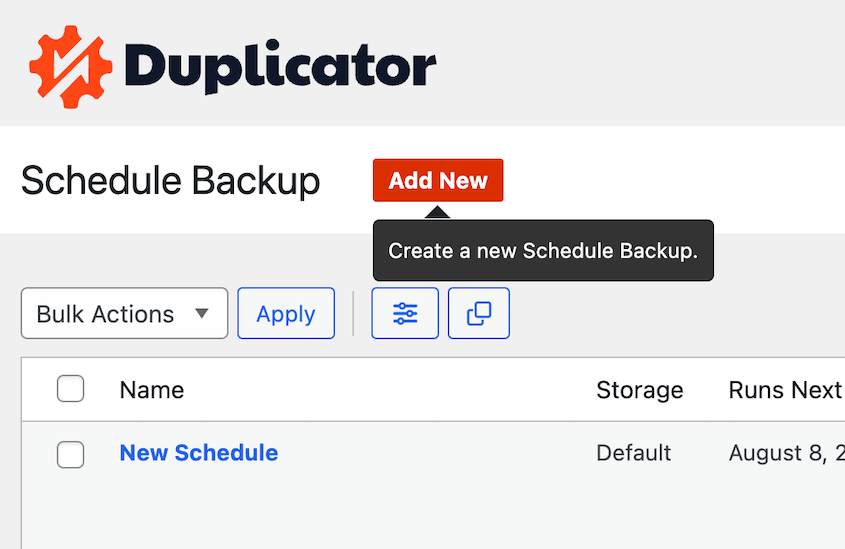
With Duplicator, find Schedules » Add New.
Name the new automatic backup schedule. Feel free to create a new backup template for custom backups.
If you want to store backups on DreamObjects, select it as your storage location.
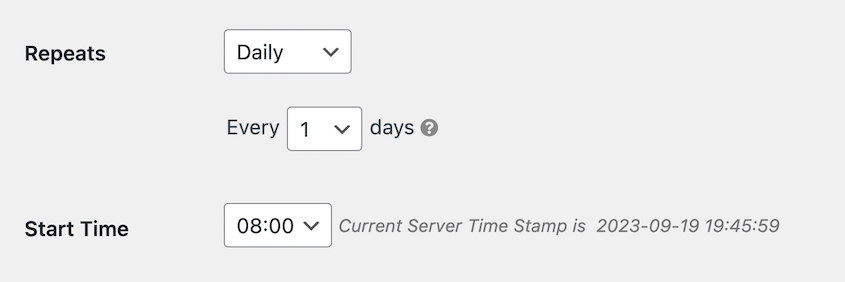
Next, you can choose how frequently your data will be backed up. Here are the different options:
- Hourly backups
- Daily backups
- Weekly backups
- Monthly backups
For each of these, you’ll be able to customize exactly when the backup runs.
After this, enable the schedule.
How to Restore Your DreamObjects Backup
If your site ever experiences a critical error or hacking attempt, the easiest way to get back online is to restore a clean backup. This will roll back your site to its previous functionality.
Go to your Backups page and find an error-free DreamObjects backup. Click on the Restore button next to it.
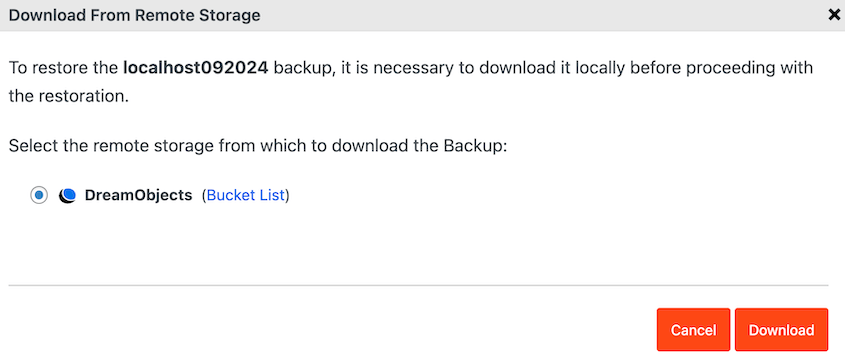
Your data is in cloud storage, so it’ll need to be downloaded. But Duplicator does this for you!
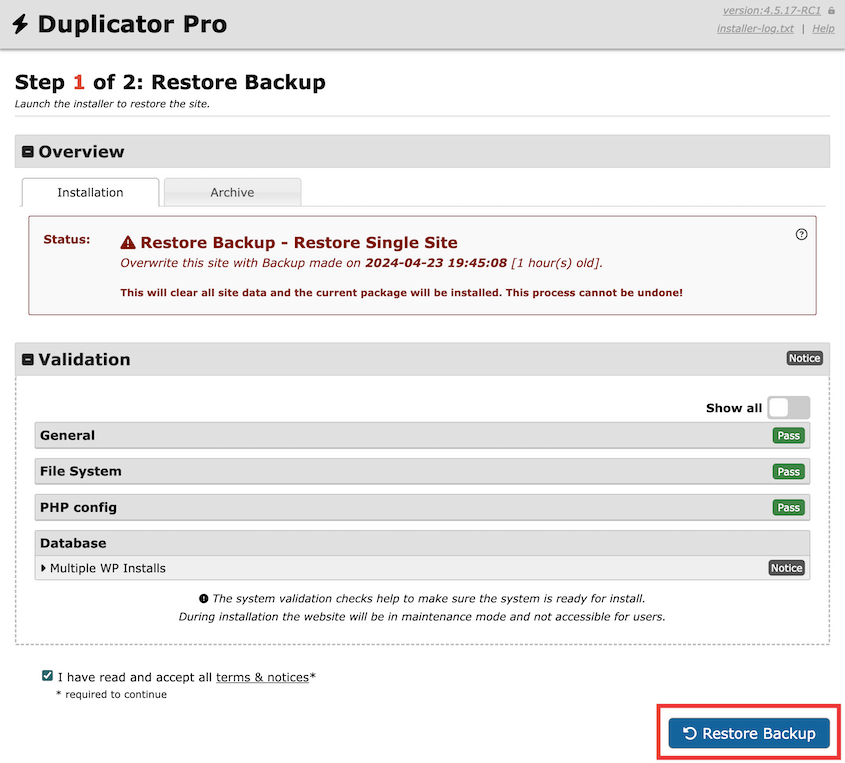
After the download, the restoration wizard will automatically pop up. At the bottom, hit Restore Backup.
To access your newly restored site, just log back in.
Other Ways to Back Up Your WordPress Site With DreamHost
If your website runs on DreamHost, your WordPress hosting provider has a built-in backup feature. Many other web hosts provide one-click backups as well.
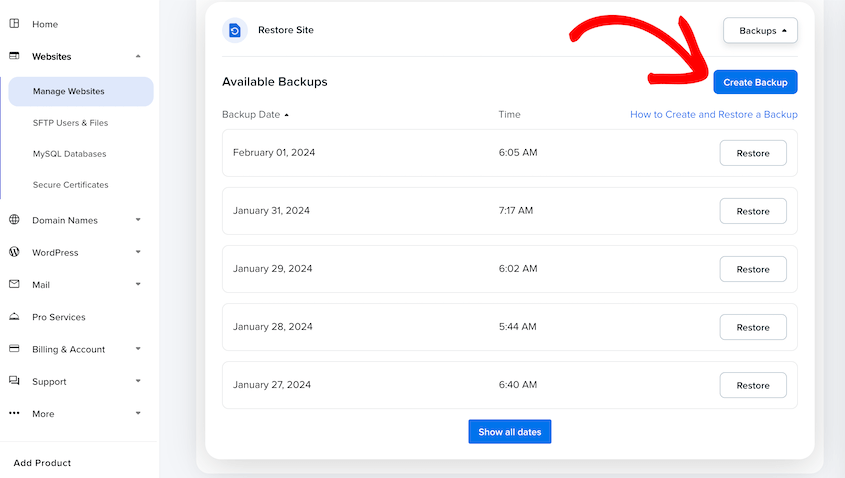
For DreamPress users, you can open the control panel for your managed WordPress hosting plan. Find the Manage Websites tab. In the Restore Site section, you’ll see a button to create on-demand backups.
However, DreamHost will automatically back up your website once a day.
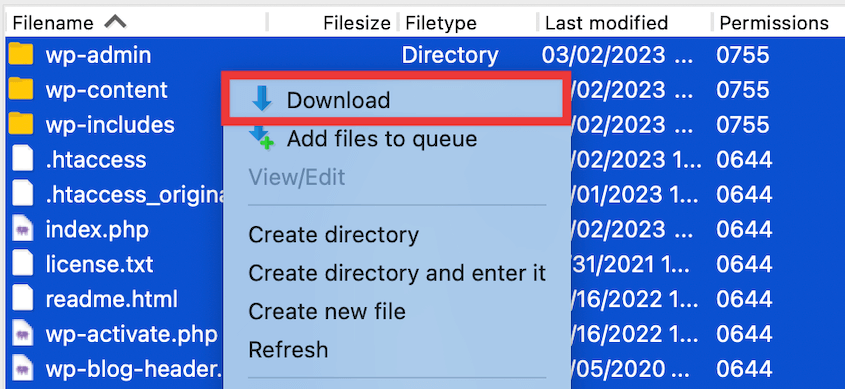
Otherwise, you can always manually back up your WordPress site. From your DreamHost hosting account, use cPanel to download your site files.
You can also connect to your web server using an FTP client like FileZilla. Similarly, download your files.
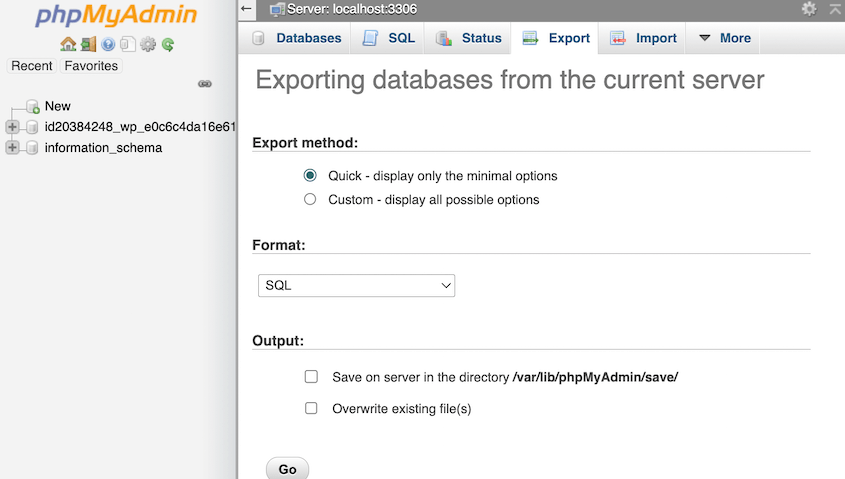
Then, open phpMyAdmin and export your entire MySQL database as a SQL file.
If you’re looking for other backup options, some popular backup plugins include UpdraftPlus, Jetpack, and BlogVault.
FAQs About DreamHost WordPress Backups
How do you use DreamObjects?
You can use DreamObjects to safely store your WordPress backups off-site. After installing Duplicator Pro and connecting DreamObjects as a storage location, create a new backup. In the Storage settings, select DreamObjects.
Does DreamHost back up WordPress?
Yes, every DreamHost plan automatically backs up WordPress daily. You can also create on-demand backups whenever you’d like. You’ll get a log of previous backups and you can restore any of these versions with one click.
Does DreamHost have unlimited storage?
DreamHost only offers unlimited storage on specific plans. This applies to the Shared Unlimited plan, which also has unlimited bandwidth.
How do I back up my entire WordPress site?
You can back up your entire WordPress site using Duplicator Pro, the best WordPress backup plugin. Simply create a backup and make sure all your site components are included. Then, download the backup or send it to cloud storage.
Conclusion
By now, you’ve created a DreamHost WordPress backup!
While you’re here, check out the following articles:
Ready to Start Saving Your Data in the Cloud?
Upgrade to Duplicator Pro to access 12 different cloud storage locations!
Get Duplicator Pro Now
Joella is a writer with years of experience in WordPress. At Duplicator, she specializes in site maintenance — from basic backups to large-scale migrations. Her ultimate goal is to make sure your WordPress website is safe and ready for growth.


