There’s a dread that settles in your stomach when you realize your WordPress site is down.
I remember that day vividly. The initial hours were a blur of frantic Googling, desperate forum posts, and a growing sense of helplessness.
Where did everything go? Could it be recovered? The technical jargon thrown around – SQL, phpMyAdmin – felt like another language.
It was in that moment of crisis that I began my journey into WordPress database restoration.
If you’ve ever felt that icy grip of doom, or if you’re just wisely preparing for the unthinkable, you’re in the right place. Let’s walk through the steps to restore your WordPress database.
Here are the key takeaways:
- Common restoration triggers include accidental deletions, security breaches, plugin conflicts, and development testing
- Regular backups are essential – restoration is nearly impossible without existing backups
- Database-only backups are faster to create and restore than full site backups
- Three restoration methods available: Plugin-based (easiest), phpMyAdmin (manual), and cPanel (hosting-dependent)
- Backup plugins like Duplicator offer the most user-friendly restoration process, even when sites are offline
- Manual restoration requires technical knowledge of phpMyAdmin and database management
Table of Contents
Why Restore Your WordPress Database?
In a perfect world, nothing bad would happen to your website. However, having a good backup plan is very important to secure your site.
By backing up your database, you’ll have a functional version to fall back on after errors, hacks, and other issues.
Let’s explore some common scenarios where you’ll need to restore your WordPress database.
It’s surprisingly easy to delete important posts, pages, or even entire sections of your website unintentionally. Having a database backup allows you to recover this lost content quickly.
- Website Hacks and Security Breaches
You could unexpectedly experience a website hack or security breach. In this case, you’ll need to restore your database to a point before the compromise occurred. This removes any malicious code or content.
- Plugin or Theme Conflicts
WordPress plugins and themes are essential for adding new functionality and style to your website. However, conflicts between them can cause critical errors. Restoring your database can help you revert to a stable state before the conflict happened.
When working on website improvements or new features, it’s common to create a staging environment. Restoring your database to a previous state can be useful when you want to reset your staging site or replicate your live site for testing purposes.
How to Restore a WordPress Database
Let me walk you through three different methods, so you can restore your database no matter your skill level!
- Method 1: Backup Plugin (Duplicator Pro): User-friendly backup automation with one-click restoration; disaster recovery works even when site is offline
- Method 2: phpMyAdmin: Manual database import/export requiring technical knowledge and file management skills
- Method 3: cPanel: Hosting control panel method with built-in backup and restore functionality
Method 1: Restore Your Database with a Backup Plugin
WordPress backup plugins are powerful tools that automate the backup and restoration process. Anyone can use backup plugins, but they’re especially useful for beginners.
Here’s how to restore your database with a backup plugin:
- Install Duplicator Pro: Purchase subscription, download plugin, activate license key in WordPress dashboard
- Create Database Backup: Add a new backup, select Database Only backup preset, and choose a storage location
- Restore When Needed: Access backup log, click Restore button, follow recovery wizard prompts to completion
Step 1: Install Duplicator Pro
Duplicator Pro is the best WordPress backup plugin for restorations. Unlike other plugins, it can restore your site even when it’s fully offline!
To begin, purchase a subscription for Duplicator Pro. The free version is great for basic backups and restores, but Duplicator Pro gives you extra disaster recovery features, drag-and-drop migrations, and even cloud storage.
Download the plugin and save a copy of your license key.
In your WordPress dashboard, install and activate Duplicator.
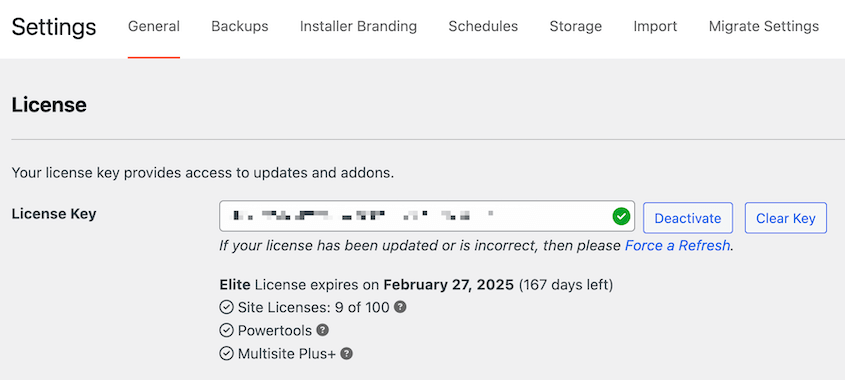
Before you can start backing up and restoring your website, you’ll need to activate your license key. Go to Duplicator Pro » Settings » General.
Here, paste your license key and hit Activate.
Step 2: Back Up Your Database
Before restoring your WordPress database, it’s important to have a recent backup in place. Fortunately, Duplicator Pro simplifies this process.
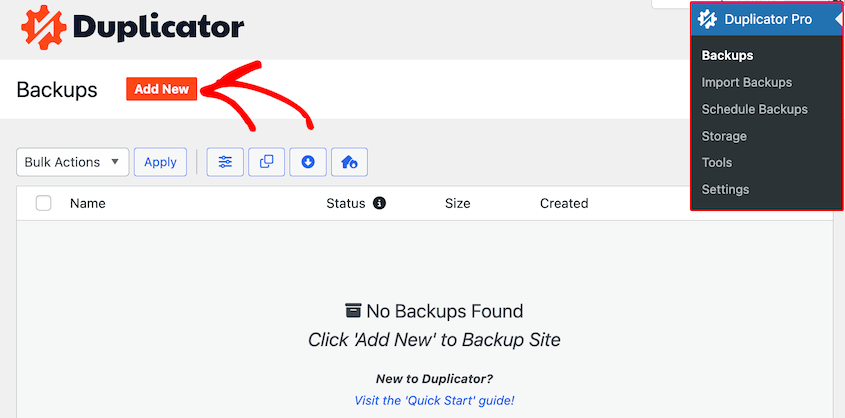
To back up your database, open the Backups page and click on Add New.
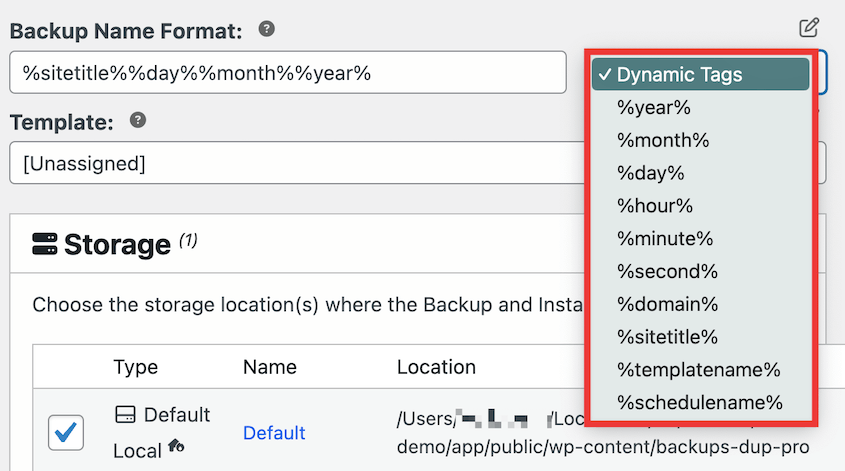
To easily find the backup later, customize the name with dynamic tags.
Then, choose a storage location. Duplicator supports all of the following options:
For this tutorial, we’ll save the WordPress database backup to the local server.
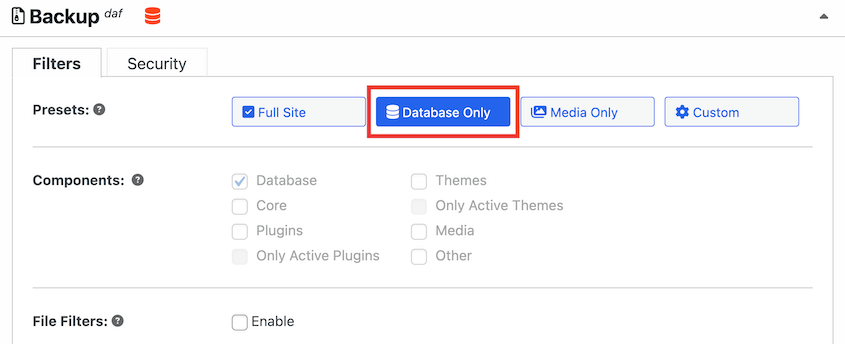
In the Backup section, click on Database Only. This will exclude everything on your site except the database. If you need to, you can also filter out any unnecessary database tables.
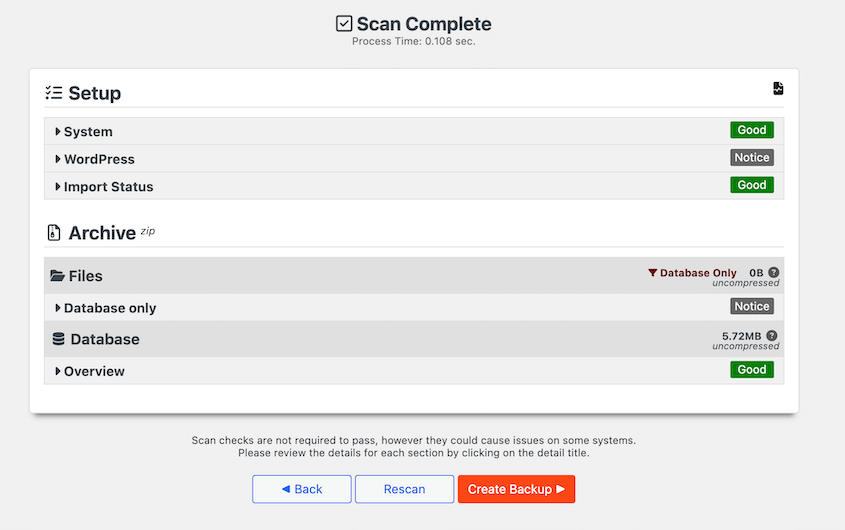
Continue to the next page. Here, you’ll see that Duplicator scanned your website. Since you’ve only included the database, it won’t scan your WordPress files.
Lastly, hit Create Backup.
To save time, consider setting up automatic backups for your database! This way, you can easily restore website backups whenever you need to.
Step 3: Restore Your WordPress Database
Whenever an error happens, you can quickly restore this database backup.
Go to your Duplicator backup log and look for the most recent database backup. It’ll have a database icon, making it easy to find.
Then, hit the Restore button.
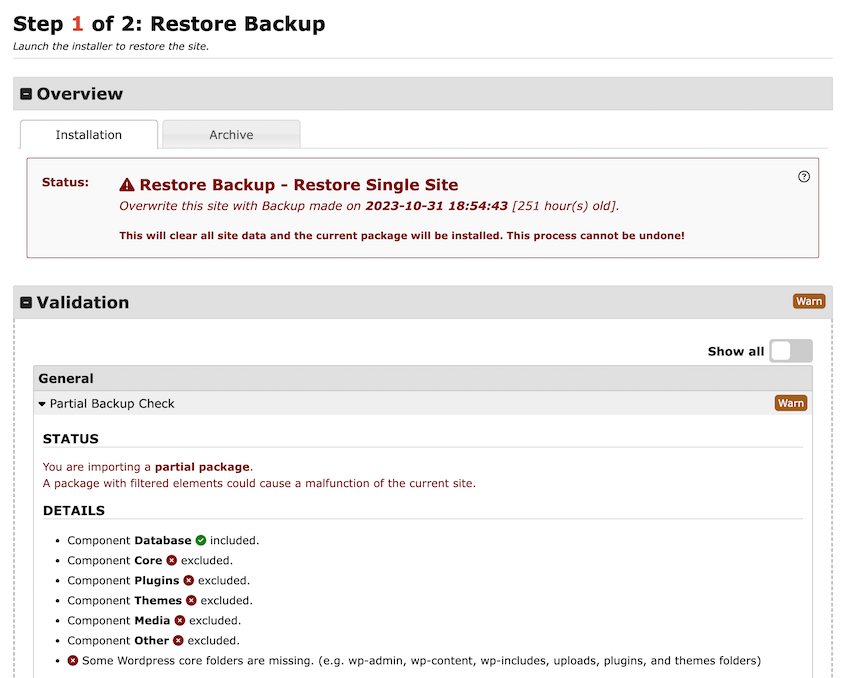
This will open the recovery wizard in a pop-up window. You’ll see that only your database will be restored.
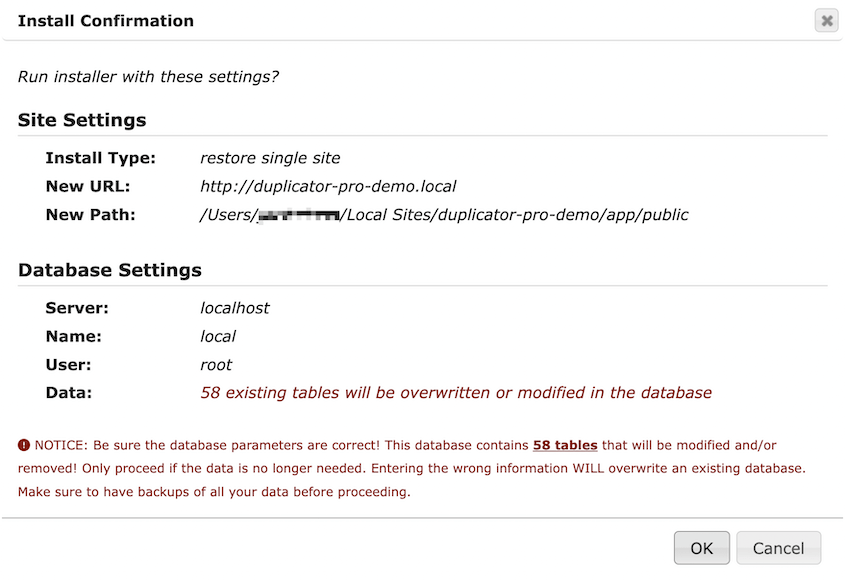
Accept the terms and conditions and click Restore Backup. Finally, confirm the installation.
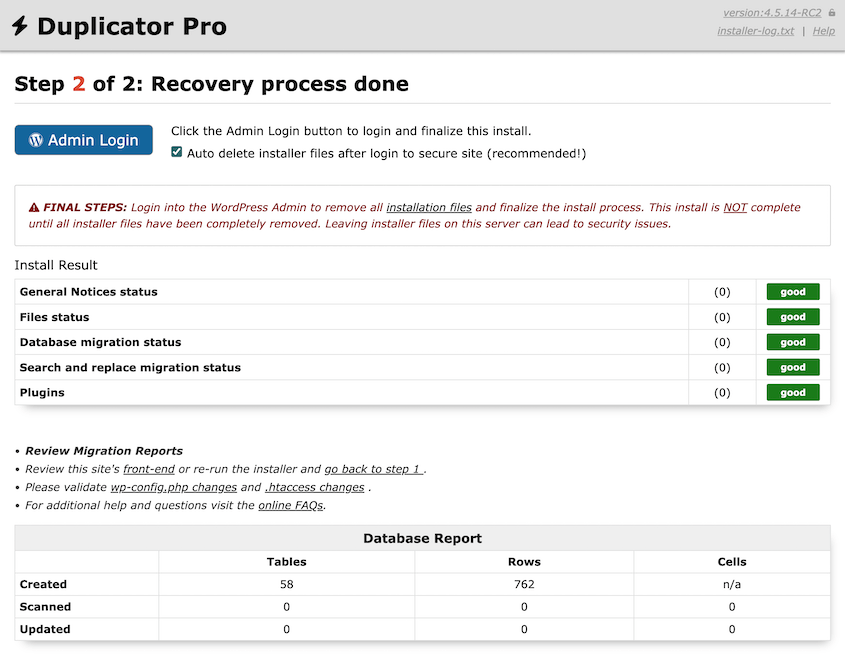
Duplicator will then restore your database. After you log back in, you’ll see that your site looks and functions exactly the way it did before the error!
If an error locks you out of your WordPress admin dashboard, download both the backup zip file and the installer file.
Then, use an FTP client like FileZilla to upload your database backup to your public_html folder. Visit https://your-domain/installer.php in a web browser to start restoring the site backup.
Method 2: Restore Your Database with phpMyAdmin
If you don’t want to use a backup plugin, you can create a manual backup. This involves downloading your database with phpMyAdmin.
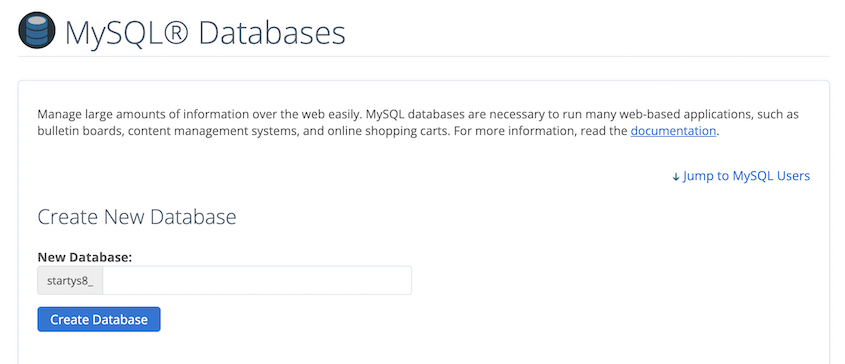
When you need to restore your database, start by creating a new one. Bluehost users can find the MySQL Databases settings, enter a new database name, and hit Create.
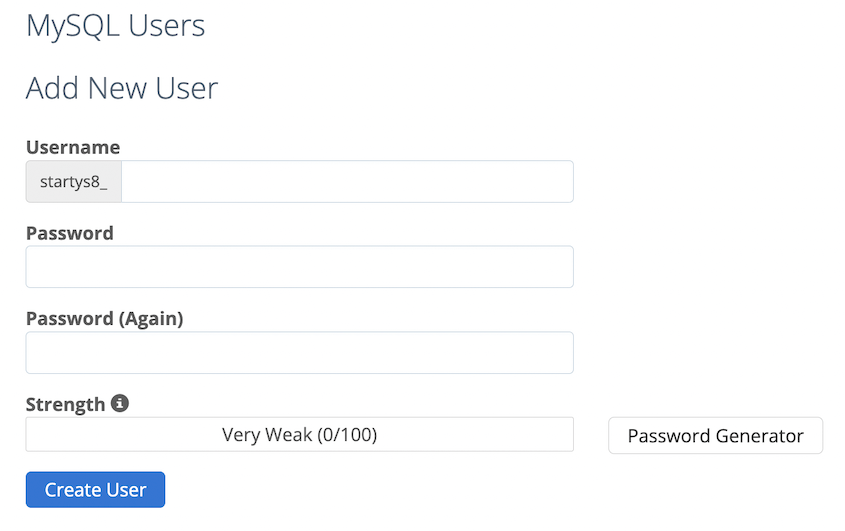
Then, create a new user by adding a username and password.
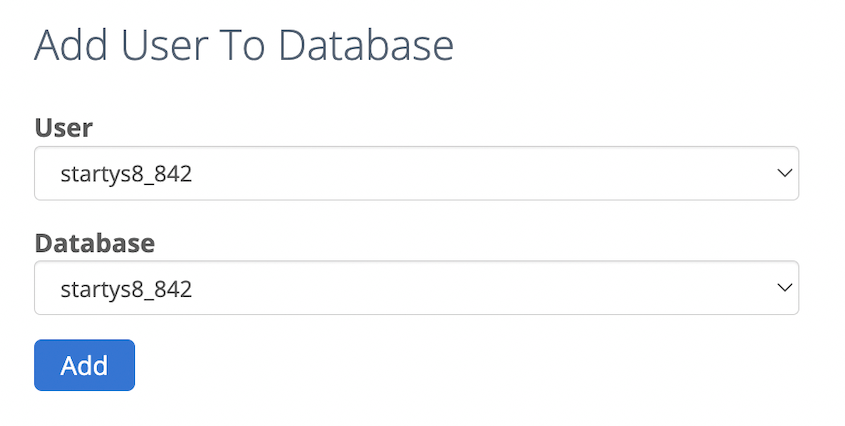
Finally, you can add the user to the new database. Feel free to assign it all privileges.
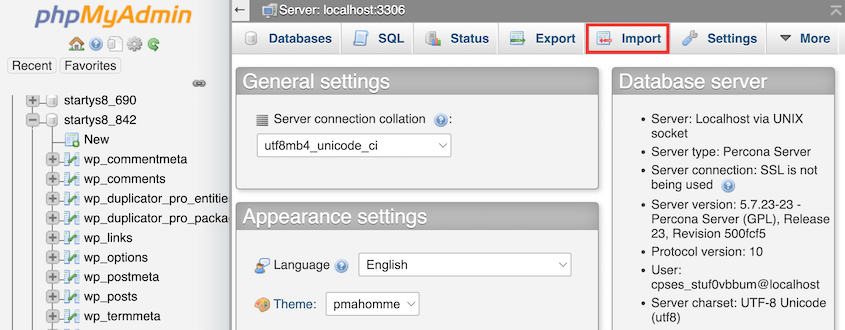
Next, log into phpMyAdmin. Click on Databases and select the new database. Then, find the Import tab.
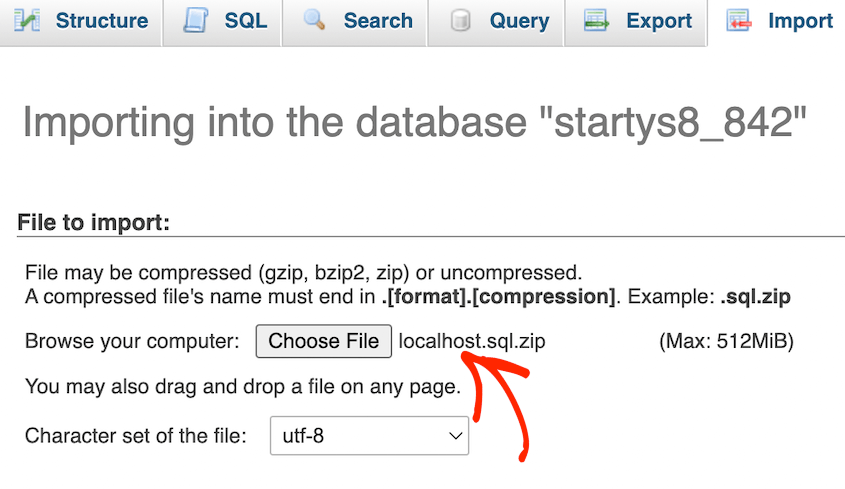
Click Choose File and upload your database backup file, which should be a SQL file. Select SQL in the Format dropdown menu and hit the Go button.
This will manually restore your database!
Quick summary of how to restore your database with phpMyAdmin:
- Create New Database: Access hosting MySQL settings, create new database name, add user with privileges
- Access phpMyAdmin: Log into database management interface, select new database, navigate to Import tab
- Upload Backup File: Choose SQL backup file, select SQL format, execute import to restore database content
Method 3: Restore Your Database with cPanel
Your web hosting account may allow you to access and edit your website with cPanel, a file manager. This also includes an easy way to restore a WordPress database.
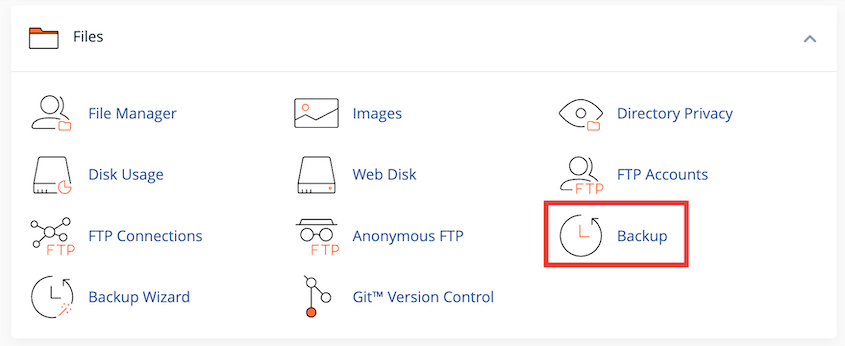
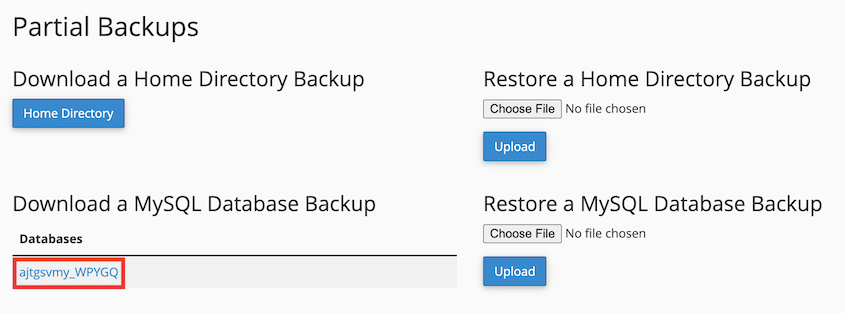
First, you’ll have to make sure your database is backed up. Open your cPanel control panel and hit Backup.
Under Download a MySQL Database Backup, click on the database you want to back up.
Once you have this file, you can upload it into the Restore a MySQL Database Backup section. After this, your database will be back up and running.
Quick summary of how to restore your database with cPanel:
- Create Database Backup: Access cPanel control panel, navigate to Backup section, download MySQL database file
- Upload Backup File: Use the Restore a MySQL Database Backup section to upload previously downloaded backup
- Complete Restoration: System processes uploaded file and restores database to previous state automatically
FAQs About Restoring a WordPress Database
How do I restore my WordPress database?
To restore your WordPress database, you can import a database backup created with a plugin like Duplicator Pro. Duplicator has simple restore options that walk you through the process of reinstalling your database. Alternatively, you can manually import a database backup into phpMyAdmin or cPanel.
How do I recover a deleted database in WordPress?
If your database has been deleted, recovery can be challenging. The best approach is to have regular backups in place using a backup plugin like Duplicator. Then, you can restore your website by importing a recent backup.
How do I restore my WordPress site without a backup?
Restoring a WordPress site without a backup is extremely difficult. Having regular backups is essential for recovery. If you don’t have a backup, consider consulting your WordPress hosting provider for possible troubleshooting solutions. You can also try to recover your site’s code with Google’s cache or the Wayback Machine.
Can I restore WordPress without a database?
A WordPress website relies heavily on its database for content and functionality. Without a database, restoring your WordPress site is near impossible. This makes it so important to regularly back up your database.
If your WordPress files are corrupted but you have a database backup, start by creating a new database. Then, upload your database backup using phpMyAdmin.
Next, go to WordPress.org and download a fresh copy of the WordPress installation files. Use an FTP client or a file manager to upload these files to your server.
Visit domain-name.com/wp-admin. You’ll have to enter your new database details.
After this, a message will say that you already have WordPress installed. You can log in with your original login credentials.
Now, perform the following actions to restore your site;
As you can see, this is not the easiest way to restore your website. To make sure your content is always secure and recoverable, make sure you’re regularly creating full backups of your WordPress site.
Conclusion
Keeping your WordPress database secure is not as daunting as it seems. By following these steps, you can bring your site back to life even if it seems like everything’s lost.
I hope this article helps you feel prepared and confident in preserving your digital data. Always keep those backups up-to-date and accessible — they might just be your saving grace.
While you’re here, you may also like these WordPress tutorials and plugin reviews:
Do you want to take one less maintenance task off your hands? Download Duplicator Pro to automate database backups and quickly restore them when you need to!
Joella is a writer with years of experience in WordPress. At Duplicator, she specializes in site maintenance — from basic backups to large-scale migrations. Her ultimate goal is to make sure your WordPress website is safe and ready for growth.


