Most website owners learn the hard way that their hosting provider’s basic backups aren’t enough. Server crashes, malware attacks, and human error can wipe out years of content in seconds. By then, it’s too late.
Backblaze B2 is a cloud storage solution that’s revolutionizing how WordPress sites handle backups. It offers Amazon S3-level protection at 20% of the cost, making enterprise-grade backup security accessible to small businesses and bloggers.
In this post, I’ll show you how to back up your WordPress site to Backblaze B2. Whether you’re a tech novice or seasoned developer, you’ll have a bulletproof backup system running in under 30 minutes.
Let’s get started!
Table of Contents
What Is Backblaze B2?
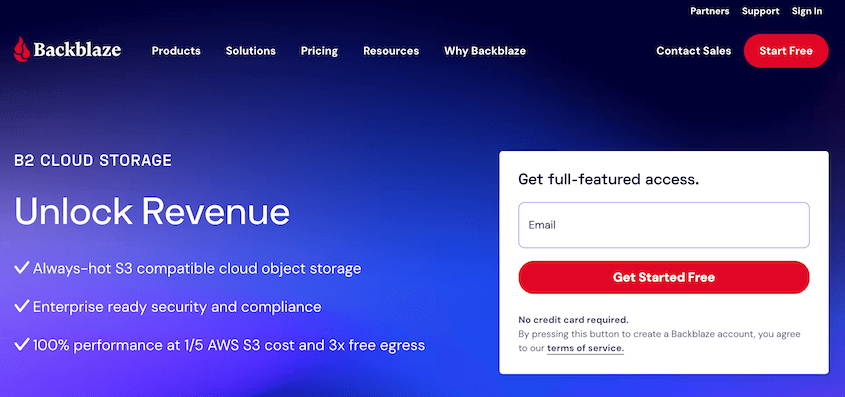
Backblaze B2 is a cloud storage service that’s gained popularity for its affordability and simplicity. It provides a reliable and cost-effective way to store and retrieve your data in the cloud.
The Benefits of Backing Up Your WordPress Site to Backblaze B2
Rather than always relying on local server backups, more and more website owners have been turning to cloud storage. By sending copies of your data off-site, you can easily restore backups after server errors.
Unlike simple file storage services like Google Drive or Dropbox, Backblaze B2 offers infinitely scalable object storage. It has the same high-performance data protection as Amazon S3, but at one-fifth the cost.
Here are a few key features that make Backblaze B2 stand out:
- Transparent, affordable prices
- 99.9% uptime SLA with no cold delays or speed premiums
- 99.999999999% data durability
- Free for the first 10GB
- Encryption and ransomware protection
- Integrates with any S3-compatible backup software
- Integrates with Veeam, Fastly, QNAP, TrueNAS, MSP360, and more
- Content Delivery Network (CDN)
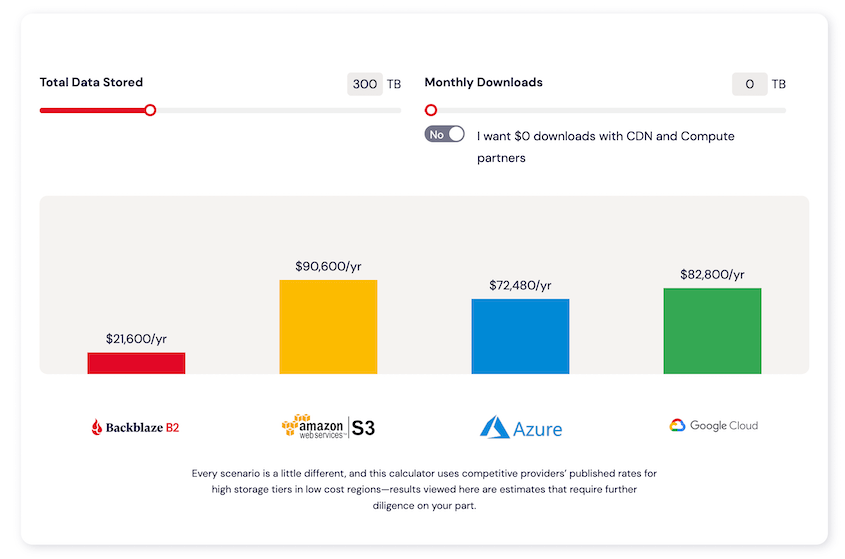
By far the best advantage of Backblaze B2 is its pricing. Its cloud storage starts at $6 per TB per month. This is ⅕ the cost of Amazon S3.
While AWS S3 will have some hidden costs, Backblaze B2 doesn’t charge egress fees. You also won’t have to pay to upload, download, or delete files. By reducing your cloud storage payments, you’ll be able to make more money from your website!
Still considering your options? Here are the top cloud storage services for WordPress backups.
How to Back Up WordPress to Backblaze B2
Backblaze B2 is one of the best cloud storage services available because of its scalability, reliability, and affordability. If you want to start backing up your website to Backblaze B2, we’ll show you how to do it!
Step 1: Install Duplicator Pro
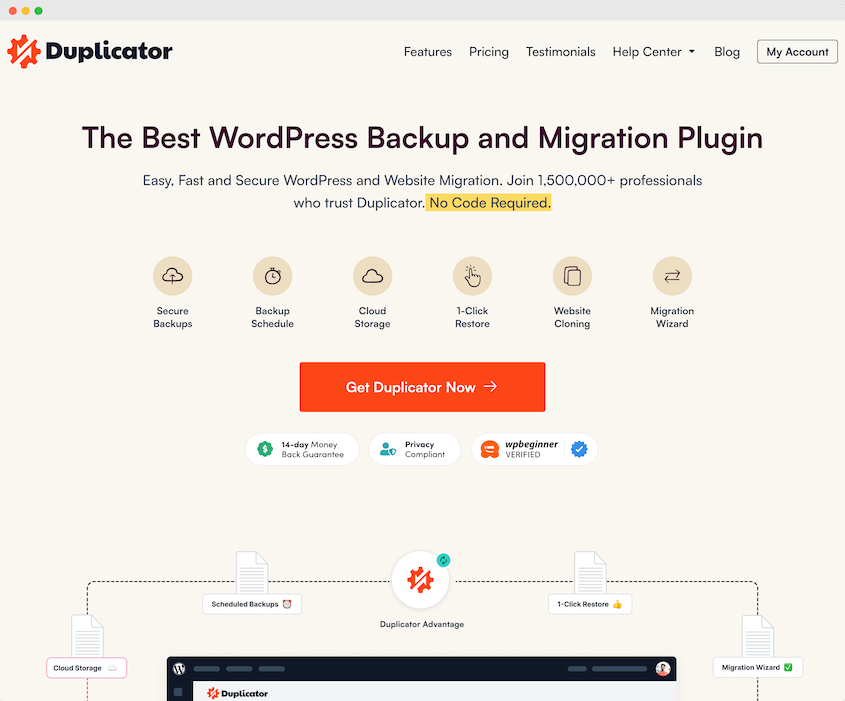
Duplicator is a powerful and user-friendly plugin designed to make WordPress backups easy. It’s perfect for beginners, ensuring that you can set up a cloud backup without any hassle.
Using Duplicator, you can back up your WordPress website to any of these third-party cloud storage services:
To get started, choose a subscription for Duplicator Pro. Although there is a free version, you’ll need to upgrade to send backups to the cloud. Plus, you’ll take advantage of features like automatic backups, drag-and-drop migrations, and WordPress Multisite support.
Then, install and activate Duplicator in your WordPress dashboard
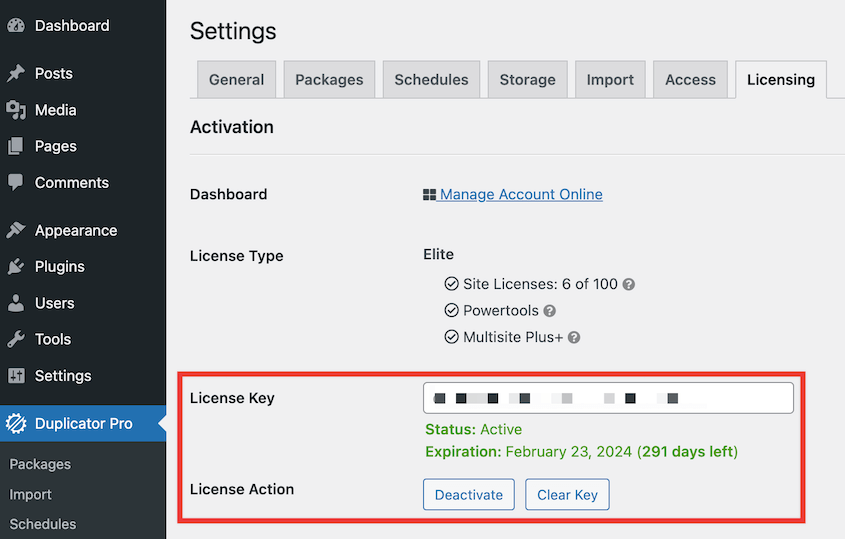
Before you can create a cloud backup, find Duplicator Pro » Settings » Licensing. Paste the license key you got with your purchase:
Hit the Activate button. Duplicator is now fully configured!
Step 2: Create a Backblaze B2 Bucket
In this step, you’ll set up your Backblaze B2 account and create a new bucket, which will store your WordPress backups.
If you don’t have a Backblaze B2 account yet, you’ll need to create one. Visit the Backblaze B2 website and enter your email and password to sign up.
After your account is created, click on the Take Me to My Account button.
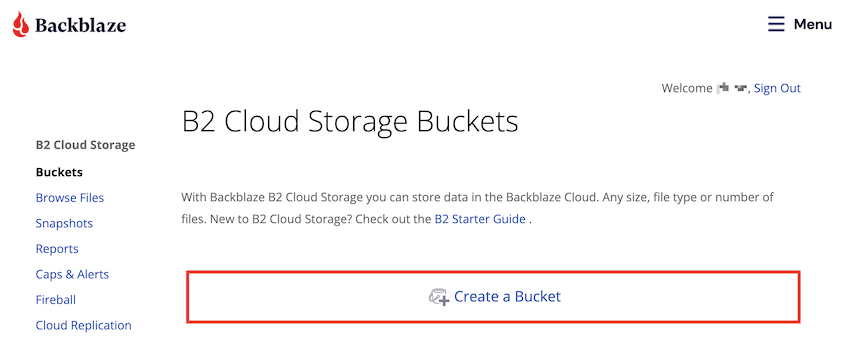
Now that you’re logged in, let’s set up a dedicated space for your WordPress backups by creating a new bucket:
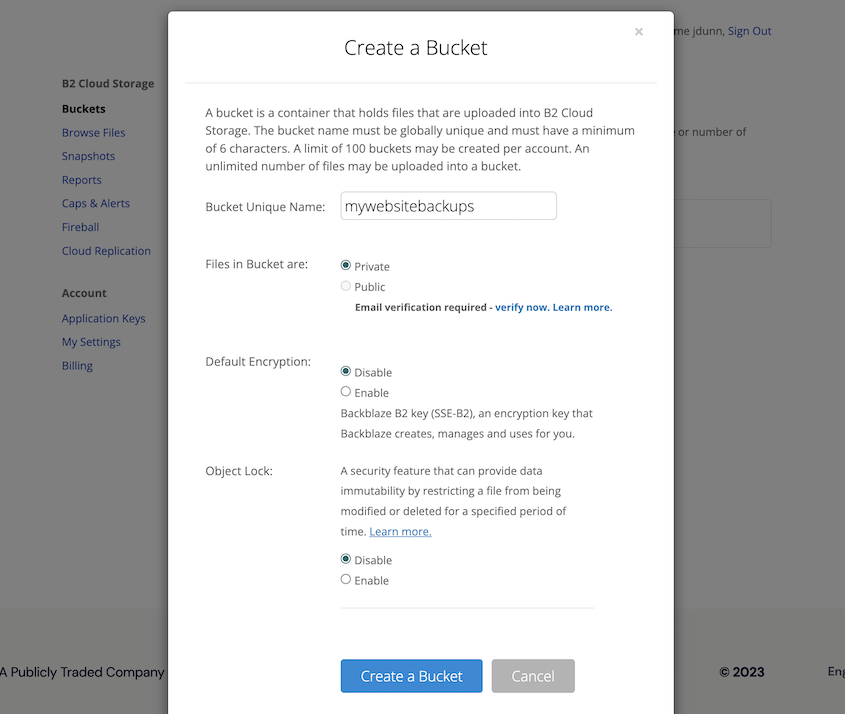
In the pop-up window, give the bucket a unique name. You can also add some extra security by making the bucket private, adding encryption, or enabling Object Lock:
After providing the necessary information, click the Create a Bucket button. Your new Backblaze B2 bucket is now ready to store your WordPress backups.
Step 3: Copy Your Application Keys
Next, you’ll need to set up application keys for your Backblaze B2 bucket. These app keys will allow Duplicator to access your designated bucket and transfer backups into it.
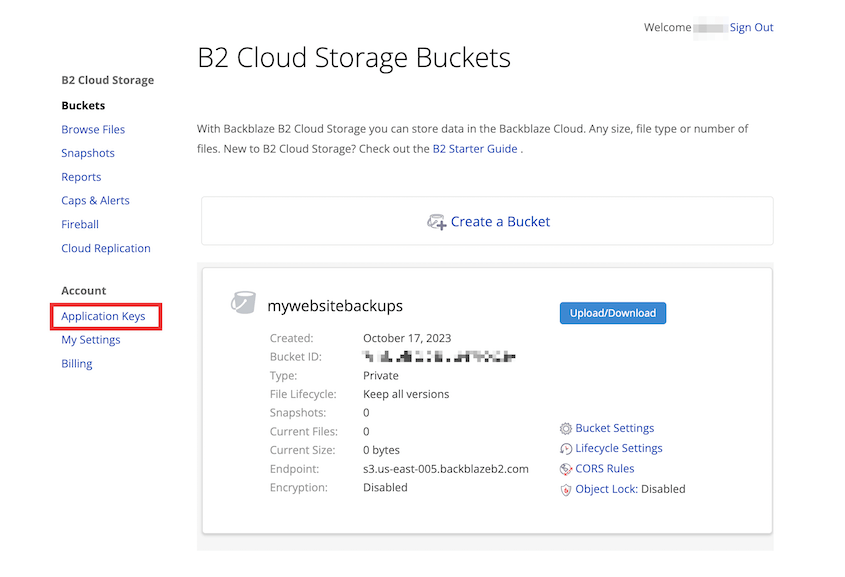
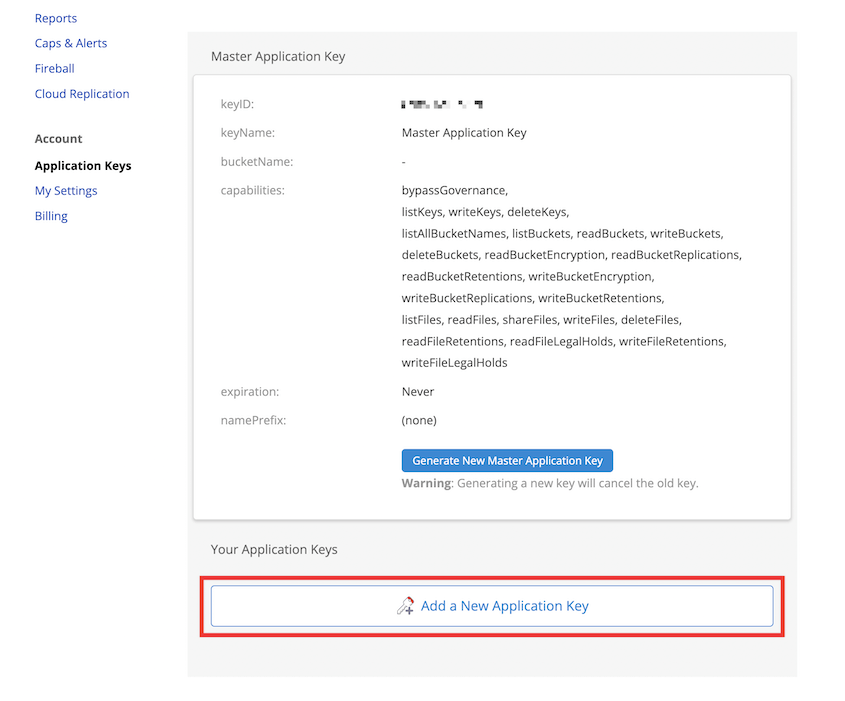
In your Backblaze B2 dashboard, find the Application Keys option:
On this page, create a new application key:
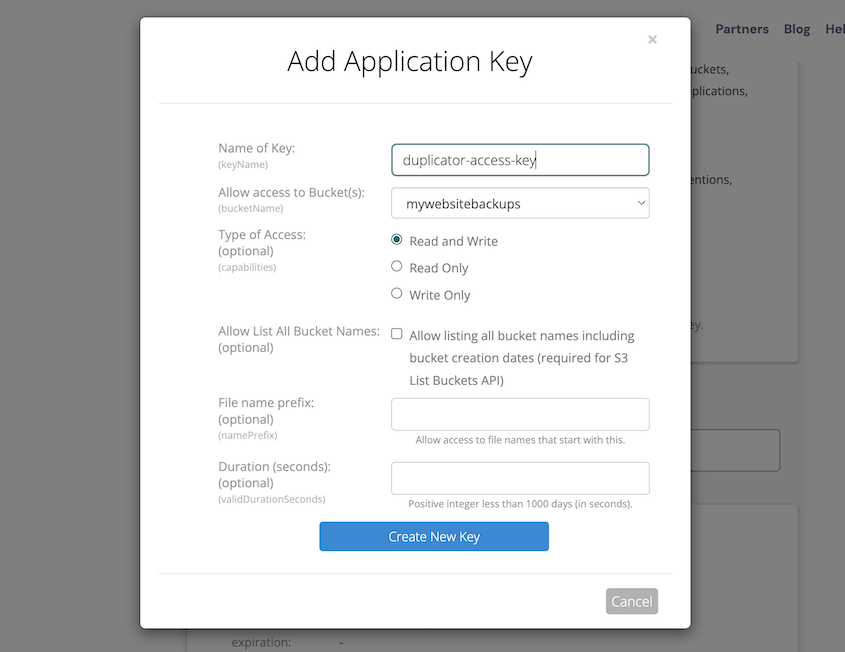
Name the application key and assign it to the bucket you just created. Make sure the access is set to Read and Write:
After creating the key, you’ll see your application key ID and the application key itself. Make sure to copy both of these, because they are essential for Duplicator to access your Backblaze B2 bucket securely.
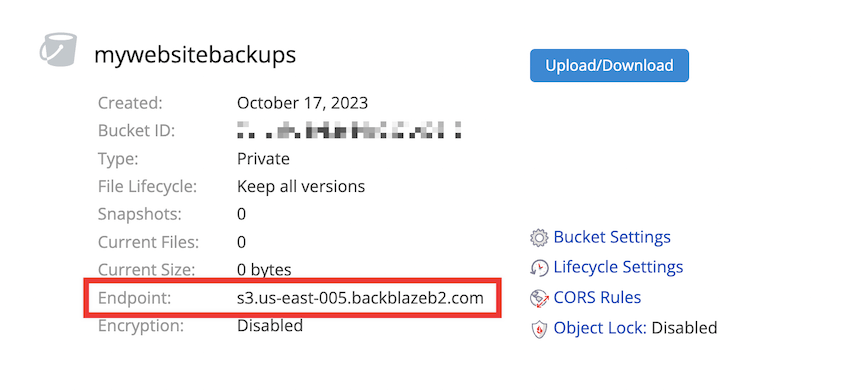
For the next step, you’ll also need to copy your bucket’s endpoint. This will be in your bucket details.
At this point, you’re ready to integrate Duplicator with your Backblaze B2 account, enabling seamless cloud backups!
Step 4: Connect Backblaze B2 to Duplicator
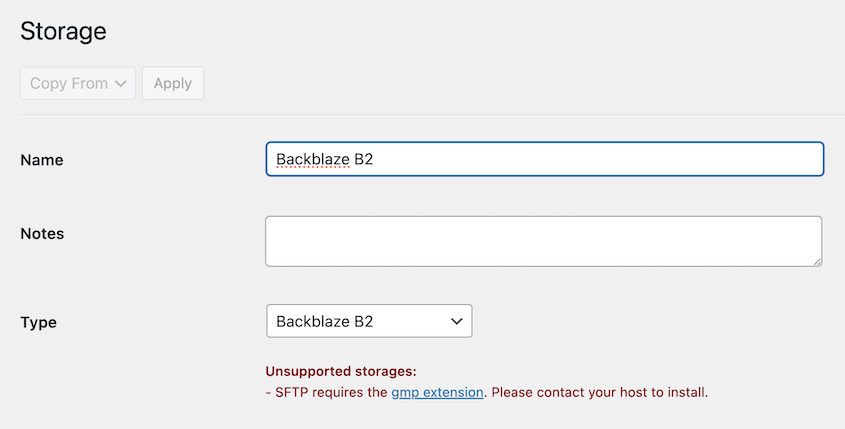
With Duplicator, you can create backups and automatically send them to cloud storage. To do that, you’ll need to set up Backblaze B2 as a new storage location. Navigate to the Storage tab and then click on Add New:
From the Type dropdown menu, choose Backblaze B2 cloud storage.
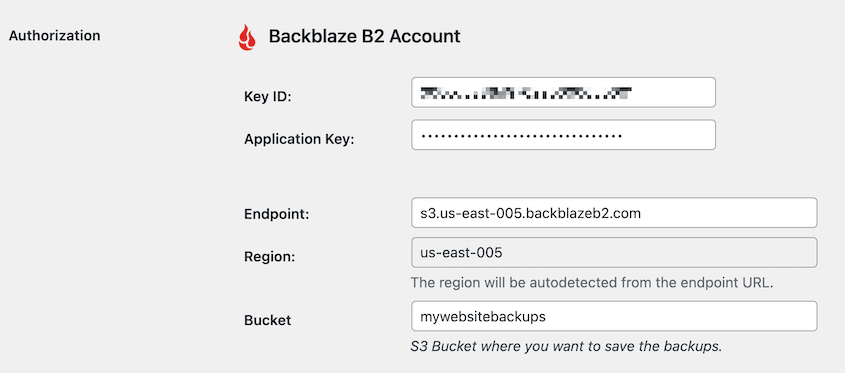
In the Authorization section, paste your application key, application key ID, endpoint, and bucket name. The region will automatically fill after you add your endpoint:
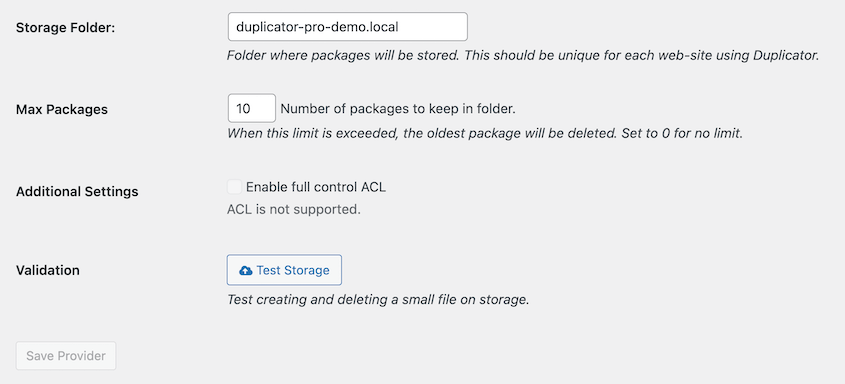
You can specify a custom folder path within your bucket to organize your backups. Leave it blank to store backups directly in the root of your bucket.
You might also want to consider customizing the Max Packages value. This optimizes your storage space by deleting old backups.
Then, save the new storage location. To make sure it was set up correctly, click Test Connection. Duplicator will create a small file on Backblaze B2 and delete it, ensuring your backups will be stored successfully.
Step 5: Create a Backblaze B2 Backup
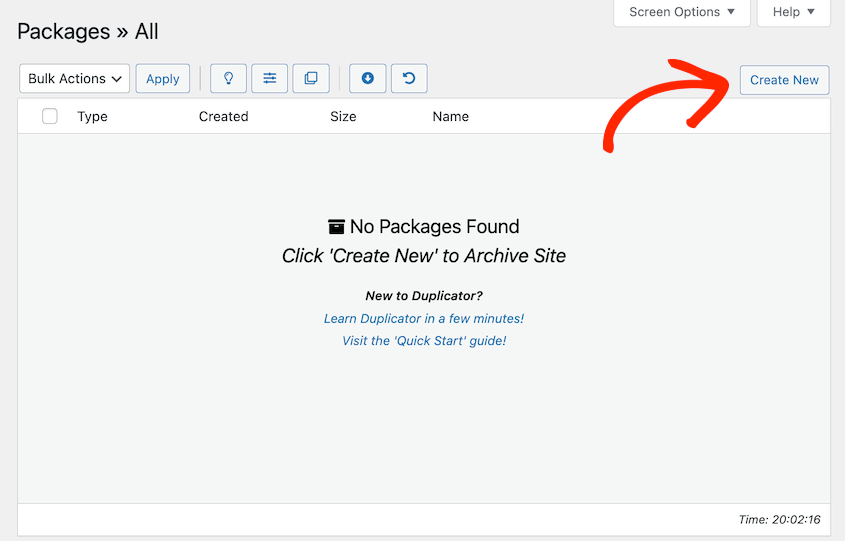
Now, you can start backing up your WordPress site! Navigate to the Packages tab and click on Create New.
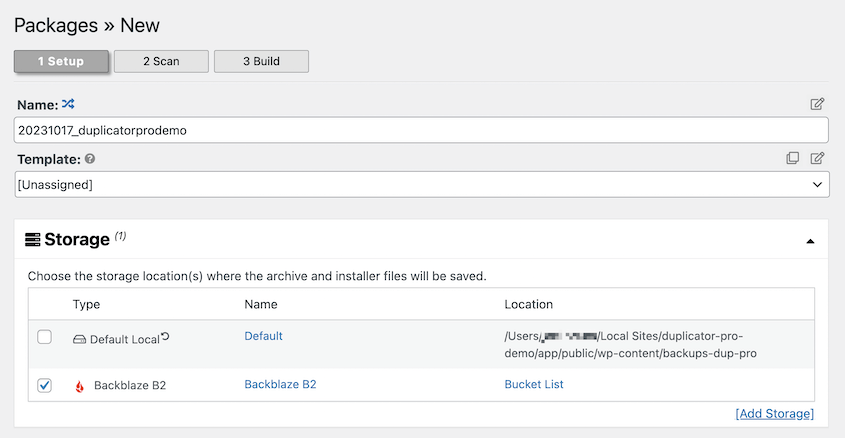
Give it a descriptive name that helps you identify the backup. Then, choose Backblaze B2 as the storage location:
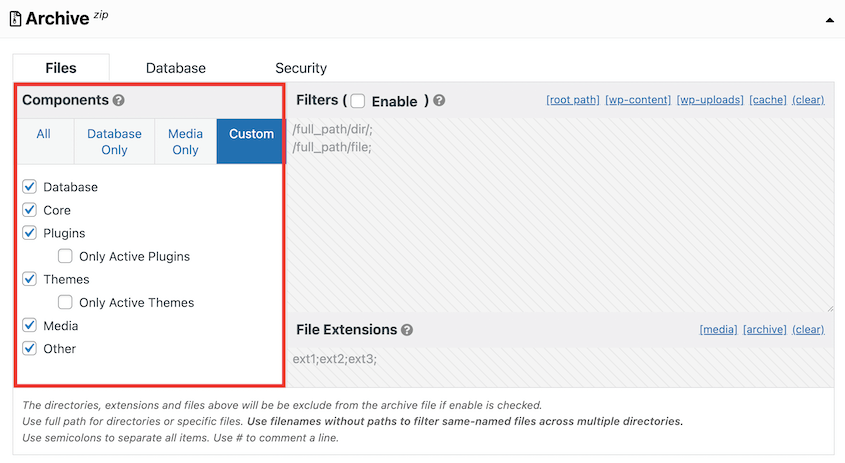
You can choose what to include in your backup, such as the database, files, themes, plugins, and other data. Make your selections based on your backup needs.
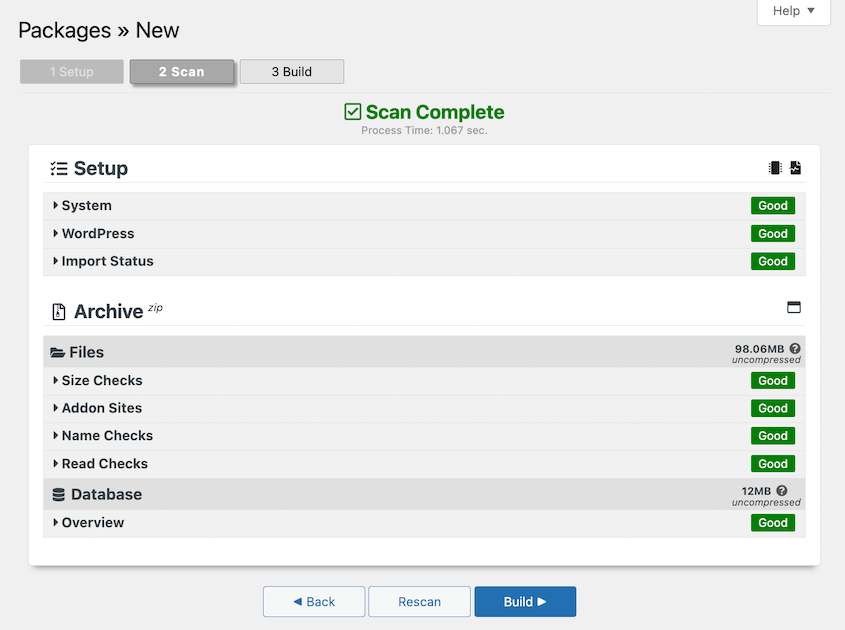
Click Next. Duplicator will scan your site to make sure it can create a backup successfully:
After this, hit Build. Duplicator will create a backup of your WordPress site. It’ll automatically be stored in your Backblaze B2 bucket.
Step 6: Set Up Automatic Backblaze B2 Backups
Automatic backups ensure that your data is regularly saved without manual intervention. When you configure automatic backups with Duplicator, it’ll act as a backup service without needing any extra help from you.
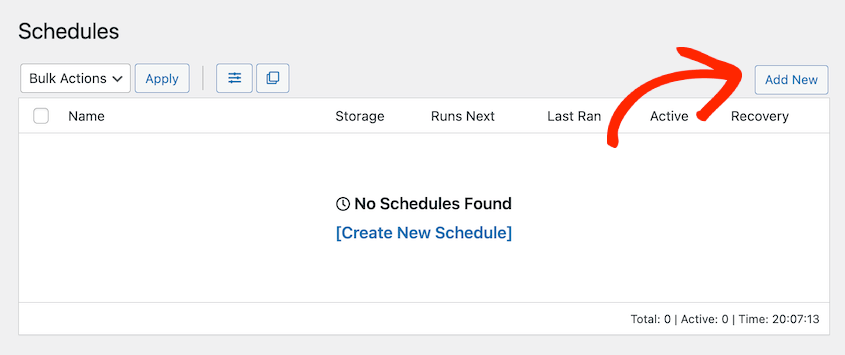
First, head over to Duplicator Pro » Schedules » Add New:
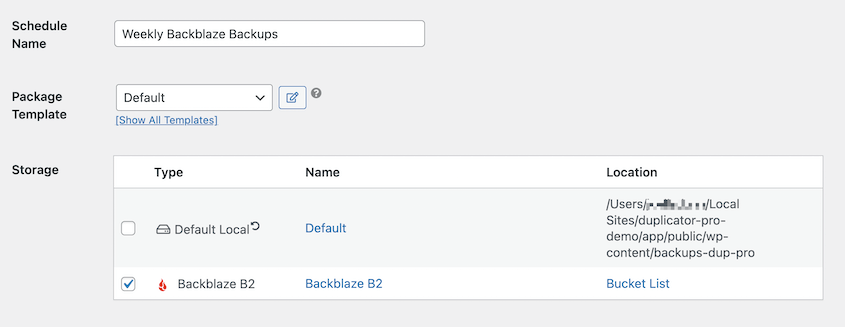
Name the schedule. You can use the default package template or create a new one for custom backups. Then, choose Backblaze B2 as the storage provider:
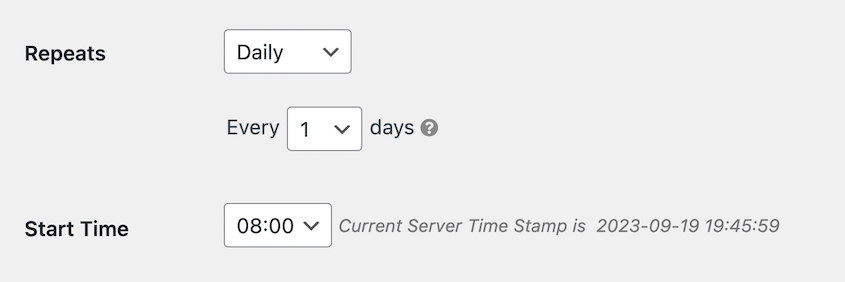
Choose how often you want your automatic Backblaze B2 backups to happen. You can select hourly, daily, weekly, or monthly backups. Specify the time of day when the backup should run:
Once your schedule is enabled, Duplicator will handle the rest. This takes manual backups off your mind, giving you one less maintenance task and speeding up your workflows!
How to Restore Your Backblaze B2 Backup
Creating backups is essential, but knowing how to restore them is equally important. If your site ever crashes, you’ll need to know how to restore a backup and get your website up and running again.
Duplicator makes cloud backup restores easy. You won’t even have to leave WordPress!
First, find the right backup on the Packages page. Next to it, hit Restore.
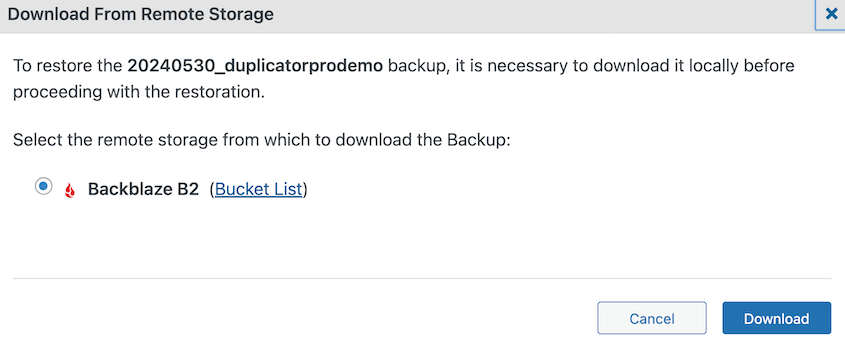
Duplicator will need to download the backup from Backblaze B2.
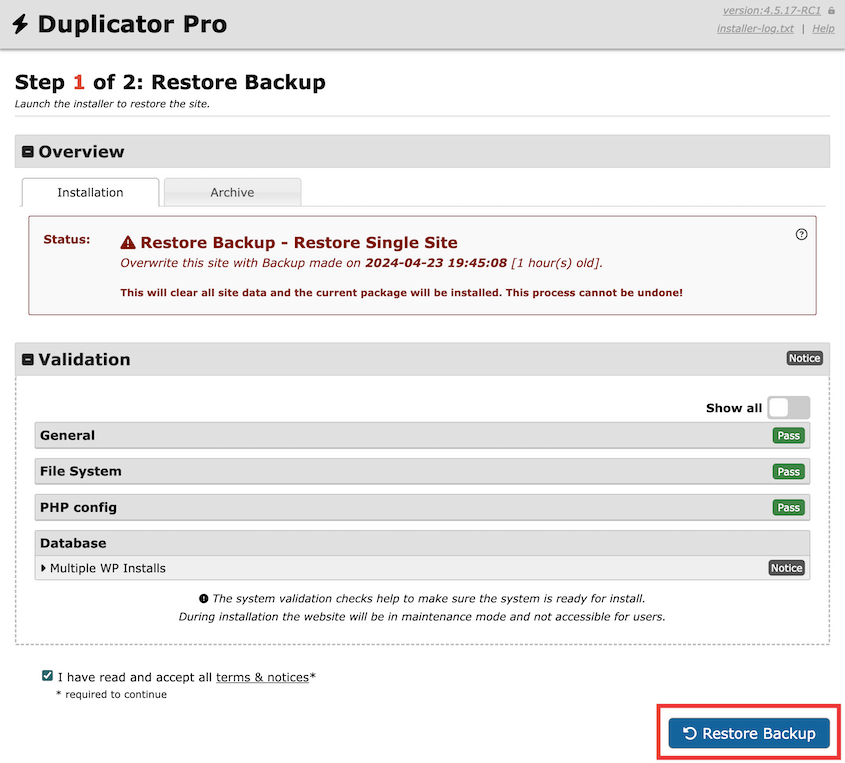
After this, the restoration wizard will automatically pop up. At the bottom, select Restore Backup.
You’ve just restored your WordPress site!
If you’re locked out of your dashboard, you can perform a classic installation. This involves manually uploading both the backup archive and installer to your root directory.
FAQs About Backblaze B2 Backups
What is the difference between Backblaze Computer Backup and B2?
Backblaze Computer Backup is designed to back up individual PC and Mac computers, providing automatic and continuous protection for your personal files. Backblaze B2, on the other hand, is a scalable cloud storage service suitable for developers, businesses, and website owners, offering more extensive storage capabilities and data access options. You can use B2 for any cloud data storage, and it will be accessible from any operating system.
What are the disadvantages of Backblaze B2?
With Backblaze B2, you can’t upload a folder full of files. Instead, you’ll have to upload files to the cloud individually. Each standard file is limited to 5GB.
Is Backblaze better than Google Drive?
The choice between Backblaze and Google Drive depends on your specific needs. Backblaze is primarily a cloud storage service for businesses and developers, while Google Drive offers a broader range of features, including document collaboration and file sharing. The decision should be based on your requirements and priorities.
What is the best alternative to Backblaze?
There are several alternatives to Backblaze including cloud storage services like Amazon S3, Google Cloud, and Wasabi. You’ll need to consider factors such as cost, features, and compatibility with WordPress.
Conclusion
Remember: Storage is cheap, but lost data is expensive.
At $6/TB, Backblaze B2 makes it possible to protect comprehensive backups without breaking your budget. The small investment you make today could save you countless hours of reconstruction work and revenue loss tomorrow.
Ready to never think about your backups again? Get Duplicator Pro today and access all 11 cloud storage integrations, including Backblaze B2. With automated cloud backups in place, you can focus on growing your business instead of worrying about data loss.
Looking to build a complete WordPress security strategy? Dive into our related guides:
Joella is a writer with years of experience in WordPress. At Duplicator, she specializes in site maintenance — from basic backups to large-scale migrations. Her ultimate goal is to make sure your WordPress website is safe and ready for growth.


