What’s your plan when your WordPress site inevitably breaks? It’s not a matter of if, but when. Plugin conflicts, security breaches, and hosting issues happen all the time.
Are you prepared to rebuild your site from scratch? Probably not.
Vultr backups are a smart solution. Vultr offers specialized cloud storage (called object storage) that’s perfect for website backups. It’s designed to be reliable, scalable, and cost-effective, making it an ideal choice for protecting your WordPress site.
In this post, I’ll show you how to back up your WordPress site to Vultr.
Here are the key takeaways:
- Why use Vultr for backups: Vultr provides S3-compatible object storage that is reliable, scalable, and cost-effective. Your data is automatically replicated to prevent loss, and it provides secure, off-site protection for your WordPress site.
- What you’ll need: You can use the Duplicator Pro plugin to easily connect your WordPress site to your Vultr account.
- How it works: You’ll create a Vultr storage “bucket,” generate access keys, and then add them to Duplicator. From there, you can create backups that automatically upload to Vultr.
Quick Summary: How to Back Up WordPress to Vultr
1. Set up a Vultr account.
To get started, create a Vultr account. You’ll need to enable object storage and add a new bucket. Be sure to copy your bucket’s access keys.
2. Connect Vultr to Duplicator Pro.
Duplicator Pro is a WordPress backup plugin that connects your site to cloud storage locations like Vultr. After you install it, create a new storage location for Vultr.
3. Create a Vultr backup.
Finally, create a new backup. From the storage options, choose Vultr. Once your site is backed up, the files will be sent over to Vultr.
Table of Contents
Why Back Up Your WordPress Site to Vultr?
Vultr is a cloud computing platform with a range of services. It was created in 2014 to make it easy for businesses and developers to take advantage of the cloud.
Along with cloud computing, VPNs, and block storage, Vultr provides object storage. This is an S3-compatible cloud storage service. It’s completely scalable, giving you the flexibility to adjust the storage size to your needs.
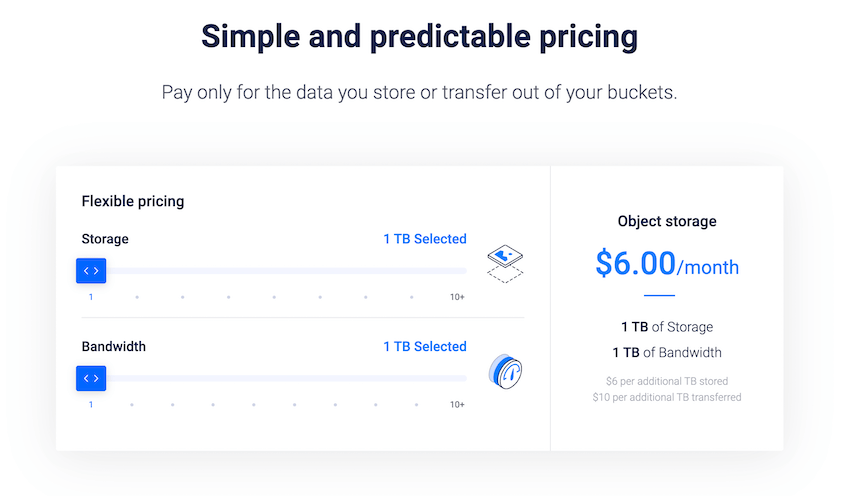
Vultr’s object storage pricing starts at $6 per month for 1TB of storage and 1TB of bandwidth. However, you can easily upgrade if you want to create a large backup log for your site. This can also be useful if you have a large site like an e-commerce store.
Here are more reasons to send your website backups to Vultr:
- Vultr’s application data is automatically cloned three times, avoiding data loss
- Offsite data protection from site crashes, cyber-attacks, and downtime
- NVMe caching layer ensures Vultr performs well and keeps your data available
- Vultr server status shows minimal downtime
I also researched some of the best cloud storage services, so check out how Vultr compares!
How to Back Up WordPress to Vultr
Once you decide Vultr is the best storage solution for your site backups, you might not know how to get started. Here’s an overview of the steps:
- Step 1: Install Duplicator Pro: Purchase, install, and activate the Duplicator Pro plugin to enable cloud storage connections and automated backups.
- Step 2: Add Object Storage and Create a Vultr Bucket: In your Vultr account, add Object Storage and create a new bucket, which will serve as the remote folder for your backup files.
- Step 3: Create Vultr Access Keys: Generate a secure Access Key and Secret Key for your Vultr bucket. These credentials allow Duplicator to access your storage.
- Step 4: Connect Vultr to Duplicator: Add a new storage provider in Duplicator, select Vultr, and paste your hostname, access keys, and bucket name to link the two services.
- Step 5: Create a Vultr Backup: Start a new backup in Duplicator, choose your Vultr storage location, and run the backup.
- Step 6: Set Up Automatic Vultr Backups: Go to Duplicator’s scheduling tool to create automated hourly, daily, weekly, or monthly backups that will be sent to Vultr without manual effort.
Step 1: Install Duplicator Pro
It all starts with getting the correct tools for the job. If you don’t, you’ll have to manually back up your site and upload these files to Vultr.
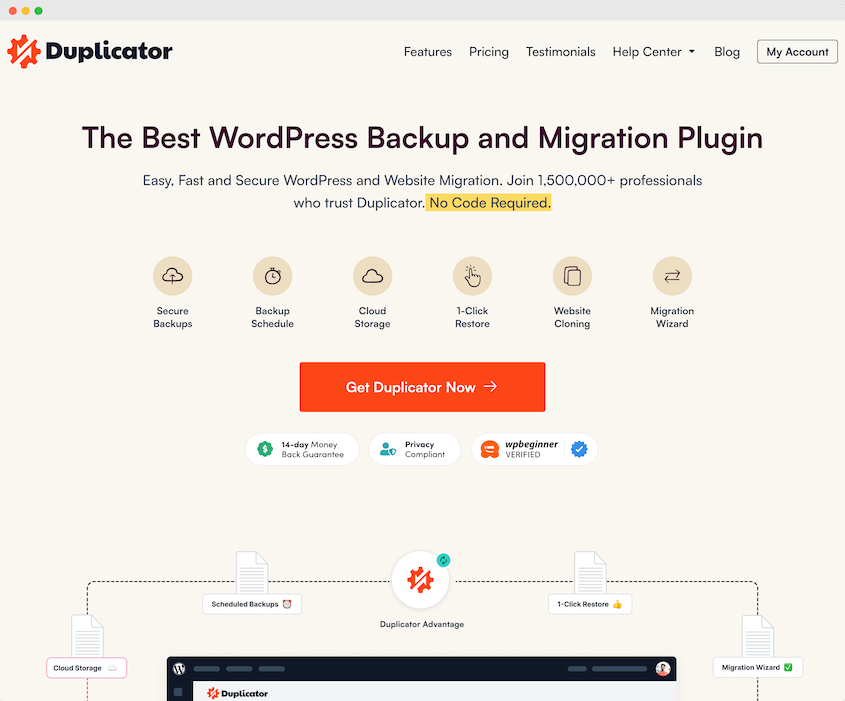
To save time and make your life easier, consider using Duplicator Pro. This is a WordPress plugin that helps back up, clone, and migrate websites.
Duplicator Pro is the best plugin for backing up your site to the cloud. It seamlessly connects to third-party cloud providers like:
There’s a free version of Duplicator, but you’ll want to upgrade to Duplicator Pro. It comes with helpful features like cloud storage and automatic backups.
Once you purchase Duplicator, copy your license key. Then, install and activate Duplicator in your WordPress site.
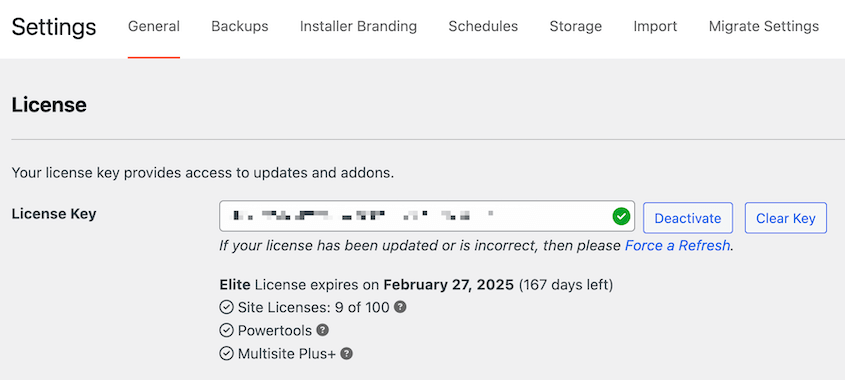
Before you back up your site, go to Duplicator Pro » Settings » General.
In these settings, paste your license key. Hit Activate to unlock Duplicator Pro’s extended features.
Step 2: Add Object Storage and Create a Vultr Bucket
To start using Vultr as a backup storage location, go to the company website and sign up for a new account. You can start for free.
However, when you’re setting up your account, you’ll need to add a payment method. But you can just link your card with a $0 deposit.
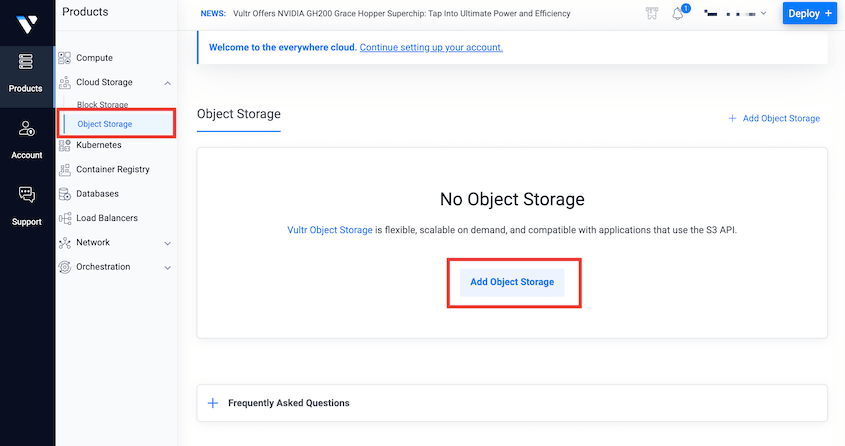
After this, you’ll see new tabs in your dashboard. Navigate to Cloud Storage » Object Storage and add object storage.
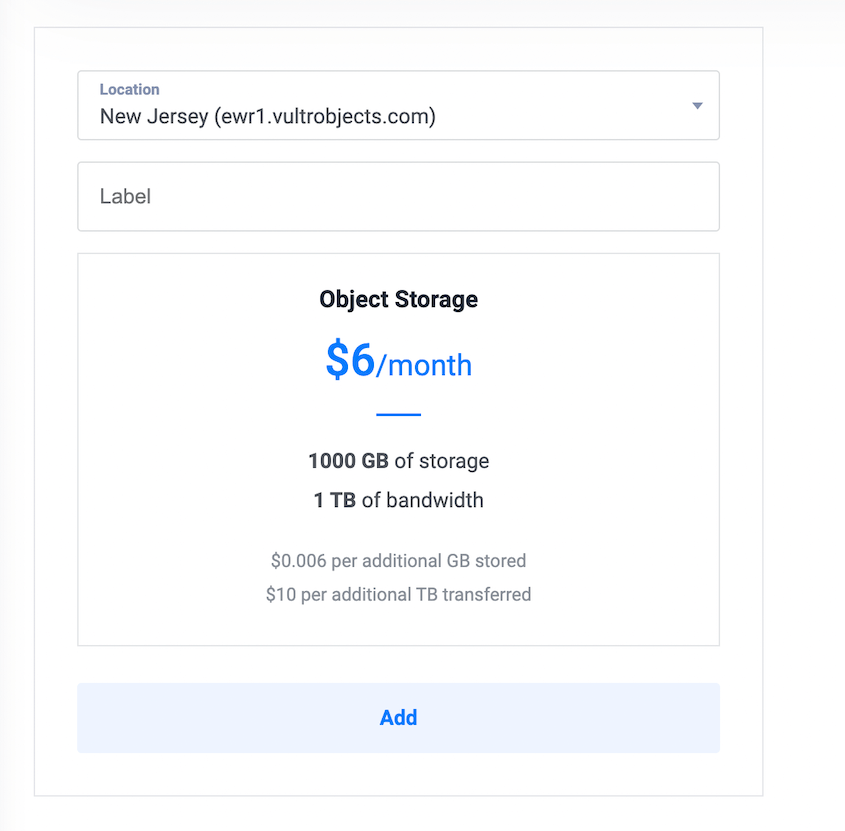
Pick a location closest to you. At this point, you’ll be charged $6 a month. But Vultr offers flexible pricing if you need extra storage.
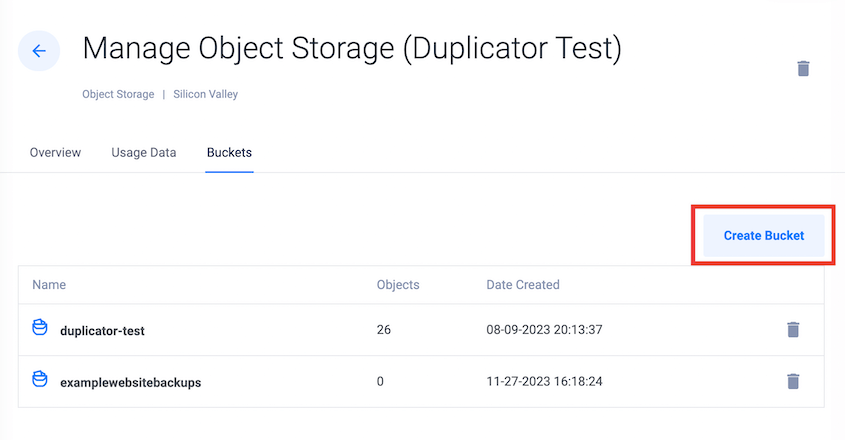
Now, click on your new object storage and find the Buckets tab. Here, hit Create Bucket.
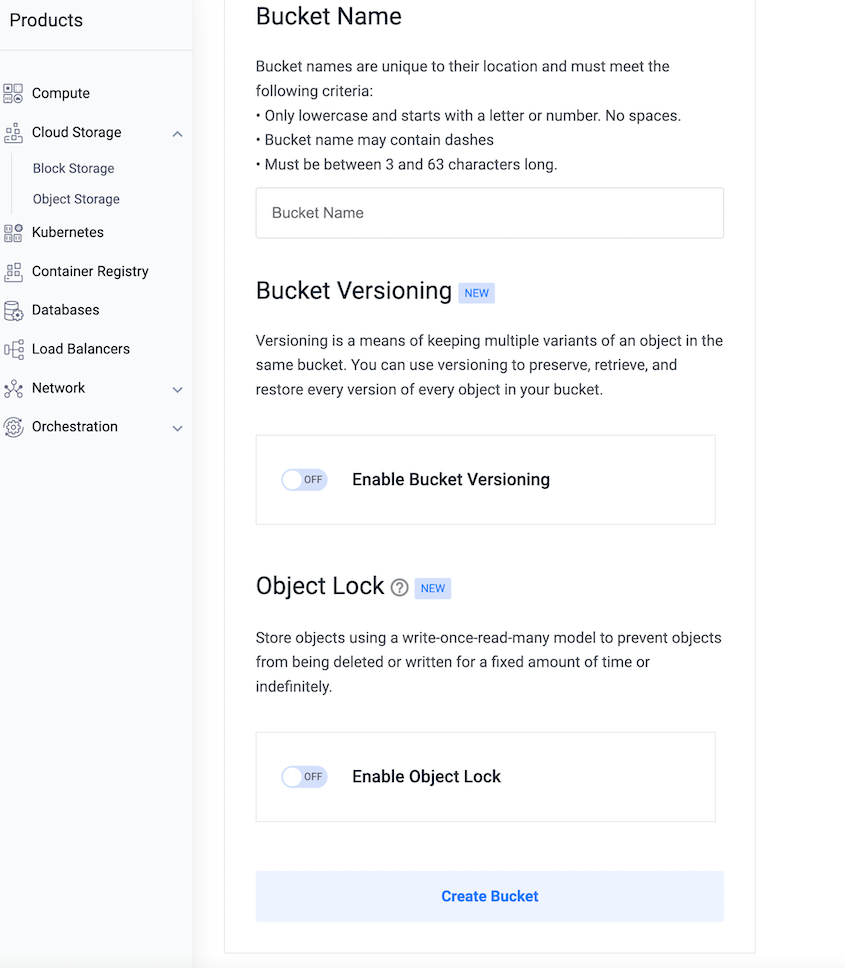
Name your bucket. Then, click on Create Bucket again.
Now you have a cloud bucket that can store your WordPress backups!
Step 3: Create Vultr Access Keys
Next, you’ll need to generate access keys for the Vultr bucket you just created. This way, Duplicator can send backups to your cloud account.
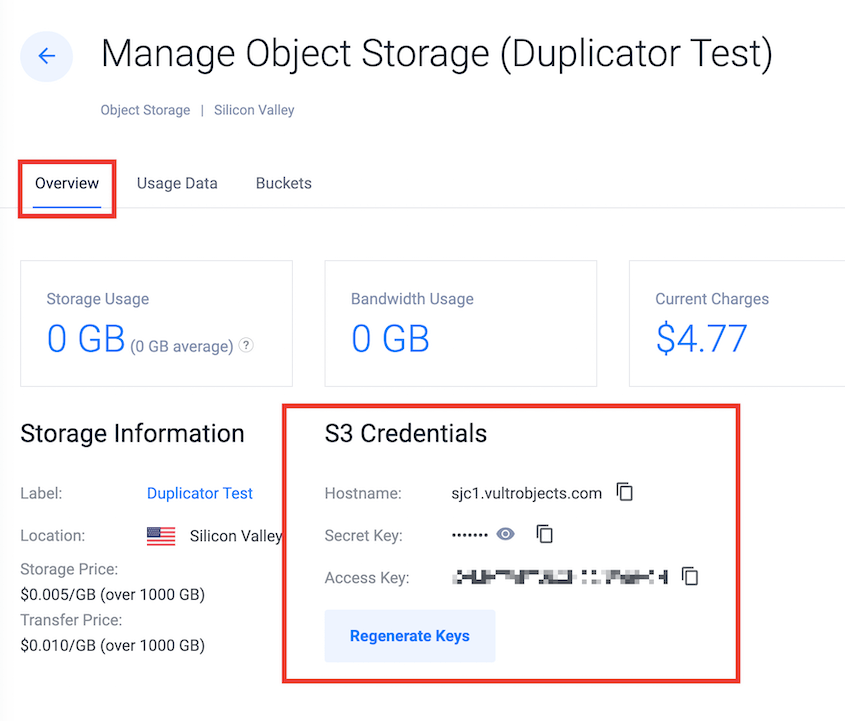
To do this, go to the Overview tab and click on Generate Keys.
Then, you’ll see your access key and secret access key. Be sure to save these, along with your hostname.
Step 4: Connect Vultr to Duplicator
After setting up your Vultr account, it’s time to connect it to Duplicator.
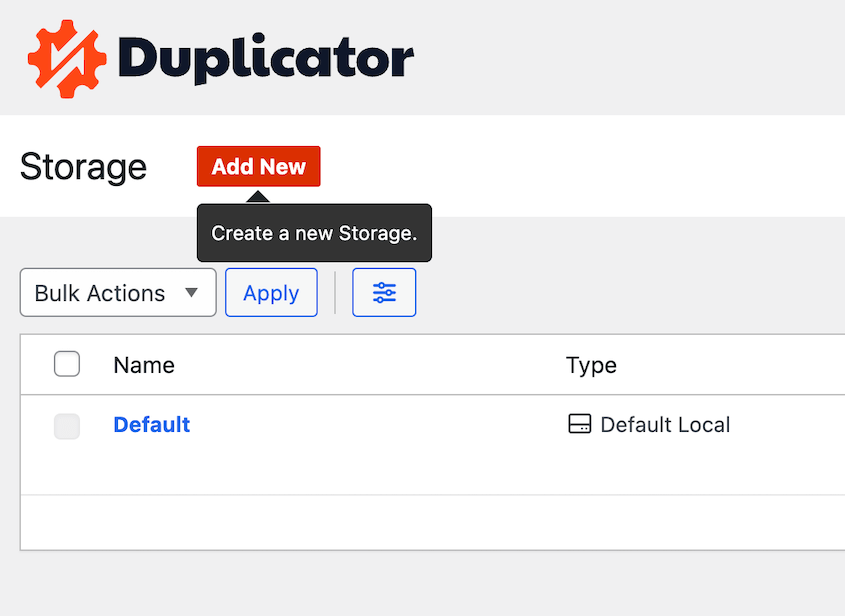
First, go to Duplicator Pro » Storage » Add New.
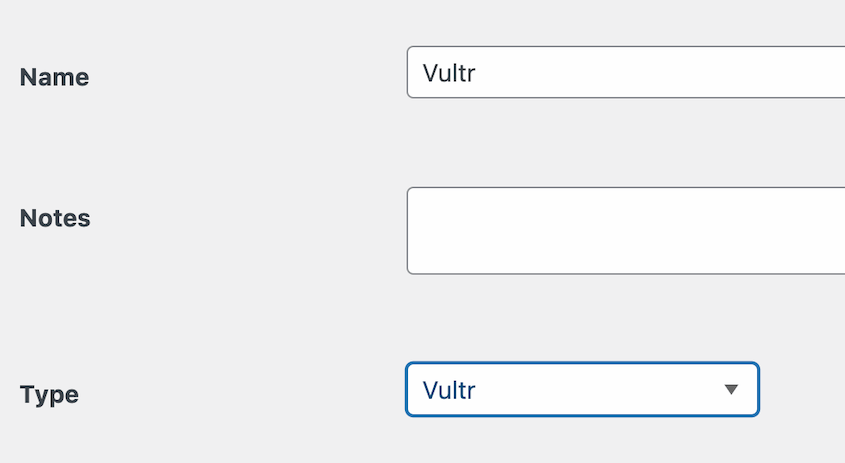
Name the new storage location Vultr. Then, choose Vultr as the Type.
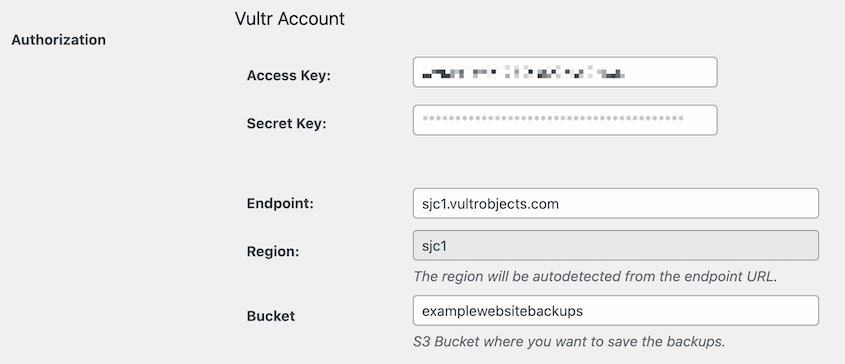
Scroll down to the Authorization section. Paste both of your access keys. You’ll also need to add the hostname into the Endpoint field. The Region will auto-fill.
Lastly, type in your bucket name.
You can choose the number of backups you want to keep in your Vultr account. Simply adjust the Max Backups value.
After saving the new provider, hit Test Storage. Duplicator will create and delete a small file on Vultr, making sure it can save larger backups.
Step 5: Create a Vultr Backup
Now you can start setting up your remote backup!
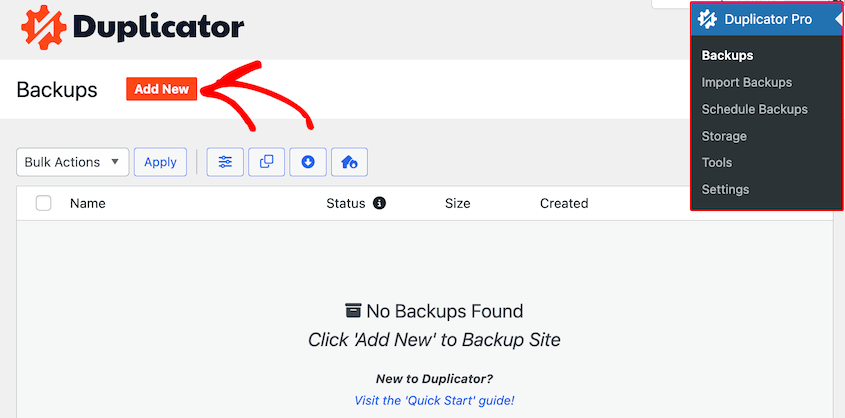
Head over to Duplicator Pro » Backups » Add New.
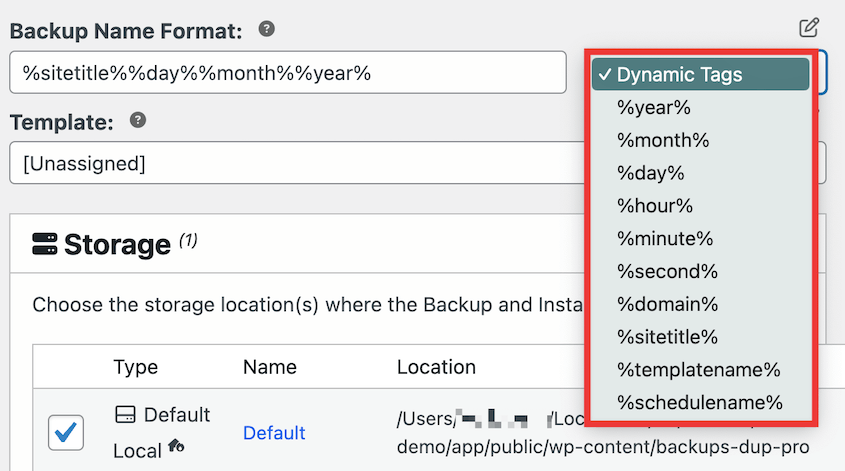
Duplicator will automatically generate a name for the backup, but feel free to add your own dynamic tags. This makes your backup easy to find.
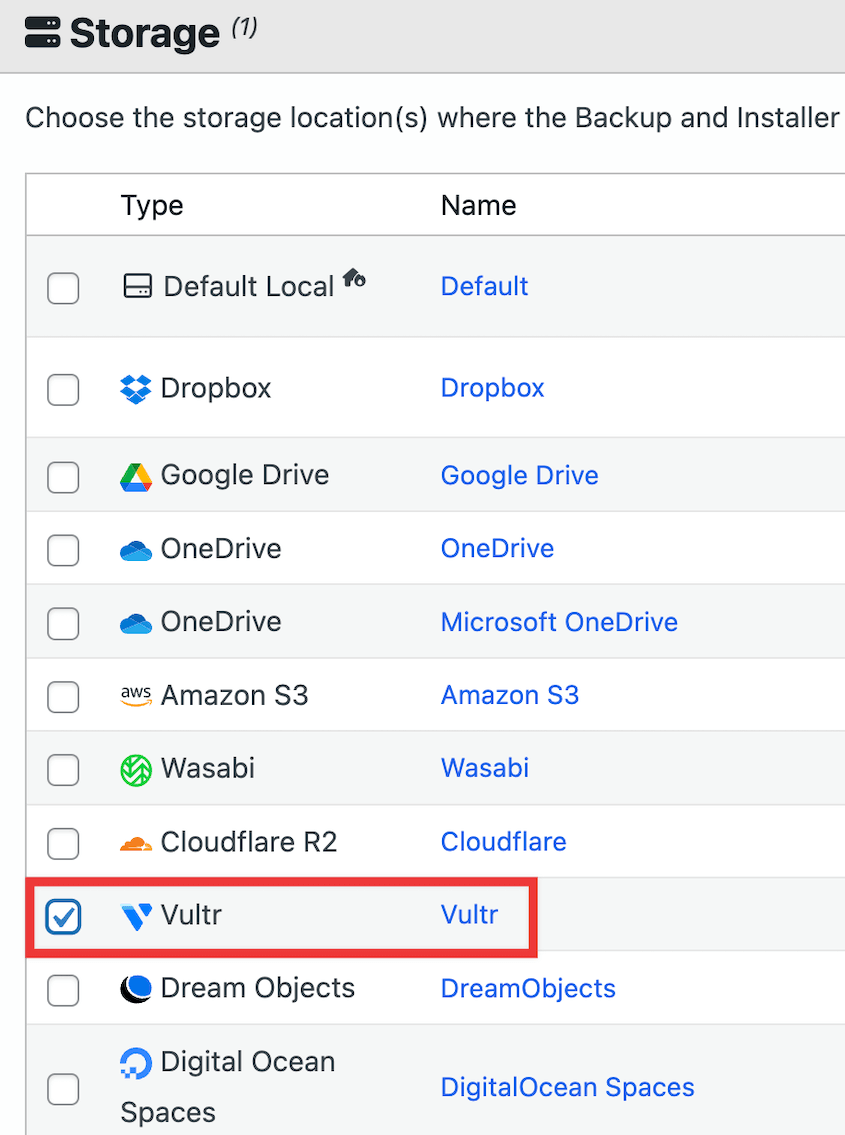
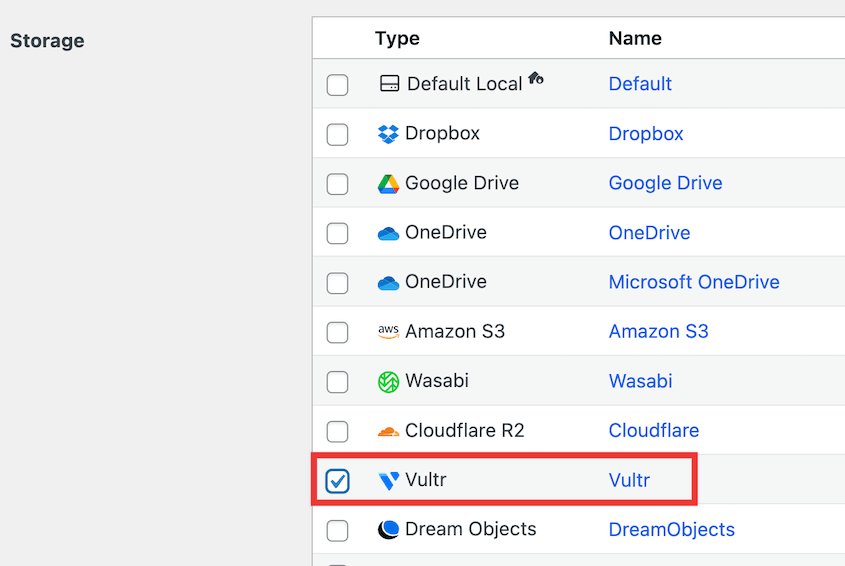
Then, choose Vultr as the storage location.
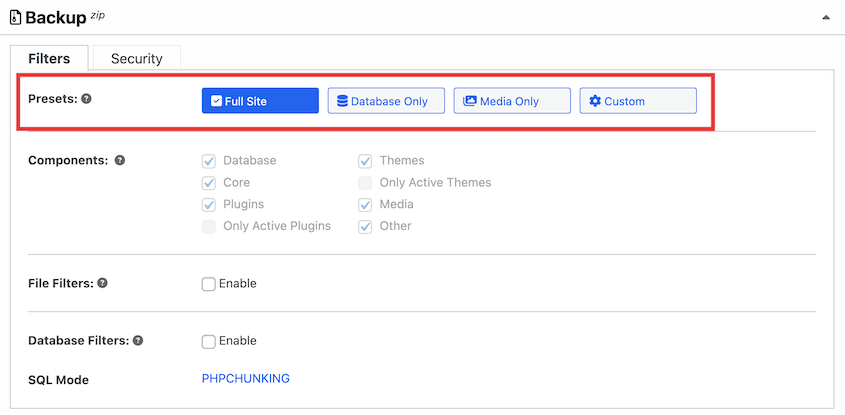
To send a full copy of your site to the cloud, select the Full Site backup preset. However, you could also create a custom backup (like a database-only or media backup).
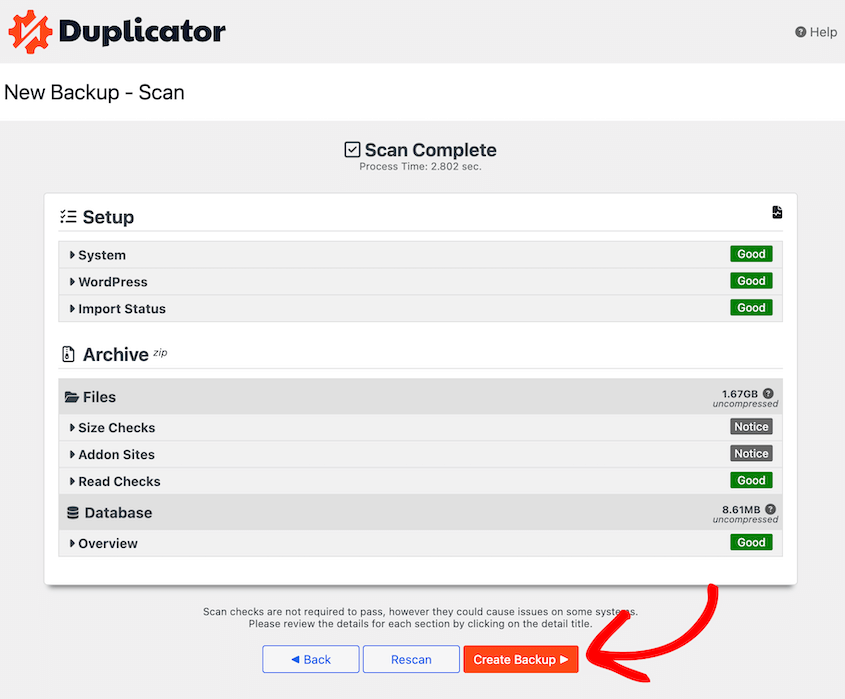
Hit Next. Duplicator will then scan your site. If everything looks okay, continue with the build.
Once Duplicator backs up your WordPress site, it will send the backup to Vultr!
Step 6: Set Up Automatic Vultr Backups
Creating on-demand backups with Duplicator is simple, but you might want a faster solution. If so, it’s time to sit back and allow automatic backups to do the work.
To get started, go to Schedule Backups » Add New. Name the backup schedule and choose a template.
Instead of the default local storage, choose Vultr.
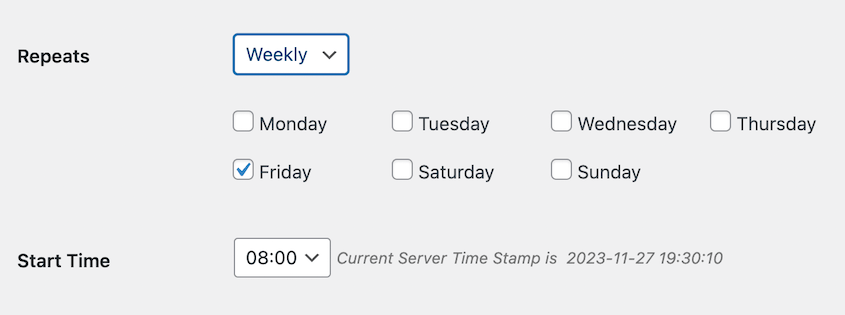
Select hourly, daily, weekly, or monthly backups. For each option, you can select an exact time or day.
At the bottom, enable the schedule. Then, save it.
You’ve successfully set up automatic Vultr backups! Duplicator will back up your site and send these copies to the cloud, so you can always restore your data.
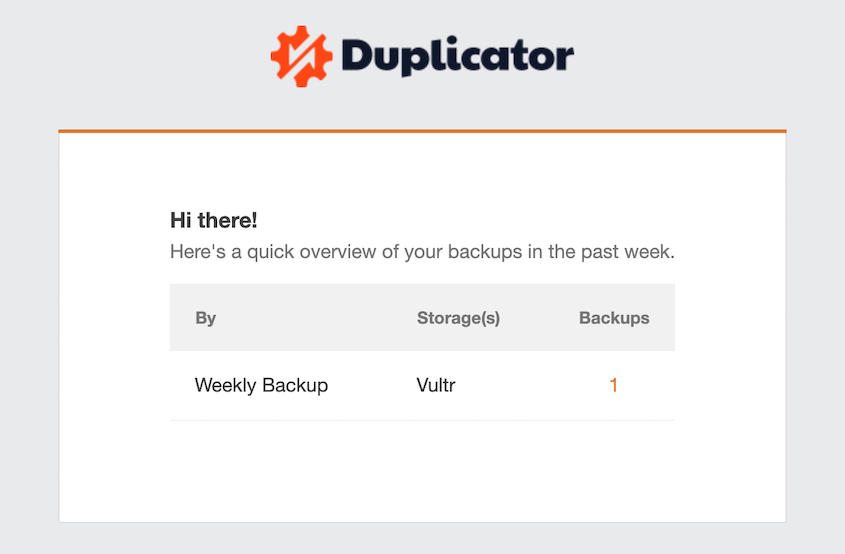
You’ll also get weekly email notifications that let you know your schedule is running smoothly.
This way, you can simply set it and forget it! You won’t have to micromanage your backups, saving you lots of time and headaches.
How to Restore Your Vultr Backup
There’s no guarantee that your site will be free from hacking, coding mistakes, or other errors. Fortunately, you can instantly restore your data whenever you need to.
Once you set up automatic backups, your site will be protected. If anything goes wrong, visit the Backups page and find a backup before the error. Click on the Restore button.
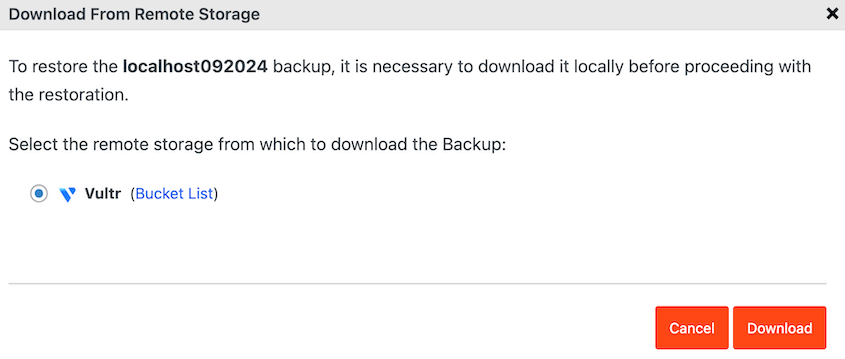
You won’t have to manually download your backups from remote storage! Duplicator can transfer cloud data directly to your local server.
Feel free to close this tab as the backup downloads. Once it’s finished, hit Restore again.
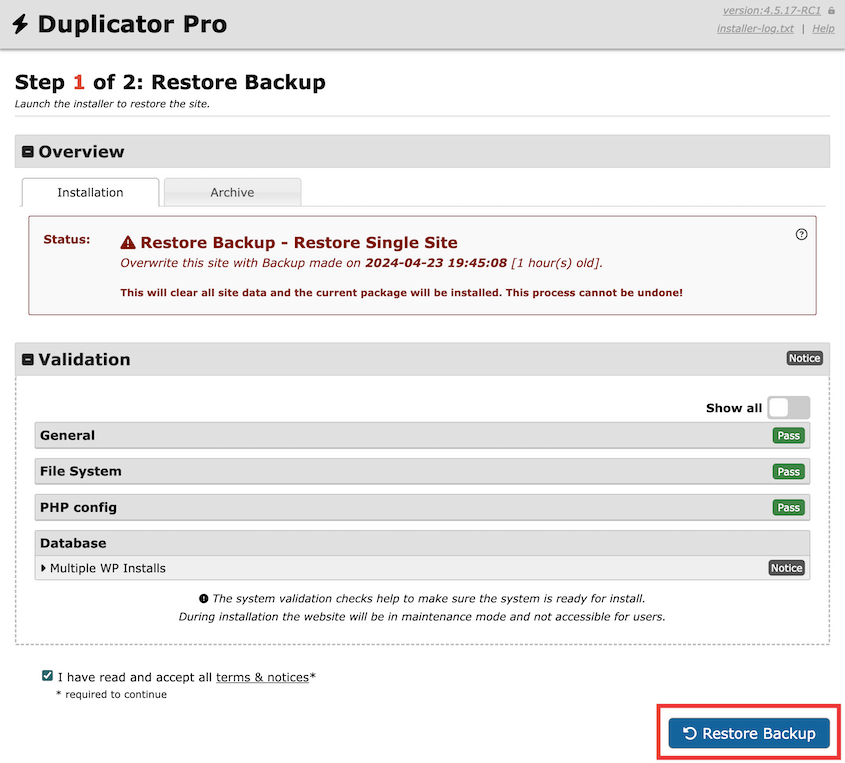
Now you’ll see the Duplicator recovery wizard. Accept the terms and conditions and continue restoring the backup.
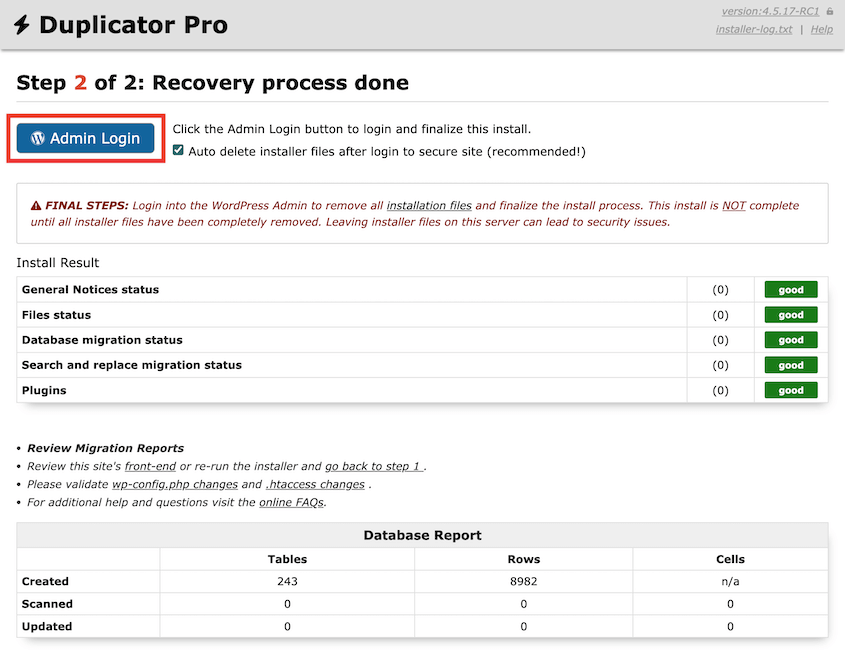
As a last step, log back into your WordPress dashboard.
Since your site has been rolled back to another version, the error should be gone!
FAQs About Vultr Backups
What’s the difference between Vultr snapshots and backups?
Vultr snapshots are like photographs of your server at a specific point in time. On the other hand, Vultr backups are automated, regularly scheduled copies of your server.
For snapshots, Vultr charges $.05 per GB per month. With automatic backups enabled, you’ll have to pay a 20% higher base monthly/hourly fee.
Using Vultr’s control panel, you can easily convert backups into snapshots. You’ll also be able to manage both backups and snapshots with the Vultr API.
Is Vultr overpriced?
No, Vultr is not overpriced. With Vultr, you get a reliable cloud server that is flexible and easy to use. Plus, you only pay for the resources that you use, which can make Vultr more cost-effective for you in the long run.
Here’s a breakdown of Vultr’s pricing:
- Cloud compute: starts at $2.50/mo
- Optimized cloud compute: starts at $30/mo
- Cloud GPU: starts at $1,750/mo
- Bare metal: starts at $7,000/mo
- Direct connect: starts at $5/mo
- Block storage: starts at $1/mo for 10GB
- Object storage: starts at $6/mo for 1TB
- Load balancers: start at $10/mo
- MySQL databases: start at $15/mo
How reliable is Vultr?
Vultr is very reliable. It has 6 data centers located across the world. Plus, its built-in caching layer and backup system ensure your data is always safe and readily accessible.
Conclusion
By now, you’ve backed up your WordPress site to Vultr!
While you’re here, you may also like these WordPress tutorials:
Are you ready to start storing your backups safely in the cloud? Download Duplicator Pro to access 14 different storage locations!
Joella is a writer with years of experience in WordPress. At Duplicator, she specializes in site maintenance — from basic backups to large-scale migrations. Her ultimate goal is to make sure your WordPress website is safe and ready for growth.


