Backing up your WordPress site might not be at the top of your to-do list. It’s one of those tasks that’s easy to put off until it’s too late.
After a few too many close calls, I spent weeks researching and testing different backup solutions, and I kept coming back to Google Drive.
When you back up your website to a cloud service like Google Drive, you’ll have a reliable, accessible backup that won’t disappear if your server crashes.
In this tutorial, I’ll show you how to send WordPress backups to Google Drive!
You’ll learn:
- Why Google Drive is an effective option for secure WordPress backup storage
- The step-by-step process to create cloud backups
- How to set up automatic backups to protect your site 24/7
- The best practices for restoring cloud backups when needed
Quick Summary: How to Back Up a WordPress Site to Google Drive
Connect your Google Drive account with Duplicator.
Duplicator Pro is a backup plugin that can send your WordPress data to cloud providers like Google Drive. You’ll need to add a new storage location and connect your Google Drive account.
Create a Google Drive backup.
Next, create a new backup. Choose Google Drive as the storage location.
Set up automatic cloud backups.
To save time, let Duplicator automatically send your backups to Google Drive. Add a new schedule with Google Drive storage. Feel free to set up hourly, daily, weekly, or monthly backups.
Table of Contents
Why Back Up Your WordPress Site to Google Drive?
One of the best ways to keep your WordPress website secure is by backing it up. If something unexpected happens (like hacks or server crashes), you can easily restore an error-free backup.
You’ll want your site backups to always be accessible. That’s why more website owners (like me) are sending their data to cloud storage locations like Google Drive.
Google Drive is a cloud storage service that allows users to store, access, and share files online. It offers a convenient way to keep files synchronized and collaborate with others.
Along with basic files like documents, Google Drive can store full copies of your WordPress site. Since your backups will be saved off-site, it also won’t use any resources on your hosting plan. Plus, these backups won’t be affected if your site becomes corrupted.
Here are some key benefits of backing up your WordPress site to Google Drive:
- Off-site backup storage for easy disaster recovery
- Encryption to protect against malware, spam, ransomware, and phishing
- Free up to 15GB
- Automatic syncing across multiple devices
- Access backups from anywhere with an internet connection
- Opportunities for team collaboration
- Community forums to help recover files and solve other problems
Google Drive can be a good option if you run a smaller site like a blog. With a free account, you’ll be able to use 15GB of storage space for your backups. You can also upgrade to 2TB for $12 per month.
Want cloud storage designed for WordPress backups? Try out Duplicator Cloud! Unlike Google Drive, it won’t use your storage space for Gmail or other unrelated data.
How to Back Up a WordPress Site to Google Drive
You could manually download your WordPress files and database and upload these directly to a Google Drive folder. However, there’s a much easier way.
I’ll show you how to set up automatic backups to Google Drive so you never have to worry about data loss!
Here’s what we’ll cover:
- Choosing the right backup plugin for Google Drive storage
- Connecting your Google Drive account to the WordPress backup plugin
- Creating your first cloud backup
- Automating the backup process for ongoing protection
Step 1: Install a Backup Plugin with Google Drive Storage
By default, WordPress doesn’t have a backup solution for your website. However, you can install a backup plugin like Duplicator.
With Duplicator, you can save a copy of your entire website, including its WordPress themes, plugins, content, database, and files.
Duplicator automatically backs your site up to the local server. However, it can send data to any of these cloud storage providers:
- Duplicator Cloud
- FTP
- Google Drive
- Dropbox
- Microsoft OneDrive
- Amazon S3
- Wasabi
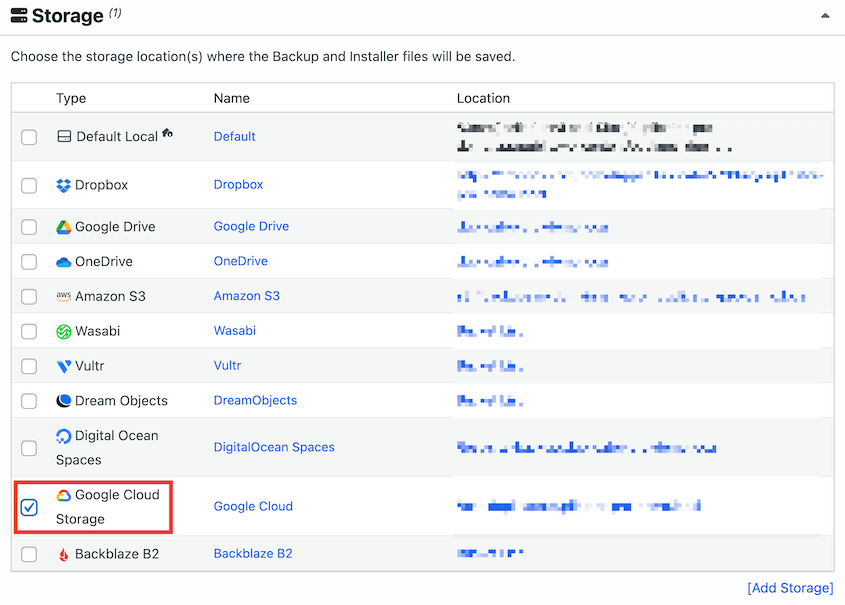
- Google Cloud
- DreamObjects
- Vultr
- DigitalOcean Spaces
- Cloudflare R2
- Backblaze B2
Although there is a free version of Duplicator, be sure to upgrade for cloud storage. You’ll also get extra migration features and automatic backups!
See how Clio Websites protects its clients from downtime with Duplicator cloud backups!
After purchasing the plugin, download it and save your custom license key. Then, install and activate Duplicator in your WordPress dashboard.
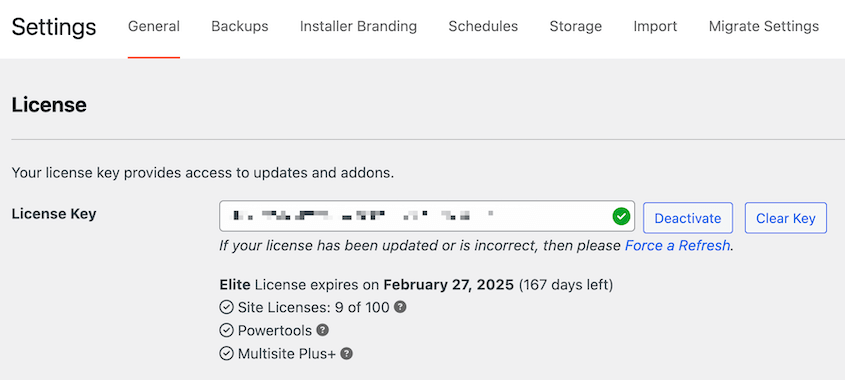
Now you’ll need to activate your license key. Navigate to the Duplicator Settings page and click on the General tab.
Paste your license key and hit Activate.
Step 2: Connect Your Google Drive Account to WordPress
Duplicator supports cloud storage services like Google Drive, Dropbox, Amazon S3, and OneDrive. To back up your website to the cloud, you’ll need to connect your third-party accounts.
Using another plugin, you might have to create a new project in the Google API console. However, Duplicator allows you to connect to Google Drive directly in WordPress.
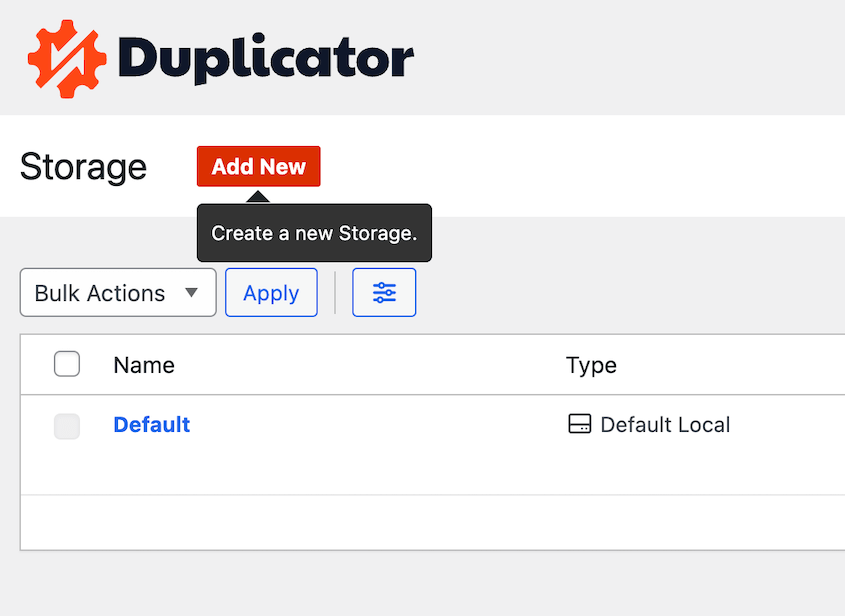
First, go to Duplicator Pro » Storage. On this page, you’ll see that the default storage location is your local server. This will save your website backups to this URL path: wp-content/backup-dup-pro/recovery.
To start using Google Drive, hit Add New.
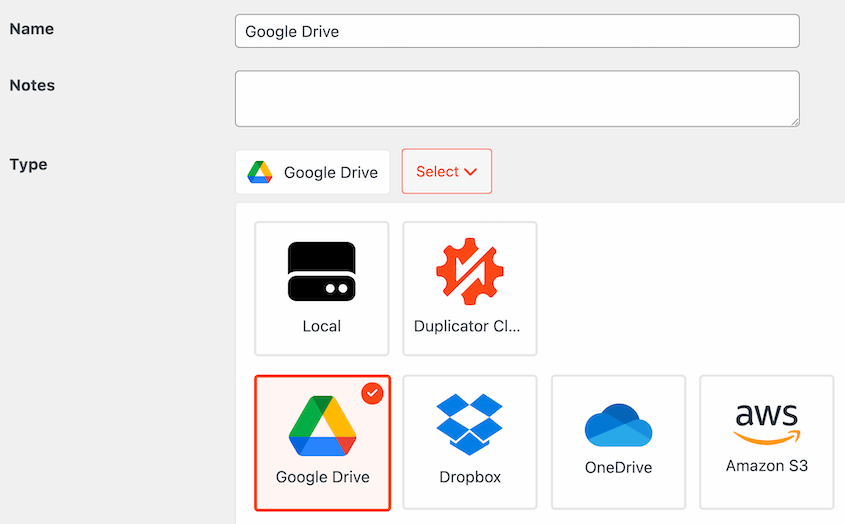
Then, name the new storage location. Using the Type dropdown menu, choose Google Drive.
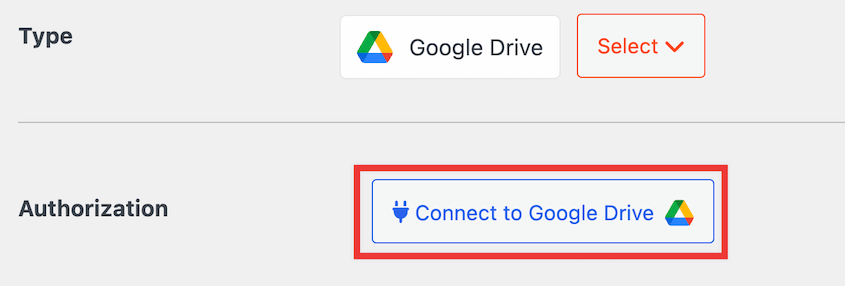
After this, you’ll see an option to Connect to Google Drive.
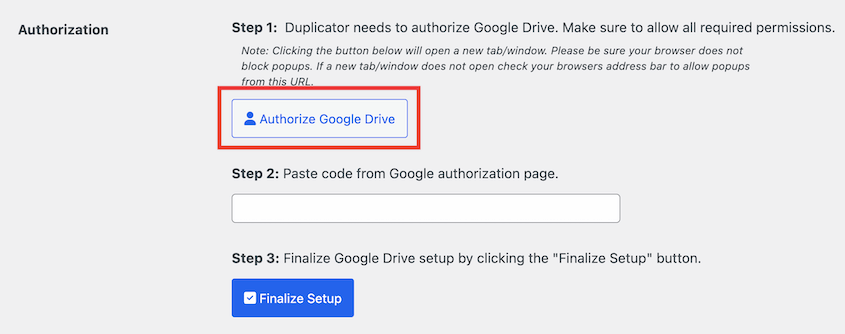
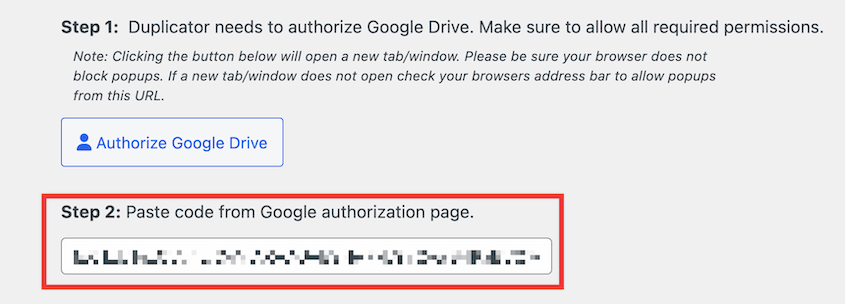
New steps will appear to walk you through the setup process. First, hit Authorize Google Drive.
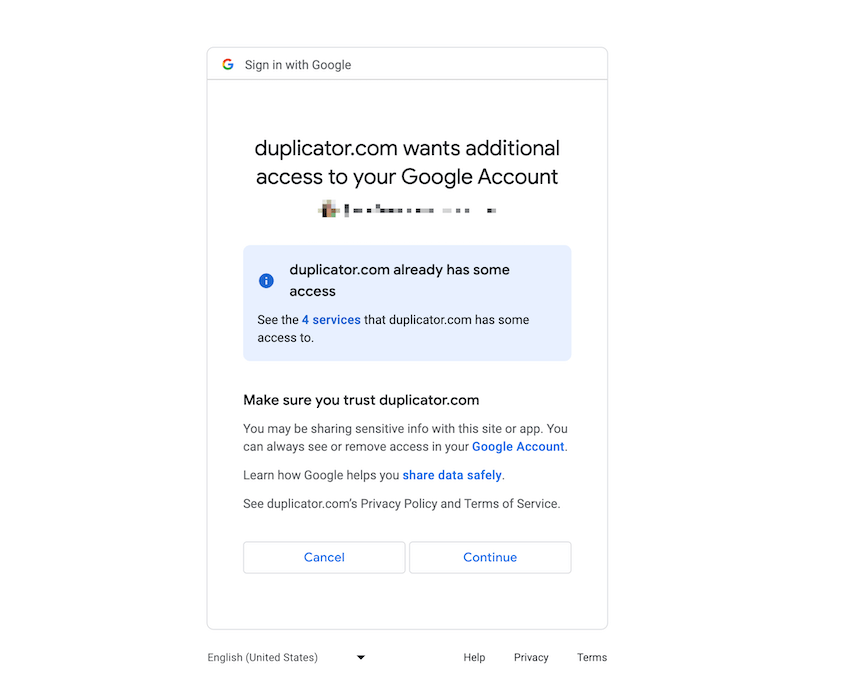
This will open a new tab, where you’ll need to sign into your Google account using your Gmail address. You should also give Duplicator access to your Google Drive account.
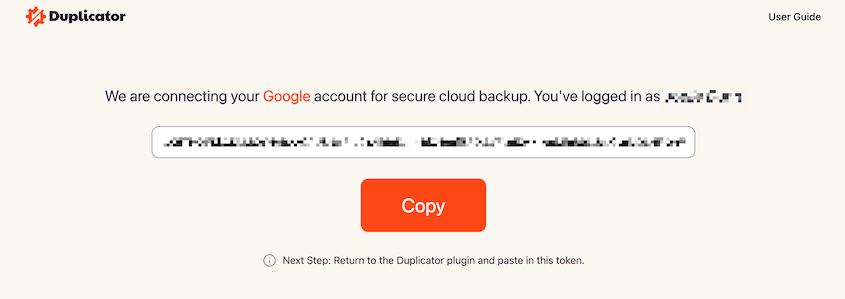
Once you do, you’ll get a unique code.
Copy this and go back to your WordPress dashboard. Then, paste the Google Drive API code into the Step 2 text box.
Lastly, click on Finalize Setup. If the connection is successful, you’ll see details about your Google account and quota usage.
Before you create a backup, authenticate this connection. Go to the bottom of this page and hit Test Storage. This will send a small file to and from your account.
You can also consider adjusting the Max Backups setting. This will be the number of backups that are allowed in your Google Drive account at one time.
If you’re using a free account, you’ll have to avoid exceeding 15GB of backups. So, don’t set the max backups value too high. Duplicator will delete old backups to optimize your storage space.
Step 3: Create a Google Drive Backup
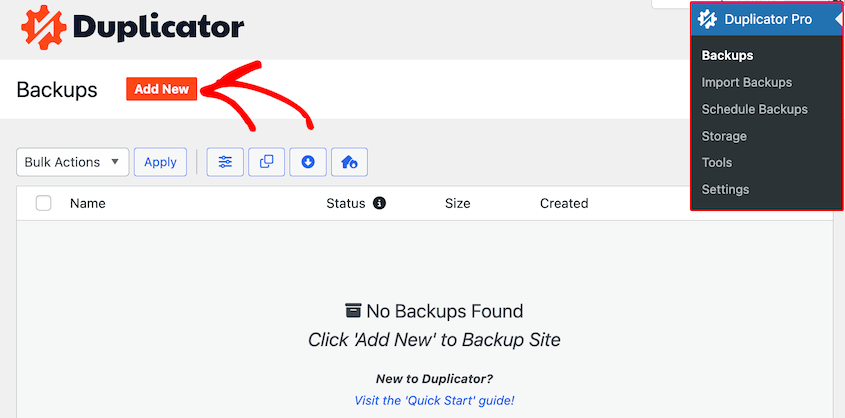
Now that you’ve added your Google Drive account as a cloud storage location, it’s time to create your first cloud backup. You can do this by finding Duplicator Pro » Backups » Add New.
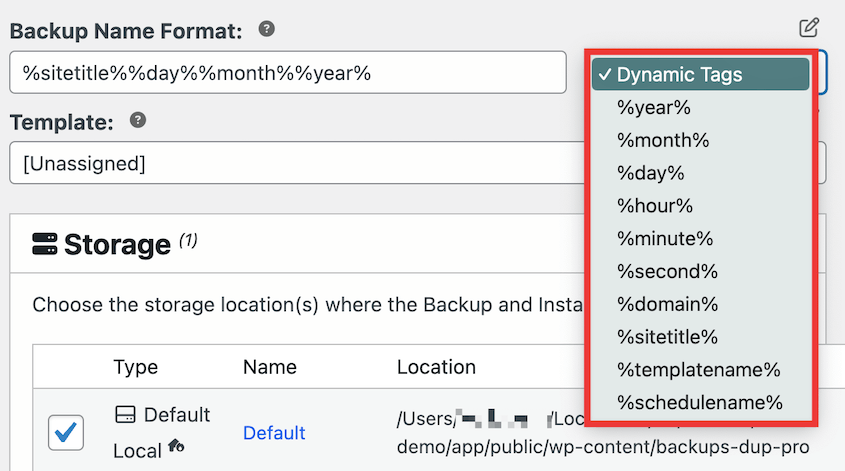
Use descriptive dynamic tags to make the backup more memorable. This will make it easy to find if you need to restore it later.
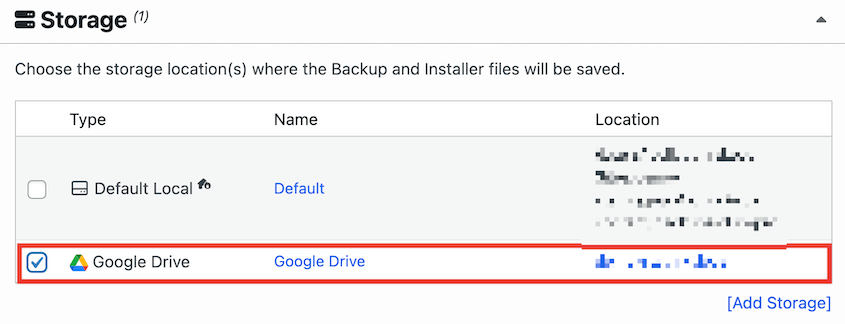
Next, expand the Storage settings. Here, you’ll see that Google Drive is now listed as a backup option. Be sure to select it.
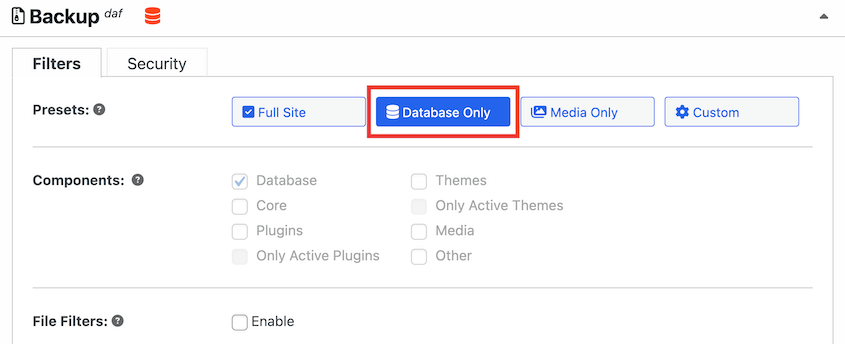
Usually, you’ll want to do a full backup of your WordPress site’s files and database. This will save the complete setup of your site. To create a full backup, select Full Site.
However, you can easily edit the archive file to only include certain data in the backup.
For example, do a database backup if you just want to save data like customer information, posts, or pages.
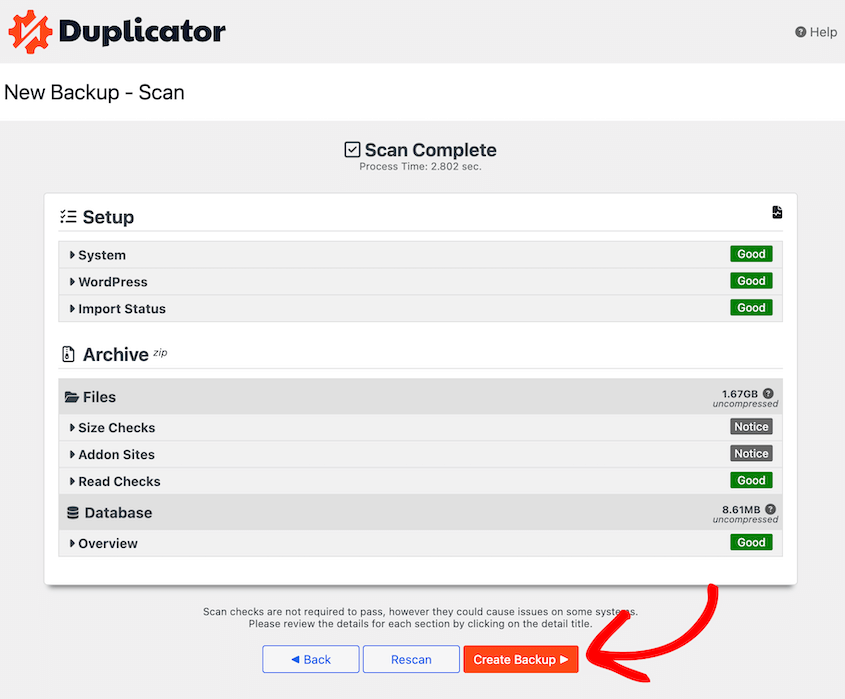
After you configure your backup, Duplicator will scan your website. You can look over this evaluation for any issues. To continue, click on Create Backup.
When Duplicator finishes creating the backup, it will be transferred to your Google Drive folder.
Step 4: Set Up Automatic Backups to Google Drive
You already know how important it is to regularly back up your website. But if you always do manual backups, you may not save your data as often as you should.
To make this process easier, set up automatic backups.
Once you create an automatic backup schedule, your website will be backed up at a certain time. You’ll always have a copy of your site on hand in case of an emergency.
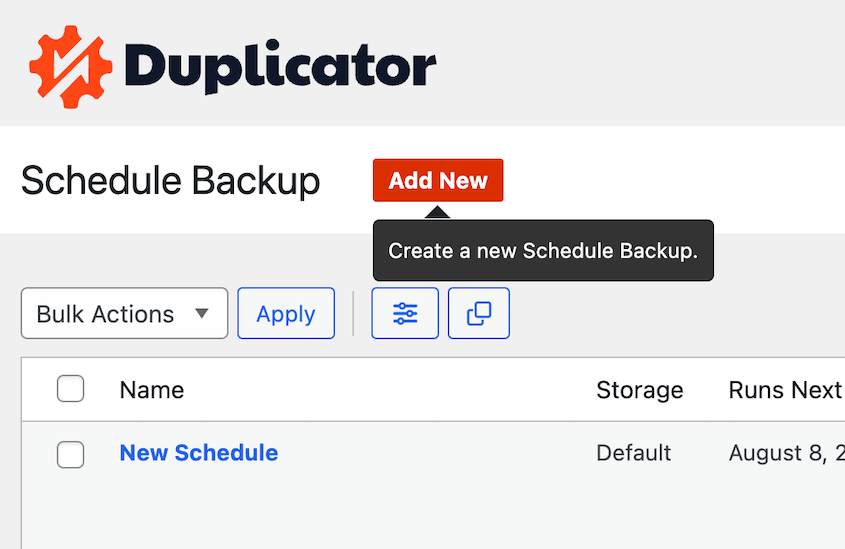
To set up automatic backups in Duplicator, go to Duplicator Pro » Schedule Backup. Then, click on Add New.
Name your schedule at the top of the page. If you want to make customizations to the default backup settings, consider creating a backup template. Alternatively, Duplicator will simply perform a full backup.
Under Storage, select Google Drive. This will send every automatic backup to the cloud.
Then, choose a schedule for your automatic backups. Duplicator supports monthly, weekly, daily, and hourly backups.
For each of these options, you’ll be able to customize when you’d like the backup to start.
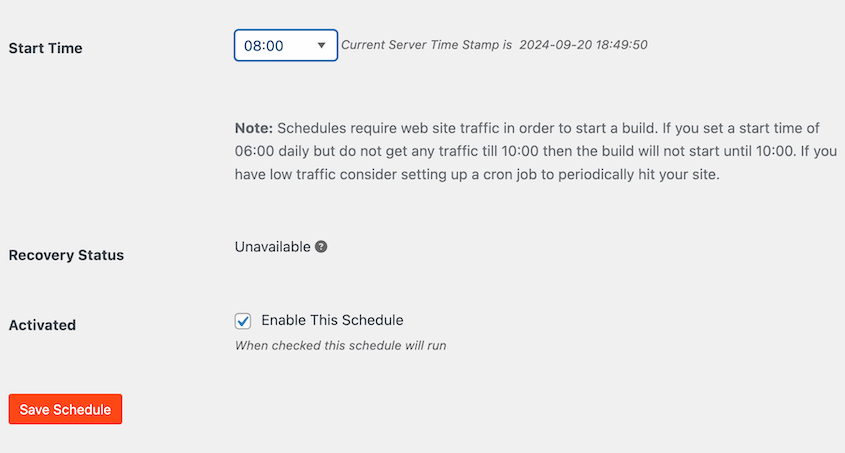
You can also select a Start Time for the schedule. Lastly, select the checkbox next to Enable This Schedule.
After you save this scheduled backup, your website will be automatically backed up to Google Drive!
How to Restore Your Google Drive Backup
If you accidentally make a coding mistake or see an unexpected WordPress error, you’ll need to restore a backup. Using Duplicator, you can easily restore any remote backup from your dashboard.
First, open Duplicator’s Backups page and find the Google Drive backup you want to restore. Then, hit Restore.
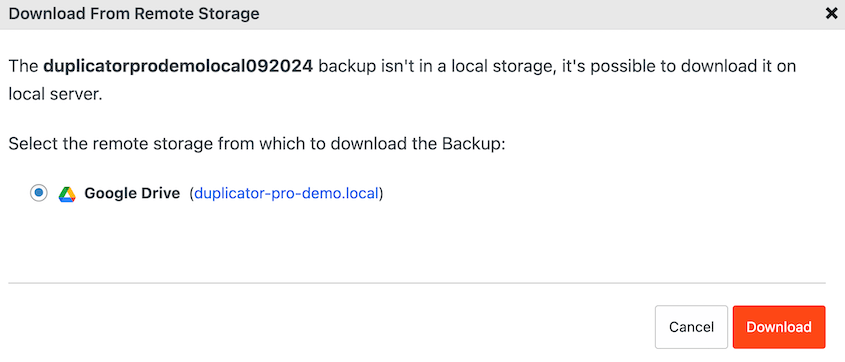
If your backup is in multiple locations, select Google Drive. Hit Download.
At this point, Duplicator will download the Google Drive backup to your local server.
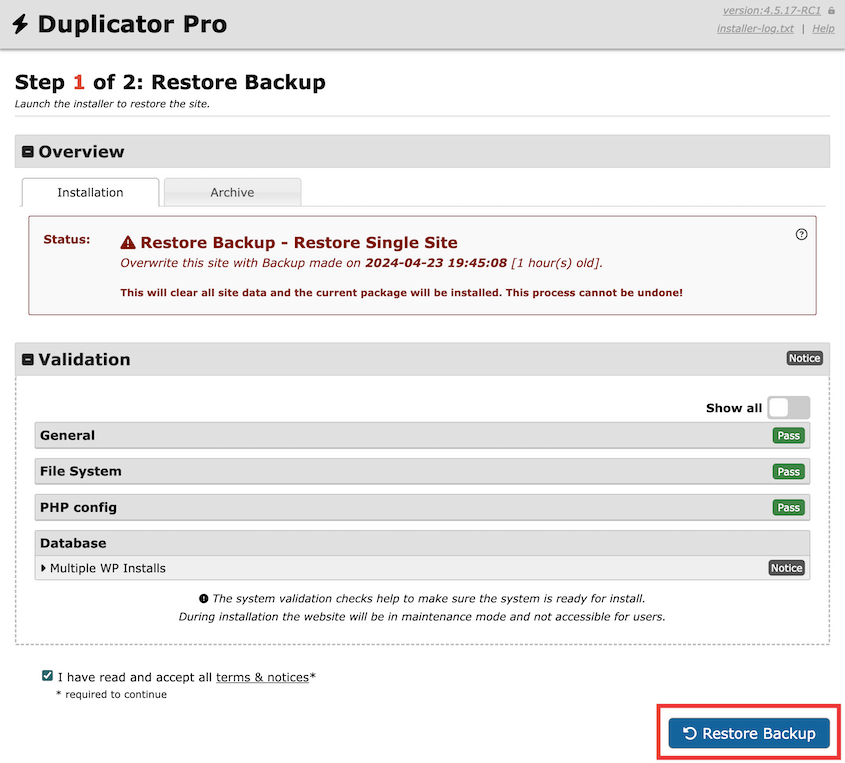
Once finished, the restoration wizard will automatically pop up. At the bottom, click on Restore Backup.
Your current site will be replaced with the saved backup, removing any errors.
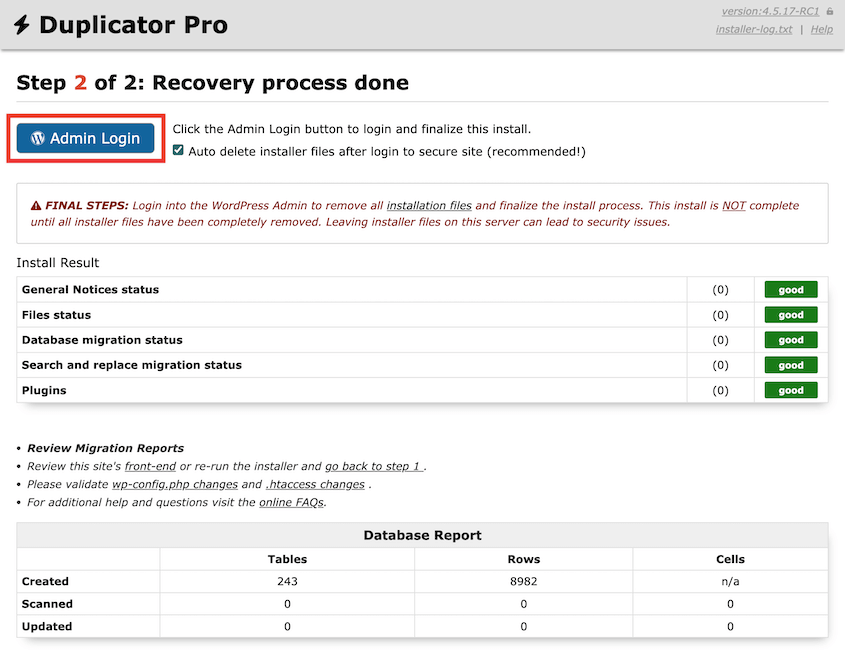
Now you can sign back into your restored website!
Frequently Asked Questions (FAQs)
Can I back up my website on Google Drive?
Yes, you can back up your website on Google Drive using tools like Duplicator Pro. This plugin allows you to save your website files and databases directly to Google Drive, ensuring secure and accessible backups. Regular backups protect your website data from loss or corruption.
Keep in mind that there is a free version of Duplicator that supports basic backup and migration features. However, you’ll need to upgrade to start sending backups to third-party cloud storage services.
How often should I back up my WordPress site?
Back up your WordPress site at least once a week or more frequently if you regularly update content or make changes. Daily backups are recommended for high-traffic websites or e-commerce platforms to minimize data loss. Use automated backup tools like Duplicator Pro to ensure consistent and reliable backups.
How do I back up all my WordPress data?
Back up all your WordPress data by exporting your files and database. Use a reliable backup plugin (like Duplicator) to automate the process or manually download your website files via FTP and export the database through phpMyAdmin. This gives you a complete copy of your website, including themes, plugins, and content.
What is the best WordPress backup plugin?
The best WordPress backup plugin is Duplicator for its ease of use and comprehensive features. Duplicator allows you to create full backups, including your site files and database tables. You can easily upload these backups to storage providers like Google Drive or Dropbox, making it a reliable choice for WordPress backups. Duplicator also supports migration and cloning.
Alternatives: The UpdraftPlus plugin can also back up your site to Google Drive. You’ll have to open the Settings tab and connect your Google Drive account to your UpdraftPlus backups. BackWPup is another popular option, but you’ll have to create a Google Drive API key manually and enter this information into the plugin settings.
How do I back up my WordPress site to Google Cloud?
To back up your WordPress site to Google Cloud, create a new bucket and generate your access keys. Then, add Google Cloud as a new storage location in Duplicator Pro. Finally, create a backup and select Google Cloud as the storage location.
Can I connect Google Drive to WordPress?
Yes, you can connect Google Drive to WordPress using the Duplicator plugin. This tool will send your website backups to a Google Drive folder.
Your WordPress Backups Belong in the Cloud
Now, your backups are no longer tied to your server. If your hosting goes down, gets hacked, or something goes catastrophically wrong, your most recent backup is sitting safely in Google Drive—accessible from anywhere, on any device, at any time.
What started as an easily ignored task has turned into a fully automated system that works around the clock to protect your data.
Don’t wait for a close call to take site security seriously. Set up your Google Drive backup schedule today and give your WordPress site the protection it deserves.
Do you want to upgrade your site’s data security? Try out Duplicator Pro to automate your WordPress backups to Google Drive!
While you’re here, you may also enjoy these extra WordPress tips and tricks:
Joella is a writer with years of experience in WordPress. At Duplicator, she specializes in site maintenance — from basic backups to large-scale migrations. Her ultimate goal is to make sure your WordPress website is safe and ready for growth.


